
Oh, you can just smell it, can’t you? That perfect moment when the air gets crisp and all you crave are those warm, bubbling desserts straight from the oven. In my family, that smell always means it’s time for baking, and nothing says cozy autumn evening quite like a truly fantastic pear crisp. Forget fussy cakes; we’re talking real, honest-to-goodness American home cooking here, the kind passed down through generations right in the heart of the Midwest kitchen.
I’m Jess Carter, and at CravyBite Kitchen, we focus on turning simple pantry staples into memorable moments. That’s why I am so excited to share this Easy Brown Sugar Cinnamon Pear Crisp with you. It’s the epitome of simple satisfaction—tender, spiced fruit under the most addictive buttery oat topping you’ve ever made. Trust me, this recipe is so reliable, it’s practically a family heirloom itself. If you’re looking for the best comfort food that tastes like a weekend hug, you’ve absolutely found it!
- Why This Easy Pear Crisp Recipe is Your New Favorite Fall Dessert
- Gathering Ingredients for Your Brown Sugar Cinnamon Pear Crisp
- How to Prepare the Ultimate Pear Crisp
- Baking Times and Tips for a Perfect Pear Crisp
- Serving Suggestions for This Homemade Pear Dessert
- Storage and Reheating Instructions for Leftover Pear Crisp
- Variations on the Classic Pear Crisp
- Frequently Asked Questions About Pear Crisp
- Nutritional Estimates for This Cozy Dessert Idea
Why This Easy Pear Crisp Recipe is Your New Favorite Fall Dessert
If you’re searching for the absolute best fall dessert recipes that genuinely deliver on cozy flavor, stop looking! This pear crisp is my go-to because it doesn’t make you feel like you need a whole day just to bake something simple. It’s inherently comforting, the kind of comforting fruit crisp everyone asks for again and again, especially when the air gets chilly.
Here is exactly why I think you’ll fall in love with it:
- It’s unbelievably fast—total time is under an hour!
- The warm spice blend makes your whole house smell amazing.
- The topping is perfectly buttery and rustic, never soggy.
Quick Baked Fruit Dessert Ready in Under an Hour
Seriously, you can get this into the oven in about 15 minutes of prep work. With a 40-minute bake time, you’re looking at a total of about 55 minutes before you’re digging into something warm and delicious. It’s the ultimate quick baked fruit dessert for unexpected guests or when you just need a sweet fix fast.
The Perfect Brown Sugar Crisp Topping Flavor
This is where the magic lives, folks. We aren’t messing around with plain white sugar here. The secret is packing in that dark brown sugar, which melts beautifully with the butter and cinnamon to create the perfect brown sugar crisp topping. It’s sweet, slightly molasses-y, and gives you that satisfying textural contrast against the soft pears underneath.
Gathering Ingredients for Your Brown Sugar Cinnamon Pear Crisp
Okay, let’s get down to brass tacks! For this pear crisp to sing, we need good, honest ingredients. Breaking this down makes shopping so much easier. You’ll need two main groups: the sweet, tender pears and that glorious, crunchy topping. Don’t skip measuring the butter correctly; we need those cold pieces!
- For the Pear Filling: 6 medium ripe pears (peeled, cored, and sliced), 1/4 cup granulated sugar, 1 tablespoon lemon juice, 1 teaspoon ground cinnamon, and 1/4 teaspoon ground nutmeg.
- For the Buttery Oat Topping: 1/2 cup all-purpose flour, 1/2 cup packed brown sugar, 1/2 cup rolled oats, 1/4 teaspoon salt, and 6 tablespoons cold unsalted butter, cut into small pieces.
Ingredient Notes and Substitutions for Your Pear Crisp
When picking your fruit, stick with firm pears like Bosc or Anjou. If you use pears that are too soft, they’ll turn to total mush when baking. If you happen to have a slightly softer batch, don’t panic! Just microwave that fruit mix for about two minutes before topping it; that kick-starts the softening. And for a little extra crunch in that oat topping recipe? Feel free to swap out half of those oats for some chopped walnuts or pecans. It adds a wonderful earthy note to this homemade pear dessert.
How to Prepare the Ultimate Pear Crisp
Alright, now that we have our ingredients ready, let’s get this beautiful dessert into the oven! Preparing this pear crisp is truly straightforward, and once you see how simple it is, you’ll be making it every week. My number one rule for any baked fruit dessert is getting your oven ready first. So, right now, you need to preheat things to 375 degrees F. Also, grab an 8×8 inch baking dish—that’s the perfect vessel for this recipe; anything too big and the fruit won’t bubble nicely.
Preparing the Spiced Pear Filling
This is the heart of our crisp, so we treat the pears kindly! Take those sliced pears and put them right into a large bowl. Now, gently rain in the granulated sugar, the lemon juice (this keeps them bright!), the cinnamon, and the nutmeg. Use your hands or a wide spatula to toss everything together. The key word here is gently! We want those pears coated beautifully without bruising them up and turning them into mush before they even hit the heat.
Once they look perfectly coated and fragrant, spread them out evenly in that prepared 8×8 inch dish. Don’t mound them up; a nice flat layer is what you’re aiming for!
Creating the Buttery Oat Topping Recipe
Time for the crunchy crown jewel! Grab a separate medium bowl—you don’t want any residual pear juice messing with this texture. Whisk together your flour, brown sugar, rolled oats, and salt. Next comes the cold butter, cut into those little cubes. This is the fun, messy part! You need to cut that butter right into the dry ingredients. I prefer using my fingertips for this, rubbing the cold butter right into the mixture. Stop when it looks like coarse crumbs—you should see pea-sized chunks of butter still visible. Those chunks melt down to make the topping crisp, not cakey. This is the defining step for a great buttery topping.
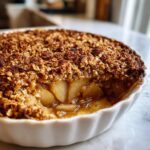
Finally, just sprinkle that crumbly goodness right over the top of your spiced pears. It should look uneven and rustic—that’s how you know it will bake up perfectly golden!
Baking Times and Tips for a Perfect Pear Crisp
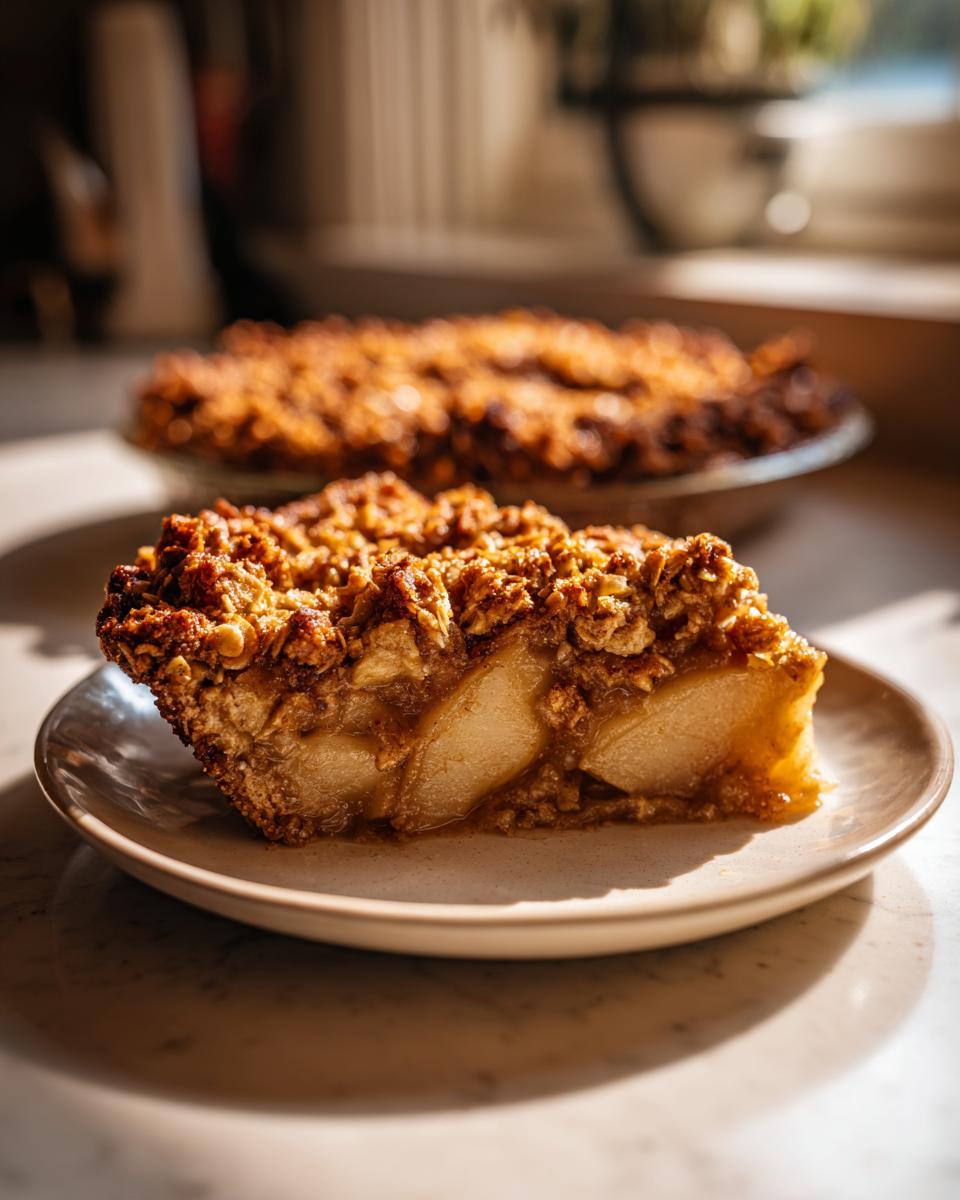
Now for the best part: waiting for that delicious smell to fill your kitchen! We are looking for a bake time of about 35 to 40 minutes in that 375-degree oven. You aren’t just baking the topping, though; you need the fruit underneath to soften up completely. So, don’t pull it out just because the top looks nice!
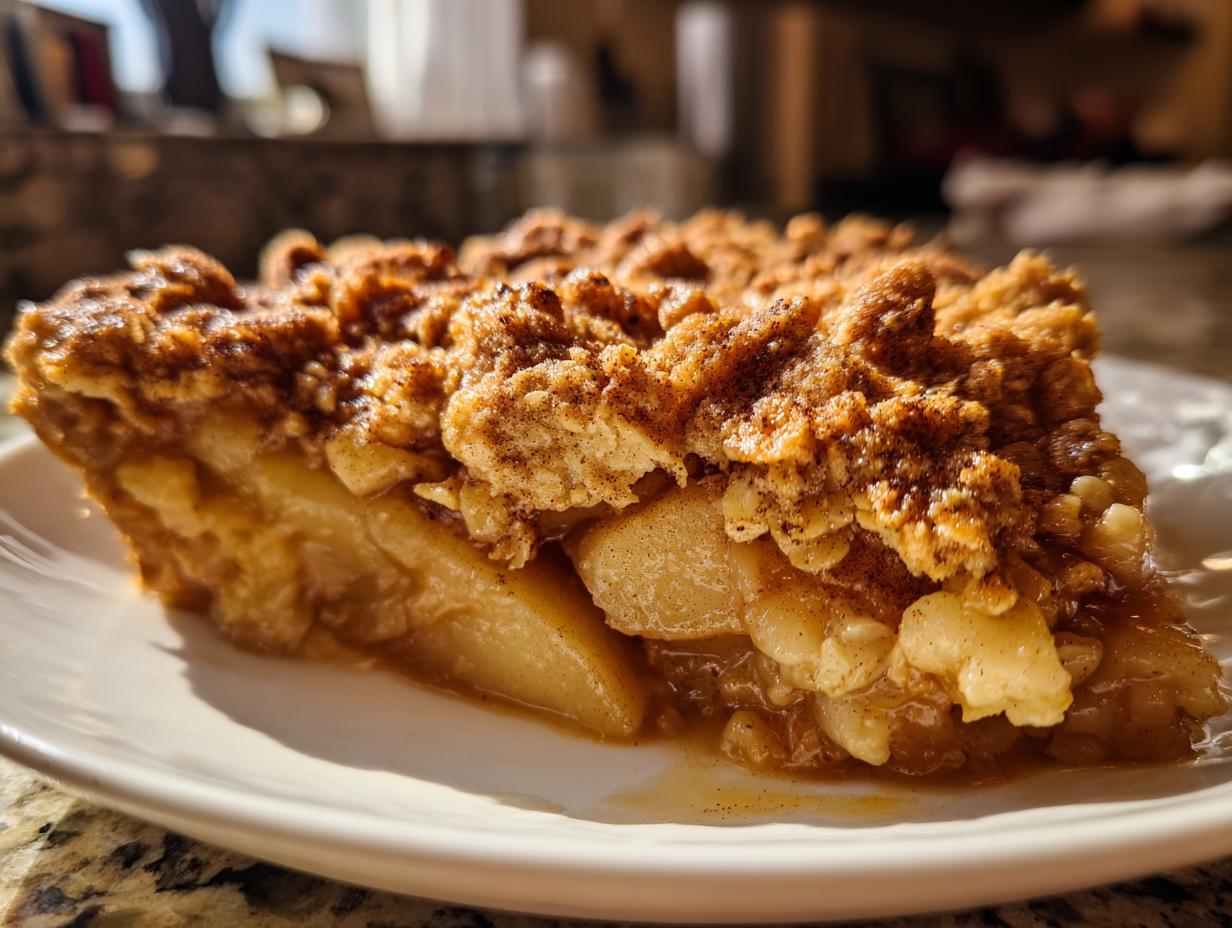
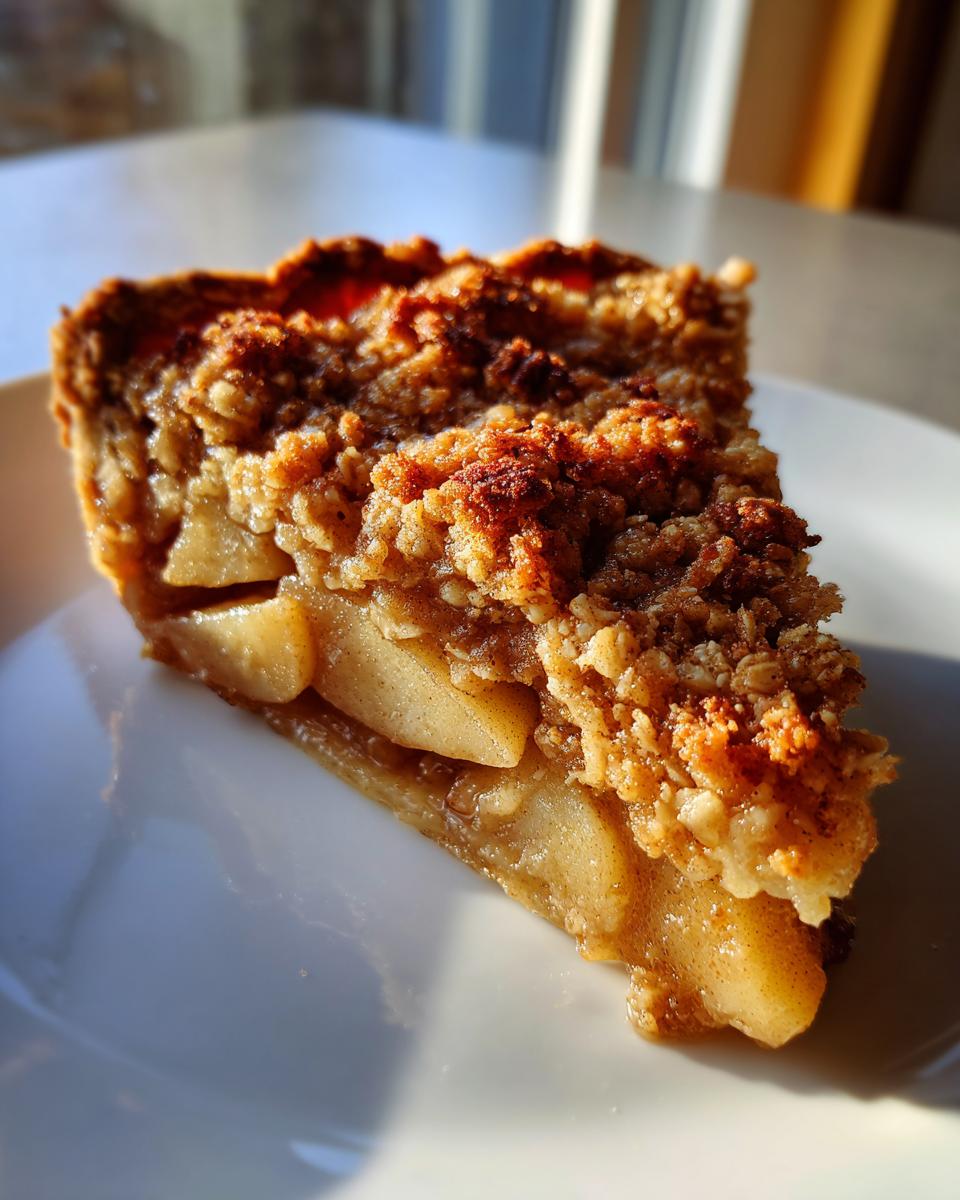
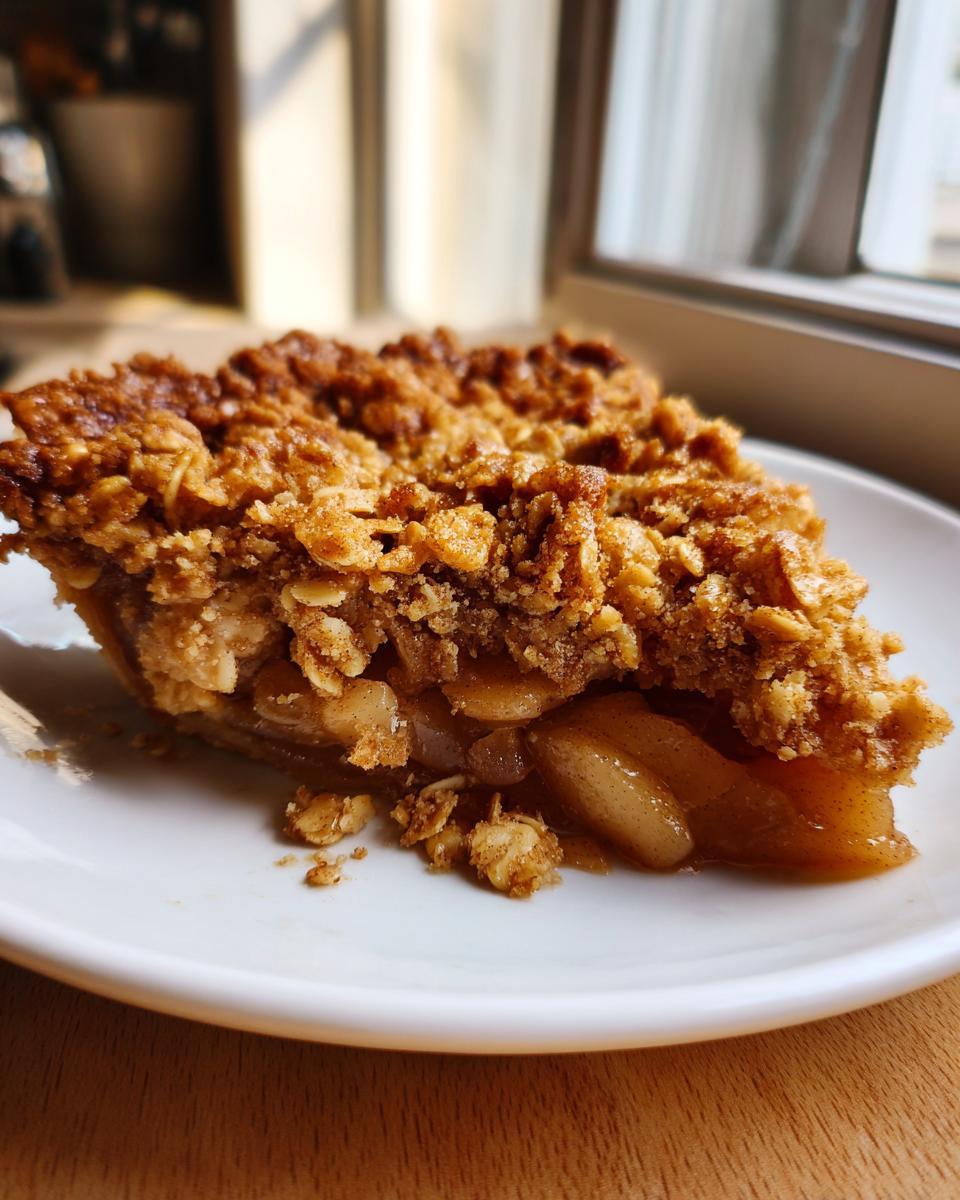
The visual cues tell you everything you need to know about a perfect crisp. You want to see the fruit filling bubbling up around the edges of your 8×8 dish—that deep, rich bubbling means the sugars have caramelized nicely. And of course, the topping should be a gorgeous, even golden brown. When you achieve that, you know you’ve made a truly warm pear dessert that’s ready to knock off your socks.
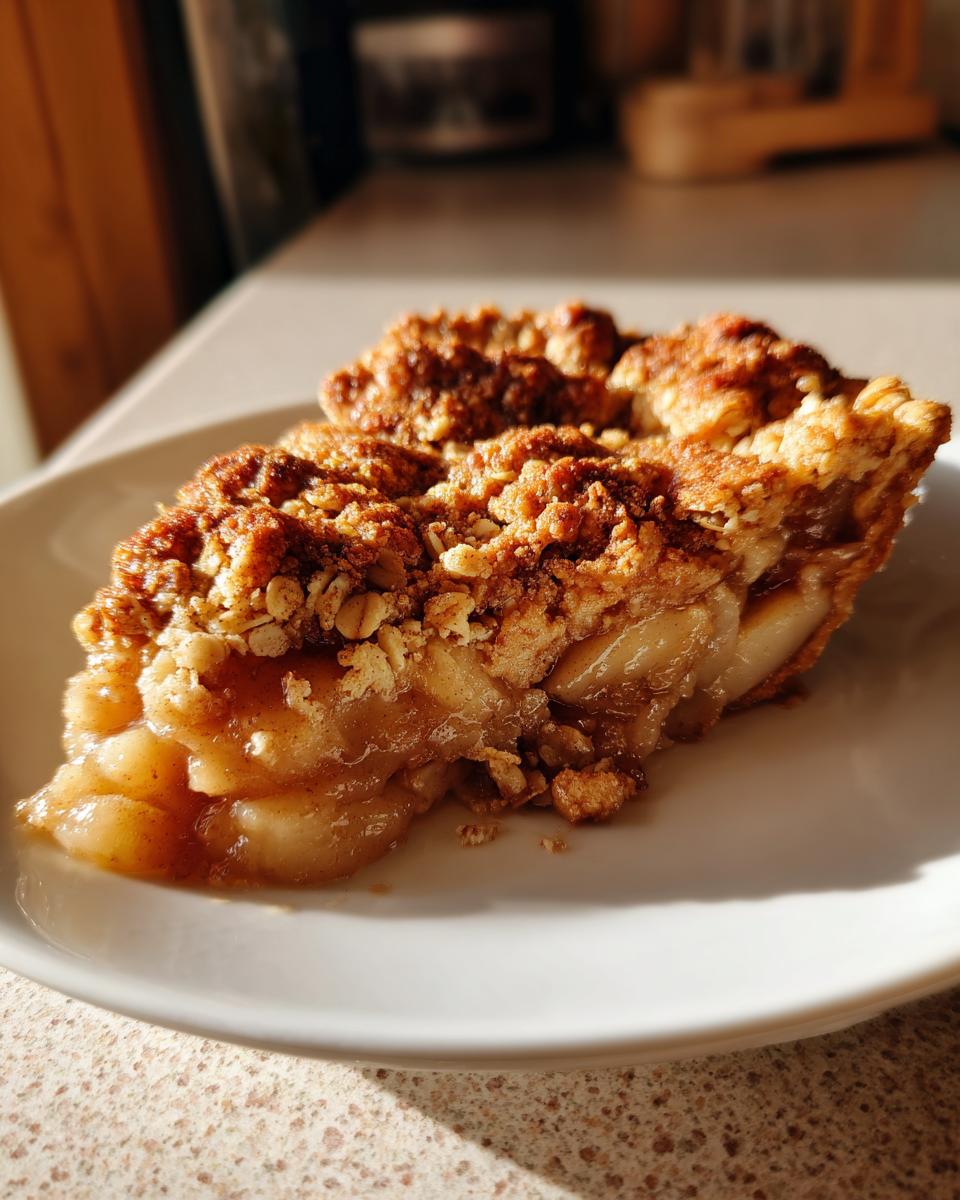
The final, and I mean final, step before serving is cooling. Please, please let this rest for at least 15 minutes. If you cut into it straight out of the oven, all those lovely juices will run everywhere, and you won’t get that nice thick sauce. Patience pays off here, I promise!
Expert Tips for Success with Your Pear Crisp
I’ve baked this recipe dozens of times, and I’ve learned a few tricks to make sure your crisp is always a showstopper. Remember how I mentioned potentially adding walnuts or pecans? If you decide to do that for extra texture, tossing them right into the topping mix works beautifully. Also, if your pears seemed a little too firm when you prepped them, that 2-minute microwave trick before topping will make sure they are tender when the topping is perfectly brown.
And a little tip from my own CravyBite Kitchen: use the best cinnamon you can find! If you have access to high-quality Saigon cinnamon, the aroma it throws off while baking makes the entire experience ten times better. You can check out a spiced companion recipe inspiration here, like this cranberry pear crisp that uses a similar method for maximum coziness!
Serving Suggestions for This Homemade Pear Dessert
Now that your homemade pear dessert is perfectly baked and has rested just long enough, it’s time for the real fun—dressing it up! While this crisp is divine all by itself, especially when served warm, the right accompaniment just takes it over the top for me. You absolutely cannot go wrong with a big scoop of good vanilla ice cream melting right into those hot, bubbly pear pockets. It’s classic for a reason!
If ice cream isn’t your thing, fresh, slightly sweetened whipped cream is gorgeous, making everything feel lighter. Or, for an extra decadent touch, drizzle on a little homemade caramel sauce. If you’re feeling spicy and want to practice some of my other favorite flavors, a tiny bit of that spiced cinnamon butter melted over the top works wonders too. Enjoy every spoonful!
Storage and Reheating Instructions for Leftover Pear Crisp
Because this pear crisp is such a fantastic seasonal pear recipe, you are probably going to have leftovers—and that’s a good problem to have! Don’t stress about making fancy airtight containers for it right away. If you have any left, just cover the baking dish tightly with plastic wrap or foil. If you’ve only eaten a little bit, you can often leave it right on the counter for the rest of the evening, provided your kitchen isn’t scorching hot.
But for keeping it longer than that, tuck it into the fridge. It should last happily for four or maybe even five days, though the topping might soften up a bit by day three; that’s just the nature of fruit crisps! When you are ready for leftovers, please, please skip the microwave for reheating if you can. Microwaving is the quickest way to steam that gorgeous, crunchy topping into mushy goo.
The best way to revive this dish is to pop your portion back into a preheated oven or even an air fryer set around 325 degrees F for about 10 to 15 minutes. You want it warm all the way through, and that little bit of dry heat will crisp up the topping again beautifully. If you happen to serve it with ice cream, you’ll be right back in heaven!
Variations on the Classic Pear Crisp
While this foundational pear crisp recipe is perfect just the way it is, I love encouraging you all to get creative! Baking is all about finding what makes you happy, and switching things up can introduce totally new, wonderful flavors to your table. We can easily transform this into something new for the next time you bake, moving toward a more rustic pear crumble feel or mixing in some tartness.
If you want to use up some apples hanging around your fruit bowl, you absolutely can mix them in with the pears! It’s a fantastic way to blend textures and flavors. You might also want to try swapping out some of the oats for pecans or adding dried cranberries for a festive kick. I even have a wonderful cranberry loaf recipe that nails that tart-sweet balance, which you can adapt here!
Making a Pear and Apple Crisp Combination
When you mix pears and apples together, you’re combining two fruits with slightly different water content and firmness, so you just need to watch things closely. Apples generally release a bit more liquid than pears do when they bake down, so I always advise against adding any extra liquid to the fruit base if you mix them 50/50.
Because apples can sometimes take just a touch longer to soften fully, you might need to bake the combined fruit for an extra 5 minutes before checking for that perfect bubbly stage. If you notice the topping browning too quickly while the fruit is still firming up, just loosely tent a piece of foil over the top of the dish. That way, the fruit finishes cooking without scorching the glorious oat topping!
Frequently Asked Questions About Pear Crisp
I always get so many questions after people try this recipe for the first time! It’s the sign of a truly beloved dish, isn’t it? Whether you’re whipping up a fresh batch or trying to troubleshoot a previous try, here are the most common things folks ask about making the best pear crisp possible. Honestly, once you nail the basics, you’re set for years of wonderful, cozy dessert ideas.
What kind of pears work best for a pear crisp?
This is such a good question, and definitely key to success! You absolutely want to stick with firm varieties that hold their shape during that hot baking time. My best recommendations are Bosc or Anjou pears. They bake up tender but still have a nice little bite to them. If you use something super soft, like a Bartlett that’s too ripe, you’ll end up with pear sauce instead of a crisp!
Can I make this recipe gluten free?
Yes, you totally can! We want everyone to enjoy these seasonal pear recipes, and making it gluten free pear crisp is surprisingly easy. For the oat topping, just make absolutely sure your rolled oats are certified gluten-free first, since cross-contamination happens easily. Then, simply swap out the all-purpose flour for a good quality 1:1 gluten-free baking blend. It works like a charm, trust me!
How do I prevent the oat topping from burning on my pear crisp?
Oh, that topping going from golden to charcoal is the worst feeling! If you notice your buttery oat topping is browning way too fast—maybe your oven runs hot, or perhaps you used a darker brown sugar—don’t panic! Just grab a sheet of aluminum foil and loosely tent it over the dish right on top of the topping. Slide it back into the oven for the remaining bake time. This shields the top from direct heat while letting the pears underneath bubble away to perfection. It’s a lifesaver, especially when baking for that full 40 minutes. If you’re looking for more ideas for delicious treats, check out my page on delicious desserts and treats!
Nutritional Estimates for This Cozy Dessert Idea
Now, I know we bake these wonderful, warm treats because they make our souls happy, not necessarily because we’re counting every macro! But when you’re sharing something like this amazing pear crisp with family or figuring out who gets the last scoop, it’s helpful to have a general idea of what’s in that delicious slice. Remember, these nutrition facts are based on standard pantry measurements for the recipe as written, serving 6 generous portions. Real life always varies a little, of course!
Here is a snapshot of the data I pulled together for one serving:
- Calories: Approximately 310
- Fat: About 15g (with 9g being saturated, hello butter!)
- Carbohydrates: Around 45g
- Protein: Roughly 4g
- Sugar: About 35g (those brown sugar and pear sugars add up!)
I always make sure to tell folks that the magic of a simple autumn baking project like this is that it’s made with whole ingredients—fruit, oats, real butter—so you know exactly what you’re eating. It’s a treat made with love, and that’s the best nutrition there is, if you ask me! Enjoy!
PrintEasy Brown Sugar Cinnamon Pear Crisp with Buttery Oat Topping
Make this easy pear crisp featuring tender, spiced pears under a crunchy, buttery oat topping. This comforting dessert uses simple ingredients and is perfect for a cozy autumn evening.
- Prep Time: 15 min
- Cook Time: 40 min
- Total Time: 55 min
- Yield: 6 servings 1x
- Category: Dessert
- Method: Baking
- Cuisine: American
- Diet: Vegetarian
Ingredients
- 6 medium ripe pears, peeled, cored, and sliced
- 1/4 cup granulated sugar
- 1 tablespoon lemon juice
- 1 teaspoon ground cinnamon
- 1/4 teaspoon ground nutmeg
- 1/2 cup all-purpose flour
- 1/2 cup packed brown sugar
- 1/2 cup rolled oats
- 1/4 teaspoon salt
- 6 tablespoons cold unsalted butter, cut into small pieces
Instructions
- Preheat your oven to 375 degrees F. Lightly grease an 8×8 inch baking dish.
- In a large bowl, combine the sliced pears, granulated sugar, lemon juice, cinnamon, and nutmeg. Toss gently to coat the pears evenly.
- Spread the spiced pear mixture into the prepared baking dish in an even layer.
- In a separate medium bowl, prepare the topping. Combine the flour, brown sugar, rolled oats, and salt.
- Cut in the cold butter using a pastry blender or your fingertips until the mixture resembles coarse crumbs.
- Sprinkle the oat topping evenly over the pears in the baking dish.
- Bake for 35 to 40 minutes, or until the topping is golden brown and the fruit filling is bubbly.
- Let the pear crisp cool for at least 15 minutes before serving. Serve warm.
Notes
- For a richer flavor, substitute half of the rolled oats with chopped walnuts or pecans.
- If your pears are very firm, you can microwave the filling mixture for 2 minutes before topping to start the softening process.
- This dessert is excellent served with vanilla ice cream or fresh whipped cream.
Nutrition
- Serving Size: 1 serving
- Calories: 310
- Sugar: 35g
- Sodium: 85mg
- Fat: 15g
- Saturated Fat: 9g
- Unsaturated Fat: 6g
- Trans Fat: 0g
- Carbohydrates: 45g
- Fiber: 5g
- Protein: 4g
- Cholesterol: 35mg