
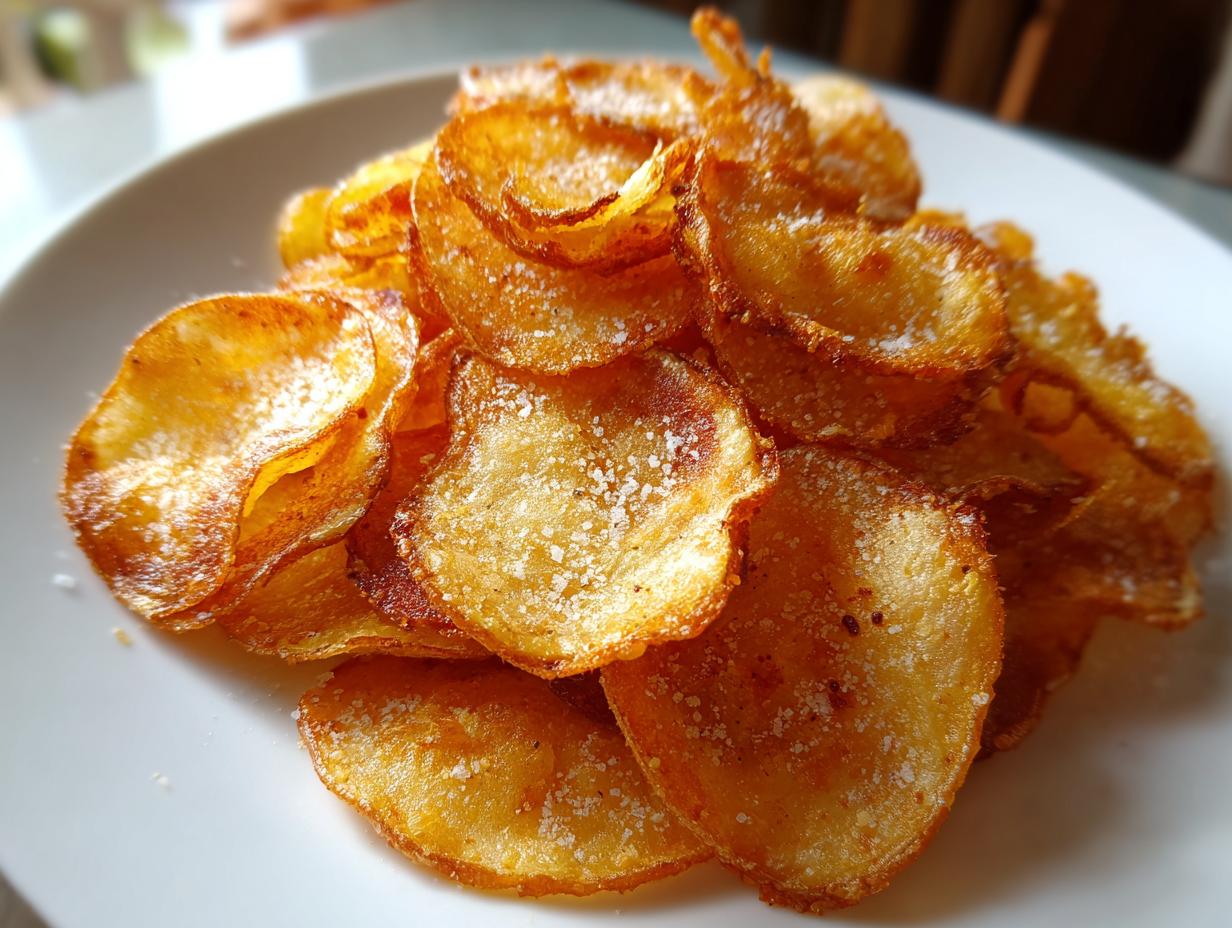
Oh, that sound! That distinct, shatteringly loud *crunch* that only the perfect batch of homemade potato chips can deliver. It’s a craving we all know, and here at CravyBite Kitchen, we believe that simple pantry staples deserve to be turned into something truly special. Forget those sad bags of store-bought snacks! I’m Jess Carter, and I’m sharing my universal recipe here. This isn’t just one way to make chips; this is the blueprint for achieving that incredible crispiness whether you prefer the lighter route in the oven, the speed of the air fryer, or the classic satisfaction of deep frying. It’s all about tradition meeting modern ease.
- Why You Will Make These Homemade Potato Chips Again and Again
- The Essential Ingredients for Perfect Potato Chips
- How to Make Crispy Potato Chips: Three Methods
- Tips for Achieving the Best Crispy Potato Chips Recipe
- Flavor Variations for Your Homemade Potato Chips
- Storage and Reheating Instructions for Potato Chips
- Serving Suggestions for These Crunchy Chips
- Frequently Asked Questions About Making Potato Chips
- Nutritional Estimates for Homemade Potato Chips
- Share Your Perfect Potato Chips Creation
Why You Will Make These Homemade Potato Chips Again and Again
When I first started tinkering with homemade chips, I was so frustrated trying to follow recipes that only worked one way. That’s why I developed this template! You get one core method that sets you up for success, and then you get to choose your adventure. It’s about giving you control over your snack time, every single time.
- The Ultimate Crunch Control: Because we take the time to soak out the starch and dry the slices properly, these potato chips become unbelievably crunchy. Seriously, the shattering sound when you bite into one? Nothing beats it.
- Total Method Versatility: Are you skipping oil this week? Use the oven. Need a quick batch for movie night? The air fryer is your best friend. Want that classic, deep-fried flavor? We cover that too! You get three reliable methods in one guide.
- Guilt-Free Snacking Potential: We all crave that salty fix, but we don’t always want the heavy feeling afterwards. By utilizing the baked or air fryer methods, you cut down significantly on fat, making these homemade potato chips a snack you can genuinely feel good about enjoying often.
- Flavor on Your Terms: Store-bought chips stick you with one flavor profile. Here, the base recipe is just salt, which means you can immediately dress them up with spices like smoked paprika or a tangy vinegar powder explosion!
The Essential Ingredients for Perfect Potato Chips
Getting the right structure starts right here, before you even turn the oven on or set up your fryer. You don’t need a million fancy things for these snacks, but the few ingredients we do use? They matter a lot. If you’ve ever had soggy, dull chips, I bet it started right here with the wrong potato or not enough drying time. Trust me on this—the quality of your potato dictates the quality of your final chip.
- 3 large Russet or Yukon Gold potatoes
- 2 tablespoons olive oil (for baking/air frying) OR 4 cups neutral oil (like canola or vegetable oil, for frying)
- 1 teaspoon fine sea salt (or to taste, fine salt sticks better than coarse!)
- 1/2 teaspoon garlic powder (optional seasoning)
- 1/2 teaspoon paprika (optional seasoning)
Ingredient Notes and Substitution Guidance
Let’s talk about that oil, because it’s your biggest variable. If you’re going the baking or air fryer route, you only need a couple of tablespoons of olive oil (or avocado oil). This helps them brown beautifully and get a little bit of that fried texture without actually frying. Don’t use too much, though, or they get heavy!
If you are deep frying, you need about four cups of a high smoke-point oil. I always go for canola or vegetable oil because they stay neutral. For the seasonings, the fine sea salt is really important. If you use big flakes of salt, they just fall right off after cooking. If you want that vibrant color, paprika is the secret weapon! And please, don’t skimp on the starch removal step we talk about next; that’s what makes these simple potato recipes seriously crunchy.
How to Make Crispy Potato Chips: Three Methods
Okay, here is where the magic—and the commitment to crunch—really happens! Before we jump into the oven, the air fryer, or the oil, every single one of these methods needs the exact same prep. This initial work is non-negotiable if you want true, homemade potato chips that snap instead of flop. It’s all about conquering starch and moisture!
Step 1: Preparing the Potatoes for Crunchy Chips
First, wash and dry your potatoes completely. I almost never peel them; that skin gives amazing texture and some rustic flavor, plus it saves time! Next, you absolutely must slice these babies thinly. I mean paper-thin. If you have one, pull out your mandoline slicer. It’s the only tool that gives you the uniform 1/16th-inch slices we need. If slices are too thick or too uneven, some will burn while others stay raw, and that’s just amateur hour, folks.
Once sliced, immediately dump them into a giant bowl of cold water. Let them sit there for at least 30 minutes—longer is even better! This soaking process pulls all that surface starch out of the potato. Starch steams when it heats up, and steam is the number one enemy of a crispy chip. Drain them well, rinse them one more time, and then comes the hard part: you have to dry them until they feel almost fuzzy with dryness. Spread them out on kitchen towels or paper towels and pat, pat, pat! Seriously, moisture is kryptonite for crunchy potato chips.
Method A: Oven Baked Potato Chips for a Healthier Snack
If you’re aiming for oven baked potato chips, preheat your oven to a nice hot 400°F (200°C). Take your dried slices and toss them gently with just two tablespoons of olive oil. You just want a light coating, not a soak!
Arrange them in a single layer on baking sheets lined with parchment paper. Do not overlap them! If they touch, they steam. They need airflow. Bake them for about 15 minutes, give the pan a good flip, and then check again after another 3 to 5 minutes. They should be golden brown and totally stiff. They will crisp up more as they cool, so don’t overcook them in the oven waiting for that final crunch!
Method B: Air Fryer Potato Chips for Quick Results
Oh, the air fryer! It’s my go-to when I need a fast batch of air fryer potato chips on a weeknight. Preheat your machine to 350°F (175°C). Oil your slices—again, just a light toss in that olive oil.
You have to work in small batches here. Pile them in, but don’t fill the basket past halfway. Cook them for about 10 minutes, but you must stop and shake that basket vigorously every five minutes. If you skip shaking, the ones on top will be perfect and the ones underneath will be soft. We want consistency!
Method C: Traditional Frying for the Ultimate Potato Chips
For the absolute deepest flavor and the most addicting texture, you have to try traditional frying. Get a heavy pot filled about 1.5 inches deep with neutral oil and heat it up until it hits a steady 350°F (175°C). A candy thermometer is your friend here, trust me!
Carefully—and I mean carefully—use tongs to drop small batches of your clean, dry slices into the hot oil. Do not crowd the pot! If you drop too many in, that oil temperature plummets, and guess what? Soggy potato chips. Let them bubble away for about 3 to 5 minutes until they are beautifully golden brown. Use a slotted spoon to scoop them out immediately and place them on a paper towel-lined plate to drain off that excess oil.
Step 3: Final Seasoning for Flavorful Potato Chips
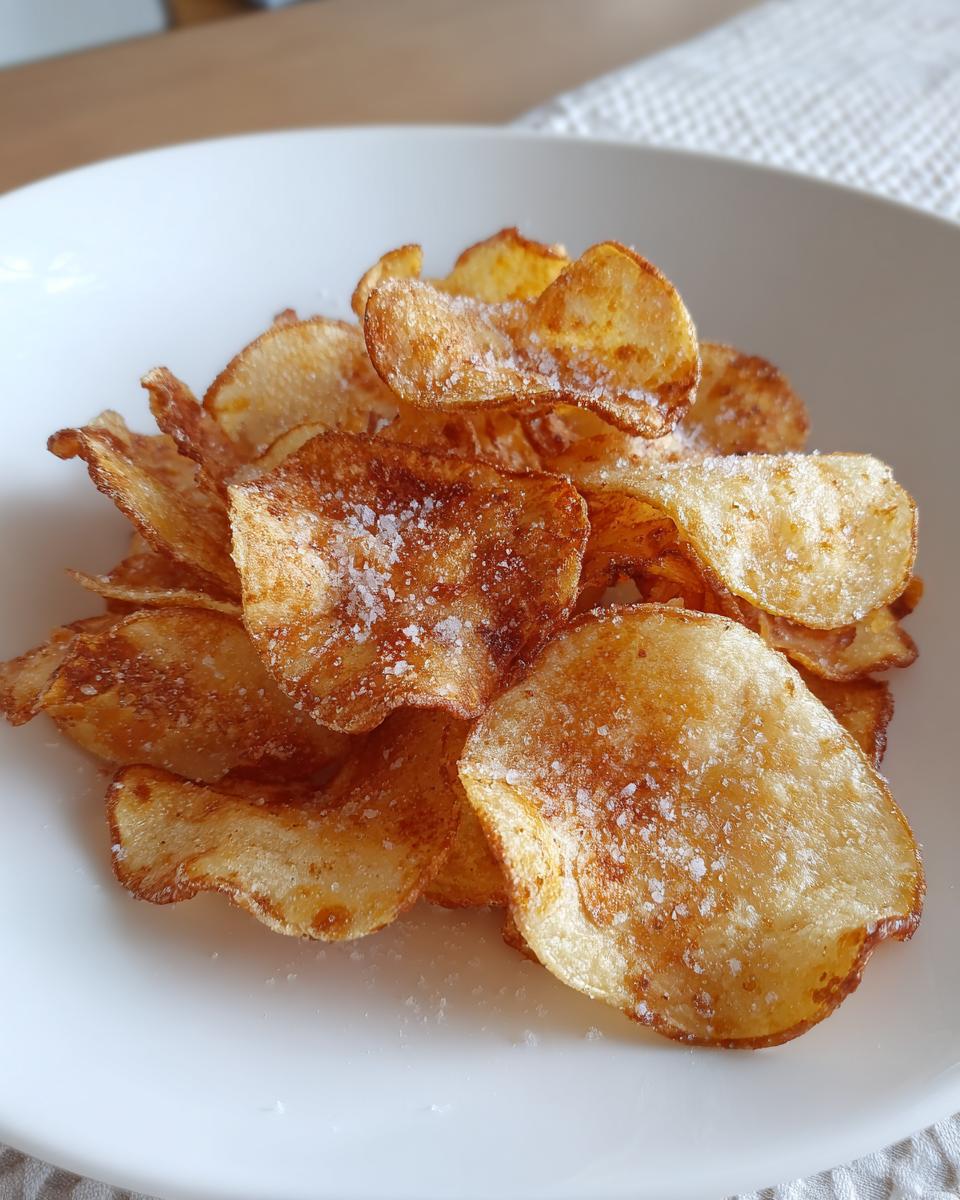
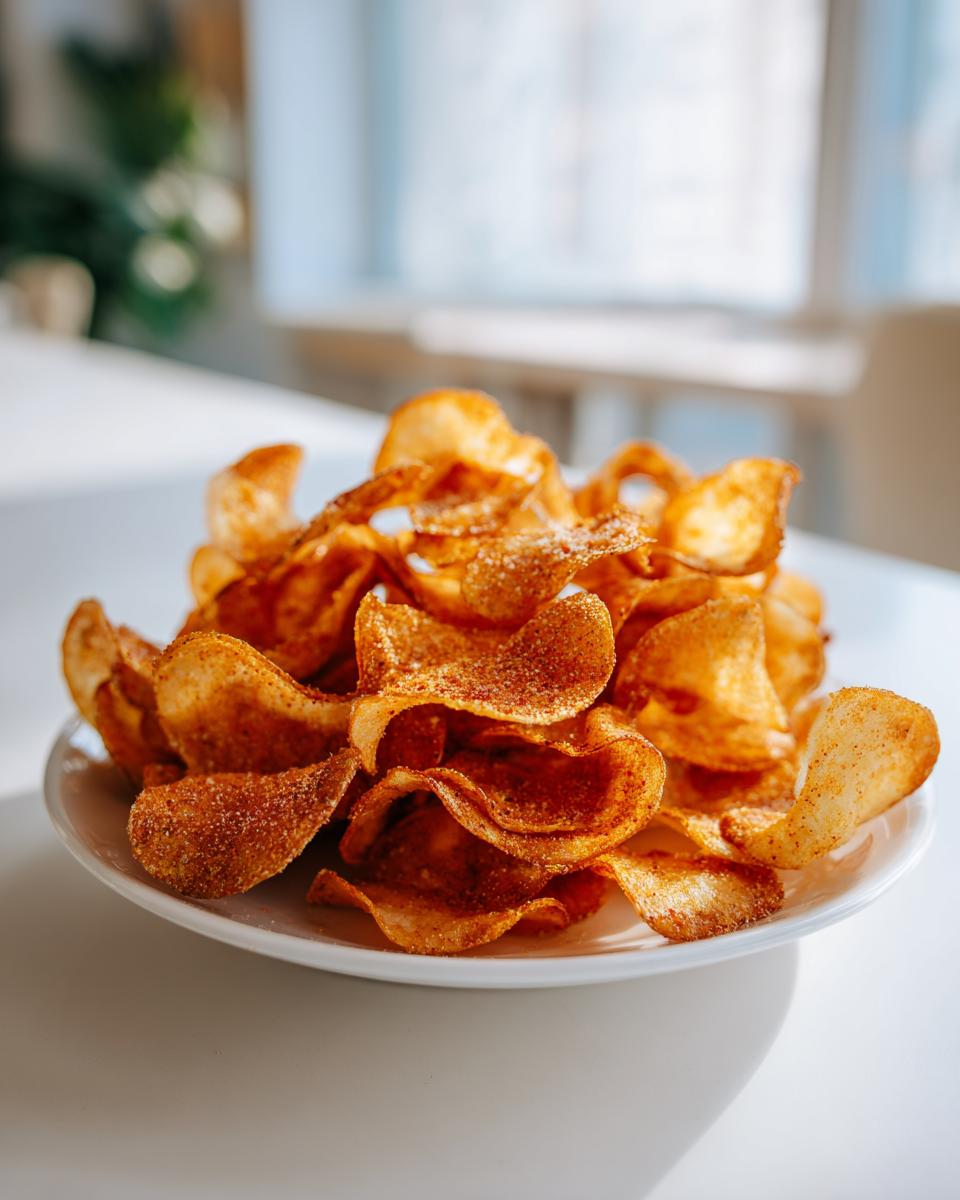
This final step is critical regardless of whether you baked, air-fried, or dropped them in a fryer. You must season immediately! The second those chips come out of the heat source, they are still slightly tacky, which means the salt and spices will stick like glue. If you wait even a minute, your seasoning will end up pooled at the bottom of your bowl.
Transfer the hot chips to a large, clean bowl right away. Sprinkle that fine sea salt evenly over the top. If you’re going classic with the optional flavors, now is the time to toss everything together gently. If you’re using garlic powder or paprika, make sure the toss is thorough but not so aggressive that you break your beautiful, crunchy creations!
Tips for Achieving the Best Crispy Potato Chips Recipe
Look, I am going to be completely honest with you. My first venture into homemade snacks was a disaster. I thought, “How hard can making homemade potato chips be?” I sliced them, I mixed them with oil, and I threw them into the oven. What came out were soft, floppy, potato-flavored discs that tasted like sadness. I realized my mistake immediately: I hadn’t dried them enough after the initial soak. That moisture clung to the potato and just steamed inside the oven instead of crisping up. Don’t make my mistake!
To guarantee you get that satisfying snap every time, you need to focus on three things that elevate this from just a recipe to a reliable technique.
- Potato Selection Matters: Stick to Russet or Yukon Gold. These potatoes have a lower moisture content and higher starch levels than waxy varieties like red potatoes. Starch is your friend here because when cooked correctly, it dries out and turns into that wonderful, crunchy structure. Save those waxy guys for roasting!
- Uniformity is Everything: I can’t stress the mandoline enough. If you have thick pieces next to paper-thin pieces, you are guaranteed uneven cooking. Keep that slicer grip tight and aim for consistency. Thinness is key to that light, melt-in-your-mouth texture we are chasing.
- Never Overcrowd the Pan or Basket: This is the rule I break most often when I’m trying to rush, and it always backfires. Whether you are baking on sheets or piling into the air fryer basket, the slices need space. If they are touching, they trap steam and turn soft. If you have to cook in three batches instead of two, that’s what you do. Patience in the cooking stage saves you from eating soggy snacks later!
If you follow those three pointers—right potato, thin slice, and space to breathe—you’ll have the best crispy potato chips recipe you’ve ever made from scratch, I promise!
Flavor Variations for Your Homemade Potato Chips
The beauty of making your own seasoned potato chips is that you’re the boss of the flavor profile. Once you’ve mastered that initial salt dusting right after they come off the heat, the world of flavor opens up! You can go gourmet, you can go spicy, or you can go totally classic. I like to keep a few small shakers ready to go, so when the chips are hot, I can move fast—remember, seasoning has to happen right away!
If you want to move beyond the simple salt and garlic powder mix suggested in the main recipe, here are some of my absolute favorite combinations that really level up your homemade snack game. Don’t be afraid to mix and match these, either!
- Tangy Vinegar & Salt: This one tastes just like those classic sour cream and onion chips, but without the cream! Right after you pull the hot chips out, sprinkle them lightly but evenly with malt vinegar powder (or citric acid powder if you can find it) and a little extra fine salt. That acidic bite is addictive.
- Smoky BBQ Dust: For a sweet-and-smoky kick, grab a good quality BBQ seasoning mix. Look for one that doesn’t have too much sugar in it, as that sugar can burn slightly under the hot coils of the oven or fryer. Toss those hot, fresh chips in the mix until they look seasoned all over. It makes them perfect for a party appetizer!
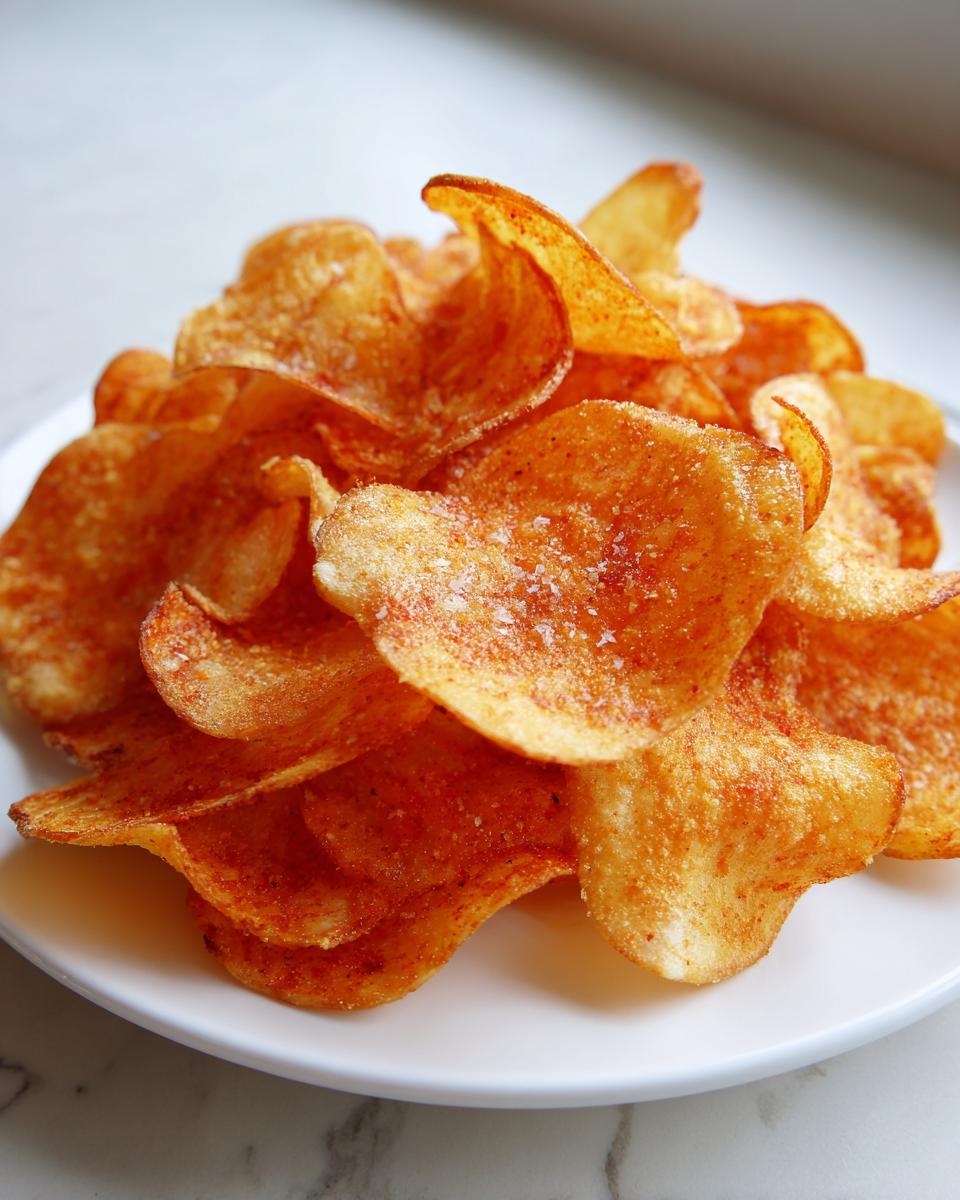
- Spicy Chili Lime: This is perfect if you like a little heat! Combine a teaspoon of chili powder, half a teaspoon of cayenne pepper (adjust this based on your spice tolerance—yikes!), and the zest of one fresh lime. You should grate the zest, let it dry out on a paper towel for about ten minutes to get rid of that excess moisture, and then toss with the spices before adding it to the hot chips.
- Cheesy Goodness: If you love cheesy snacks, grab some nutritional yeast—it gives a great, nutty “cheesy” flavor without actual cheese. Mix a few tablespoons of nutritional yeast with a pinch of onion powder and a little garlic powder. The fine texture clings perfectly to the hot, oiled chips, giving you a salty, savory, surprisingly low calorie chips experience.
The main thing to remember when experimenting with seasonings is that if you use powdered mixes, you need a little bit of oil or moisture on the chip already for it to adhere. If you’re using the oven or air fryer method, the 2 tablespoons of oil you added earlier will work great. If you’re deep frying, you might want to lightly mist the chips with cooking spray right after they come out of the oil before seasoning them, just to give the spices something to grab onto!
Storage and Reheating Instructions for Potato Chips
Now, let’s be real. The best time to eat these homemade potato chips is about five minutes after they leave the heat source, when they are still radiating heat and have that perfect, brittle snap. But if you manage to have leftovers—which is a major accomplishment in my house—you need to know how to treat them so they don’t turn soft by morning. My primary goal for storage is keeping air and moisture out!
You absolutely must store any leftovers in an airtight container on the counter at room temperature. Don’t even think about putting them in the fridge! Refrigerators are moist environments, and that humidity will turn your gorgeous, crunchy chips into sad, chewy pieces of potato in no time. A good quality Tupperware or even a tightly sealed Ziploc bag works wonders for keeping them fresh for a few days.
But what happens when you grab that container the next day and they’ve gone a little limp? Don’t toss them! We can bring them back to life easily. This is my pro tip for reviving them, regardless of which cooking method you used.
How to Quickly Re-Crisp Softened Chips
If your perfectly sliced potatoes have lost their snap, you just need to reheat them quickly to drive out any ambient moisture they’ve absorbed. You aren’t actually cooking them again, you are just drying them out a tiny bit!
Here’s what I do:
- Oven Quick Crisp: Spread the soft chips back out on a parchment-lined baking sheet. Pop them into a 300°F (150°C) oven for just 3 to 5 minutes. Keep a close eye on them! They should regain their crunch surprisingly fast.
- Air Fryer Rescue: This is my favorite, since it’s so fast. Lay the slightly soft chips in the basket (no need to be perfect about layering this time) and run the air fryer at 325°F (160°C) for about 2 or 3 minutes. Seriously, watch them like a hawk because they go from crisp to burnt very quickly once they start heating up!
Remember, deep-fried chips tend to hold their crispness slightly longer than baked ones, but even they benefit from a quick trip back to a dry heat source. These simple steps ensure that your hard work making those thin slices pays off, and you get that satisfying crunch right up until the last chip!
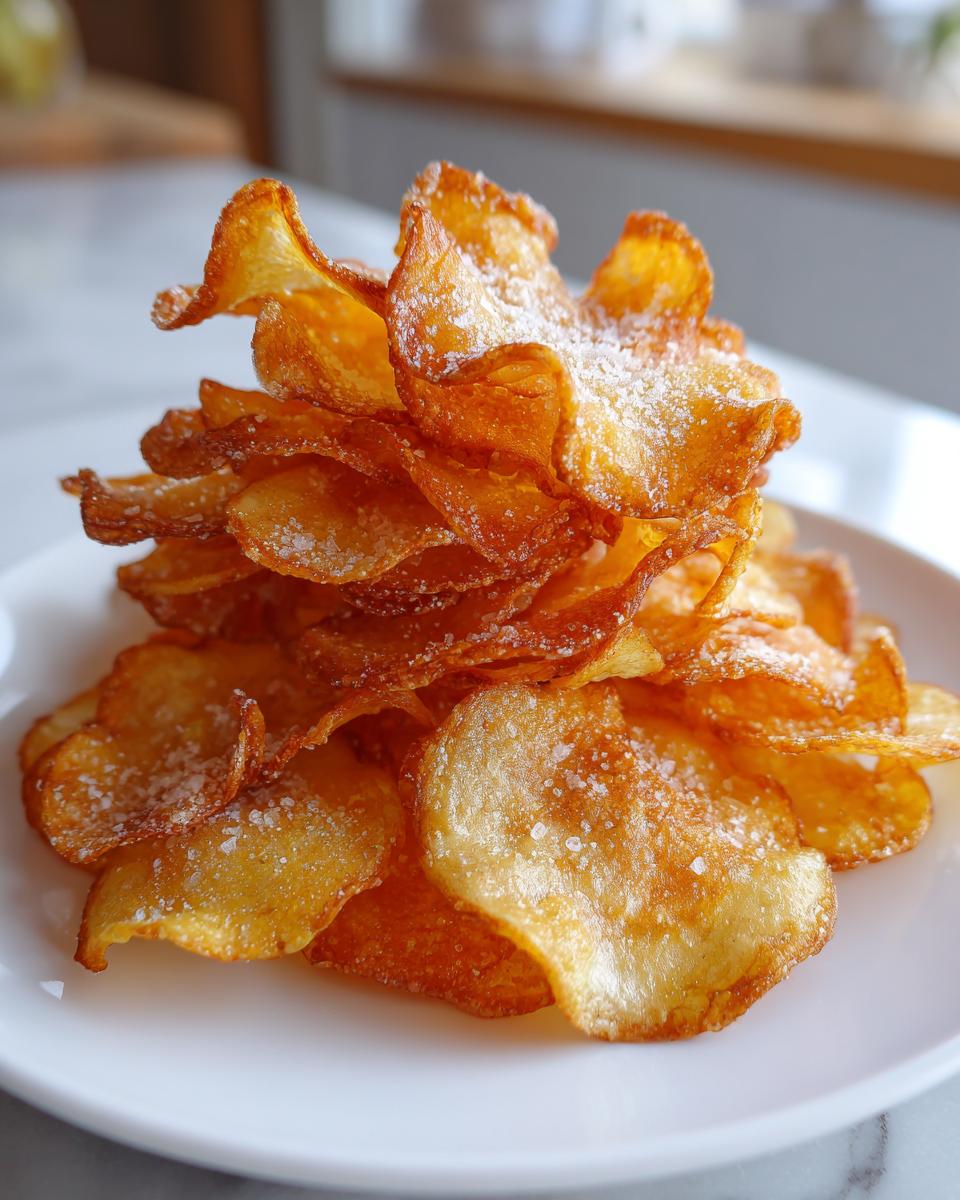
Serving Suggestions for These Crunchy Chips
Okay, you’ve done the hard work. You’ve sliced thin, you’ve soaked out the starch, and you’ve achieved that heavenly, light crunch. Now the really fun part begins: eating them! I swear, the flavor of these homemade potato chips changes completely depending on what you pair them with. They go from being just a simple snack to the star of the show, whether you’re hosting a big crowd or just settling in for a quiet night.
Since these are such a foundational snack, they pair perfectly with so many things. You can dress them up to be sophisticated party appetizers or keep them simple for a solo indulgence. Here are my favorite ways to serve up these crunchy delights:
- The Ultimate Dip Vehicle: Forget celery! These chips are sturdy enough for the thickest dips. They are the best vehicle for my creamy French Onion Dip or your favorite seven-layer dip. When you serve these as party appetizers, make sure you put out sturdy bowls of dip because the chips disappear fast!
- Elevated Burger Night: If you’re grilling burgers or even making simple grilled cheese sandwiches, ditch the bag of chips from the store. Laying these crunchy slices right next to a juicy burger, or even crumbling them right on top of the burger for texture, makes a standard weeknight meal feel like a gourmet cookout.
- The Perfect Movie Night Snacks: There is no better sound for a thrilling scene than the loud crunch of a homemade chip. For movie night snacks, I often season a batch with a little extra Italian seasoning, which smells amazing filling the living room. They are light enough that you can munch through the whole feature without feeling weighed down.
- Side for Soup and Salad: Sometimes I make a lightly salted batch (no extra seasonings) just to have on hand for lunch. They are fantastic crumbled over a creamy tomato soup instead of croutons, or crushed up and sprinkled over a simple green salad for that salty crunch you sometimes miss when eating fresh veggies. They add such a fun, unexpected texture contrast!
Honestly, once you taste how fresh these snacks are, you’ll find excuses to make them! They are just too good to save for just one occasion.
Frequently Asked Questions About Making Potato Chips
It’s totally normal to have questions when you move from store-bought convenience to making amazing potato chips from scratch! I’ve poured so much time into perfecting this, so I want to make sure you skip the troubleshooting phase and jump right into the crispy eating phase. Here are the things I hear asked most often about getting that perfect crunch.
Why are my homemade potato chips soggy instead of crunchy?
Ah, the dreaded soggy chip! This nearly always comes down to two things: starch or moisture. If you skipped the soaking step where we remove the starch, the potato can’t dry out properly. But the biggest culprit is usually moisture left over after washing. If your slices aren’t completely patted dry after their cold bath—like, almost sandpaper dry—that water turns to steam in the oven or fryer and steams the potato instead of crisping it. Go back and dry those slices again, seriously!
Do I really need a mandoline slicer for this recipe?
You don’t *technically* need one, but if you want truly amazing, bakery-quality crunchy chips, yes, it makes a world of difference. Trying to get them consistently 1/16th of an inch thick by hand is nearly impossible, and the thickness variation causes uneven cooking. A mandoline ensures every single slice cooks at the same rate. It’s a safety investment too, since I recommend keeping your fingers far away from that blade!
Can I use sweet potatoes or red potatoes instead of Russets?
You certainly can try, but the results will be different! Russets (or Yukon Golds) are high in starch, which helps them crisp up and dehydrate beautifully. Sweet potatoes have more sugar and moisture, so they tend to caramelize faster and can remain slightly chewier, even when baked. If you try sweet potatoes, watch them like a hawk and be prepared for a different, sweeter texture. For classic, salty, satisfying thinly sliced potatoes snack, stick to Russets.
How can I season these chips without the seasoning falling off?
This is where the timing of your seasoning comes in! The spices need something sticky to grab onto. If you are using the oven or air fryer method, the small amount of oil you toss them with beforehand is enough to act as the glue. If you are deep frying, you must sprinkle the salt and spices *immediately* after they come out of the oil, while they are still glistening and hot. If you let them cool for even two minutes, the oil solidifies a bit, and the seasoning just slides off!
Is the air fryer method truly healthier than baking?
That’s a great question, especially since we are aiming for healthy potato chips! Both are healthier than deep frying, as they use significantly less added fat. The air fryer is generally considered slightly more “healthy” because it circulates hot air very intensely, requiring even less oil than you might use to brush on a baking sheet for the oven. Both methods will give you fantastic texture, but the air fryer wins on speed and oil conservation!
Nutritional Estimates for Homemade Potato Chips
I always want to be transparent about what we’re putting into our bodies here at CravyBite Kitchen, especially when we’re talking about transforming simple potatoes into something so incredibly addictive! Because this recipe offers three main ways to cook these homemade potato chips—baking, air frying, and traditional frying—the nutritional facts change dramatically. Frying, even when done right, absorbs a lot more oil, which bumps up the fat and calorie count significantly.
The figures below are based on the Oven Baked Method, using just the two tablespoons of olive oil spread across the entire batch. If you use the frying method, the fat content will be much higher, easily doubling or tripling in that category, so please keep that in mind for your usual snack rotation!
These estimates are for one serving (1/6th of the recipe):
- Calories: 150
- Total Fat: 7g
- Saturated Fat: 1g
- Carbohydrates: 21g
- Fibre: 2g
- Protein: 3g
- Sodium: 250mg (This can vary wildly based on how much salt you add at the end!)
See? That’s why I love the baking or air frying options when I’m whipping these up for a regular afternoon snack. You still get that deeply satisfying crunch you crave from the best simple potato recipes, but you keep those calories in a very reasonable range. If you’re deep frying, think of this as a special occasion treat, and you’ll adjust your expectations accordingly for the macros! Either way, you’re eating better because they are fresh and made with ingredients you trust.
Share Your Perfect Potato Chips Creation
Well, we made it! We took a humble potato and went through the whole process—slicing, soaking, drying, and finally cooking—to create what I truly think is the best homemade potato chips recipe out there. I hope you feel that spark of kitchen confidence now, knowing you can whip up crunchy, salty, perfectly seasoned snacks any time the craving strikes!
Now that you’ve tried this recipe, I absolutely, positively need to know how it went down in your kitchen. Did you stick with the traditional frying method for that unbeatable flavor? Or was the air fryer your winning ticket for speed and ease? Maybe you surprised yourself and found the oven baked batch was your favorite healthy way to snack?
Please do me a favor: scroll down and leave me a star rating right below this post. And more importantly, drop a comment and tell me which cooking method won your household over! I love reading about your successes.
If you ended up posting a picture of your gorgeous, golden creations on Instagram or Pinterest—which, let’s be honest, you totally should have—please tag me! It truly makes my day to see CravyBite Kitchen recipes out there making people’s snack times happier. If you ever have questions or want to share other ideas, you can always reach out via my contact page. Happy crunching, friends!
PrintUniversal Crispy Homemade Potato Chips Recipe (Oven, Air Fryer, or Fried)
Make the best homemade potato chips using your preferred method. Achieve that satisfying crunch whether you bake them, use an air fryer, or fry them traditionally. This recipe delivers thin, perfectly salted chips from scratch.
- Prep Time: 20 min
- Cook Time: 20 min
- Total Time: 40 min
- Yield: 6 servings 1x
- Category: Snack
- Method: Baking, Air Frying, or Frying
- Cuisine: American
- Diet: Vegetarian
Ingredients
- 3 large Russet or Yukon Gold potatoes
- 2 tablespoons olive oil (for baking/air frying) or 4 cups neutral oil (for frying)
- 1 teaspoon fine sea salt (or to taste)
- 1/2 teaspoon garlic powder (optional seasoning)
- 1/2 teaspoon paprika (optional seasoning)
Instructions
- Prepare the potatoes: Wash and dry the potatoes completely. Do not peel them if you prefer skin-on chips.
- Slice the potatoes: Use a mandoline slicer to cut the potatoes into very thin, uniform slices, about 1/16 inch thick. Uniformity is key for even cooking.
- Soak the slices: Place the sliced potatoes in a large bowl of cold water for at least 30 minutes, or up to 2 hours. This removes excess starch, which helps them crisp up.
- Dry thoroughly: Drain the potatoes and rinse them under cold water. Spread the slices in a single layer on clean kitchen towels or paper towels. Pat them completely dry. Moisture prevents crisping.
- Season: In a bowl, toss the dry potato slices with 2 tablespoons of olive oil (for baking/air frying only). If frying, skip the oil toss now.
- Choose your method:
- Oven Baked Method: Preheat your oven to 400°F (200°C). Arrange the oiled slices in a single layer on baking sheets lined with parchment paper. Bake for 15-20 minutes, flipping halfway through, until golden brown and crisp.
- Air Fryer Method: Preheat the air fryer to 350°F (175°C). Place the oiled slices in the air fryer basket in a single layer, working in batches. Cook for 10-15 minutes, shaking the basket every 5 minutes, until crisp.
- Traditional Frying Method: Heat the neutral oil in a heavy-bottomed pot to 350°F (175°C). Working in small batches, carefully add the potato slices to the hot oil. Fry for 3-5 minutes, stirring occasionally, until golden brown. Remove with a slotted spoon and drain on paper towels.
- Final Seasoning: Immediately transfer the hot chips (from any method) to a clean bowl. Sprinkle evenly with 1 teaspoon of sea salt, garlic powder, and paprika, if using. Toss gently to coat.
- Serve immediately for the best crunch.
Notes
- For the best crunch, ensure your potato slices are paper-thin. A mandoline slicer is highly recommended for this recipe.
- If you are making a large batch, use the oven or air fryer method and cook in multiple batches to avoid overcrowding the pans, which causes steaming instead of crisping.
- Try different seasonings like onion powder, chili powder, or a dash of vinegar powder after they come out of the heat.
Nutrition
- Serving Size: 1/6 of recipe (baked)
- Calories: 150
- Sugar: 1
- Sodium: 250
- Fat: 7
- Saturated Fat: 1
- Unsaturated Fat: 6
- Trans Fat: 0
- Carbohydrates: 21
- Fiber: 2
- Protein: 3
- Cholesterol: 0