
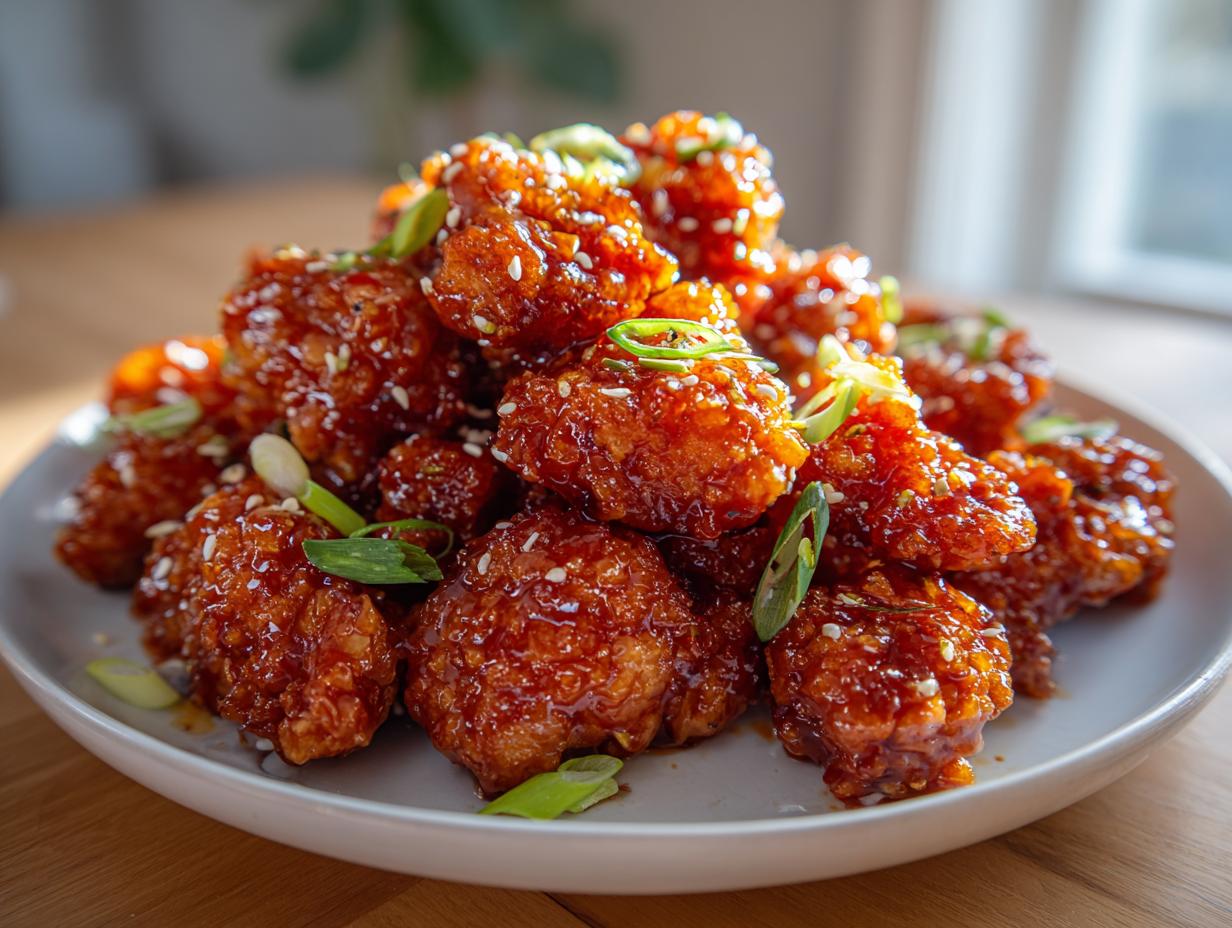
Oh, that craving hits hard, doesn’t it? You know the one—that irresistible sweet, sticky, and tangy pull from your favorite Chinese spot? Well, stop reaching for the phone because we are about to conquer that craving right here in your own kitchen today! We’re talking about the orange chicken recipe that truly lives up to the hype. Forget soggy chicken; my goal is to deliver that perfectly crispy, takeout-style bite every single time. Coming from a background in nutrition, I’ve spent years figuring out how to make comfort food deeply satisfying without being overly complicated. This recipe is proof that you can have a Better Than Takeout experience that’s quick enough for a busy weeknight dinner. Trust me, you’re going to love how accessible this feels!
- Why This Crispy Orange Chicken Recipe is Better Than Takeout
- Ingredients for Your Easy Homemade Orange Chicken
- Step-by-Step Instructions for Perfect Orange Chicken
- Tips for the Best Orange Chicken Success
- Variations: Making Healthy Baked Orange Chicken
- Serving Suggestions for Your Orange Chicken Dinner
- Storage and Reheating Instructions for Leftover Orange Chicken
- Frequently Asked Questions About Orange Chicken
- Share Your Homemade Orange Chicken Experience
Why This Crispy Orange Chicken Recipe is Better Than Takeout
When you’re paying for takeout, you’re really paying for that crunch that fades away two blocks from the restaurant. Not here! We nail the texture while keeping the process shockingly simple. Why mess around with less when you can have the best? We are aiming straight for that incredible Panda Express Copycat Recipe feel, but better, because you control the quality.
Here’s why this Easy Homemade Orange Chicken wins every weeknight battle:
- Supreme Crispiness: That coating doesn’t mess around.
- Flavor Bomb Glaze: Brightly flavored with real citrus, not just syrup.
- Speed: We can get dinner on the table fast—perfect for busy slates! Find more great ideas for quick meals here: The Best Orange Chicken Recipe.
Achieving Restaurant Style Orange Chicken Texture
Okay, this is crucial. You can’t just toss chicken in flour and expect greatness. We are double-dredging! After the egg wash, you really need to press that flour and cornstarch mix onto every single piece. I mean really press it in there! That combination creates a light, sturdy shell that traps the moisture inside while frying, making sure you get that satisfying shatter when you bite in. It’s non-negotiable for true, Crispy Takeout Style Chicken.
The Secret to a Perfect Sweet and Tangy Glaze
The biggest difference between this Simple Orange Chicken Sauce and the bottled stuff is freshness. Seriously. You need the zest of the actual oranges; that oil in the peel holds all the floral, bright notes that make the flavor pop. And don’t skip the rice vinegar! That vinegar cuts through the sweetness from the sugar and gives you that necessary little tang. It keeps the sauce from becoming too heavy or cloying. It’s what makes it taste like something special, not just sweet chicken.
Ingredients for Your Easy Homemade Orange Chicken
Gathering your supplies is half the battle won, right? When you have everything measured and sitting on the counter, that last 15 minutes of cooking goes by in a flash. I’ve broken everything down into the chicken prep and the amazing sauce so you don’t lose track. Make sure you grab those oranges; the fresh juice is key to that bright citrus punch! Seriously, don’t try to substitute the fresh juice if you want that Restaurant Style Orange Chicken flavor.
For the Crispy Coating and Chicken
- 2 lbs boneless, skinless chicken breasts, cut into 1-inch pieces
- 1 cup all-purpose flour
- 1/2 cup cornstarch
- 1 teaspoon salt
- 1/2 teaspoon black pepper
- 2 large eggs, lightly beaten
- Vegetable oil, for frying (You might need 2 inches deep!)
For the Authentic Orange Sauce
- 1 cup fresh orange juice
- 1/2 cup granulated sugar
- 1/4 cup rice vinegar
- 3 tablespoons soy sauce
- 1 tablespoon sesame oil
- 1 tablespoon grated fresh ginger
- 2 cloves garlic, minced
- 1/2 cup orange zest (from about 3 oranges)
- 1 tablespoon cornstarch mixed with 2 tablespoons cold water (This is our slurry!)
- Optional garnish: Sesame seeds and sliced green onions
Step-by-Step Instructions for Perfect Orange Chicken
Alright, sleeves are rolled up! This is where the magic happens, and I promise, it moves fast, so stay focused. Because we want that perfect Sticky Citrus Chicken texture, timing on the fry is everything. Having all your sauce ingredients ready to go before you even turn on the stove for the sauce is crucial for keeping this a Quick Weeknight Chicken Dinner. Having everything ready means you can get this amazing meal on the table fast enough for even the busiest nights. You can find more reliable weekday meals over at quick easy weeknight dinners!
Coating and Frying the Chicken
First things first, let’s get that oil hot! You really need about two inches deep in a sturdy pot or Dutch oven, heating it up to a steady 350°F (175°C). If you don’t have a thermometer, drop a pinch of flour in—if it sizzles vigorously right away, you’re close. Dip your chicken pieces first into the beaten eggs, making sure they get a good coat, and then immediately dredge them hard into that flour/cornstarch mix. Press that coating on! Fry them in small batches, though—this is the secret! If you overcrowd the pan, the oil temperature dips, and you end up with soggy coating instead of crispy chicken.
Creating the Sticky Citrus Chicken Glaze
While the last batch of chicken is frying, jump right on the sauce. Throw everything—juice, sugar, vinegar, soy, zest, ginger, and garlic—into a small saucepan. Get it simmering medium heat until that sugar is completely gone. Now, for the thickening: whisk that cornstarch slurry really well, and pour it in slowly while stirring constantly. You’ll see it change almost instantly to that glossy, thick glaze! As soon as it starts looking like it could coat the back of a spoon, pull it right off the heat. Don’t let it cook too long, or it turns gummy—I learned that the hard way!
Tossing and Serving Your Orange Chicken
Once your chicken is golden and resting on the rack, it’s time for the grand finale. Put all those crispy beauties into a large bowl—the biggest one you have. Pour that warm, beautiful orange glaze right over the top. Now, using a rubber spatula—you don’t want to crush those crispy edges!—gently toss everything together until every piece is shiny and coated. Don’t wait! This Easy Asian Chicken Dinner tastes best when that coating is still perfectly crisp, so get it straight onto your plate with some rice!
Tips for the Best Orange Chicken Success
You’ve got the crispy chicken, you have the beautiful glaze, but sometimes—just sometimes—chemistry happens in the kitchen that you didn’t quite sign up for! I’ve been there. I remember one batch where I added the slurry too fast, and I ended up with a thick, starchy blob instead of a lovely glaze. It tasted okay, but it certainly didn’t look like Restaurant Style Orange Chicken! Don’t panic if your sauce isn’t cooperating at first. A little tweak is all it takes to salvage it.
I always keep a tiny bit of extra cornstarch mixed with cold water (just a teaspoon mixed in a tablespoon of water) nearby when I’m finishing the sauce. If you see it’s just not thickening up nicely after a minute of simmering, whisk in that reserve slurry, a tiny bit at a time, until you see that gorgeous gloss setting in. For those who like to explore different textures, you can check out my tips for air-fryer fried chicken, which might inspire you for your next crispy adventure!
Troubleshooting Common Issues
If you find yourself with a sauce that looks just too runny—meaning it runs right off the chicken without clinging—that’s a common fix. Just keep stirring in tiny amounts of extra slurry until it thickens up properly. Remember, it thickens as it cools slightly, too, so give it just a second before adding too much!
Now, what if the opposite happens? Sometimes that fresh orange juice is super concentrated, and your sauce turns into glue before you even get the chicken tossed in. Don’t throw it out! Just take it off the direct heat and whisk in a splash of plain hot water or a little extra orange juice until it loosens up enough. You want it pourable and glossy, but thick enough to cling. This is the difference between a delicious meal and a soupy mess, and controlling that glaze is the ultimate win for making Better Than Takeout Chinese Food at home.
Variations: Making Healthy Baked Orange Chicken
I know, I know. Deep frying gives you that amazing, shatteringly crisp texture that nothing else quite matches. But sometimes, the deep fryer feels like too much effort, or maybe you’re just trying to keep things a little lighter during the week. That is totally fair! My nutrition background means I am always looking for ways to make our favorite dishes work for our lifestyle, because we shouldn’t have to skip out on something delicious just because we’re trying to eat better.
If you want to skip the oil but still crave that sticky, citrusy flavor of our orange chicken, turning to the oven is my absolute favorite hack. It’s not quite the same level of crunch as the fried version, but honestly, it’s so close, and it’s a fraction of the cleanup—and way less mess! This adaptation means you can easily fit this into your collection of less-intense weeknight meals. You can see a great example of how these changes can work by checking out another take on that healthier concept.
Here is how we transition this recipe:
- Skip Frying: Don’t heat up the oil! Simply prepare your chicken pieces exactly as directed for the coating—egg wash followed by a firm press into the flour/cornstarch mix.
- Bake Time: Line a baking sheet with parchment paper (you know I love my parchment paper for easy cleanup!) and arrange the coated chicken in a single layer. You want them spread out so they can bake, not steam.
- Oven Temp: Pop those trays into an oven that is already preheated to 400°F (200°C).
- Timing It Right: Bake them for about 15 to 20 minutes. You need to flip them halfway through—maybe around the 8-minute mark—to make sure both sides get nice and golden brown. They won’t be quite as puffy as the fried ones, but they will be firm and lovely.
Once they are baked through and look golden, take them out and toss them right into your finished, glossy orange glaze just like the recipe directs! It transforms that baked chicken into fantastic, Healthier Baked Orange Chicken that still delivers that sweet and tangy punch you love.
Serving Suggestions for Your Orange Chicken Dinner
So, you’ve got this incredible mound of glossy, crispy, sweet-and-tangy chicken sitting there—what do you put next to it? Because we’re aiming for the feeling of a truly satisfying, quick meal without a mountain of dishes, keeping the sides simple is my philosophy. This dish is rich and flavorful, so you want companions that soak up that extra glaze but don’t fight for attention.
Honestly, you can’t go wrong with fluffy white rice. It’s the perfect neutral ground for that sauce to settle into. If you’re aiming to elevate your rice game just a little bit without adding stress, check out my recipe for the best fluffy rice pilaf. It’s a little richer than plain steamed rice but still incredibly easy to manage alongside this main dish.
Beyond rice, you absolutely need a good green element to balance out the orange and sugar. I usually stick to something quick-blanched or lightly sautéed. Don’t overcomplicate this part; the star of the show is your chicken!
- Steamed broccoli is my go-to. It holds its texture, and the bright green looks gorgeous next to that deep orange glaze. Just a little sprinkle of salt is all it needs.
- Lightly sautéed snap peas with a tiny drizzle of sesame oil are fantastic too. They offer a different kind of crunch that complements the chicken coating nicely.
- If you happen to have leftover cooked rice from earlier in the week, you can toss that rice with a little bit of the sauce and some frozen peas and carrots to make a super-fast fried rice side instead! That’s truly embracing the quick weeknight chicken dinner mode.

As long as you have something absorbent (rice) and something green (veggie), you have a complete, restaurant-worthy meal ready to go. It’s all about finishing strong without creating extra cleanup drama!
Storage and Reheating Instructions for Leftover Orange Chicken
Oh, the best part of making a big batch of orange chicken is having glorious leftovers for lunch the next day! But here’s the thing: that beautiful crispy coating doesn’t love sitting in sauce for too long. If you pack it up while it’s still warm after being tossed, the moisture from the sauce will inevitably make those crispy bits turn soft or even a little bit chewy. We want to keep the integrity of that crunch for as long as possible, right?
My best advice, which I learned after finding a soggy container in the fridge one time, is to separate things if you know you won’t eat it all right away. If you know you’ll have leftovers, keep the sauce and the crispy chicken pieces separate when you initially put everything away. This is the secret weapon for maintaining that texture!
Storing Your Crispy Chicken Separately
If you have extra fried chicken pieces before you toss them in the glaze, just put those beauties in an airtight container. They can hang out in the fridge for about three days perfectly fine. When you’re ready to eat them, pull out what you need, warm up the sauce (see below), warm the chicken separately, and then toss them together right before serving. This keeps the inside flaky and the exterior much crunchier.
Reheating to Keep That Crunch
The microwave is the enemy of crispy food, period. It just steams everything internally, making it limp. If you want that Better Than Takeout experience even on day two, you need dry heat! If you baked the chicken initially, the oven works perfectly. If you fried it, either the oven or the air fryer is your best friend.
Here’s my go-to method:
- Oven Method: Lay the leftover chicken pieces out on a baking sheet—don’t pile them up! Heat your oven (or toaster oven) to about 375°F (190°C) and bake for about 5 to 7 minutes until they just feel hot through.
- Air Fryer Trick: This is even faster! Pop the chicken pieces into the air fryer basket, set it to 380°F (195°C), and let it run for 3 to 4 minutes. It really wakes up that coating again!
Once the chicken is reheated until it’s hot and firm again, quickly warm your leftover orange sauce gently in a small pan, and then toss the hot chicken in just until it’s coated again. It’s amazing how close this gets you back to that fresh-made flavor!
Frequently Asked Questions About Orange Chicken
Can I make this Panda Express Copycat Recipe faster than 45 minutes?
Oh, that’s the million-dollar question, isn’t it? Who doesn’t want their favorite flavors faster? While the total time listed is about 45 minutes when starting from scratch, hitting that legendary 30 Minute Orange Chicken goal is absolutely doable if you are strategic! The trick is to get the prep done ahead of time. If you cube your chicken, set up your coating bowls (flour, egg, flour again), and measure all your sauce ingredients before you even turn the stove on, you shave off at least 15 minutes of active work.
The actual frying and sauce simmering moves quickly—the slow part is the measurement and setup. So yes, if you prep efficiently, you can totally get this Panda Express Copycat Recipe on the table in under half an hour. That’s my kind of weeknight magic!
What is the best oil to use for frying this orange chicken?
When you’re deep-frying, you have to respect the smoke point of the oil, especially since we need that oil to be nice and hot (350°F) to create a crispy shell quickly. Throwing in chicken that cools the oil too much is what makes it soggy! I generally stick to neutral oils that have high smoke points so they can handle the heat without breaking down or imparting a weird flavor. Vegetable oil works just fine, as noted in the recipe, but canola oil is another champion here.
If you want to get fancy and you’re looking for a slightly cleaner flavor profile, peanut oil is traditionally what many restaurants use. It’s fantastic for frying, though it can sometimes be a little pricier. Whatever you choose, make sure you have enough to cover the chicken by at least an inch or two in the pot so it fries evenly!
How can I make the sauce thicker if it remains watery?
If you’ve simmered your orange sauce, added the slurry, and stirred like crazy, but it still looks more like thin juice than a thick glaze, don’t worry! It happens, especially if your orange juice was a little less concentrated that day. This is where that reserved cornstarch slurry comes back into play. Remember, we mixed 1 tablespoon of cornstarch with 2 tablespoons of cold water?
If your sauce is still thin, take the pan right off the heat for a second. Whisk up a tiny bit more slurry—maybe just a teaspoon of cornstarch into a splash of cold water—and whisk that *slowly* into your simmering sauce. Give it about 30 seconds of stirring over low heat. It should tighten right up into that beautiful, glossy coating you need for your Sticky Citrus Chicken. Just be careful not to add too much at once, or you’ll end up with orange-flavored gelatin instead of a clinging sauce!
Share Your Homemade Orange Chicken Experience
I truly hope this recipe brings that irresistible takeout flavor right into your home! Now that you’ve made your own batch of crispy, sweet, and tangy orange chicken, I’d absolutely love to hear all about it. Please take a moment to leave a rating for the recipe below—especially let me know how crispy your chicken turned out! That’s the marker of success for me.
Did you try the oven method or did you go full-on crispy frying? Snap a picture of your beautiful meal over rice and tag me on social media! Seeing your successes means the world to me and helps others feel more confident stepping into the kitchen. If you have any lingering questions, you can always reach out via my contact page. Happy cooking, friends!
PrintBetter Than Takeout Crispy Orange Chicken (Easy Copycat Recipe)

Make restaurant-quality Crispy Orange Chicken at home. This easy recipe delivers the sweet, tangy citrus glaze you love, making it better than your favorite takeout spot for a quick weeknight dinner.
- Prep Time: 20 min
- Cook Time: 25 min
- Total Time: 45 min
- Yield: 4 servings 1x
- Category: Dinner
- Method: Frying
- Cuisine: Chinese American
- Diet: None
Ingredients
- 2 lbs boneless, skinless chicken breasts, cut into 1-inch pieces
- 1 cup all-purpose flour
- 1/2 cup cornstarch
- 1 teaspoon salt
- 1/2 teaspoon black pepper
- 2 large eggs, lightly beaten
- Vegetable oil, for frying
- 1 cup fresh orange juice
- 1/2 cup granulated sugar
- 1/4 cup rice vinegar
- 3 tablespoons soy sauce
- 1 tablespoon sesame oil
- 1 tablespoon grated fresh ginger
- 2 cloves garlic, minced
- 1/2 cup orange zest (from about 3 oranges)
- 1 tablespoon cornstarch mixed with 2 tablespoons cold water (slurry)
- Optional garnish: Sesame seeds and sliced green onions
Instructions
- Prepare the chicken coating: In a medium bowl, whisk together the flour, cornstarch, salt, and pepper.
- Dip the chicken pieces first into the beaten eggs, letting excess drip off, then dredge thoroughly in the flour mixture, pressing to coat well.
- Heat about 2 inches of vegetable oil in a deep skillet or Dutch oven to 350°F (175°C).
- Fry the chicken in batches, ensuring not to overcrowd the pan, for 4 to 6 minutes until golden brown and cooked through. Remove chicken with a slotted spoon and place on a wire rack set over a baking sheet to drain excess oil.
- Prepare the orange sauce: In a small saucepan, combine the orange juice, sugar, rice vinegar, soy sauce, sesame oil, ginger, garlic, and orange zest.
- Bring the sauce mixture to a simmer over medium heat, stirring until the sugar dissolves.
- Whisk the cornstarch slurry and slowly pour it into the simmering sauce, stirring constantly until the sauce thickens to a glossy glaze, about 1 minute. Remove from heat.
- Place the crispy chicken pieces in a large bowl. Pour the warm orange glaze over the chicken. Toss gently until all pieces are evenly coated.
- Serve immediately over steamed white rice, garnished with sesame seeds and green onions.
Notes
- For a healthier option, bake the coated chicken at 400°F (200°C) for 15-20 minutes, flipping halfway, instead of frying.
- You can substitute chicken thighs for breasts if you prefer darker meat.
- Use fresh orange juice for the best sweet and tangy flavor in your glaze.
Nutrition
- Serving Size: 1 serving
- Calories: 550
- Sugar: 35
- Sodium: 750
- Fat: 28
- Saturated Fat: 6
- Unsaturated Fat: 22
- Trans Fat: 0
- Carbohydrates: 45
- Fiber: 2
- Protein: 35
- Cholesterol: 110