
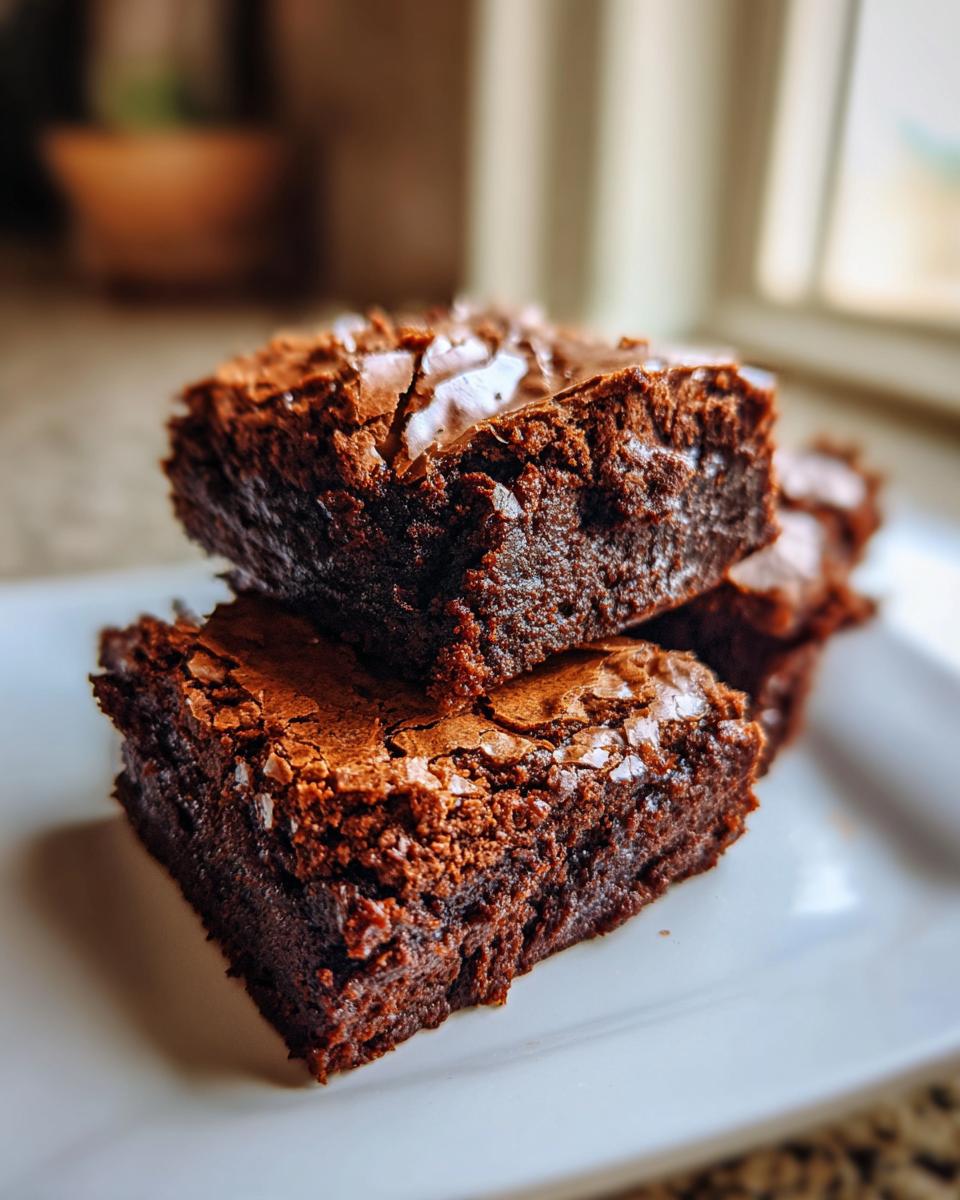
Oh, my goodness, if you’ve ever hunted for that elusive perfect chocolate square—the one that’s dense enough to feel substantial but melts into pure joy, with that shiny, slightly crisp roof? I think I’ve finally cracked the code. Forget those dry, cakey things or those overly complicated recipes; here at CravyBite Kitchen, we believe extraordinary meals shouldn’t take extraordinary effort. I, Jess Carter, spent years looking at the science of food, but I always came back to my family’s kitchen. That’s where I learned the real secret: reliable, comforting American baking done right. I promise you, making the **best homemade brownies** from scratch is easier than you think, and this recipe delivers the ultimate fudgy and chewy result with that desired crackly top. Get ready; this is the one you’ll keep forever.
- Why This is the Best Ever Brownie Recipe
- Ingredients for Ultimate Fudgy and Chewy Brownies
- How to Make Brownies with a Crackly Top: Step-by-Step Instructions
- Tips for Success When Baking Brownies
- Storage and Reheating Instructions for Gooey Chocolate Treats
- Variations on Classic Brownies
- Frequently Asked Questions About Baking Brownies
- Estimated Nutritional Data for These Brownies
- Share Your Favorite Homemade Brownies Experience
Why This is the Best Ever Brownie Recipe
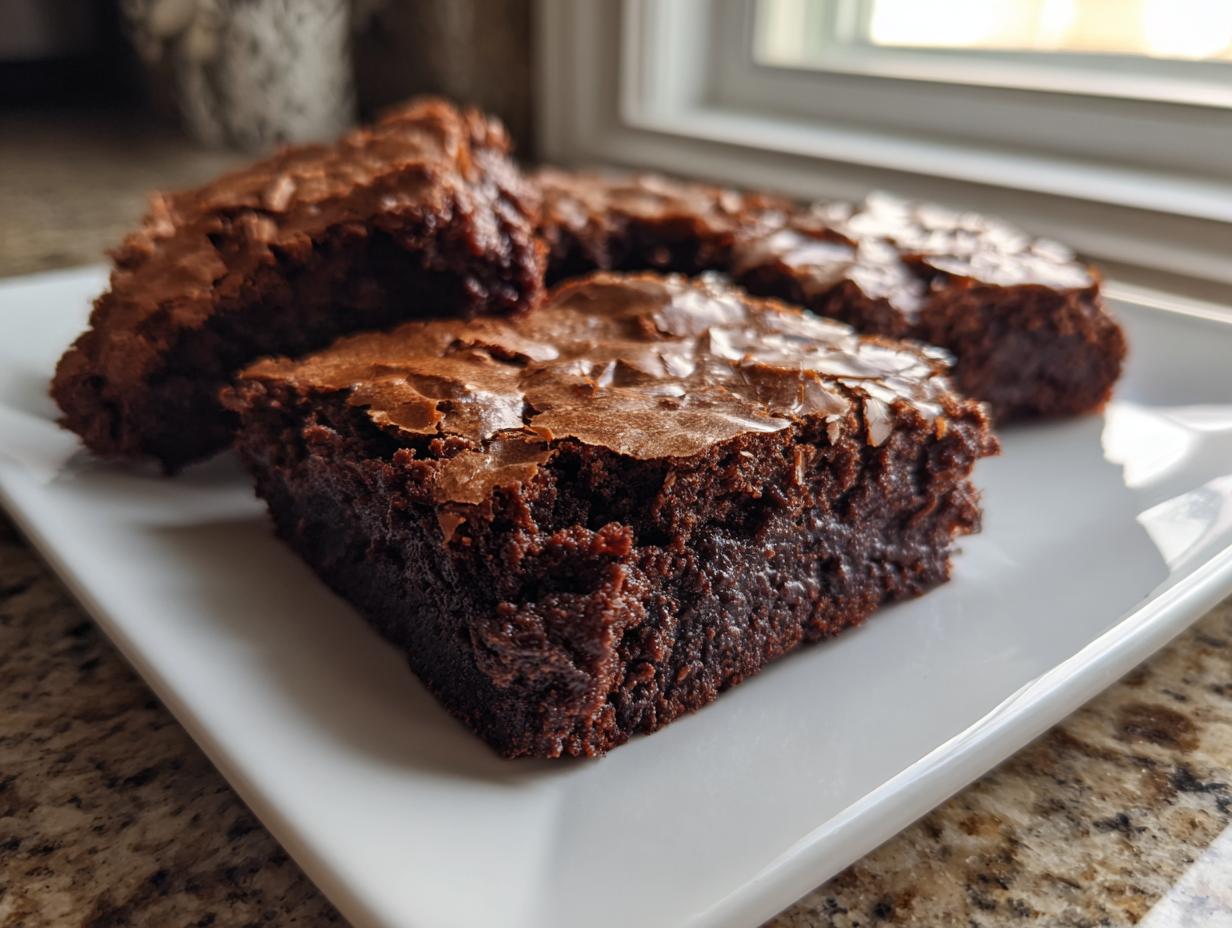
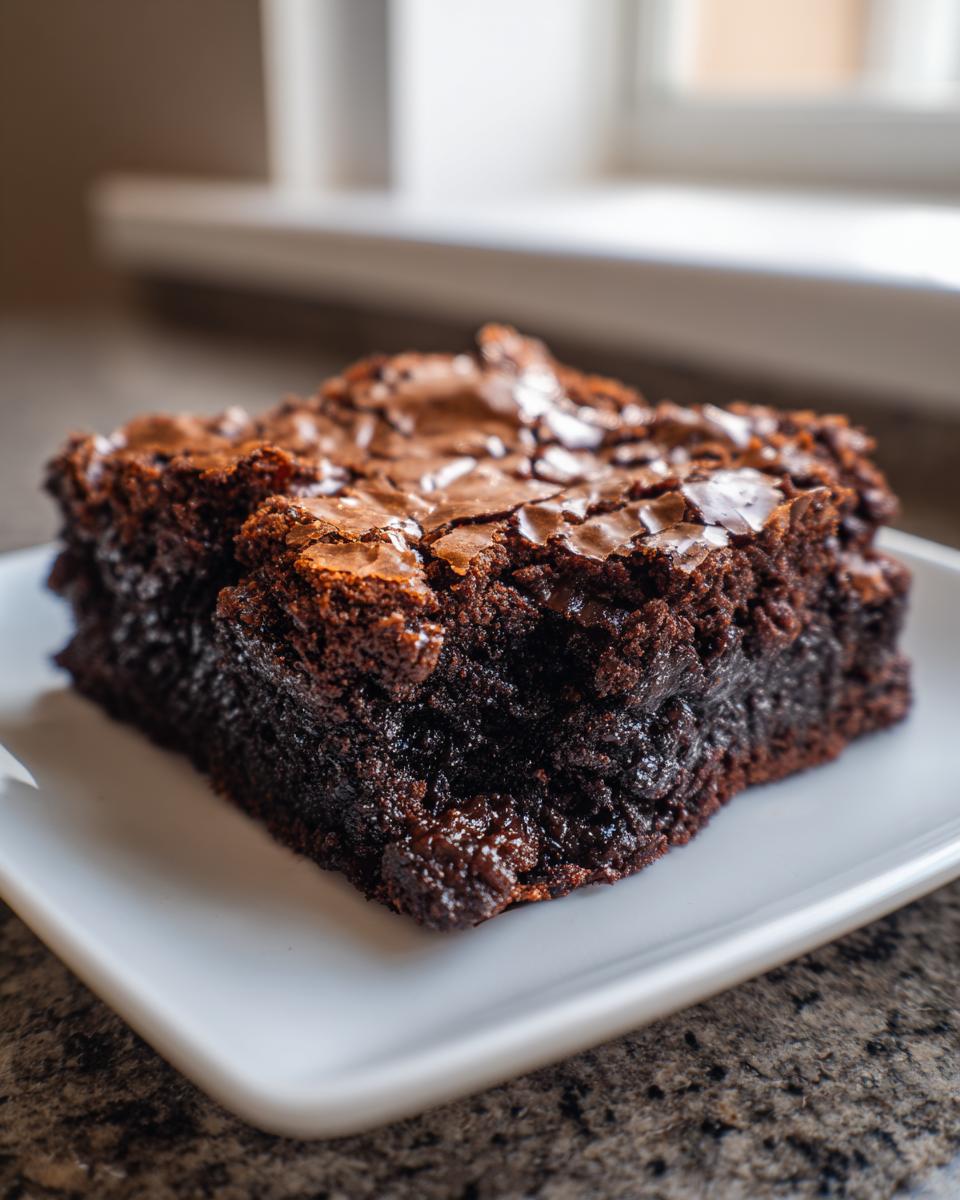
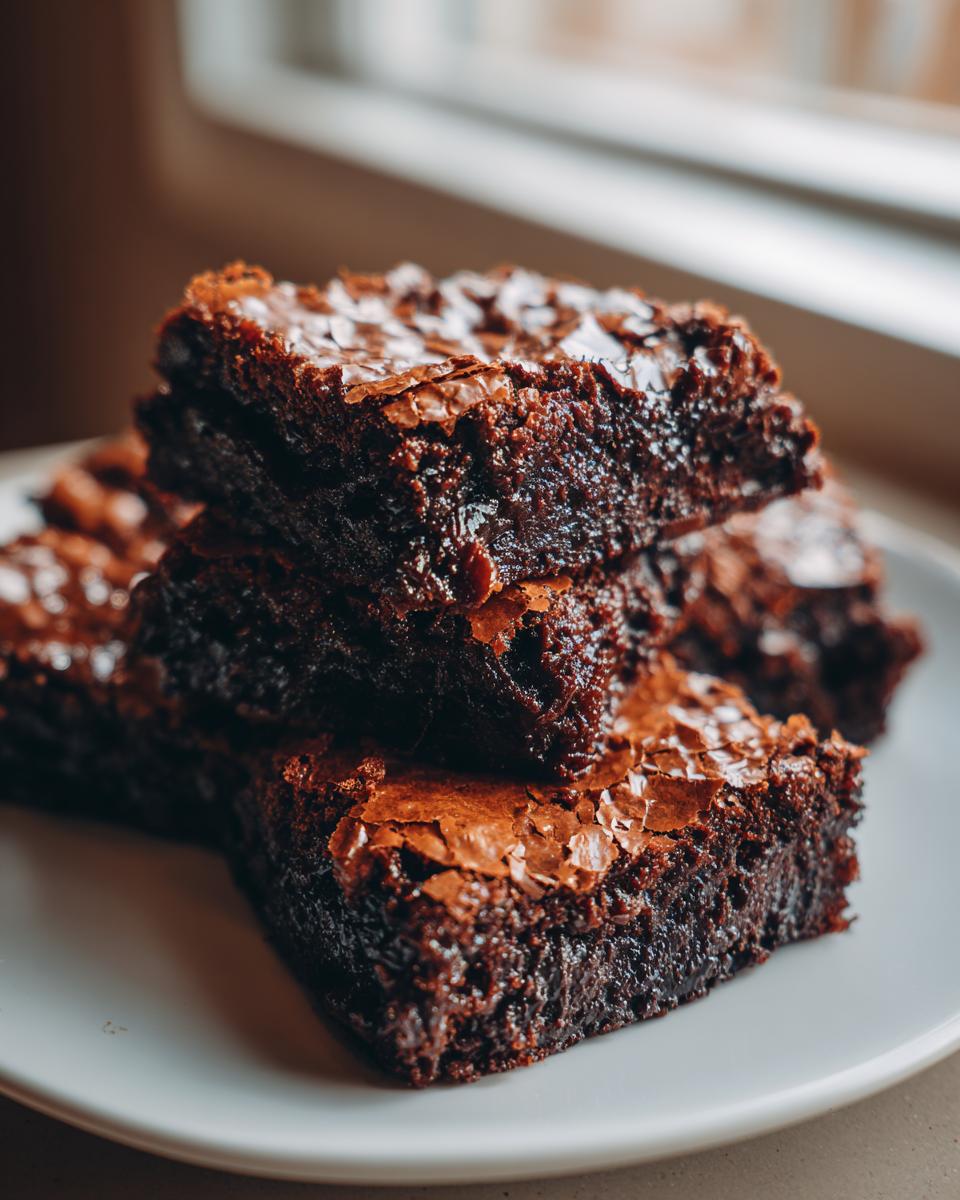
Listen, I’ve tried every version out there, and what people really want when they ask for the **best homemade brownies** is a textural masterpiece. This recipe delivers, hands down. When you bite into these, you get that deep, rich dark chocolate flavor immediately, followed by a center that is completely fudgy and almost gooey. Trust me, that satisfying chewiness around the edges? That’s non-negotiable!
But let’s be honest, the real bragging right here is the top. We are talking about that paper-thin, shiny, crackly shell that you usually only find in fancy bakeries. We achieve that using just melted butter and pure granulated sugar—no struggling with separating yolks needed! This is truly the recipe for the **ultimate fudgy brownies**, and once you’ve nailed this one, you won’t look back. I even have a few other chocolate favorites on my main recipe page if you’re feeling adventurous, like my famous chocolate cherry cookies, but you have to master this one first!
Ingredients for Ultimate Fudgy and Chewy Brownies
Okay, here’s the lineup. The beautiful thing about this recipe is how simple the components are. You likely already have most of this stuff lurking in your pantry right now. We are keeping it pure and focused—no melted chocolate chopping required here, just rich cocoa powder doing all the heavy lifting for that deep flavor. These measurements are crucial, so please grab your kitchen scale if you can!
- 1 cup (227g) unsalted butter
- 2 cups (400g) granulated sugar
- 4 large eggs
- 1 tablespoon vanilla extract
- 3/4 cup (65g) unsweetened cocoa powder
- 1/2 cup (60g) all-purpose flour
- 1/2 teaspoon salt
- 1/4 teaspoon baking powder
Ingredient Notes and Substitutions for Perfect Brownies
Since you asked about making them perfect, I have a couple of little tricks my Mom used to tell me about. If you want an even deeper, almost caramel note in your fudgy squares, try swapping out 1/4 cup of that granulated sugar for packed light brown sugar. It just adds another layer of flavor that’s fantastic. Also, don’t be afraid to toss in 1 cup of your favorite mix-ins! I’m obsessed with adding semi-sweet chocolate chips or some chopped pecans right before they go into the oven. It adds such a great textural counterpoint to all that gooey goodness.
How to Make Brownies with a Crackly Top: Step-by-Step Instructions
Now for the fun part—let’s put this simple, one-bowl recipe into action! When I make these **brownies**, I always crank up some good music because baking should be enjoyable, not stressful. Pay close attention to the wet ingredients, because that is where the magic happens for that glorious crackly top. We’re turning simple pantry staples into something truly decadent! If you want to see how others achieved this perfect texture, check out this guide on the best fudgy brownies.
Preparing the Pan and Oven for Your Brownies
First things first, get your oven preheated to 350°F (175°C). We want everything nice and warm when the batter is ready. For the pan (I use a 9×9 inch metal square pan), you absolutely must use parchment paper. Cut a sheet so it hangs over two opposite sides like little handles. This simple technique guarantees easy removal later, which is crucial when dealing with such gooey chocolate treats. Trust me, you don’t want one stuck layer!
Achieving the Fudgy Base: Mixing Wet Ingredients for Rich Dark Chocolate Brownies
Grab a small saucepan and melt that butter low and slow—we don’t want it sizzling or browning. Once it’s liquid gold, take it off the heat and whisk in both cups of granulated sugar until they are completely married together. This mixture needs to look uniform. Now, add your four large eggs one at a time, beating well after each addition. This is key! You want the whole mixture—our base for these **rich dark chocolate brownies**—to look smooth, glossy, and slightly lighter, almost like shiny ribbons when you lift your whisk. Stir in your vanilla here too.
Combining Dry Ingredients and Final Batter Mix for Chewy Brownie Recipe Easy
In a separate bowl—don’t worry, we aren’t dirtying too many dishes—whisk your cocoa powder, flour, salt, and baking powder together. Now, gently fold the dry ingredients into the glossy wet mixture. I mean *gently*. You are mixing only until you no longer see white streaks of flour. If you overmix this simple batter, you activate the gluten, and suddenly, you’ve made a tough cake instead of a perfectly **chewy brownie recipe easy** to love! Stop mixing the second you think you’re done. No more!
Pour all that beautiful batter into your prepared pan and spread it nice and even. You can get some fantastic ideas for fudgy desserts by checking out chocolate caramel toffee crunch cake if you want more indulgence! If you’re looking for another great bake, don’t forget to try the easy puff pastry chocolate croissant recipe!
Baking and Cooling Your Homemade Brownies
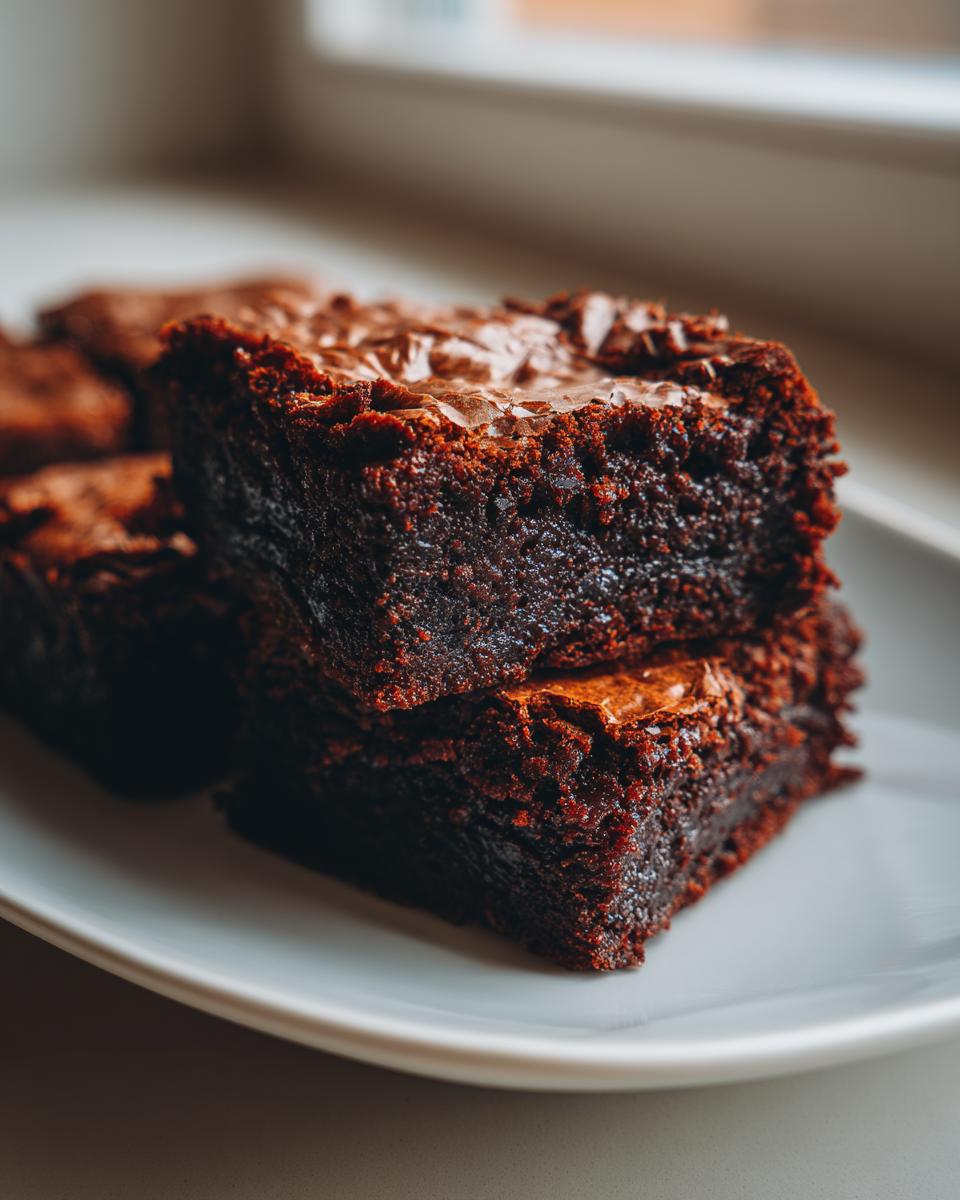
Bake these beauties for about 28 to 32 minutes. Do not walk away! You are looking for the edges to look set and slightly pulled away from the pan, but the center absolutely cannot be dry. When you stick a toothpick in near the middle, it should come out with moist, fudgy crumbs clinging to it—not wet batter, but definitely not clean. That’s how you get the perfect outcome for your **homemade brownies**!
Here’s the hardest part: once they come out, you must let them cool completely in the pan on a wire rack. Seriously, wait until they are mostly room temperature before you use those parchment handles to lift them out! Cutting hot or even warm fudgy bars just results in gorgeous chocolate puddles, and we worked too hard for that!
Tips for Success When Baking Brownies
So you’ve made the batter, but you want those guaranteed results, right? I learned a few tricks over the years that separate a good bake from the **best ever brownie recipe**. First, even though we melt the butter, make sure your eggs are at room temperature. Room temperature eggs emulsify better with the sugar and butter, which seriously boosts that crackly top formation we love so much. Don’t peek!
Seriously, keep that oven door shut tight until the very end of the suggested time; opening it too early lets all that hot air rush out and can cause your brownies to collapse into a dense pancake center instead of holding that beautiful fudgy structure. Another tip for those ultimate fudgy brownies is to use a metal pan, not glass, because metal conducts heat faster and more evenly, which helps set the edges properly (or you can read more about texture perfection here). Also, while these are cocoa powder brownies, if you find yourself wanting an extra layer of chocolate intensity, a half teaspoon of instant espresso powder mixed in with the dry ingredients works wonders without making them taste like coffee. Check out my recipe for chocolate brownie cookies for another amazing chocolate fix!
Storage and Reheating Instructions for Gooey Chocolate Treats
You’re going to want to save these little squares of heaven, but I hope you manage not to eat them all on the first day! The absolute best way to store your **gooey chocolate treats** is right in that 9×9 pan, covered tightly with plastic wrap or foil, kept right on the counter at room temperature. They keep beautifully like this for three to four days. Do *not* put them in the fridge unless you absolutely have to, because the cold tends to make them firm up too much.
If you want that melt-in-your-mouth, fresh-out-of-the-oven experience after they’ve cooled completely, I have a secret weapon. Just take one square and zap it in the microwave for about 10 seconds. It softens everything up perfectly! If you’re feeling extra fancy one morning, you can try topping those warm squares with a homemade marshmallow—I have my recipe for easy homemade marshmallows ready for you!
Variations on Classic Brownies
So you’ve mastered the base recipe for these simple delights, but maybe you want to switch things up next time? That’s the beauty of a great foundation for your chocolate squares! If you loved the richness, you absolutely have to try making these into **brown butter brownie recipe** squares next time. Browning your butter adds this incredible nutty depth that plays so well with the cocoa. You just melt the butter slowly until those milk solids toast and smell nutty, then proceed exactly as written—it’s a total game-changer.
Like I mentioned before, adding that tiny bit of espresso powder elevates the chocolate big time. It just deepens the dark chocolate flavor without tasting like coffee at all, making for truly **rich dark chocolate brownies**. If you’re feeling super nostalgic, you can always look up old-school recipes like the famous Nostalgic Lunch Lady Brownies, though they tend to be a little cakier. For other layered fun, check out my recipe for fudgy layered bars too! These classic homemade brownies are just the starting point for so much chocolate fun.
Frequently Asked Questions About Baking Brownies
I know when you’re baking for pure indulgence, you want everything to go perfectly. Don’t sweat it if you have a few questions swirling around! Sometimes achieving that perfect texture for our **chewy brownie recipe easy** just takes a little nudge in the right direction. Here are some things folks ask me all the time about getting these homemade delights just right.
How do I guarantee my brownies have a shiny, crackly top?
This is the million-dollar question, isn’t it? The secret is actually in the science between the fat and the sugar, and it happens when you whisk that sugar right into the melted butter and then beat it vigorously with the eggs until it gets glossy. Think of it like building a tiny meringue layer on top. The heat from the oven causes the sugar to rise and set before the rest of the batter fully sets. If you skip those steps where you beat the wet ingredients until they are shiny, you basically skip the crackle—so don’t rush that part!
Can I substitute the cocoa powder for melted chocolate in these brownies?
That’s a tricky one! While I love melted chocolate, this specific recipe is formulated to rely on the fat ratio and structure provided by the cocoa powder to keep these **brownies** perfectly fudgy and dense; it hydrates differently than solid, melted chocolate does. If you tried to swap them directly, they would likely end up thicker, maybe even a bit cakey, because the fat content would be off, and you wouldn’t get that signature gooey chocolate treat texture. Stick to the cocoa powder for this version!
What is the best way to cut clean squares from fudgy brownies?
Oh, trust me, cutting a rich, fudgy batch when they’re warm is a disaster waiting to happen—you pull the knife out and the whole square deforms! The number one tip is patience: Let them cool almost completely, like I talk about in the baking steps. Once they are cool, grab a large, sharp knife—the longer the blade, the better—and dip it into a tall glass of very hot water. Wipe the blade completely dry, then make one clean slice. Dip, wipe, cut. Repeat that hot water process before every single cut, and you’ll get the cleanest, prettiest squares you’ve ever made. If you need a good frosting for a layer cake instead, I’ve got my vanilla buttercream recipe ready!
Estimated Nutritional Data for These Brownies
When we bake things this rich and decadent, we know we’re indulging a little bit, and that’s perfectly fine! Food is meant to nourish the soul, remember? I always pull these numbers together just so you have a rough idea of what you’re enjoying in each square. It helps me balance out the rest of the week’s meals, you know?
Here is the estimated breakdown for one serving based on 16 squares:
- Serving Size: 1 square
- Calories: 260
- Sugar: 28g
- Sodium: 110mg
- Fat: 14g
- Saturated Fat: 8g
- Carbohydrates: 33g
- Protein: 3g
Now, please take this information with a grain of salt—literally! Because we are using real ingredients like butter and pure cocoa powder, the exact brands you choose can change the final numbers slightly. I always tell folks, these values are a good guide for your **simple dessert squares**, but they are estimates for this wonderful, homemade treat.
Share Your Favorite Homemade Brownies Experience
Now that you’ve seen how we get that perfect, dense texture and that shiny, spectacular crackly top, I truly want to see what you created! Baking is meant to be shared, and seeing your success is honestly the best part of my entire week. Did you manage to get that beautiful shatter on the top layer? Did they stay fudgy? Don’t be shy!
Please promise me you’ll leave a rating right below this little note and tell me about it in the comments. Knowing that this **brownies** recipe is becoming a favorite in your kitchen too—that’s what keeps me excited to share these family traditions. If you took a picture of your incredible squares, tag me! I love connecting with you guys, whether you’re whipping up these chocolate hits or tackling something totally different, like my cozy easy black bean chili recipe next week!
Happy baking, my friends. Enjoy every single fudgy bite!
PrintThe Ultimate Fudgy and Chewy Brownies with a Crackly Top
Make the best homemade brownies from scratch. This simple, one-bowl recipe delivers rich, dark chocolate flavor with a dense, fudgy center and the perfect shiny, crackly top.
- Prep Time: 15 min
- Cook Time: 30 min
- Total Time: 45 min
- Yield: 16 servings 1x
- Category: Dessert
- Method: Baking
- Cuisine: American
- Diet: Vegetarian
Ingredients
- 1 cup (227g) unsalted butter
- 2 cups (400g) granulated sugar
- 4 large eggs
- 1 tablespoon vanilla extract
- 3/4 cup (65g) unsweetened cocoa powder
- 1/2 cup (60g) all-purpose flour
- 1/2 teaspoon salt
- 1/4 teaspoon baking powder
Instructions
- Preheat your oven to 350°F (175°C). Line a 9×9 inch metal baking pan with parchment paper, leaving an overhang on two sides for easy removal.
- In a medium saucepan over low heat, melt the butter completely. Remove from heat.
- Whisk the granulated sugar into the melted butter until fully combined. This step helps create the crackly top.
- Add the eggs one at a time, beating well after each addition until the mixture is smooth and glossy. Stir in the vanilla extract.
- In a separate bowl, whisk together the cocoa powder, flour, salt, and baking powder.
- Gradually add the dry ingredients to the wet ingredients. Mix only until just combined; do not overmix.
- Pour the batter into the prepared pan and spread evenly.
- Bake for 28 to 32 minutes. The edges should look set, and a toothpick inserted near the center should come out with moist, fudgy crumbs attached, not wet batter.
- Let the brownies cool completely in the pan on a wire rack before lifting them out using the parchment overhang.
- Cut into squares and serve your gooey chocolate treats.
Notes
- For an even richer flavor, substitute 1/4 cup of the granulated sugar with packed light brown sugar.
- If you want extra fudgy brownies, reduce the baking time by 2 minutes.
- You can add 1 cup of chocolate chips or chopped nuts to the batter before baking for added texture.
Nutrition
- Serving Size: 1 square
- Calories: 260
- Sugar: 28
- Sodium: 110
- Fat: 14
- Saturated Fat: 8
- Unsaturated Fat: 6
- Trans Fat: 0
- Carbohydrates: 33
- Fiber: 2
- Protein: 3
- Cholesterol: 65