
Oh, you know the feeling. You’re craving that hearty, wholesome goodness—something beautiful and nutritious for your family’s sandwiches or that perfect slice of toast in the morning. But what do you get? A dense, heavy loaf that feels more like a doorstop than bread! I’ve been there, believe me. As a nutritionist, I know the value of whole grains, but as a home cook, I also know that healthy food should taste incredible, too. That’s why I worked so hard to bridge that gap. This isn’t just another recipe; this is the recipe for genuinely soft and fluffy whole wheat bread. We are banishing the brick loaves forever!
- Why This Soft Whole Wheat Bread Recipe Works (The Secret to Fluffy Loaves)
- Gathering Ingredients for Your Homemade Whole Wheat Bread
- Step-by-Step Instructions for Easy Whole Wheat Bread
- Tips for Achieving the Best Whole Wheat Sandwich Bread Texture
- Storage and Making Ahead with Your Whole Wheat Loaf
- Serving Suggestions for Fresh Baked Bread
- Frequently Asked Questions About Making Whole Wheat Bread
- Nutritional Snapshot of This Nutritious Bread Recipe
- Share Your Soft Whole Wheat Bread Success
Why This Soft Whole Wheat Bread Recipe Works (The Secret to Fluffy Loaves)
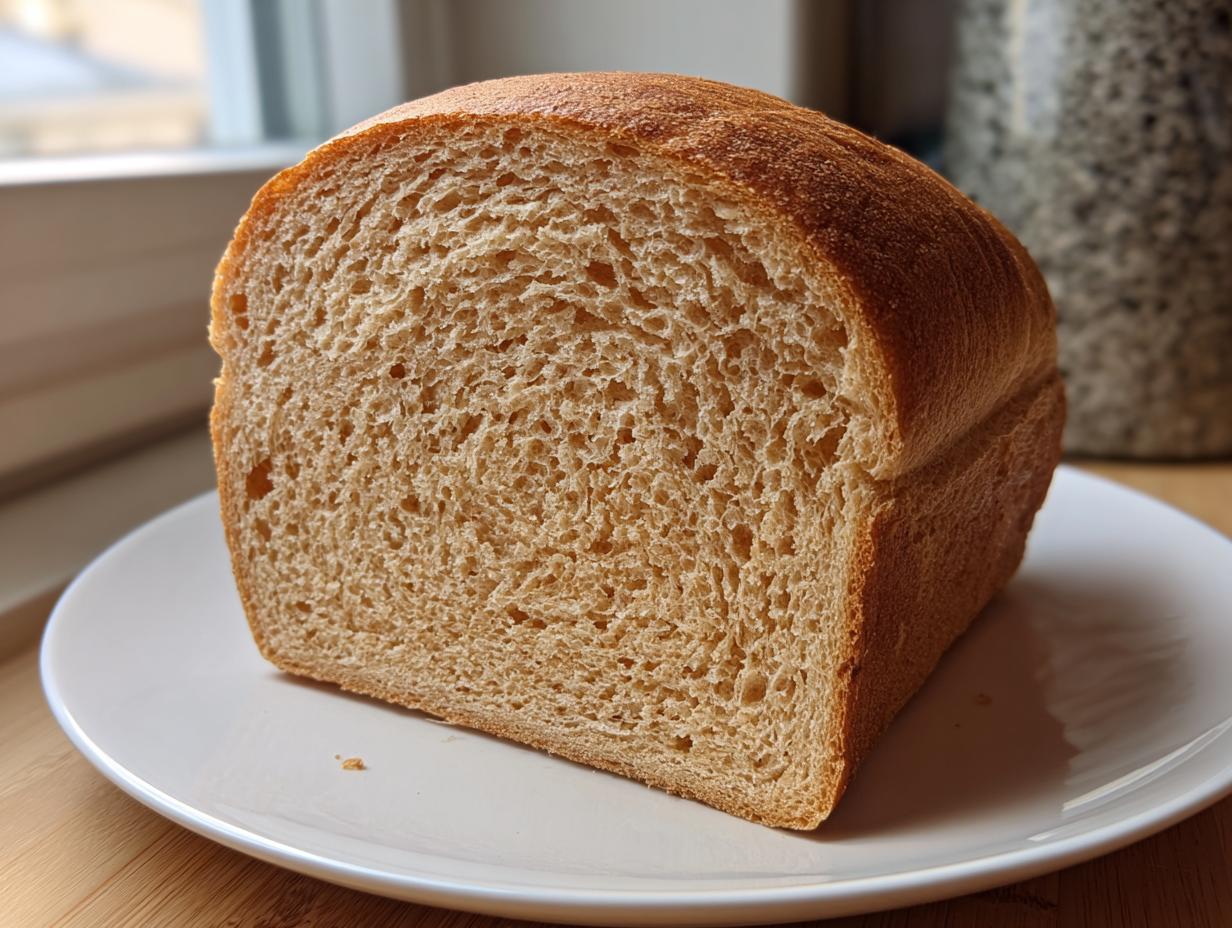
If you’ve ever sworn off homemade whole wheat bread because it always came out too heavy, you’re about to change your mind! The secret to achieving that light, airy crumb you see in bakery windows—the kind that’s wonderful for your daily sandwiches—isn’t complicated. It comes down to respecting the flour itself and adding things that coat the bran nicely. That’s where the honey and oil come into play; they are our champions of moisture and tenderness. This soft whole wheat bread recipe is famous in my family because it delivers on the promise of a truly fluffy whole wheat bread, every single time.
We aren’t just crossing our fingers; we are being intentional! If you want a beautiful, tall loaf rather than a squat one, you need a little binder insurance. You’ll want to check out my thoughts on making croissants for perfect pastry structure, because the same structural rules apply here!
Ingredient Science for the Best Whole Wheat Bread
Whole wheat flour is heavy because the bran cuts those delicate gluten strands we need for lift. To counteract this, we use a blend of whole wheat and all-purpose flour. This balancing act gives the dough structure without becoming too chewy. For those who want extra insurance against density, I sometimes add a tiny bit of vital wheat gluten. It’s like giving your dough superpowers, helping that whole wheat loaf rise high and proud, even with the whole grains weighing it down!
Gathering Ingredients for Your Homemade Whole Wheat Bread
Okay, now that we know *why* this bread works, let’s make sure we have everything ready to go! When it comes to homemade whole wheat bread, the ingredient list is crucial because we are using every measurement to ensure that soft texture. I’ve had readers write in saying they tried swapping things, and trust me, that’s when the brick forms! So please, stick closely to what I’ve written down here. Having everything measured out before you start mixing is called ‘mise en place,’ and it’s the secret to keeping this process fun and stress-free.
If you need a quick side dish for when this bread comes out of the oven, you should absolutely check out my recipe for easy homemade garlic butter—it pairs perfectly with a fresh slice!
Here is exactly what you need for one beautiful, soft loaf:
- 1 cup warm water (And I mean *warm*! Aim for 105°F to 115°F – too hot kills the yeast, too cold makes it lazy!)
- 2 1/4 teaspoons active dry yeast
- 3 tablespoons honey (This is the sweet backbone of the flavor!)
- 1/4 cup vegetable oil or melted butter (Your choice, but both provide necessary moisture)
- 1 1/2 teaspoons salt
- 1 1/2 cups whole wheat flour
- 2 to 2 1/2 cups all-purpose flour (Plus just a little bit extra if you need to dust your counter later)
- 1 teaspoon vital wheat gluten (This is optional, but honestly, it’s my favorite booster for structure.)
Step-by-Step Instructions for Easy Whole Wheat Bread
Alright, deep breath! Baking bread from scratch can sound scary, but I promise you that with these steps, you’ll be serving up the best whole wheat bread your family has ever tasted. This process is straightforward, even if you’ve never made yeast bread before. We need patience during the resting times, but the active work time is really quick! We are aiming for that perfect, sliceable loaf that’s sturdy for your lunchtime spread.
We’re going to walk through this slowly. If you want to get ahead, you could try whipping up a batch of my easy puff pastry for another time, but for now, focus on this fabulous whole wheat sandwich bread!
Activating Yeast and Mixing the Dough
First things first: wake up that yeast! In your biggest bowl, mix that warm water—remember, that sweet spot between 105°F and 115°F—with your honey. Sprinkle the yeast right on top. Don’t stir it too much, just let it hang out for about 5 to 10 minutes. If it gets foamy and bubbly on top, success! Your yeast is ready for action, which means you’ve already won half the battle for that fluffy whole wheat bread.
Now, stir in your oil or butter and that salt. It’s time for the star players: dump in the whole wheat flour first, along with that optional vital wheat gluten if you’re using it. Mix it until it just comes together into a messy ball. Now, start adding the all-purpose flour, maybe 1/2 cup at a time. You need enough to make a *shaggy* dough—that’s just a term for dough that holds itself together but still looks a bit rough around the edges. Don’t force in too much extra flour yet!
Kneading and the First Rise for Whole Wheat Loaf
Time to get your hands in there! Turn that shaggy dough out onto a surface dusted very lightly with flour. We need to knead this for about 6 to 8 minutes. If you use a stand mixer with a dough hook, use medium-low speed for about 5 to 7 minutes. The dough is done kneading when it feels smooth, pliable, and elastic. If it’s sticky, add just a tiny bit more flour, maybe a teaspoon at a time. You are building strength for your whole wheat loaf!
Once it looks good, grab a clean bowl, lightly coat the inside with oil, and put your dough ball in there. Give it a flip so it’s coated on all sides. Cover it tight with plastic wrap or a damp kitchen towel. Find a warm, draft-free spot—the top of the fridge works well for me! Let this first rise go for a good hour to an hour and a half, or until it has visibly doubled up in size. That patience is what makes this a truly easy yeast bread.
Shaping and Final Proofing Before Baking
When that dough has puffed up nicely, gently punch it down—just deflate it without squishing out all the air. Turn it onto your clean, lightly floured space again. Pat it into a rough rectangle, then tightly roll it up like you are rolling up a rug, starting from the short end. Pinch that final seam shut really well. Tuck the ends under slightly so it looks like a neat little loaf shape.
Rub some oil inside your 9×5 inch loaf pan and gently place your dough log in there, seam-side down. Cover it loosely again and let it have its second nap for about 30 to 45 minutes. Here’s how you know it’s truly ready to bake: the dough should be cresting about 1 inch over the top edge of the pan. About 15 minutes before this second rise is up, go ahead and crank your oven to 375°F (190°C). While that’s heating, you can dream about dipping your treats into some homemade easy homemade marshmallows—though this bread is definitely better with butter!
Tips for Achieving the Best Whole Wheat Sandwich Bread Texture
It really bothers me when people give up on whole wheat bread because they keep ending up with loaves that could double as gym weights! Remember, bridging the gap between healthy and delicious is my whole mission here. Achieving that signature soft and fluffy texture isn’t magic, but it does require knowing a few little tricks that the professional bakers use. If you follow these tips exactly, you’ll have the very best whole wheat bread.
My biggest piece of advice, and this is crucial for any healthy homemade bread, is about cooling. Seriously, the hardest part is waiting an hour after it comes out of the oven before slicing! If you cut into it hot, that steam escapes too fast, and you end up compressing the crumb, which means instant density. Let it cool completely on a wire rack—it helps set the internal structure.
For those wanting deeper flavor, make sure you check out how I season my savory dips here: best onion dip! But for bread, moisture is key.
Also, remember that water temperature when activating the yeast? If it’s too high, you kill the yeast, and you won’t get the rise needed for a fluffy whole wheat bread. If you’re curious about boosting that lovely whole grain flavor, take a look at this homemade flavor guide!
Flour Adjustments and Ingredient Swaps
Now, let’s talk flour specifics, because this makes a huge difference in your soft whole wheat bread recipe. If you can easily find it, look for *white* whole wheat flour instead of the standard dark kind. It comes from a paler wheat berry, and it gives you the nutritional benefits but results in a much lighter-colored and softer crumb. Trust me on this one for that classic whole wheat sandwich bread look!
And remember that vital wheat gluten I mentioned? That little cup full of power is fantastic if you want to swap out more all-purpose flour for the whole wheat. It provides extra scaffolding to catch all those bubbles. It’s a great trick for a beginner bread recipe when you’re trying to get that lofty height!
Storage and Making Ahead with Your Whole Wheat Loaf
One of the best parts about baking a whole wheat loaf this perfect is knowing it lasts! Unlike those airy white breads that go stale overnight, this recipe holds up beautifully because of all that wholesome moisture we worked so hard to incorporate, especially with the honey and oil. This is fantastic for busy weeks because you only need to bake once to cover lunches and breakfasts!
For just keeping it at room temperature, wrap that completely cooled loaf tight in plastic wrap—slicing it first helps, but honestly, I leave it whole until I need it. You should easily get 3 to 4 good days out of it, and it stays wonderfully soft for your morning toast.
But if you’re like me and bake a large batch hoping to save some for later, you absolutely must freeze some for your easy homemade whole wheat bread stash. It’s so simple! Just slice up the entire cooled loaf first. I always put a small piece of parchment paper between each slice. This stops them from sticking together in the cold. Then, pop those slices into a heavy-duty freezer bag, press out all the air you can, and seal it tight.
When you need a slice for school lunch or toast for breakfast, just pull what you need right from the freezer! It thaws out super quick on the counter, or you can even toss a slice straight into the toaster. Having this nutritious bread recipe ready to go anytime is a total game-changer for weeknight meals. Speaking of meals, this bread is phenomenal dipped into my easy black bean chili when the weather gets chilly!
Serving Suggestions for Fresh Baked Bread
Now that you have this gorgeous, soft, and genuinely flavorful whole wheat bread, what should you do with it? Honestly, tearing off a hot end piece right off the cooling rack with a smear of good butter and an extra drizzle of honey is peak happiness. That’s my favorite way to taste-test!
But for actual eating, this loaf is designed to be your daily workhorse. It’s sturdy enough to handle a jam-packed lunch sandwich without collapsing, which is exactly what we aimed for when creating this easy whole wheat bread setup. It toasts up beautifully—crisp on the edges, but still tender inside.
If you are having this at dinner, try serving thick slices alongside something warm and comforting. This bread is just phenomenal soaking up the last bits of broth. If you need a comforting dinner idea to go with it, you have to try my creamy cheddar potato cheese soup. It’s warm, savory, and the perfect pairing for your whole grain bread recipe!
Frequently Asked Questions About Making Whole Wheat Bread
I always tell people that baking bread is a conversation with the yeast, and sometimes you have to adjust based on what it tells you! Since you are aiming for that satisfying, soft whole wheat bread, there are a few questions that pop up almost every time readers try this recipe for the first time. Don’t worry if you’re running into issues; troubleshooting is just part of learning to bake the best whole wheat bread!
If you’re looking for a quick dinner to serve alongside this lovely loaf, you should definitely check out my recipe for easy crock pot creamy chicken tortilla soup!
Can I make this a 100 percent whole wheat bread recipe?
That is such a common question! Yes, you absolutely can try to make this a 100 percent whole wheat bread recipe by swapping out all the all-purpose flour for more whole wheat flour. However, I have to give you a little warning: You will sacrifice some of that incredible fluffiness we worked so hard for. Since the bran in 100% whole wheat cuts gluten strands so well, the resulting whole grain bread recipe will be noticeably denser. You might even need to add an extra splash of warm water as you mix, because 100% whole wheat flour tends to soak up liquid a bit faster.
Why is my homemade whole wheat bread dense or brick-like?
Ugh, the dreaded brick! This is usually one of three culprits, and it’s fixable next time. First, check your yeast activation! If the water was too hot or too cold, the yeast didn’t wake up properly, meaning you didn’t get gas production needed for rise. Second, check your kneading. If you over-knead, you actually work the gluten too hard, and it tightens up, leading to a dense loaf. Third, check the second rise—if you didn’t let it proof long enough, there isn’t enough internal structure to support the loaf during baking. For your next batch of healthy homemade bread, focus on that warm water!
Nutritional Snapshot of This Nutritious Bread Recipe
I always want to remind folks that while CravyBite Kitchen focuses on flavor and comfort, we respect the *fuel* we put in our bodies. I’ve always got my nutrition background buzzing in the back of my mind! Because we’re using whole wheat flour and honey instead of processed white ingredients, this nutritious bread recipe is a fantastic choice for everyday eating. It’s so satisfying to know you are serving your family real, wholesome food.
Now, please remember these numbers are just my best estimates based on the ingredients listed here. If you change the oil to butter, or sneak in extra honey for your children’s toast, the totals will shift a little bit. I always used this as a guide, not a strict rulebook for dieting. If you’re compiling your own records, you can check out some of my favorite healthy swaps in my quick healthy breakfast ideas!
For one slice of this amazing whole wheat bread (Yield: 1 loaf):
- Calories: 120
- Fat: 3g
- Saturated Fat: 0.5g
- Trans Fat: 0g
- Cholesterol: 0mg
- Sodium: 180mg
- Carbohydrates: 20g
- Fiber: 3g
- Sugar: 3g
- Protein: 4g
See that fiber content? That’s what makes this healthy homemade bread so much better than highly refined white bread! It keeps you feeling full longer, which is key for avoiding that mid-morning slump.
Share Your Soft Whole Wheat Bread Success
I truly hope this recipe has changed the way you think about baking with whole grains. Seriously, when you pull that beautiful, soft whole wheat loaf out of the oven and smell that nutty, warm goodness, you’ll understand why I’ve poured so much of my heart into perfecting it!
Now that you’ve done the work—the yeast activation, the kneading, the waiting—I absolutely want to see your results! Don’t keep that perfectly fluffy success to yourself!
- Did you manage that light, fluffy texture everyone chases for their whole wheat sandwich bread?
- How many slices did you eat while it was still warm (don’t worry, I won’t tell!)?
- What did you pair it with—butter and honey, or maybe you used it for a hearty lunch sandwich?
Head over to the comments below and give me a star rating when you try this out. And if you want to keep in touch about new recipes or if you ever need to ask me a quick question about your easy homemade whole wheat bread trial run, you know you can reach out anytime through my contact page down at the bottom. Happy baking!
PrintThe Ultimate Soft & Fluffy Homemade Whole Wheat Sandwich Bread (Easy Recipe)

Bake a loaf of whole wheat bread that is soft and fluffy, avoiding the dense texture often associated with whole grains. This easy recipe is perfect for daily sandwiches and toast.
- Prep Time: 20 min
- Cook Time: 35 min
- Total Time: 2 hr 50 min
- Yield: 1 loaf 1x
- Category: Baking
- Method: Yeast Baking
- Cuisine: American
- Diet: Vegetarian
Ingredients
- 1 cup warm water (105°F to 115°F)
- 2 1/4 teaspoons active dry yeast
- 3 tablespoons honey
- 1/4 cup vegetable oil or melted butter
- 1 1/2 teaspoons salt
- 1 1/2 cups whole wheat flour
- 2 to 2 1/2 cups all-purpose flour (plus more for dusting)
- 1 teaspoon vital wheat gluten (optional, for extra structure)
Instructions
- Activate the yeast: In a large bowl, combine the warm water and honey. Sprinkle the yeast over the top and let it sit for 5 to 10 minutes until foamy.
- Mix wet ingredients: Add the oil (or melted butter) and salt to the yeast mixture. Stir to combine.
- Combine flours: Add the whole wheat flour and vital wheat gluten (if using) to the wet ingredients. Mix until just combined.
- Add all-purpose flour: Gradually add the all-purpose flour, mixing until a shaggy dough forms.
- Knead the dough: Turn the dough out onto a lightly floured surface. Knead for 6 to 8 minutes until the dough is smooth and elastic. If you are using a stand mixer with a dough hook, mix on medium-low speed for 5 to 7 minutes. The dough should feel soft but not sticky.
- First rise: Lightly grease a large bowl. Place the dough in the bowl, turning to coat. Cover the bowl with plastic wrap or a clean kitchen towel. Let the dough rise in a warm place for 1 to 1.5 hours, or until it has doubled in size.
- Shape the loaf: Gently punch down the risen dough. Turn it out onto a lightly floured surface and shape it into a log. Place the dough seam-side down into a greased 9×5 inch loaf pan.
- Second rise: Cover the loaf pan loosely and let the dough rise again in a warm spot for 30 to 45 minutes, or until the dough has crested about 1 inch above the rim of the pan.
- Bake: Preheat your oven to 375°F (190°C) during the last 15 minutes of the second rise. Bake for 30 to 35 minutes, or until the top is golden brown and the internal temperature reaches 190°F (88°C).
- Cool: Remove the bread from the pan immediately and let it cool completely on a wire rack before slicing. This prevents the bottom crust from becoming soggy.
Notes
- For a softer crumb, use white whole wheat flour instead of traditional whole wheat flour.
- If you prefer a slightly sweeter loaf for toast, increase the honey to 1/4 cup.
- This bread freezes well. Slice the cooled loaf and place parchment paper between slices before freezing in an airtight bag for up to 3 months.
Nutrition
- Serving Size: 1 slice
- Calories: 120
- Sugar: 3
- Sodium: 180
- Fat: 3
- Saturated Fat: 0.5
- Unsaturated Fat: 2.5
- Trans Fat: 0
- Carbohydrates: 20
- Fiber: 3
- Protein: 4
- Cholesterol: 0