
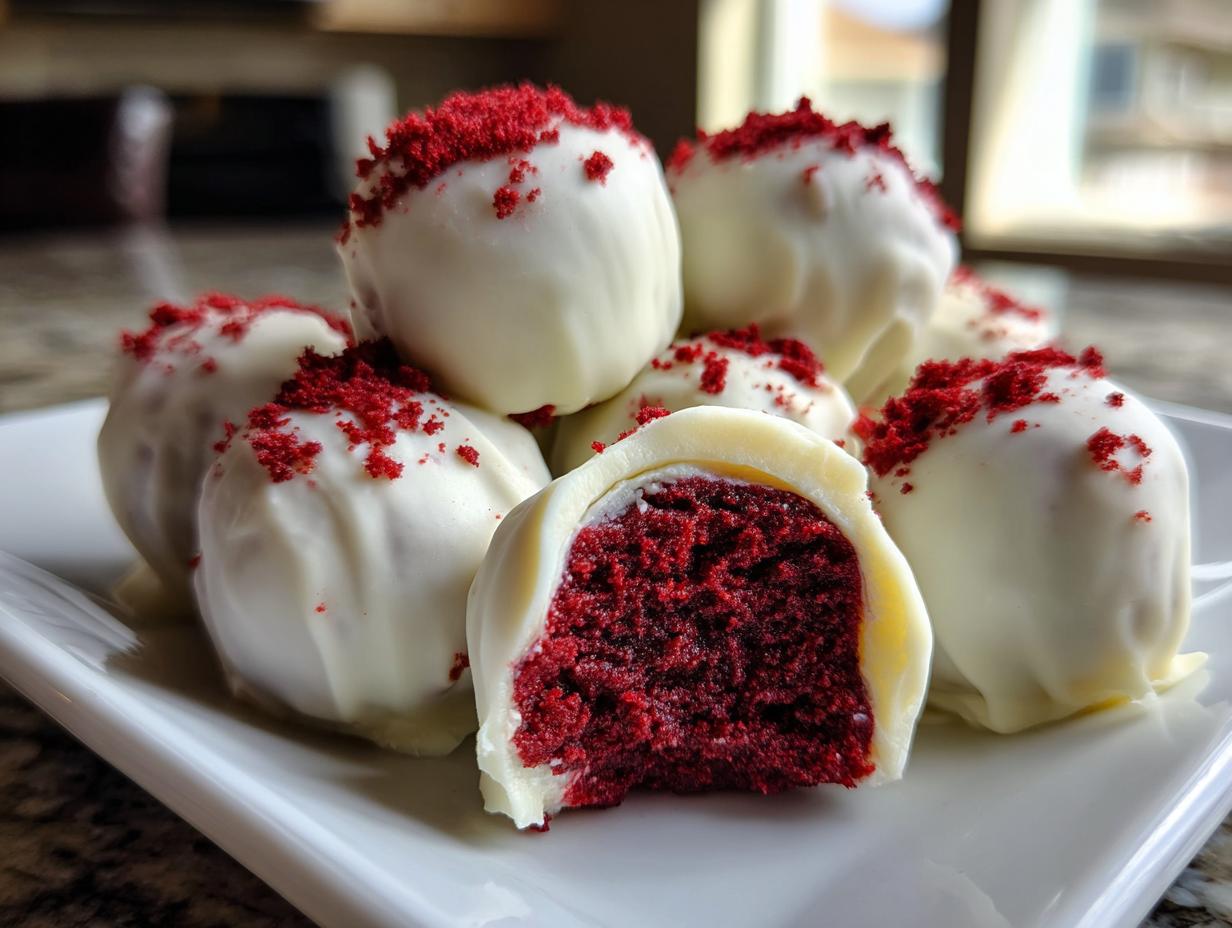
There’s something magical about turning a decadent slice of cake into a perfectly formed, bite-sized treasure, isn’t there? If you love that deep, velvety flavor but dread turning on the oven, then you’ve stumbled into the right place here at CravyBite Kitchen. We are focused on accessible pleasure, which is why I’m sharing my absolute favorite recipe for red velvet cake balls—and yes, they are gloriously no-bake! This specific version uses a simple cake mix hack to guarantee an ultra-moist center every single time. As someone with a background blending nutrition science with generations of Midwest home cooking traditions, I know exactly how to make show-stopping desserts without turning it into a daunting chore.
- Why These Easy Red Velvet Cake Balls Are Your New Go-To Party Desserts
- Gathering Ingredients for Your Red Velvet Cake Balls Recipe
- Expert Tips for Perfect Red Velvet Cake Balls Every Time
- Step-by-Step Instructions for Easy Cake Balls Assembly
- Variations for Your Red Velvet Dessert Balls
- Serving Suggestions for Bite Sized Red Velvet Desserts
- Storage and Make-Ahead Tips for Red Velvet Cake Balls
- Frequently Asked Questions About Red Velvet Cake Balls
- Nutritional Estimates for Red Velvet Cake Balls
- Share Your Bite-Sized Red Velvet Creations
Why These Easy Red Velvet Cake Balls Are Your New Go-To Party Desserts
Honestly, when I need something impressive but my oven is already full of, say, a pot roast, this is the recipe I run to. These little bites are total showstoppers without any actual baking required, which is why they are perfect for any gathering. You get maximum wow factor for minimum fuss, which is exactly what we strive for here at CravyBite Kitchen!
- They make incredible party desserts because they aren’t messy to eat—it’s all contained in that perfect little ball!
- They qualify as fantastic No Bake Red Velvet Treats, saving you oven space, especially when the holidays roll around.
- They look elegant dipped in chocolate, making them taste far fancier than they actually are.
Effortless Assembly: The No-Bake Advantage
We are skipping the whole bake-and-cool marathon! We use a cake mix hack, which speeds things up immensely. All you’re doing is crumbling cooked cake (store-bought or leftover) and mixing it with frosting. Think of it as super-fudgy, truffle-like construction. It’s ready for the fridge in minutes!
Perfect Pairing: Cream Cheese Frosting Cake Balls Flavor
You can’t have red velvet without that tangy bite to cut through the sweetness, right? That’s why pairing the cake crumbs with a good, thick cream cheese frosting is non-negotiable. It gives you the ultimate Cream Cheese Frosting Cake Balls experience. It makes the center fudgy, moist, and perfectly balanced before that chocolate shell goes on.
Gathering Ingredients for Your Red Velvet Cake Balls Recipe
Okay, let’s get down to what you actually need. Because this recipe is designed to be easy, we’re leaning into some simple pantry staples and convenience items. Trust me, using the boxed cake mix is our little secret for keeping these absolutely rich and fudgy inside! Remember, precision matters here, so grab exactly what I listed below.
Here is what needs to be ready on your counter before we start mixing:
- One box (15.25 oz) of Red Velvet Cake Mix. Yes, just the mix!
- One full container (16 oz) of Cream Cheese Frosting. Either your favorite store-bought kind or homemade works perfectly here.
- About 12 oz of White Chocolate Melting Wafers or Candy Melts. These set so much nicer than regular chips!
- One teaspoon of Coconut Oil. This is optional, but it makes the coating dip much smoother.
- Red sprinkles or sanding sugar if you want that festive final touch.
Expert Tips for Perfect Red Velvet Cake Balls Every Time
Listen, making these red velvet cake mix cookies style bites is super easy, but a couple of little tricks turn them from good to absolutely incredible. We want those perfect, fudgy centers, right? When you’re aiming for those melt-in-your-mouth Fudgy Red Velvet Bites, the details in the prep work make all the difference. This is where knowing the science behind why we do things comes in handy!
Achieving the Right Crumb Texture
This is huge, so pay attention! You absolutely must let your baked cake cool—and I mean completely cool—before you even think about crumbling it. If it’s even slightly warm, the heat will steam the cream cheese frosting, and you’ll end up with goop instead of beautiful crumb structure. I use my hands for crumbling because it lets me feel the texture, but if you have a ton of cake, a food processor works wonders. Just pulse it gently; you don’t want dust, you need small, recognizable crumbs.
The Secret to Smooth Chocolate Dipped Red Velvet Bites Coating
If you’ve ever tried melting candy wafers and ended up with thick, clumpy chocolate that refuses to coat smoothly? Ugh, I hate that! That’s why that optional teaspoon of coconut oil is my MVP. It sounds weird, I know! But the oil breaks the viscosity of the melting wafers just enough to make them lovely and fluid. When your chocolate is thin, it coats evenly without adding a gummy layer of chocolate around your perfect little ball. Dip quickly, let the excess drip right off, and you’ll have flawless chocolate dipped red velvet bites every time.
Step-by-Step Instructions for Easy Cake Balls Assembly
Alright, we’ve got our ingredients army lined up! Now we move into the assembly phase, which, remember, is the whole reason we call these no-bake wonders. We need structure here, so make sure you follow these steps precisely, especially that chilling time, because that’s the secret weapon that keeps these from melting into puddles when they hit the warm chocolate.
Baking and Crumbing the Red Velvet Base
First off, you need the cake base. Bake that red velvet mix according to the box directions for a 9×13 sheet cake. Once it’s out of the oven, you *have* to walk away! Let it cool completely, maybe even put it in the fridge for a little while. When it’s stone-cold, crumble the entire thing into a big bowl. We are looking for fine, uniform crumbs to make the best No Bake Red Velvet Treats imaginable.
Forming and Chilling the Red Velvet Truffles
Time for the magic binder! Dump that whole container of cream cheese frosting right into the crumbs. Mix it up—it takes a little elbow grease—until it’s totally combined and feels like thick, slightly sticky dough. Now, roll them into uniform little balls, about an inch wide, and line them up on parchment paper. Pop this tray into the fridge for at least 30 minutes. Seriously, don’t skip this chilling step, or your gorgeous red velvet truffles will fall apart when you dip them.
Dipping and Setting the White Chocolate Covered Cake Truffles
While those are chilling, melt your white chocolate wafers, adding that teaspoon of coconut oil if you have it, just like we talked about earlier! Once chilled, use a fork or a dipping tool to submerge each cake ball completely in the warm chocolate. Lift it out, gently tap the fork against the side of the bowl to let the excess drip off, and immediately set that coated ball back on the parchment. If you want sprinkles, add them now before the chocolate sets hard! Let them sit until the chocolate is completely firm.
Variations for Your Red Velvet Dessert Balls
We love these simple white chocolate-dipped red velvet dessert balls, but honestly, sometimes you need to jazz things up based on the season or what you have in the pantry. The base is so good, it really can handle whatever coating magic you want to throw at it! It’s all about making these little bites work for your party theme.
Switching Up the Coating: Beyond White Chocolate
White chocolate is my go-to because it shows off that gorgeous red interior, but don’t feel limited! If you want a deeper, richer chocolate flavor that really pops against the red, go for good quality dark chocolate or milk chocolate melts. Thinking ahead to the holidays? Melt some green candy melts and decorate them like my famous Grinch Oreo Balls! You are the boss of the coating here, so have fun with the color.
Making Red Velvet Truffles with a Booze Kick
If you’re making these for a grown-up gathering—maybe a dinner party or an evening celebration—you can definitely elevate them into true adult truffles. I often sneak a tiny splash of bourbon or dark rum right into the frosting mixture when I’m combining it with the cake crumbs. It adds a lovely, subtle warmth that deepens the whole flavor profile. Think sophisticated Red Velvet Truffles instead of just a simple cake ball!
Serving Suggestions for Bite Sized Red Velvet Desserts
These little gems are truly versatile! Since they’re already bite-sized, they are perfect for absolutely filling up a dessert table without taking up too much real estate. They look stunning arranged tightly on a tiered platter for a big party—think showers or holiday buffets. For special occasions like Valentine Desserts, lining them up on a white platter with a few dark chocolate drizzle stripes makes them look instantly elegant.
If you’re planning a cozy get-together, you can serve these alongside a festive drink, like that amazing cranberry-orange sangria I shared recently I shared recently. They’re basically miniature pieces of celebration, ready to go in one bite!
Storage and Make-Ahead Tips for Red Velvet Cake Balls
One of the best things about using the cake mix hack for these red velvet cake balls recipe is how well they hold up! You can absolutely make these ahead, which is a lifesaver when you’re hosting.
If you are dipping them in chocolate, I always say wait to coat them until just a day or two before serving, just so that chocolate shell stays perfectly crisp. Store the *uncoated* balls in an airtight container in the fridge for about five days. But here’s my real pro tip for big events: you can freeze them! Pop those already-dipped beauties on a baking sheet, freeze them until they are solid—they’re surprisingly sturdy!—then transfer them to a freezer bag. They stay delicious and fudgy for up to three months. Just let them thaw overnight in the fridge before you serve them up!
Frequently Asked Questions About Red Velvet Cake Balls
It’s totally normal to have questions when you’re making your first batch of these amazing red velvet cream cheese balls! They are so quick that people often wonder if they’re skipping a vital step. Don’t worry, I’ve answered the biggest ones so you can serve up perfect bite sized red velvet desserts with confidence!
Can I use homemade cake instead of cake mix for these red velvet cake balls?
Oh, absolutely! If you have leftover homemade red velvet cake, go for it! As a nutritionist, I always appreciate knowing exactly what goes into my food. However, I keep recommending the cake mix hack because it’s so reliable for moisture and speed. The box mixes tend to have a specific formula designed to stay wonderfully soft even after being dried out and crumbled, which is key for our no bake red velvet treats!
What is the best way to get a smooth chocolate coating?
This is all about temperature control and consistency, friends. Make sure you aren’t overheating your melting wafers; if they get too hot, they seize up and get grainy—yuck! The best thing you can do is stir in that tiny bit of coconut oil we mentioned. It really loosens everything up so your chocolate flows beautifully over your chilled cake balls, ensuring you get those gorgeous, thin layers of white chocolate covered cake truffles instead of thick, uneven shells.
Nutritional Estimates for Red Velvet Cake Balls
Now, I know we’re making these delicious red velvet cake balls for fun and flavor, not for a nutrition competition! But since I come from a background that looks at the whole picture of food, I like to give you a general idea of what’s packed into one of these sweet bites.
Please remember these serving sizes and calorie counts are just estimates. They change a lot depending on the exact brand of frosting you use or how big you roll your balls! But for a single, one-inch ball, here’s the snapshot:
- Serving Size: 1 ball
- Calories: About 220
- Sugar: Roughly 20g
- Fat: Around 14g
They pack a punch of flavor, which is worth it in my book for a special, homemade candy treat!
Share Your Bite-Sized Red Velvet Creations
Now that you have the secret to making the absolute best, easiest red velvet cake balls, I really want to see what you whip up! This is the part of home cooking I love the most—seeing how you bring these simple, comforting recipes into your own kitchens.
Are you keeping them classic with a sprinkle of red sugar? Or did you go wild with gold sprinkles for New Year’s or little pumpkin faces for the fall? Drop a comment below and let me know which coating you chose—white, milk, or dark chocolate!
Seriously, give this recipe a star rating if it became your new favorite quick treat! And if you snap a picture before they all disappear (which they always do quickly, trust me!), tag me on social media. Happy rolling, friends!
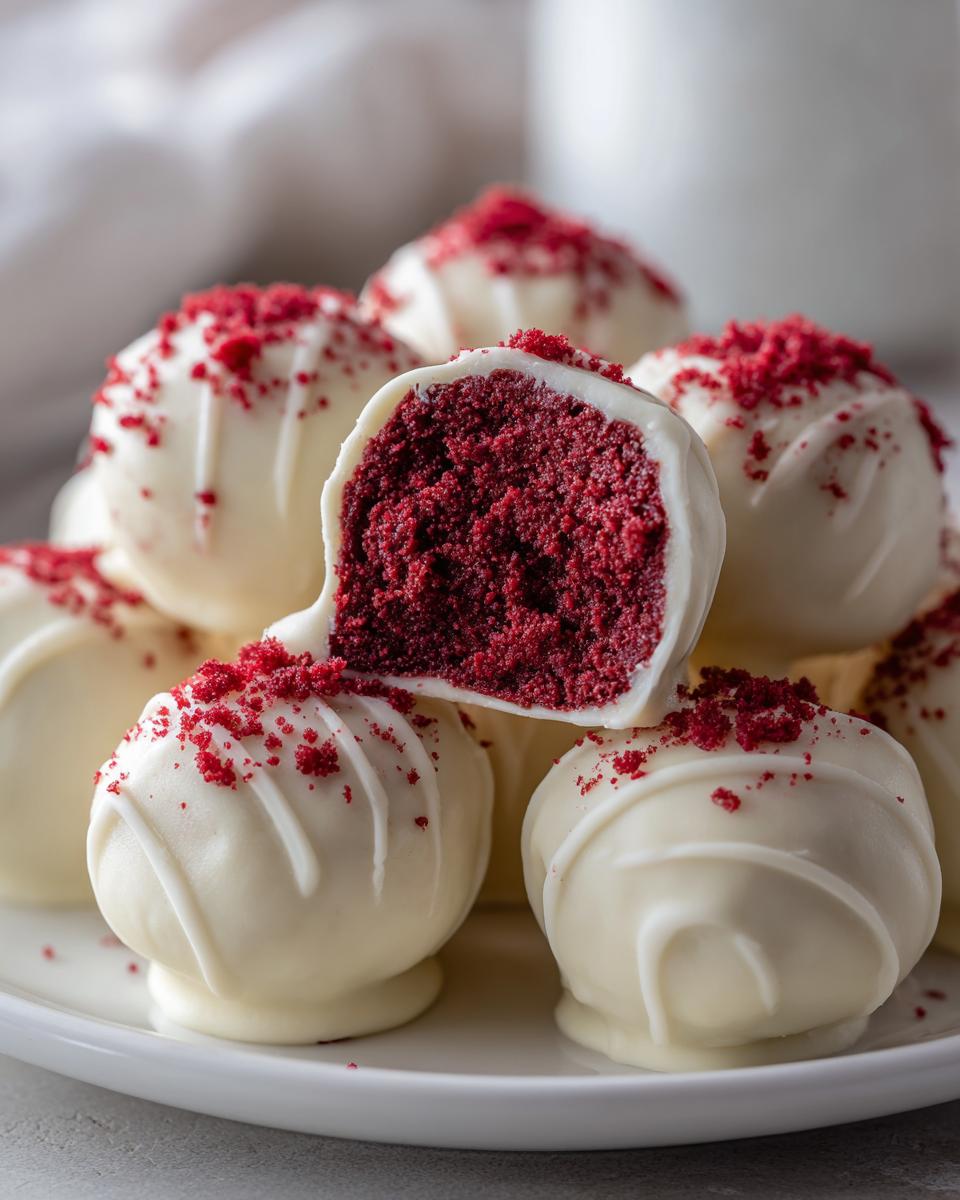
PrintEasy No-Bake Red Velvet Cake Balls with Cream Cheese Frosting

Make these simple, bite-sized Red Velvet Cake Balls using a cake mix hack and cream cheese frosting. They are coated in white chocolate for a rich, fudgy, and elegant party dessert.
- Prep Time: 25 min
- Cook Time: 30 min
- Total Time: 85 min
- Yield: 24 servings 1x
- Category: Dessert
- Method: No Bake (Assembly)
- Cuisine: American
- Diet: Vegetarian
Ingredients
- 1 box (15.25 oz) Red Velvet Cake Mix
- 1 container (16 oz) Cream Cheese Frosting (store-bought or homemade)
- 12 oz White Chocolate Melting Wafers or Candy Melts
- 1 teaspoon Coconut Oil (optional, for smoother dipping)
- Red sprinkles or sanding sugar (optional, for decoration)
Instructions
- Prepare the cake according to the package directions for a 9×13 inch sheet cake. Bake the cake and let it cool completely on a wire rack.
- Once cool, crumble the entire cake into fine crumbs into a large mixing bowl. You can use your hands or a food processor for this step.
- Add the entire container of cream cheese frosting to the cake crumbs. Mix thoroughly until the mixture is uniform and holds together when pressed.
- Roll the mixture into small, uniform balls, about 1 inch in diameter. Place the rolled balls on a parchment-lined baking sheet.
- Chill the cake balls in the refrigerator for at least 30 minutes. This step helps them firm up before dipping.
- Melt the white chocolate wafers according to package directions. If using, stir in the coconut oil for a thinner consistency.
- Dip each chilled cake ball into the melted white chocolate, allowing excess chocolate to drip off. You can use a dipping tool or a fork.
- Immediately place the dipped balls back onto the parchment-lined sheet. If using, sprinkle with red sprinkles before the chocolate sets.
- Allow the chocolate coating to set completely at room temperature, or speed up the process by chilling them again briefly.
Notes
- Using a boxed cake mix is a time-saving hack that keeps the center moist and fudgy.
- For a richer flavor, use homemade cream cheese frosting instead of store-bought.
- You can substitute the white chocolate coating with milk chocolate or dark chocolate candy melts.
- These cake balls freeze well. Store them in an airtight container in the freezer for up to three months.
Nutrition
- Serving Size: 1 ball
- Calories: 220
- Sugar: 20g
- Sodium: 150mg
- Fat: 14g
- Saturated Fat: 8g
- Unsaturated Fat: 6g
- Trans Fat: 0.5g
- Carbohydrates: 23g
- Fiber: 0.5g
- Protein: 2g
- Cholesterol: 15mg