
Oh, I know the weeknight struggle. You want something everyone will actually gobble up, but you just do not have the energy for a complicated recipe after a long day. That’s why I’m so excited to share my secret weapon: the Ultimate Crispy Baked Chicken Tenders with Honey Mustard Dip! Seriously, these are the best homemade chicken tenders you’ll ever make, and they come out crazy crispy right in the oven. Forget soggy strips—this recipe is tested, trusted, and developed based on my own journey balancing flavorful home cooking with years of looking at nutrition science. Jess Carter guarantees this is going to become your go-to quick weeknight chicken dinner!
- Why You Will Make These Ultimate Crispy Baked Chicken Tenders
- Gathering Ingredients for Your Easy Chicken Tender Recipe
- Step-by-Step Instructions for Oven Baked Chicken Tenders
- Expert Tips for Juicy Chicken Tender Guide Success
- Serving Suggestions for Your Chicken Tender Meal
- Storage and Reheating Instructions for Leftover Chicken Tenders
- Frequently Asked Questions About Making Chicken Tenders
- Nutritional Snapshot of These Crispy Chicken Strips
- Share Your Ultimate Crispy Baked Chicken Tenders Experience
Why You Will Make These Ultimate Crispy Baked Chicken Tenders
I know what you’re thinking: baked means boring, right? Wrong! These are not your sad microwave options. These chicken tenders are designed for real life while delivering that satisfying crunch we crave. Trust me, this recipe is a winner for busy families.
- They give you that incredible crunch using a simple breading process.
- They are packed with flavor without needing hours of prep work.
- They are perfect for kids, adults, and even for meal prepping lunches!
Quick Weeknight Chicken Dinner Ready in Under 40 Minutes
We are looking at a total time of just 35 minutes from start to finish! You read that right. This truly delivers on the promise of a quick weeknight chicken dinner without skipping flavor.
Achieving Maximum Crispiness with Panko Crust Chicken Tenders
The secret weapon here is the panko. Those coarse Japanese bread crumbs mixed with a little spritz of oil mimic frying, giving you amazingly crispy chicken tenders without all the messy oil cleanup. Perfection!
Gathering Ingredients for Your Easy Chicken Tender Recipe
When you’re aiming for the best homemade chicken tenders, I can’t stress this enough: use exactly what the recipe calls for! Especially when it comes to the breading components. I laid this entire process out so you can get organized before you even turn the oven on. This prevents that awful moment where you run out of egg wash halfway through breading your strips! Keeping the measurements precise here is how you build trust that this easy chicken tender recipe will work perfectly for you.
For the Best Homemade Chicken Tenders
You’ll need your protein and your three dredging stations ready to go. Don’t try to eyeball the spices; that’s when the flavor goes sideways!
- 1.5 lbs boneless, skinless chicken breasts, cut into uniform strips
- 1 cup all-purpose flour
- 2 large eggs, lightly beaten
- 1.5 cups panko bread crumbs
- 1 teaspoon salt
- 0.5 teaspoon black pepper
- 0.5 teaspoon garlic powder
- 0.25 teaspoon paprika
- Cooking spray (you need a good quality spray here!)
For the Honey Mustard Dip
Now, for the dip that takes these crispy chicken strips over the top. You literally just whisk these four things together. It’s so simple you’ll never buy the jarred stuff again.
- 0.5 cup mayonnaise
- 0.25 cup Dijon mustard
- 2 tablespoons honey
- 1 teaspoon apple cider vinegar
Step-by-Step Instructions for Oven Baked Chicken Tenders
Okay, this is where the magic happens! Making these oven baked chicken tenders is really just about organization. If you have your prep bowls set up before you cut the chicken, you fly through this. We aren’t deep-frying today, but we are creating a crust so sturdy and crispy you won’t miss the oil splatter, I promise. Follow these steps exactly, and you’ll have the juiciest chicken strips ready for that gorgeous honey mustard dip in under 20 minutes of cooking time! If you need another technique inspiration similar to this, check out my guide on baking with a parmesan crust.
Setting Up the Breading Station for Crispy Chicken Strips
Line up three shallow dishes! In the first, put your flour. In the second, whisk those two eggs lightly. The third dish is for your amazing mixture of panko, salt, pepper, garlic powder, and paprika. Before you start coating, make sure you really shake off any extra flour from the chicken. That’s crucial; too much flour just turns into clumps when it hits the egg.
Baking the Chicken Tenders to Golden Perfection
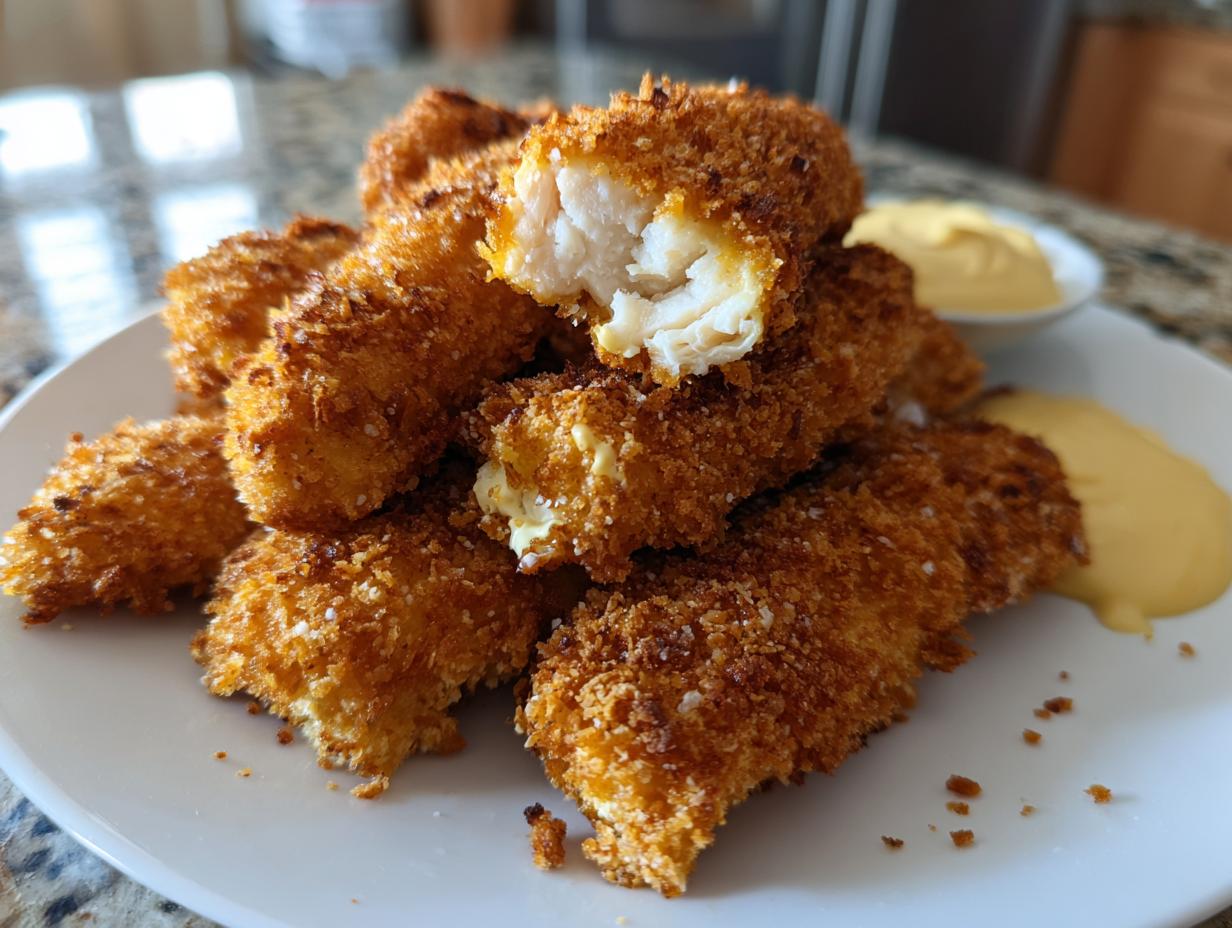
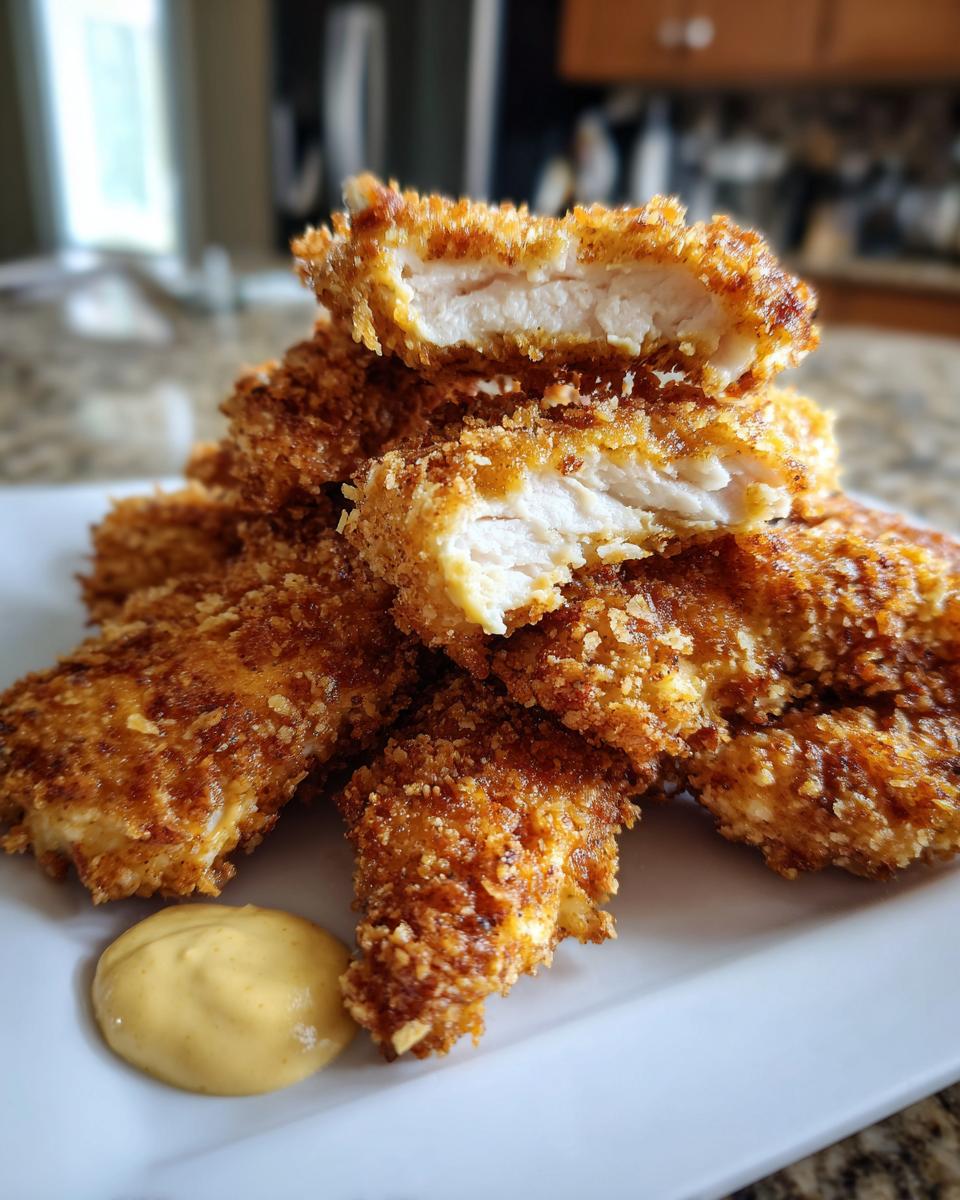
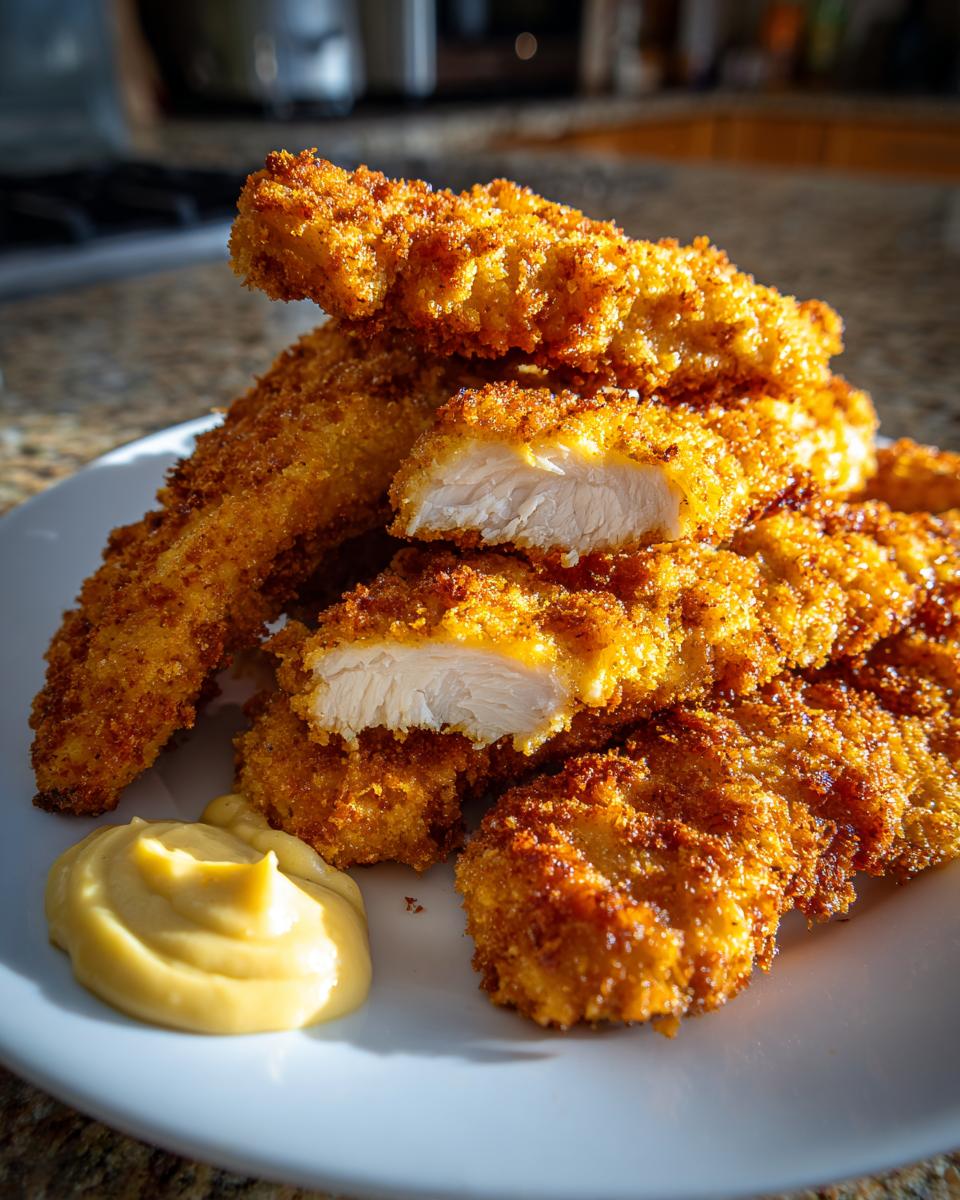
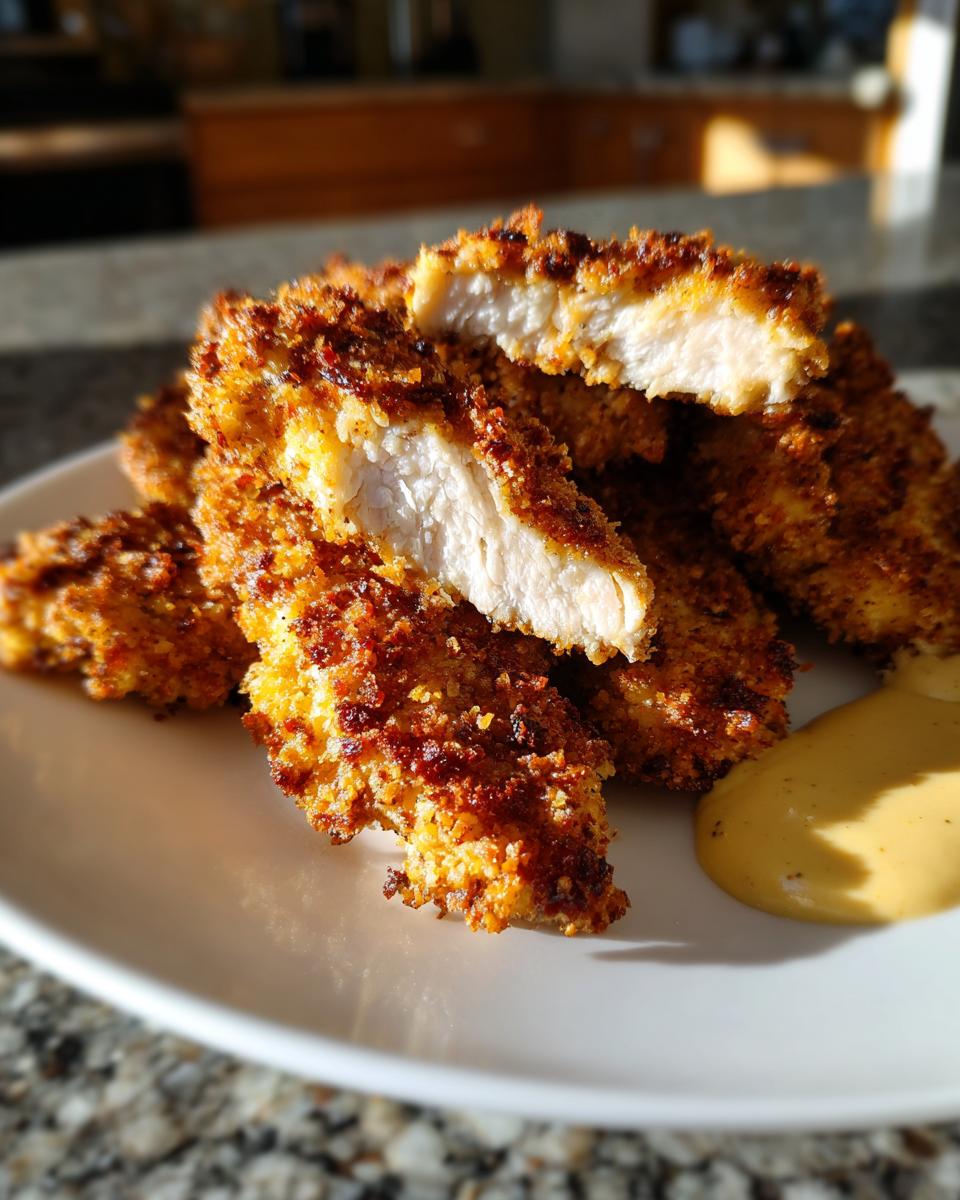
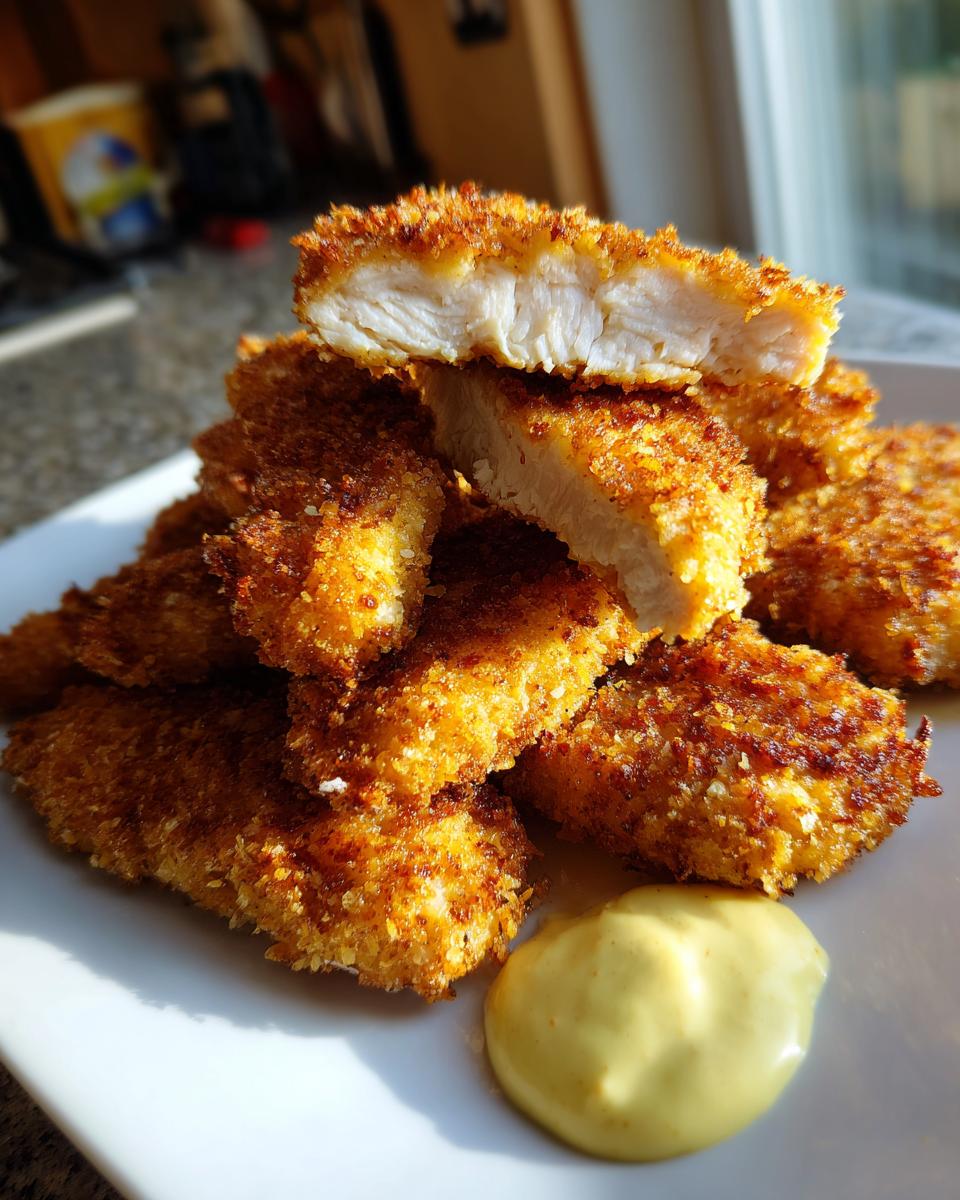
First things first, get that oven hot—425°F! Line your sheet with parchment paper and spray it down. Dip the flour-dusted piece into the egg, let it drip, and then press it hard into the panko mix so it sticks everywhere. Place the coated chicken tenders on the sheet and spray the tops generously with cooking spray. Bake for 10 minutes, flip them, and bake for another 8 to 12 minutes until they hit 165°F inside. That’s how you get them golden brown and perfect every time!
Expert Tips for Juicy Chicken Tender Guide Success
Okay, you have the recipe down, but now I’m going to give you the little secrets that take these from “good” to “I’m never buying frozen again!” These tips are drawn straight from years of testing this exact recipe to ensure every single batch of chicken tenders comes out perfectly juicy inside and perfectly crunchy outside. These small adjustments make a huge difference in how your final product tastes!
Achieving the Crispiest Chicken Tenders with a Rest
My biggest tip for that unbelievably crisp crust? Don’t rush them straight into the oven! After you finish breading all your chicken tenders, let them sit right there on that baking sheet for about 10 minutes. This lets the panko absorb a tiny bit of moisture from the egg wash, which helps the crust adhere better once it hits the heat. It’s basically pre-setting the crunch!
Making Air Fryer Chicken Tenders Variation
If you’re trying to keep clean-up even easier, guess what? These work beautifully in the air fryer! Just pop those sprayed, breaded strips into the basket—don’t crowd them!—and cook them at 375°F for about 10 to 12 minutes total. Remember to flip them halfway through for even color. You can check out my method for crispy air fryer sides for more tips on getting that appliance running perfectly!
Serving Suggestions for Your Chicken Tender Meal
Now that you have the main event cooked and ready—and believe me, you did great!—we need to talk about what goes on the plate next to those beautiful crusty strips. Since this is such a fantastic kid friendly chicken recipe, I always lean toward easy sides that cook alongside the tenders or can be made ahead.
For simple starches, forget complicated mashed potatoes! Try oven-roasted sweet potato fries—the slight sweetness pairs wonderfully with the honey mustard dip we made. If you’re in a total rush, a bag of microwaveable steamable green beans is never a bad idea.
But if you want something green with a little flair that I often make, try throwing some broccoli or carrots in the oven alongside your strips after seasoning them lightly with salt, pepper, and a dash of olive oil. They roast up perfectly while your tenders are baking!
Storage and Reheating Instructions for Leftover Chicken Tenders
The great thing about making a big batch of these strips is surviving on leftovers the next day! If you have any that didn’t get devoured—which is rare in my house—storage is super important if you want that crust to survive.
Tuck them into an airtight container in the fridge. They are safe to eat for about three to four days after baking. Now, please, for the love of crunch, do NOT reach for the microwave!
Microwaving just steams the crust right off, leaving you with soggy chicken. The best way to bring these back to life is to reheat them in a 375°F oven for about 5 to 8 minutes, or toss them in the air fryer for just 4 minutes. That heat blast instantly re-crisps the panko crust. It’s a game-changer for getting that crisp texture back for lunch the next day!
Frequently Asked Questions About Making Chicken Tenders
I know you might have a few lingering questions after seeing how simple this process is. When you’re trying something new, especially when it promises a healthy chicken tenders recipe that actually tastes incredible, it’s smart to double-check! I’ve answered some common snags I hear about achieving those perfect, satisfyingly breaded chicken tenders.
Can I make these chicken tenders gluten free?
Yes, absolutely! If you need gluten free chicken tenders, you have a couple of great options. Swap the all-purpose flour for a 1:1 gluten-free baking blend, and then use crushed cornflakes or certified gluten-free panko crumbs in the final breading step. They crisp up beautifully!
What is the best way to reheat breaded chicken tenders?
I covered this before, but it bears repeating because it’s so important! Skip the microwave entirely. You must use a conventional oven set to 375°F for about 8 minutes, or pop them into your air fryer for 4 minutes. Heat is what reactivates that crispiness!
How do these homemade chicken tenders compare to frozen ones?
Honestly? There is no comparison. Frozen chicken tenders are often padded with unnecessary fillers and are frequently pre-fried, meaning they can never truly get as crispy or juicy as these homemade strips. Buying them frozen is convenient, but making them from scratch, like this recipe, gives you complete control over the quality of meat and breading. You taste the real chicken!
Nutritional Snapshot of These Crispy Chicken Strips
Now, because I have that nutrition background, I know some of you are looking for that healthier take on comfort food, and I love that! While baking instead of deep-frying gets us way ahead of the game, remember these are just estimates based on the ingredients listed above. Things like how much cooking spray you use or the exact size of your chicken pieces can make them vary slightly.
For a standard serving size of four strips, here is what we are generally looking at:
- Calories: 380
- Protein: 32g
- Fat: 15g (with only 3g Saturated Fat—pretty good for a crispy dish!)
- Carbohydrates: 30g
It’s a great balance of filling protein and satisfying carbs, which is why this recipe works so well for a filling, yet reasonably light, family dinner!
Share Your Ultimate Crispy Baked Chicken Tenders Experience
Wow, you made it to the end! I truly hope these crispy baked strips become a staple in your home just like they are in mine. I always love hearing back from you all. Did you try the honey mustard dip or go rogue with another sauce?
Please leave a star rating right below this recipe—it helps other home cooks feel confident trying it out! If you snapped a picture of your golden brown feast, tag me! And if you have any lingering questions about substitutions or technique, drop them in the comments section, and I’ll hop in to help you out. You can always reach me directly through my Contact page too!
PrintUltimate Crispy Baked Chicken Tenders with Honey Mustard Dip

Make the best homemade chicken tenders right in your oven. These crispy chicken strips use a simple breading process for a juicy chicken tender guide that is perfect for a quick weeknight chicken dinner.
- Prep Time: 15 min
- Cook Time: 20 min
- Total Time: 35 min
- Yield: 4 servings 1x
- Category: Dinner
- Method: Baking
- Cuisine: American
- Diet: Vegetarian
Ingredients
- 1.5 lbs boneless, skinless chicken breasts, cut into uniform strips
- 1 cup all-purpose flour
- 2 large eggs, lightly beaten
- 1.5 cups panko bread crumbs
- 1 teaspoon salt
- 0.5 teaspoon black pepper
- 0.5 teaspoon garlic powder
- 0.25 teaspoon paprika
- Cooking spray
- For the Dip: 0.5 cup mayonnaise
- 0.25 cup Dijon mustard
- 2 tablespoons honey
- 1 teaspoon apple cider vinegar
Instructions
- Preheat your oven to 425 degrees Fahrenheit. Line a baking sheet with parchment paper and lightly coat with cooking spray.
- Set up a standard breading station with three shallow dishes. Place the flour in the first dish. Mix the beaten eggs in the second dish. Combine the panko bread crumbs, salt, pepper, garlic powder, and paprika in the third dish.
- Take each chicken tender and dredge it thoroughly in the flour, shaking off any excess.
- Dip the floured tender into the egg mixture, allowing excess to drip off.
- Press the tender firmly into the panko mixture, coating all sides completely to achieve a good crust.
- Place the breaded chicken tenders on the prepared baking sheet, ensuring they do not touch. Spray the tops generously with cooking spray for extra crispiness.
- Bake for 10 minutes. Flip the tenders over and bake for another 8 to 12 minutes, or until the internal temperature reaches 165 degrees Fahrenheit and the crust is golden brown.
- While the tenders bake, prepare the dip. Whisk together the mayonnaise, Dijon mustard, honey, and apple cider vinegar in a small bowl until smooth.
- Serve the crispy chicken strips immediately with the homemade honey mustard dip.
Notes
- For extra crispiness, let the breaded tenders rest on the baking sheet for 10 minutes before baking.
- You can substitute whole wheat flour for a slightly healthier option.
- This recipe works well for air fryer chicken tenders; cook at 375 degrees Fahrenheit for 10-12 minutes, flipping halfway.
Nutrition
- Serving Size: 4 tenders
- Calories: 380
- Sugar: 8
- Sodium: 450
- Fat: 15
- Saturated Fat: 3
- Unsaturated Fat: 12
- Trans Fat: 0
- Carbohydrates: 30
- Fiber: 2
- Protein: 32
- Cholesterol: 110