
If you’re like me, and you love taking a standard appetizer and turning it into something that stops everyone dead in their tracks, then I have the recipe for you! We all know deviled eggs are mandatory for any proper party spread, but how often do you see them presented like an absolute showstopper? Get ready, because today we’re moving far beyond the standard deviled egg platter inspiration and creating the ultimate edible centerpiece: the deviled egg bouquet.
When Jessica Carter started CravyBite Kitchen, it was all about taking humble ingredients and showing how spectacular they can be with just a little love. This arrangement is the perfect example of that—it looks like it took hours of specialized catering work, but trust me, it’s totally doable for any home cook preparing for Easter brunch or Mother’s Day. It’s about connecting traditions and turning simple food into a memorable focal point for your table!
- Why This deviled egg bouquet Makes Impressive Appetizer Spreads
- Gathering Ingredients for Your deviled egg bouquet
- Expert Steps to Prepare the deviled egg bouquet
- Tips for Success with Your deviled egg bouquet
- Making Your deviled egg bouquet Suitable for Holiday Food Presentation
- Storage and Make-Ahead Tips for the deviled egg bouquet
- Frequently Asked Questions about the deviled egg bouquet
- Nutritional Estimates for This deviled egg bouquet Recipe
- Share Your deviled egg bouquet Creations
Why This deviled egg bouquet Makes Impressive Appetizer Spreads
Listen, nobody’s going to complain about plain deviled eggs, right? They’re too good! But if you really want to nail those impressive appetizer spreads and become the legend of your next gathering, forget flat trays. We need height! We need drama! This deviled egg bouquet takes that classic, creamy bite and elevates it into a stunning, architectural piece.
When I first played around with this concept, it was for a big Easter brunch we were hosting. I had mountains of eggs ready, and the usual platter just looked… flat. I tried sticking toothpicks into a melon, and let’s just say, my early attempts leaned closer to funny food displays than elegant snacking! But once I figured out the right anchor, transforming those piped eggs into little edible flowers? Wow. Suddenly, the appetizer wasn’t just food; it was the star of the table. It genuinely turns a reliable snack into a true edible centerpiece. It shows your guests you put thought into every single detail of your party food arrangements.
Gathering Ingredients for Your deviled egg bouquet
Before we start sticking things into foam, we have to make sure the stars of the show—those creamy fillings—are perfect. Remember what Jess Carter preaches: honest ingredients cooked with care taste the best! We are building something sturdy here, so pay close attention not just to the filling, but to the base that holds everything up. You’ll need the usual suspects for the filling, but the real magic comes from having the right structural support ready to go.
Base Materials for the deviled egg bouquet Structure
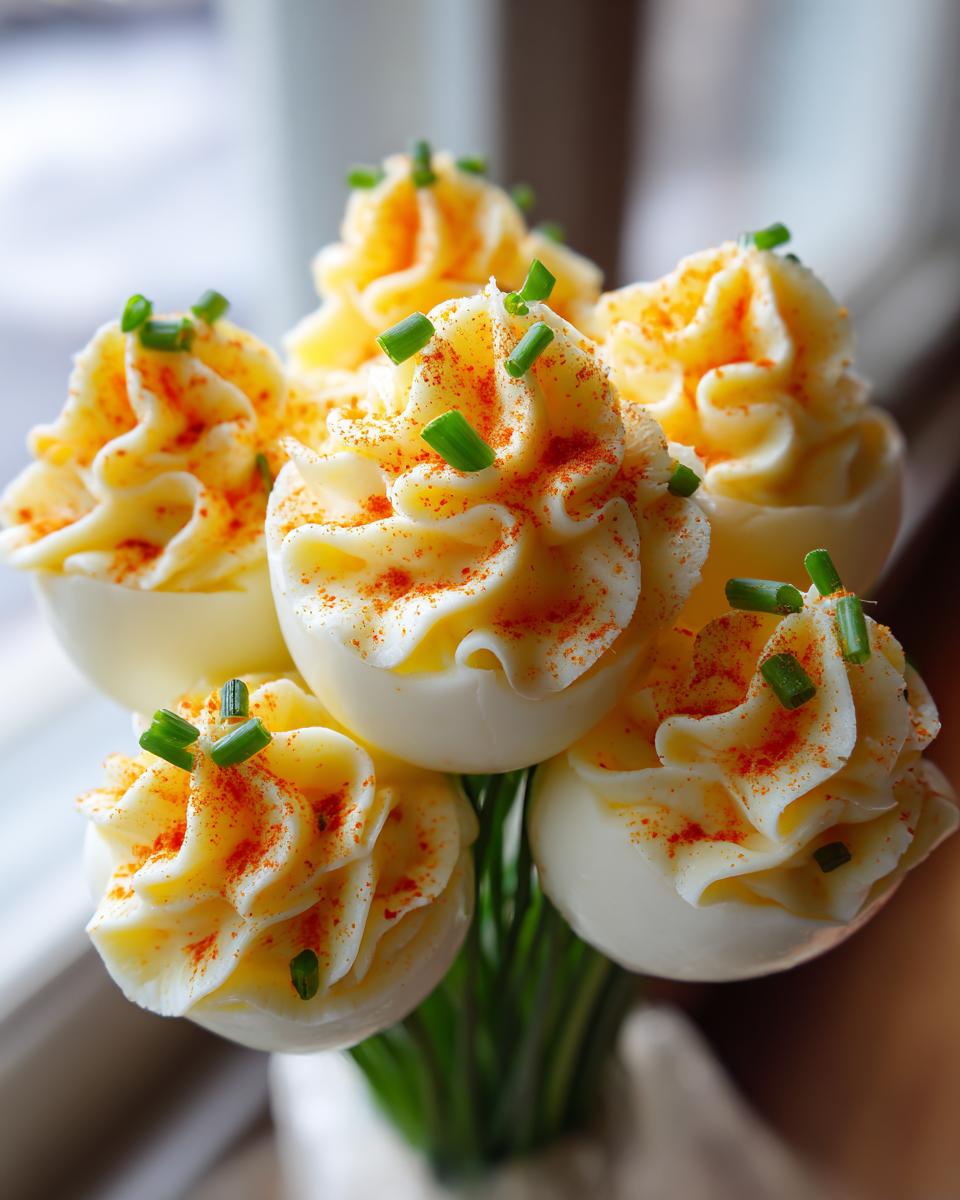
This is where we shift gears from cooking to crafting! For this flower shaped food presentation to stand tall, the foundation matters. You absolutely need a sturdy, food-safe anchor. I always grab a block of floral foam—make sure it’s the kind safe for indirect food contact, or you can wrap it completely in plastic wrap. Alternatively, you can hollow out the center of a big, firm head of cabbage or lettuce to act as a natural holder. Stability is key so your beautiful deviled egg bouquet doesn’t suddenly slump over!
Expert Steps to Prepare the deviled egg bouquet
Alright, now for the fun part—the actual technique! We’re taking these ingredients and turning them into glorious, swirled little blooms. This process is all about patience, especially when handling the eggs. Don’t rush the cooling; that ice bath is vital for easy peeling and a clean look. We’re going for perfection here since this is such a showy dish! If you’re looking for other easy things to prep ahead, check out my tips on some healthy breakfast ideas that save time later, but right now, we focus on these appetizers!
Perfectly Hard-Boiled Eggs and Yolk Preparation
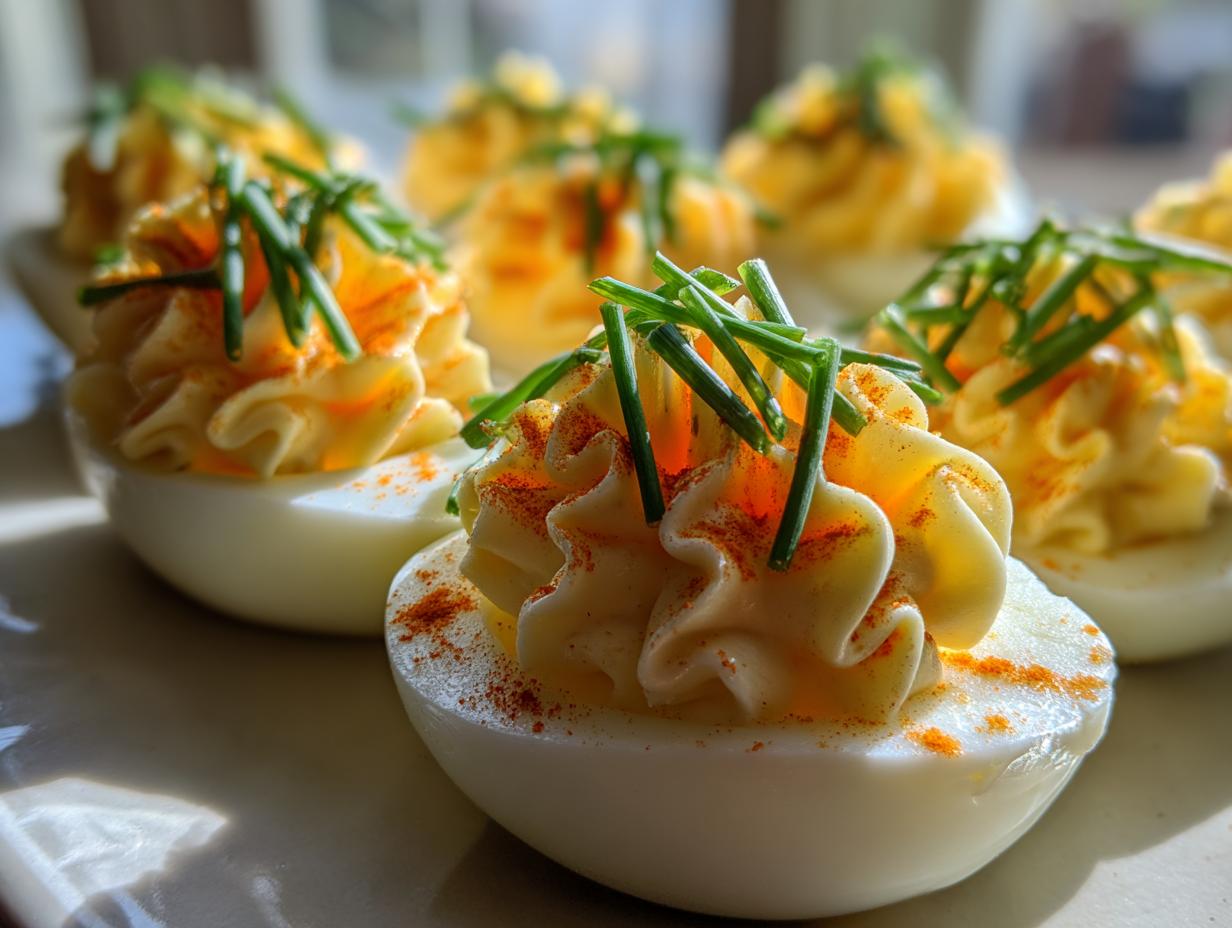
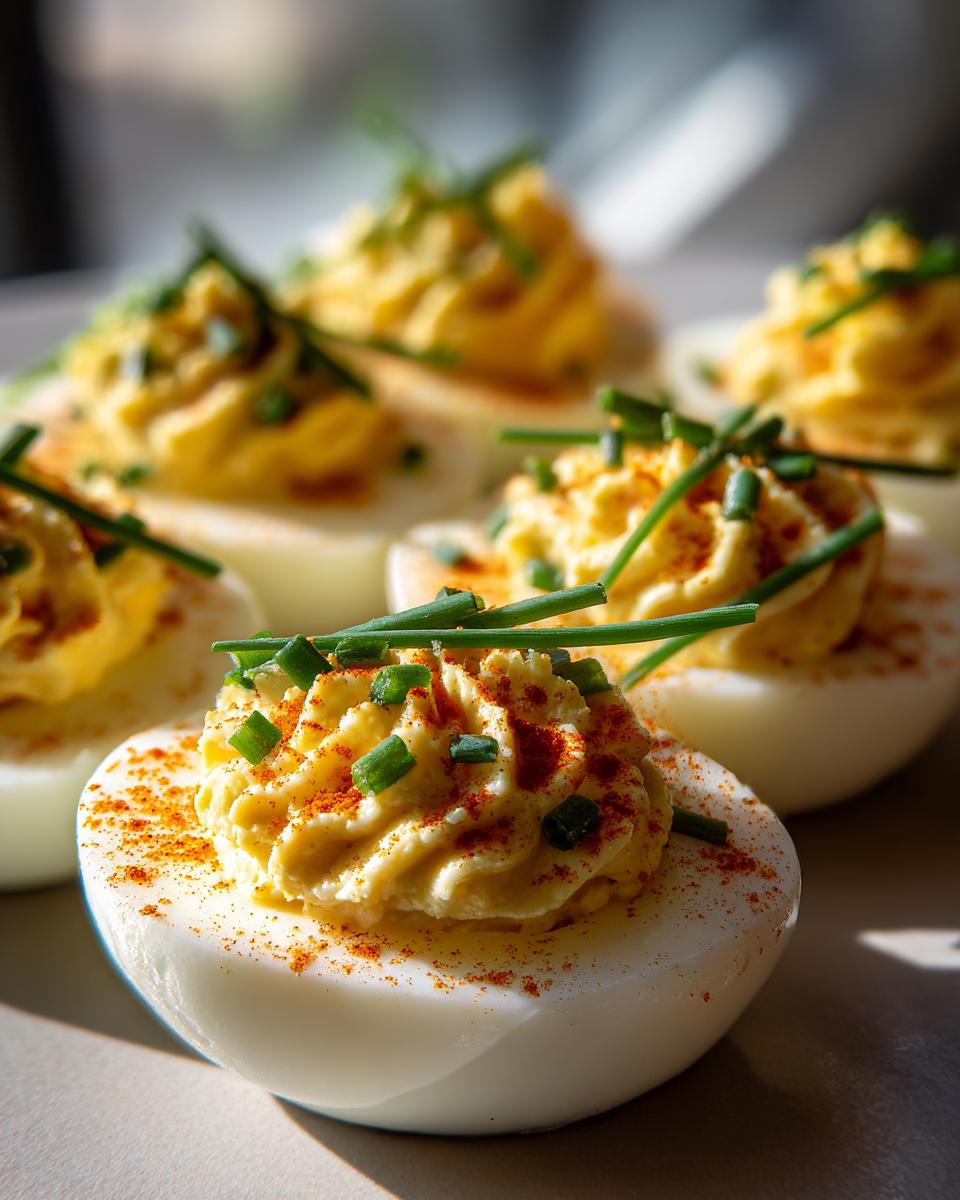
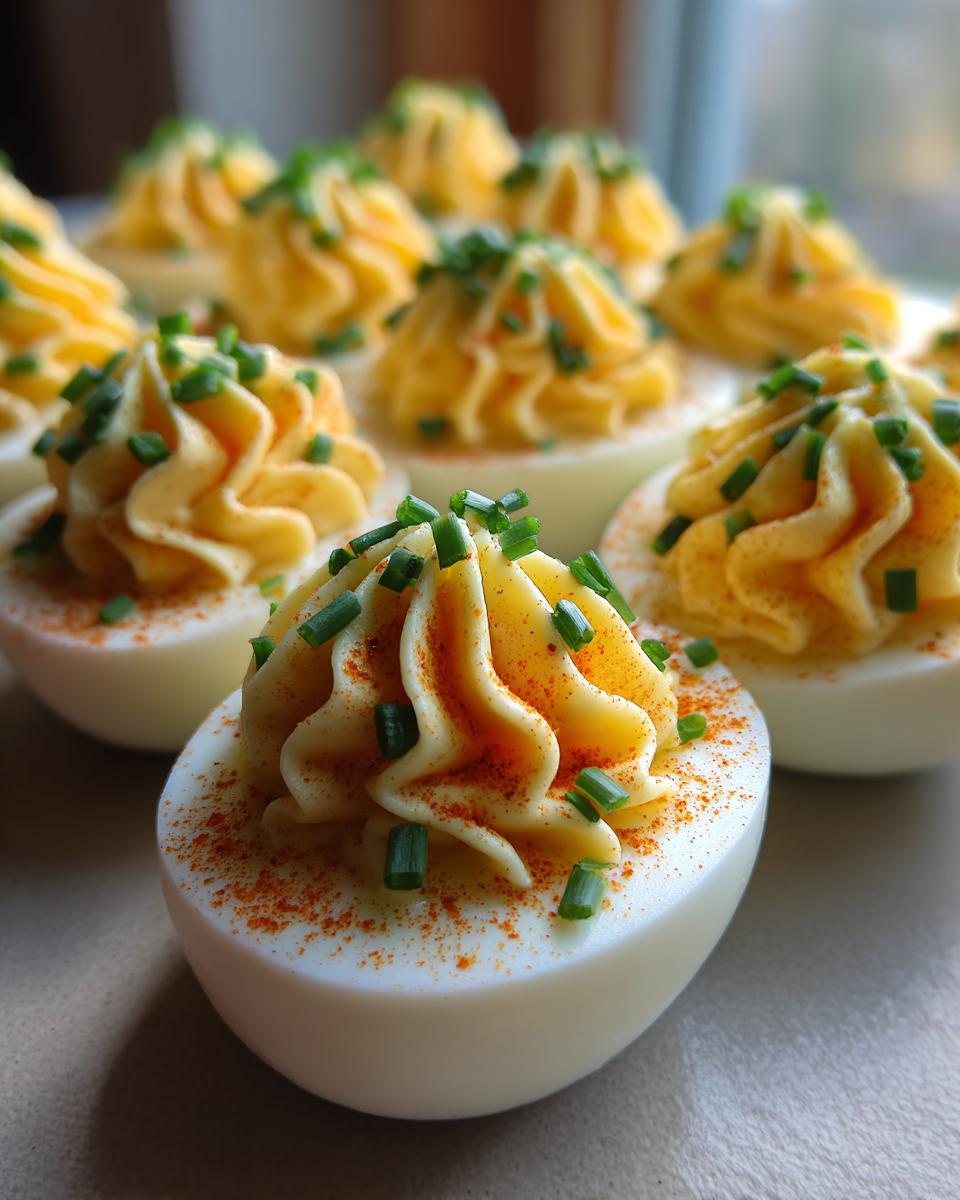
Start by getting those eggs cooked. Pop them in a pot, cover with cold water, bring it to a rolling boil, then kill the heat and let them sit covered for exactly 10 minutes. Timing is everything! Immediately shock them in ice water—this stops the cooking and makes them peel like a dream. Once peeled and halved, scoop those beautiful yolks into a bowl. Mash them really well, then stir in your mayonnaise, that zesty Dijon mustard, vinegar, salt, and pepper until it’s perfectly smooth. I mean, smooth. No lumps allowed! We want that filling creamy enough to hold its shape when piped.
Assembling the deviled egg bouquet Structure
Now, get your base anchor ready. Make sure that food-safe foam is secured tightly inside your decorative container—that’s what gives us the vertical lift. Next, the star tip on your piping bag makes all the difference; it creates those gorgeous ridges that mimic petals, giving us that unique deviled egg recipe look. Carefully pipe that creamy filling back into the egg white halves, making a nice tall swirl. Before you place them, slide a wooden skewer (or toothpick if you’re feeling delicate) into the bottom of each filled egg. Then, gently insert the skewer into your foam base. Don’t just stick them in flat! Vary the heights, angling some forward and some back, to really give that 3D bouquet shape.
Once they’re all anchored, sprinkle heavily with chives for that leafy green detail and give the tops a very light dusting of paprika. Remember that tip about feeling the food? You want to create depth in the arrangement so that it looks lush and full, not just a flat circle of eggs.
Tips for Success with Your deviled egg bouquet
Making this arrangement look stunning is one thing, but making sure it stays perfect until everyone digs in is another! If you’re looking for ways to move beyond the plain recipe and create genuinely gourmet deviled egg fillings, I have a little secret. Try adding a teaspoon of prepared horseradish or a tiny pinch of curry powder into the yolk mixture. It gives a wonderful, slightly unexpected kick that makes these instantly one of your unique deviled egg recipes.
Also, keep everything cold! The filling tastes best when it has chilled for at least an hour before serving. Since we’re dealing with delicate piping and construction, chilling the filled whites right before you skewer and arrange them helps the filling firm up. Head over and check out my other gourmet deviled egg recipes for more flavor ideas, but honestly, the bouquet structure itself is the real win here!
Making Your deviled egg bouquet Suitable for Holiday Food Presentation
This presentation just screams ‘special occasion,’ doesn’t it? The deviled egg bouquet is tailor-made for holidays where you want that centerpiece to shine. For an Easter brunch display, think softer colors. That dusting of paprika acts like a delicate pink or red bloom petal, and the chives really bring in that fresh spring green we crave. It looks organic and beautiful!
If you’re making these for Mother’s Day food ideas, you might lean into slightly more vibrant garnishes. Try swapping out some of the chives for finely chopped mint or snipping up some dill alongside it. The goal, especially for any spring gathering recipes, is to make those piped yolks look like natural flowers. The height we achieved with the skewer method really sells the idea that this is a genuine, lovely floral centerpiece, just one you can totally eat!

Storage and Make-Ahead Tips for the deviled egg bouquet
Planning ahead is the secret sauce to looking relaxed when guests arrive! You absolutely shouldn’t assemble the entire gorgeous deviled egg bouquet the day before; no one wants wilted lettuce or wobbly eggs. Here’s what I do: boil and peel your eggs a day ahead. The yolk filling? Mix that up, pipe it into the whites, and keep those filled halves tightly covered in the fridge. They are perfect chilling for about 4 to 6 hours! This lets them firm up so beautifully.
The final assembly, inserting the skewers into the foam anchor and arranging them like flowers, should happen no more than two hours before serving. This keeps the base fresh and the filling perfectly cold. If you need more advice on prepping early, check out my guide to the best make ahead appetizers—it takes the stress out of party hosting!
Frequently Asked Questions about the deviled egg bouquet
It’s natural to have questions when you’re trying something new, especially when it comes to big party food arrangements! This setup is different from the usual, so I want to make sure you feel confident bringing this centerpiece to your next event. Trust me, once you see this creative appetizer idea in person, you’ll never go back to flat trays!
Can I use a different base instead of floral foam for my deviled egg bouquet?
Absolutely! You don’t have to run out and buy foam, though it works really well for stability. If you look at the notes, I mentioned using the head of a large, hollowed-out cabbage or even a decorative, wide-mouthed vase—just line the vase first! The key is stability, whether you’re creating a fancy DIY food stand tutorial or using produce. You just need something firm for those skewers to grip onto securely!
What makes this different from standard deviled egg platter inspiration?
That’s the whole point! Standard deviled egg platter inspiration usually shows eggs lying flat, side-by-side, taking up a huge amount of horizontal space. What we’re doing is using vertical space. By inserting skewers and anchoring them in a central base, we create a 3D, clustered shape—that’s what gives it the ‘bouquet’ look. It draws the eye upward and instantly separates your offering from every other appetizer on the table.
Nutritional Estimates for This deviled egg bouquet Recipe
Now, I know some of you count macros, and others are just curious about what exactly you’re serving your guests. Since we’re focusing on traditional, homemade deliciousness here, remember that nutritional counts are always going to be approximate! These numbers are based on using standard large eggs and average measurements for mayonnaise and Dijon.
For those tracking calories or sodium, here’s what the basic deviled egg bouquet recipe breaks down to per two-half serving:
- Serving Size: 2 halves
- Calories: 90
- Protein: 3g
- Fat: 8g (Saturated Fat: 2g)
- Carbohydrates: 0.5g
- Sodium: 110mg
This is based on yield of 24 halves total. If you end up with a slightly different count because you used extra paprika or a different brand of mustard, don’t worry one bit! This is real food, made in a real kitchen. If you want to make these lighter, you could try swapping half the mayo for plain Greek yogurt, but honestly, you might lose some of that classic creamy texture we worked so hard to achieve in the filling!
Share Your deviled egg bouquet Creations
I truly hope you feel inspired to try making this amazing deviled egg bouquet for your next gathering! Seriously, when you see the look on people’s faces when they realize the centerpiece they’ve been admiring is actually edible? It’s the best feeling in the world!
I’d absolutely love to see how yours turned out! Did you manage to get those perfect swirls? What kind of garnish did you use to make your petals pop? Head down to the comments and let me know how the construction went and what variation of the filling you tried. Don’t forget to tag us on social media when you show off your beautiful holiday food presentation!
If you have any lingering questions about the process or maybe want to share a different idea for an impressive appetizer spread, please don’t hesitate to reach out through the contact page. Happy arranging, and enjoy being the star of your own dinner party!
PrintDeviled Egg Bouquet: An Impressive Appetizer Centerpiece

Learn how to arrange deviled eggs into an edible bouquet presentation, perfect for Easter brunch or Mother’s Day displays.
- Prep Time: 30 min
- Cook Time: 15 min
- Total Time: 45 min
- Yield: 24 halves (12 servings) 1x
- Category: Appetizer
- Method: Chilling
- Cuisine: American
- Diet: Vegetarian
Ingredients
- 12 large eggs
- 1/2 cup mayonnaise
- 2 tablespoons Dijon mustard
- 1 tablespoon white vinegar
- 1/2 teaspoon salt
- 1/4 teaspoon black pepper
- 1/4 cup finely chopped fresh chives (for garnish)
- Paprika (for dusting)
- 1 large head of lettuce or cabbage (for the base)
- 1 bouquet holder or floral foam block (food-safe)
- Wooden skewers or toothpicks
Instructions
- Place eggs in a saucepan and cover with cold water. Bring water to a boil, then remove from heat, cover, and let stand for 10 minutes.
- Drain hot water and immediately cover eggs with ice water to stop the cooking process. Once cool, peel the eggs and slice them in half lengthwise. Scoop the yolks into a bowl.
- Gently mash the yolks with a fork. Add mayonnaise, Dijon mustard, vinegar, salt, and pepper. Mix until smooth and creamy.
- Transfer the yolk mixture into a piping bag fitted with a star tip. This tip helps create a decorative, flower-like appearance.
- Prepare your base: Secure the food-safe foam block inside a decorative container or use the core of a hollowed-out cabbage head. This will act as the anchor for your bouquet.
- Pipe the yolk filling back into the egg white halves, creating a decorative swirl that resembles a flower bloom.
- Insert a wooden skewer or toothpick into the bottom of each filled egg half, ensuring the skewer is long enough to reach the base anchor.
- Arrange the filled eggs onto the foam base, inserting the skewers firmly into the anchor material to create a dense, bouquet shape. Position them at varying heights for visual interest.
- Dust the tops of the piped filling lightly with paprika. Sprinkle the exposed filling and egg whites with chopped chives for a green, leafy accent.
- Place the finished deviled egg bouquet on your party food arrangements table as an edible centerpiece.
Notes
- For a gourmet deviled egg filling variation, add 1 teaspoon of horseradish or a pinch of curry powder to the yolk mixture.
- Use a sturdy, wide-mouthed vase or a decorative bread basket lined with lettuce leaves as an alternative base for your display.
- Make the egg whites ahead of time and store them covered in the refrigerator. Fill them no more than 2 hours before serving for best texture.
Nutrition
- Serving Size: 2 halves
- Calories: 90
- Sugar: 0.5
- Sodium: 110
- Fat: 8
- Saturated Fat: 2
- Unsaturated Fat: 6
- Trans Fat: 0
- Carbohydrates: 0.5
- Fiber: 0
- Protein: 3
- Cholesterol: 95