
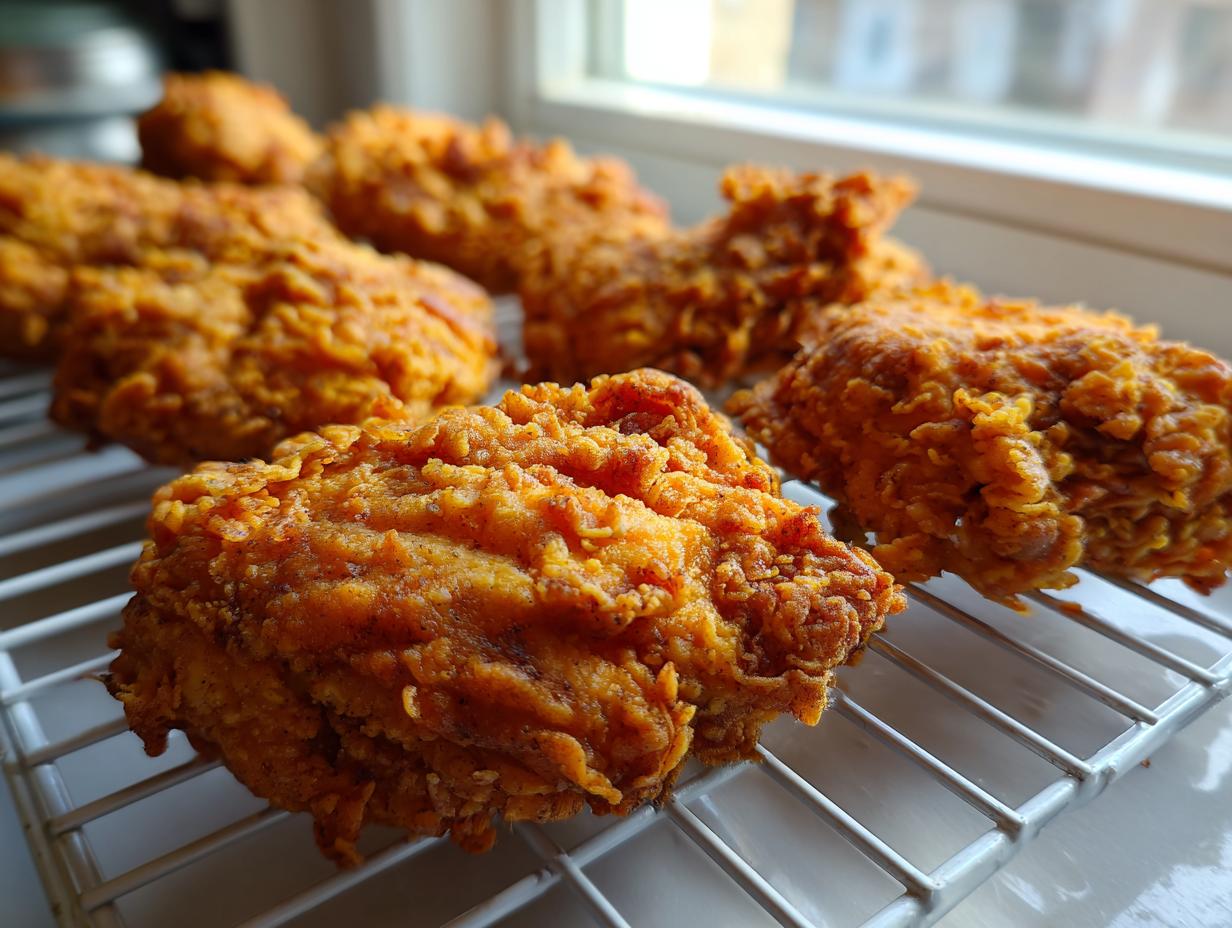
If there’s one thing that makes me happier than anything, it’s that sound—that first bite into perfectly cooked fried chicken where the crust shatters just right. We’re not aiming for just good chicken today; we’re making the absolute best in texture and flavor: my Ultra-Crispy Buttermilk Southern Fried Chicken! Achieving that iconic contrast—juicy meat against a dramatically crunchy coating—is more than just luck. It’s where my background in nutrition science, understanding how acid works on protein, meets my deep love for true Southern cooking tradition. Trust me, after years of testing, I’ve nailed this method to give you foolproof results every time you step up to that skillet. If you love bold flavors but need quick options later, make sure you check out my guide for quick, easy weeknight dinners!
- Why This Buttermilk Southern Fried Chicken Recipe Delivers Maximum Crispiness
- Ingredients for the Best Homemade Fried Chicken
- How To Make Fried Chicken: Step-by-Step Instructions
- Tips for Success with Your Crispy Fried Chicken Recipe
- Variations: From Southern Fried Chicken to Chicken Fried Chicken
- Serving Suggestions for Your Savory Chicken Dinner Ideas
- Storage and Reheating Instructions for Leftover Fried Chicken
- Frequently Asked Questions About Classic Fried Chicken
- Understanding the Nutrition of This Comfort Food Chicken Recipe
- Share Your Ultra-Crispy Fried Chicken Creations
Why This Buttermilk Southern Fried Chicken Recipe Delivers Maximum Crispiness
Listen, anyone can fry chicken, but making that juicy and crispy chicken combination everyone raves about? That takes a couple of secrets. I promise you, this method, passed down through generations but refined by my own testing, guarantees that perfect texture. It’s about respecting the process!
- The Brine: We soak the chicken long enough—at least four hours, preferably overnight—to ensure every fiber is tenderized.
- The Dredge: I’m using a blend that goes above and beyond simple flour to create that signature, attention-grabbing crust.
The Power of Buttermilk Brined Chicken
That thick, tangy buttermilk isn’t just for flavor, y’all. The mild acidity gently breaks down the proteins in the meat. That means when it hits the hot oil, the chicken stays incredibly moist inside while developing that beautiful, flavorful surface. Don’t rush this part; that long soak is crucial for truly tender fried chicken!
Achieving the Signature Crunchy Chicken Coating
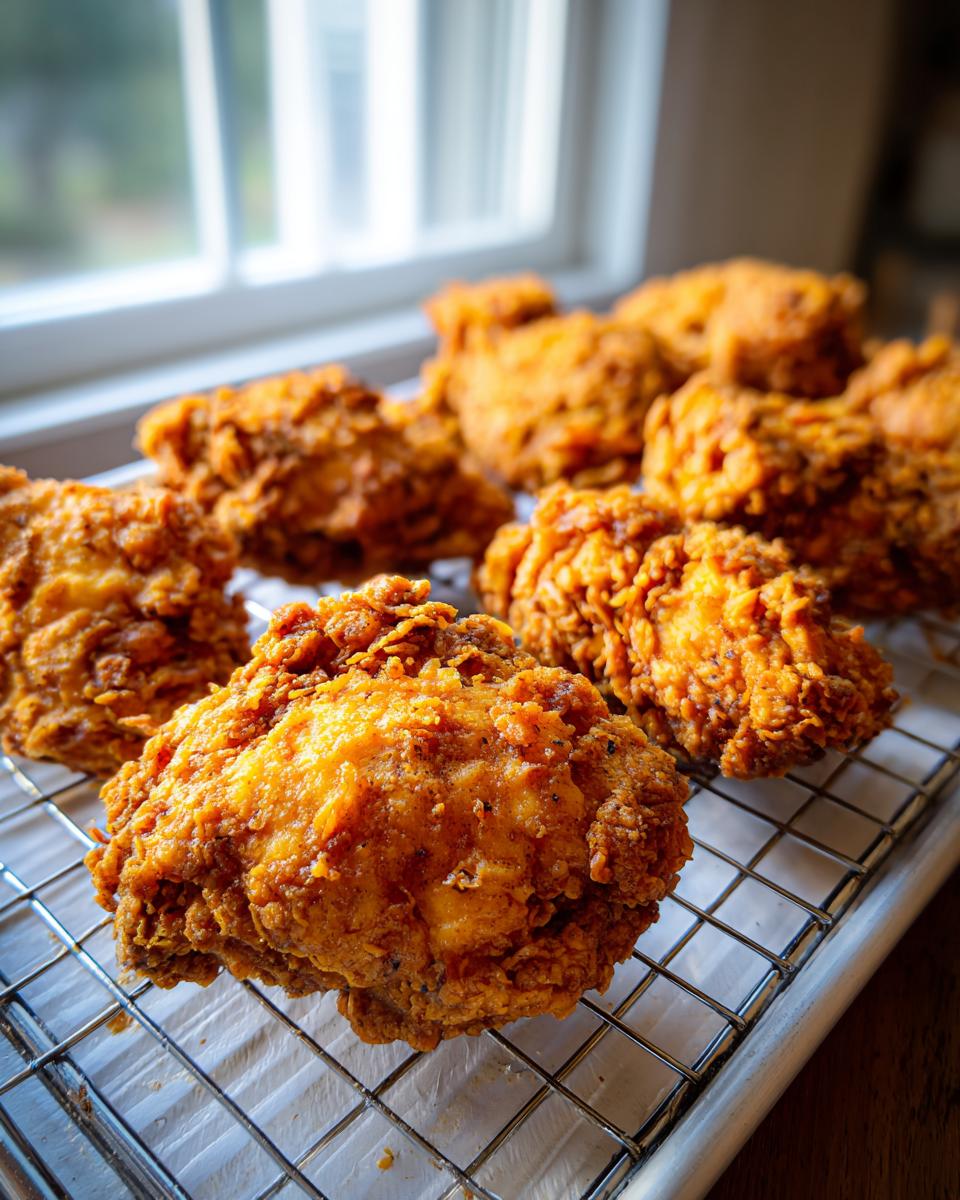
Here’s where we talk texture. If you only use flour, you get a decent crust, but if you want that shatteringly crunchy chicken coating, you need cornstarch mixed right into your dredge blend. It amps up the crisp factor big time. Plus, when you press that flour mixture onto the wet buttermilk-soaked chicken, it creates those lovely, craggy pockets that turn deep golden brown.
Ingredients for the Best Homemade Fried Chicken
Okay, now that you know *why* this recipe is fantastic, let’s talk about what you actually need! You don’t need a million fancy things, but the quality of a few key items really matters here. Think of this as your building block for the best homemade fried chicken you’ve ever made. We need the stars of the show: the chicken, the marinade army, and the dredging dredge. Gather everything up before you start the magic. If you’re looking for another way to use buttermilk perfectly, check out my recipe for fluffy buttermilk pancakes—it’s a keeper!
For the brine, you’ll need 4 glorious pounds of bone-in, skin-on chicken pieces—I usually mix thighs and drumsticks, but whatever your family loves works! You’ll submerge that in 4 generous cups of buttermilk seasoned up with 2 tablespoons of kosher salt, 1 tablespoon of black pepper, and just a tiny bit of cayenne if you like a little spark. For the dredging mixture, grab 4 cups of all-purpose flour, but crucially, 1/2 cup of cornstarch for that extra crunch. Then we spice that dry mix up with 2 tablespoons paprika, 1 tablespoon garlic powder, and 1 tablespoon onion powder. And finally, don’t forget the vegetable oil or shortening—you need a good 4 to 6 cups for deep frying!
How To Make Fried Chicken: Step-by-Step Instructions
This is it! The moment we turn simple ingredients into the ultimate Southern comfort food. Making amazing fried chicken requires a little patience upfront so we can get that payoff later. Remember, we’re aiming for foolproof fried chicken, and that starts with respecting the brine time before we even think about heating the oil.
The Overnight Buttermilk Brine for Tender Fried Chicken
This brine step is non-negotiable for truly tender results. You’re going to mix up your buttermilk, salt, pepper, and cayenne right in a big bowl—make sure that chicken is completely swimming in it! Cover it up tight and stick it in the fridge. Seriously, less than four hours just won’t cut it for that deep tenderizing effect. I highly recommend doing this the day before so you can sleep soundly knowing your chicken is getting pampered!
Preparing the Dredge and Double-Dipping Technique
While the chicken is chilling, whisk together all your dry ingredients. That flour, cornstarch, and spices need to be perfectly integrated to create an even coating. Once the chicken comes out, let the extra buttermilk drip off—you want it wet, not soaked. Now for the crispy coat: dredge it, press it hard, and for the best golden brown chicken, you can dip it *back* into any leftover buttermilk quick dip, and then dredge it again. That double coat builds massive texture!
Deep Fried Chicken: Temperature Control is Key
Heating the oil is the second sacred step. You need 3 inches to cover the pieces, and the temperature must be rock-solid at 325°F. If your oil is too cool, the coating gets greasy; too hot, and the outside burns before the inside cooks. Only toss in 3 or 4 pieces at a time—cramming the pot drops the temperature fast! Dark meat needs about 12 to 15 minutes, aiming for an internal temp of 165°F. And listen to me: never, ever drain them on paper towels! Always use a wire rack over a sheet pan so the air can circulate and keep that glorious crust crisp. If you need a heartier meal idea afterward, check out my recipe for crock pot chicken and rice!
Tips for Success with Your Crispy Fried Chicken Recipe
Now that you’ve got this incredible recipe for crispy fried chicken, I want to give you a couple of little final pointers from my kitchen to yours—these are the things people often skip that make the biggest difference between good and *amazing*!
First, after you’ve done that beautiful double-dip dredging process? Don’t put it straight into the oil. Let those floured pieces rest right on your wire rack for about 15 minutes. Trust me on this! This resting step lets that coating fully hydrate and adhere to the chicken, so you won’t lose that gorgeous, craggy texture when it hits the sizzle.

Second, maintenance is everything when frying. You absolutely need a thermometer to keep an eye on the oil. If it dips much below 315°F or climbs above 330°F after you add chicken, you’re either losing its crispness or risking burning. Maintain that sweet spot for that perfect golden color. When you’re done, if you’re looking for amazing sides, try this easy crusty Italian bread recipe to sop up any extra juices!
Variations: From Southern Fried Chicken to Chicken Fried Chicken
We absolutely love this fried chicken recipe as a classic Southern staple, but the best part about having a solid foundation like this buttermilk brine is how easily you can shift gears! You can totally customize the dredge to hit whatever craving you have that day.
Say you want something with a bit more heat? Easy fix! Before you start dredging, add an extra teaspoon or two of cayenne to your flour mixture, maybe even some smoked paprika or a pinch of dried mustard powder. That’ll give you a spicy kick in every crispy bite. If you want to try a totally different dish, this base chicken preparation is perfect for making Chicken Fried Chicken, too. You’d prepare the chicken exactly as we did here through the dredging stage, shallow fry it until golden, and then instead of serving it plain, whip up a rich white gravy—maybe check out my recipe for creamy Tuscan chicken for some gravy inspiration if you need a good creamy base to start from!

The key is that the buttermilk has already done its job making the meat tender. Whether you serve it smothered in gravy or just with a squeeze of lemon, you’ve mastered the method for seriously delicious, crunchy comfort food!
Serving Suggestions for Your Savory Chicken Dinner Ideas
Now that you’ve made the most incredible, crispy, juicy fried chicken known to humankind, you need things to put beside it, right? Nothing goes sadder than epic chicken sitting alone on a plate! Because this dish is so rich and savory, we need sides that either cut through that richness with brightness or soak up those amazing fried bits.
If you want to lean hard into the Southern theme, you cannot beat classic mashed potatoes—creamy and fluffy—or maybe some good old-fashioned buttermilk biscuits. Those biscuits are just begging to be smeared with butter right next to that perfectly seasoned crust.
For something bright to balance it out, coleslaw is your best friend. The crunch and tang of a good, vinegar-based slaw really make the richness of the chicken sing. Cornbread or some buttery corn on the cob are also fantastic additions. And if you’re looking for a side that’s just as comforting as the main event, you absolutely have to try my recipe for ultimate creamy cheese grits. It turns any savory chicken dinner idea into a full-blown feast that feels like an event. Seriously, pairing the crunchy chicken with creamy grits? It’s food heaven!
Storage and Reheating Instructions for Leftover Fried Chicken
Oh man, if you have any leftover fried chicken, you are in luck! But let’s be honest, the joy of fried chicken fades if you reheat it wrong. The biggest mistake people make? The microwave! Don’t you dare zap that beauty; it goes straight to rubbery sadness, and we worked too hard for that golden crust to let it turn soggy.
When storing, you need air circulation, even in the fridge. Once the pieces are completely cool after frying, place them on a plate and cover them loosely, or better yet, store them in a container layered with paper towels—though the rack is best! Keep them in the fridge for up to three days.
Reheating is where we win back that crunch! My go-to method is the oven. Preheat your oven to about 375°F. Lay the cooled pieces out on a wire rack placed over a baking sheet, just like we did when they first came out of the oil. Pop them in the oven for about 8 to 10 minutes until they are piping hot all the way through. That dry heat crisps up the crust beautifully.
If you happen to have an air fryer, that’s even better! It’s like a mini convection oven designed for crispness. Set your air fryer to 350°F and heat those leftovers for maybe 5 minutes, shaking the basket gently halfway through. It brings the chicken back to life! If you prefer something perhaps less crispy but still easy, you might try my easy oven-baked BBQ chicken recipe for your next meal, but for this crispy batch, stick to dry heat!
Frequently Asked Questions About Classic Fried Chicken
I get so many questions about this recipe—and honestly, that’s how you know we’ve hit on something special! People want to know the nitty-gritty details that take them from home cook to frying pro. Here are the things I hear most often when folks are learning how to make fried chicken with that perfect Southern flair.
What is the best oil to use for deep fried chicken?
This is a big one because the oil is doing half the work! You need a fat that can handle high heat without burning or turning black too fast. While shortening gives you that truly authentic old-school flavor and results, I usually lean toward a neutral vegetable oil, like canola or peanut oil, because they have higher smoke points. They keep things clean and let that beautiful crust develop nicely. Just make sure you have enough of it—about 3 to 4 inches in your pot—so the chicken pieces aren’t touching the bottom!
Can I use chicken breasts for this fried chicken recipe?
Yes, you absolutely can use breasts! But since white meat cooks faster and can dry out easier than dark meat (thighs and drumsticks), you need to adjust your time. Remember in the instructions, I said dark meat needs 12 to 15 minutes? For thick, bone-in breasts, you are going to watch them closer, likely pulling them out between 8 and 10 minutes, checking for that 165°F internal temperature. If you cut them into larger pieces before brining, it helps keep them juicier overall. It’s still fantastic classic fried chicken, just be vigilant with your timing!
Since we are talking about reliable recipes, if you ever need a reliable sweet bake to follow up this savory dinner, my recipe for easy moist coffee cake is always a huge hit!
Understanding the Nutrition of This Comfort Food Chicken Recipe
I always get asked about putting nutrition facts on my recipes, and I love that you’re curious! As someone who studied nutrition, I feel it’s super important to give you an idea of what you’re eating, especially when it’s a rich treat like this fried chicken. But let me be really clear: since everyone fries in slightly different amounts of oil, and chicken pieces vary so much in size, these numbers are just my best estimate based on the recipe breakdown. Think of this as a guide for your comfort food chicken recipes, not a guarantee straight from a testing lab. For that ultra-crunchy flavor, I encourage you to check out another fantastic recipe like the one over at Recipes by Lucille, but here’s what we’re looking at for my version, based on 6 average servings:
- Serving Size: 1 piece (mixed parts)
- Calories: 450
- Fat: 28g (with 7g saturated fat)
- Protein: 32g
- Carbohydrates: 15g
- Sugar: 1g
- Sodium: 650mg
See that high protein? That’s our juicy chicken working hard! Now, if you ever need to reach out with a desperate late-night cooking question, don’t hesitate to check out my contact page—I love hearing from you all!
Share Your Ultra-Crispy Fried Chicken Creations
Whew! We did it! You’ve now got the secrets to making real, honest-to-goodness, shatteringly crisp fried chicken right in your own kitchen. I truly hope you taste the love and hard work in every single golden-brown piece. Since this recipe means so much to me and my CravyBite heritage, I desperately want to know how your batch turned out!
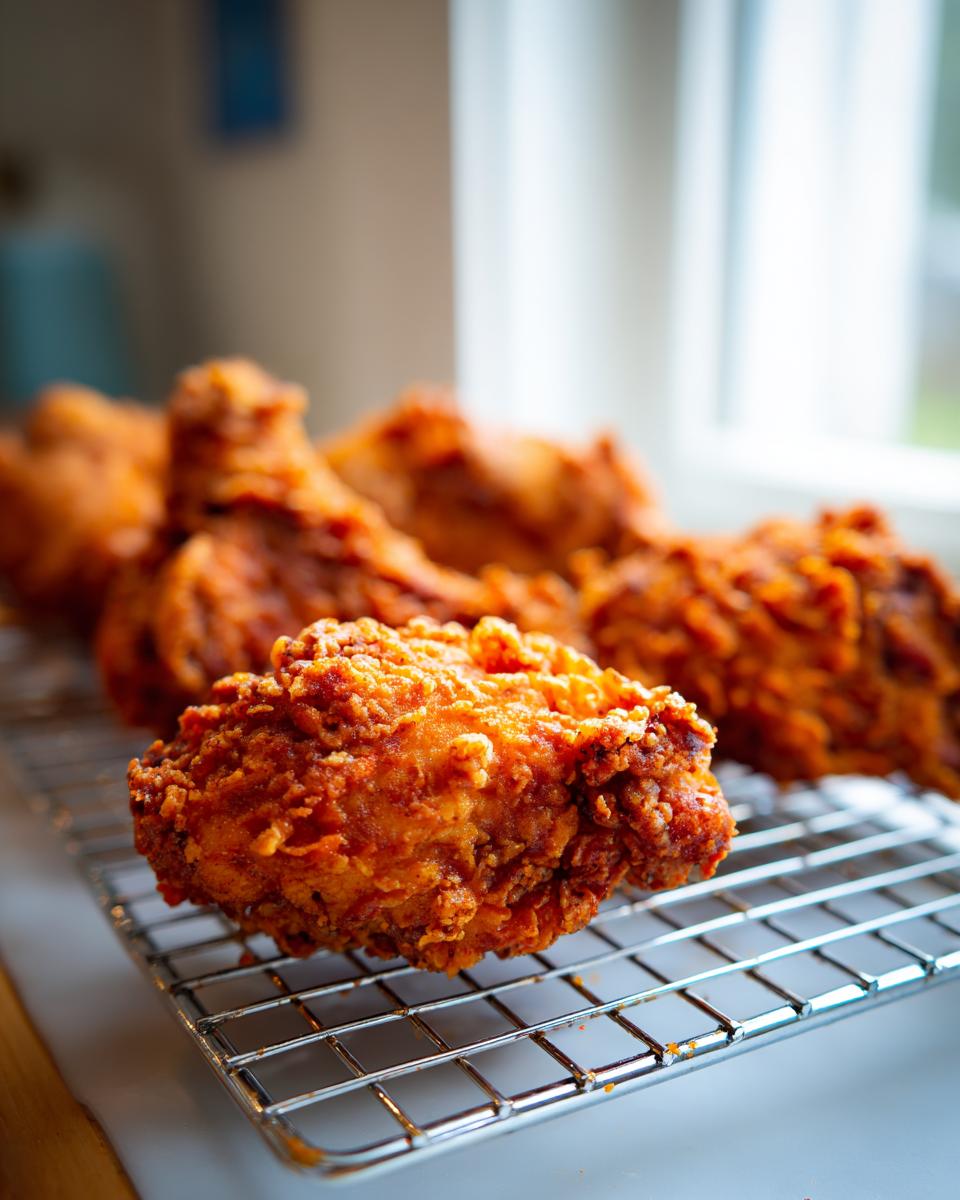
Please, please, please be sure to come back here and leave a rating for the recipe. Five stars only, right? Just kidding—but seriously, let me know if it gave you the crunch you were hoping for! And if you snap a picture of that gorgeous bird sitting on your cooling rack, tag me on social media! Seeing your success is honestly the best part of my day.
If you’re curious about the journey of CravyBite Kitchen or just want to see more recipes built on this foundation of real American cooking, feel free to read all about my background on the About page. Happy cooking, everyone!
PrintUltra-Crispy Buttermilk Southern Fried Chicken

Make the best homemade fried chicken that is juicy inside and has a golden, crunchy coating. This recipe uses a buttermilk brine for tender results.
- Prep Time: 20 min
- Cook Time: 45 min
- Total Time: 4 hours 5 minutes (includes overnight brine)
- Yield: 6 servings 1x
- Category: Dinner
- Method: Deep Frying
- Cuisine: American Southern
- Diet: None
Ingredients
- 4 lbs bone-in, skin-on chicken pieces (thighs, drumsticks, breasts)
- 4 cups buttermilk
- 2 tablespoons kosher salt
- 1 tablespoon black pepper
- 1 teaspoon cayenne pepper (optional, for a kick)
- 4 cups all-purpose flour
- 1/2 cup cornstarch
- 2 tablespoons paprika
- 1 tablespoon garlic powder
- 1 tablespoon onion powder
- Vegetable oil or shortening, for frying (about 4-6 cups)
Instructions
- In a large bowl, combine the buttermilk, kosher salt, black pepper, and cayenne pepper. Add the chicken pieces, ensuring they are fully submerged. Cover the bowl and refrigerate for at least 4 hours, or preferably overnight, to achieve maximum tenderness.
- In a separate shallow dish, whisk together the flour, cornstarch, paprika, garlic powder, and onion powder. This is your dredge mixture for the crunchy coating.
- Remove the chicken from the buttermilk, letting excess drip off, but do not rinse.
- Dredge each piece of chicken thoroughly in the flour mixture, pressing the flour onto the chicken to create a thick, craggy coating. For an extra crispy fried chicken texture, you can perform a double dip: dip the floured chicken back into the remaining buttermilk for a few seconds, then dredge it again in the flour mixture.
- Heat 3 inches of oil in a large, heavy-bottomed pot or deep fryer to 325 degrees Fahrenheit. Use a thermometer to monitor the temperature; maintaining this heat is key for juicy and crispy chicken.
- Carefully place 3-4 pieces of chicken into the hot oil, ensuring you do not overcrowd the pot, which lowers the oil temperature. Fry the chicken in batches.
- Fry dark meat (thighs, drumsticks) for about 12-15 minutes, turning occasionally, until deep golden brown and the internal temperature reaches 165 degrees Fahrenheit. Fry white meat (breasts) for 8-10 minutes.
- Remove the cooked fried chicken from the oil and place it on a wire rack set over a baking sheet to drain excess oil. Do not place it directly on paper towels, as this can steam the crust and make it soggy.
- Serve your classic fried chicken immediately as a savory chicken dinner idea.
Notes
- For the crispiest coating, let the dredged chicken rest on the wire rack for 15 minutes before frying. This allows the coating to adhere better.
- If you are making Chicken Fried Chicken, prepare a simple white gravy to smother the finished product.
- Maintain the oil temperature between 315°F and 330°F throughout the cooking process for foolproof fried chicken.
Nutrition
- Serving Size: 1 piece (mixed parts)
- Calories: 450
- Sugar: 1
- Sodium: 650
- Fat: 28
- Saturated Fat: 7
- Unsaturated Fat: 21
- Trans Fat: 0
- Carbohydrates: 15
- Fiber: 0
- Protein: 32
- Cholesterol: 110