
Oh, the smell! Is there anything on earth more comforting than the aroma of fresh bread baking? It just stops the whole house. I’m Jess Carter, and while I love sharing those traditional, slow-cooked family recipes, I also know that sometimes you need that bakery magic without spending half a day in the kitchen. That’s why I’m sharing my absolute go-to recipe for the best italian bread you can make at home. Forget dry, bland loaves—we’re achieving that coveted, crackly, golden crust and an interior that’s perfectly soft and chewy. It’s the real deal, blending my family’s love for honest cooking with smart, practical steps that fit right into your busy weeknight dinner plans.
- Why This Is The Best Italian Bread Recipe You Will Ever Make
- Simple Ingredients for Your Easy Homemade Bread
- Step-by-Step Instructions for Crusty Italian Bread Recipe
- Tips for Success Baking Your Rustic Italian Loaf
- Ingredient Notes and Substitutions for Italian Bread
- Serving Suggestions: What to Serve with Italian Bread
- Storage and Reheating Instructions for Your Warm Italian Loaf
- Frequently Asked Questions About Quick Italian Bread
- Sharing Your Baking Journey
Why This Is The Best Italian Bread Recipe You Will Ever Make
Seriously, if you’ve been intimidated by making bread, you need to try this one. I’ve worked countless hours perfecting this recipe so you don’t have to reinvent the wheel. This isn’t just another loaf; this is your ticket to getting bakery style bread at home!
- It delivers on the promise: a gorgeous, crunchy exterior every single time.
- The interior crumb is unbelievably soft and chewy—perfect for soaking up sauce.
- It’s fast! You can be slicing a warm loaf in just over two hours total.
It really is the best Italian bread recipe I’ve ever tested, and I promise you’ll feel like a pro baker after using it.
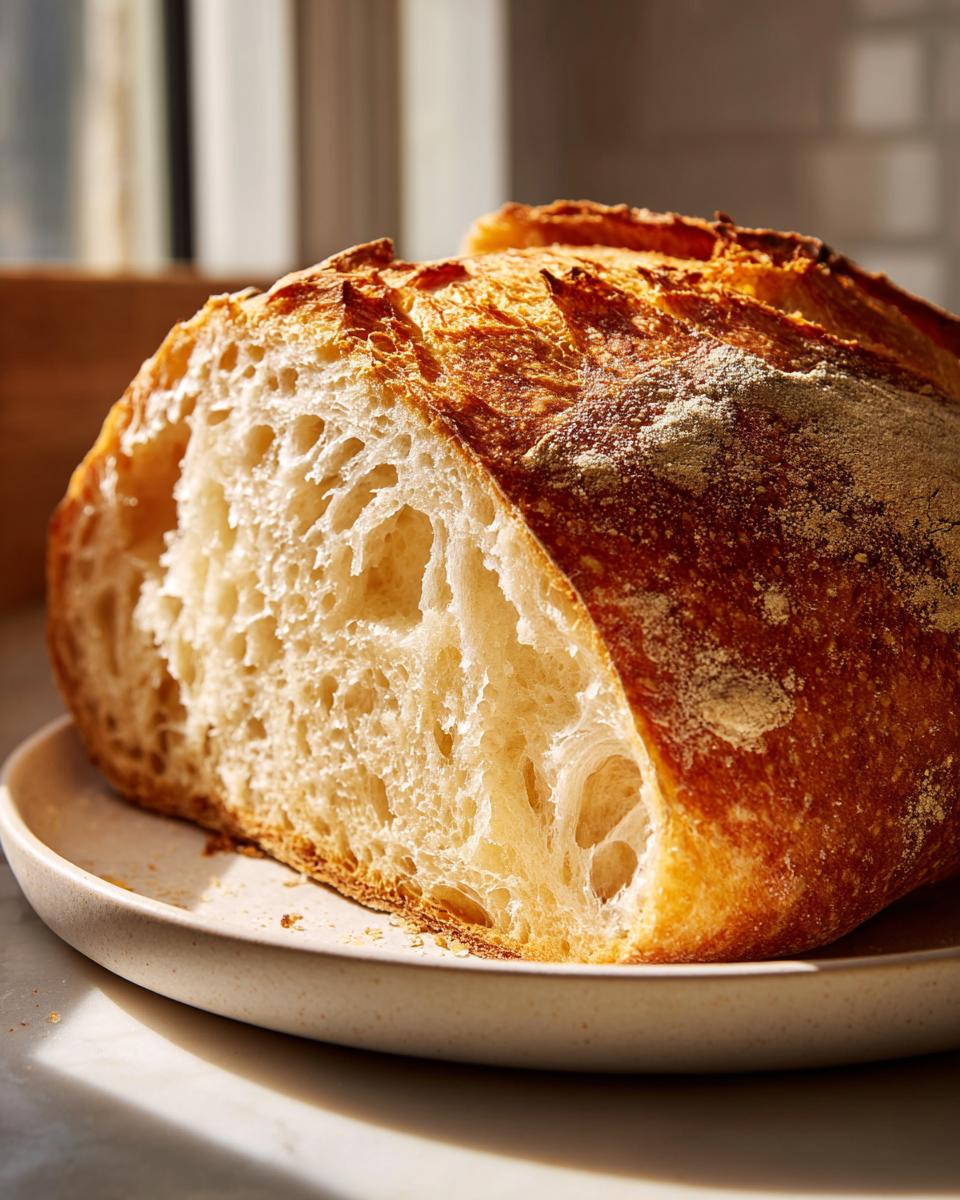
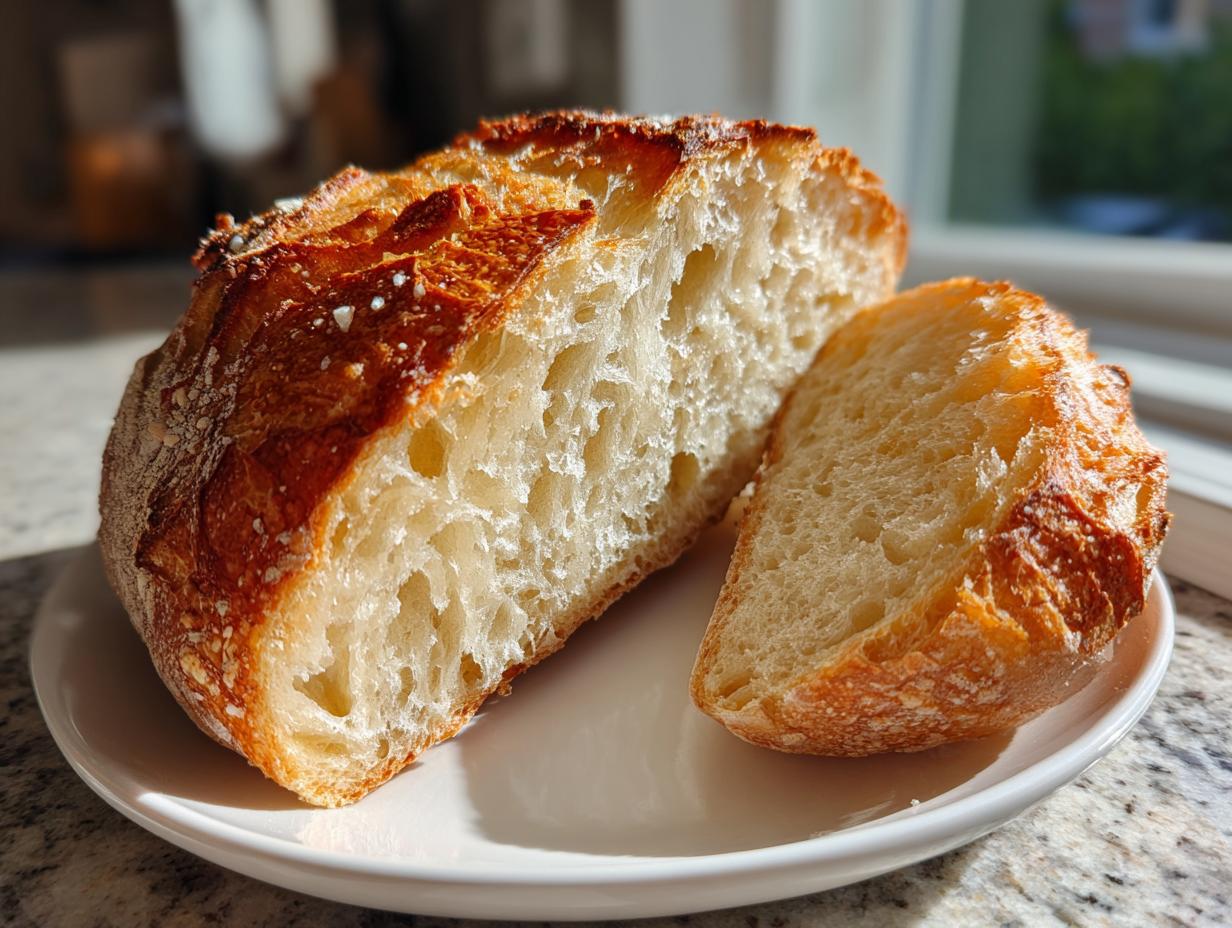
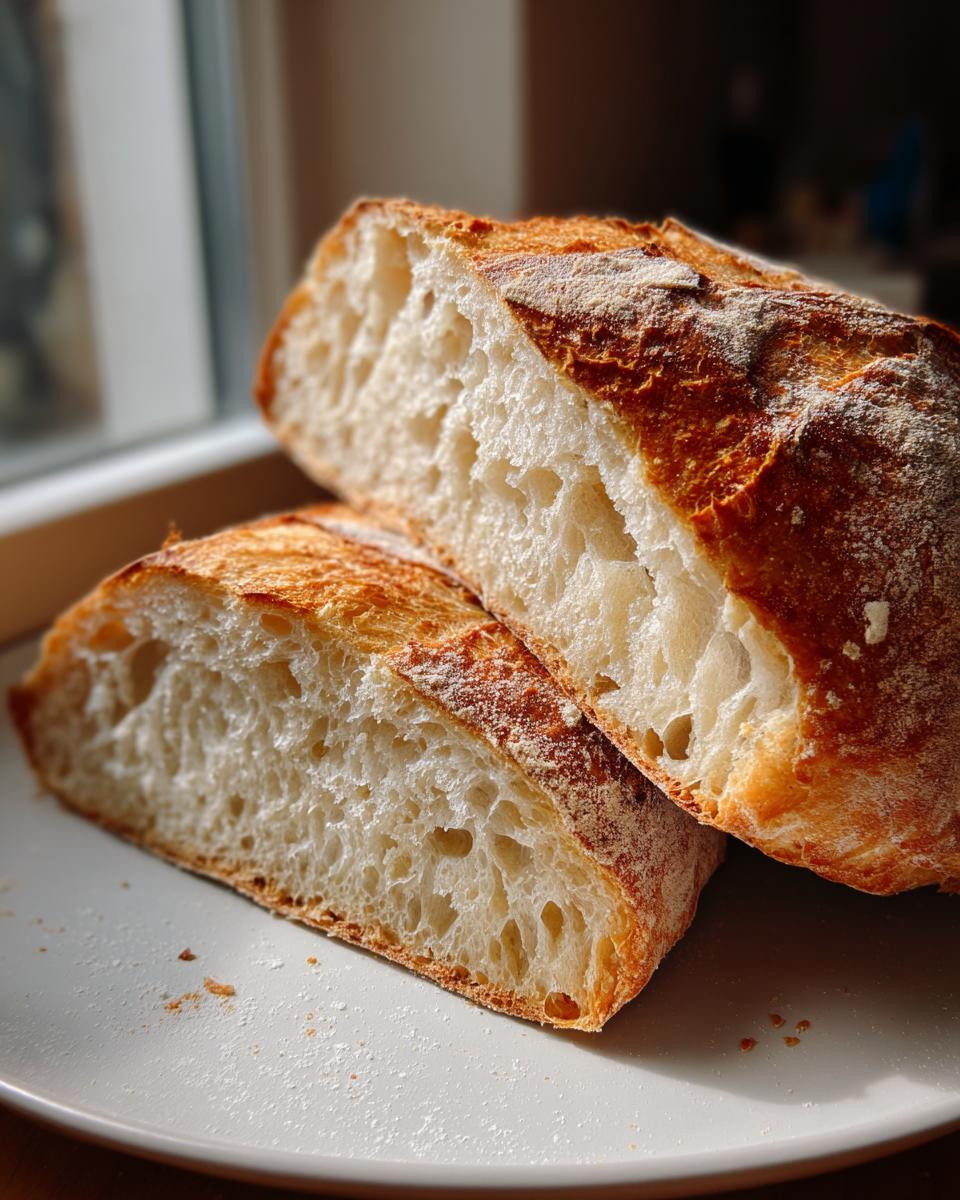
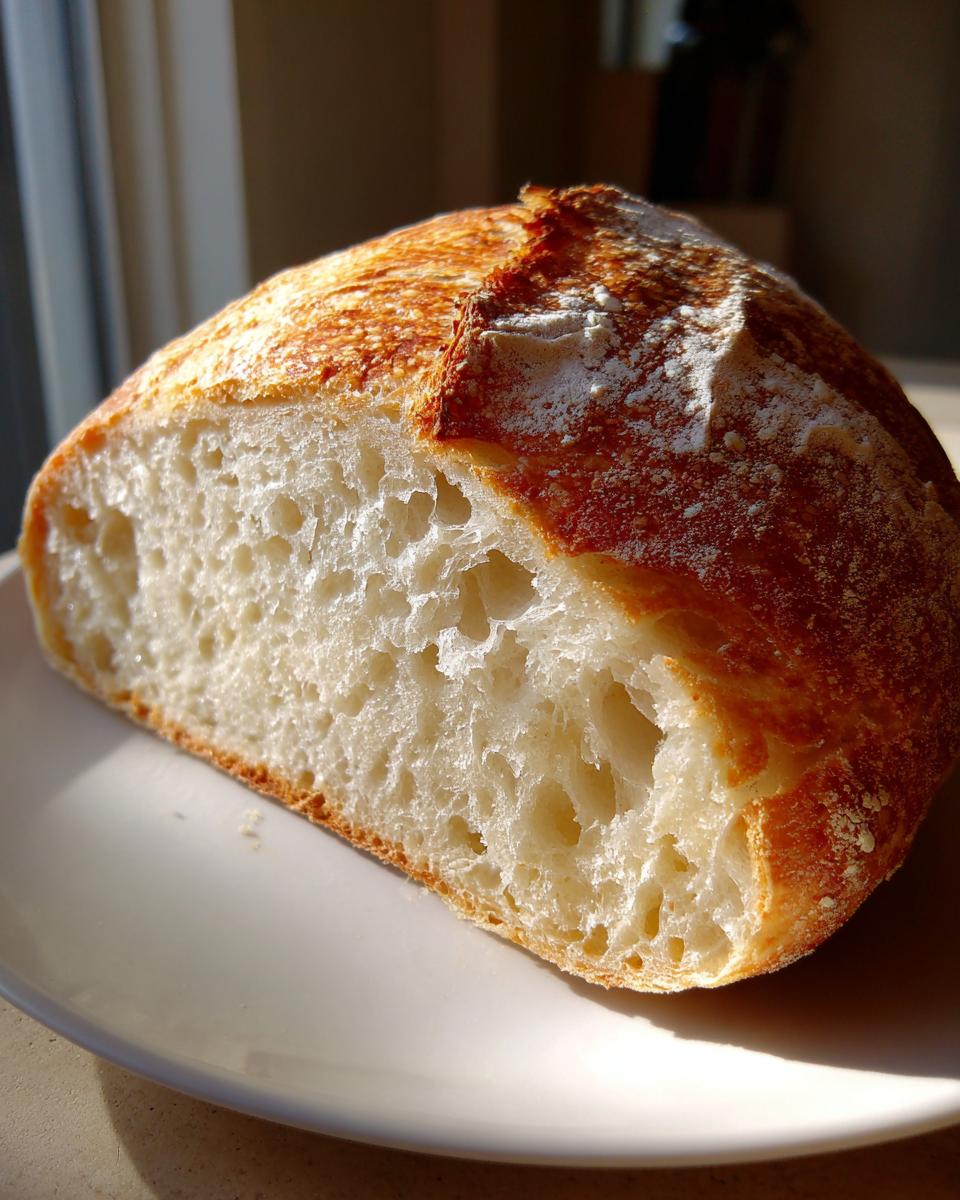
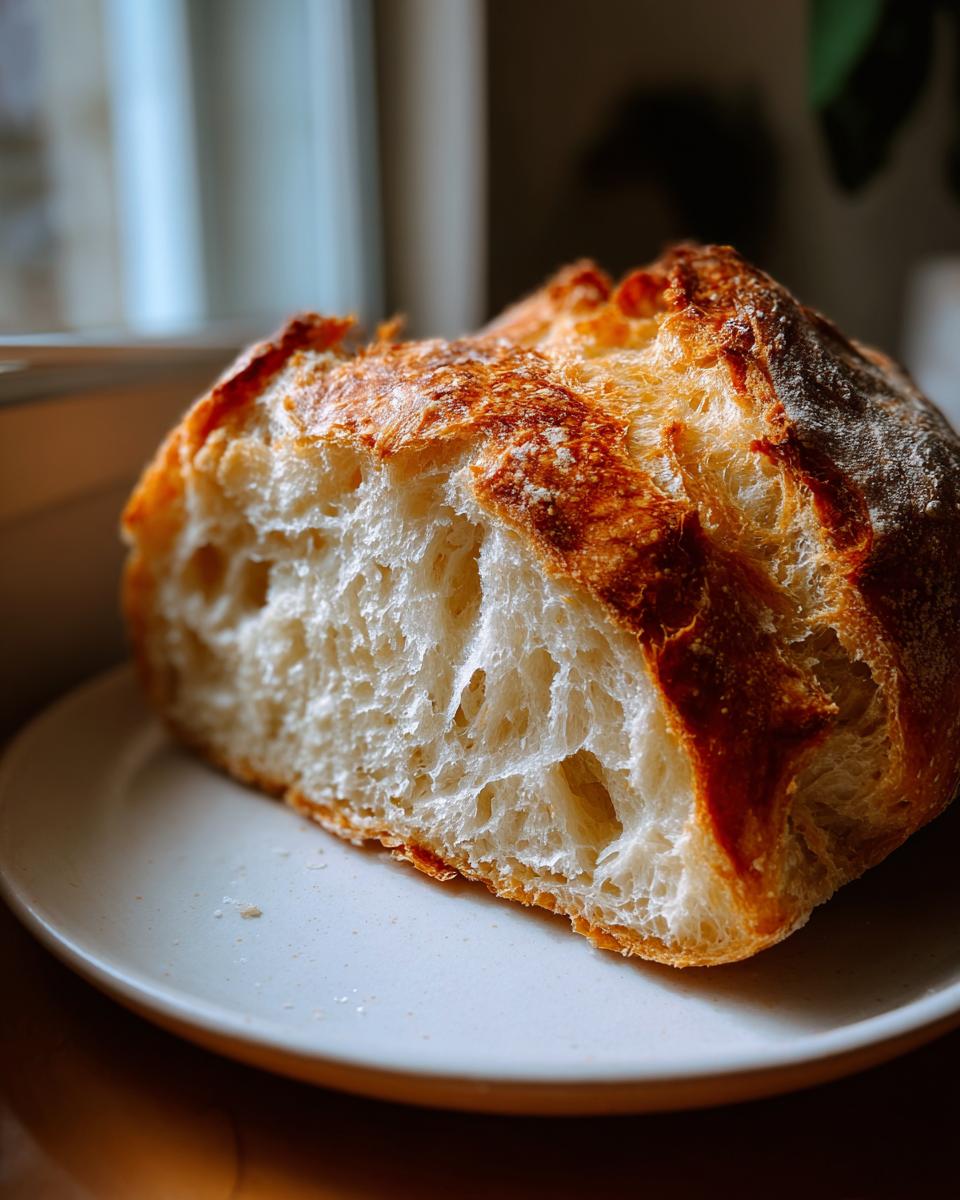
Achieving That Perfect Crispy Crust
The secret to that crackly, golden shell isn’t magic, it’s steam! In the instructions, you’ll see we preheat a pan in the oven, and then carefully dump hot water in it right before the bread goes in. That burst of humidity keeps the dough surface soft just long enough for it to expand beautifully before it sets up hard and crispy. Don’t skip that step; it’s how you get a real crusty Italian bread!
Soft and Chewy Italian Loaf Texture Guaranteed
That wonderful, airy pull you get? That comes from both kneading until the dough is really smooth and giving it the proper time for that first rise. When you knead by hand, you’re building those strong gluten networks. This is what traps the gas from the yeast, creating that light, cloud-like interior. That’s the wonderful soft and chewy Italian loaf texture we are aiming for.
Simple Ingredients for Your Easy Homemade Bread
The beauty of this rustic loaf is that you probably have everything you need right now. I always say that the most extraordinary food comes from the simplest simple bread ingredients! You don’t need any fancy durum flour or specialized equipment here.
Here is exactly what you’ll need to grab before we get started:
- 3 1/2 cups all-purpose flour
- 1 1/2 teaspoons salt (just regular table salt works great)
- 1 teaspoon granulated sugar
- 2 1/4 teaspoons active dry yeast (that’s one standard packet—trust the packet measurement!)
- 1 1/4 cups warm water (make sure this is between 105-115°F, or it will kill your yeast!)
- 2 tablespoons olive oil (use a good quality one for flavor padding)
That’s it! Five pantry staples plus one binder. Keep these precise measurements handy, and you are already halfway to that amazing golden brown finish.
Step-by-Step Instructions for Crusty Italian Bread Recipe
Alright, let’s get our hands into this dough! Making this crispy crust bread tutorial is so straightforward, but watching the dough transform is the best part. Remember, bread-making is about patience—don’t rush those rising times, they are mandatory for that lovely internal structure!
Activating Yeast and Initial Mixing
First thing’s first: we wake up that yeast! Grab your warm water—it needs to be just right, around 105 to 115°F. Stir in the sugar and then sprinkle the yeast right on top. Now, you wait, and I mean *wait*. If you don’t see it bubbling up and looking completely foamy after about five to ten minutes, your yeast is probably dead, and we need to start over with fresh yeast. That foam is your assurance that we are ready to bake a beautiful loaf!
Kneading and First Rise for Your Italian Bread
Once the yeast is happy, you pour in the oil and half the flour, mixing it until it looks shaggy. Then, you add the rest slowly until it comes together. Turn the dough out onto a lightly floured counter and start kneading! You need to work it for a good six to eight minutes. You’ll know you’re done when the dough feels smooth all over—not sticky, not tight, but springy. That’s your signal to put it in an oiled bowl, cover it up, and let it have a long nap for about an hour and a half until it’s doubled up. That’s your first rise.
Shaping and Creating Steam for the Crispy Crust
Gently deflate the dough—no need to punch it hard! Shape it into your desired rustic loaf or tuck it into a greased pan. Then, cover it again for its second rest, which is shorter, maybe 45 minutes. While it’s puffing up, get your oven screaming hot to 400°F. Here’s the big secret for that golden exterior: put a shallow metal pan on the bottom rack while it preheats. When you’re ready to bake, give your loaf a few quick shallow cuts on top, slide it in, and then—carefully—pour a cup of hot water into that hot bottom pan. Watch that steam surround your bread! Bake for about 30 to 35 minutes until it’s deep gold, and pull it out immediately to cool on a rack.
Tips for Success Baking Your Rustic Italian Loaf
Look, I’m a professional baker, and I still mess up sometimes—that’s just how it rolls when you work with yeast! I remember one time trying to rush the bake by cranking the heat way up after the steam part, thinking I’d speed up the process for dinner. What I ended up with was a loaf that was burnt charcoal on the outside and goo in the middle. My lesson learned? Trust the timing, especially after that steam bath!
To make sure you get that beautiful, Golden Brown Italian Loaf every time, keep your water temperature consistent for the yeast activation. If it’s too cool, the yeast sleeps; too hot, and it dies! Also, when you score the top of your rustic Italian loaf—those cuts you make just before baking—slash about a half-inch deep at a shallow angle. This lets the bread expand where you want it to, rather than exploding randomly on the side. It really adds to that artisan look!
One final trick for that extra crispy crunch that mimics a true professional bakery setup: spray a little water directly onto the loaf surface two or three times during the first ten minutes of baking. It sounds counterintuitive, but it keeps the surface pliable so it can crisp up perfectly later on.
Ingredient Notes and Substitutions for Italian Bread
I want to talk about those ingredients for a second, because even though this recipe is easy, treating the basic stuff right is what separates a normal loaf from a show-stopping Italian bread. It’s all about knowing *why* we use what we use, right? That’s what builds real cooking confidence in the kitchen.
Let’s start with the water. You absolutely cannot skimp on getting the temperature right here. If your water is too cold, your yeast just sits there taking a nap. If it’s scorching hot, you’ve accidentally boiled your yeasties, and they won’t wake up to help your bread rise. You need that sweet spot—that 105 to 115°F range. It feels just warm to the touch, definitely not hot. Trust me, taking an extra thirty seconds with a thermometer saves you from a flat, sad loaf!
Now for the flour. I wrote this recipe using standard all-purpose flour because I want this to be accessible to everyone, no trip to a specialty store required! However, if you happen to have bread flour on hand, you can definitely swap it cup-for-cup. Bread flour has slightly higher protein, which means you might need to knead it just a touch longer to develop the gluten, or maybe add a tiny splash more water if the dough feels too tight. But honestly? The all-purpose flour gives us that perfect, slightly less chewy crumb that I love for dipping, so sticking to the recipe works wonders for this particular loaf.
Olive oil is another place where you can choose a little better. If you have a nice, fruity extra virgin olive oil, use it! It really adds a subtle, almost sweet note to the crust when it bakes. It’s one of those little upgrades that makes your easy homemade bread taste like it came from a fancy Italian bakery.
Serving Suggestions: What to Serve with Italian Bread
This bread is practically begging to be used! I always bake an extra loaf just for sandwiches because torn into pieces, it makes the most incredible, sturdy Italian sandwich bread. The crust holds up perfectly to wet ingredients, unlike flimsy store-bought white bread.
But let’s talk dipping—my favorite use! Have you ever tried my slow-simmered Marinara sauce? Dipping thick hunks of this warm loaf into that rich tomato sauce is pure comfort. For an even fancier appetizer, set out small bowls of high-quality olive oil mixed with balsamic vinegar and cracked black pepper. That’s the easiest, most elegant way to enjoy Italian bread for dipping.
And honestly? If you have leftover slices, toast them up the next day and pile on fresh basil, garlic, and tomatoes for amazing bruschetta. It never lasts long enough to go stale, though!
Storage and Reheating Instructions for Your Warm Italian Loaf
This bread really is best the day it comes out of the oven, but we often have leftovers! To keep that crust as crisp as possible, you need air circulation. Don’t wrap it tightly in plastic wrap right away; that traps moisture and makes the crust soggy fast. Instead, let it cool completely on a wire rack first.
Once cool, store it wrapped loosely in parchment paper or a clean tea towel on the counter for about two days. If you want to bring back that amazing warm Italian loaf magic? Pop a slice directly onto the oven rack at about 350°F for five minutes. It revives the crust perfectly!
Frequently Asked Questions About Quick Italian Bread
I get so many questions about getting this loaf done fast, or what happens if you skip a step. Baking is flexible, but there are a few things you just can’t cheat on if you want that amazing bakery texture. These are the questions I hear most often from folks just starting out trying to make their first quick Italian bread!
Can I make this Italian bread recipe without kneading?
That’s the eternal question for any home baker, isn’t it? While there are fantastic ‘no knead’ recipes out there, this specific recipe is structured around developing a strong gluten network through kneading. If you skip the 6-8 minutes of kneading, you’ll end up with a much softer, almost cake-like crumb rather than that lovely, slightly irregular, chewy texture that makes our rustic Italian loaf so satisfying. For this particular recipe, I really recommend kneading it out; it makes all the difference in hitting that crusty goal.
How do I get a faster rise for this bread?
If you’re trying to push this into an even faster timeline, you need to focus on the environment, not the yeast amount. We already start warm, but you can definitely optimize. Think of it as creating the perfect spa day for your dough! The best way to speed up the rise is to put the covered bowl in the absolute warmest spot in your house. My favorite spot is setting the bowl inside a (turned off!) oven with just the light on—it holds a perfect 80-85°F. This makes it a true fast rising bread recipe, shaving about 15 minutes off the required rise time. Be careful not to make it too hot, though!
If you have any other specific questions about ingredient weights or oven temps, please don’t hesitate to reach out over at my contact page. I love hearing from you all!
Sharing Your Baking Journey
Honestly, seeing what you all create with these recipes is the absolute best reward for me. That feeling when you pull a perfectly golden loaf out of your own oven? That’s what CravyBite Kitchen is all about—bringing that joy right into your home kitchen.
I put my heart and soul into making sure this crusty Italian bread recipe is foolproof for everyone, whether you’re a brand-new baker or you’re tossing dough around like a professional. So, once you’ve sliced into that warm, chewy interior, I’d love to hear about it!
Please take a minute to leave a rating below—did you get that bakery-style crust you were hoping for? If you snapped a picture of your beautiful loaves, absolutely tag me on social media! I promise I look at every single one. Connecting with you all keeps my passion burning bright.
Happy baking, friends. And remember, if you ever have questions about keeping things running smoothly (or if you want to know more about how we handle your info, you can check out our privacy policy), just drop me a line. Now go enjoy that warm Italian bread!
PrintEasy Crusty Italian Bread Recipe: Bakery Style Loaf at Home
Bake bakery-style Italian bread with a golden, crispy crust and a soft, chewy interior. This simple recipe is perfect for beginners and uses basic pantry ingredients for a warm loaf ready in a few hours.
- Prep Time: 20 min
- Cook Time: 35 min
- Total Time: 2 hours 5 minutes
- Yield: 1 loaf 1x
- Category: Baking
- Method: Baking
- Cuisine: Italian
- Diet: Vegetarian
Ingredients
- 3 1/2 cups all-purpose flour
- 1 1/2 teaspoons salt
- 1 teaspoon granulated sugar
- 2 1/4 teaspoons active dry yeast (1 packet)
- 1 1/4 cups warm water (about 105-115°F)
- 2 tablespoons olive oil
Instructions
- In a large bowl, mix the warm water, sugar, and yeast. Let it stand for 5 to 10 minutes until foamy. This confirms your yeast is active.
- Add the olive oil, salt, and half of the flour to the yeast mixture. Mix until just combined.
- Gradually add the remaining flour, mixing until a shaggy dough forms.
- Turn the dough out onto a lightly floured surface. Knead for 6 to 8 minutes until the dough is smooth and elastic.
- Lightly oil a clean bowl. Place the dough in the bowl, turning once to coat. Cover the bowl with plastic wrap or a clean towel.
- Let the dough rise in a warm place for 1 to 1.5 hours, or until it has doubled in size. This is your first rise.
- Gently punch down the dough. Shape it into a rustic loaf or place it in a lightly greased 9×5 inch loaf pan.
- Cover the shaped dough again and let it rise for another 30 to 45 minutes, or until puffy. This is your second rise.
- Preheat your oven to 400°F (200°C). Place a shallow pan on the bottom rack to create steam; you will pour water into this later.
- Lightly score the top of the loaf with a sharp knife if desired. Carefully pour 1 cup of hot water into the shallow pan on the bottom rack to create steam for a crisp crust.
- Bake for 30 to 35 minutes, or until the crust is deep golden brown and the internal temperature reaches 200°F (93°C).
- Remove the bread from the oven and immediately transfer it to a wire rack to cool completely before slicing.
Notes
- For an extra crispy crust, spray the loaf with water a few times during the first 10 minutes of baking.
- If you want to use this for sandwiches, a 9×5 inch loaf pan works well for a uniform shape.
- This bread is excellent served warm with olive oil for dipping.
Nutrition
- Serving Size: 1 slice
- Calories: 150
- Sugar: 1
- Sodium: 250
- Fat: 2
- Saturated Fat: 0.5
- Unsaturated Fat: 1.5
- Trans Fat: 0
- Carbohydrates: 30
- Fiber: 1
- Protein: 4
- Cholesterol: 0