
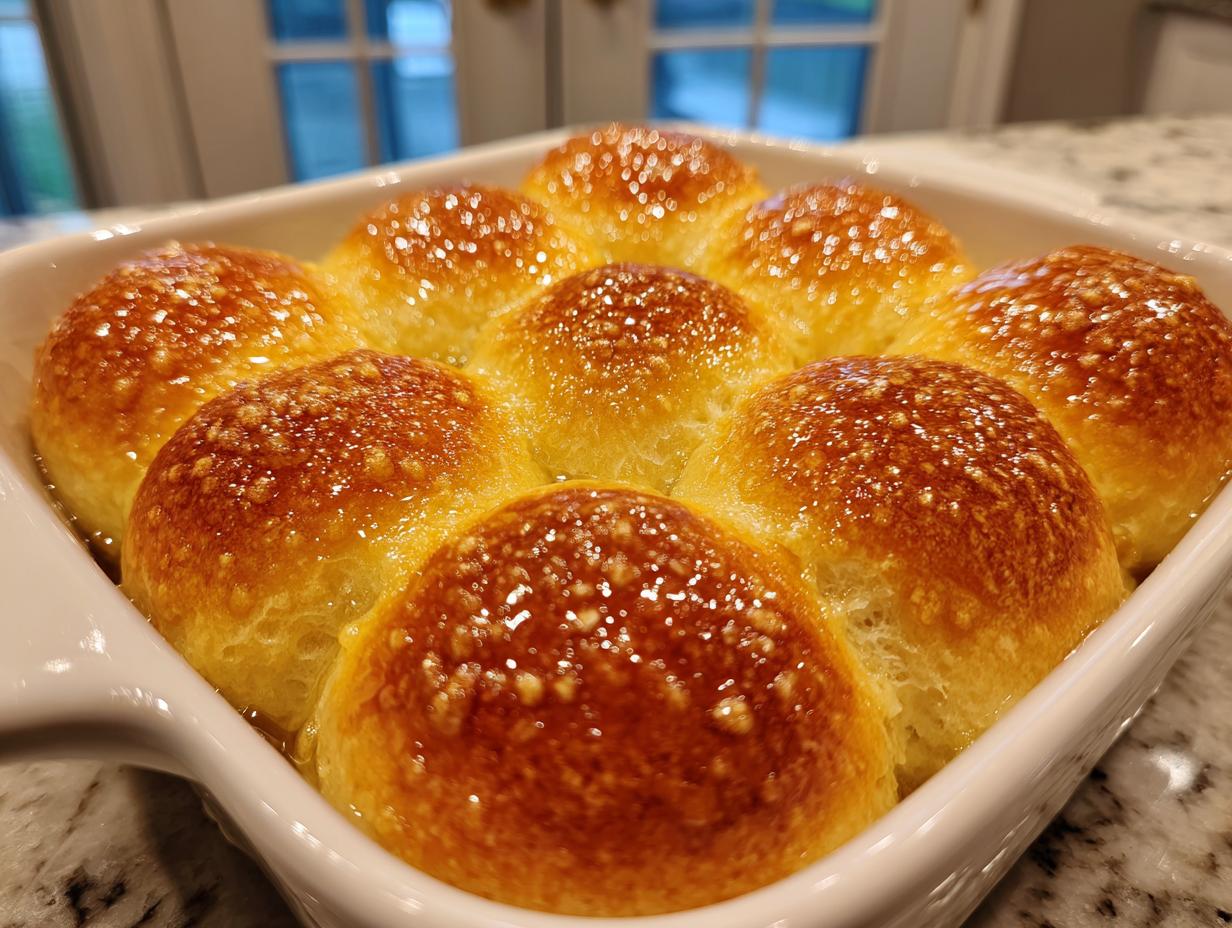
There is absolutely nothing that smells more like home than yeast dough quietly rising in the kitchen. Forget those dry, sad little packaged rolls you pick up at the store; we’re making something real here. I’m talking about the ultimate soft and fluffy homemade dinner rolls—the kind that practically melt the second they hit your mouth, drenched in rich, melted butter. When I developed this classic recipe, I was calling back to my roots in American home cooking, where every side dish was a love letter. These buttery yeast rolls are the centerpiece of every holiday table I host, and trust me, you’re going to want to keep this batch of warm, perfect dinner rolls all to yourself! If you want to know more about the heritage behind CravyBite Kitchen, check out my story here.

- Why You Will Love This Soft Dinner Rolls Recipe
- Essential Ingredients for Perfect Buttery Dinner Rolls
- Step-by-Step Guide to Making Fluffy Homemade Bread Dinner Rolls
- Baking and Applying the Signature Buttery Topping to Dinner Rolls
- Variation: Making Texas Roadhouse Style Rolls Copycat Topping
- Tips for Success When Making Your Dinner Rolls From Scratch
- Storage and Make Ahead Dinner Rolls Instructions
- Frequently Asked Questions About Soft Dinner Rolls Recipe
- Sharing Your Comfort Food Baking Creations
Why You Will Love This Soft Dinner Rolls Recipe
Okay, you deserve amazing bread! These aren’t just rolls; they are little clouds of comfort. Why should you trust my recipe over every other one out there? Easy. Because they deliver exactly what we crave.
- They are unbelievably soft and fluffy—truly bakery-style, from scratch!
- That decadent, generous slather of melted butter and honey makes them ridiculously buttery.
- They are surprisingly easy for a yeast roll, requiring just a couple of simple rises.
- Honestly, they are miles better than anything you’ll find in a plastic bag at the grocery store.
Essential Ingredients for Perfect Buttery Dinner Rolls
Getting those glorious, pillowy dinner rolls means we can’t cut corners here. But don’t panic! Every single ingredient listed below plays a critical role in achieving that soft and fluffy texture we are obsessing over. Grab your measuring cups, and let’s assemble our superstars.
Here is what you need:
- 1 cup warm water (must be between 105-115°F—this is key!)
- 2 1/4 teaspoons active dry yeast
- 1/4 cup granulated sugar
- 1/2 cup whole milk, warmed slightly
- 1/4 cup unsalted butter, melted, plus 4 tablespoons reserved for topping
- 1 large egg, lightly beaten
- 3 1/2 to 4 cups all-purpose flour
- 1 teaspoon salt
- For topping: 2 tablespoons honey mixed with 2 tablespoons melted butter
Ingredient Notes and Substitutions for Your Dinner Rolls
A couple of small details make a huge difference when you’re aiming for the best homemade rolls. First, about that water temperature—if it’s too cool, your yeast stays asleep. If it’s too hot, you kill it! Keep it in that 105 to 115-degree range so the yeast gets happy and foamy.
Also, I noted using all-purpose flour, but if you really want that extra light cloud texture, try swapping out one cup with bread flour. The higher protein in bread flour builds a slightly stronger structure, which helps those rolls rise super high and stay light. Don’t skip the milk or the egg either; those add incredible richness that makes our dinner rolls feel more like a treat than just a side dish.
Step-by-Step Guide to Making Fluffy Homemade Bread Dinner Rolls
Alright, friends, this is where the magic truly starts to happen! Yeast dough can seem intimidating, but I promise you that once you follow these steps for our buttery yeast rolls, you’ll never go back to the store-bought versions. The process is straightforward, but timing is everything when you want those perfectly risen rolls.
First things first: wake up that yeast! Mix your warm water and sugar, sprinkle on the yeast, and wait about 5 to 10 minutes. If it gets foamy, your yeast is alive and ready to work its magic. Then, you add in the milk, melted butter, and that gorgeous egg. Once that’s combined, start adding your flour and salt mixture gradually. Keep adding until you get a shaggy mess that just pulls away from the sides of the bowl.
Then comes the fun part—kneading! Turn that dough out onto a floured surface. I like to work it for a solid 6 to 8 minutes. You’ll know it’s getting there when it stops being sticky and starts feeling smooth and elastic under your hands. If it feels like it’s fighting you too much, sprinkle on just a tiny bit more flour, but be careful not to add too much, or you’ll lose the softness! You can see my video on shaping dough over at my simple Italian bread recipe for a visual tip on feeling the gluten develop.
Achieving the Perfect First Rise for Dinner Rolls
Once you’ve kneaded the dough smooth, you need to let it rest, and this rest period is critical for fluffiness. Put the dough ball into a lightly oiled bowl, turn it over so the top is coated lightly, and cover it up tight with plastic wrap or a clean kitchen towel. Now, find the warmest spot in your kitchen! I usually use the barely warmed, turned-off oven with the door cracked. You want it to sit for about 1 to 1.5 hours until it has visibly doubled in size. Don’t poke it too soon!
Shaping and Second Proofing for Fluffy Homemade Rolls
When the dough has doubled, you gently punch it down—it should smell wonderfully yeasty now! Now, we divide. I usually aim for 12 large rolls or 16 smaller ones for a 9×13 pan. Weighing them helps keep them uniform, but eyeballing it works too! Roll each piece between your palms until you have a perfectly smooth, tight ball. Place them close together in your greased pan—this is important! When they bake against each other, the outsides stay wonderfully soft instead of forming a hard crust.
Cover the pan again and let them have their final snooze. This second rise only needs about 30 to 45 minutes. They need to look puffy and soft before they go into the oven. If they look resistant when you gently poke them, they need five more minutes of warmth!
Baking and Applying the Signature Buttery Topping to Dinner Rolls
Now for the moment of truth! Get your oven preheated to 375°F (190°C). Our rolls typically need 15 to 20 minutes in there. You’re looking for that beautiful, deep golden-brown color on the top. Don’t overbake them, or you’ll risk drying out all that fluffiness we worked so hard to create!
The second they come out, you need to move fast, because the topping is what seals in all that moisture and adds that incredible flavor. While they are piping hot, mix up your honey and extra melted butter. Brush that glossy mixture all over the tops while they are still steaming. Seriously, the smell right here is divine comfort food baking in action! Then, before you even think about serving them, hit them with the final drizzle of plain melted butter. That double-dose of butter is why these are the best homemade rolls.
Variation: Making Texas Roadhouse Style Rolls Copycat Topping
If you’ve been craving those irresistibly sweet and salty rolls you get at that famous steakhouse, you are in luck! We can tweak our basic recipe easily to get that flavor profile. After you brush the rolls with the basic honey-butter mixture right out of the oven, it’s time for the secret weapon for the Texas Roadhouse Style Rolls copycat treatment.
For this wonderful variation, you just need a little cinnamon sugar. Mix about one teaspoon of cinnamon with one tablespoon of regular sugar. Once the honey-butter is brushed on and glistening, sprinkle this cinnamon sugar mix lightly and evenly over the tops. It melts right in, giving you that slightly sweet, warm kick we all love on our dinner rolls. It’s an amazing upgrade for a Sunday dinner or maybe after a busy day planning quick, easy weeknight dinners. For more inspired ways to use up those fantastic yeast roll recipes, check out this take on the topping from another home cook here.
Tips for Success When Making Your Dinner Rolls From Scratch
Baking bread is a bit of chemistry, but mostly it’s about trusting your senses. If you keep two main pitfalls in mind, you’re golden. First, be stingy with the extra flour during kneading! It’s tempting to flour up your board when the dough seems sticky, but too much flour is how you end up with stiff, dense rolls instead of fluffy homemade bread. Only add enough to keep it manageable.
Second, make sure that yeast is actually fresh. If your water/sugar bowl doesn’t bubble up in 10 minutes, toss the whole batch and start over with new yeast. Dead yeast means zero rise, and no one wants a flat, sad dinner roll. Trust me on this—a little diligence upfront saves hours of disappointment later!
Storage and Make Ahead Dinner Rolls Instructions
We all know these soft dinner rolls are best right out of the oven, but sometimes life gets busy, right? The great news is these are fantastic for preparing ahead of time! If you want to make your dinner rolls from scratch the day before Thanksgiving, assemble them in the pan as usual, then cover the whole thing super tightly with plastic wrap. Pop them straight into the fridge for up to 24 hours. They stop rising in the cold, which is perfect.
When you’re ready to bake, take them out of the fridge about 30 minutes before baking to let them take the chill off. You’ll need to add about 3 to 5 extra minutes to the baking time. If you just have leftovers, store them in an airtight container at room temperature for up to three days. If they stiffen up a little, just microwave one for about 15 seconds with a tiny splash of water to bring back that amazing fluffiness. For more make-ahead inspiration for big meals, check out my easy homemade lasagna recipe!
Frequently Asked Questions About Soft Dinner Rolls Recipe
I totally get it—when you’re baking something that needs yeast, you always have a few burning questions waiting! I’ve gathered the ones I get asked the most about achieving truly soft, pillowy dinner rolls. Hopefully, this helps you feel totally confident before you even start kneading!
Can I use instant yeast instead of active dry yeast?
Yes, absolutely! Instant yeast is a workhorse, and it’s actually fantastic for getting those quick dinner rolls done faster. If you use instant yeast, you can skip the step where you proof it in the warm water and sugar. Just mix the instant yeast right in with your dry ingredients (flour and salt). Then, proceed with adding the wet ingredients right after that. It cuts down about 10 minutes right off the top!
How do I keep my dinner rolls soft overnight?
This is an excellent question for anyone planning a holiday meal—nobody wants stale rolls the next morning! The trick to keeping them soft is entirely about trapping the steam and moisture. Once they have cooled slightly, place them in an airtight container or a Ziploc bag. For extra insurance, you can even drape a clean paper towel over the tops before sealing the container. When you reheat them briefly, they’ll spring right back to life!
Can I make these quick dinner rolls in a bread machine?
You certainly can adapt this for a bread machine, especially if you are looking for a hands-off process. Most bread machines have a dough cycle. I always recommend using the **dough cycle, NOT the bake cycle**. You want the machine to mix and knead everything for you, but you still need to shape the rolls by hand and give them that second rise on the counter before baking them in a traditional oven at 375°F. This ensures they get that beautiful, puffy shape. You can pair these rolls with my creamy Tuscan chicken for a fantastic dinner!
Sharing Your Comfort Food Baking Creations
That’s it—you have conquered the best, fluffiest batch of dinner rolls the neighborhood has ever tasted! I am so excited for you. Now, I really want to see your work! Did you try the honey butter or go for the full Texas Roadhouse style? Head over to my contact page, give this recipe a solid rating if you loved it, and share a picture of those warm, beautiful rolls!
PrintThe Ultimate Soft and Fluffy Homemade Dinner Rolls (Classic Buttery Recipe)
You can make incredibly soft, fluffy, and buttery dinner rolls from scratch. This classic yeast roll recipe delivers comforting homemade bread that tastes much better than store-bought options, perfect for any family meal or holiday side dish.
- Prep Time: 25 min
- Cook Time: 20 min
- Total Time: 2 hours 5 minutes
- Yield: 12 to 16 servings 1x
- Category: Side Dish
- Method: Baking
- Cuisine: American
- Diet: Vegetarian
Ingredients
- 1 cup warm water (105-115°F)
- 2 1/4 teaspoons active dry yeast
- 1/4 cup granulated sugar
- 1/2 cup whole milk, warmed
- 1/4 cup unsalted butter, melted, plus 4 tablespoons for topping
- 1 large egg, lightly beaten
- 3 1/2 to 4 cups all-purpose flour
- 1 teaspoon salt
- For topping: 2 tablespoons honey mixed with 2 tablespoons melted butter
Instructions
- Activate the yeast: In a large bowl, combine the warm water and sugar. Sprinkle the yeast over the top and let it sit for 5 to 10 minutes until foamy.
- Mix wet ingredients: Add the warmed milk, 1/4 cup melted butter, and the beaten egg to the yeast mixture. Stir to combine.
- Combine dry ingredients: In a separate bowl, whisk together 3 1/2 cups of the flour and the salt.
- Form the dough: Gradually add the flour mixture to the wet ingredients, mixing until a shaggy dough forms.
- Knead the dough: Turn the dough out onto a lightly floured surface. Knead for 6 to 8 minutes until the dough is smooth and elastic. Add the remaining flour only if the dough is too sticky to handle.
- First rise: Place the dough in a lightly oiled bowl, turning once to coat. Cover the bowl with plastic wrap or a clean towel and let it rise in a warm place for 1 to 1.5 hours, or until doubled in size.
- Shape the rolls: Gently punch down the dough. Divide the dough into 12 or 16 equal pieces. Roll each piece into a smooth ball. Place the balls close together in a greased 9×13 inch baking pan.
- Second rise: Cover the pan loosely and let the rolls rise again in a warm spot for 30 to 45 minutes, or until puffy.
- Bake: Preheat your oven to 375°F (190°C). Bake for 15 to 20 minutes, or until the tops are golden brown.
- Apply topping: While the rolls are still hot, mix the 2 tablespoons of honey with 2 tablespoons of melted butter. Brush this mixture evenly over the tops of the warm rolls.
- Serve: Brush the remaining 2 tablespoons of melted butter over the rolls right before serving for extra buttery flavor. Serve warm.
Notes
- For Texas Roadhouse Style Rolls: After brushing the rolls with the honey-butter topping, sprinkle a small amount of cinnamon sugar (1 teaspoon cinnamon mixed with 1 tablespoon sugar) over the tops while they are still hot.
- Make Ahead Tip: You can assemble the rolls in the pan, cover tightly, and refrigerate for up to 24 hours before baking. Let them sit at room temperature for 30 minutes before baking, and add 3-5 minutes to the bake time.
- For extra soft dinner rolls, use bread flour instead of all-purpose flour.
Nutrition
- Serving Size: 1 roll
- Calories: 180
- Sugar: 4g
- Sodium: 220mg
- Fat: 6g
- Saturated Fat: 3.5g
- Unsaturated Fat: 2.5g
- Trans Fat: 0g
- Carbohydrates: 28g
- Fiber: 1g
- Protein: 4g
- Cholesterol: 25mg