
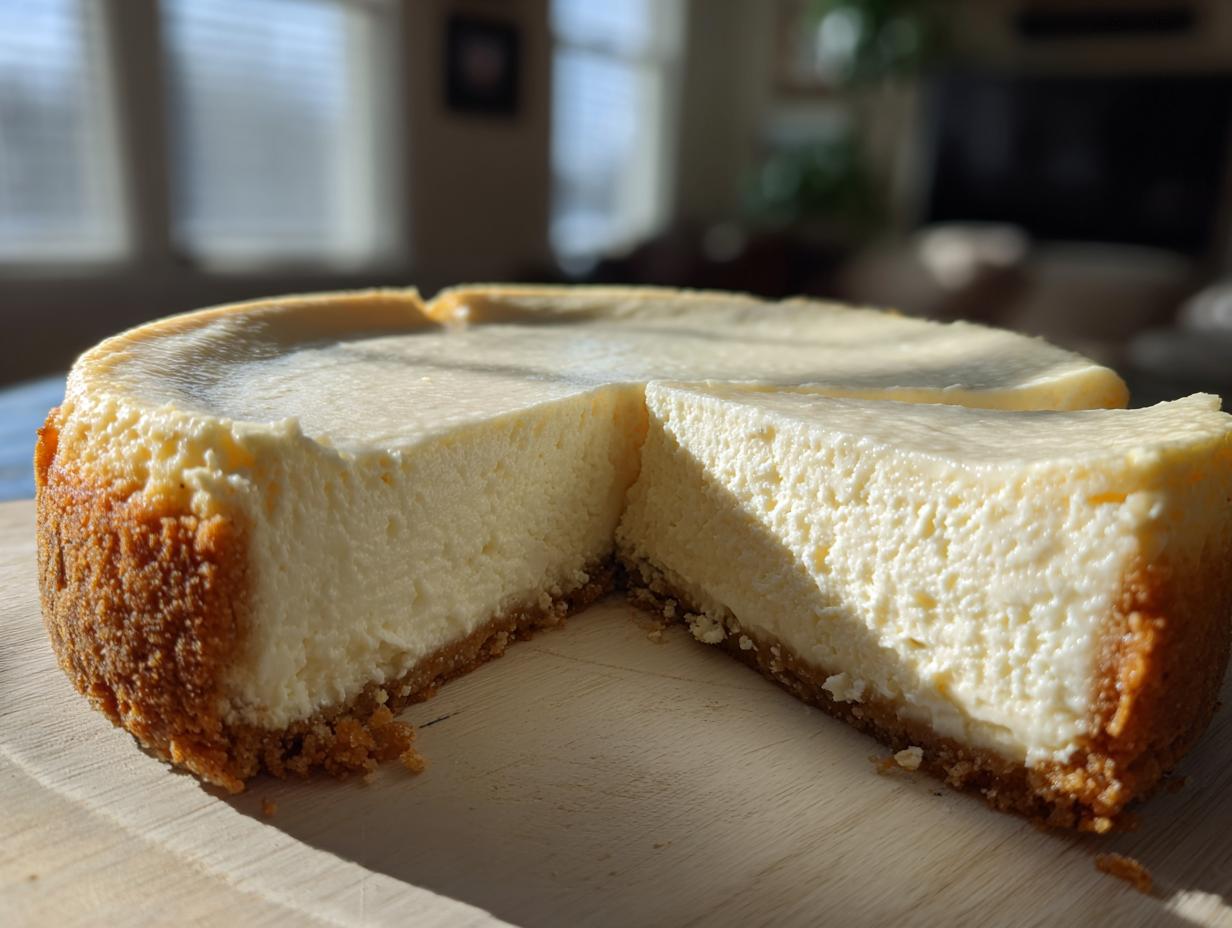
I know the struggle all too well—you crush your workout, you’re tracking those macros diligently, but then 8 PM hits, and you just *need* something creamy and decadent. Before CravyBite Kitchen, satisfying that craving while staying on track felt like a myth! But I’m here to bust that myth wide open. As someone who spent years consulting in nutrition, I learned that balance, not deprivation, is the key to consistency. That’s why I poured all my expertise into developing what I truly call the Ultimate Baked Protein Cheesecake. Yes, you read that right: a genuinely creamy, indulgent slice that packs over a whopping 35 grams of protein! We’re merging the classic comfort of American baking with hard-core macro tracking, so you never have to choose between dessert and your goals again. Get ready to bookmark this amazing, guilt-free treat.
I promise you, this recipe uses simple pantry staples to create something spectacular.
Check out more of my delicious desserts and treats while you’re here!
- Why This Baked Protein Cheesecake is Your New Favorite Healthy Cheesecake Dessert
- Gathering Ingredients for Your Ultimate Baked Protein Cheesecake
- How to Prepare the Baked Protein Cheesecake Instructions
- Tips for the Best Cottage Cheese Cheesecake Recipe Success
- Variations: Making Your Protein Cheesecake Fit Your Diet
- Storage and Reheating Instructions for Your Protein Cheesecake
- Frequently Asked Questions About This High Protein Cheesecake Recipe
- Estimated Nutritional Data for Your Macro Friendly Cheesecake
- Share Your Satisfying Protein Snax Creation
Why This Baked Protein Cheesecake is Your New Favorite Healthy Cheesecake Dessert
When I set out to make this, I wasn’t aiming for just ‘good for a protein dessert.’ I wanted it to rival the real deal—that velvety, rich indulgence you remember. This Protein Cheesecake manages to do it all!
- It delivers massive satisfaction while perfectly supporting your fitness roadmap. I know how much you watch those numbers, so I made sure this was balanced.
- It’s incredibly light on sugar and fat compared to a classic version, meaning you get that sweet fix without the major guilt trip later.
- The texture is unbelievably smooth. Seriously, I’ll never go back to heavier versions for my day-to-day dessert!
If you’re looking for something that truly satisfies, check out my creamy cheese grits recipe too—sometimes comfort food just needs a little twist!
Macro Friendly Cheesecake: 35g Protein Per Serving
I made sure the math was exciting here! Every single slice of this recipe clocks in at a whopping 35 grams of protein. That’s more protein than most standard protein bars, packed into a delicious, baked dessert. This is truly the definition of a Macro Friendly Cheesecake that lets you finish the day strong, nutritionally speaking.
Achieving Creamy Protein Dessert Texture Without Full Fat
How do we get that rich melt-in-your-mouth feel without using a full brick of cream cheese? That’s where my nutrition background comes in handy! We use a powerhouse pairing of well-drained cottage cheese and non-fat Greek yogurt. These ingredients lend body and that wonderful tang associated with classic cheesecake, resulting in a phenomenal Low Calorie Cheesecake that feels anything but light!
Gathering Ingredients for Your Ultimate Baked Protein Cheesecake
Okay, now that we know this recipe is going to be amazing for our fitness goals, let’s talk about what you need to pull this off. Listen, the texture of this dessert hinges entirely on the quality and preparation of your dairy! I’ve learned over the years that using the right blend of ingredients is non-negotiable if you want that smooth, authentic finish, especially when we are cutting back on traditional cream cheese.
I highly recommend taking a look at my recipe for lasagna with cottage cheese if you want to see how versatile drained cottage cheese can be outside of dessert! Now, let’s get your ingredients lined up perfectly.
Crust Ingredients Clarity
We are keeping the crust simple, gluten-free, and low-carb to start this treat off right. Measure these out carefully—it makes a big difference when you press it down!
- 1 cup almond flour. Make sure this is finely ground!
- 1/4 cup zero-calorie sweetener blend—I mean an erythritol/monk fruit combo works best for that real sugar taste.
- 4 tablespoons melted coconut oil. Don’t melt it completely until it’s hot, just soft enough to pour easily.
The Creamy Filling Components for Protein Cheesecake
This is where the magic happens! The combination of cottage cheese and Greek yogurt is our secret weapon for achieving high protein content without sacrificing that delightful, creamy protein dessert texture. Remember what I said about needing to drain the dairy? Pay extra attention here!
- 16 ounces low-fat cottage cheese, drained really, really well. Seriously, use a fine-mesh sieve or cheesecloth for this!
- 1 cup plain non-fat Greek yogurt. It needs to be plain; we control the sweetness!
- 1/2 cup vanilla whey or casein protein powder. If you can swing it, casein mimics that thick cream cheese mouthfeel better, so I always recommend that first!
- 1/2 cup zero-calorie sweetener blend (yes, the same one for the crust).
- 2 large eggs—these are vital for binding it all together when baked.
- 1 teaspoon vanilla extract and just a tiny pinch of salt to make all those sweet and tangy flavors pop.
How to Prepare the Baked Protein Cheesecake Instructions
Alright, friends, putting this unbelievable Protein Cheesecake together is surprisingly simple, but the timing is everything! Since we’re baking, we need to respect the temperature changes—that’s how we lock in the smooth texture and avoid those dreaded surface cracks. I’m going to walk you through my exact process, focusing on the blending technique because that’s where amateur results turn into something truly spectacular. Don’t rush the cooling phase; trust me, your patience pays off here!
For some inspiration on meals that fit this healthy lifestyle when you aren’t baking, pop over and check out my quick and easy weeknight dinners!
Step 1: Crust Preparation and Pre-Bake for Baked Protein Cheesecake
First things first, get that oven warming up to 325°F (160°C). While it heats, take your springform pan—I use a 7-inch one for the perfect thickness—and grease it lightly or just line the bottom with parchment. Now, mix your crust ingredients: the almond flour, the 1/4 cup sweetener, and the melted coconut oil. You just want it to look like wet sand. Press that mixture firmly and evenly into the bottom of the pan. Don’t get shy; press it down well! Pop that crust into the hot oven for just 8 minutes until it smells slightly toasted. Pull it out and let it chill while you make that incredible filling.
Step 2: Creating the Smooth Filling Base
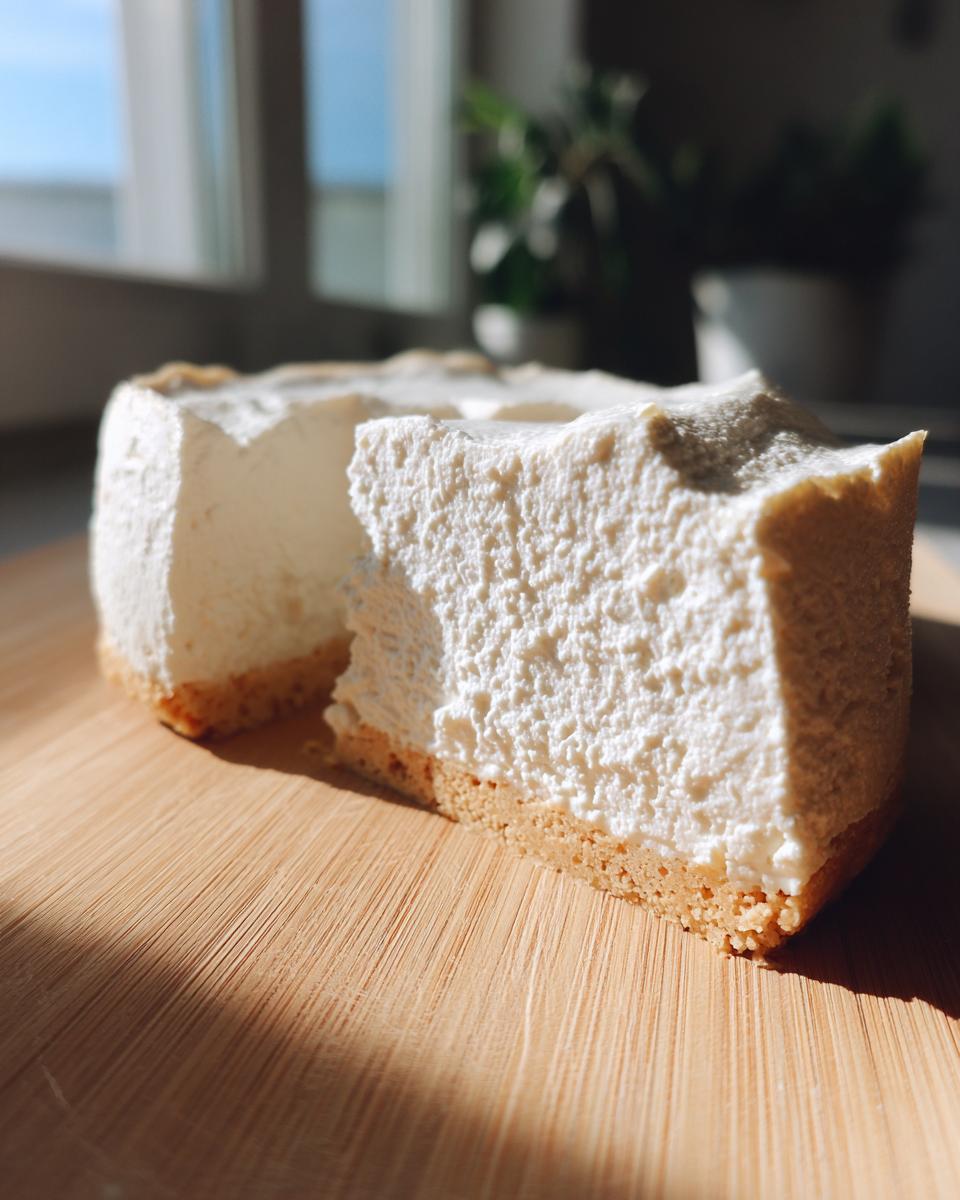
This is the most important part for creaminess! Get your food processor or a serious blender out. Add your well-drained cottage cheese and Greek yogurt first. You need to blend this combination until it is absolutely, 100% silky smooth. Stop and scrape down the sides about three times! Once it looks like thick, smooth cream, add your protein powder, the remaining sweetener, eggs, vanilla, and salt. Pulse this just until everything is incorporated and uniform. Stop blending the minute it looks good—over-mixing after the eggs are in can actually incorporate too much air, which leads to cracking!
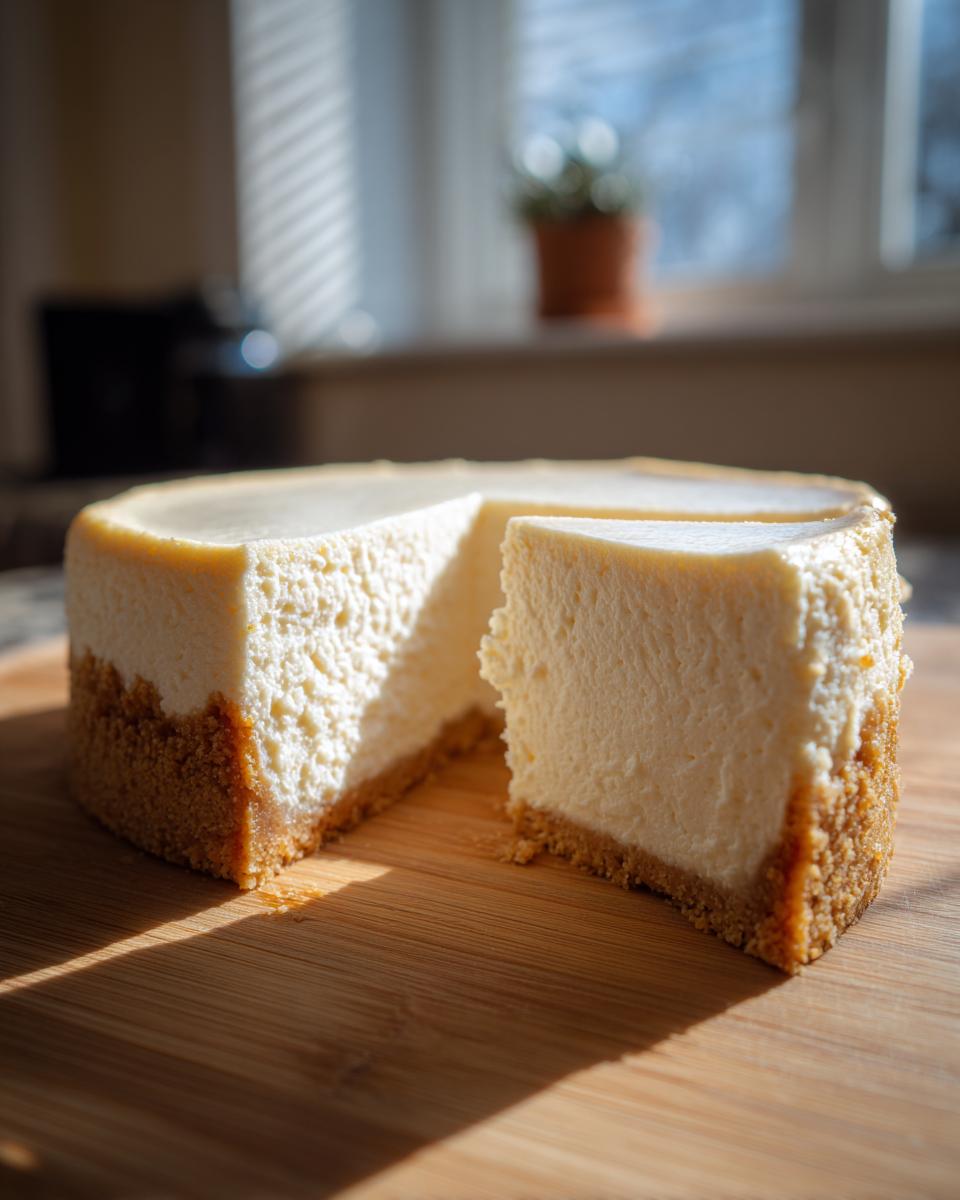
Step 3: Baking and Slow Cooling to Prevent Cracks
Gently pour that beautiful, smooth filling right over your pre-baked crust. Slide it into the oven and let it bake for about 45 to 55 minutes. You are looking for the edges to look firm and set, but the very center still needs to have a tiny, mesmerizing wobble to it when you gently nudge the pan. Once it looks right, turn the oven completely off. Here is the golden rule: crack the oven door open just a tiny bit and leave the cheesecake inside that warm environment for a full hour. This slow, gradual cooldown is absolute magic for preventing those sad surface cracks!
Tips for the Best Cottage Cheese Cheesecake Recipe Success
We’ve gotten through the big steps, but I want to share two little secrets that separate a decent Cottage Cheese Cheesecake Recipe from one you brag about to everyone. Since we aren’t using the full fat of traditional cream cheese, we have to be a little more mindful about handling our dairy substitutes. These tips are things I learned the hard way—trust me, nobody wants a soupy dessert!
If you ever need a dense, moist treat that bakes perfectly, my moist date and nut bread is another winner that relies on good moisture control!
The Essential Step: Draining Dairy for Your Protein Cheesecake
I cannot stress this enough: if you skip the draining step for the cottage cheese, your Protein Cheesecake will weep liquid all over the plate. When I first tried this recipe years ago, I thought, “It’s probably fine if it’s just a little damp.” Big mistake! It came out looking more like a ricotta pudding than a cheesecake. You need to get rid of that excess water so the protein powder and eggs have something solid to grab onto. Line a sieve with cheesecloth, add your cheese, and let it sit over a bowl in the fridge for at least an hour before blending.
Protein Powder Choice for a Better Texture
When you’re making a traditional cheesecake, texture comes from the fat in the cream cheese. Here, we are relying on the texture of the powder itself. If you have the option between whey and casein, always reach for casein powder for this recipe. Whey works fine—I’ve used it plenty of times—but casein absorbs liquid much better, giving you a denser, more structured mouthfeel that mimics true cheesecake beautifully.
Variations: Making Your Protein Cheesecake Fit Your Diet
One of the best things about building a fantastic base recipe, like this marvelous Protein Cheesecake, is how easily it adapts! Since I built this foundation to be naturally low in sugar and fat, it’s already rocking the goals for many of you, but we can tweak it even further. Whether you need portion control for meal prep or want to lean into a specific flavor profile, this recipe is wonderfully flexible. It’s already naturally a fantastic Gluten Free Cheesecake because we use almond flour, but let’s look at maximizing your healthy treat potential!
If you’re looking for something super fast for those busy afternoons, you might adore my moist chocolate mug cake recipe—it’s instant gratification!
Creating Mini Protein Cheesecakes for Portion Control
Okay, self-control is tough, I get it! Cheesecake feels best when you can just grab one perfectly portioned slice, right? That’s why making these into Mini Protein Cheesecakes is one of my favorite hacks. Instead of using that 7-inch springform pan, grab a standard muffin tin and line it with paper liners. Divide your batter evenly among the cups. Because they are smaller and thinner, they cook much faster. You’ll only need about 20 to 25 minutes in the oven, not the full 50. They are perfect for grabbing straight from the fridge for a quick, satisfying snack!
Flavor Swaps for a Sugar Free Protein Dessert
If you want a slightly different taste profile for your Sugar Free Protein Dessert, getting adventurous with the filling is easy. You do not need to change the sweetener amount at all, which is great because we want to keep that perfect sweetness level locked in.
- For a bright, tangy flavor, try adding the zest of one whole lemon to the filling mixture right before the final blend.
- If you’re feeling chocolatey, whisk in about two tablespoons of unsweetened cocoa powder along with your protein powder. It moves this toward a Keto Friendly Protein Dessert profile depending on your sweetener choice, and it tastes unbelievably rich!
Storage and Reheating Instructions for Your Protein Cheesecake
You’ve poured your heart into baking this beautiful, high-protein treat, so now we have to make sure it lasts! Since this recipe relies on yogurt and cottage cheese rather than heavy cream cheese, structure is key, and that structure only sets up properly in the cold. If you’re tempted to slice into it right after it cools down on the counter, I’m going to gently stop you right there! Proper chilling isn’t just about temperature; it’s essential for flavor development too. It lets all those subtle vanilla and sweet notes really meld together beautifully.
When you’re ready for the next batch of baked goods, make sure you check out my easy crusty Italian bread recipe—sometimes you just need something savory after all that sweet!
Best Practices for Chilling and Serving
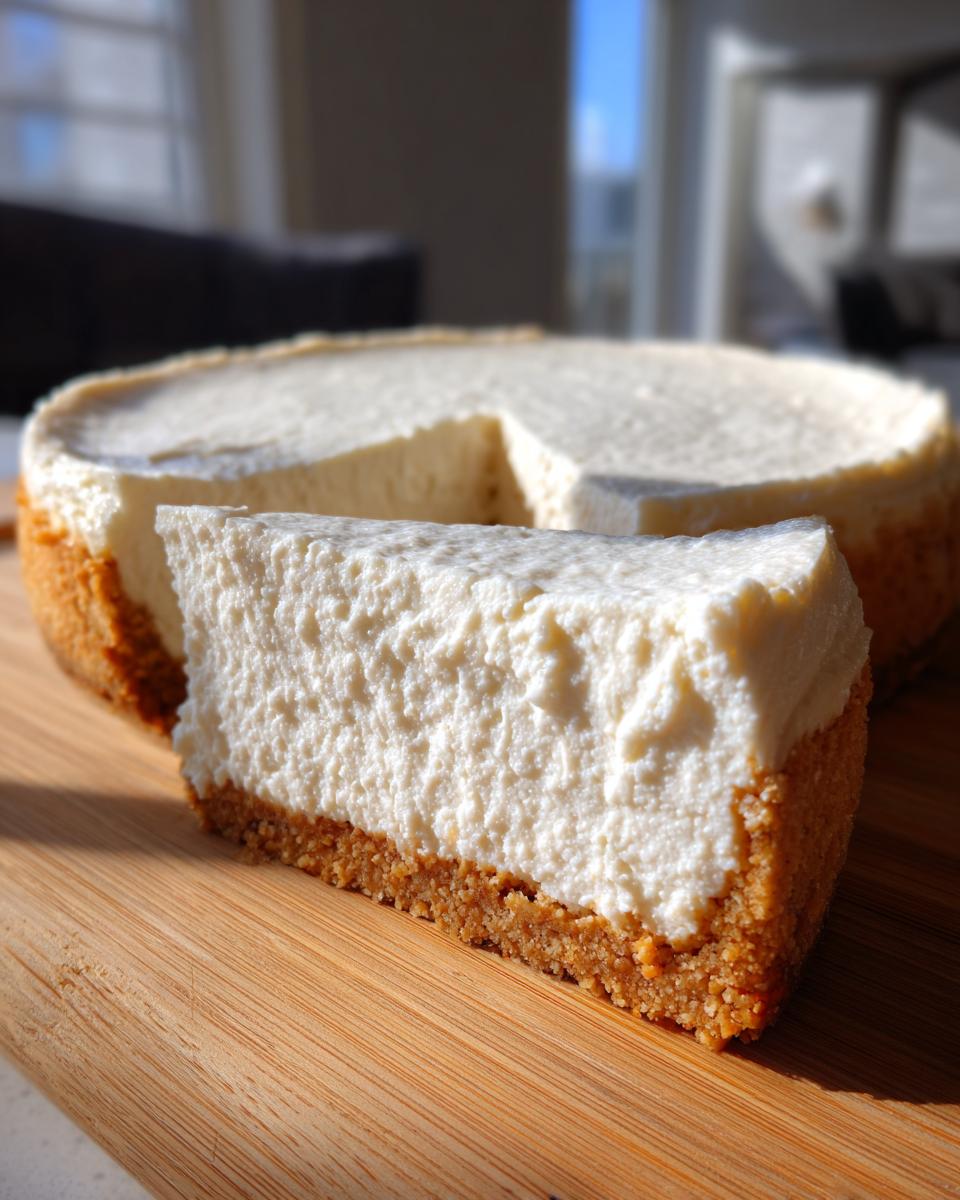
Listen, you must refrigerate this cheesecake for a minimum of six hours, but honestly, overnight is where it truly shines. When it sets up overnight, the texture becomes firm enough that you can cut clean slices, and the flavor deepens significantly. Think about it—the flavors get to hang out and get acquainted in the cold! When you store it, keep it covered tightly in the springform pan—or transfer it gently to an airtight container once it’s set. This keeps it fresh in the fridge for up to five days. If you freeze individual slices tightly wrapped, it keeps well for about a month!
Frequently Asked Questions About This High Protein Cheesecake Recipe
I get so many questions when people see just how much protein is packed into this recipe, and honestly, I love talking shop! It just shows how dedicated you all are to enjoying delicious food that fits your lifestyle. Here are some of the things I hear most often about making this great High Protein Dessert.
If you’re looking for some easy savory meal ideas to balance out all this sweet goodness, don’t forget to check out my easy oven-baked BBQ chicken recipe!
Can I make this recipe into a No Bake Protein Cheesecake?
That’s a great thought! While this particular recipe is designed to be baked—and that baking process is what sets the protein powder and dairy just right—you certainly could adapt it. However, for a true No Bake Protein Cheesecake, you’d need something to take the place of the eggs setting the structure. I usually recommend adding a stabilizing agent like gelatin or a bit more cold cream cheese (if you aren’t worried about cutting the fat!) to help it firm up in the fridge. This recipe relies on that oven time, so be ready to switch up your technique significantly if you go the no-bake route!
What is the best way to sweeten this Protein Cheesecake without sugar?
For this recipe, I swear by the bulk zero-calorie sweetener blend—you know, the erythritol or monk fruit mix. It measures almost exactly like sugar and doesn’t leave that weird, chalky aftertaste that some sweeteners can give you. If you are making this as a Sugar Free Protein Dessert, stick to swapping the sweeteners cup-for-cup. If you prefer to use pure stevia drops instead, you’ll need to start small, maybe 1/2 teaspoon, dissolve it in the vanilla extract first, taste the filling mix, and then slowly add more drops until you hit the right sweetness level for you. It takes tiny amounts!
How do I ensure my Protein Cheesecake is Low Calorie Cheesecake?
The beauty of this entire setup is that it’s inherently a Low Calorie Cheesecake option because of the ingredients we chose! We ditched the traditional heavy cream cheese entirely and went with low-fat cottage cheese and non-fat Greek yogurt. Plus, using almond flour in the crust instead of graham crackers saves a ton of calories. If you look at the nutritional breakdown I listed below, you’ll see it comes in at only 245 calories per slice! As long as you don’t slather it with a sugary topping, you are hitting those lower-calorie goals easily. Always remember you can see another fantastic recipe example over at Katie’s site for comparison if you want another perspective!
Estimated Nutritional Data for Your Macro Friendly Cheesecake
Now, let’s look at the numbers, because knowing what goes into your body is just as important as knowing how it tastes! Since I’m a nutritionist at heart, I know you want that transparency. I calculated the nutrition based on using the low-fat cottage cheese and non-fat Greek yogurt specified in the ingredients. Remember, if you swap out protein powders or use different sweeteners, these numbers might shift just a tiny bit, so take this as a super close guideline for your Macro Friendly Cheesecake.
If you’re looking for more ways to keep your morning fuel tasting great, check out my tips for healthy breakfast ideas!
Here is the breakdown per serving (one slice):
- Serving Size: 1 slice
- Calories: 245
- Protein: 35g (Can you believe that number?!)
- Fat: 9g (Mostly healthy fats from the almond flour and coconut oil)
- Carbohydrates: 12g (Keep that fiber in mind!)
- Sugar: 4g (Naturally occurring from the dairy)
- Saturated Fat: 4g
- Unsaturated Fat: 5g
- Fiber: 2g
- Cholesterol: 65mg
See? That’s proof that you can absolutely enjoy a big, satisfying slice of baked dessert without derailing your fitness plan. It truly is a light, yet incredibly filling treat.
Share Your Satisfying Protein Snax Creation
Now that you’ve gone through all the steps, I am just bursting with excitement to hear what you think! Seriously, making this Protein Cheesecake felt like a genuine breakthrough for me, and I hope it becomes a staple in your kitchen too. Baking always feels like community work, even when you’re doing it alone!
Did you manage to get that incredible 35-gram protein hit per slice? What toppings did you use, or did you stick to the simple cooling method? Please don’t leave me hanging!
I truly want you to leave a rating right here on the recipe card—those stars mean the world to me and help other busy cooks find reliable recipes. If you snapped a picture of your perfectly set cheesecake using the slow-cooling method, please tag me on social media! Seeing your beautiful, macro-friendly creations fills my heart up more than you know.
If you have any lingering questions about substitutions, dairy draining, or anything else that popped up while you were baking, head over to my contact page—I love chatting about the little details that make home cooking great!
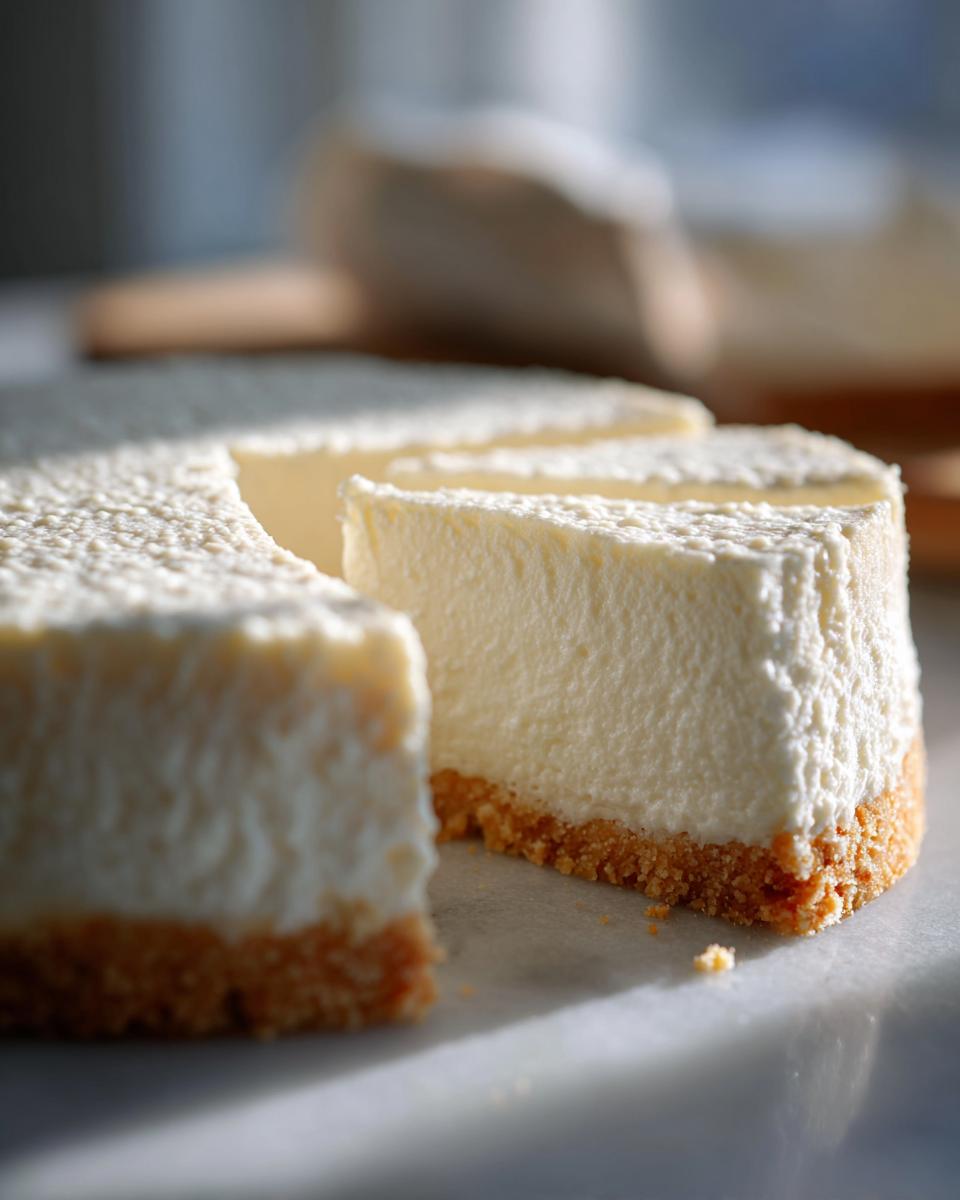
PrintUltimate Baked Protein Cheesecake (35g Protein Per Slice)

Make a creamy, satisfying baked cheesecake that supports your fitness goals. This recipe uses cottage cheese and Greek yogurt to deliver over 35 grams of protein per serving while keeping the texture rich and indulgent.
- Prep Time: 20 min
- Cook Time: 55 min
- Total Time: 7 hours 15 min
- Yield: 8 servings 1x
- Category: Dessert
- Method: Baking
- Cuisine: American
- Diet: Low Fat
Ingredients
- 1 cup almond flour
- 1/4 cup zero-calorie sweetener blend (erythritol/monk fruit)
- 4 tablespoons melted coconut oil
- 16 ounces low-fat cottage cheese, drained well
- 1 cup plain non-fat Greek yogurt
- 1/2 cup vanilla whey or casein protein powder
- 1/2 cup zero-calorie sweetener blend
- 2 large eggs
- 1 teaspoon vanilla extract
- Pinch of salt
Instructions
- Preheat your oven to 325°F (160°C). Lightly grease a 7-inch springform pan or line it with parchment paper.
- Prepare the crust: Mix the almond flour, 1/4 cup sweetener, and melted coconut oil until combined. Press this mixture firmly into the bottom of the prepared pan. Bake the crust for 8 minutes, then remove it from the oven.
- Prepare the filling: In a food processor or high-powered blender, combine the drained cottage cheese and Greek yogurt. Blend until completely smooth, scraping down the sides as needed. This step is key for a creamy texture.
- Add the protein powder, 1/2 cup sweetener, eggs, vanilla extract, and salt to the blended cheese mixture. Process until the filling is smooth and uniform. Do not overmix once the eggs are added.
- Pour the protein filling over the pre-baked crust in the springform pan.
- Bake for 45 to 55 minutes. The edges should look set, but the center should still have a slight wobble.
- Turn off the oven, crack the door open slightly, and let the cheesecake cool inside the oven for 1 hour. This slow cooling prevents cracking.
- Remove the cheesecake from the oven and let it cool completely on a wire rack.
- Cover the cheesecake and refrigerate for at least 6 hours, or preferably overnight, before slicing and serving.
Notes
- Drain the cottage cheese thoroughly using a fine-mesh sieve or cheesecloth to remove excess liquid; this prevents a watery filling.
- For a richer flavor, use casein protein powder, as it mimics the texture of cream cheese better than whey alone.
- If you prefer mini cheesecakes, divide the batter into a muffin tin lined with paper liners and reduce the baking time to 20-25 minutes.
Nutrition
- Serving Size: 1 slice
- Calories: 245
- Sugar: 4
- Sodium: 280
- Fat: 9
- Saturated Fat: 4
- Unsaturated Fat: 5
- Trans Fat: 0
- Carbohydrates: 12
- Fiber: 2
- Protein: 35
- Cholesterol: 65