
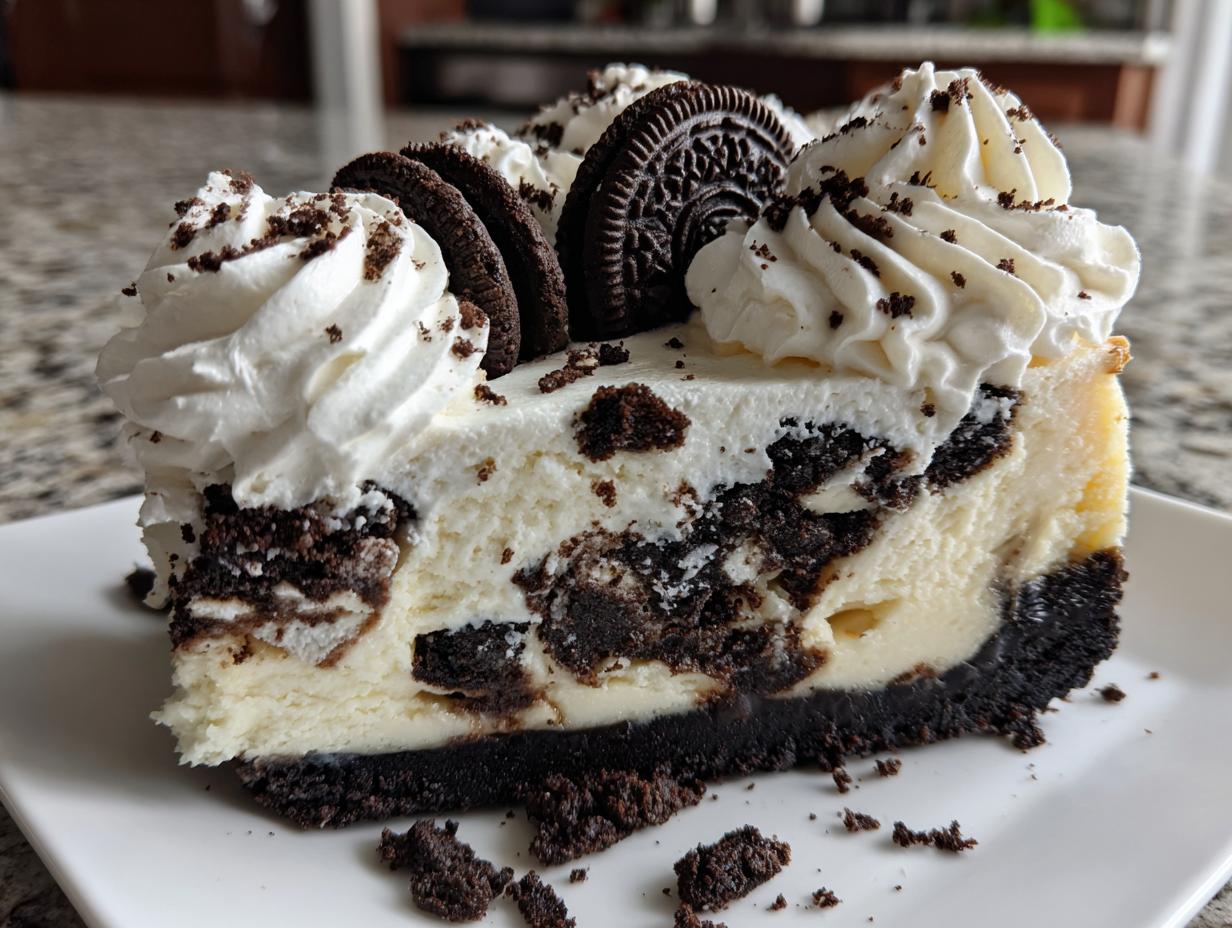
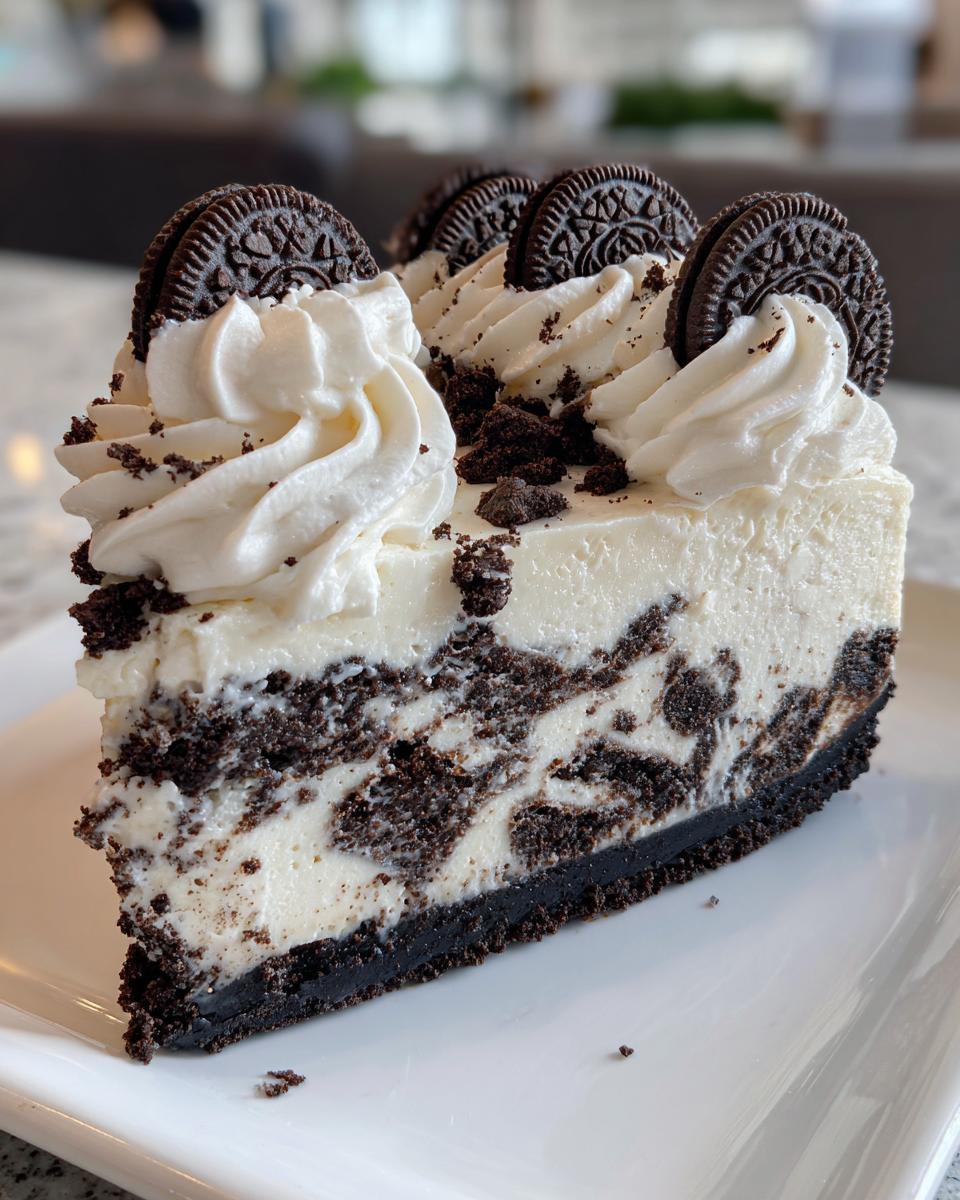
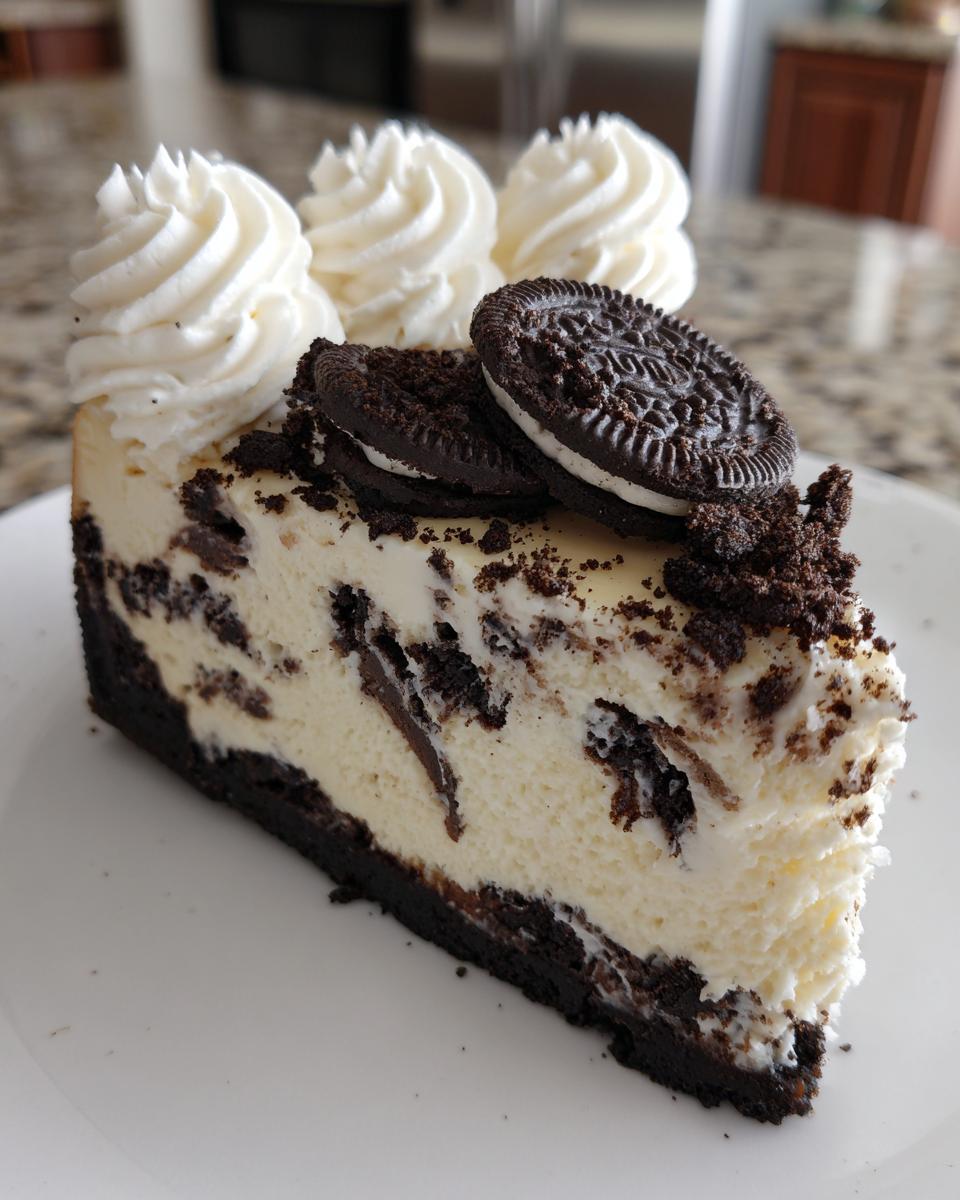
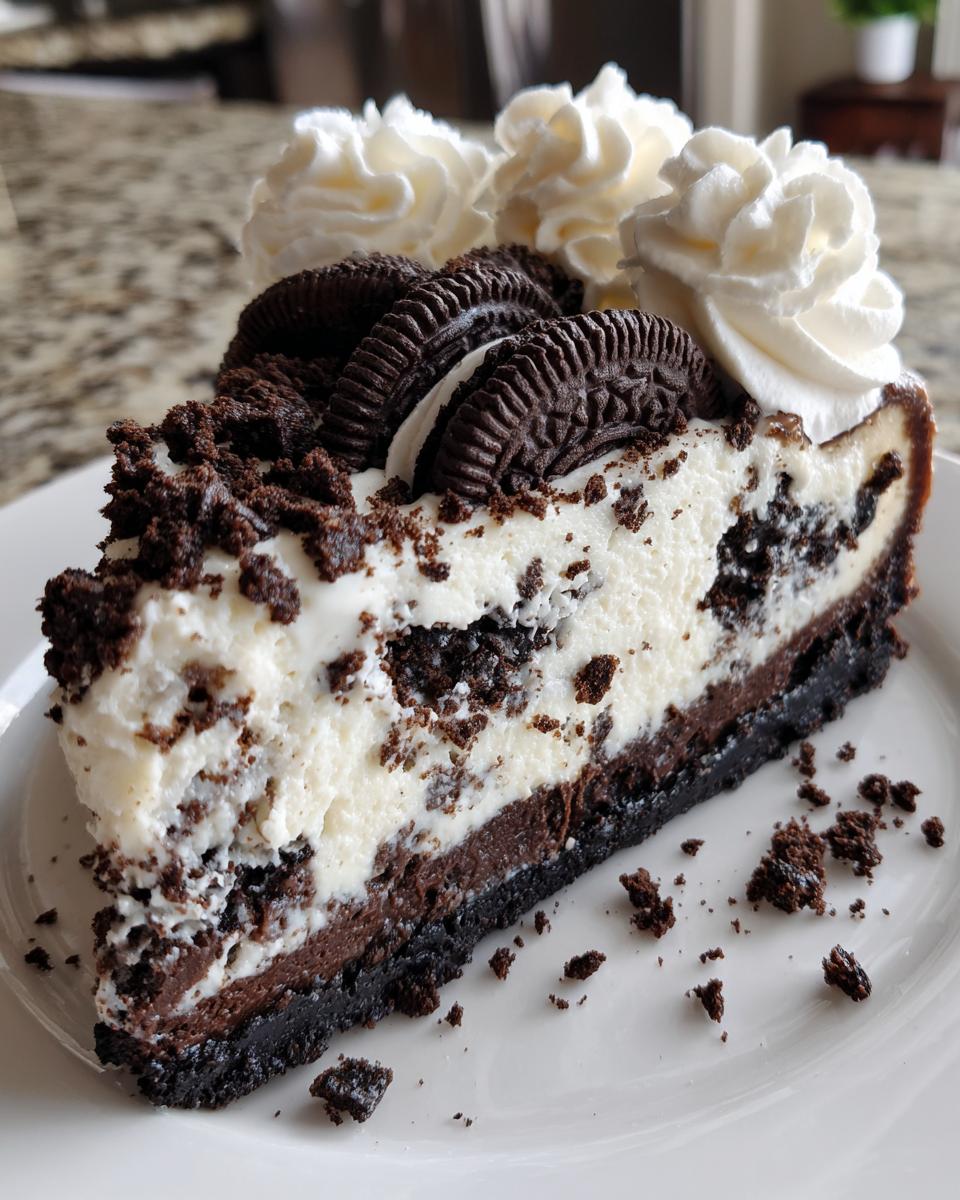
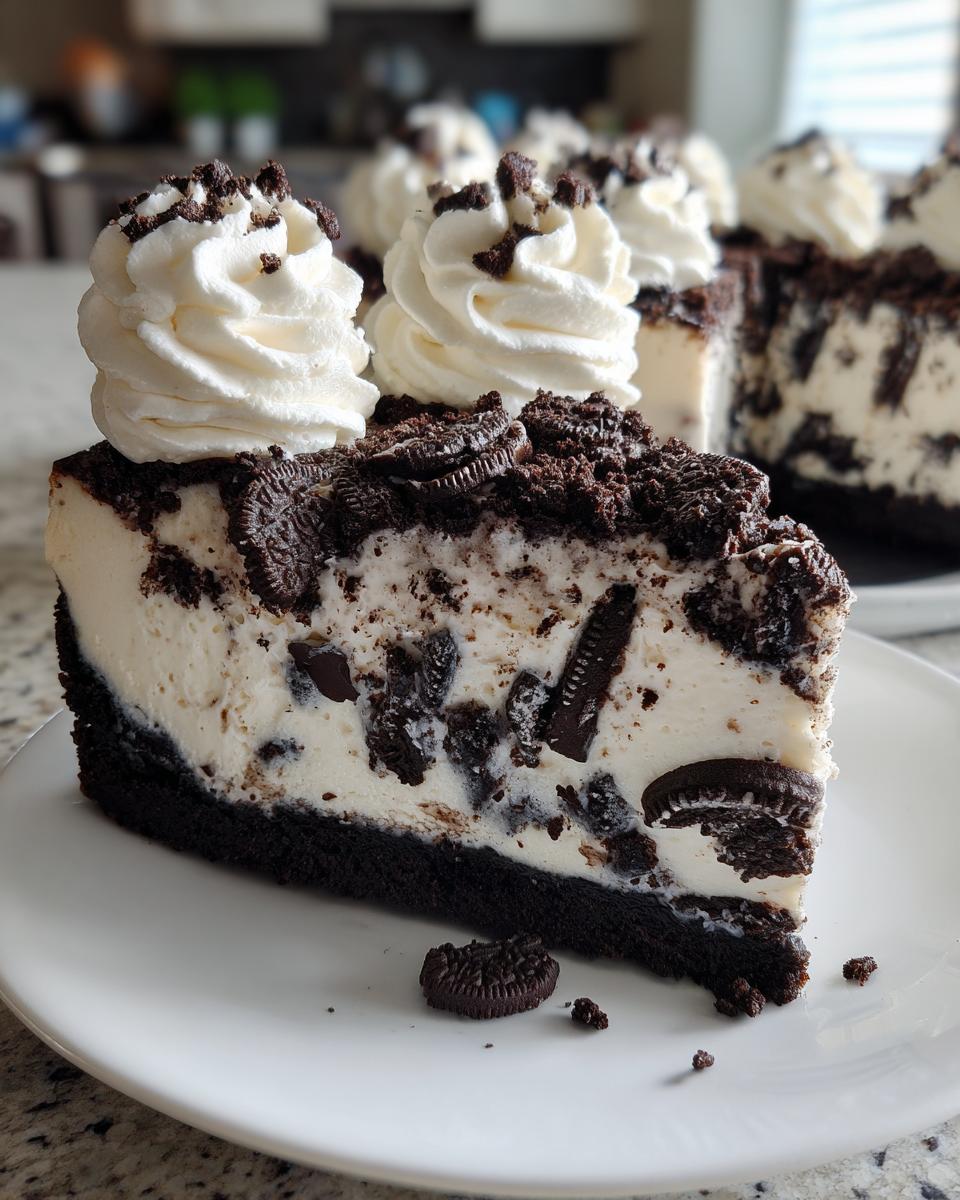
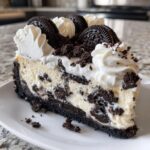
Oh, you know those desserts that just *scream* comfort? The ones that make everyone stop talking when you bring them out? For me, nothing beats a truly decadent, melt-in-your-mouth oreo cheesecake. It’s the perfect blend of creamy dairy richness and that familiar, delightful crunch of chocolate cookies.
I’m Jess Carter, and while I’ve spent years looking at the science behind food, this recipe is pure soul. This isn’t just any dessert; making this Baked Oreo Cheesecake Recipe from scratch is a little ritual in my kitchen. We use specific techniques here—like the water bath—to ensure you get that velvety smooth, absolutely crack-free texture every single time. Trust me, when family gathers, seeing this gorgeous, whole cheesecake waiting on the counter is just the best feeling. It signals celebration, connection, and a whole lot of indulgence.
We’re going all the way—from a buttery cookie crust to that cloud-like whipped topping. If you’re tired of weeping cheesecakes or sandy fillings, stick with me. We’re going to make the Best Cheesecake Recipe you’ve ever tried. Don’t forget to check out some of my other favorite delicious desserts treats while you’re here!
- Why This Baked Oreo Cheesecake Recipe Works for You
- Essential Ingredients for Your Homemade Oreo Cheesecake
- Step-by-Step Instructions for the Perfect Oreo Cheesecake
- Tips for Success Making Your Oreo Cheesecake
- Variations: Beyond the Classic Oreo Cheesecake Recipe
- Serving Suggestions for This Decadent Dessert
- Storage and Reheating Instructions for Oreo Cheesecake
- Frequently Asked Questions About Oreo Cheesecake
- Share Your Homemade Oreo Cheesecake Experience
Why This Baked Oreo Cheesecake Recipe Works for You
I get it—baking a cheesecake can feel intimidating. People worry about cracks and grainy fillings, and honestly, those fears are real if you rush it! But this specific Oreo Cheesecake Recipe is designed to skip all that frustration. It’s truly about making an Easy Oreo Cheesecake that looks like one you bought from a fancy bakery.
- It delivers that intense, Creamy Oreo Cheesecake texture we all crave, not something dense or crumbly.
- It’s sturdy enough to be one of your go-to Party Desserts, slicing beautifully every single time.
- This Homemade Oreo Cheesecake tastes richer than anything you’d buy, making it that perfect centerpiece for Family Gathering Treats.
Achieving the Creamy Oreo Cheesecake Texture
The secret sauce? Temperature control, my friends! You absolutely must use room temperature cream cheese; if it’s cold, you get lumps, and we can’t have that in a Decadent Dessert like this. Also, the water bath (that pan of hot water we bake it in) keeps the oven air moist and gentle. This stops the edges from overbaking while the center is still liquid. Then, that slow cooling inside the oven? That patience is what guarantees a silky-smooth top, letting the cheesecake set up beautifully without that awful top crack.
Essential Ingredients for Your Homemade Oreo Cheesecake
When you’re making an indulgence like this, you can’t cut corners on the key players! I’ve listed everything out, but I want to stress the importance of preparation here, because even simple ingredients need love. This Oreo Dessert Recipe relies on quality, especially for that creamy core.
For the foundation, we’re using Oreos—about 1 3/4 cups of crushed cookies—mixed with just a little bit of melted butter. Don’t use the cream filling from the cookies here; we want that pure, dark chocolate crunch!
Now for the filling itself. Make sure you have three full bricks (8 ounces each!) of cream cheese, and they absolutely must be softened. I mean fully room temperature soft, or you’ll end up with lumps, and we want this cheesecake smooth as silk. We layer in sugar, vanilla, and sour cream for tang, then the four eggs must go in one by one.
My favorite part? Folding in that final cup of Oreos. They need to be roughly chopped. I don’t want dust; I want chunky bites of chocolate cookie distributed throughout. If you love my fudgy recipes, check out my tips for getting that perfect set when making fudgy Oreo brownies!
Finally, the topping is easy peasy: heavy whipping cream, powdered sugar, and vanilla whipped up until you get those beautiful stiff peaks. Don’t forget the extra cookies for sprinkling on top for the final flourish!
Step-by-Step Instructions for the Perfect Oreo Cheesecake
Okay, let’s get down to business! Making this oreo cheesecake is all about following a few non-negotiable steps, especially when we are aiming for that restaurant-quality, ultra-creamy result. I swear, if you follow the baking and cooling instructions exactly, you save yourself so much heartache later. Once you master this technique, you’ll want to try my classic New York-style cheesecake next!
Preparing the Oreo Cookie Crust Recipe
First things first: get that oven preheated to 350°F (175°C). Since we are serious about moisture control, grab your 9-inch springform pan and wrap the outside bottom and sides super tightly with heavy-duty foil. Yes, twice! This is for the water bath later, and you don’t want any leaks. While that heats up, mix your Oreo crumbs and melted butter together. Press this mixture *firmly* into the bottom of the pan. I use the bottom of a measuring cup to really pack it down tight—a loose crust tends to crumble when you serve it! Pop that base into the oven for just 10 minutes. Then pull it out so it can cool just a touch while we mix the filling.
Mixing the Creamy Oreo Cheesecake Filling Ideas
This is where we build that luxurious texture! Start beating your softened cream cheese until it’s fluffy and there isn’t a single lump to be seen. Then slowly stream in the sugar, beating until it’s beautifully mixed. Now, add the vanilla and sour cream. Here comes the most important part for avoiding cracks: add those four large eggs *one at a time*. I mean it—low speed, just until the yellow disappears, then stop the mixer and scrape the bowl before adding the next one. Why? If you beat air into the eggs, the cheesecake will puff up too much in the oven and then deflate and crack later. Do not overmix!
When it looks perfectly smooth, gently fold in your roughly chopped Oreo cookie pieces. You want those chunks distributed, not pulverized.
Baking and Slow Cooling Your Baked Cheesecake
Time for the magic water bath, which is essential for that professional creamy cheesecake finish. Place your foil-wrapped springform pan inside a big roasting pan. Carefully pour boiling water into the roasting pan until it comes halfway up the sides of the cheesecake pan. Slide the whole setup into the oven to bake for about 55 to 65 minutes. You know it’s done when the edges look set, but the very center still has a tiny wobble when you gently nudge the pan.
Now, resist the urge to pull it out! Turn the oven off completely, crack the door open just a little bit—maybe sticking a wooden spoon in the crack—and let the cheesecake sit in that cooling oven environment for a full hour. This slow acclimatization is my biggest tip for keeping the surface pristine and crack-free.
Finishing and Chilling the Oreo Cheesecake
Once that hour in the oven is up, remove the pan from the water bath, take off the foil, and let it cool completely on a wire rack. Once it’s reached room temperature, cover it up and send it to the fridge. You absolutely must chill this for at least 6 hours, but honestly, overnight is when this Oreo Cheesecake truly sets up perfectly. Right before you serve it, whip up your quick topping—heavy cream, powdered sugar, and vanilla until you get those firm, beautiful stiff peaks.
Spread that whipped cream lovingly over the top, scatter a few extra OREO pieces on top for flair, and then carefully release the sides of the springform pan. Slice and watch the happy faces!
Tips for Success Making Your Oreo Cheesecake
Even with the detailed instructions, sometimes little things can throw off your Homemade Oreo Cheesecake. I want to make sure you feel totally confident, so here are a few extra nuggets of wisdom I’ve picked up over the years of testing this recipe for perfect results every time.
I’m going to repeat this because it’s so important for a Creamy Oreo Cheesecake: room temperature cream cheese is non-negotiable. If you try to rush it and the cheese is still cold off the counter, your batter will look curdled, and beating it longer just means you’re whipping in too much air, which leads straight to cracking. Let it sit out for at least an hour, or microwave it gently in 10-second bursts, stirring in between, until it yields easily to a finger press.
To keep that beautiful crust locked in place, try this trick: after pressing the crumb mixture into the pan, place the springform pan (without batter) in the freezer for 15 minutes before you initially bake it. This firms up the butter and crumb structure just enough so it doesn’t shrink or lift when the liquid filling hits it. It’s a small step that really helps secure that base!
And speaking of those dreaded cracks—we talked about the water bath and slow cooling, but here’s one more thing that really helps manage the environment: don’t open the oven door to peek during the main bake time! Seriously! Every time you open that door, you lose heat and let cooler, dry air rush in, which shocks the top surface. Trust the cook time, trust the jiggle test, and resist the urge to look!
If you love creamy texture but need something faster, you might want to skip baking altogether and look into my creamy cheesy twice-baked potatoes for a savory idea, or perhaps try the No-Bake variation on this cheesecake. No baking means no worrying about cracks!
Variations: Beyond the Classic Oreo Cheesecake Recipe
I absolutely love this base oreo cheesecake recipe because it’s just begging to be jazzed up! While the classic look is amazing for Family Gathering Treats, sometimes you need a little sprinkle of something different. Don’t worry, you don’t need a whole new recipe—just a fun swap! These little tweaks make it feel brand new for your next gathering.
First off, let’s talk cookies. If you just can’t get enough chocolate, why not switch out those classic Oreos for something different in the crust and filling? You could easily substitute Golden Oreos for a lighter, vanilla-forward base—that makes for a stunning contrast against the cream cheese! Or, if you’re feeling super deep and dark, try using a chocolate wafer cookie instead of Oreos entirely. It makes the crust extra dense and almost brownie-like.
Another huge crowd-pleaser, especially if you love intense chocolate flavor, is swapping out our simple whipped cream topping for a gorgeous chocolate ganache. Honestly, pouring homemade ganache over a cold, baked cheesecake is pure magic. Just heat heavy cream until simmering, pour it over high-quality chopped dark chocolate, let it sit for five minutes, then whisk gently until perfectly smooth. Drizzle that over the top instead of the whipped cream and watch your guests swoon! For more amazing flavor combinations, I have a wonderful chocolate chip cheesecake bar recipe that might inspire you too.
And if you’re making this specifically for a crowd and want individual portions—hello, Mini Oreo Cheesecakes! You can bake this exact recipe in lined muffin tins. Just reduce the baking time significantly, probably down to 18 to 20 minutes max. They look so cute and serve just as beautifully as the big one, only much quicker to eat!
Serving Suggestions for This Decadent Dessert
Now that you’ve gone through all that effort for the perfect oreo cheesecake, the important question is: how do you serve it up to make it an absolute event? This oreo cheesecake is incredibly rich all on its own, but the right accompaniment can take it from delicious to legendary, especially when you are setting up for Party Desserts that people will talk about!
Because the flavor profile is so intense—that deep, dark chocolate cookie playing against the bright, tangy cream cheese—we want drinks that cut through that richness just a little bit. Coffee is an absolute must. I always serve slices alongside a fresh, piping hot black coffee. The slight bitterness cleanses the palate beautifully between bites. If you want something cold, a tall glass of cold milk is just classic, simple heaven. Remember, nostalgia plays a huge part in comfort food!
If you want to dress up the plating for your Family Gathering Treats, don’t overdo it. Less is more when the star is this good. A tiny drizzle of something extra special on the side of the plate, not necessarily over the cake itself, works wonders. Have you ever tried making my easy homemade chocolate syrup recipe? It’s fantastic for drizzling just a thin accent line on the plate before setting the slice down. It looks super professional!
For a non-beverage pairing, a small bowl of fresh raspberries or strawberries on the side is perfect. The acidity and freshness of the fruit is the absolute best counterpoint to that heavy, sweet creaminess. It just brightens everything up. Trust me, put out a platter of this cheesecake with a side of fresh berries, and you won’t have a crumb left at the end of the night!
Storage and Reheating Instructions for Oreo Cheesecake
Alright, now that you’ve gone through all that effort for the perfect oreo cheesecake, we have to talk about keeping it magnificent! Unlike a regular cake, cheesecake is actually a little fragile, which is why chilling is absolutely key here. If you made this ahead of time for a crowd, you’re in luck!
The very best way to store your finished, topped cheesecake is in the refrigerator. Make sure it’s covered well—I usually use the lid that came with my springform pan if I have it, or I carefully cover the top loosely with plastic wrap, making sure the wrap doesn’t physically touch the whipped cream topping.
You absolutely need that chilling time. While the recipe says 6 hours is the minimum, I truly insist you let this set up overnight. It needs that full time for the texture to transition from just creamy to perfectly firm and sliceable. When properly stored in the fridge, this Homemade Oreo Cheesecake will stay delicious for about 4 to 5 days. It’s so rich that you probably won’t be eating it daily anyway, right?
Now, about reheating this beauty? Look, sweet friend, cheesecake just doesn’t reheat well. Heating it up usually causes the texture to break down—it gets soft, sometimes watery, and you lose all that beautiful structure we worked so hard to achieve with the water bath and slow cooling. Since this is a rich, decadent treat, it’s meant to be served cold or cool from the fridge. If you’re worried about it getting too cold straight from the fridge, just pull the slice out onto your serving plate about 20 minutes before you plan to eat it. That takes the chill off just enough so you get the best flavor without sacrificing the texture!
Frequently Asked Questions About Oreo Cheesecake
I know you might still have a couple of burning questions before you dive in! Cheesecake questions are my favorite because they usually center around achieving that perfect texture. We made this recipe to be supremely reliable, but a little extra knowledge never hurts when baking something this special!
Can I make an Easy No Bake Oreo Cheesecake instead?
Oh, absolutely! Sometimes you just don’t want to turn the oven on, especially when summer hits. If you want a truly Quick Cheesecake, you can definitely convert this. The main difference is that you skip steps 1 through 8 entirely—bye-bye water bath! For the filling, you’ll mix the softened cream cheese, sugar, sour cream, and vanilla, but instead of eggs, you’ll fold in the full cup of heavy whipping cream (whipped to stiff peaks) right at the end. Then, you just pour it over the crust and chill it for at least 8 hours. It’s a fantastic, easy alternative for a fast no-bake dessert!
How do I get a perfectly smooth, crack-free Oreo Cheesecake?
This is the million-dollar question for any Best Cheesecake Recipe, right? You want that gorgeous, even surface, not a roadmap of cracks! If you stick to the method in the instructions, you’ll be golden. There are three main things you must focus on:
- Room Temp Ingredients: Your cream cheese has to be utterly soft so it beats smoothly without any lumps from the start.
- Gentle Mixing After Eggs: Once the eggs are in, mix on low speed *just* until combined. Overmixing whips air into the batter, and that air expands, causing the structure to collapse and crack later.
- The Water Bath & Slow Cool: The water bath provides gentle, even heat, and allowing the cheesecake to cool inside the turned-off oven for an hour is the critical step for temperature stabilization.
Follow those three things, and you’re set for a beautiful, Creamy Oreo Cheesecake! If you’re aiming for that luscious slice that rivals even the best places, maybe check out how others approach the Cheesecake Factory Oreo Cheesecake Recipe for inspiration, though I promise mine is just as decadent!
Share Your Homemade Oreo Cheesecake Experience
Now that you have the roadmap for making perhaps the most incredible oreo cheesecake you’ve ever tackled, I truly want to hear about it! Cooking is a conversation, and I love knowing how these recipes turn out in your kitchens across the country. Did you manage that perfectly creamy texture? Did your family devour it in five minutes flat?
Please don’t be shy! Leave me a star rating right here on the recipe card so I know you loved this rich treat. And if you have a minute, drop a comment below. Tell me if you tried the chocolate ganache variation or stuck with my favorite simple whipped topping. Your feedback helps me make sure this is the absolute Best Cheesecake Recipe out there!
If you took a gorgeous picture of your finished Decadent Dessert—especially that first perfect slice—tag me on social media! I always feature reader creations in my stories. Seeing your success makes all the recipe testing worth it. For any tricky questions that pop up once you start mixing, you can always reach out to me directly through our contact page. Happy baking, friends!
PrintThe Ultimate Baked Oreo Cheesecake Recipe
Make this rich, creamy Oreo Cheesecake from scratch. It features a buttery Oreo crust and a luscious, velvety filling studded with crushed chocolate cookies. This recipe delivers the decadent texture you want for any celebration.
- Prep Time: 25 min
- Cook Time: 65 min
- Total Time: 8 hr 30 min
- Yield: 12 servings 1x
- Category: Dessert
- Method: Baking
- Cuisine: American
- Diet: Vegetarian
Ingredients
- 1 3/4 cups Oreo cookie crumbs (about 30 cookies)
- 1/4 cup unsalted butter, melted
- 3 (8 ounce) packages cream cheese, softened
- 1 1/2 cups granulated sugar
- 1 teaspoon vanilla extract
- 1/4 cup sour cream
- 4 large eggs
- 1 cup Oreo cookie pieces, roughly chopped
- 1/2 cup heavy whipping cream
- 1/4 cup powdered sugar
- 1 teaspoon vanilla extract
- Extra Oreo cookies, for topping
Instructions
- Preheat your oven to 350°F (175°C). Wrap the outside of a 9-inch springform pan tightly with heavy-duty aluminum foil. Boil water for a water bath.
- Prepare the crust: Mix the Oreo cookie crumbs and melted butter in a bowl until combined. Press the mixture firmly into the bottom of the prepared springform pan. Bake the crust for 10 minutes. Remove and let it cool slightly.
- Prepare the filling: In a large bowl, beat the softened cream cheese with an electric mixer until smooth. Gradually add the granulated sugar and beat until fully combined.
- Beat in the vanilla extract and sour cream until the mixture is creamy. Add the eggs one at a time, mixing on low speed just until each egg is incorporated. Do not overmix.
- Gently fold in the 1 cup of roughly chopped Oreo cookie pieces. Pour the filling over the cooled crust.
- Create the water bath: Place the foil-wrapped springform pan into a larger roasting pan. Carefully pour boiling water into the roasting pan until it reaches halfway up the sides of the springform pan.
- Bake for 55 to 65 minutes, or until the edges are set but the center still has a slight jiggle.
- Turn off the oven, crack the oven door open slightly, and let the cheesecake cool inside the oven for 1 hour. This slow cooling helps prevent cracks.
- Remove the cheesecake from the water bath and foil. Let it cool completely on a wire rack. Once cool, cover and chill in the refrigerator for at least 6 hours, or preferably overnight.
- Prepare the topping: In a small bowl, whip the heavy whipping cream, powdered sugar, and vanilla extract until stiff peaks form.
- Before serving, spread the whipped cream over the chilled cheesecake and top with extra Oreo cookies or cookie crumbs. Release the springform sides before slicing.
Notes
- For the creamiest texture, make sure your cream cheese is fully softened to room temperature before mixing.
- To prevent cracks, do not overbeat the batter once the eggs are added, and always use a water bath during baking.
- If you prefer a quicker dessert, you can make this as a No Bake Oreo Cheesecake by using 1 cup of whipped cream folded into the cream cheese mixture and chilling for 8 hours instead of baking.
Nutrition
- Serving Size: 1 slice
- Calories: 450
- Sugar: 45g
- Sodium: 320mg
- Fat: 28g
- Saturated Fat: 17g
- Unsaturated Fat: 11g
- Trans Fat: 0.5g
- Carbohydrates: 48g
- Fiber: 1g
- Protein: 6g
- Cholesterol: 95mg