
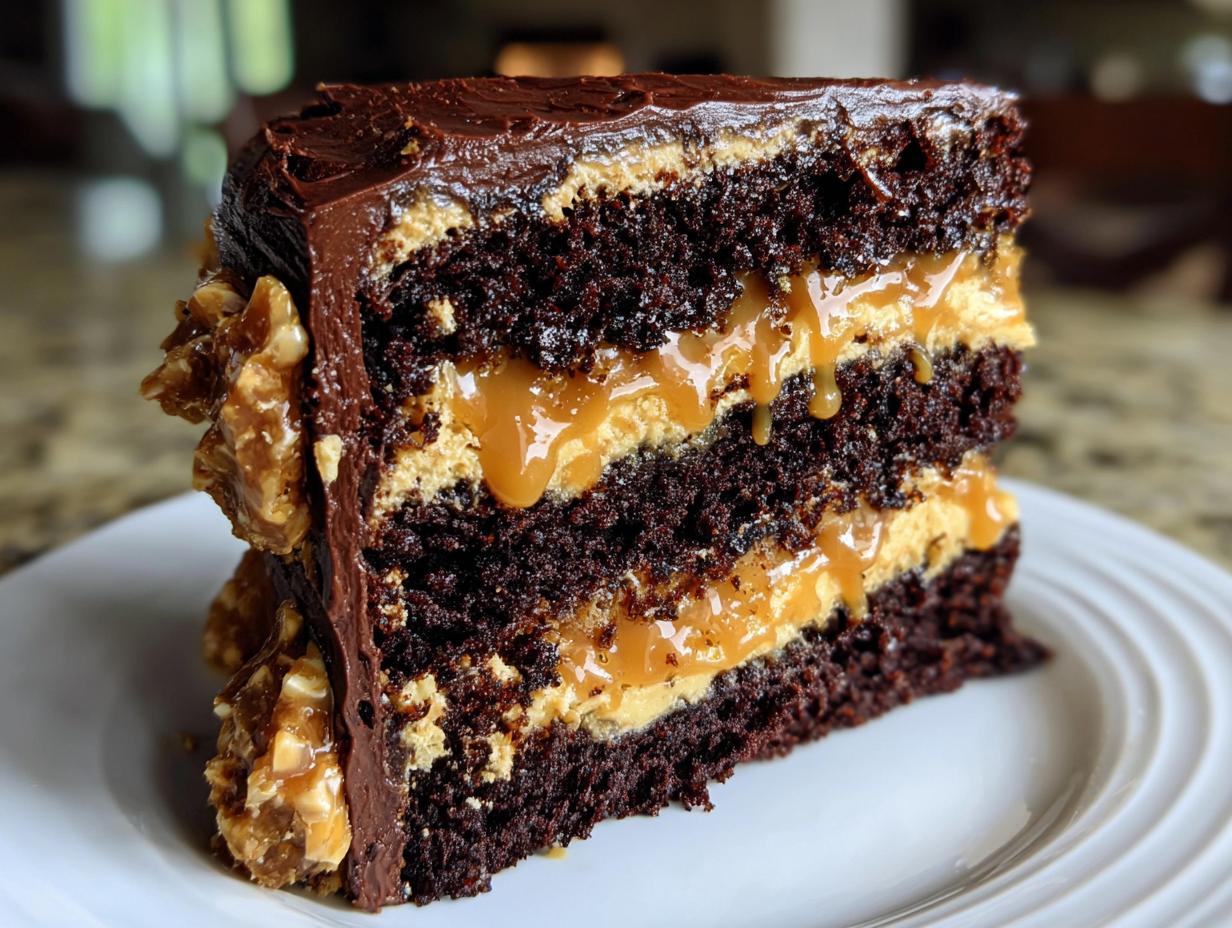
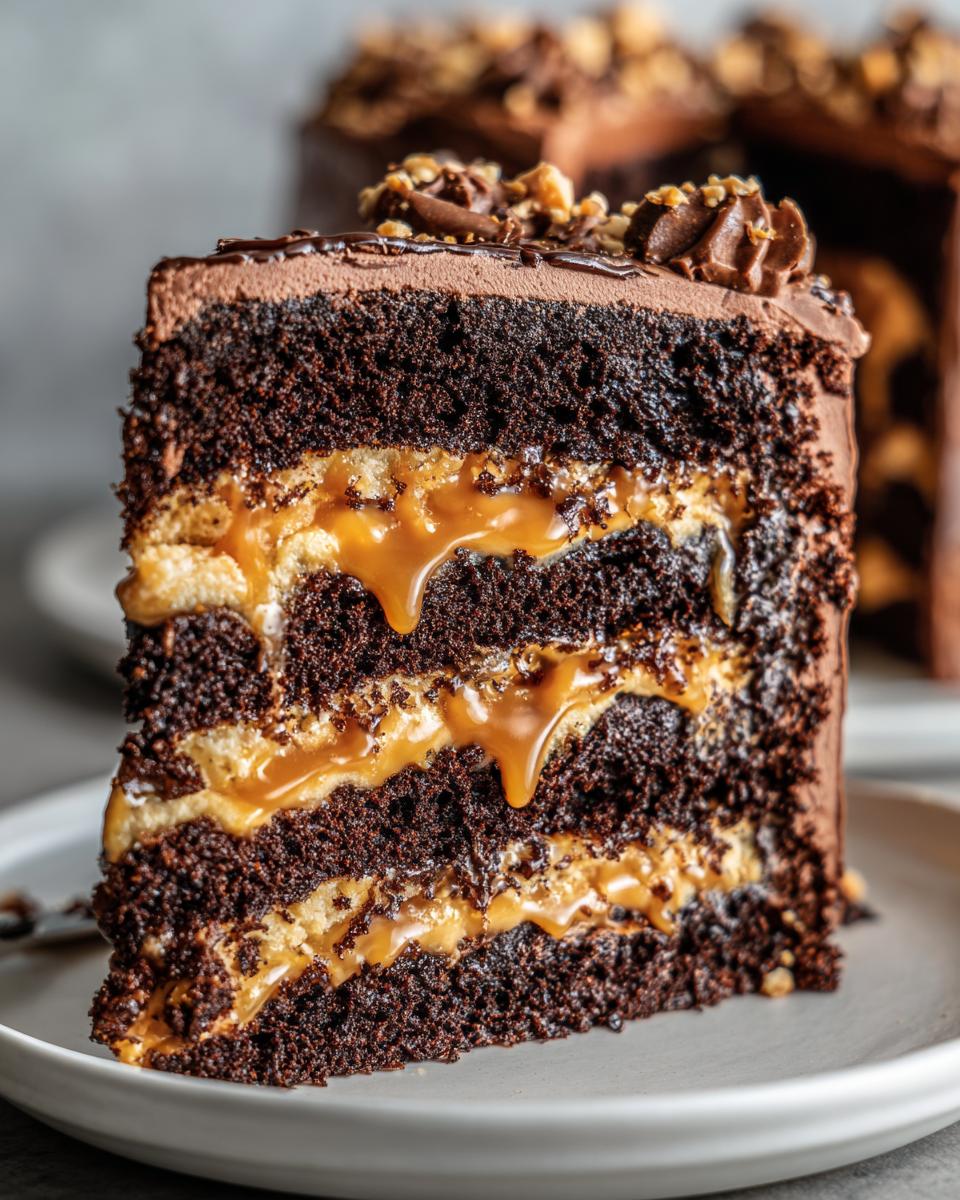
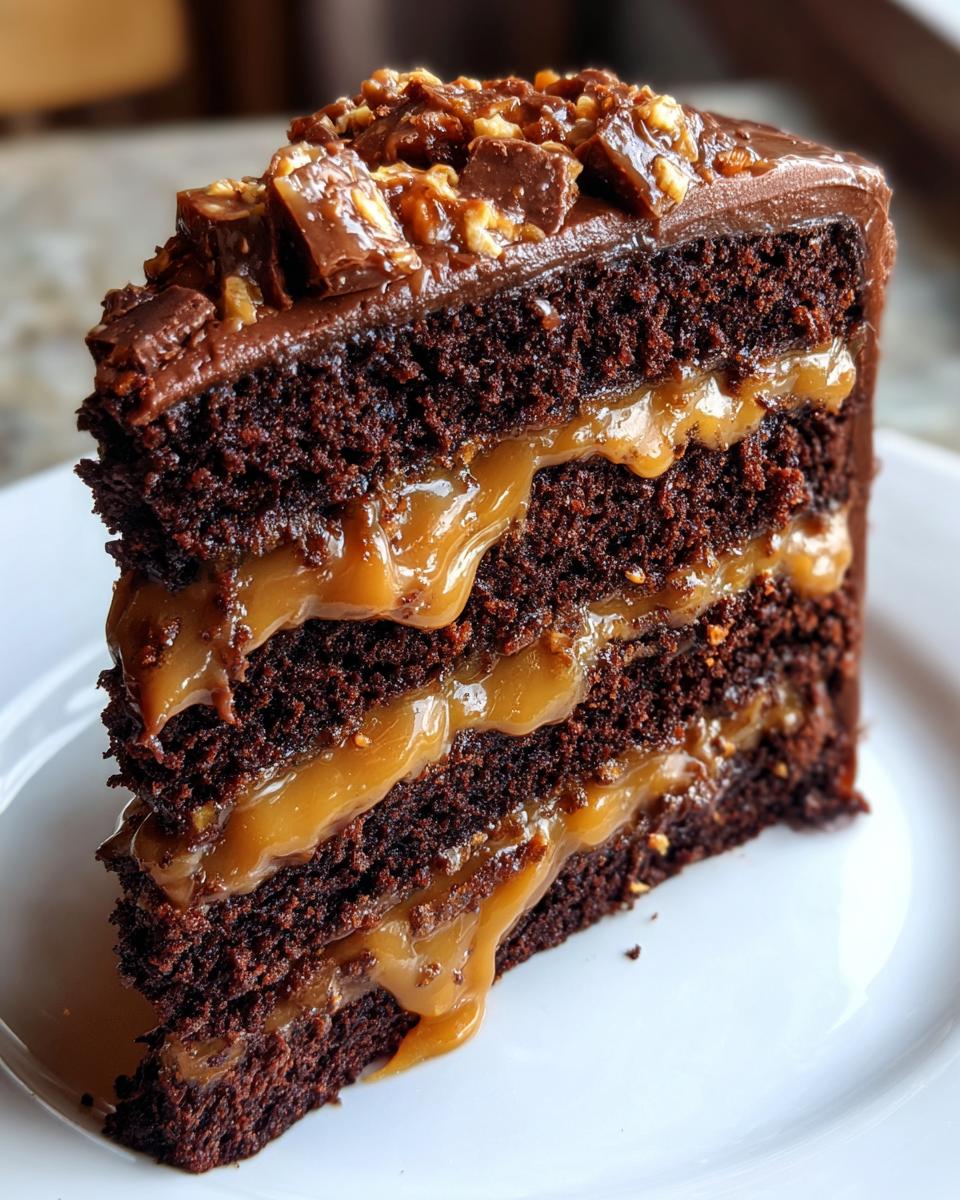
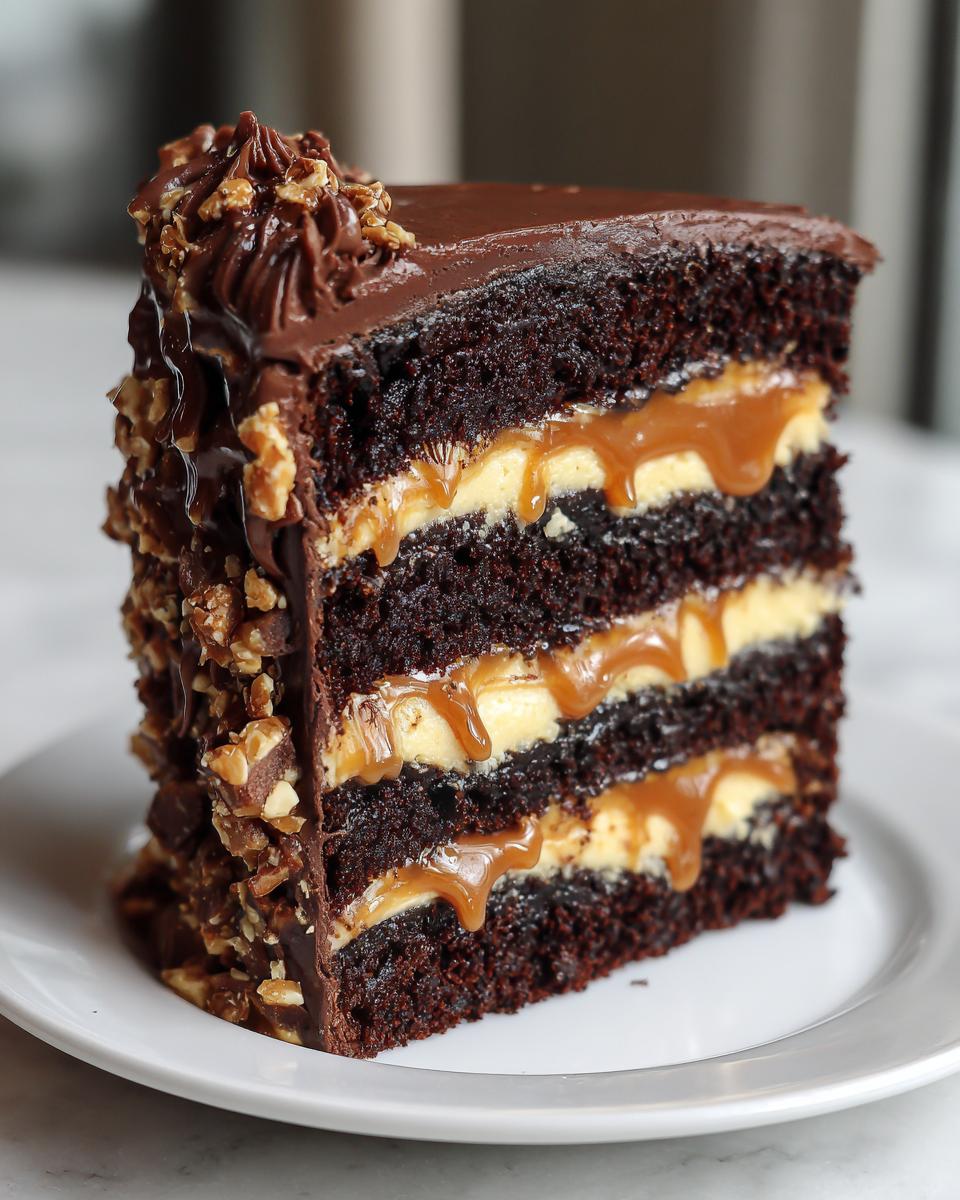
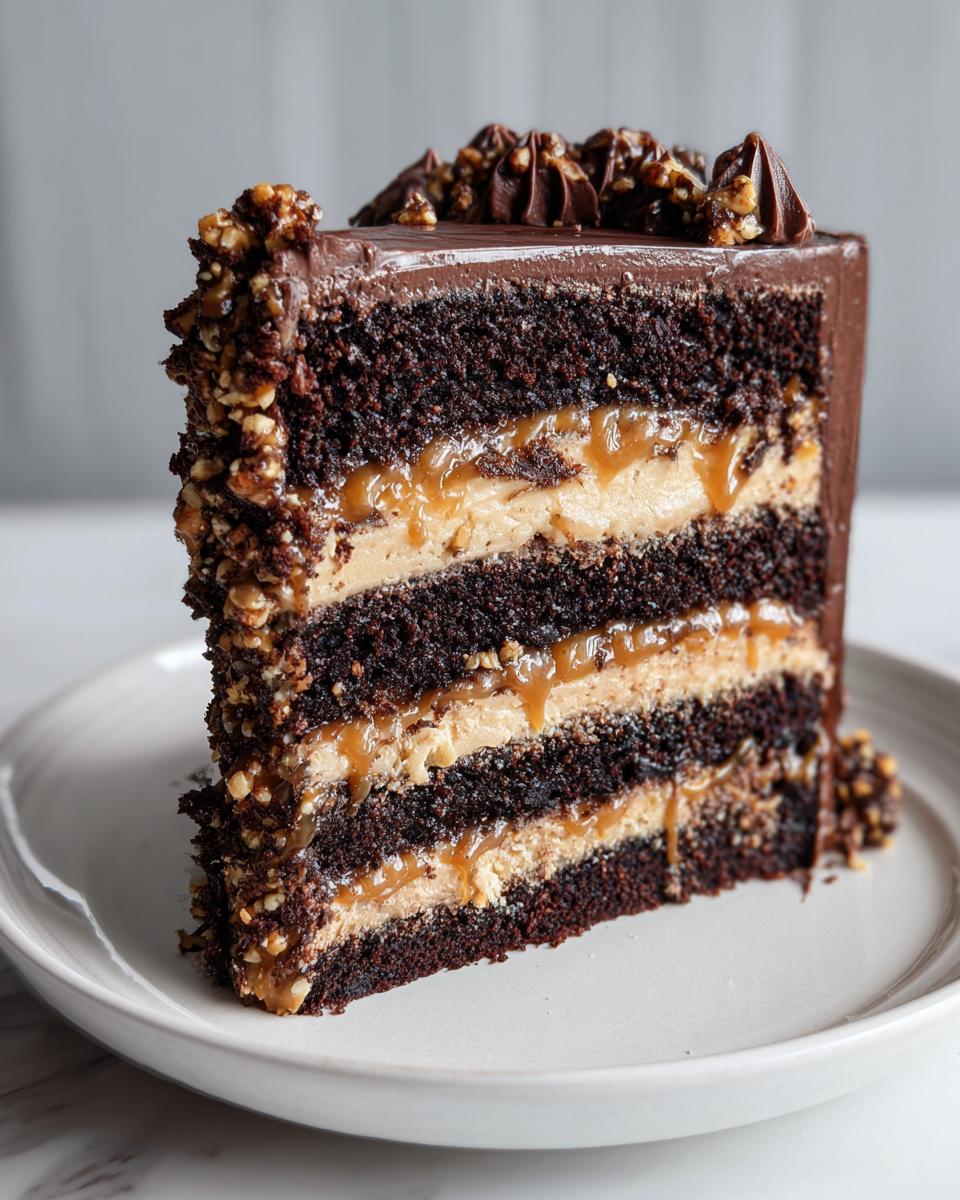
Oh, you know those desserts you see in a fancy bakery window and think, “There is no way I can recreate that magic at home”? Well, forget that thought right now! If you’re looking for the absolute pinnacle of indulgence—a dessert that is decadent, multi-textured, and just screams “celebration”—then this is it. We are diving headfirst into the chocolate caramel toffee crunch cake. Seriously, this cake manages to balance deep, moist chocolate with that gooey, slightly salty caramel and, best of all, a satisfying crunch. Here at CravyBite, I, Jess Carter, promise you a tested, reliable formula that brings that genuine bakery quality right onto your own kitchen counter. Get ready to impress everyone, because this showstopper is easier than it looks!
Trust me, you’ll want to check out this collection of our most delicious desserts and treats before you start!
- Why This Chocolate Caramel Toffee Crunch Cake is a Showstopper (Experience & Trust)
- Gathering Ingredients for Your Chocolate Caramel Toffee Crunch Cake
- Step-by-Step Instructions for the Chocolate Caramel Toffee Crunch Cake
- Tips for a Perfect Chocolate Caramel Toffee Crunch Cake Finish
- Ingredient Notes and Substitutions for Rich Chocolate Dessert Ideas
- Storing and Reheating Your Decadent Chocolate Cake Recipe
- Frequently Asked Questions About Layered Caramel Crunch Dessert
- Serving Suggestions for Your Ultimate Chocolate Caramel Toffee Crunch Cake
- Estimated Nutritional Information for This Indulgent Treat
- Share Your Masterpiece Chocolate Caramel Toffee Crunch Cake
- Serving Suggestions for Your Ultimate Chocolate Caramel Toffee Crunch Cake
- Estimated Nutritional Information for This Indulgent Treat
- Share Your Masterpiece Chocolate Caramel Toffee Crunch Cake
Why This Chocolate Caramel Toffee Crunch Cake is a Showstopper (Experience & Trust)
When I developed this recipe, the goal wasn’t just to make a chocolate cake; it was to build an experience. You deserve a cake that feels special, that tastes like you spent all day in the kitchen—even if you didn’t! I rely on tested techniques to ensure every component sings.
- Perfectly Balanced Richness: We use a deep cocoa powder base that avoids being too sweet, providing the perfect backdrop for the intense caramel flavor. It’s rich, yeah, but never heavy.
- Texture is King: This is what sets it apart. You get the soft, moist crumb from the cake layer, followed by the smooth, flowing salted caramel, and then that unmistakable, buttery snap from the homemade toffee crunch.
- Bakery-Quality Look, Home Cook Ease: I’ve worked out the kinks so assembly is straightforward. While it looks like something that should cost a fortune at a gourmet bakery, I promise you, it’s totally achievable in your own oven.
- The Salty Contrast: That hint of sea salt in the caramel isn’t just an afterthought; it’s essential! It cuts through the sweetness of the toffee and dark chocolate beautifully, making you reach for that next bite.
- Reliable Chocolate Layers: Forget dry, crumbly chocolate cake. My method ensures three incredibly moist and tender layers every single time. That’s the non-negotiable foundation of any truly great celebration cake.
- Homemade Crunch factor: Making the toffee yourself rather than relying on chips gives you control over the size and intensity of the crunch. It adds a level of buttery depth you just can’t buy off the shelf.
Gathering Ingredients for Your Chocolate Caramel Toffee Crunch Cake
Okay, here’s the deal with a cake this complex: precision matters! When you’re dealing with candy-making and delicate batters, measuring everything correctly isn’t just a suggestion; it’s the difference between a showstopper and, well, a disaster. Don’t worry though; I’ve listed everything out clearly so you can have a smooth baking session. For this ultimate chocolate caramel toffee crunch cake, we really need to focus on three separate builds that come together at the end: the cake itself, that incredible homemade toffee crunch, and finally, the components for our frosting and luscious salted caramel filling.
Since you’ll want that deep chocolate flavor in your frosting later, make sure you have everything ready. You might even want to whip up a batch of easy homemade chocolate syrup for drizzling adjustments!
For the Moist Chocolate Cake Layers
This is based on a well-tested, hot-liquid method that keeps that chocolate flavor incredibly rich and the crumb tender. You’ll need standard dry pantry items, but the wet ingredients are what make it work perfectly.
- 1 3/4 cups all-purpose flour
- 1 3/4 cups granulated sugar (We need this much sugar to balance the cocoa!)
- 3/4 cup unsweetened cocoa powder (Go for a good quality one here, it makes a difference!)
- 1 1/2 teaspoons baking soda
- 1 1/2 teaspoons baking powder
- 1 teaspoon salt
- 2 large eggs (Make sure these are room temperature, trust me!)
- 1 cup buttermilk (This is key for moisture and tang!)
- 1/2 cup vegetable oil
- 2 teaspoons vanilla extract
- 1 cup hot water or hot brewed coffee (If you use coffee, the chocolate flavor blooms beautifully, but hot water works great too!)
For the Homemade Toffee Crunch
This is the texture superstar of the cake! We need the basics to make a quick, buttery candy that shatters nicely. After it cooks, you want about 1 cup of small, crunchy pieces scattered throughout the layers.
- 1 cup granulated sugar
- 1/2 cup unsalted butter
- 1/4 cup water
- 1 teaspoon baking soda (This is what makes it airy and crunchy!)
- 1 cup chopped toffee pieces (This count is what you need after you break it up from the sheet.)
For the Salted Caramel Sauce and Frosting Components
Here’s where we assemble the gooey middle and the rich, dark chocolate coating that holds everything together. The caramel sauce needs to be slightly cooled before layering, and the butter for the frosting needs to be perfectly softened—not melted!
- For the Salted Caramel Sauce: 1 cup granulated sugar, 1/4 cup water, 1/2 cup heavy cream (warmed!), 4 tablespoons unsalted butter (cut into pieces), 1 teaspoon sea salt.
- For the Chocolate Buttercream: 2 cups unsalted butter (softened perfectly!), 4 cups powdered sugar, 1 cup unsweetened cocoa powder, 1 teaspoon vanilla extract, and 1/4 cup milk or heavy cream (for consistency adjustment).
- We also reserve some of the final sauce and frosting for drizzling and pressing onto the sides later!
Step-by-Step Instructions for the Chocolate Caramel Toffee Crunch Cake
Alright, deep breath! This is the best part. Making this chocolate caramel toffee crunch cake is broken down into four manageable parts, and if you tackle them one at a time, you’ll have a showstopper ready before you know it. We’re tackling the components that need cooling first, then the cake, and then we put it all together. Remember, patience in the candy steps pays off huge in texture later on!
Making the Homemade Toffee Crunch
Candy making can feel a little intimidating, but we’re keeping this super simple and fast. Safety first though—that hot sugar is serious stuff, so keep little hands away!
- First, you absolutely must line a baking sheet with parchment paper. Don’t skip this, or you’ll be scraping hardened sugar forever!
- In a medium saucepan, mix your 1 cup of sugar, butter, and water. You need to heat this over medium heat until the sugar dissolves completely. Once it starts boiling, STOP STIRRING. Stirring once it boils messes up the crystal structure.
- Watch it closely! You need that mixture to boil until it gets a deep amber color. If you have a candy thermometer, aim for about 300 degrees F. If not, look for that rich, dark honey shade.
- As soon as it hits that color, yank it off the heat immediately. Now, quickly whisk in the baking soda. Don’t be scared when it foams up like crazy—that’s what you want! It means you’ll get that airy crunch.
- Pour that bubbling mixture onto your prepared sheet and spread it out just a tiny bit, don’t fuss over it. Let it cool completely until it’s hard and brittle. Once it’s rock solid, give it a good whack with the back of a heavy spoon to break it into small, crunchy pieces. Measure out about 1 cup and set it aside.
Baking the Moist Chocolate Cake Layers
This batter comes together really quickly once you have your dry stuff mixed, and that hot liquid at the end unlocks all the cocoa goodness. We are aiming for three perfect 8-inch layers, so prep those pans!
- Get your oven preheated to 350 degrees F. Grease and flour three 8-inch round cake pans beautifully.
- In a great big bowl, whisk together all your dry ingredients: flour, sugar, cocoa powder, baking soda, baking powder, and salt. Give it a really good whisk so there are no clumps hiding anywhere.
- Now, add your eggs, buttermilk, oil, and vanilla extract right into the dry mix. Beat this stuff on medium speed for about two full minutes. Don’t skimp on that mixing time; it builds the structure!
- Here’s the magic trick: Carefully stir in that cup of hot water or coffee. The batter will get super thin, almost soupy. That’s exactly what we want!
- Divide the batter evenly between your three pans (I usually eyeball it, but weighing them is even better if you’re super serious!).
- Bake them for 30 to 35 minutes. Always start checking at 30 minutes! Use a toothpick; if it comes out with moist crumbs clinging to it (not wet batter!), they are done. Let them cool in the pans for about 10 minutes before you carefully flip them out onto a wire rack to cool completely.
Cooking the Salted Caramel Sauce
This sauce is going to be used for drizzling *and* filling, so let’s make sure it’s perfect. Remember, we need the cream warmed up beforehand—cold cream hitting that hot sugar is a recipe for an instant, sticky mess.
- In a heavy-bottomed saucepan—this helps avoid scorching—combine the 1 cup of sugar and 1/4 cup of water. Heat this over medium heat. You let it sit until the sugar dissolves and then you let it boil steadily until it reaches that deep amber caramel color.
- Once it’s that beautiful color, pull the pan completely off the heat. Now, slowly—and I mean slowly—whisk in that warmed heavy cream. It’s going to bubble up violently, so stand back a bit! Keep whisking until it smooths out.
- Whisk in your pieces of cold butter until everything is melted and creamy. Finally, stir in that teaspoon of sea salt. Taste it—isn’t that salty contrast divine?
- Let the caramel cool slightly. We’re reserving half of it for drizzling later, and the other half will get mixed into the frosting components.
Whipping the Chocolate Buttercream
A standard chocolate buttercream is needed here to hold the gooey caramel in place, but we are going to enhance it with some of that luxurious caramel sauce we just made. Texture is everything for frosting; we want it stiff enough to hold those layers up, but creamy enough to spread nicely.
- Make sure your butter is softened perfectly—it should give easily when pressed but not look greasy. Beat that butter until it looks light and fluffy; this might take a few minutes with a stand mixer.
- Slowly start adding your powdered sugar and cocoa powder, alternating with that small amount of milk or cream. Start the mixer on low so you don’t create a sugar cloud in your kitchen!
- Once everything is incorporated, beat it on medium-high for another minute to get it light and airy. If it seems too stiff to spread, add another splash of milk. If it seems too thin, sneak in a little more powdered sugar.
- Here’s where we add flavor depth: Mix in about half of your cooled salted caramel sauce into this buttercream. Save the other half for layering! Beat until it’s all combined into one super-rich chocolate frosting.
Assembling Your Layer Cake with Caramel Filling
This is the fun, architectural part! Make sure your cake layers are completely cool before you start, or the buttercream will melt into soup, and those lovely layers will slide right off each other. If you want an extra-stable cake, chilling the layers for just 30 minutes sets them up perfectly.
- Place your first cake layer down on your serving plate or cake stand. Don’t forget to put a tiny dollop of frosting underneath to glue it down!
- Spread a generous, even layer of the chocolate buttercream over the top of that first layer. You want a good, thick cushion.
- Now, drizzle half of your *reserved* salted caramel sauce right over that buttercream layer. Don’t drown it, but give it a good, generous swirl.
- Sprinkle half of your homemade toffee crunch pieces over the gooey caramel. Make sure you get crunch right up to the edge!
- Gently place your second cake layer on top. Repeat the whole process: buttercream, the remaining caramel drizzle, and the final half of your crunchy toffee pieces.
- Top it with the third and final cake layer. Use the rest of your chocolate buttercream to frost the entire cake—top and sides. I like to use an offset spatula to smooth the sides, but a rustic, slightly textured look is gorgeous too!
- For the grand finale, take the small amount of reserved chocolate frosting to pipe a decorative swirl border on top, and then drizzle any leftover caramel over the very top edge so it runs down the sides beautifully. Press a few extra toffee bits onto the sides for that final, irresistible touch!
Feel free to check out this easy casserole recipe for dinner while you wait for this gorgeous cake to set up!
Tips for a Perfect Chocolate Caramel Toffee Crunch Cake Finish
You’ve done the hard work! You’ve baked the moist chocolate cake layers, you’ve wrestled that glorious caramel, and your homemade toffee is shattering perfectly. Now we just need to make sure this magnificent chocolate caramel toffee crunch cake holds up and looks as incredible as it tastes. Presentation is everything when you create a showstopper like this, so here are a few little tricks I keep up my sleeve.
First off, texture management is key. Nothing spoils a crunchy topping faster than humidity or too much gooey sauce touching it too soon!
Keeping the Toffee Crunch Crispy
This is the most common issue! If you add the toffee bits too early, especially onto the caramel layer, they’ll get soft and chewy, and honestly, sometimes that’s nice, but we are aiming for shatter here.
- Wait Until the Last Minute: If you’re serving the cake the same day, add the toffee crunch right before frosting the top layers. You want that crunch to be the last thing that hits the caramel and frosting.
- Protect the Sides: When pressing toffee pieces onto the sides of the cake, use a little bit of your thick chocolate buttercream as the adhesive *after* smoothing the final coat everywhere else. Don’t use caramel as glue on the sides, as it’s too fluid.
- For Storing: If you know you need to store this cake covered overnight, keep the toffee pieces separate. Frost the cake completely, but save the crunch. When you are ready to serve the next day, press the toffee pieces onto the top layer just 15 minutes before slicing.
Dealing with Frosting Consistency
Our chocolate buttercream is sturdy because of the butter and cocoa ratio, but layering with caramel can sometimes make it want to weep or squish out.
- Chill Your Layers: As I mentioned in the assembly notes, chilling the cake layers for 30 minutes once they are fully cool makes them firm up beautifully. This reduces crumbs and gives the buttercream a better surface to grip onto when frosting.
- The Crumb Coat is Your Friend: Always start with a very, very thin layer of buttercream all over the cake first. This traps all those pesky chocolate crumbs. Chill the cake for another 15 minutes after the crumb coat before you apply the final, beautiful thick layer of frosting. This ensures a clean finish.
- Salvaging Runny Caramel: If your caramel seems a little too thin when you try to drizzle, just pop the bowl in the fridge for 10 minutes. It thickens up fast as it cools, giving you more control over those beautiful drips down the side. For extra decadent flavor, check out these bakery-style cookie tips that sometimes apply to cake texture too!
Remember, this cake is all about layers! If you want to see the exact technique I used for a similar flavor profile that focuses on texture, I highly recommend checking out the methods detailed over at Devour Dish.
Take your time with the final frosting pass, and don’t worry about perfection. The rustic look of the caramel dripping and the generous sprinkle of toffee is what really makes this dessert shine!
Ingredient Notes and Substitutions for Rich Chocolate Dessert Ideas
When you’re aiming for that high-end, gourmet feel at home, ingredient quality really comes into focus, doesn’t it? Every element in this cake plays a role, especially when we are trying to balance fat, acid, and sweetness. I use what I learned studying nutrition and applying it to classic American baking—it makes the finished product so much more reliable.
Let’s talk about a few key swaps you might need to make, especially if you’re mid-bake and realize you’re missing something crucial. Making substitutions doesn’t mean you have to compromise on the richness we are aiming for with these dessert ideas!
Buttermilk Substitute: Don’t Panic!
Buttermilk is fantastic in chocolate cakes because the acid reacts with the baking soda, helping keep the crumb tender, but I know not everyone keeps a carton on hand constantly. If you run out, don’t stress! You can easily make a quick substitute right now.
Here’s my standard rule for making homemade buttermilk: take 1 cup of regular milk—whole milk works best, but 2% is fine—and stir in 1 tablespoon of white vinegar or fresh lemon juice. Let that mixture sit on the counter for about 5 to 10 minutes. You’ll see it start to curdle slightly. That’s your buttermilk, ready to go into the chocolate cake batter!
Coffee vs. Water in the Chocolate Cake
You noticed in the instructions I gave you the option of hot water or hot brewed coffee, right? This is a classic baker’s trick, and it’s one I always recommend when making a truly deep chocolate cake. Coffee doesn’t make the cake taste like mocha, I promise! What it does is intensify the flavor molecules in the cocoa powder.
Using hot coffee instead of hot water deepens the complexity. It adds a subtle, roasted note that makes people say, “Wow, what is in this cake?” If you’re worried about flavor, stick to regular brewed coffee—don’t use espresso unless you love a bold punch. If you truly can’t have caffeine, hot water is a perfect replacement, and the cake will still be wonderfully moist thanks to the oil and buttermilk.
Why Quality Cocoa Powder Matters
We use a full 3/4 cup of cocoa powder in the batter, so the quality really shines through. I’m a big fan of using natural, unsweetened cocoa powder for this recipe because of its interaction with the baking soda, which gives us lift. If you happen to only have Dutch-processed cocoa powder—which is alkalized and darker—you might notice the cake doesn’t rise quite as dramatically. If you must use Dutch-processed, consider reducing the baking soda slightly and maybe adding an extra half teaspoon of baking powder just to compensate for the lost lift, but keep the buttermilk ratio the same.
For the frosting, using a high-quality sweetened cocoa powder is important for that dark, rich color. If your frosting comes out a little too light brown, it’s usually because the cocoa powder wasn’t intense enough. You can always sneak in a little chocolate chip banana bread flavor trick and add an extra teaspoon or two of cocoa, adjusting the liquid slightly.
Storing and Reheating Your Decadent Chocolate Cake Recipe
You’ve made an absolute masterpiece—the chocolate caramel toffee crunch cake! Now the big question: how do we keep this beauty looking and tasting incredible for days? Because we have three gooey components involved—the layers, the salted caramel, and that buttercream frosting—storage is a little different than keeping a simple sheet cake around.
Because of all that rich caramel and cream in the frosting, refrigeration is mandatory, folks. Don’t just leave this magnificent creation sitting out on the counter overnight; the caramel will get sloppy, and the frosting might not hold its shape.
Refrigeration Rules for Maximum Freshness
When you aren’t actively serving slices, this cake needs to be stored properly to maintain that essential textural contrast between the moist cake and the crunchy topping.
- Cover It Well: After assembly, the first thing I do is secure the cake against freezer burn and fridge smells. You can use a proper cake carrier if you have one. If not, gently tent the cake with plastic wrap, making sure the plastic isn’t touching the frosting or the toffee pieces on top. This barrier is super important!
- The Seal of Approval: If you can’t tent it without touching the decoration, store it in a large, airtight container. This keeps the fridge air from drying out those lovely chocolate layers.
- Shelf Life: Honestly, this cake is at its absolute peak in that first 24 hours, but due to the caramel and butter content, it should be good in the fridge for up to four days.
Bringing the Crunch Back: Serving Temperature Secrets
This is arguably the most important tip I can give you for this recipe! If you slice into this cake straight out of the fridge, the buttercream will be almost rock hard, and the cake layers will feel tighter than they should. We want that gooey texture back!
Always, always, *always* let your refrigerated chocolate caramel toffee crunch cake sit on the counter for at least 60 to 90 minutes before you plan on slicing into it. This allows the butter in the frosting to soften just enough so it yields beautifully when cut, and it lets the residual moisture in the cake layers come back to life.
If you need to speed things up? Don’t microwave the slices; you’ll melt the caramel instantly! Instead, if you are in a real rush, you can place the slice on a plate and stick it under a low oven’s warming element for just five minutes, but room temperature is genuinely the best way to serve this kind of layered dessert. If you want some other quick, rich chocolate ideas, feel free to look through my fudgy brownie recipes for storage tips—they often overlap!
Also, if you’re wondering how others managed this decadent bake, I’ve seen some fantastic results shared by bakers over at Gym On Set!
Frequently Asked Questions About Layered Caramel Crunch Dessert
When you go all out on a dessert this amazing, you are going to have questions! I’ve had thousands of comments on this rich chocolate dessert, and I’ve gathered the most common queries about texture and prep time here for you. My goal is to make sure that when you sit down to bake this, you feel totally confident.
Is this such a complicated showstopper birthday cake to make all at once?
It looks complicated, I know! But here’s the real secret: you absolutely do not have to make all the components the day you plan to serve it. This is perfect for preparing ahead! The homemade toffee crunch can be made up to a week in advance and stored tightly sealed at room temperature. The salted caramel sauce can also be made a few days early and stored in the fridge (just warm it slightly before using it in the frosting or for drizzling). The cake layers themselves freeze beautifully once cooled.
When you are ready to assemble, just whip up the simple chocolate buttercream. By breaking the work into smaller chunks, this doesn’t feel like a marathon bake at all!
How can I guarantee a gooey caramel layer and not a hard center?
The key to preventing that hard caramel center when you use it as a filling is temperature management and using the right amount of it. First, don’t let the salted caramel cool completely before using it for the filling; it should still feel warm, not hot, but definitely not cold or stiff right out of the fridge. Second, remember that we incorporate some of the caramel sauce right into the chocolate buttercream for the filling layers. This actually softens the texture of the filling layer, ensuring that when chilled, it’s still pleasantly soft and gooey rather than chewy or hard.
Can I use store-bought caramel instead of making my own?
You certainly can, especially if you are short on time! I always suggest making it from scratch because you get that perfect balance of saltiness and deep cooked-sugar flavor, but if you need a shortcut for this layered caramel crunch dessert, go for it. Buy the best quality, thickest caramel sauce you can find. If it seems too thin, just cook it down gently on the stove for a few minutes to concentrate it before you incorporate it into the frosting.
What’s the best way to cut this textured dessert recipe without ruining the edges?
This is where a sharp, clean knife comes into play! After you’ve let the cake come back to room temperature (remember that 60-90 minute rule!), dip a long, thin, sharp knife into a tall glass of very hot water. Wipe the knife completely dry with a clean paper towel, and then make your cut. Wipe it dry again between *every single slice*. This hot, clean blade slices right through the soft cake, the gooey caramel, and the crunchy toffee without dragging them all down into a messy smear. It keeps those layers looking crisp for your guests!
If you are looking for other impressive, no-fuss recipes that still look impressive, you might enjoy learning how to make my creamy soup recipes!
Serving Suggestions for Your Ultimate Chocolate Caramel Toffee Crunch Cake
You’ve successfully navigated the baking, the toffee making, and the assembly. This chocolate caramel toffee crunch cake is a rich chocolate centerpiece, so it really doesn’t need much competition on the plate! However, if you want to take that final presentation up a notch, here are my go-to ways to serve this absolute indulgence.
Because this cake is so intensely flavored—deep chocolate, salty caramel, toffee sweetness—the best accompaniments are usually simple and cooling, or robust enough to stand up to the richness.
The Perfect Drink Pairing
You need something to cut through that decadent fat and sugar! A great way to start is simple: a perfectly brewed, strong cup of coffee is my number one recommendation. The bitterness of the coffee plays off the sweetness of the caramel and really highlights the deep notes in the chocolate layers.
If you prefer something cold, a glass of ice-cold milk is surprisingly effective—it just cleanses the palate between bites. For an evening celebration, a small pour of a deep bourbon or a good quality stout beer pairs wonderfully with the intensity of the toffee and chocolate.
Simple Side Garnishes
I usually don’t add much more to the plate because the cake is doing all the heavy lifting, but a tiny flourish can look elegant.
- Vanilla Bean Ice Cream: A small scoop of high-quality vanilla bean ice cream melting slightly next to a slice creates an instant sauce base. It’s classic for a reason!
- A Sprinkle of Flaky Sea Salt: Even though we put salt *in* the caramel, a tiny pinch of Maldon flaky sea salt right on top of the slice when serving adds an extra textural pop and brightens the whole flavor profile.
- Fresh Raspberries: If you really want to add a vibrant color contrast against the dark brown, a few fresh raspberries placed on the plate offer a welcome tartness that cuts through the richness.
If you ever want to try something completely different but equally satisfying, these apple cheesecake bars with caramel streusel are fantastic!
Estimated Nutritional Information for This Indulgent Treat
Now, I’ll be upfront: this is a celebration cake, not an everyday snack! When you combine butter, sugar, cream, and deep chocolate, the numbers are going to reflect that pure indulgence. Please remember, these values are just estimates based on standard ingredient amounts and how much frosting/caramel ends up per serving when the cake is sliced into 12 even pieces. Nutrition is always my focus in the kitchen, but sometimes, you just need a glorious slice of comfort!
We calculated this based on 12 standard slices:
- Serving Size: 1 slice
- Calories: Approximately 650 (Yep, she’s a splurge!)
- Sugar: Around 85g (That’s where the caramel and toffee comes from!)
- Fat: Roughly 35g
- Carbohydrates: About 80g
- Protein: About 6g
If you are keeping track, the sodium comes mainly from the sea salt we added to the caramel filling. As a comparison for your rich chocolate dessert ideas planning, my next recipe is much lighter, so check out the banana bread when you need something a bit less intense!
Share Your Masterpiece Chocolate Caramel Toffee Crunch Cake
Alright, I’ve shared every single secret I have to make this showstopper happen in your kitchen. Now, it’s your turn! I absolutely live for seeing what you all create. Baking is a community effort, and I want to see your beautiful, drippy, crunchy results.
When you make this chocolate caramel toffee crunch cake, please come back here and leave me a star rating and let me know how it went. Did the toffee shatter perfectly? Did your caramel drizzle look just right? Every piece of feedback helps me and other bakers trying this recipe next!
If you snap a photo, tag me on social media! And if you want to connect with me personally and share recipes, check out the About Page to learn more about my journey. For more inspiration that looks just as stunning, take a peek at how others achieved amazing texture over at Mom Savor!
Serving Suggestions for Your Ultimate Chocolate Caramel Toffee Crunch Cake
You’ve successfully navigated the baking, the toffee making, and the assembly. This chocolate caramel toffee crunch cake is a rich chocolate centerpiece, so it really doesn’t need much competition on the plate! However, if you want to take that final presentation up a notch, here are my go-to ways to serve this absolute indulgence.
Because this cake is so intensely flavored—deep chocolate, salty caramel, toffee sweetness—the best accompaniments are usually simple and cooling, or robust enough to stand up to the richness.
The Perfect Drink Pairing
You need something to cut through that decadent fat and sugar! A great way to start is simple: a perfectly brewed, strong cup of coffee is my number one recommendation. The bitterness of the coffee plays off the sweetness of the caramel and really highlights the deep notes in the chocolate layers.
If you prefer something cold, a glass of ice-cold milk is surprisingly effective—it just cleanses the palate between bites. For an evening celebration, a small pour of a deep bourbon or a good quality stout beer pairs wonderfully with the intensity of the toffee and chocolate.
Simple Side Garnishes
I usually don’t add much more to the plate because the cake is doing all the heavy lifting, but a tiny flourish can look elegant.
- Vanilla Bean Ice Cream: A small scoop of high-quality vanilla bean ice cream melting slightly next to a slice creates an instant sauce base. It’s classic for a reason!
- A Sprinkle of Flaky Sea Salt: Even though we put salt *in* the caramel, a tiny pinch of Maldon flaky sea salt right on top of the slice when serving adds an extra textural pop and brightens the whole flavor profile.
- Fresh Raspberries: If you really want to add a vibrant color contrast against the dark brown, a few fresh raspberries placed on the plate offer a welcome tartness that cuts through the richness.
If you ever want to try something completely different but equally satisfying, these apple cheesecake bars with caramel streusel are fantastic!
Estimated Nutritional Information for This Indulgent Treat
Now, I’ll be upfront: this is a celebration cake, not an everyday snack! When you combine butter, sugar, cream, and deep chocolate, the numbers are going to reflect that pure indulgence. Please remember, these values are just estimates based on standard ingredient amounts and how much frosting/caramel ends up per serving when the cake is sliced into 12 even pieces. Nutrition is always my focus in the kitchen, but sometimes, you just need a glorious slice of comfort!
Serving Size and Macronutrients
We calculated this based on 12 standard slices. Look, it’s a gorgeous dessert, and we want to see you enjoy every bite, but be mindful of that rich caramel!
- Serving Size: 1 slice
- Calories: Approximately 650 (Yep, she’s a splurge!)
- Sugar: Around 85g (That’s where the caramel and toffee comes from!)
- Fat: Roughly 35g
- Carbohydrates: About 80g
- Protein: About 6g
Additional Details
If you are keeping track, the sodium comes mainly from the sea salt we added to the caramel filling. We used all the details provided to calculate this out, but since we all measure and frost slightly differently, treat these as a fantastic guideline.
As a comparison for your rich chocolate dessert ideas planning, my next recipe is much lighter, so check out the banana bread when you need something a bit less intense!
Share Your Masterpiece Chocolate Caramel Toffee Crunch Cake
Alright, I’ve shared every single secret I have to make this showstopper happen in your kitchen. Now, it’s your turn! I absolutely live for seeing what you all create. Baking is a community effort, and I want to see your beautiful, drippy, crunchy results.
When you make this chocolate caramel toffee crunch cake, please come back here and leave me a star rating and let me know how it went. Did the toffee shatter perfectly? Did your caramel drizzle look just right? Every piece of feedback helps me and other bakers trying this recipe next!
If you snap a photo, tag me on social media! And if you want to connect with me personally and share recipes, check out the About Page to learn more about my journey. For more inspiration that looks just as stunning, take a peek at how others achieved amazing texture over at Mom Savor!
PrintUltimate Chocolate Caramel Toffee Crunch Cake
Create a showstopping, bakery-quality dessert at home with this recipe for a moist chocolate cake layered with gooey salted caramel and crunchy homemade toffee bits. This cake delivers indulgence with every slice.
- Prep Time: 45 min
- Cook Time: 40 min
- Total Time: 125 min
- Yield: 12 servings 1x
- Category: Dessert
- Method: Baking
- Cuisine: American
- Diet: Vegetarian
Ingredients
- For the Moist Chocolate Cake Layers:
- 1 3/4 cups all-purpose flour
- 1 3/4 cups granulated sugar
- 3/4 cup unsweetened cocoa powder
- 1 1/2 teaspoons baking soda
- 1 1/2 teaspoons baking powder
- 1 teaspoon salt
- 2 large eggs
- 1 cup buttermilk
- 1/2 cup vegetable oil
- 2 teaspoons vanilla extract
- 1 cup hot water or hot brewed coffee
- For the Homemade Toffee Crunch:
- 1 cup granulated sugar
- 1/2 cup unsalted butter
- 1/4 cup water
- 1 teaspoon baking soda
- 1 cup chopped toffee pieces (or store-bought toffee bits)
- For the Salted Caramel Sauce:
- 1 cup granulated sugar
- 1/4 cup water
- 1/2 cup heavy cream, warmed
- 4 tablespoons unsalted butter, cut into pieces
- 1 teaspoon sea salt
- For Assembly and Frosting (Use your favorite chocolate buttercream):
- 2 cups unsalted butter, softened
- 4 cups powdered sugar
- 1 cup unsweetened cocoa powder
- 1 teaspoon vanilla extract
- 1/4 cup milk or heavy cream
- 1/2 cup chocolate frosting, reserved for topping
- 1/2 cup salted caramel sauce, reserved for drizzling
Instructions
- Prepare the Toffee Crunch: Line a baking sheet with parchment paper. In a medium saucepan, combine 1 cup sugar, butter, and water. Heat over medium heat, stirring until sugar dissolves. Stop stirring and boil until the mixture reaches a deep amber color (about 300 degrees F on a candy thermometer). Remove from heat immediately. Quickly whisk in the baking soda (the mixture will foam). Pour onto the prepared sheet and spread slightly. Let cool completely, then break into small, crunchy pieces. Set aside.
- Bake the Chocolate Cake Layers: Preheat your oven to 350 degrees F. Grease and flour three 8-inch round cake pans. Whisk together flour, sugar, cocoa powder, baking soda, baking powder, and salt in a large bowl. Add eggs, buttermilk, oil, and vanilla. Beat on medium speed for two minutes. Carefully stir in the hot water or coffee. Divide batter evenly among the prepared pans. Bake for 30 to 35 minutes, or until a toothpick inserted comes out clean. Cool in pans for 10 minutes before inverting onto a wire rack to cool completely.
- Make the Salted Caramel Sauce: Combine 1 cup sugar and 1/4 cup water in a heavy-bottomed saucepan. Heat over medium heat without stirring until the sugar dissolves, then boil until it reaches a deep amber color. Remove from heat. Carefully whisk in the warm heavy cream (it will bubble vigorously). Whisk in the butter pieces until melted, then stir in the sea salt. Let cool slightly. Reserve half for filling/drizzling and half for the frosting.
- Prepare the Chocolate Buttercream: Beat the softened butter until creamy. Gradually add powdered sugar and cocoa powder, alternating with milk/cream until smooth. Beat in vanilla extract. If the frosting is too thin, add more powdered sugar; if too thick, add a splash more milk.
- Assemble the Cake: Place one cooled cake layer on a serving plate. Spread a layer of chocolate buttercream over the top. Drizzle generously with half of the reserved salted caramel sauce. Sprinkle with half of the homemade toffee crunch pieces. Repeat with the second cake layer, buttercream, remaining caramel, and toffee crunch. Top with the final cake layer.
- Frost and Finish: Frost the entire cake with the remaining chocolate buttercream. Use a small amount of the reserved chocolate frosting to create a decorative top border or swirl. Drizzle any remaining caramel over the top edge so it drips down the sides. Press extra toffee pieces onto the sides or top edge for texture.
Notes
- For the moistest cake, use hot brewed coffee instead of hot water; the coffee deepens the chocolate flavor without making the cake taste like coffee.
- If you prefer a smoother caramel layer, you can mix a few tablespoons of the buttercream into the reserved caramel sauce before layering to create a softer filling consistency.
- Chill the cake layers for 30 minutes before frosting to make assembly easier and prevent crumbs.
Nutrition
- Serving Size: 1 slice
- Calories: 650
- Sugar: 85g
- Sodium: 350mg
- Fat: 35g
- Saturated Fat: 20g
- Unsaturated Fat: 15g
- Trans Fat: 0.5g
- Carbohydrates: 80g
- Fiber: 3g
- Protein: 6g
- Cholesterol: 120mg