

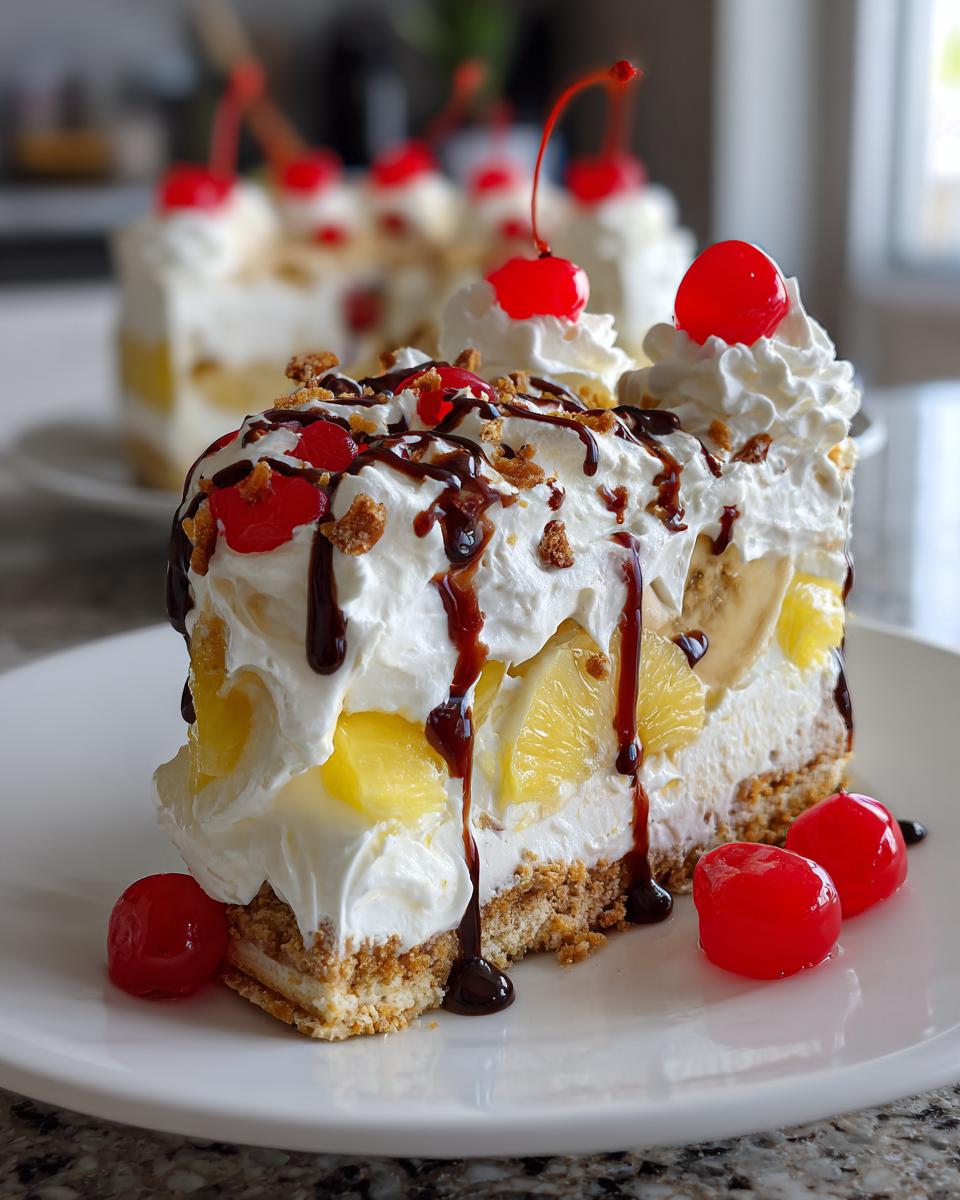
Oh, there’s just something about those perfect, hot summer days that makes me crave the ultimate sweet, chilled treat, right? You know, the kind that whisks you right back to sticky-fingered happiness! Today, we’re not pulling out the oven mitts, we’re grabbing the freezer trays because we are making the absolute best banana split cake. This beauty captures all the classic sundae flavors—banana, pineapple, that creamy base—in one stunning, no-bake, layered dessert. Here at CravyBite Kitchen, founded by me, Jess Carter, we believe the very best food should come without major drama or fuss. This recipe proves you can create something truly special and reliable using just good ingredients and a little chill time. If you love simple, impressive sweets, this one belongs right alongside our other delicious desserts and treats!
- Why This No-Bake banana split cake is Your New Favorite Summer Dessert
- Gathering Ingredients for Your banana split cake
- Step-by-Step Instructions to Make the banana split cake
- Tips for the Best banana split cake Texture and Flavor
- Variations on the Classic banana split cake
- Serving Suggestions for Your Chilled dessert
- Storage and Make Ahead Instructions for banana split cake
- Frequently Asked Questions About the banana split cake
- Nutritional Estimate for a Slice of banana split cake
- Share Your CravyBite Kitchen Creations
Why This No-Bake banana split cake is Your New Favorite Summer Dessert
When the temperatures rise, the last thing I want is to stand over a hot oven. That’s why this banana split cake has earned its permanent spot on my summer rotation! It’s easily one of the best no bake desserts you can pull together. Trust me, this sweet treat is designed for relaxed entertaining.
- It’s a stunning layered dessert that looks fancy but is secretly super simple.
- Active prep time is minimal—we’re talking 20 minutes max!
- It’s the ultimate easy party dessert because you make it completely ahead of time.
If you’re looking for something that screams summer fun without breaking a sweat, you’ve found it. Check out my favorite easy puff pastry chocolate croissant recipe later, but for now, let’s focus on the chill factor!
Zero Oven Time for Maximum Chill
Honestly, this is the main selling point when it’s ninety degrees outside! It’s truly a no oven dessert. You mix the crust, you layer the fillings, and then the magic happens in the fridge. All you need is a little planning time for chilling, which means more time enjoying the sunshine with your guests.
The Perfect Retro Dessert for Any Gathering
This recipe just has that fun, nostalgic feel to it. It’s a classic retro dessert that everyone recognizes from ice cream parlors years ago. Because it needs to chill completely, it’s the perfect make ahead dessert. You finish it the day before a potluck or BBQ, and it’s ready to go when everyone else is scrambling!
Gathering Ingredients for Your banana split cake
Okay, the beauty of a great cherry pie filling recipe, or in this case, a banana split cake, is that it relies on things we usually have on hand. Since this is a chilled dessert, we want quality where it counts, especially when dealing with the fruit. Don’t worry, we aren’t using anything exotic!
Crust Components
We start with the base, and you need a sturdy foundation so your layers don’t go sliding around when you cut into them. Make sure your graham cracker crumbs are fine, like sand!
- 1 1/2 cups graham cracker crumbs
- 1/3 cup unsalted butter, melted – It needs to be fully liquid so it coats those crumbs nicely.
- 1/4 teaspoon salt. Yes, salt! It keeps the sweetness from being overwhelming.
Creamy Filling and Pudding Layers
This is where the lush, decadent texture comes from. Make sure that cream cheese is actually softened—if it’s too cold, you’ll end up with little hard chunks that won’t blend into the smooth, sweet cream dessert we are aiming for.
- 8 ounces cream cheese, softened completely
- 1 cup powdered sugar
- 1/2 cup granulated sugar
- 1 teaspoon vanilla extract
- 1 cup cold milk. Remember, the colder the milk, the faster your pudding will set!
- 1 (3.4 ounce) package instant vanilla pudding mix. Make sure it’s the instant kind, not cook-and-serve!
- 1/2 of the container of frozen whipped topping (thawed). We save the other half for later!
Fruit and Topping Essentials for the banana split cake
These are the stars of the show, making this feel like a true fruit dessert sundae! My biggest warning here, and this is important for retaining that perfect icebox cake texture: drain your canned fruit until you are sure it’s dry. Seriously, squeeze the pineapple!
- 3 ripe bananas, sliced—they should be yellow, not green, but not mushy brown yet.
- 1 (20 ounce) can crushed pineapple, drained well. I mean really well, folks!
- 1/2 cup chopped peanuts (if you’re feeling traditional, otherwise skip them!)
- 1/2 cup maraschino cherries, drained
- 2 tablespoons chocolate syrup for drizzling, baby!
Step-by-Step Instructions to Make the banana split cake
Alright, let’s get down to business! Even though this is a no bake dessert, the assembly order is crucial for that beautiful, clean slice we want. Think of this as building a delicious tower of nostalgia. We need to take our time when we layer everything so that when it sets up, it holds its shape like a proper cake, not a runny puddle! If you love making things from scratch, you should check out how easy it is to make graham cracker toffee!
Building the Graham Cracker Crust
This crust has to be solid because it’s holding up a whole lot of creamy goodness. In a medium bowl, you’ll mix together your graham cracker crumbs, that melted butter, and the salt. Stir it until everything looks like wet sand—it should hold together when you pinch it! Now, press that mixture firmly into the bottom of your 9×13 inch dish. Here’s an expert tip from me, Jess: use the flat bottom of a measuring cup or a heavy glass to really pack it down layer. You want this crust dense!
Once it’s packed tight, put that dish straight into the freezer. We want it super cold and set while we tackle the filling. This initial freeze is just as important as the final chill, honestly.
Preparing the Cream Cheese and Pudding Base
We have two creamy components to whip up, but we need to keep them separate initially. First, grab your softened cream cheese, powdered sugar, granulated sugar, and vanilla. Beat those together until they are perfectly smooth and fluffy. No lumps allowed! In a completely separate bowl, whisk up that cup of cold milk and the instant vanilla pudding mix until it starts to thicken up—that usually takes about two minutes of hard whisking.
Now, gently fold half of your thawed whipped topping into the cream cheese mixture. Then, gently, gently, fold in the thickened pudding mixture. Listen to me: Do not overmix this! We want to keep that air in there. Overmixing reminds the whipped topping that it’s supposed to deflate, and we absolutely cannot have that!
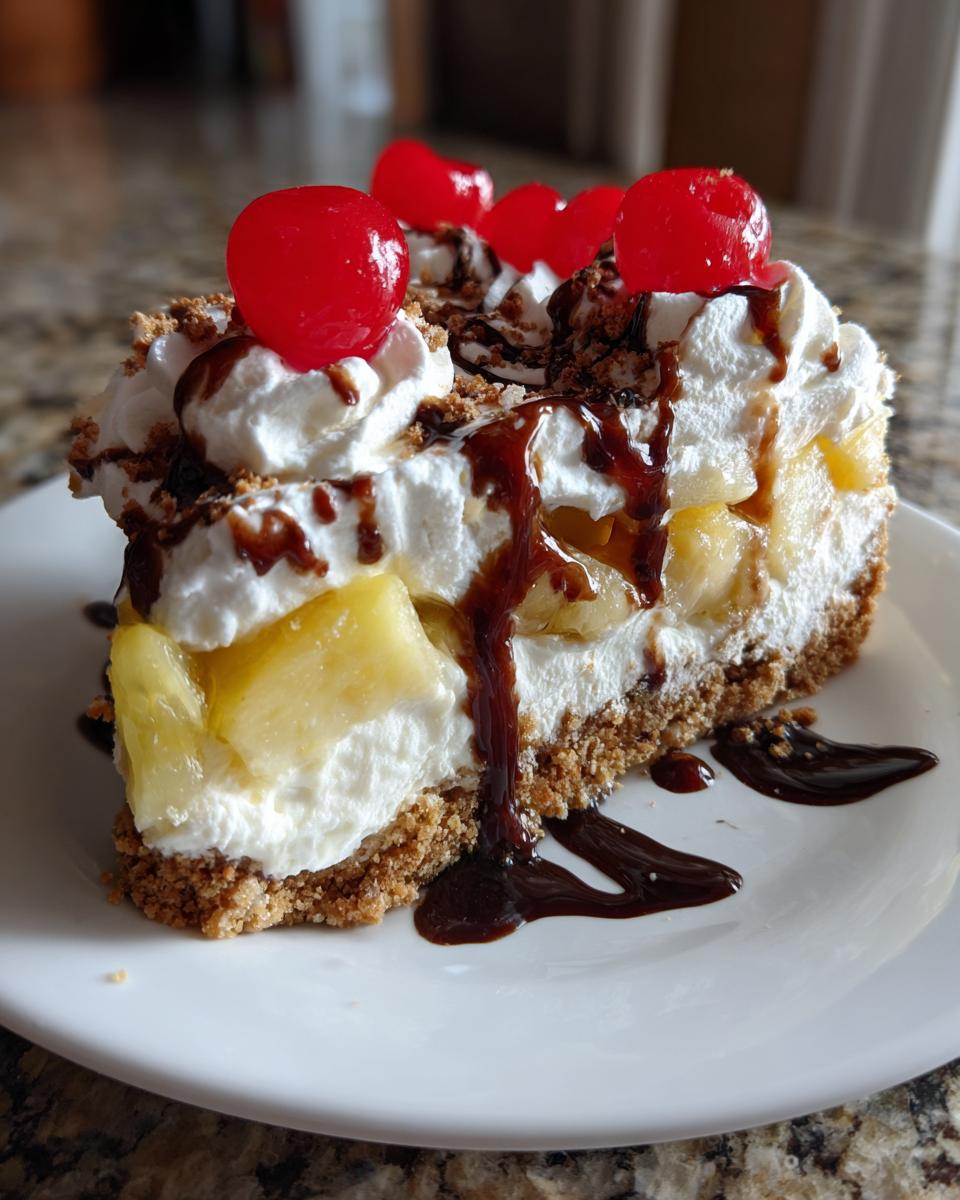
Layering the banana split cake Flavors
Pull your crust out of the freezer—it should feel rock-hard! Spread that lovely cream cheese/pudding mixture smoothly right over the top of the chilled crust. This layer is the glue that holds everything together, making it such a great icebox cake.
Next come the stars: arrange your banana slices evenly over the filling. Don’t stack them too high! Then, gently sprinkle that well-drained crushed pineapple over the bananas. If you skipped draining the pineapple properly, this is where you’ll run into trouble, so please make sure those little bits are dry!
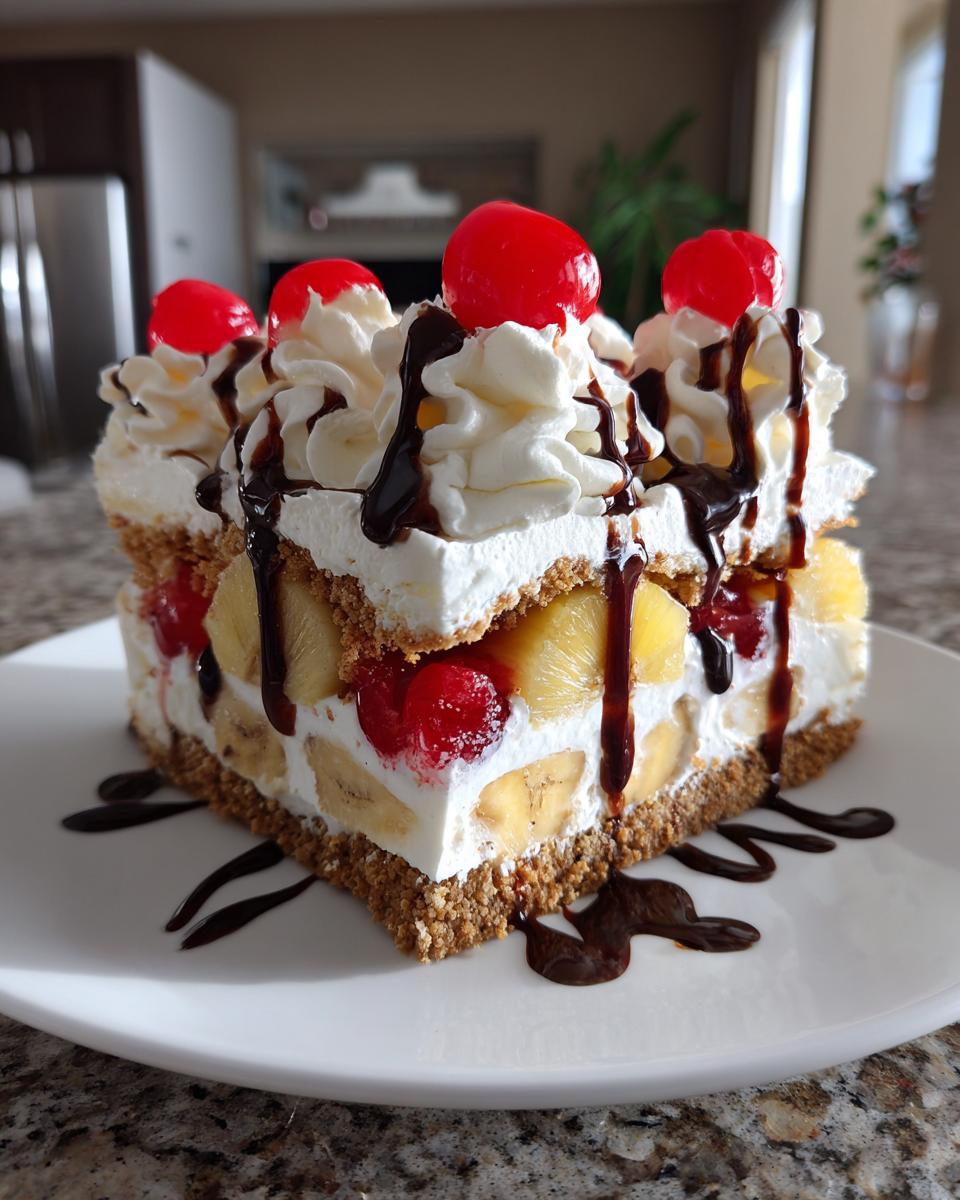
Final Toppings and Chilling
Time to finish off this masterpiece! Take that remaining half of your whipped topping and spread it gently over the pineapple layer. If you’re using the peanuts, sprinkle those on top now. Then, snake that chocolate syrup across the surface—I like to do crisscross lines! Finally, dot the top with your drained maraschino cherries. You can put one on top of where you plan to cut your slices, or just scatter them around.
Cover the whole thing up tightly with plastic wrap (make sure the wrap doesn’t stick to the topping!) and pop it into the refrigerator. This is non-negotiable: you must let this refrigerator cake chill for at least four hours, but honestly, overnight is when it truly solidifies and tastes the best. Patience pays off here!
Tips for the Best banana split cake Texture and Flavor
Now that you have your layers assembled, let’s talk about locking in that amazing texture. Since this banana split cake relies on no baking, our preservation techniques are all about temperature and moisture control. You want that lovely, fluffy texture, not a soupy mess, right? These little tricks are what elevate this from just a good fruit dessert to an absolutely perfect, sliceable treat.
Managing Moisture: The Pineapple Secret
I mentioned it before, but I’m going to harp on it because it is the make-or-break moment for this layered dessert! Canned crushed pineapple is just swimming in juice, and while that juice is sweet, adding it directly to our layers will turn your beautiful crust soggy in no time. Soggy crusts are my nemesis!
Here is what I do, and trust me on this one: Drain the pineapple in a fine-mesh sieve. Then, press down on the solids with the back of a spoon. Still not satisfied? Take that strained pineapple and spread it out on a few layers of paper towels for about ten minutes. We need those crumbs to stay crisp beneath that lush, sweet cream dessert filling. If you skip this draining step, the whole thing will weep into a watery disaster by the time you slice it.
Achieving a Stable Cream Cheese Dessert Layer
When you go to beat your cream cheese for that essential middle layer, pay attention to its starting temperature. If you rush it and use cream cheese that’s only slightly soft, or still has a solid, cold core, you’ll end up fighting lumps through the entire mixing process. Lumps mean your final cream cheese dessert layer won’t spread evenly, and it certainly won’t set up firm enough to support your fruit!
My approach is simple: Take the block out of the fridge an hour before you start. You should be able to lightly press your finger into it and leave a soft indent without sinking all the way through. That’s the perfect consistency for mixing with the sugars until it’s pale and airy. This ensures you get that silky smooth base before you even think about folding in the pudding or whipped cream. If you want to level up moisture in other baking projects, sometimes I even use my homemade easy homemade marshmallows in fillings, but for this one, the cream cheese has to be perfect!
Variations on the Classic banana split cake
While the classic banana split cake recipe is pretty darn perfect, I always encourage my readers—and myself!—to play around a little. Since we aren’t actually baking anything, making substitutions is usually painless, as long as we respect the moisture levels, which we’ve already mastered by draining that pineapple, right?
This dessert is so flexible because it’s essentially a layered pudding dream. If you aren’t a huge pineapple fan, or maybe you just want to mix things up, you can absolutely swap in some other gorgeous fruits. For instance, if you want a different flavor profile for your banana pineapple cherry dessert, try swapping the pineapple entirely for sliced strawberries. Strawberries give you a little tartness that cuts through the richness of the cream cheese layer beautifully! Just make sure you drain those strawberries well, too, maybe even pat them dry with a paper towel after slicing.
Or, if you want to lean into the chocolate angle a bit more, skip the chocolate syrup drizzle on top and instead fold a cup of mini chocolate chips directly into that whipped topping before spreading it on. That gives you those little pockets of firm chocolate—it’s like a chocolate chip blizzard on top of your chilled dessert!
If you’re feeling really adventurous and want to try something different on the bottom, instead of the graham cracker crust, you could use crushed vanilla wafers. They give a slightly sweeter, richer base that is decadent but keeps that wonderful no-bake structure we love. And speaking of chocolate and cherries, if you adore those flavors together, you should definitely save this chocolate cherry cookies recipe for another day; they share similar flavor notes!
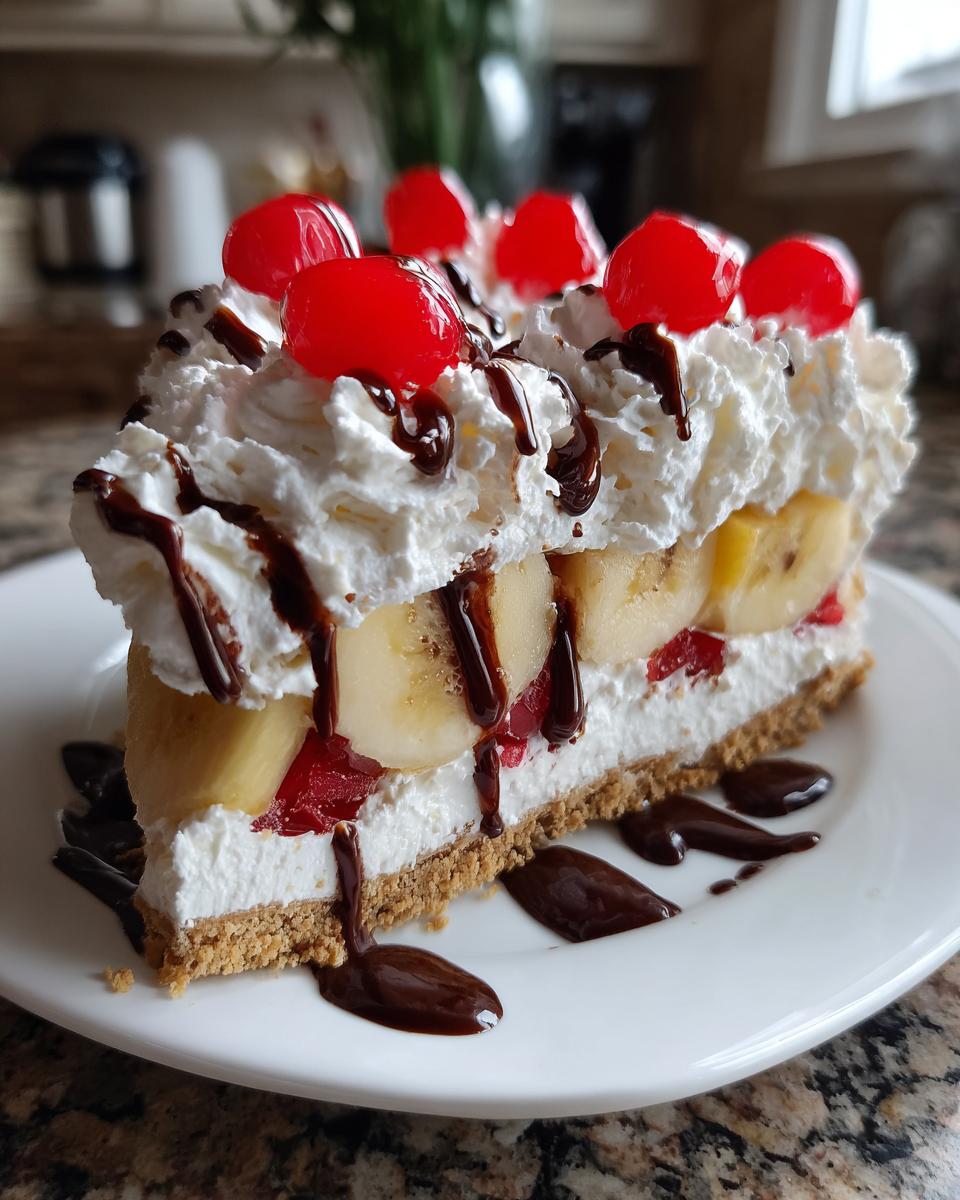
Serving Suggestions for Your Chilled dessert
The grand reveal! Serving up this magnificent banana split cake is almost as fun as making it, but presentation really matters when you’ve put effort into those perfect layers. Since this is such a rich, decadent sweet cream dessert, you don’t need a ton of extra flash on the side, but a few simple touches can really elevate the experience.
First things first: cutting. Because this is a refrigerator cake and not a standard baked cake, getting those perfect squares requires a sharp, thin knife. Before every single slice, dip your knife in hot water and wipe it clean with a paper towel. Seriously, do this between every cut! It melts the chilled topping and filling just enough to glide right through without dragging the layers down. This is the professional way to serve any icebox cake, and it keeps those layers looking distinct.
When it comes to serving, I really prefer keeping things simple. The cake already has chocolate syrup and nuts built right in, so you don’t want to overwhelm it. A tiny dusting of extra powdered sugar right before taking it to the table always looks elegant, even though it’s a casual dessert.
What pairs with this wonderfully sweet and creamy creation? A cup of hot coffee! Since this is essentially a fancy, cool whip dessert, the slight bitterness of a good hot cup alongside it is just divine, especially if you’re serving this after a big summer dinner. If you want something even more comforting, you can always whip up a batch of my rich and creamy homemade hot cocoa recipe for the kids (and maybe for yourself later in the evening!). It’s sweet against sweet, but somehow, with banana and chocolate, it just works!
Storage and Make Ahead Instructions for banana split cake
One of the biggest wins for any banana split cake is that it’s built for convenience! Since this is a total make ahead dessert, you can completely relax the day you plan to serve it. Seriously, that’s a huge bonus when you are hosting a big group or getting ready for a potluck!
The absolute best scenario for this refrigerator cake is to assemble the whole thing—crust, filling, fruit, and toppings—and then let it chill overnight. That extra time allows the pudding and cream cheese layers to firm up completely, which keeps everything neat when cutting. If you can’t wait that long, make sure you hit that four-hour minimum chill time we talked about earlier. Any less, and those layers might shift, which is never fun!
When it comes to storage, treat it like you would any other dairy-heavy, chilled dessert. You need an airtight seal to keep those fresh banana slices from browning too much (though a little browning is inevitable with this fruit dessert!). I cover the 9×13 dish tightly with plastic wrap. If that wrap touches the whipped topping too much, don’t panic; just gently lift and reseal it. You can keep leftovers safely in the fridge for up to two full days.
Now, a little warning on those bananas: they are the first thing to go soft in this recipe. If you want it to look picture-perfect on Day Two, you might have to slice a few fresh bananas and add them right before serving. If you’re planning on having leftovers for more than 48 hours, I honestly recommend skipping the initial banana layer and just topping the finished cake with fresh slices right before you serve the second time around. Storing extras of my easy crock pot creamy chicken tortilla soup is simple, but this dessert needs the cold!
Frequently Asked Questions About the banana split cake
I love getting questions from you all because it means you’re out there making this banana split cake, and I get to troubleshoot any little issues! Since this is a bit different from a standard baked cake—it’s a true icebox cake—people always ask about the fruit and the chilling time. Keep ’em coming, by the way! If you make this, please leave me a comment below! For more fast ideas, I always have my quick and easy weeknight dinners bookmarked.
Can I substitute fresh pineapple for canned in this banana split cake?
That’s a great question! You absolutely can use fresh pineapple, but I have to give you a serious heads-up if you do. Fresh fruit is beautiful, but it has so much more water content than the canned stuff (even after we drain the canned pineapple!). If you use fresh, you need to make sure that pineapple is perfectly ripe, and then you must drain it until your hands are tired, or maybe even gently sauté it for just five minutes to cook off some of that moisture. Trust me, using canned, well-drained pineapple is easier and gives you that consistent texture we need in this layered dessert. Otherwise, you risk turning that gorgeous graham cracker crust soggy!
How long can I keep this no bake dessert refrigerated?
This cake is famous for being a make ahead dessert, but it does have a short shelf life compared to a brownie or a tough cookie. Because we are using fresh bananas in the middle, I always recommend trying to eat this glorious no bake dessert within two days. The structure will still be totally fine on Day Three if you keep it covered tightly in the fridge, but those bananas start getting a little soft around the edges. If you know you’ll have leftovers past 48 hours, it’s better to serve your two best days and freeze the rest, wrapped super well, or just slice off the banana layer before freezing the rest of the custard.
Is this considered an ice cream cake inspiration?
That’s a fun way to look at it! It definitely shares that amazing, chilled, multi-layered appeal of an ice cream cake inspiration, but structurally, no, it isn’t frozen hard like one. We aren’t using scoops of ice cream here. Instead, we rely on a filling made from vanilla pudding mixed with cream cheese and whipped topping. This means when you pull it out of the fridge, it’s firm and sliceable, but it melts in your mouth softly, unlike a solid block of ice cream. It’s a refrigerator cake, which makes serving much easier!
Nutritional Estimate for a Slice of banana split cake
I always like to show you folks what you’re working with! Since this sweet treat is a decadent, creamy indulgence made with sugar, butter, cream cheese, and all those lovely fruits, the numbers add up a bit. Keep in mind that this is just an estimate, as the exact amount of sugar and fat can change depending on the brand of whipped topping or how much chocolate syrup you ultimately drizzle on top! This breakdown is based on dividing the recipe exactly into 12 generous servings.
- Serving Size: 1 slice
- Calories: 380
- Sugar: 35g
- Fat: 20g (with 10g saturated fat)
- Carbohydrates: 48g
- Protein: 5g
- Sodium: 250mg
See? That’s pretty robust! This banana split cake is definitely a dessert to savor, not stress about. It’s meant for parties and enjoying life, not counting every single calorie. Think celebratory treat rather than a daily snack, and you’ll feel great about digging in. Just remember that these are our best guesses based on standard ingredients, so if you use full-fat cream cheese versus light, those numbers will shift!
Share Your CravyBite Kitchen Creations
And there you have it! Your kitchen now holds the secrets to the most amazing, cool, and utterly delightful banana split cake. I truly poured my CravyBite heart into making these instructions clear because I want you to feel that rush of accomplishment when you pull this beauty out of the fridge.
Now comes the best part: I want to see yours! Part of the joy of sharing recipes, especially an easy layered cake like this, is seeing how you all make them your own. Did you go wild with the chocolate drizzle? Did you swap in strawberries like I suggested? Don’t be shy!
Please come back here and give this recipe a proper rating. Five stars if you loved it! And I mean it—leave me a comment below telling me how it went over at your gathering. Hearing your stories really makes my day and inspires me to keep sharing that classic American home cooking heritage!
If you snap a picture while you’re serving up those perfect chilled squares, tag CravyBite Kitchen on social media! You can always drop me a line on my contact page if you have any burning follow-up questions. Happy chilling, everyone—enjoy every single bite of this creamy, fruity masterpiece!
PrintEasy No-Bake Banana Split Cake

Make this layered, chilled dessert that captures the classic flavors of a banana split sundae using simple ingredients and no oven time.
- Prep Time: 25 min
- Cook Time: 0 min
- Total Time: 4 hr 25 min
- Yield: 12 servings 1x
- Category: Dessert
- Method: No-Bake/Chilling
- Cuisine: American
- Diet: Vegetarian
Ingredients
- 1 1/2 cups graham cracker crumbs
- 1/3 cup unsalted butter, melted
- 1/4 teaspoon salt
- 8 ounces cream cheese, softened
- 1 cup powdered sugar
- 1/2 cup granulated sugar
- 1 teaspoon vanilla extract
- 1 cup cold milk
- 1 (3.4 ounce) package instant vanilla pudding mix
- 1 (8 ounce) container frozen whipped topping, thawed (like Cool Whip)
- 3 ripe bananas, sliced
- 1 (20 ounce) can crushed pineapple, drained well
- 1/2 cup chopped peanuts (optional)
- 1/2 cup maraschino cherries, drained
- 2 tablespoons chocolate syrup
Instructions
- Prepare the crust: Mix graham cracker crumbs, melted butter, and salt in a medium bowl until combined. Press the mixture evenly into the bottom of a 9×13 inch baking dish. Place the dish in the freezer while you prepare the filling.
- Make the cream cheese layer: In a large bowl, beat the softened cream cheese, powdered sugar, granulated sugar, and vanilla extract until smooth.
- Prepare the pudding layer: In a separate bowl, whisk together the cold milk and instant vanilla pudding mix for two minutes until it begins to thicken.
- Combine the layers: Gently fold half of the thawed whipped topping into the cream cheese mixture. Then, fold the pudding mixture into the cream cheese mixture until just combined. Do not overmix.
- Assemble the cake: Spread the cream cheese/pudding mixture evenly over the chilled graham cracker crust. Arrange the sliced bananas over the filling. Sprinkle the drained crushed pineapple over the bananas.
- Top the cake: Spread the remaining half of the whipped topping over the fruit layers. If using, sprinkle the chopped peanuts over the whipped topping. Drizzle the chocolate syrup over the top layer. Place a maraschino cherry on top of each serving area, or scatter them across the top.
- Chill: Cover the dish and refrigerate for at least 4 hours, or preferably overnight, to allow the layers to set firmly.
- Serve: Cut into squares and serve cold.
Notes
- Drain the crushed pineapple thoroughly; excess liquid will make the cake watery.
- You can substitute strawberries for pineapple if you prefer the traditional banana split topping combination.
- For a firmer crust, press the crumb mixture firmly into the dish using the bottom of a measuring cup.
Nutrition
- Serving Size: 1 slice
- Calories: 380
- Sugar: 35
- Sodium: 250
- Fat: 20
- Saturated Fat: 10
- Unsaturated Fat: 10
- Trans Fat: 0
- Carbohydrates: 48
- Fiber: 2
- Protein: 5
- Cholesterol: 45