
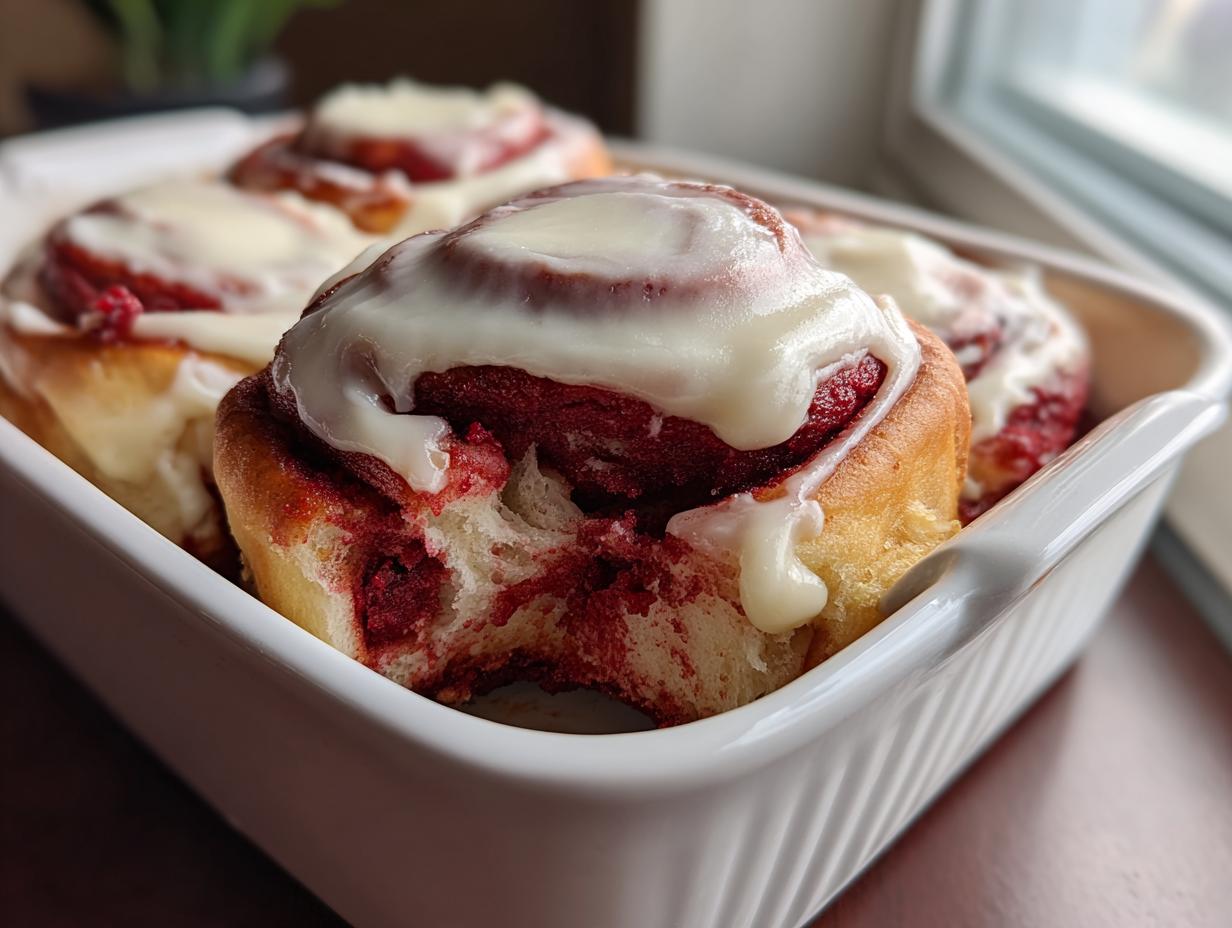
If you are looking for a breakfast bake that just screams ‘celebration,’ you’ve absolutely landed in the right spot! Forget your standard Sunday morning fare; we are tackling the ultimate showstopper: the red velvet cinnamon rolls. I’m talking about rolls so incredibly soft and fluffy they practically float, swirled thick with cinnamon, and drenched in a tangy cream cheese frosting that cuts through the sweetness just perfectly. This recipe is pure indulgence, but don’t let that fool you! Much like Jess Carter believes, CravyBite Kitchen is all about bridging that gap between wholesome, real ingredients and delicious, traditional American baking. We’ve taken the best techniques to ensure these rolls deliver that magnificent bakery-style texture every single time. If you love gooey desserts, make sure you check out my recipe for chocolate cinnamon rolls later! Trust me, once you master this dough, you’ll be set for the best weekend mornings.
- Why You Will Love These Bakery Style Red Velvet Bakes
- Gathering Ingredients for Your Red Velvet Cinnamon Rolls Recipe
- How to Make From Scratch Sweet Rolls: Step-by-Step Instructions
- Tips for Perfect Soft and Fluffy Cinnamon Rolls Every Time
- Ingredient Notes and Substitutions for Red Velvet Cinnamon Rolls
- Storage and Reheating Instructions for Your Red Velvet Cinnamon Rolls
- Serving Suggestions for Your Decadent Sweet Breakfast
- Frequently Asked Questions About Red Velvet Cinnamon Rolls
- Estimated Nutritional Data for Red Velvet Cinnamon Rolls
- Share Your Indulgent Weekend Treat Creations
Why You Will Love These Bakery Style Red Velvet Bakes
I know, I know, making rolls from scratch can feel like a commitment, but these beauties *are* worth every minute of rising! You deserve a showstopper for your next holiday or special brunch, and these deliver big time. Here’s exactly why I obsessed over getting this Red Velvet Cinnamon Rolls Recipe perfect:
- They are genuinely Soft and Fluffy Cinnamon Rolls—I mean, pillowy doesn’t even cover it! That gorgeous, tender, yeast-raised dough melts in your mouth. You get that authentic, comforting feeling you expect from a top-tier bakery, right in your own kitchen.
- Talk about visual impact! The deep, vibrant crimson color swirled inside makes these incredible Festive Brunch Treats. They look like they belong on a magazine cover, especially once that tangy frosting drips down the sides.
- We’re keeping the traditional heart of the cinnamon roll strong. Unlike some versions that skip it, these are packed with that warm, slightly earthy cinnamon and cocoa filling, making them truly decadent.
- The frosting! Oh, that rich, thick, and wonderfully tangy cream cheese frosting cuts the richness perfectly. It’s the necessary contrast that keeps you coming back for just one more swirl.
- These are surprisingly versatile. They shout “Valentine’s Day Cinnamon Rolls” louder than anything else, but they are just as welcome on Christmas morning or for an indulgent weekend treat. Planning a big spread? Check out my recipe for my famous Christmas breakfast casserole to round out the meal!
Gathering Ingredients for Your Red Velvet Cinnamon Rolls Recipe
Okay, deep breath! Seeing a big list of ingredients can sometimes make my stomach flip when I’m trying a new recipe, but I promise you, everything here is worth it for that show-stopping red color and incredible softness. We are making these the right way—from scratch! This recipe is totally worth the effort, especially that gorgeous Tangy Cream Cheese Glaze we make at the end. If you’ve ever made my vanilla buttercream frosting, you know I keep the ingredients simple but the method key. Ready to see what we need? Let’s check the list.
For the Vibrant Red Velvet Cinnamon Rolls Dough
This dough is where that signature color comes from. Listen to me on this point: use good quality coloring for the best Vibrant Red Velvet Baking results—the gel kind works miles better than the liquid drops!
- 1 cup warm milk (It needs to be warm, not hot, around 105-115°F!)
- 2 ¼ teaspoons active dry yeast (That’s one standard packet.)
- ¼ cup granulated sugar
- 1 large egg, room temperature (Cold eggs can shock the dough, so pull this out early!)
- 3 ½ cups all-purpose flour, plus more for dusting
- 1 teaspoon salt
- 2 tablespoons unsalted butter, melted
- 2 tablespoons red food coloring (Gel is highly recommended here; don’t be shy!)
- 1 teaspoon white vinegar (This is a subtle trick to give that slight tang reminiscent of buttermilk.)
- 1 teaspoon vanilla extract
Did you know that pairing these with a great vanilla frosting can be fun too? Check out my guide on vanilla buttercream frosting recipe for best stability if you want a thicker topping instead of the glaze!
For the Classic Cinnamon Filling Swirl
This part is where we get that lovely chocolate-cinnamon depth. Since we are using cocoa powder here, you get beautiful Cocoa Cinnamon Rolls without losing that essential cinnamon roll smell!
- ¾ cup unsalted butter, softened (Make sure this is soft—you should be able to press your finger right into it!)
- 1 cup packed light brown sugar
- 2 tablespoons ground cinnamon
- 1 tablespoon unsweetened cocoa powder
For the Tangy Cream Cheese Frosting Rolls Topping
This is mandatory, folks! No red velvet roll is complete without a generous slathering of cream cheese frosting. Remember to have your Cream Cheese Frosting Rolls ingredients beautifully softened so they whip up smooth.
- 8 ounces cream cheese, softened
- ½ cup unsalted butter, softened
- 3 cups powdered sugar, sifted (Sifting saves you clumps, trust me!)
- 1 teaspoon vanilla extract
- 1 tablespoon milk (or more, just until you hit that perfect pourable consistency)
How to Make From Scratch Sweet Rolls: Step-by-Step Instructions
This is the heart of the operation! Making those show-stopping Red Velvet Cinnamon Rolls from scratch is where the magic happens, and honestly, it’s more rewarding than you think. We need to treat this dough right so it turns out beautifully soft and not dense at all. When I teach a baking process, I always break it down into manageable chunks so you don’t feel overwhelmed. If you’ve ever made my super soft dinner rolls, the initial steps here will feel familiar! Get your mixing bowls ready, because we’re making some unbelievably Gooey Breakfast Swirls. For another amazing cinnamon treat, don’t forget to check out my recipe for cinnamon butter Texas Roadhouse copycat recipe later!
Activating Yeast and Mixing the Homemade Red Velvet Dough
First things first: we have to wake up that yeast. Think of the yeast as needing a nice, warm bath—if the milk is too cold, it stays asleep, and if it’s too hot, it dies! We want it just right in Step 1.
- In a small bowl, I mix the warm milk, yeast, and just a teaspoon of the granulated sugar. You let this sit for about 5 to 10 minutes. When it’s ready—and this is your key sign—it will look foamy and bubbly on top. If you don’t see foam, your milk was too cold or too hot, and you need to start this part over, I’m afraid!
- Once that yeast is happy, move to a big bowl or your stand mixer. Add the remaining sugar, flour, and salt. Then, pour in the yeast mixture, the egg, the melted butter, that vibrant red food coloring (use the gel, please!), vinegar, and vanilla. Mix everything until it looks like a rough, thick mess—we call that a shaggy dough here. Don’t worry about perfection yet!
Kneading and Allowing the Dough to Rise
Now we develop that wonderful gluten structure that gives us the bakery-style chewiness we are aiming for. If you’re kneading by hand, put on some good music; it helps! If you’ve mastered my technique for soft, fluffy, buttery dinner rolls, this kneading step will be a breeze.
- Turn that shaggy dough out onto a lightly floured surface. You need to knead this for a good 8 to 10 minutes. Keep pushing, folding, and turning until the dough feels completely smooth and elastic under your hands. The color should be a deep, gorgeous red now!
- Next, get a lightly oiled bowl—any clean bowl will do—and put the dough inside, flipping it over once so the top gets a little coating of oil. Cover it up tight with plastic wrap or a clean kitchen towel. Let this beast rise in a cozy, draft-free spot for about 1 to 1.5 hours, or until it has definitely doubled in size.
Preparing the Cinnamon Swirl Dessert Filling
While the dough is puffing up and thinking happy thoughts, we get our filling ready. This is where we load up on brown sugar and spice! This mixture is what will make your Cinnamon Swirl Dessert dreams come true.
- In a medium bowl, take your softened butter and beat it up until it’s nice and creamy.
- Add in that brown sugar, cinnamon, and the tablespoon of cocoa powder. Beat this together until it’s totally smooth. You don’t want any hard clumps of butter in there. Set this amazing-smelling mixture aside; it needs to be ready when that dough comes out of its first rise.
Rolling, Cutting, and Second Rise for Gooey Breakfast Swirls
This part requires a little bit of calm focus, especially when rolling them up so they don’t look lopsided. We want those pretty spirals!
- Gently punch down the dough to release all that built-up air. On a well-floured surface, roll that beautiful red dough into a large rectangle—aiming for about 12 by 18 inches, give or take.
- Take that prepared filling and evenly smear it all over that red canvas. Make sure you leave about a half-inch border clear along one of the long edges. This empty edge is going to seal the deal later.
- Starting from the long edge *opposite* the clean border, roll the dough up super tightly into a log. Pinch that clean seam closed firmly! Honestly, if you have unflavored dental floss, use it to cut the log into 12 equal rolls—it gives you the cleanest cut ever. If you don’t have floss, a sharp knife works too, but floss keeps the spiral shape neat.
- Arrange all your beautiful rolls cut-side-up in a greased 9×13 inch baking dish. Cover them loosely again and let them have their final nap for 30 to 45 minutes until they look puffy again. Start heating your oven to 375°F (190°C) during the last 15 minutes of this second rise.
Baking and Finishing the Red Velvet Cinnamon Rolls
This is the moment of truth! Soon you’ll have incredible Red Velvet Cinnamon Rolls smelling up your whole house. We are aiming for that perfect soft, fluffy texture here.
- Bake them in that 375°F oven for 20 to 25 minutes. They should look cooked through and maybe just slightly golden on the very edges—remember, we don’t want them dry, so watch them closely!
- Let them cool just a tiny bit. They should be warm, but not piping hot, before frosting. If they are too hot, the cream cheese frosting melts right into nothingness!
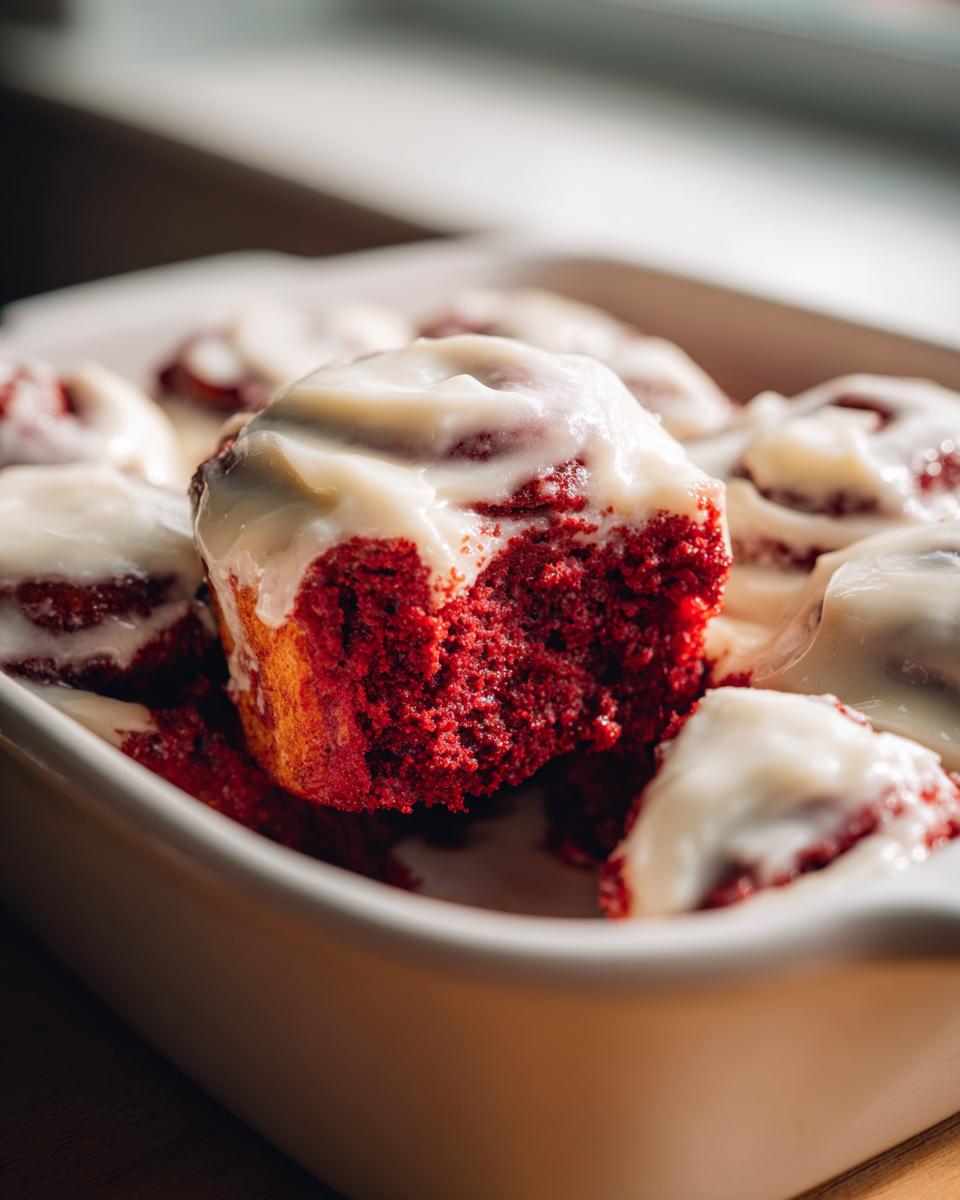
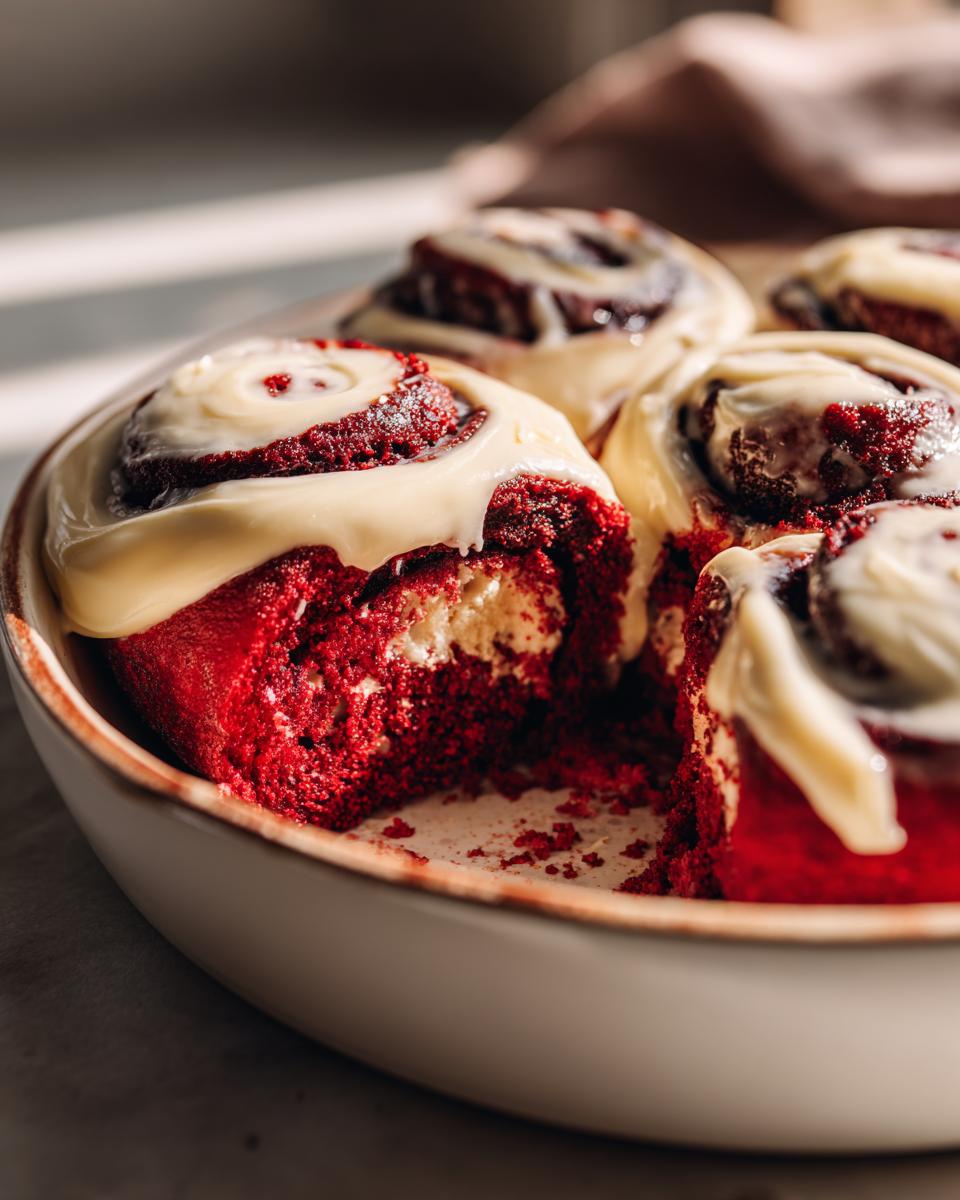
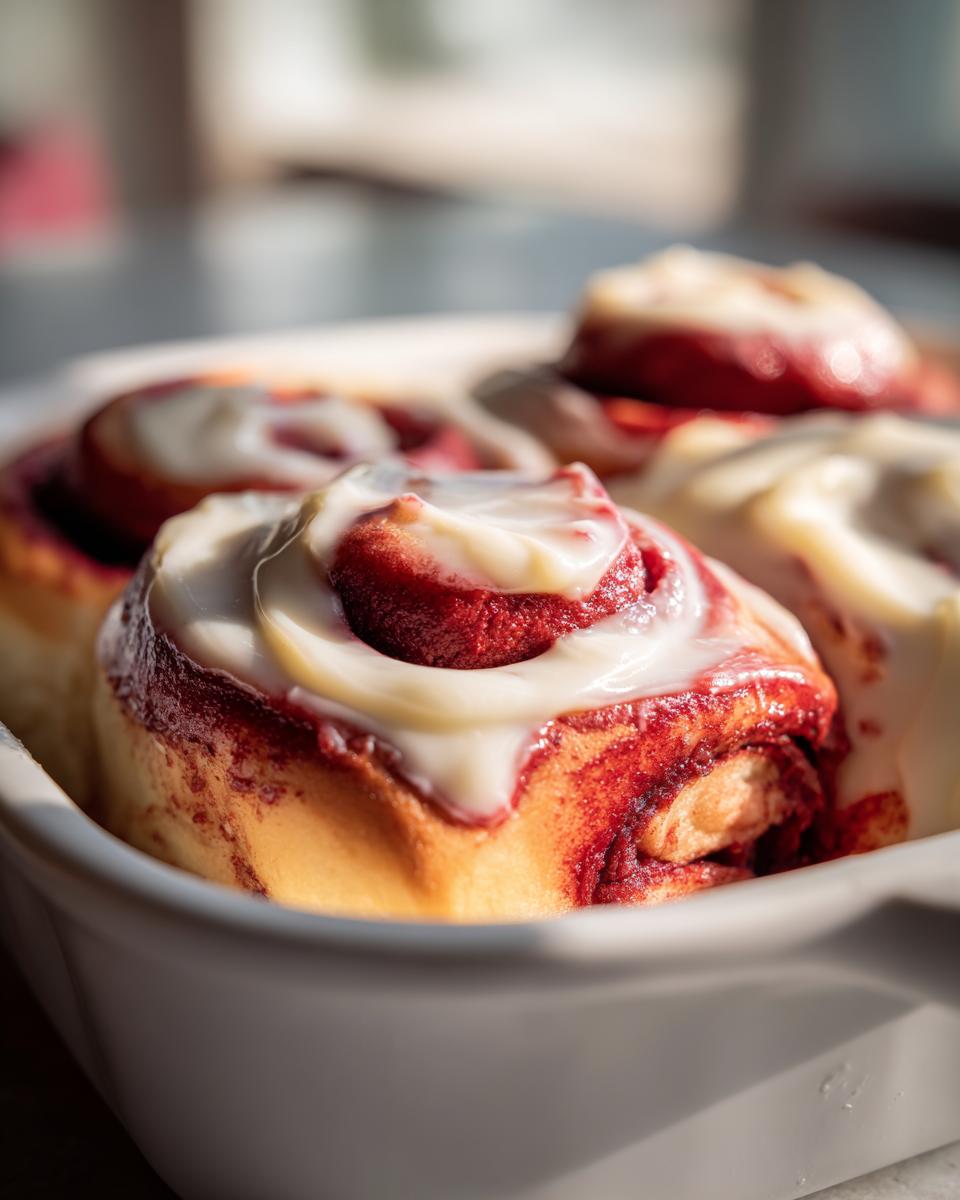
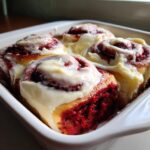
- Take your wonderful, smooth cream cheese topping (made earlier!) and generously spread it all over the warm rolls. That tangy glaze should slowly melt down into every swirl, creating the perfect Decadent Sweet Breakfast experience.
Tips for Perfect Soft and Fluffy Cinnamon Rolls Every Time
Listen, getting that truly soft and fluffy texture isn’t just luck; it’s about respecting the yeast and treating the dough right. If you want these to look as stunning as the best Valentine’s Day Cinnamon Rolls out there, you have to pay attention to a few crucial details I learned early on. These tips are what separate a good roll from a show-stopping, bakery-style dream!
First up: Temperature, temperature, temperature! I mentioned this with the yeast, but it applies everywhere. Make sure your milk is in that sweet spot (around 105°F). If you’re using the room temperature ingredients for the frosting, make sure the butter and cream cheese are *just* soft, not melty. If your butter melts, your frosting will be runny, and nobody wants runny frosting on their delicious Red Velvet Cinnamon Rolls.
Next, let’s talk kneading. You need to develop that gluten so your roll has structure but can still stretch. Don’t quit kneading too early! You are looking for that elastic, windowpane stage where you can gently stretch a small piece of dough thin enough to see light through it without tearing immediately. This structure is what traps the gases during rising, giving you that beautiful, pillowy lift. If you have questions about developing texture, my guide on best soft chewy classic snickerdoodle recipe goes into deep detail on dough handling, too.
For that incredible deep red color that really screams ‘wow,’ a lot of bakers find success using buttermilk instead of regular milk, coupled with gel food coloring. This brings out a richer red tone and a slight tanginess that complements the cocoa. If you look around at the best recipes online, you’ll see links like this one pointing out that gel coloring makes a huge difference: red velvet cinnamon rolls recipe often suggests gel for the best results.
Finally, don’t rush the rises! This is the hardest part for me, trust me. If you rush the first rise, the dough won’t have enough structure to hold the filling when you roll it up. If you rush the second rise, they won’t puff up enough in the oven, resulting in dense rolls instead of wonderfully soft and fluffy cinnamon rolls. Be patient with your dough; it does all the hard work for you!
Ingredient Notes and Substitutions for Red Velvet Cinnamon Rolls
I get so many questions about the little details in this recipe, especially since we’re aiming for that perfect bakery look and feel. Don’t stress if your pantry is missing one specific tiny thing! While I deeply believe in the ingredients listed for the absolute best results, home cooking means flexibility. I’ve found a few tried-and-true swaps that keep these Red Velvet Cinnamon Rolls delicious without losing that pillowy texture.
Let’s tackle the tricky bits first, starting with that color. I stressed using gel coloring above, and I’m going to stress it again because it’s so important for vibrant color. Liquid drops just don’t pack the same punch, and you end up adding way too much liquid, which can throw off the dough balance. Gel coloring gives you that intense, beautiful red that stays vibrant even after baking, which is a huge part of why these are such Festive Brunch Treats.
What about the milk? If you find yourself out of regular milk, you can totally use buttermilk instead! In fact, I think buttermilk makes these even better because it adds that essential slight tang we look for in classic red velvet flavor. If you don’t have buttermilk, you can make a quick version right at home: just take your cup of milk and stir in one teaspoon of white vinegar or lemon juice, let it sit for 5 minutes. If you want to read more about using buttermilk for supreme fluffiness, check out my guide on buttermilk biscuits ultra fluffy southern recipe—the science of the fluff is the same!
Butter swaps are a little trickier, especially for the filling and the creaming stage of the dough. I really, really recommend sticking to unsalted butter for consistency, especially in the dough. If you absolutely must substitute, you can use a firm vegetable shortening in the filling, but for the *dough*, try to use a high-quality butter alternative that is firm when cold, not that soft, spreadable tub stuff. That firmness is what helps your dough establish structure during the kneading process, making those From Scratch Sweet Rolls rise tall and soft!
Storage and Reheating Instructions for Your Red Velvet Cinnamon Rolls
This is the question every good baker dreads answering: “What do I do with the leftovers?” Honestly, these Red Velvet Cinnamon Rolls are so good, you might not have any leftovers, but just in case you manage to hold back, we need a plan! We want to keep that soft, pillowy texture intact, which means we have to manage moisture retention carefully. Nobody wants a dry red swirl the next day, right?
If you’re eating them the same day, leave them right there in the baking dish, covered loosely with foil or plastic wrap, on the counter at room temperature. They’ll stay wonderfully soft for about 24 hours. Believe me, covering them is crucial—if you leave them exposed, that gorgeous frosting hardens up, and the rolls dry out fast.
For longer storage, you definitely need the fridge. Once they have cooled completely (this is important!), you can store them in an airtight container for up to four days. I usually recommend waiting until they are fully cool before the final layer of frosting goes on, or separating the frosting if you know they won’t be eaten within 12 hours. If you decide to frost them fully before chilling, just know the cream cheese glaze will firm up significantly.
Now, for the best part: reheating! We need to bring back that ‘gooey breakfast swirls‘ feeling. Microwaving is the fastest way, but too much time leaves them chewy. Take just one roll—or maybe two, ha!—and place it on a microwave-safe plate. Pop it in for about 15 to 20 seconds. That little blast of heat brings the butter back to life and makes the dough soft again. If you want to get really fancy—and this is what I do for true weekend indulgence—wrap the roll loosely in a damp paper towel and microwave that for 20 seconds. That steam is pure magic for re-moisturizing them!
If you’ve refrigerated them, they might need 30 seconds or maybe a quick 10 seconds more. If the cream cheese topping got rock hard, you can add a tiny dab of butter or even a tiny smear of homemade marshmallow fluff on top after reheating to recreate that just-frosted look. Speaking of fluffy treats, you absolutely have to try my easy homemade marshmallows recipe if you want something else perfectly soft and sweet!
Serving Suggestions for Your Decadent Sweet Breakfast
Okay, we’ve done the hard work, and these Red Velvet Cinnamon Rolls are fresh out of the oven, dripping with cream cheese glory—now we have to talk about how to serve them up! You can’t just shove these masterpieces onto a plain white plate; they deserve a proper presentation, especially if you’re making them for Festive Brunch Treats like Valentine’s Day or a special holiday morning.
First and foremost: coffee. Always coffee. These rolls have cocoa, spice, and tang, so they pair gorgeously with a robust black coffee or a creamy latte. But if you want to go full brunch mode, we need some savory balance, right? The richness of the red velvet and the sugar crash needs a little counterpoint!
I absolutely love serving these alongside something really bright and fresh. Think about cutting up some crisp, slightly tart fruit—maybe sliced kiwi or some beautiful ruby red grapefruit. That acidity is a fantastic contrast to all that butter and sugar. If you’re making a big spread, you can balance the sweets with something savory that still feels comforting. You might want to try my recipe for stuffed french toast recipe easy brunch on the side; it takes the breakfast theme up a notch!
And for the beverages? If you are serving these to adults, forget boring orange juice. You need something festive that matches the color palette! I whip up a big pitcher of festive cranberry orange sangria any time I have these rolls on the table. Nothing beats eating a decadent sweet breakfast like these rolls while sipping something bubbly and spiced. It just makes the whole morning feel special, and these are definitely rich enough to call for a slightly lighter accompaniment.

Remember, these are best served warm so that frosting is perfectly gooey and melting into those lovely red swirls. Don’t let them sit too long before serving!
Frequently Asked Questions About Red Velvet Cinnamon Rolls
I totally get it; sometimes you want the flavor profile but maybe not the full commitment of a from-scratch dough. That’s okay! Baking should be fun, not torture. I’ve gathered up the questions I get asked most often about these gorgeous, vibrant rolls. If you’re wondering about time, color, or that amazing glaze, you’ll find your answers here.
Can I use cake mix instead of making Homemade Red Velvet Dough?
Oh, the age-old shortcut question! Yes, you absolutely *can* use a red velvet cake mix to speed things up, and it will certainly give you those beautiful Red Velvet Cinnamon Rolls flavor-wise. You just mix the cake mix with some eggs and a little extra liquid to create a workable dough. However, and this is the big trade-off, you won’t get that wonderfully airy, authentic texture you get from using yeast and kneading the flour yourself. My recipe focuses on that Bakery Style Red Velvet Bakes texture—that pillowy feel takes time with yeast. If speed is your absolute priority, the cake mix hack works, but if you want the best, softest roll possible, stick to the yeast dough. For more fun, slightly easier red velvet things, peep my easy red velvet cake pops recipe!
How do I keep my Red Velvet Cinnamon Rolls from turning brown when baked?
This is a big worry, and it all comes down to color preservation! The redness in the dough usually handles the heat fairly well because we use gel coloring, but if you bake them too long or too hot, the edges *will* get golden brown, and that beautiful red interior can look a little muddy. The key here is temperature control. Keep your oven at the specified 375°F and pull them out right as they look done—around 20 to 25 minutes. They should be set but still look quite moist in the center. If they seem finished but still look pale on top, you can try putting them under the broiler for just 30 seconds, but watch them like a hawk so they don’t burn!
What is the best way to make a thick Cream Cheese Frosting Rolls glaze?
That luscious topping should drape over your Red Velvet Cinnamon Rolls, not run off like thin milk! The secret to a thick, beautiful Tangy Cream Cheese Glaze is managing your liquid content against the sugar. You need that 3 cups of sifted powdered sugar for body. Start by beating your softened cream cheese and butter until they are completely smooth—if you have lumps, your frosting will be ruined. Then, add the sugar a cup at a time. When you add the milk, *only* add one teaspoon at a time! Stop adding liquid the moment the frosting goes from looking like thick paste to something that slowly folds over itself when you lift the whisk. It should still be thick enough that you can write your name in it before it spreads out. If you need more inspiration on rich toppings, check out how other bakers tackle their versions here: red velvet cinnamon rolls.
Estimated Nutritional Data for Red Velvet Cinnamon Rolls
Okay, let’s talk turkey about what we’re putting into our bodies when we dive headfirst into these gorgeous Red Velvet Cinnamon Rolls. Since we’re busy home cooks, I know you want to know what you’re dealing with, especially with all that rich butter and brown sugar!
I want to be super clear here: the values below are estimations based on the specific ingredients and measurements I listed earlier, yielding 12 rolls. If you tweak the amount of cream cheese frosting (and who could blame you?), or swap out the flour, those numbers will change! These figures are a guide, not a registered dietitian’s report. But for a truly Decadent Sweet Breakfast, these estimates give you a good ballpark idea for one serving (one roll).
- Serving Size: 1 roll
- Calories: 450
- Sugar: 45g
- Sodium: 350mg
- Fat: 24g
- Saturated Fat: 15g
- Unsaturated Fat: 9g
- Trans Fat: 0.5g
- Carbohydrates: 55g
- Fiber: 1g
- Protein: 5g
- Cholesterol: 55mg
Enjoy them! When something tastes this amazing, a little bit of indulgence is exactly what Sunday morning calls for. Don’t let the numbers stop you from creating these stunningly Soft and Fluffy Cinnamon Rolls!
Share Your Indulgent Weekend Treat Creations
Now that you’ve had a chance to bake these incredible Red Velvet Cinnamon Rolls, I truly want to know what you think! Did you manage to keep your kitchen clean while rolling? Did the color come out as vibrant as you hoped? Don’t keep all that gooey, spicy goodness to yourself!
Please, please, please leave a rating and a comment below. Hearing from you about your success with this recipe—or any little challenges you faced—helps me keep improving and ensures the next home cook finds success right away. I read every single comment because that connection we build in the kitchen is what CravyBite is all about.
And if you made these stunning rolls and snapped a picture, I absolutely *need* to see them! Tag me over on social media! Seeing your beautiful, vibrant red swirls makes my entire week. Use the hashtag so I can find your amazing creations. We are building this community together, one delicious, comforting bake at a time.
If you loved the feeling of making something truly special from scratch, why not learn a bit more about the whole CravyBite Kitchen philosophy? You can hop over to the About page to see more about how I blend nutrition science with time-honored American baking traditions. Happy baking, friend!
PrintBakery-Style Red Velvet Cinnamon Rolls with Tangy Cream Cheese Frosting
Make soft, fluffy Red Velvet Cinnamon Rolls from scratch. These rolls feature a vibrant red dough swirled with cinnamon filling and are topped with a luscious, tangy cream cheese frosting, making them a showstopper for any brunch or holiday.
- Prep Time: 45 min
- Cook Time: 25 min
- Total Time: 175 min
- Yield: 12 servings 1x
- Category: Breakfast
- Method: Baking
- Cuisine: American
- Diet: Vegetarian
Ingredients
- For the Dough: 1 cup warm milk
- 2 ¼ teaspoons active dry yeast
- ¼ cup granulated sugar
- 1 large egg, room temperature
- 3 ½ cups all-purpose flour, plus more for dusting
- 1 teaspoon salt
- 2 tablespoons unsalted butter, melted
- 2 tablespoons red food coloring (gel recommended)
- 1 teaspoon white vinegar
- 1 teaspoon vanilla extract
- For the Cinnamon Filling: ¾ cup unsalted butter, softened
- 1 cup packed light brown sugar
- 2 tablespoons ground cinnamon
- 1 tablespoon unsweetened cocoa powder
- For the Cream Cheese Frosting: 8 ounces cream cheese, softened
- ½ cup unsalted butter, softened
- 3 cups powdered sugar, sifted
- 1 teaspoon vanilla extract
- 1 tablespoon milk (or more, for desired consistency)
Instructions
- Activate the yeast: In a small bowl, combine the warm milk, yeast, and 1 teaspoon of the granulated sugar. Let stand for 5 to 10 minutes until foamy.
- Mix the dough ingredients: In a large bowl or stand mixer, combine the remaining granulated sugar, flour, and salt. Add the yeast mixture, egg, melted butter, red food coloring, vinegar, and vanilla extract. Mix until a shaggy dough forms.
- Knead the dough: Turn the dough out onto a lightly floured surface and knead for 8 to 10 minutes until the dough is smooth and elastic. It should be a deep, vibrant red.
- First rise: Place the dough in a lightly oiled bowl, turning to coat. Cover the bowl with plastic wrap or a clean towel and let it rise in a warm spot for 1 to 1.5 hours, or until doubled in size.
- Prepare the filling: While the dough rises, prepare the cinnamon filling. In a medium bowl, beat together the softened butter, brown sugar, cinnamon, and cocoa powder until smooth and well combined. Set aside.
- Roll out the dough: Gently punch down the risen dough. On a lightly floured surface, roll the dough into a large rectangle, approximately 12×18 inches.
- Spread the filling: Evenly spread the cinnamon filling mixture over the entire surface of the red dough, leaving a small half-inch border on one long edge.
- Roll and cut: Starting from the long edge opposite the border, tightly roll the dough into a log. Pinch the seam closed. Use unflavored dental floss or a sharp knife to cut the log into 12 equal rolls.
- Second rise: Arrange the rolls in a greased 9×13 inch baking dish. Cover loosely and let them rise again for 30 to 45 minutes until puffy. Preheat your oven to 375°F (190°C) during the last 15 minutes of the second rise.
- Bake the rolls: Bake for 20 to 25 minutes, or until the rolls are cooked through and lightly golden on the edges.
- Make the frosting: While the rolls cool slightly, prepare the cream cheese frosting. Beat the softened cream cheese and butter together until smooth. Gradually add the powdered sugar and vanilla extract. Add milk one teaspoon at a time until you reach a thick, spreadable consistency.
- Frost and serve: Spread the cream cheese frosting generously over the warm rolls. Serve immediately for the best, gooey texture.
Notes
- For the most vibrant color, use a high-quality gel food coloring instead of liquid drops.
- If you want to prepare these ahead, assemble the rolls, place them in the baking dish, cover tightly, and refrigerate overnight. In the morning, let them sit at room temperature for 30 minutes before baking, adding 5-10 minutes to the bake time.
- This recipe uses a from-scratch dough for a bakery-style, soft and fluffy texture, which requires time for rising.
Nutrition
- Serving Size: 1 roll
- Calories: 450
- Sugar: 45g
- Sodium: 350mg
- Fat: 24g
- Saturated Fat: 15g
- Unsaturated Fat: 9g
- Trans Fat: 0.5g
- Carbohydrates: 55g
- Fiber: 1g
- Protein: 5g
- Cholesterol: 55mg