
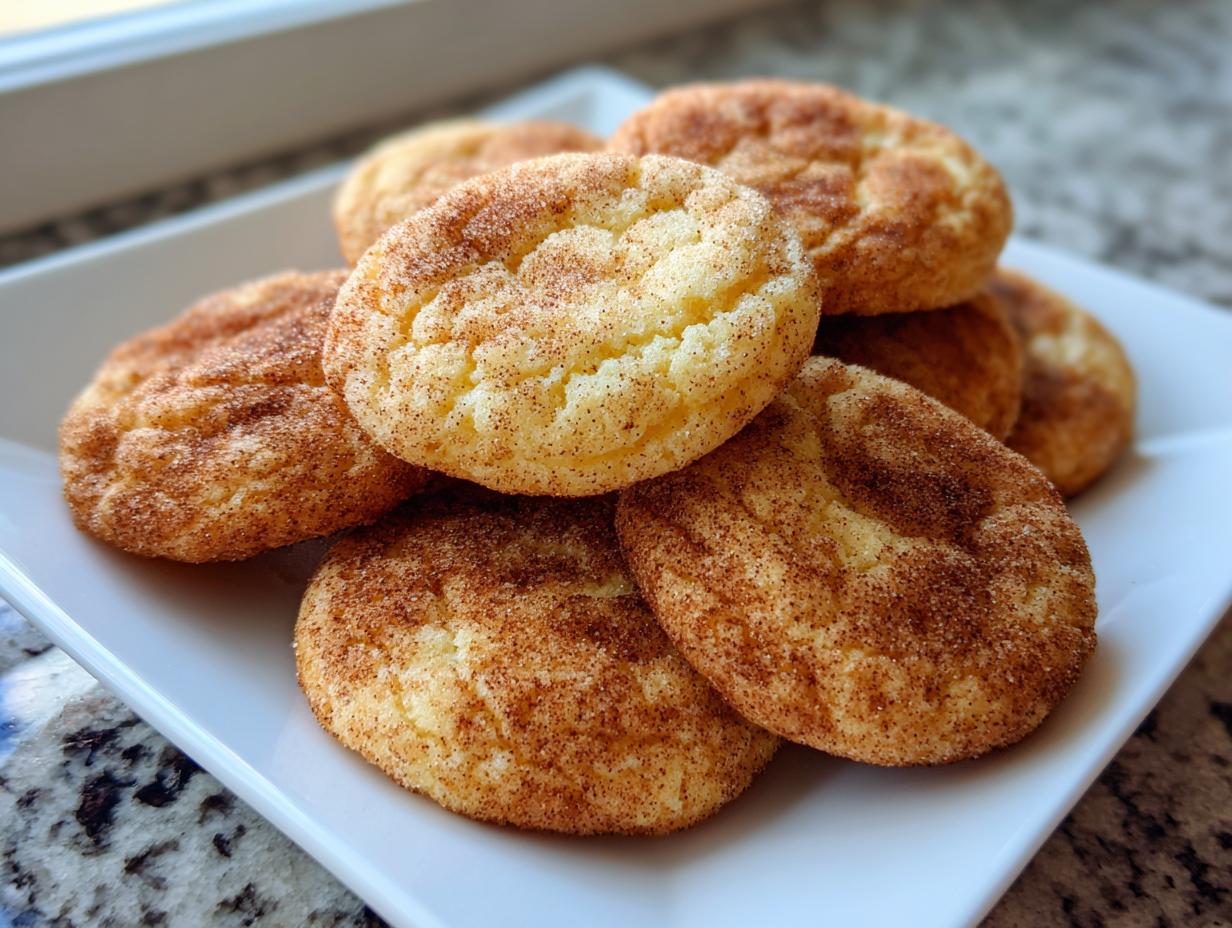
There is just something about cinnamon and sugar swirling together that instantly takes me back to my childhood kitchen. Forget complicated desserts; when I truly need comfort food, I turn to the simple magic hiding in my pantry staples. That’s why I have spent years perfecting what I wholeheartedly believe is the Best Soft and Chewy Classic Snickerdoodle Recipe you’ll ever meet. My grandmother always said that baking should feel like telling a story, and these beauties tell a tale of time-honored American home cooking. They have that signature crackle and that perfect give when you bite down. If you’re hunting for a foolproof snickerdoodle that truly delivers that soft, melt-in-your-mouth experience, stick with me. You won’t regret it!
- Why This Classic Snickerdoodle Recipe Stands Apart
- Ingredients for the Best Soft and Chewy Snickerdoodle Cookies
- Step-by-Step Instructions for Perfect Homemade Snickerdoodles
- Snickerdoodle Baking Tips for Consistent Results
- Storage and Keeping Your Snickerdoodle Cookies Fresh
- Variations on the Classic Cinnamon Spice Desserts
- Frequently Asked Questions About Snickerdoodle Baking
- Nutritional Estimates for This Snickerdoodle Recipe
- Share Your Homemade Snickerdoodle Creations
- Nutritional Estimates for This Snickerdoodle Recipe
- Share Your Homemade Snickerdoodle Creations
Why This Classic Snickerdoodle Recipe Stands Apart
You see a lot of recipes out there claiming to be the best, but honestly, ours has a few secret weapons that make it shine, especially when it comes to that perfect texture. Most people just want a nice, soft snickerdoodle, and that’s what we deliver. We’ve made sure this recipe is a winner for holiday baking and cookie exchanges alike.
- We use the perfect ratio of butter to sugar—creamed just right—to guarantee the best spread.
- The secret to that signature look is knowing exactly when to pull them from the heat so they don’t get hard.
- We don’t mess around on the tang; that bright flavor sets us apart from plain cinnamon sugar cookies.
Achieving The Ultimate Snickerdoodle Texture
Listen, nobody wants a dry, crumbly cookie, especially when they’re craving Chewy Center Cookies! My goal here is maximum chewiness in the middle, while the edges just start to set up with a tiny bit of crispness. That contrast is everything. You achieve it by pulling these beauties out right when they look a little pale in the very middle. Trust me, they finish cooking on the hot pan!
The Essential Role of Cream of Tartar Cookies
If you’re trying to make a real, authentic snickerdoodle, you absolutely cannot skip the cream of tartar. I know some folks try to simplify things, but this ingredient is non-negotiable for us. It’s an acid, see? It teams up with the baking soda to give you that wonderful, subtle tartness that makes a cream of tartar cookie taste like a snickerdoodle. Plus, it’s what helps create those gorgeous, delightful cracks all over the top surface. It’s kitchen chemistry, and it works every time!
Ingredients for the Best Soft and Chewy Snickerdoodle Cookies
When you’re ready to bake these wonderful snickerdoodle cookies, you’ll be happy to know that you probably have most of what you need right there in the cupboard! I always keep my pantry stocked for emergency comfort baking sessions. Remember, precision matters when we are aiming for that perfect soft texture, so measure carefully, especially that flour!
For the dough, you’ll need the basics, but don’t skip that cream of tartar—it’s our flavor MVP. I think it’s fun to pair these with my recipe for cinnamon butter for a truly decadent experience! Here is exactly what you need to gather up:
- 1 cup salted butter, softened (Make sure it’s actually soft, not melty!)
- 1 and 1/3 cups granulated sugar
- 1/3 cup packed brown sugar
- 2 large eggs
- 2 teaspoons vanilla extract
- 3 and 1/4 cups all-purpose flour, spooned and leveled (Please, please spoon and level! Don’t scoop right from the bag!)
- 1 teaspoon baking soda
- 3/4 teaspoon kosher salt
- 1 and 1/2 teaspoons cream of tartar
And of course, for that characteristic, gorgeous exterior coating, you’ll need a mix created separately:
- 1/3 cup granulated sugar (for rolling)
- 3 tablespoons ground cinnamon (for rolling—use a fresh, fragrant one!)
Having these fresh staples ready ensures you get those beautiful, thick cookies everyone swoons over!
Step-by-Step Instructions for Perfect Homemade Snickerdoodles
Alright, let’s get baking! If you follow these instructions exactly, you are going to pull out the most beautiful batch of snickerdoodle cookies you’ve ever seen. The whole process is surprisingly fast, especially compared to how many compliments you’ll get later! Remember that the key to these cookies is the contrast between the soft center and that spicy, sugary crust.
First things first: Get that oven warmed up!
- Set your oven to a solid 375°F (190°C). I always line my baking sheets with parchment paper. It saves cleanup time, and honestly, it helps the cookies bake evenly across the bottom, which is crucial for that perfect texture.
- We start with the wet stuff. In a nice big bowl—or your stand mixer if you’re feeling fancy—you need to cream together the softened butter, the main 1 and 1/3 cups of granulated sugar, and all of that brown sugar. You need to beat this until it’s noticeably light and fluffy. Pro Tip: If your butter is too cold, this step feels slow, so make sure it’s properly softened!
- Once you have that fluffy base, mix in your two large eggs, one at a time, making sure each one is fully incorporated before adding the next. Then, pour in that vanilla extract and mix until it’s all happy together.
- Now for the dry team. Grab a separate medium bowl and whisk together your flour, the baking soda, kosher salt, and that all-important cream of tartar. Whisking them separately ensures the leavening agents are perfectly distributed.
- This is where you need patience! Gradually add your dry mixture into the wet ingredients. You only mix this on low speed until it *just* comes together. Seriously, stop mixing the second you don’t see streaks of dry flour anymore. Overmixing is the enemy of soft cookies! For more tips on getting delicious mixes right, check out my thoughts on my easy parmesan pasta recipe—the mixing principles are similar!
Preparing the Dough and Cinnamon Sugar Coating
We’re almost ready for the fun part—the rolling! Before you even scoop, you need to prepare your coating station. In a small, shallow bowl, combine the remaining 1/3 cup of plain granulated sugar with the 3 tablespoons of ground cinnamon. Give that a good stir so you don’t end up with just cinnamon pockets in one bite and plain sugar in the next.
Once your dough is mixed (and not overmixed!), scoop it into balls—I find about 1.5 tablespoons is my sweet spot for that standard thickness. Roll each ball thoroughly in that cinnamon-sugar blend. I mean *completely* coated. You want the sugar mixture right up against the dough everywhere. Then, space those beauties about 2 inches apart on your prepared baking sheets. They need room to breathe and spread!
Baking Your Snickerdoodle Cookies Right
This is the moment of truth where we lock in that soft and chewy center! Pop those sheets into that preheated 375°F oven. They only need 8 to 10 minutes, depending on your oven’s mood that day. For the perfect texture, you need to watch them like a hawk!
You want to pull your snickerdoodle cookies out when the edges look set and just barely starting to turn golden brown, but the centers still look puffy and maybe even slightly underbaked. If they look completely done when you pull them out, they will be overbaked in about five minutes sitting there. Let them chill out on that hot baking sheet for a full 5 minutes. That residual heat helps them finish setting up just enough. After five minutes, gently move them over to a wire rack to cool completely. Enjoy that sweet aroma that means you nailed the recipe!
Snickerdoodle Baking Tips for Consistent Results
Even with the best snickerdoodle recipe in hand, sometimes the cookie gods aren’t smiling on us, right? But honestly, most texture issues come down to a couple of tiny tweaks that I learned the hard way over the years. You want those cookies to stay soft and not turn into brittle little discs, and that usually comes down to time and temperature. Don’t worry if your first batch wasn’t perfect; that’s why we write down helpful tips!
One thing I learned from testing batch after batch is that you absolutely cannot overbake these. Seriously, take them out when you think they look slightly too soon. That carry-over heat does all the heavy lifting! For those classic, slightly tangy, crackled tops that make everyone call you a genius baker, remember the power of the cream of tartar. It’s our acid working magic against the baking soda; that reaction is what gives you that signature bounce and tang that makes a world-class snickerdoodle.
Temperature Control and Dough Chilling
The temperature of your dough when it goes into the oven impacts everything—the spread, the thickness, and the bottom browning. If you are looking for those super thick, bakery-style cookies instead of the flatter ones, I have one great tip for you: Chill the dough!
If you find your dough is too soft or you just prefer a puffier cookie, scoop your dough balls, get them rolled in the cinnamon sugar, and then pop the whole tray into the refrigerator for about 30 minutes before baking. Chilling solidifies that butter just a bit. When the colder dough hits the hot oven, it takes longer for the fats to melt, meaning the cookies spread less rapidly. This gives you a thicker, chewier cookie overall. It’s a simple trick that delivers huge results for turning out thick snickerdoodle cookies!
If you want to dive deeper into yeast and dough handling principles (even though these don’t use yeast!), I wrote a quick guide on how to make sourdough starter from scratch that really breaks down why temperature is the number one factor in baking success. Take that science into your cookies!
Storage and Keeping Your Snickerdoodle Cookies Fresh
These snickerdoodle cookies are honestly the best the day they are baked. But if you have any leftovers—which I doubt you will!—storage is important. Keep them in a completely airtight container at room temperature. Don’t refrigerate them, or they’ll turn hard faster than you can say ‘cinnamon sugar!’
If they stiffen up by day two, don’t toss them! Just pop one on a microwave-safe plate for about 10 seconds. That quick little warm up brings back all that amazing soft chewiness we worked so hard to create. They taste almost homemade all over again!
Variations on the Classic Cinnamon Spice Desserts
While this classic recipe for snickerdoodles is genuinely unbeatable when you want that authentic taste, I do love playing around with spices sometimes! You can easily modify these just by changing up the spice blend in the rolling sugar. It’s a wonderful way to keep things fresh for holiday baking without messing with the structure of the dough itself.
If you want to amp up the warmth, try mixing in about half a teaspoon of ground nutmeg with your cinnamon and sugar for the coating. Nutmeg pairs beautifully with the slight tang from the cream of tartar! Or, if you’re feeling particularly adventurous and want a deeper, richer flavor, try swapping out half of the granulated sugar in your coating for a little bit of fine, turbinado sugar. That adds a tiny crunch and a nice hint of molasses.
And speaking of comfort, if you’re looking for something spoonable instead of strictly cookie-shaped, I’ve seen some absolutely divine ideas lately, like taking a batch of dough just like this—maybe thickening it slightly—and pressing it into a baking dish. Suddenly, you have a giant, soft, cinnamon-swirled dessert that dips perfectly into ice cream. It’s like a giant cookie that you don’t have to share perfectly!
If you are looking for other great spiced recipes that give you that cozy feeling, you might want to check out my notes on easy moist gingerbread cupcakes for something a little different this season. And when fall rolls around, sometimes I crave savory-sweet, which is why I developed my recipe for sweet potato gnocchi with maple brown butter—it hits that same warm flavor profile!
Frequently Asked Questions About Snickerdoodle Baking
I always get a flood of questions when readers try this recipe for the first time, especially when they’re hunting for that perfect textural sweet spot. It’s great knowing so many people are baking these homemade snickerdoodles! Here are the things I get asked most often about making these classic treats.
Can I skip the cream of tartar?
Oh, honey, please don’t! If you skip the cream of tartar, you aren’t making a true snickerdoodle; you’re just making a regular cinnamon sugar cookie, and we want that signature tang! The cream of tartar is what gives these cookies their slight sour note to balance the sweetness and—just as importantly—it’s what helps create that beautiful, crackled look on top. If you absolutely can’t find it, you can substitute with 1 teaspoon of lemon juice mixed with 1/2 teaspoon of baking soda, but honestly, keep cream of tartar on your shelf. It’s essential for that authentic flavor profile!
How do I make thicker snickerdoodles instead of flat ones?
This is a super common question, especially for a cookie that naturally spreads a bit like this one. We already talked about chilling the dough, which is the number one method for thicker cookies—chill those dough balls for 30 minutes before rolling. Another trick for thick snickerdoodle cookies is to make sure your butter isn’t too warm when you start creaming it. If the butter is too soft, it melts too fast in the oven, causing a rapid spread. Room temperature, but slightly firm butter helps keep things controlled!
Can I use salted butter, since that’s what I have?
Yes, absolutely, you can use salted butter in this Classic Snickerdoodle Cookie Recipe! We call for salted butter in the recipe above, which is perfect. But if you only have unsalted, just make sure you add that 3/4 teaspoon of kosher salt back in to keep the balance right. If you use salted and your salt measurement seems low, you can always add just a tiny pinch more, but usually, the amount in the salted butter is plenty to season the dough correctly against all that sugar.
What’s the best way to store my cinnamon spice desserts?
These are best eaten right away, of course, but if you need to save them, treat them well! Keep them in an airtight container at room temperature, and try to eat them within three or four days. They truly are the best soft and chewy cookies when they are fresh. Don’t crowd them in the container; if you stack them, put a piece of parchment paper between the layers to stop them from getting sticky.
If you have other questions that weren’t covered here, please don’t hesitate to reach out on my contact page. Happy baking!
Nutritional Estimates for This Snickerdoodle Recipe
I always look at the full picture of what we’re eating, blending my nutrition knowledge with my love for good comfort baking. Keep in mind that these numbers are just estimates based on standard ingredient measurements—your exact portion sizes and brands might shift things slightly! Here’s what you can generally expect per cookie, assuming about 3 dozen yield.
- Serving Size: 1 cookie
- Calories: 150
- Sugar: 14g
- Sodium: 100mg
- Fat: 8g
- Saturated Fat: 5g
- Unsaturated Fat: 3g
- Trans Fat: 0g
- Carbohydrates: 19g
- Fiber: 0g
- Protein: 2g
- Cholesterol: 30mg
Share Your Homemade Snickerdoodle Creations
Now that you’ve got the secrets to the ultimate snickerdoodle in your hands, I absolutely want to see what you create! Baking is meant to be shared, and I love seeing your beautiful sweet treats pop up online. If you make this recipe, please leave a rating right here on the page—five stars if you loved that soft, chewy texture!
Let me know in the comments how they turned out, if you added any secret spice twists of your own, or if you have any other questions about making these holiday baking classics. Don’t forget to tag me on social media so I can share your success! Your feedback truly helps other bakers feel confident trying my heritage recipes. We keep all feedback and personal details safe, as outlined in our privacy policy.
PrintThe Best Soft and Chewy Classic Snickerdoodle Recipe

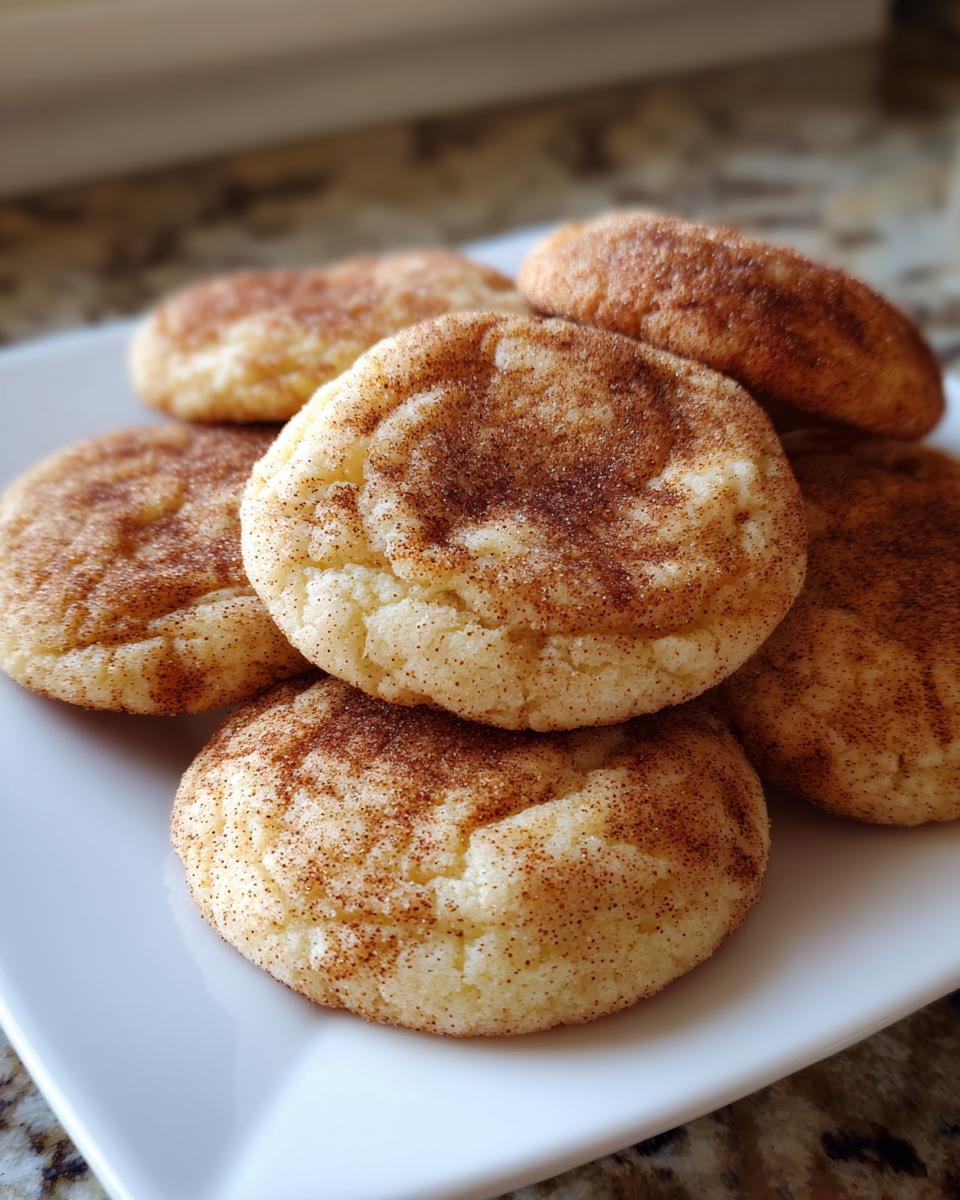
Make classic Snickerdoodle cookies that are perfectly soft in the center with slightly crisp edges. This recipe uses simple pantry staples and cream of tartar for the signature tang and crackled top.
- Prep Time: 15 min
- Cook Time: 10 min
- Total Time: 25 min
- Yield: About 3 dozen cookies 1x
- Category: Dessert
- Method: Baking
- Cuisine: American
- Diet: Vegetarian
Ingredients
- 1 cup salted butter, softened
- 1 and 1/3 cups granulated sugar
- 1/3 cup packed brown sugar
- 2 large eggs
- 2 teaspoons vanilla extract
- 3 and 1/4 cups all-purpose flour, spooned and leveled
- 1 teaspoon baking soda
- 3/4 teaspoon kosher salt
- 1 and 1/2 teaspoons cream of tartar
- 1/3 cup granulated sugar (for rolling)
- 3 tablespoons ground cinnamon (for rolling)
Instructions
- Preheat your oven to 375°F (190°C). Line baking sheets with parchment paper.
- In a large bowl, cream together the softened butter, 1 and 1/3 cups granulated sugar, and brown sugar until the mixture is light and fluffy. This step is key for texture.
- Beat in the eggs one at a time, then mix in the vanilla extract.
- In a separate medium bowl, whisk together the flour, baking soda, salt, and cream of tartar.
- Gradually add the dry ingredients to the wet ingredients, mixing on low speed until just combined. Do not overmix the dough.
- In a small, shallow bowl, mix the remaining 1/3 cup granulated sugar and the ground cinnamon for the coating.
- Scoop the dough into balls, about 1.5 tablespoons each. Roll each ball thoroughly in the cinnamon-sugar mixture until completely coated.
- Place the coated dough balls about 2 inches apart on the prepared baking sheets.
- Bake for 8 to 10 minutes. For soft and chewy cookies, remove them when the edges are set but the centers still look slightly underbaked.
- Let the cookies cool on the baking sheet for 5 minutes before transferring them to a wire rack to cool completely.
Notes
- For the ultimate soft and chewy texture, do not overbake. Pull them from the oven when the centers look soft.
- Cream of tartar provides the necessary acid to react with the baking soda, giving the cookies their characteristic tang and helping them spread and crackle.
- If you want a thicker cookie, chill the dough for 30 minutes before rolling and baking.
Nutrition
- Serving Size: 1 cookie
- Calories: 150
- Sugar: 14g
- Sodium: 100mg
- Fat: 8g
- Saturated Fat: 5g
- Unsaturated Fat: 3g
- Trans Fat: 0g
- Carbohydrates: 19g
- Fiber: 0g
- Protein: 2g
- Cholesterol: 30mg