
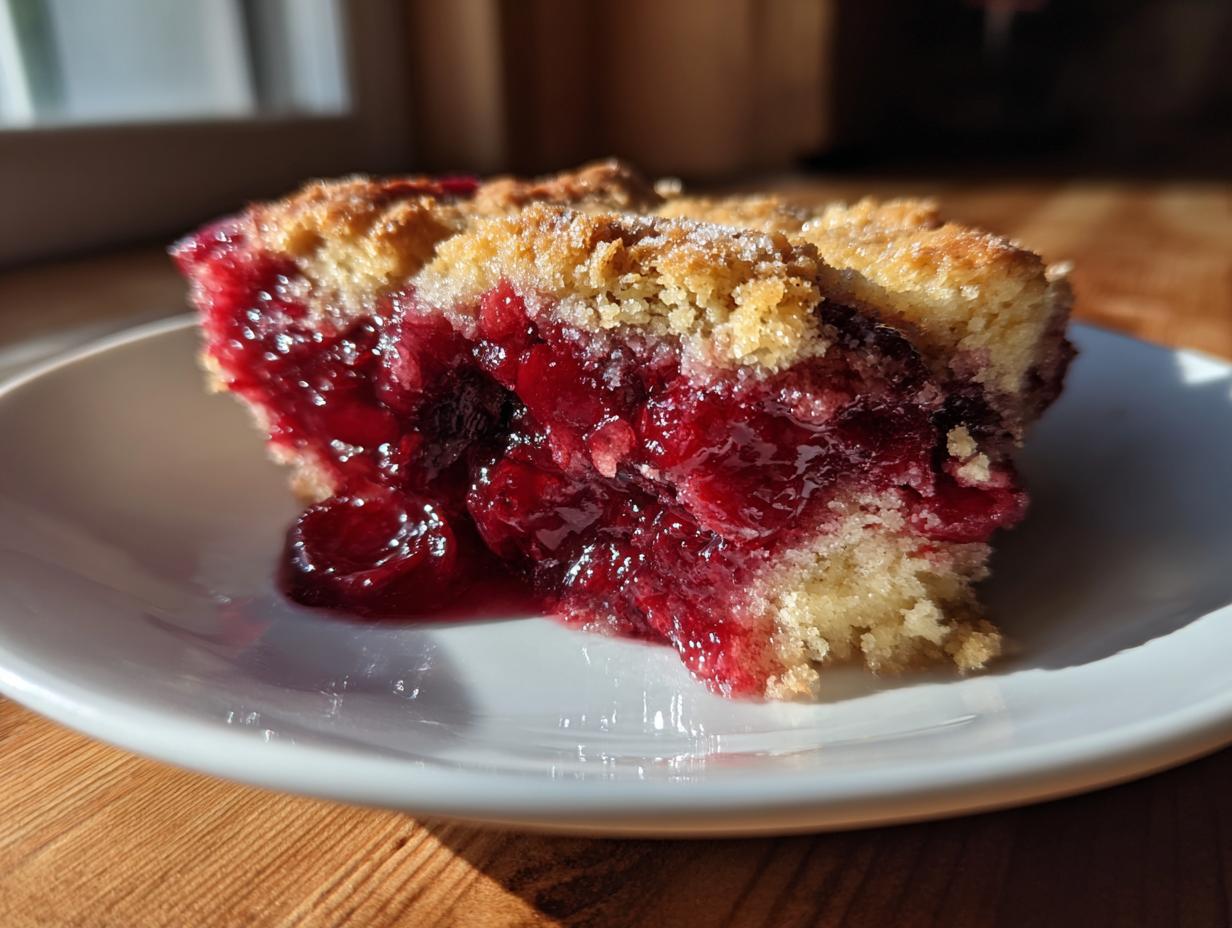
There is just nothing in this world quite like pulling a warm, bubbly fruit dessert out of the oven on a chilly evening, right? That sweet, nostalgic aroma takes me right back to my grandmother’s kitchen, and honestly, that’s what CravyBite Kitchen is all about—bringing that feeling home. If you think incredible homemade desserts are only for weekends or special occasions, you’ve got to see this! We’re talking about the ultimate easy cherry cobbler recipe. It’s designed for maximum payoff with minimum fuss, making it a perfect fast dessert recipe for weeknights.
Here at the kitchen, my philosophy, which founder Jess Carter holds dear, is that cooking should always feel like an “accessible pleasure.” This recipe perfectly embodies that. You don’t need complicated pastry skills or hours of your time to get that deep, comforting flavor. Trust me, this is the simple bake that proves you can make something truly special after a long day!
- Why This is the Best Easy Cherry Cobbler Recipe
- Gathering Ingredients for Your Easy Cherry Cobbler
- How to Make Cherry Cobbler from Scratch: Step-by-Step Instructions
- Tips for a Perfect Crisp and Bubbly Fruit Topping
- Serving Suggestions for Your Sweet Cherry Comfort Food
- Storage and Reheating Instructions for Leftover Easy Cherry Cobbler
- Variations on This Quick Baked Fruit Dessert
- Frequently Asked Questions About Making Easy Cherry Cobbler
- Share Your Experience with This Easy Cherry Cobbler
- Share Your Experience with This Easy Cherry Cobbler
Why This is the Best Easy Cherry Cobbler Recipe
I’ve tested pretty much every quick fruit bake out there, and this specific cherry cobbler—the one I use when I need something done in under an hour—always wins. It beats those fancy layered desserts any day because it focuses strictly on flavor and ease. It truly delivers on the promise of a best homemade cherry cobbler without any stress.
Why does this recipe stand out compared to other quick takes on this classic? Because everything is set up for guaranteed success, even if you’ve never made a dessert before. We focus on keeping it simple so you spend less time measuring and more time enjoying that bubbly filling. You can check out some other favorite delicious desserts and treats on the site, but this one is my go-to for pure comfort.
Quick Baked Fruit Dessert Ready Fast
Time is precious, especially after work! You only need about 15 minutes to mix everything up, and we’re looking at less than an hour total bake time. That means you can have a piping hot, incredible sweet cherry comfort food ready to eat before the evening news even finishes. It’s the definition of a fast dessert recipe for weeknights.
Beginner Friendly Cobbler Success
Forget wrestling with pie dough or rolling out delicate pastry! That’s where most people give up, but not here. This topping is a simple, thick batter that you just mix in one bowl and drop right over the fruit with a spoon. If you can stir ingredients together, you can conquer this recipe. It’s truly designed to be a foolproof, beginner friendly cobbler.
Gathering Ingredients for Your Easy Cherry Cobbler
When I say this is an easy cherry cobbler recipe, I mean it! We are relying on pantry staples to get this dessert on the table fast. That’s why we’re using canned cherries—no pitting required! That immediately cuts down on prep time, transforming this into a fantastic simple cherry dessert recipe. Don’t worry, we add flavor enhancers like almond extract to make sure it tastes like you spent all afternoon making it from scratch!
Below, I’ve laid out exactly what you need, broken down so you can grab everything and get started instantly. Just make sure that butter is properly chilled for the topping—it’s a small detail that makes a huge difference in texture later on!
For the Sweet Cherry Filling
- 2 (15 ounce) cans pitted sweet cherries in heavy syrup, undrained
- 1/2 cup granulated sugar
- 1 tablespoon cornstarch
- 1 teaspoon lemon juice
- 1/4 teaspoon almond extract
For the Simple Cobbler Topping
This topping is technically a thick, cake-like batter that we drop over the fruit. To get that lovely lift and structure, make sure your butter is truly cold and cut into those tiny pieces before you mix it in!
- 1 cup all-purpose flour
- 1/2 cup granulated sugar
- 1 1/2 teaspoons baking powder
- 1/4 teaspoon salt
- 1/2 cup cold unsalted butter, cut into small pieces
- 1/2 cup milk
How to Make Cherry Cobbler from Scratch: Step-by-Step Instructions
Okay, deep breaths! This is where the magic happens, but seriously, don’t panic about the “from scratch” part. Jess Carter designs these recipes so that they feel homemade without the headache. We’re using a batter drop topping, which is way faster than fussing with rolling pins. Grab your 8×8 dish and get that oven heating up to 375 degrees F right away. Lightly grease that dish so we don’t have any sticking drama later on! If you’re curious about other detailed step-by-step processes, checking out how to make sourdough starter from scratch shows the kind of precision we use, even in something as simple as this.
Preparing the Cherry Filling Base
First things first—we want that filling plump and thick, not watery. In a medium bowl, take both cans of those sweet cherries, syrup and all! Add the half cup of sugar, the cornstarch (that’s your secret weapon for thickening!), the lemon juice, and just a dash of almond extract. Give that a gentle stir. You don’t want to break up the cherries too much! Once it looks nicely coated, pour this gorgeous red mixture right into your greased baking dish. That’s the base layer done!
Mixing the Quick Cobbler Topping Batter
Now for our easy topping! In a separate bowl, whisk together your dry topping stuff: the flour, the other half-cup of sugar, baking powder, and salt. Next, we cut in that cold butter. I use my fingers for this—squish that cold butter into the dry mix until it looks like coarse crumbs, sort of like wet sand. Then, pour in the milk and stir *just* until it comes together. I mean it: stop stirring when you see those last few streaks of flour. If you overmix the batter, it gets tough, and nobody wants a tough topping on their easy cherry cobbler!
Assembling and Baking Your Easy Cherry Cobbler
This assembly part is the most fun! Take spoonsful of that thick topping batter and drop them evenly right over the cherry mixture you poured earlier. It’s totally fine—actually, it’s perfect—if there are gaps between the batter dollops. That allows the filling to bubble up beautifully! Pop the whole thing into the preheated oven for about 35 to 40 minutes. You’re looking for a golden brown topping and filling that is visibly hot and bubbly around the edges. Once it’s out, you absolutely have to let it rest for 15 minutes. This cooling time lets the cherry filling set up so it doesn’t run everywhere when you scoop it out!
Tips for a Perfect Crisp and Bubbly Fruit Topping
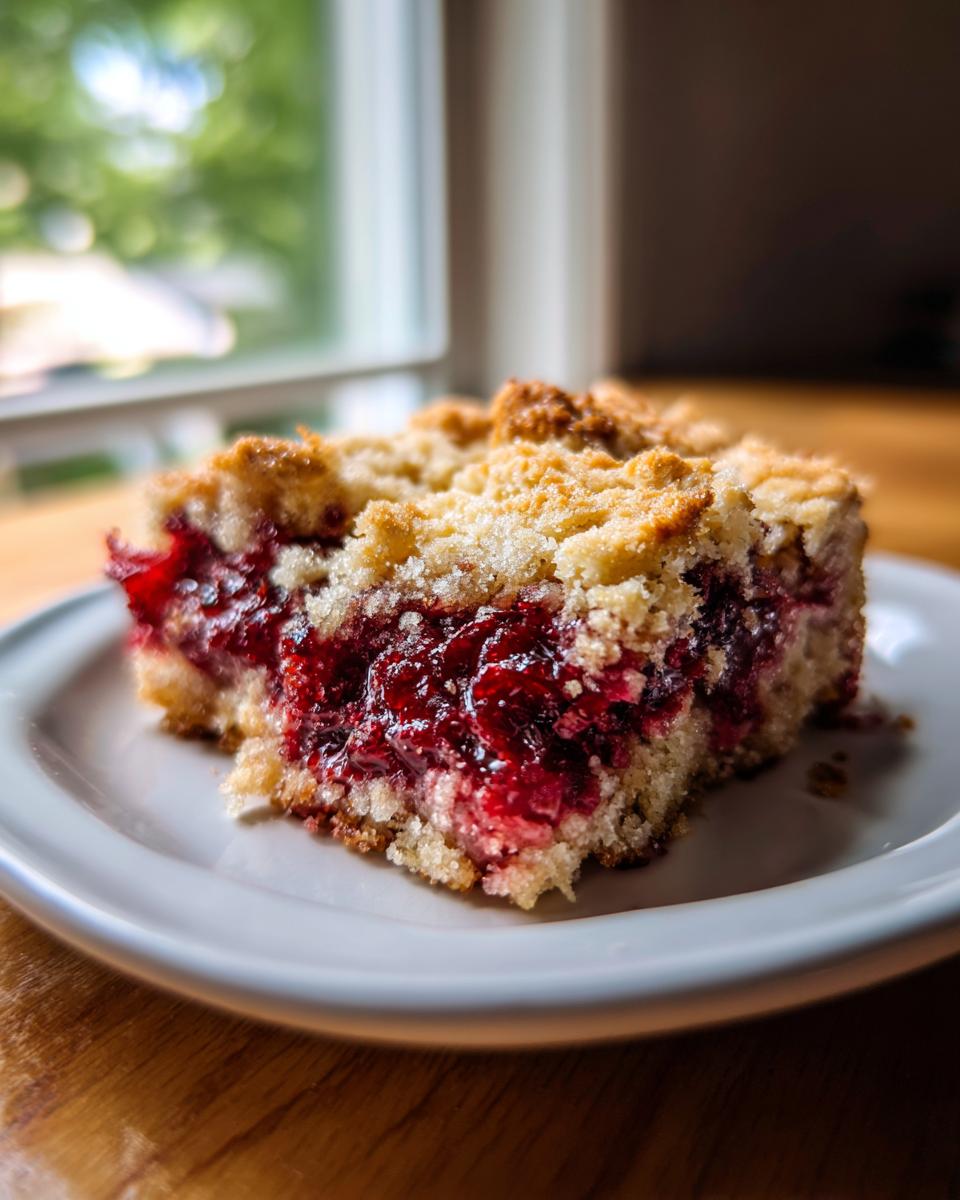
Even with a super easy cherry cobbler recipe, a few little tricks can elevate it from “good” to “I need the recipe right now!” The key to getting that perfectly baked, crisp topping that stands up to the warm fruit underneath is really all about temperature and technique. We want that filling to bubble up invitingly, but we don’t want a soggy mattress underneath our delicious baked batter.
When I bake these fruit desserts, I focus on two things: keeping things cold where they need to be cold, and making sure the fruit is properly stabilized. If you’re looking for other fun texture tips, check out my guide on making easy homemade marshmallows—it’s all about temperature control there, too!
Ingredient Notes and Substitutions for Easy Cherry Cobbler
Let’s talk butter temperature. Remember how I told you to cut in the cold butter until it looked like coarse crumbs? That step is crucial for that **crisp and bubbly fruit topping**. When cold chunks of butter hit the hot oven, they create tiny bursts of steam under the topping. Those steam pockets give you height and a wonderfully light texture! If your butter melts while cutting it in, stick the flour-and-butter mixture into the freezer for 10 minutes before adding the milk. It saves the whole topping!
Now, about those cherries. Using the canned fruit—syrup and all—is what makes this a true simple cherry dessert recipe that anyone can manage. But if you have fresh or frozen cherries on hand, go for it! If you use fresh, you might need to increase the cornstarch slightly, maybe up to 1 1/2 tablespoons, just to ensure that filling sets up nicely when it bubbles. On the flip side, if you only have canned pie filling instead of canned cherries in heavy syrup, use the filling but be careful with the added sugar. You might only need half of the 1/2 cup of sugar listed in the recipe since pie filling is already sweetened. Always taste before you commit to that extra sweetness!
Serving Suggestions for Your Sweet Cherry Comfort Food
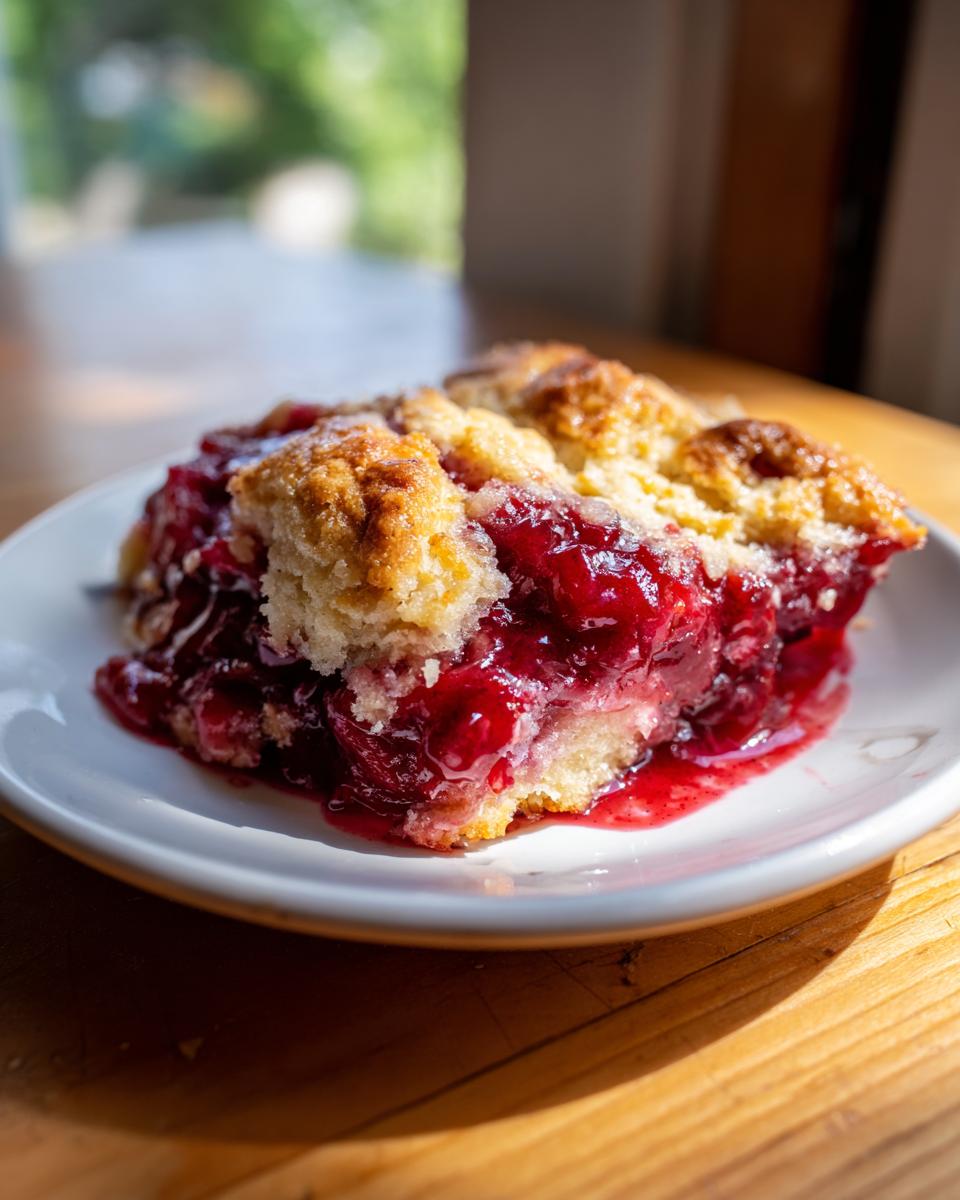
This is the best part! Once your **easy cherry cobbler** has rested for those crucial 15 minutes and the filling has settled just a touch, it begs for something cold and creamy on top. Seriously, do not skip this step. My absolute number one choice for this **sweet cherry comfort food** is always a big scoop of high-quality vanilla ice cream. The contrast between the hot, tart cherries and the melting, sweet cream is just heaven.
If you want something a little richer than ice cream, a dollop of fresh, lightly sweetened whipped cream works wonders. Or, if you happen to have some vanilla buttercream frosting leftover from another bake—you can check out my favorite recipe for pure vanilla buttercream frosting here—a tiny, artful swirl on top adds a lovely touch of indulgence. Either way, serve it warm! It makes this quick baked fruit dessert feel extra special.
Storage and Reheating Instructions for Leftover Easy Cherry Cobbler
I never count on having leftovers of this easy cherry cobbler—it disappears so fast! But when there is some left (usually just enough for a small snack the next morning), how you treat it matters a lot. You want to preserve that beautiful texture we worked so hard to achieve with the topping, right?
First things first: don’t put it away while it’s still hot! Let it cool down completely to room temperature first. Putting a warm dish directly into the fridge steams the topping, and that’s a fast track to sogginess, which is the exact opposite of what we want in a quick baked fruit dessert.
Once it’s fully cooled, cover the baking dish tightly with plastic wrap or foil. If you’re just keeping it on the counter, it’s usually fine for a day because of the high sugar content in the fruit, but I almost always pop mine in the fridge just to be safe, especially if it’s humid. It should keep beautifully for three, maybe four days tucked away in there.
Now, for reheating, the microwave is tempting because it’s so fast, but I strongly advise against it if you cherish that topping! Microwaving tends to make the batter a little chewy and dense. For the very best result—the one that brings it closest to fresh-from-the-oven perfection—use your regular oven or a toaster oven. Set it to about 325 degrees F. Pop a slice onto a small oven-safe plate or piece of foil and heat it for about 10 minutes, or until everything is warmed through and you see the fruit bubbling just a tiny bit again.
If you are absolutely desperate for a single serving right now, a 20-second zap in the microwave is acceptable, but pair it immediately with a scoop of ice cream to cut through any slight rubberiness. Remember, proper storage keeps this dessert delicious, but reheating it right is what keeps that homemade cherry cobbler texture in check!
Variations on This Quick Baked Fruit Dessert
Part of the fun of cooking, especially with something as straightforward as this **easy cherry cobbler**, is playing around once you’ve mastered the basics! Since this recipe uses such a simple batter drop method, it’s incredibly resilient to small adjustments. You don’t have to worry about complicated techniques or precise kneading; you can experiment and still end up with a wonderful, warm fruit dessert. I love tweaking mine when I’m feeling particularly inspired!
The best part is that these changes keep us firmly in the ‘easy’ zone. We aren’t venturing into anything that requires making a separate streusel topping or crafting intricate pastry designs. Think of these as minor flavor upgrades that still qualify as a **quick baked fruit dessert**.
Spice it Up: Adding Warmth to the Filling
Cherry and warm spice are old friends, and if you want to elevate those fruit flavors without adding any extra steps to the assembly, just sneak a little spice right into the cherry mixture when you combine the fruit and cornstarch. My favorite addition is about 1/2 teaspoon of ground cinnamon. It gives the filling a deeper, almost autumnal flavor, which is lovely even in the middle of summer!
You could also try a tiny pinch of ground nutmeg—just a pinch, like a whisper! A little almond extract already goes into this recipe, but if you really love that flavor, a bit of complementary spice makes the cherry taste pop even more. It’s a super simple way to create a completely different vibe from what I shared in my main recipe.
The Skillet Trick for an Easier Cleanup
If you want to minimize dishes, this is your golden ticket! You can absolutely adapt this recipe to make an easy skillet cherry cobbler. Instead of pouring the filling into an 8×8 dish and mixing the batter separately, you can do most of the groundwork right in a heavy, oven-safe cast iron skillet. Preheat your oven and grease the skillet. Mix the cherry filling ingredients together right in the skillet. Then, drop your batter spoonfuls right over the surface *in the skillet*.
When you use the skillet method, the baking time might be a few minutes shorter because the cast iron holds and transfers heat so efficiently. Plus, who doesn’t love a dessert that goes straight from the oven to the table? Talk about charm! If you’re looking for other ways to merge ease with exciting flavor, I’ve played around with a chocolate cherry cookie recipe that absolutely blows my mind, though that one certainly requires a bit more effort than this cobbler!
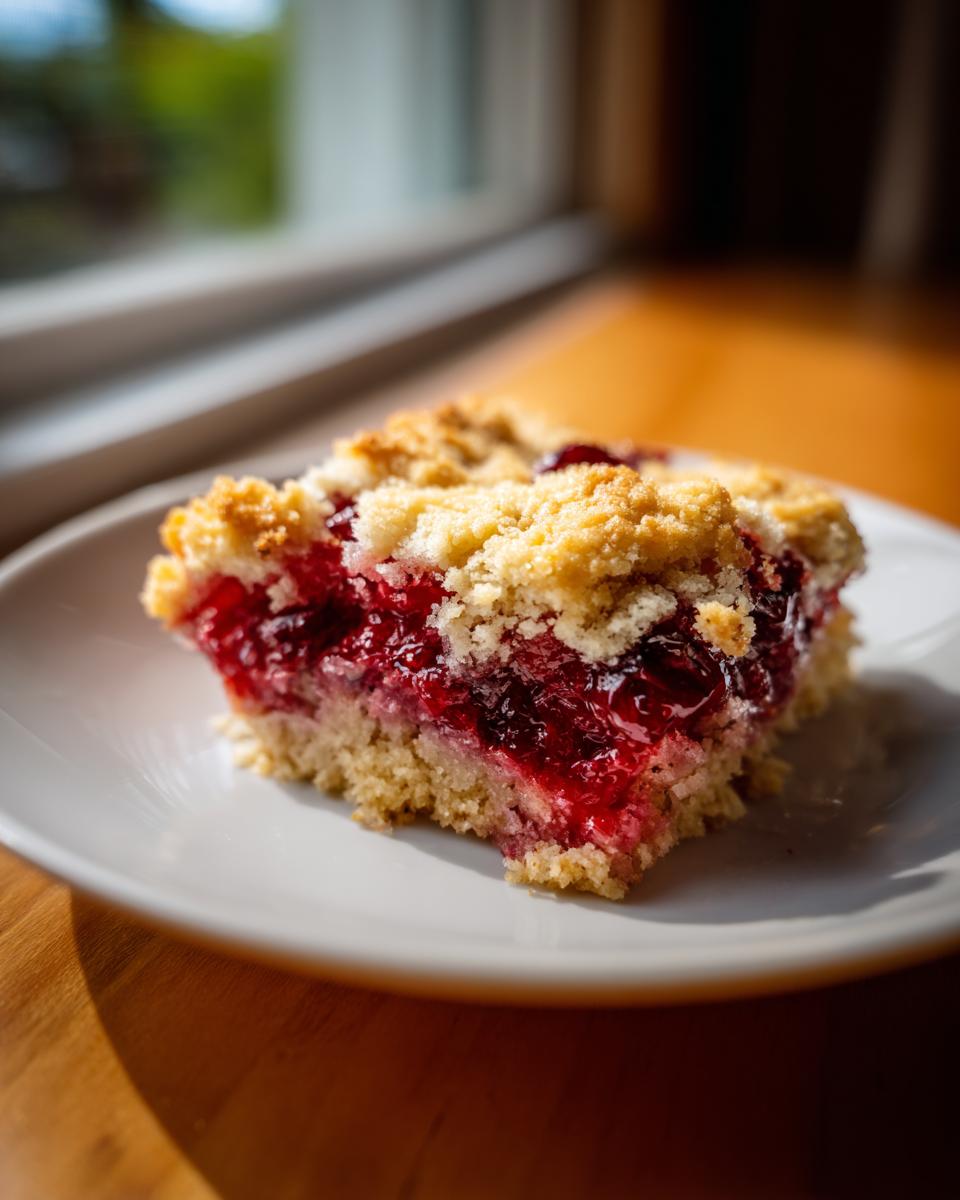
A Little Crunch on Top
While this recipe delivers a soft, cake-like drop topping, sometimes you just crave that tiny bit of contrast. If you want a hybrid between a cobbler and a crisp, you can make two adjustments. First, use the cold butter in the topping as directed. Second, once the topping is dropped over the cherries, grab about 2 tablespoons of quick-cooking oats—the standard type is fine—and sprinkle them lightly over the batter dollops. The oats toast up beautifully in the oven, giving you a slight, delicious crunch across the top while keeping the base soft and cakey underneath. It’s minimal extra work for maximum textural impact!

Frequently Asked Questions About Making Easy Cherry Cobbler
I always get questions when readers try out one of my favorite easy cherry cobbler recipes for the first time! That’s totally normal, especially when you’re trying to nail that perfect balance between speed and flavor. Most of the time, the questions revolve around ingredients or technique tweaks. If you’re looking for more super-fast meals in general, I’ve compiled some great quick, easy weeknight dinners inspiration on the site too!
Here are the top things folks ask me when they are making this delicious, bubbling dessert for the first time. Don’t sweat it if you have questions; that means you care about making it delicious!
Can I use fresh cherries instead of canned for this easy cherry cobbler?
That’s a great question! You absolutely can, and fresh cherries, when they are in season, are divine. However, using those wonderful canned cherries in heavy syrup is one of the main reasons this remains a truly simple cherry dessert recipe for weeknights. If you decide to go fresh, you’ll have to pit them all yourself—that’s a good chunk of time dedicated to prep work!
If you use fresh or frozen cherries, you’ll need to adjust the liquid slightly. Since they don’t come packed in syrup like the canned ones, I usually add an extra tablespoon or two of water or cherry juice and maybe a tiny bit more sugar, depending on how tart your cherries are. Also, make sure you increase that cornstarch to a full 1 1/2 tablespoons so the filling sets up nicely. Stick to the canned versions for the easiest outcome, trust me!
What is the difference between cobbler and crisp?
This confusion pops up all the time! It all comes down to what sits on top of that gorgeous fruit filling. This recipe is a cobbler because the topping is a thick batter—almost like a drop biscuit or a very soft cake—that you spoon directly over the fruit. It sets up to be soft and cakey right on top of the bubbling filling.
A crisp, on the other hand, uses a streusel-like topping, usually involving flour, butter, sugar, and often oats. The crisp topping is decidedly crumbly and crunchy once baked. This recipe is designed to avoid any no complicated pastry fruit bake, so we stick to the simple batter drop method for that classic soft cobbler top!
Can I make this a Southern style cherry cobbler?
You sure can try to capture that genuine Southern style cherry cobbler feel! The main difference between my quick batter version and the traditional Southern version is the topping. My recipe avoids the need for any complex dough rolling or biscuit cutting. If you want that iconic, taller, fluffier biscuit topping, you’ll need to prepare a simple biscuit dough separately (you know, flour, baking powder, cold fat, and milk) and drop spoonfuls of *that* dough over the cherries instead of using the batter described in Step 5.
While the biscuit topping is amazing, it adds a few extra mixing steps and dishes. That’s why this recipe skips the potentially tricky homemade pastry work, keeping it straightforward for those weeknight cravings!
Share Your Experience with This Easy Cherry Cobbler
Well, that’s it! We’ve gone from a bag of pantry staples to a piping hot, bubbly, incredibly delicious **easy cherry cobbler** in under an hour. Doesn’t that feel amazing? This is what I mean when I talk about accessible pleasure in the kitchen. I truly hope you whip this up soon and let the sweet, comforting aroma fill your home.
If you followed the steps—especially chilling that butter and being careful not to overmix the topping batter—I know you’ll rate this recipe 5 stars! Please come back and let me know how it turned out in the comments below. I love hearing about your successful bakes and seeing how you serve this irresistible **homemade cherry cobbler**. Happy baking, and don’t forget to reach out if you have any final questions via my contact page!
Share Your Experience with This Easy Cherry Cobbler
Well, that’s it! We’ve gone from a bag of pantry staples to a piping hot, bubbly, incredibly delicious easy cherry cobbler in under an hour. Doesn’t that feel amazing? This is what I mean when I talk about accessible pleasure in the kitchen. I truly hope you whip this up soon and let the sweet, comforting aroma fill your home.
If you followed the steps—especially chilling that butter and being careful not to overmix the topping batter—I know you’ll rate this recipe 5 stars! Please come back and let me know how it turned out in the comments below. I love hearing about your successful bakes and seeing how you serve this irresistible homemade cherry cobbler. Happy baking, and don’t forget to reach out if you have any final questions via my contact page!
PrintEasy Cherry Cobbler Recipe

Make this simple cherry cobbler using basic ingredients for a comforting, quick-to-prepare dessert.
- Prep Time: 15 min
- Cook Time: 40 min
- Total Time: 55 min
- Yield: 6 servings 1x
- Category: Dessert
- Method: Baking
- Cuisine: American
- Diet: Vegetarian
Ingredients
- 2 (15 ounce) cans pitted sweet cherries in heavy syrup, undrained
- 1/2 cup granulated sugar
- 1 tablespoon cornstarch
- 1 teaspoon lemon juice
- 1/4 teaspoon almond extract
- 1 cup all-purpose flour
- 1/2 cup granulated sugar
- 1 1/2 teaspoons baking powder
- 1/4 teaspoon salt
- 1/2 cup cold unsalted butter, cut into small pieces
- 1/2 cup milk
Instructions
- Preheat your oven to 375 degrees F. Lightly grease an 8×8 inch baking dish.
- In a medium bowl, combine the undrained cherries, 1/2 cup sugar, cornstarch, lemon juice, and almond extract. Stir gently to mix. Pour this cherry mixture into the prepared baking dish.
- In a separate bowl, whisk together the flour, 1/2 cup sugar, baking powder, and salt for the topping.
- Cut in the cold butter using a pastry blender or your fingers until the mixture resembles coarse crumbs.
- Pour the milk into the dry ingredients and stir just until combined to form a thick batter. Do not overmix.
- Drop spoonfuls of the batter evenly over the cherry filling. It does not need to cover the entire surface; gaps are fine.
- Bake for 35 to 40 minutes, or until the topping is golden brown and the cherry filling is bubbly around the edges.
- Let the cobbler cool for at least 15 minutes before serving.
Notes
- For a crisp topping, chill the butter thoroughly before mixing it into the flour mixture.
- Serve this sweet cherry comfort food warm with vanilla ice cream for the best experience.
- If you prefer a Southern style cherry cobbler, you can use a biscuit topping recipe instead of this batter topping.
Nutrition
- Serving Size: 1 serving
- Calories: 350
- Sugar: 45g
- Sodium: 180mg
- Fat: 15g
- Saturated Fat: 9g
- Unsaturated Fat: 6g
- Trans Fat: 0g
- Carbohydrates: 55g
- Fiber: 2g
- Protein: 4g
- Cholesterol: 35mg