
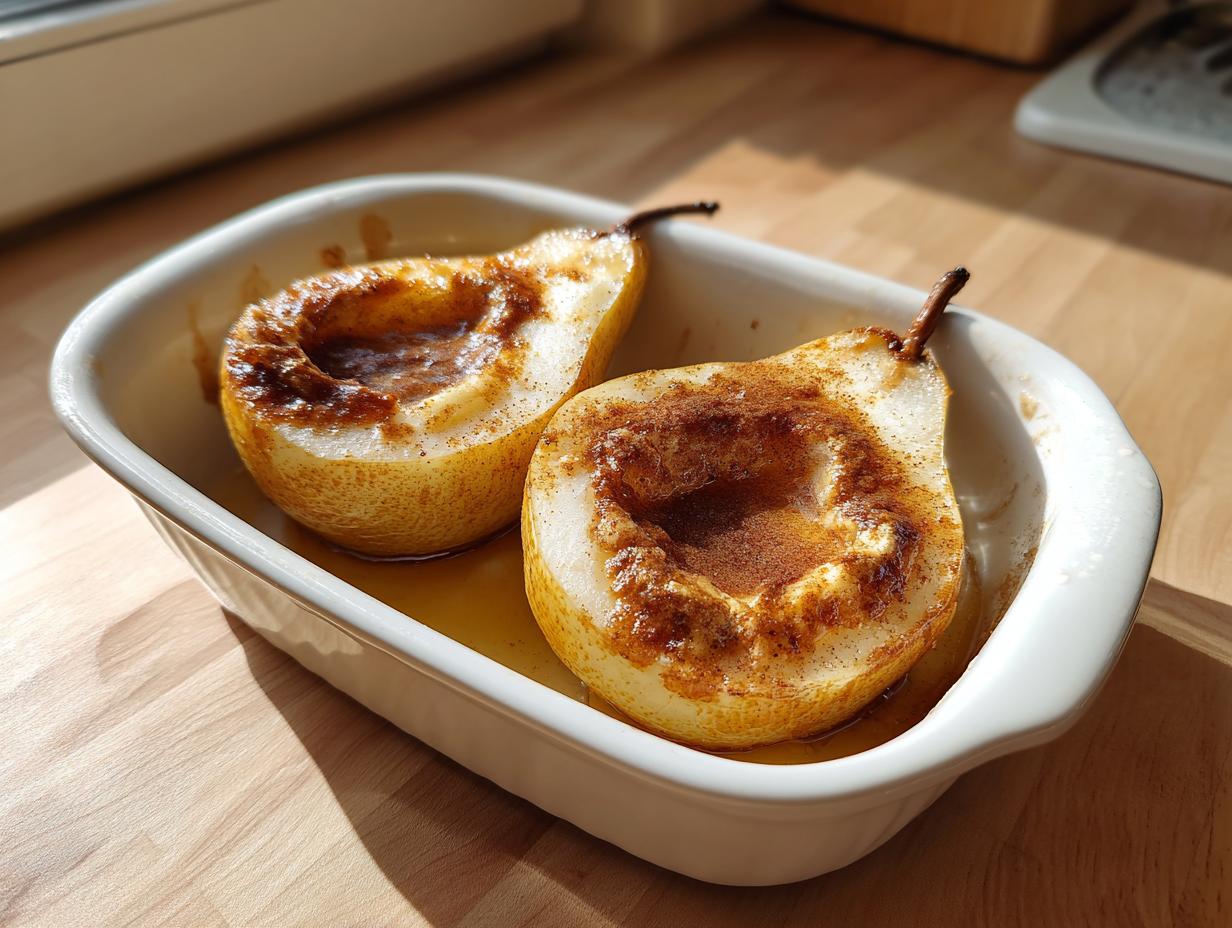
When the chill starts creeping in, don’t you just crave that warm, deeply comforting dessert that tastes like a hug? You know the one—simple, sweet, and requires next to no fuss. That’s exactly why I’m sharing my go-to recipe for Cinnamon Honey Baked Pears. Here at CravyBite Kitchen, we believe food should nourish the soul, and as someone with a background in nutrition, I make sure these are wholesome, too, relying on the pear’s natural sugars enhanced by golden honey.
This isn’t some complicated bake-off entry; this is pure, tender, spiced fruit perfection that tastes like it took hours but really only needs about ten minutes of prep work. Trust me, this simple roasted fruit recipe will become your new favorite way to end a chilly evening.
- Why You Will Love These Cinnamon Honey Baked Pears
- Essential Ingredients for Perfect Baked Pears
- Step-by-Step Guide: How to Prepare Your Baked Pears
- Tips for Achieving Perfect Tender Roasted Pears
- Serving Suggestions for Your Quick Elegant Dessert
- Storage and Reheating Instructions for Baked Pears
- Frequently Asked Questions About Baked Pears
- Estimated Nutritional Data for Baked Pears
- Share Your Cozy Baking Experience
Why You Will Love These Cinnamon Honey Baked Pears
When I develop a new recipe for CravyBite Kitchen, the question is always: Does it make life easier while tasting incredible? These spiced pears tick every single box, which is why I know you’re going to be obsessed. Forget heavy, complicated desserts; this one delivers comfort without the commitment!
- It’s the ultimate in cozy flavor. That combination of warm cinnamon and rich honey just smells like home on a crisp afternoon.
- They are surprisingly good for you! When you’re looking for healthy pear dessert ideas that still feel indulgent, using natural fruit sweetness is the answer.
- You can customize them endlessly—they are fantastic totally plain, but adding a sprinkle of nuts or a zest of orange makes them feel like real five-star food.
- They look so elegant! Seriously, cutting a pear in half and drizzling it with honey makes it look like you spent hours fussing, which is always my favorite kind of baking magic.
Quick and Effortless Preparation
I am serious when I say this is fast. You only need about 10 minutes to get these pears prepped, sliced, cored, and drizzled. Life is too short to fuss when you can have dessert ready in under an hour total. If you’re looking for an easy baked pears recipe that delivers maximum payoff for minimum effort, this is it.
Naturally Sweet and Wholesome
Part of my philosophy here is using ingredients that do the heavy lifting for us. Pears have such a satisfying, deep sweetness when they concentrate during baking. We use honey and just a touch of brown sugar—that’s it! We aren’t overwhelming the fruit; we are just highlighting what’s already wonderful about it. It’s a perfect way to incorporate more fruit into your evenings while sticking to those healthy pear dessert ideas without feeling like you’re missing out on something rich.
Essential Ingredients for Perfect Baked Pears
If you want your baked pears to turn out beautifully tender and not turn into mush, the ingredients have to be right. This is where we treat our simple ingredients with the respect they deserve. I’ve listed every measurement down to the last sprinkle! Don’t skip the vanilla—it adds that background depth that makes people ask, “What *is* that amazing flavor?”
- Four firm pears, we need them to hold their shape during the roast!
- Four tablespoons of unsalted butter, and you need to cut this into small little pieces before you start.
- Four tablespoons of golden honey—the real stuff, please!
- Four teaspoons of ground cinnamon. Don’t skimp here, this is the star spice!
- Two tablespoons of brown sugar. This helps create that gorgeous caramel around the edges.
- One teaspoon of pure vanilla extract. Just a drop of magic!
- A tiny pinch of salt—it wakes everything up.
- Optional, but highly recommended: A quarter cup of chopped walnuts or pecans if you want a nice crunch.
Choosing the Right Pears for Baking
Okay, so this is critical, and it’s where so many people mess up their tender roasted pears. You absolutely cannot use pears that are totally soft; they’ll dissolve into applesauce territory before they even caramelize properly. My rule? Always reach for firm pears when baking.
I always go for Bosc pears or Anjou pears. Bosc holds up so well because it’s naturally firmer, which means when you take them out of the oven, they are perfectly soft inside but still have some structure. Anjou is usually a close second, nice and crisp when raw, meaning they bake down beautifully without collapsing. Remember, we are aiming for tender, not liquid!
Step-by-Step Guide: How to Prepare Your Baked Pears
Okay, deep breaths! While baking can sometimes feel intimidating, preparing these baked pears is so straightforward, it’s almost silly. Since we’re already dealing with roasting fruit, which is very similar to roasting vegetables—you want everything to kiss the heat evenly—you might want to check out my tips for garlic herb roasted veggies if you’re looking for other simple roasting ideas! But for these pears, it’s all about setting up the stage correctly so the honey and cinnamon can do their magic. Follow these three key phases, and you can’t go wrong.
Prepping the Pears and Oven Setup
First things first, we need heat! Go ahead and preheat your oven to 375 degrees Fahrenheit. Don’t wait until the pears are all cut before you do this; we want the oven ready to go. Next, grab a small baking dish—the goal here is to fit the pear halves snugly right next to each other. If they are too far apart, the juices won’t pool nicely into that sweet sauce we love.
Wash your four firm pears really well. Lay them on a cutting board and slice them right down the middle, lengthwise. Now for the coring part! You need to scoop out all the seeds and that tough little core right in the middle. I usually use a melon baller for this, but a small spoon works just fine too. Just make sure that cup shape is clean and ready to hold all the wonderful goodness we’re about to add.
Creating the Honey Cinnamon Filling for Baked Pears
Grab a tiny little bowl. We’re going to mix two of our flavor powerhouses: the brown sugar and the ground cinnamon. Just give those a swirl until they look evenly colored.
Take those small pieces of butter we cut earlier—about one teaspoon of butter—and gently press one piece right into the hollow space of each pear half. This melts down and combines with our spices to make a rich base. Then, take your cinnamon-sugar mix and sprinkle it generously right over that butter. This combination is what turns into that incredible, mouthwatering glaze!
Now, drizzle that gorgeous honey evenly over all the pear halves. If you’re using vanilla, just add a few drops right over the top into the baking dish. If you decided to grab those walnuts or pecans, scatter them across the tops now—they’ll toast up beautifully while baking.
Baking Time and Checking for Tenderness
Into the oven they go! These flavorful honey baked pears for dessert usually need about 30 to 40 minutes at 375°F. You’ll know they are getting close when you peek in and see the liquids bubbling away nicely in the bottom of the pan—that’s your natural caramel forming!
The real test for doneness is the fork. You need to gently pierce the thickest part of the pear flesh. If your fork slides in with just the slightest bit of resistance, they are done! If you feel like you’re pushing hard, give them another 5 or 10 minutes and check again. We want them soft all the way through. Let them cool just a touch so you don’t burn your mouth, and then dig in!
Tips for Achieving Perfect Tender Roasted Pears
You’ve got the basic recipe down, and you know the pear firmness matters, but I always like to share the little tricks I learned over the years that elevate something simple into something unforgettable. Getting that perfect texture for your tender roasted pears really comes down to understanding how heat interacts with fruit sugar. It saves you from that disappointing moment when you pull out a dish that looks gorgeous but ends up a little too firm.
If you’re worried about your pears being overly firm right out of the gate, remember the note above about variety—Bosc is your friend! But even with the sturdiest fruit, sometimes you need that gentle boost during baking to ensure they melt beautifully in your mouth. You can check out how others tackle their spiced fruit over at this great resource if you’re ever curious.
Flavor Boosts for Your Baked Pears
This recipe is amazing as-is—truly! But if you want to play around with the spices a little bit, or if you want to make a batch of warm spiced pears dessert that tastes truly unique, I have two favorite additions that go right into the bottom of that baking dish. They mix with the honey and butter runoff to create the most incredible syrup!
First, if you have fresh ginger sitting around, slice up just a couple of thin coins and tuck them into any empty spaces between the pear halves. Ginger and pear are just sensational together—it adds a little zip that cuts through the sweetness. It’s subtle, but it makes a difference!
Second, and this is one of my absolute favorites for turning up the cozy factor, add a splash of fresh orange juice—maybe half an orange worth of juice, straight into the bottom of the pan along with the honey drizzle. The acidity from the orange really brightens up the cinnamon and honey mixture. It keeps the final syrup tasting vibrant, not heavy. Just remember, these little additions infuse during the roast, so they become part of the final, perfect tender roasted pear experience!
Serving Suggestions for Your Quick Elegant Dessert
Now that you’ve pulled those gorgeous, bubbling, caramelized baked pears out of the oven, the fun part starts: deciding how to serve them! Honestly, they are totally delicious just on their own, warm from the dish, but I believe that presentation and temperature contrast are what turn a simple recipe into a truly quick elegant dessert. You’ve put in the 10 minutes of prep; let’s make this look like it came from a fancy restaurant!
My favorite things to pair with these spiced pears involve something creamy and cold. That contrast between the warm, soft fruit and a cool, rich topping is just heavenly during the fall and winter months. If you aren’t a traditional frosting person, you should still check out my recipe for vanilla buttercream frosting just to see how simple it is to make a beautiful topping from scratch!
Pairing Baked Pears with Creamy Toppings
If you’re serving these right away, you need that ice-cold contrast. I’m telling you, a single scoop of good quality vanilla ice cream melting right into the honey-cinnamon syrup at the bottom of the bowl? Perfection. The sugar content in the syrup keeps the ice cream from freezing solid, making this pairing unbeatable.
But if you’re looking for something that feels a little lighter but still hits that creamy spot, Greek yogurt is your best friend here. Plain Greek yogurt, maybe with just a tiny drizzle of extra pure honey on top, adds this slight tanginess that balances the deep sweetness of the baked fruit perfectly. It makes it feel almost virtuous, even though you’re eating dessert!
Another great serving idea, especially if you topped them with nuts while baking, is just a simple spoonful of crème fraîche. It’s tangy, it’s rich, and it melts ever so slightly into the edges of the warm pear half. No matter what you choose, use a nice bowl—a wide, shallow bowl is best so you can spoon some of that incredible roasted syrup over the whole thing!
Storage and Reheating Instructions for Baked Pears
I try to convince everyone to eat these fresh out of the oven because the texture of truly warm, tender roasted pears is just unmatched. But let’s be real—sometimes you want dessert tomorrow, or maybe you made a double batch because guests kept asking for seconds! Good news: these keep beautifully, which builds confidence in knowing you can make them ahead of busy holiday dinners.
The great thing about baked fruit is that it lasts longer than a delicate sponge cake. You can safely store leftovers right in the baking dish if you have a lid for it, or you can transfer the pear halves and any extra syrup into an airtight container. Personally, I wouldn’t recommend keeping them longer than three or four days in the refrigerator, just to keep that flavor at its peak.
When you go to reheat them, my number one piece of advice is to go low and slow. Don’t blast them in the microwave! Microwaving fruit can make it unevenly hot and mushy in spots. Instead, skip the nuclear option. Preheat your oven to a very gentle 300 degrees Fahrenheit.
Place the pear halves back into a small, oven-safe dish or even just lay them on a small baking sheet. If you have any of that leftover honey syrup from the bottom of the original pan, drizzle just a teaspoon over each pear half before baking. This prevents them from drying out while they warm up.
They only need about 10 to 15 minutes to come back up to temperature. When they are gently warmed through, the texture will be much closer to fresh-baked than microwaved. They’ll be perfect for topping some yogurt or enjoying as a lovely, warm snack the next morning. It’s that simple—no fuss, maximum reward, even when they aren’t piping hot straight from the oven!
Frequently Asked Questions About Baked Pears
Look, I get it. Sometimes you follow a great recipe, but a little something still feels unclear. Since these baked pears are such a staple for me during the cooler months—they feel just as appropriate for a cozy weekend breakfast as they do for a fancy dinner party—I wanted to tackle some of the questions I always hear. These tips are meant to make sure your venture into fall baked fruit recipes is a total success!
Can I use different sweeteners instead of honey in these baked pears?
Oh, absolutely! Honey is fantastic because it caramelizes beautifully and has that deep floral note, but we all have different pantry staples, right? If you don’t have honey on hand, or if you just prefer a different flavor profile, maple syrup is a stellar, direct swap. Maple syrup works just like honey in this case. It melts down wonderfully and helps create that soft, sugary glaze when mixed with the brown sugar and butter.
When you use maple syrup, you are still adhering to the core idea of this recipe: making a simple roasted fruit recipe that relies on natural, liquid sweeteners rather than piles of refined white sugar. The flavor will lean slightly more woodsy or earthy, which is amazing when paired with cinnamon. Just use the same four tablespoons, and you’ll get the same perfect roasting effect!
Are baked pears considered a healthy dessert?
That is one of my favorite things about this dish! Yes, I definitely consider these a healthier dessert option, especially when you compare them to things like heavy pies or frosted cakes. Why? Because the star ingredient is the fruit itself! We are using four whole pears, which pack serious fiber and vitamins.
We aren’t loading these up; we are just adding enough honey and butter to enhance the natural flavor. Since we use controlled amounts of sweetener—instead of drowning the fruit—you are getting all the benefits of a whole fruit dessert. They fit right into that category of healthy pear dessert ideas because you’re satisfying that sweet craving with something that actually gives you built-in nutritional benefits. If you top it with Greek yogurt instead of ice cream, you’re winning big time!
If you’ve ever tried my easy black bean chili, you know I love food that tastes decadent but is good for you on the inside. These pears follow that exact same path. You can enjoy them without any guilt!
Estimated Nutritional Data for Baked Pears
Whenever I share a recipe that feels this comforting, people always ask me where the nutrition lies, and I love that! Since I have that background in nutrition, keeping track of this stuff is just second nature to me. Now, remember, this is just an estimate for each serving—one pear half—based on the ingredients listed and doesn’t account for what you might drizzle on top, like ice cream or extra honey.
Generally speaking, these baked pears are fantastic because they are naturally high in fiber from the fruit itself. For a healthy pear dessert idea, the numbers look pretty great:
Each serving comes out to roughly 240 calories. The fat content is quite low, around 10 grams total, with only about 6 grams coming from saturated fat. The natural sugars and the honey we add put the sugar total around 35 grams per half, which is where those satisfying caramel flavors come from! We are looking at about 40 grams of total carbohydrates, with 6 grams of that being fiber, which is excellent for dessert.
I always say that when you compare this to a slice of traditional cake loaded with frosting, it’s a win! You’re getting real fruit and natural sweetness. The sodium is nearly negligible, right around 5 milligrams, and there’s about 1 gram of protein per serving. It’s a reliable, naturally sweet finish to any meal, and I hope seeing these numbers makes you feel even better about whipping up this simple roast!
Share Your Cozy Baking Experience
That’s it! You’ve made my Classic Cinnamon Honey Baked Pears, and I truly hope the smell of warm cinnamon and bubbling honey is filling your kitchen right now. When I share a recipe developed right here at CravyBite Kitchen, my favorite part is hearing how it turns out for you at your own family table. It’s about building that community of real home cooks connecting through simple, honest food.
I want to know everything! Did you manage to get those pears perfectly tender? Did you go for the vanilla ice cream, or were you brave and tried the Greek yogurt suggestion? Don’t keep these successes—or even your little kitchen mishaps—to yourself!
Please take a moment down in the comments below to leave a rating for this recipe. Five stars if you think these baked pears are the coziest dessert ever, but I want to hear your honest feedback too! If you decided to try adding a little fresh ginger on top, let us know how that worked out for you!
If you snap a picture of your beautiful, caramelized Pears—especially one showing off your favorite topping—I would absolutely love to see it! You can share photos or send me any detailed questions you might have about oven temperatures or pear firmness over at my contact page. Happy baking, friend! I can’t wait to see your sweet creations.
PrintClassic Cinnamon Honey Baked Pears

Make these simple, tender baked pears infused with warm cinnamon and sweet honey. This easy roasted fruit recipe creates a comforting dessert perfect for cozy nights or as a healthy finish to any meal.
- Prep Time: 10 min
- Cook Time: 35 min
- Total Time: 45 min
- Yield: 4 servings 1x
- Category: Dessert
- Method: Baking
- Cuisine: American
- Diet: Vegetarian
Ingredients
- 4 firm pears (such as Bosc or Anjou)
- 4 tablespoons unsalted butter, cut into small pieces
- 4 tablespoons honey
- 4 teaspoons ground cinnamon
- 2 tablespoons brown sugar
- 1 teaspoon vanilla extract
- Pinch of salt
- Optional: 1/4 cup chopped walnuts or pecans
Instructions
- Preheat your oven to 375 degrees Fahrenheit. Lightly grease a small baking dish that fits the pears snugly.
- Wash the pears. Cut each pear in half lengthwise. Use a melon baller or small spoon to carefully scoop out the core and seeds from each half.
- Place the pear halves cut-side up in the prepared baking dish.
- In a small bowl, mix the brown sugar and cinnamon together.
- Place a small piece of butter (about 1 teaspoon) into the hollowed-out center of each pear half. Sprinkle the cinnamon-sugar mixture over the butter.
- Drizzle the honey evenly over all the pear halves. Add a few drops of vanilla extract to the dish.
- If using nuts, sprinkle the chopped walnuts or pecans over the tops of the pears.
- Bake for 30 to 40 minutes, or until the pears are tender when pierced with a fork. The juices in the bottom of the dish should be bubbling and slightly caramelized.
- Remove from the oven and let cool slightly before serving warm.
Notes
- Serve these warm baked pears with a scoop of vanilla ice cream or a dollop of plain Greek yogurt for a contrast in temperature and texture.
- For an extra layer of flavor, add a splash of orange juice or a few thin slices of fresh ginger to the bottom of the baking dish before roasting.
- If your pears are very firm, you may need to add 5 to 10 minutes to the total cook time.
Nutrition
- Serving Size: 1 pear half
- Calories: 240
- Sugar: 35
- Sodium: 5
- Fat: 10
- Saturated Fat: 6
- Unsaturated Fat: 4
- Trans Fat: 0
- Carbohydrates: 40
- Fiber: 6
- Protein: 1
- Cholesterol: 25