
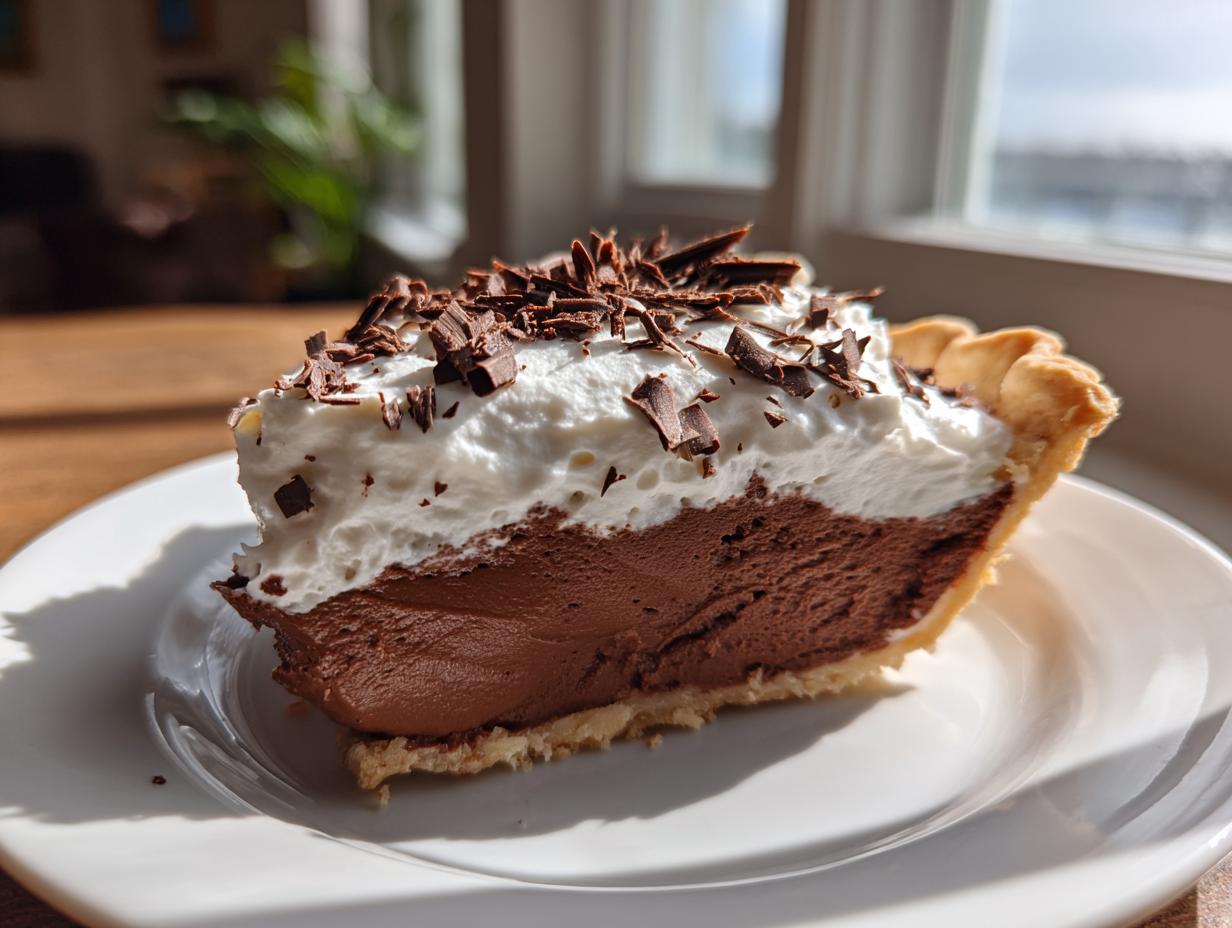
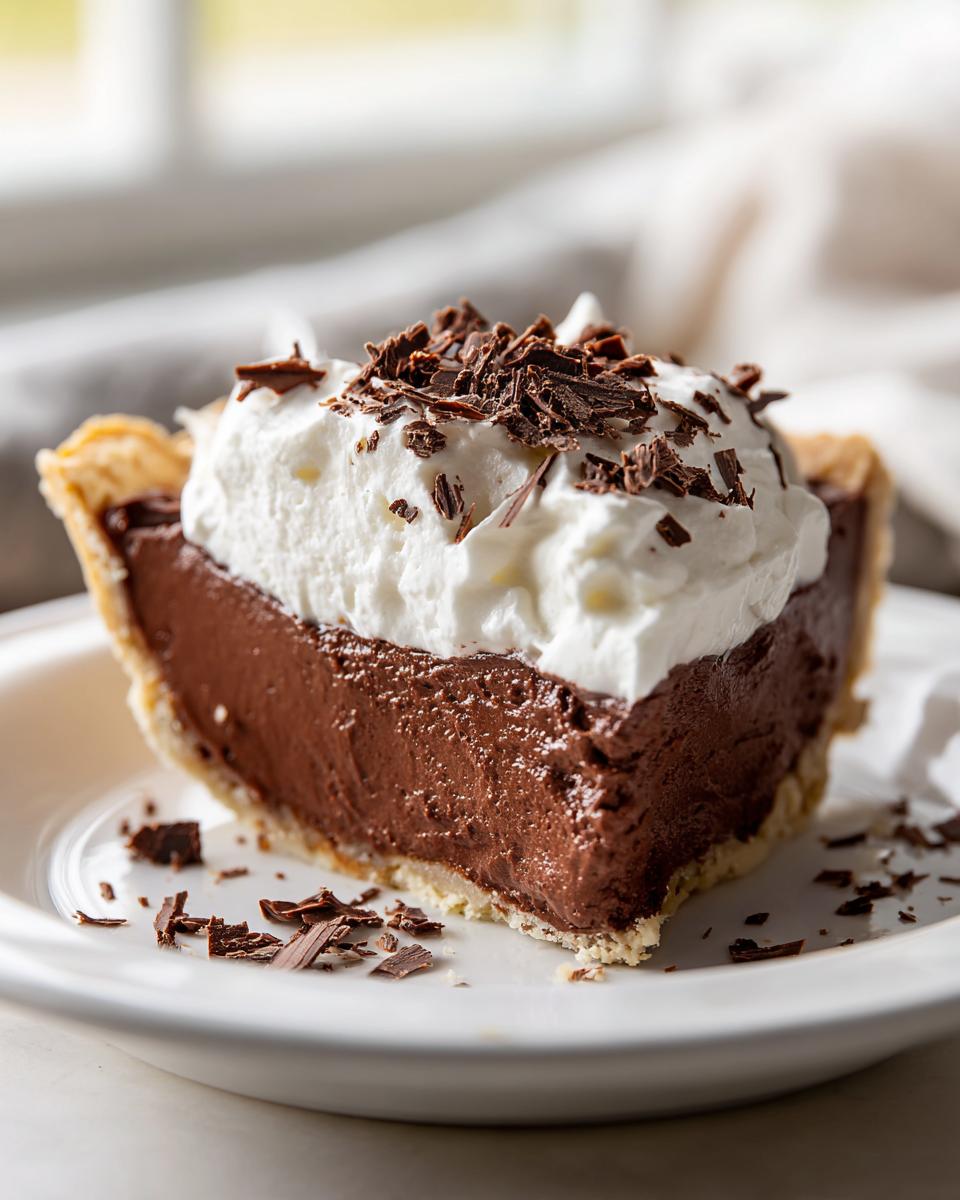
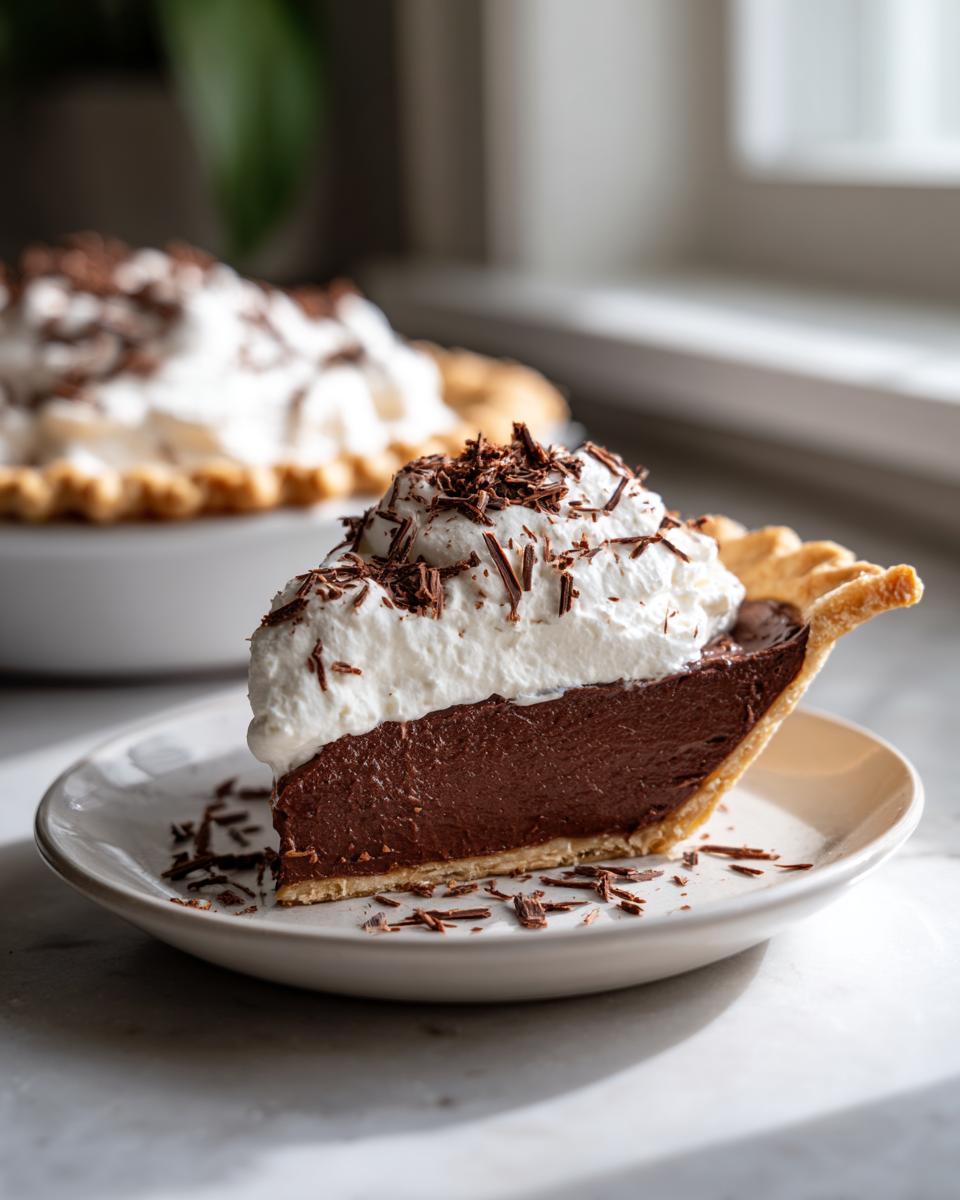
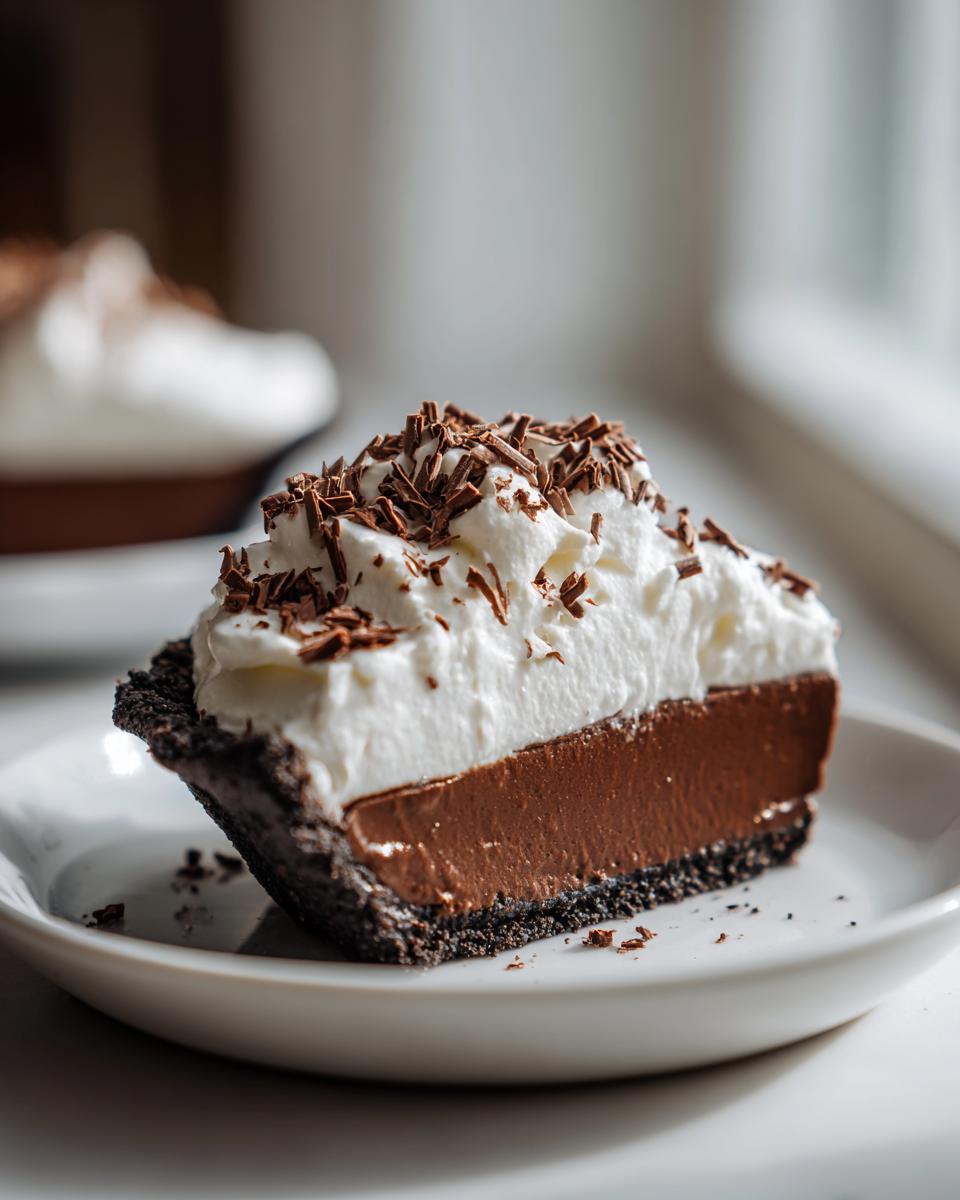
Oh, my friends, there are desserts, and then there’s the kind of dessert that stops conversation dead in its tracks. You know what I mean—the classic American showstoppers that feel instantly nostalgic. For me, that’s always been homemade chocolate cream pie. Too often, though, the filling ends up lumpy, or it turns grainy overnight. Not here! When I bake this pie, I’m channeling that old-school kitchen wisdom my family passed down. I’m Jess Carter, and I believe in using time-honored techniques to conquer modern baking fears. We are absolutely nailing that rich, velvety, silky chocolate filling today, trust me. This recipe is proof that simple ingredients, handled with care, create magic. If you are ready to bake the best pie you’ve ever tasted, check out all my favorite creamy dessert recipes!
- Why This Homemade Chocolate Cream Pie Recipe Works
- Ingredients for the Best Chocolate Cream Pie
- Step-by-Step Instructions for Your Chocolate Cream Pie
- Tips for the Ultimate Silky Chocolate Cream Pie
- Make Ahead Dessert: Storing Your Chocolate Cream Pie
- Frequently Asked Questions About Chocolate Cream Pie
- Estimated Nutritional Information for Chocolate Cream Pie
- Share Your Decadent Chocolate Dessert Experience
Why This Homemade Chocolate Cream Pie Recipe Works
I know you’ve run into those recipes that sound great but turn out disappointing. This chocolate cream pie isn’t one of them, I promise! I developed it because I was tired of rubbery fillings or pies that weeped after chilling. This easy cream pie recipe hits that sweet spot between being incredibly rich and surprisingly simple to put together. It’s an absolute winner for holidays or when you just need a decadent pick-me-up.
- It delivers that deep, classic chocolate flavor without needing specialty ingredients.
- It’s genuinely quick cooking time—less than 20 minutes on the stove!
- The final texture is unmatched: truly luscious and never grainy.
Achieving the Perfect Silky Chocolate Filling
Look, the secret sauce to a flawless pie is all about tempering. If you’ve ever ended up with scrambled eggs in your beautiful custard, this is for you. We slowly introduce some of that hot chocolate base to the yolks before they ever hit the main saucepan. This gently wakes them up! It’s the most important step for getting that silky chocolate filling that melts in your mouth.
Crust Options for Your Chocolate Cream Pie
I’m offering you total flexibility here because pie crust stress is real! You can absolutely use a pre-baked crust if you’re in a hurry—we all have busy days! If you bake your own flaky crust, make absolutely sure it is cool first. For a fast, no-fuss approach, an Oreo crust or a simple Graham cracker crust works just as magically under this chocolate filling. It all holds up splendidly.
Ingredients for the Best Chocolate Cream Pie
Okay, getting the right ingredients is half the battle, right? If you use cheap cocoa or skip the chilling time, you’ll miss out on that perfect texture we’re chasing! What I list below gives you that deep, rich flavor that makes this the best chocolate cream pie winner. Don’t substitute the cornstarch for flour—that’s a rookie mistake that affects how silky this filling sets up. Also, make sure your butter is cut into pieces so it melts easily when we take the custard off the heat.
I love that you can grab most of this stuff right from your pantry. If you’re looking for other fun things to make with your pantry staples, you should check out my guide on easy homemade marshmallows next time you need a filling boost!
For the Silky Chocolate Custard Filling
- 1 (9 inch) pre-baked pie crust (And yes, this works great with a Graham cracker or Oreo crust, too!)
- 1 1/2 cups granulated sugar
- 1/3 cup unsweetened cocoa powder (Use the good stuff!)
- 1/4 cup cornstarch (This is your structural superhero for the chocolate cream pie filling!)
- 1/4 teaspoon salt
- 1 3/4 cups cold whole milk
- 2 large egg yolks, lightly beaten
- 2 tablespoons unsalted butter, cut into pieces
- 1 teaspoon vanilla extract
For the Whipped Cream Topping
- 1 cup heavy whipping cream, chilled
- 2 tablespoons powdered sugar
- Chocolate shavings, for garnish (Get fancy!)
Step-by-Step Instructions for Your Chocolate Cream Pie
Alright, this is where the real fun starts! Trust me, watching this mixture transform on the stove into that luxurious, rich texture is the best part of making this amazing chocolate cream pie. Just follow these steps exactly, and you won’t end up with any surprises when you slice into this beauty later.
Preparing the Dry Mix and Milk Base
First things first, make sure your pie crust is totally cooled—whether you baked a pastry shell or used an Oreo base. Next, grab a medium saucepan. In there, you absolutely must whisk the sugar, cocoa powder, cornstarch, and salt together until they are completely one color. If you skip this, you’ll get little streaks of dry starch everywhere in your filling! Once everything is friendlier, slowly whisk in the cold whole milk until you have a smooth, dark liquid. No lumps allowed for this silky filling!
Cooking and Thickening the Chocolate Custard
Now, set that pot over medium heat. This requires your active attention! You need to stir constantly, constantly, constantly until the mixture starts bubbling heavily. Once it hits a rolling boil, let it boil for exactly one minute while stirring hard. Then, yank that pan right off the heat. That minute of boiling activates the cornstarch perfectly so we get that thick, glorious structure for our chocolate cream pie.
Tempering Egg Yolks for a No-Fail Chocolate Cream Pie
This is the pro move, folks. In a separate small bowl, whisk those two egg yolks lightly. You want to ‘temper’ them, which just means we don’t shock them! Take about half a cup of that super hot chocolate custard and drizzle it *very slowly* into the yolks while whisking the whole time. Once they look happy and warm, pour that whole warmed-up yolk mix back into the saucepan. Put it back on medium heat, stir for just a minute or two until it thickens up a bit more, but don’t let it boil rapidly after the yolks go in, or you’ll have scrambled bits!
Chilling and Finishing the Chocolate Cream Pie
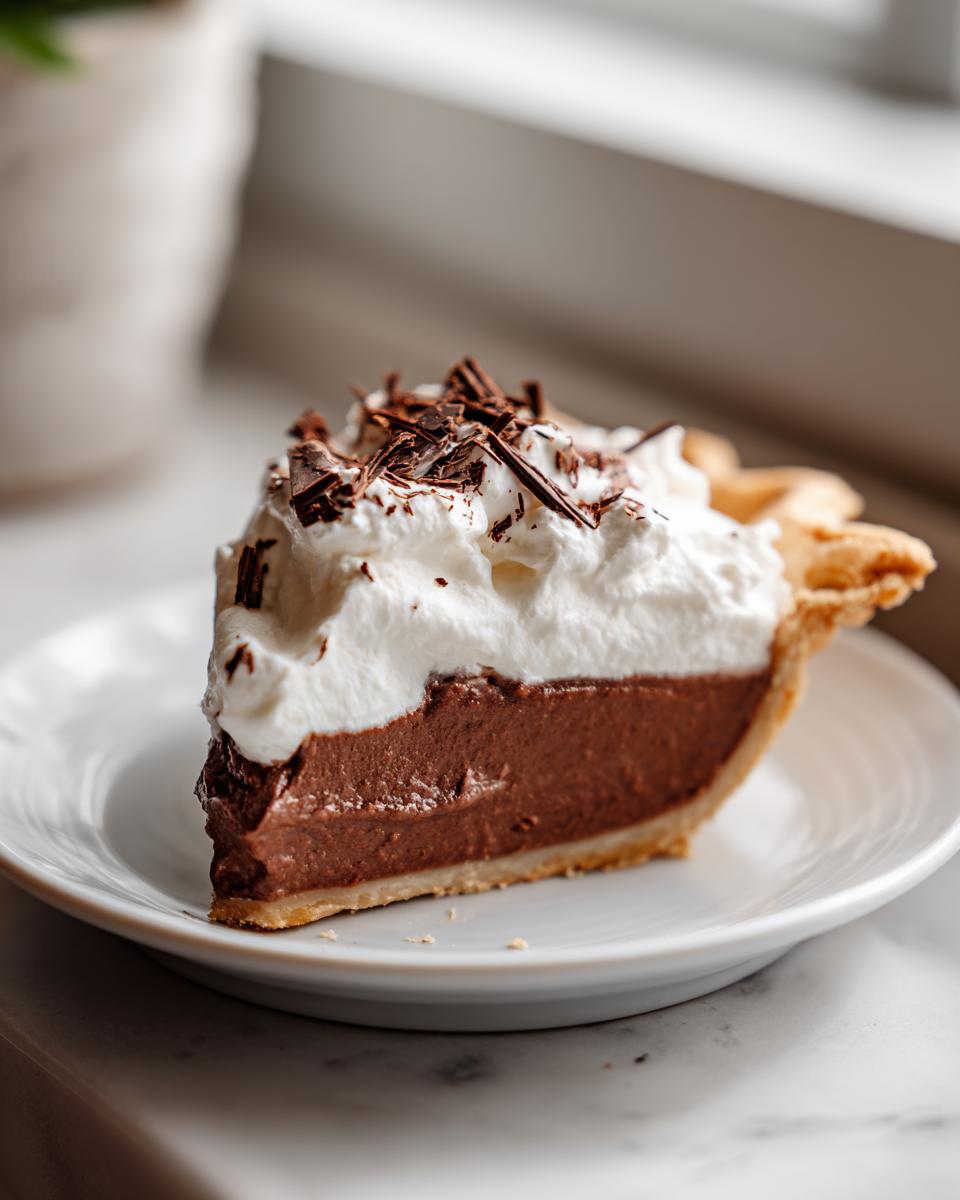
Off the heat! Stir in that butter until it disappears, then the vanilla. Pour that spectacular hot mixture into your cooled crust. Here is the secret for a smooth top: grab a piece of plastic wrap and press it directly onto the surface of the filling. This stops that ugly dry skin from forming. Seriously, don’t skip it. Chill this lovely pie for a minimum of three hours until it’s completely set before you dare touch the whipped cream. Once it’s firm, top it with fresh whipped cream and those little chocolate shavings—heaven!
Tips for the Ultimate Silky Chocolate Cream Pie
We’ve nailed the cooking, but a few expert tweaks can take this from a great pie to the most decadent chocolate dessert anyone has ever tasted. My advice comes from years of trying to replicate my mom’s pie perfectly. It’s all about those tiny finishing touches that elevate the finished product without adding much stress. Remember, we’re aiming for that gorgeous, melt-in-your-mouth moment when you bite into this chocolate cream pie!
Ingredient Swaps for Your Chocolate Cream Pie
If you want to skip baking entirely, go ahead and use that pre-made Oreo crust—it adds a nice little crunch that perfectly contrasts the filling. If you are feeling extra decadent, here’s a little secret: replace just half a cup of that cold whole milk with heavy cream in the filling. You get a slightly richer mouthfeel, which is lovely. We already talked about using that good quality cocoa, but swapping milk for cream is the next best thing if you want to push the flavor envelope.
Making Perfect Chocolate Curls for Garnish
Listen, a pie topped with just plain whipped cream is fine, but using chocolate curls makes it look like you bought it from a fancy bakery! It’s ridiculously easy. Take a room-temperature chocolate bar—make sure it’s not too cold or it will just snap. Use a simple vegetable peeler and run it down the side of the chocolate block. Thin ribbons curl right off! These little flourishes make this pie look magazine-ready. If you already love mixing frostings and toppings, you might want to stock up on my reliable vanilla buttercream frosting recipe for other treats!
Make Ahead Dessert: Storing Your Chocolate Cream Pie
One of the biggest wins for this chocolate cream pie is that it’s the ultimate make ahead dessert! This is fantastic when you’re getting ready for a big dinner or holiday. Because the filling is a true custard, we have to treat it right in the fridge, though.
When you’ve topped your pie with that beautiful fresh whipped cream, it’s best eaten the same day for the best fluff factor. The moisture from the filling can start to break it down a little overnight. But if you need to store it assembled, make sure it’s covered tightly with plastic wrap or a dome lid. Keep it in the coldest part of your refrigerator.
Now, if you plan ahead—which I highly recommend—store the pie *un-topped*. Chill that wonderful, silky chocolate filling in the crust for up to two days before you plan to serve it. Then, right before your guests arrive, whip up that fresh cream and top it off. It keeps everything looking and tasting picture-perfect, and you save so much stress on the day of the party! If you love planning meals ahead, you might enjoy my tips on making my 7-layer salad ahead of time too; it’s a lifesaver!
Leftovers? Oh, I hope you have some! Store slices in airtight containers in the fridge. Honestly, sometimes I think this chocolate cream pie tastes even better the next day once the filling is totally firm and the flavors have settled in. It lasts really well for about three days topped or four days if you stored the filling unstirred by that fluffy cloud on top.
Frequently Asked Questions About Chocolate Cream Pie
I get so many great questions whenever I post this recipe—it’s clear everyone loves a spectacular chocolate cream pie! Most people are worried about texture or speed, which is totally understandable when you’re aiming for that perfect slice. Here are some of the most common things folks ask me after trying out this recipe.
Can I use instant pudding instead of making a homemade Silky Chocolate Filling?
Oh, that’s the speed question! Look, if you are absolutely desperate for chocolate in five minutes, instant pudding works in a pinch. But if you want that truly rich, deep flavor and that silky chocolate filling that just melts against the crust, you must make the custard from scratch. Instant mixes are just… fine. This recipe is designed to give you a luxurious, homemade chocolate custard pie experience. The custard we make has a richness that box mixes just can’t replicate, especially with the real butter and egg yolks giving it body! You’ll taste the difference, I promise.
How do I prevent my chocolate cream pie filling from cracking when chilled?
This happened to me when I was younger and impatient! You want to avoid that tight, weird skin forming on top, right? The best defense is making sure you press your plastic wrap *directly* onto the surface of the hot filling before it goes into the fridge. I mean, zero air space between the plastic and the pie surface. That skin forms when air hits the cooling custard. If you are worried about cracking after it’s fully set, sometimes that means the filling was too hot when you poured it into the shell, or it chilled too fast. Let it cool on the counter until it’s just barely warm before you cover it tightly!
Is this considered an Old Fashioned Chocolate Pie?
It absolutely is! When people ask for an old fashioned chocolate pie, they usually mean one made with a stovetop custard base where you temper the egg yolks and use cocoa powder, just like this. It’s the classic style—not the heavy, fudgy kind, and definitely not the quick pudding version. This recipe really honors the tradition of those beautiful, creamy pies our grandmothers used to make. It’s comforting, it’s classic, and because you’re making the real deal, it’s going to taste incredible. If you want more rustic, traditional flavors, I have a fantastic black bean chili recipe that fits that vibe too!
Estimated Nutritional Information for Chocolate Cream Pie
Now, let’s talk fuel! Because this is a truly decadent chocolate dessert, it does pack a little punch, but isn’t that the point sometimes? Remember, I told you earlier that these numbers are based on our specific recipe—the one using a traditional crust and the homemade filling—so they are just estimates. If you switch to an Oreo crust or use half-and-half instead of whole milk, your final count will change, of course.
When you serve up a slice of this luscious, silky chocolate filling pie, here is what you can generally expect per serving:
- Serving Size: 1 slice
- Calories: 410
- Sugar: 38g (Yes, it’s a treat!)
- Fat: 21g
- Protein: 6g
- Carbohydrates: 52g
- Sodium: 210mg
I always try to look at the good stuff, too! We get a nice bit of protein from those egg yolks and milk, and you’re enjoying simple sugars here, not a bunch of weird preservatives. This chocolate cream pie is meant to be enjoyed, fully and completely. Don’t sweat the numbers too much when you’re making something this special!
Share Your Decadent Chocolate Dessert Experience
Well, we made it! You’ve created a masterpiece, a truly decadent chocolate dessert that smells like heaven and tastes even better. Now that you’ve pulled that gorgeously topped chocolate cream pie out of the fridge, I absolutely need to hear about it!
Baking, for me and for CravyBite Kitchen, is all about that connection. When you make a recipe, the kitchen comes alive, and I want to celebrate that with you. Did you use the flaky crust? Did you go for the Oreo base? Tell me about the whipped cream—was it piled high like a mountain?
Please, please leave a comment below! Let me know how this easy cream pie recipe worked for you. Your feedback helps me serve you better, and honestly, seeing pictures of your beautiful pies makes my whole day. Seriously, drop a star rating if you loved that incredibly silky chocolate filling!
If you’re already planning your next showstopper, you might want to take a peek at my favorite chocolate caramel toffee crunch cake recipe while you grab a delicious slice of pie!
Happy eating, sweet friends!
PrintThe Best Homemade Chocolate Cream Pie with Silky Filling

Make this rich, velvety chocolate cream pie from scratch. This recipe focuses on a no-fail chocolate custard filling that sets perfectly, served in a buttery crust and topped with fresh whipped cream.
- Prep Time: 20 min
- Cook Time: 15 min
- Total Time: 3 hours 35 min
- Yield: 8 servings 1x
- Category: Dessert
- Method: Stovetop Custard
- Cuisine: American
- Diet: Vegetarian
Ingredients
- 1 (9 inch) pre-baked pie crust (or use a Graham cracker or Oreo crust)
- 1 1/2 cups granulated sugar
- 1/3 cup unsweetened cocoa powder
- 1/4 cup cornstarch
- 1/4 teaspoon salt
- 1 3/4 cups cold whole milk
- 2 large egg yolks, lightly beaten
- 2 tablespoons unsalted butter, cut into pieces
- 1 teaspoon vanilla extract
- 1 cup heavy whipping cream
- 2 tablespoons powdered sugar
- Chocolate shavings, for garnish
Instructions
- Prepare your pie crust and set it aside to cool completely if you baked it.
- In a medium saucepan, whisk together the granulated sugar, cocoa powder, cornstarch, and salt.
- Gradually whisk in the cold whole milk until the mixture is smooth.
- Place the saucepan over medium heat. Cook, stirring constantly, until the mixture thickens significantly and comes to a boil. Let it boil for one minute, continuing to stir. Remove the pan from the heat.
- In a small bowl, lightly whisk the egg yolks. Temper the yolks by slowly whisking about 1/2 cup of the hot chocolate mixture into the yolks.
- Pour the tempered yolk mixture back into the saucepan with the remaining hot chocolate mixture. Return the pan to medium heat. Cook, stirring constantly, for 1 to 2 minutes until the filling thickens more and just begins to bubble. Do not let it boil rapidly after adding the yolks.
- Remove the pan from the heat. Stir in the butter pieces until melted and smooth. Stir in the vanilla extract.
- Pour the hot, silky chocolate filling into the cooled pie crust. Press plastic wrap directly onto the surface of the filling to prevent a skin from forming. Chill in the refrigerator for at least 3 hours, or until completely cold and set.
- When ready to serve, prepare the topping: In a chilled bowl, beat the heavy whipping cream and powdered sugar with an electric mixer until stiff peaks form.
- Spread or pipe the whipped cream over the chilled chocolate filling. Garnish with chocolate shavings.
- Slice and serve this decadent chocolate dessert immediately.
Notes
- For a no-bake option, use a pre-made Oreo cookie crust instead of baking your own.
- If you prefer a richer chocolate flavor, substitute 1/2 cup of the milk with 1/2 cup of heavy cream.
- To make chocolate curls, use a vegetable peeler on a room-temperature chocolate bar.
Nutrition
- Serving Size: 1 slice
- Calories: 410
- Sugar: 38g
- Sodium: 210mg
- Fat: 21g
- Saturated Fat: 12g
- Unsaturated Fat: 9g
- Trans Fat: 0.5g
- Carbohydrates: 52g
- Fiber: 2g
- Protein: 6g
- Cholesterol: 65mg