
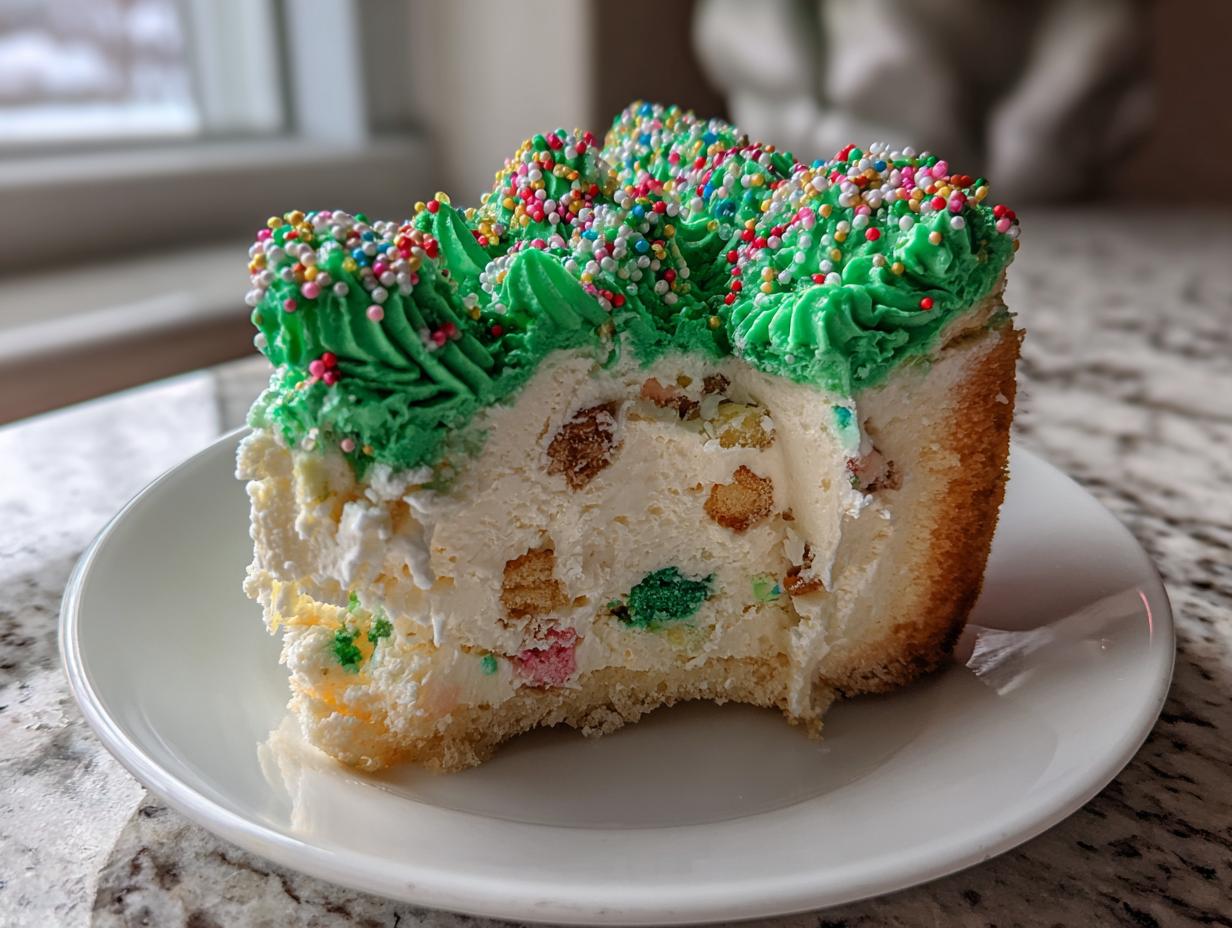
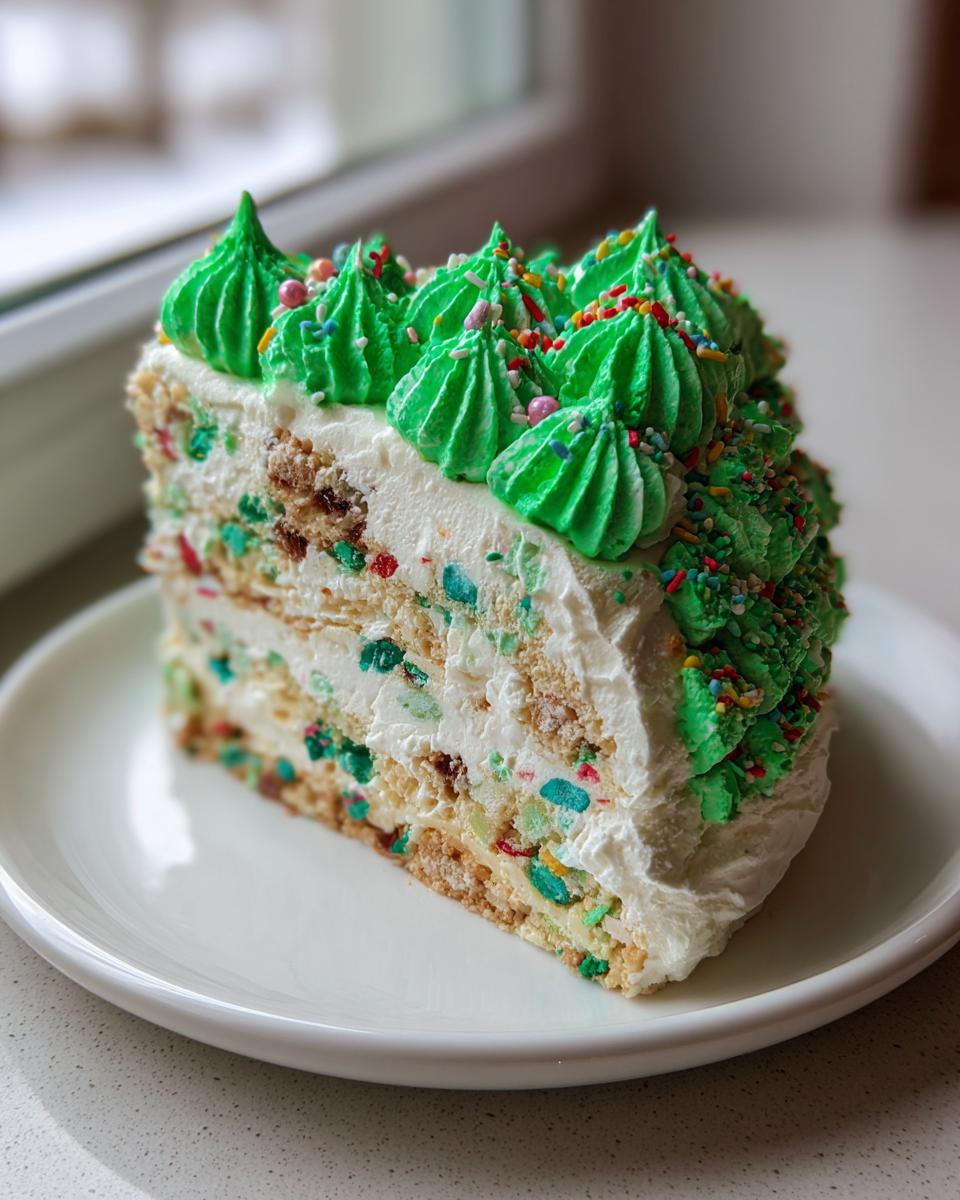
December rolls around, and suddenly, my kitchen needs to produce something that screams ‘Christmas!’ but doesn’t require me to spend three solid days stressing over it, right? That’s why this show-stopping christmas tree cheesecake is my absolute go-to when I need that ‘wow’ factor. We’re blending that rich, velvety cheesecake texture with the absolute nostalgia of those Little Debbie Christmas Tree snack cakes—it’s pure magic. I’m Jess Carter, and after years of balancing nutritious eating with the need for real holiday comfort food, I perfected this mashup. It’s creamy, it’s festive, and honestly, it requires less fuss than a traditional frosted layer cake. Trust me, this centerpiece will be the star of your holiday table.
- Why This Little Debbie Christmas Tree Cheesecake is Your New Holiday Favorite
- Ingredients for the Ultimate Christmas Tree Cheesecake Recipe
- Essential Equipment for Your Christmas Tree Cheesecake
- Step-by-Step Instructions for a Baked Christmas Tree Cheesecake
- Decorating Your Show Stopping Christmas Dessert: The Tree Topping
- Tips for the Perfect Christmas Tree Cheesecake
- Variations: No Bake Christmas Tree Cheesecake Options
- Storing and Serving Your Festive Holiday Cheesecake
- Frequently Asked Questions About This Christmas Tree Cheesecake Recipe
Why This Little Debbie Christmas Tree Cheesecake is Your New Holiday Favorite
If you want a festive holiday cheesecake that genuinely turns heads, this is it. Why should you ditch the standard baking lineup for this recipe? Well, it ticks all the boxes for a perfect holiday bake!
- It’s a true show-stopping centerpiece; everyone asks what it is!
- Those Little Debbie Christmas Tree Snack Cakes bring instant, wonderful nostalgia to every slice.
- The texture is outrageously creamy—way smoother than some of those overly dense versions out there.
- It looks complicated, but the core mixing is actually remarkably simple. This christmas tree cheesecake base comes together fast.
Ingredients for the Ultimate Christmas Tree Cheesecake Recipe
Okay, let’s talk supplies! Transparency is key here, especially for a recipe this special. We rely on simple pantry staples but with one very non-negotiable item that gives us that unique, warm vanilla flavor the holiday season screams about. Make sure your cream cheese is truly softened—I mean, let it sit out for at least two hours. That’s my guarantee for avoiding lumps!
We’re using all the measurements from the main recipe card here, divided into what makes the crust and what makes that dreamy, decadent filling. And yes, you absolutely need the classic Little Debbie Christmas Tree Snack Cakes; they are the whole point of this bake!
- For the Crust:
- 180 grams graham cracker crumbs (I like to pulse mine a little finer for a tighter base!)
- 85 grams unsalted butter, melted (Don’t be tempted to cut back on this fat; it makes the graham cracker crust hold together perfectly.)
- For the Velvety Filling:
- 675 grams cream cheese, softened (Don’t skip that softening step, seriously!)
- 100 grams granulated sugar
- 1 package (13 oz) Little Debbie Christmas Tree Snack Cakes, roughly chopped (Grab one package; you’ll use half inside and save the rest for decorating!)
- 1 cup heavy cream
- 1 teaspoon vanilla extract
- For the Christmas Green Topping (We’ll detail the decorating later, but you need these ready to go!):
- Green food coloring (a few drops is all it takes!)
- White frosting (store-bought is fine for quick decorating!)
- Assorted holiday sprinkles (The more colorful, the better for that festive cheer.)
Essential Equipment for Your Christmas Tree Cheesecake
Before we even think about mixing that delicious filling, we need to make sure our arsenal is ready. You can’t build a spectacular dessert centerpiece without the right tools, right? I always pull these items out the night before so nothing holds up the baking process on Christmas Eve!
Here are the absolute must-haves for tackling this creamy Christmas dessert successfully:
- 9-Inch Springform Pan: This is non-negotiable for any good cheesecake. It lets you release the sides without having to flip your beautiful creation upside down. Make sure you’ve got parchment paper ready to line the bottom, too!
- Electric Mixer (Handheld or Stand): While you *could* mix this by hand—and bless your heart if you try!—a mixer is essential for getting that cream cheese perfectly smooth. We need zero lumps here.
- Piping Bag and Star Tip: This is what turns a beautiful cheesecake into a stunning Christmas tree! You need a standard piping bag and a medium to large star tip (like a Wilton 1M or 2D) to pipe those realistic-looking evergreen branches with the green whipped cream.
- Rubber Spatula: For scraping down the sides of the bowl when you combine your filling. We don’t want to waste any of that good stuff!
- Offset Spatula: Super handy, though not strictly required, for smoothing the filling evenly over the crust before baking. It just makes that first layer look so neat.
Step-by-Step Instructions for a Baked Christmas Tree Cheesecake
Creating this iconic dessert is much easier than it looks. We’re going to follow a classic cheesecake process but sneak in those wonderful Little Debbie pieces right into the center for that incredible flavor punch. This is how we guarantee a creamy, crack-free christmas tree cheesecake that looks custom-made for Santa’s arrival. I learned this slow baking method from a fellow baker, and it’s a lifesaver!
Preparing the Crust and Filling Base
First things first: Preheat your oven to 325°F (160°C). Get that 9-inch springform pan ready by lining the bottom with parchment paper—this saves so much headache later! For the crust, just mix your graham cracker crumbs and melted butter until they look like damp sand. Press that mixture down firmly and evenly into the bottom of the pan. Bake it for just 10 minutes to set it, then let that crust cool down completely before we move on.
Now for the filling! Make sure your six seventy-five grams of cream cheese are really relaxed—soft and smooth. Beat the cheese until it’s velvety, then gradually add the sugar. Once that’s blended, gently fold in about half of your chopped Little Debbie Christmas Tree Snack Cakes. Don’t overmix now; we want those little chunks intact! Pour this creamy filling right over your cooled crust. You can check out similar techniques for smooth bases over at Little Debbie Christmas Tree Cheesecake!
Baking and Cooling the Creamy Christmas Dessert
Carefully pour the filling into the crust and then give the pan a gentle tap on the counter. This sounds simple, but tapping releases those sneaky air bubbles that love to cause cracking! Bake it for about 50 to 60 minutes. You know it’s ready when the edges look set but the very center still has a slight, gentle jiggle. You do *not* want it solid!
Here is where we show some professional patience, which is my biggest tip. Turn the oven off completely. Now, prop the oven door open just a crack—maybe slide a wooden spoon in there. Let that cheesecake hang out inside the warm oven for a full hour while it slowly descends in temperature. This gradual cooling prevents that dreaded surface crack. After the hour, take it out, let it finish cooling on the counter, and then cover it up. It needs a minimum of six hours, but overnight is always best for that firm, dreamy texture.
Decorating Your Show Stopping Christmas Dessert: The Tree Topping
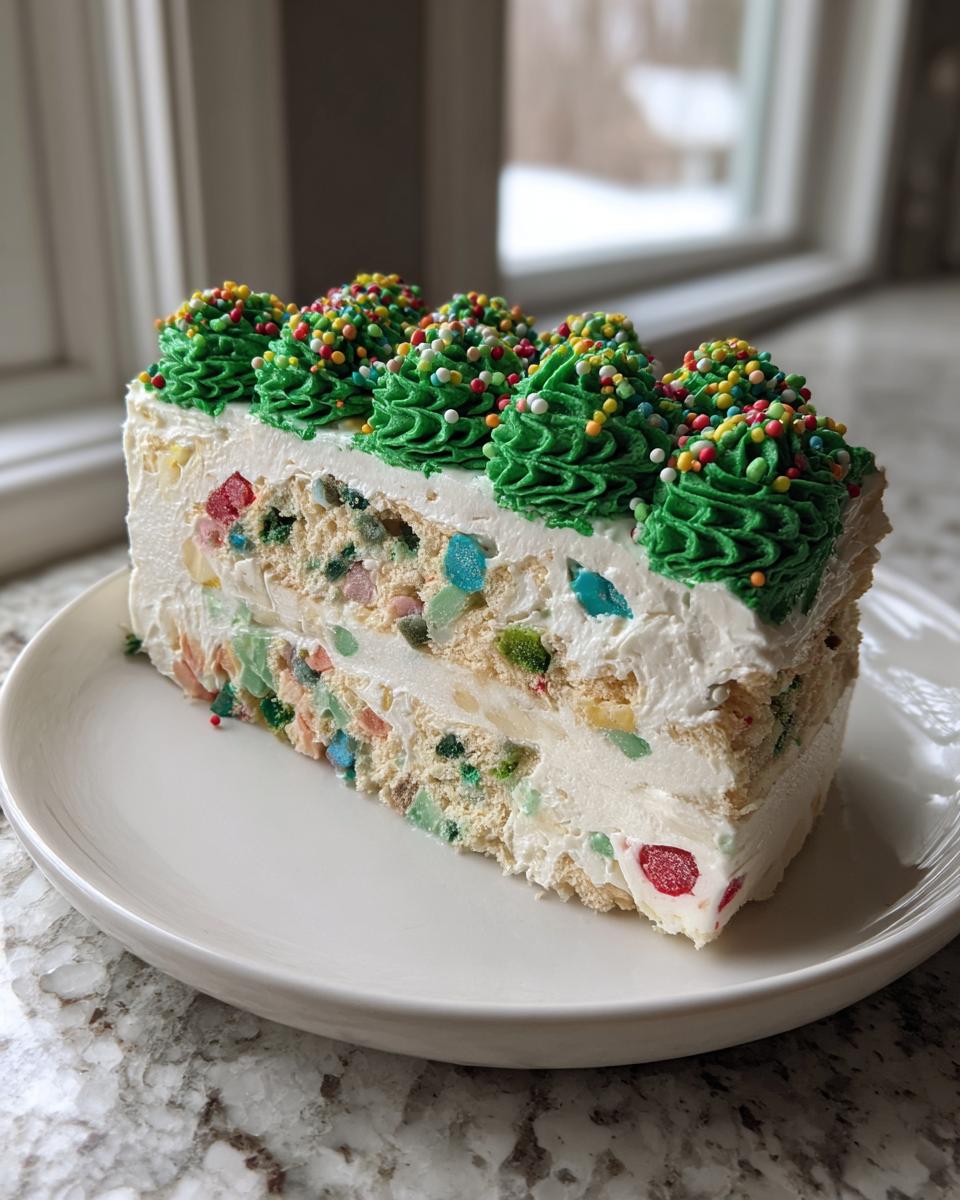
We’ve reached the grand finale! This is what makes everybody stop scrolling and lean in for a closer look at your amazing christmas tree cheesecake. Once the cheesecake is chilled—and I mean really cold—it’s time to bring out the festive green whipped cream. This topping is what defines the look, creating those lovely, dimensional branches that make it look like a perfectly decorated little spruce.
First, take your cup of heavy cream and vanilla and whip it up until you get nice soft peaks. Then, start adding your green food coloring a drop at a time. Seriously, start small; that color concentrates fast! Mix it until you have a vibrant, but still appetizing, Christmas green. You don’t want something that looks neon, just deep and festive.
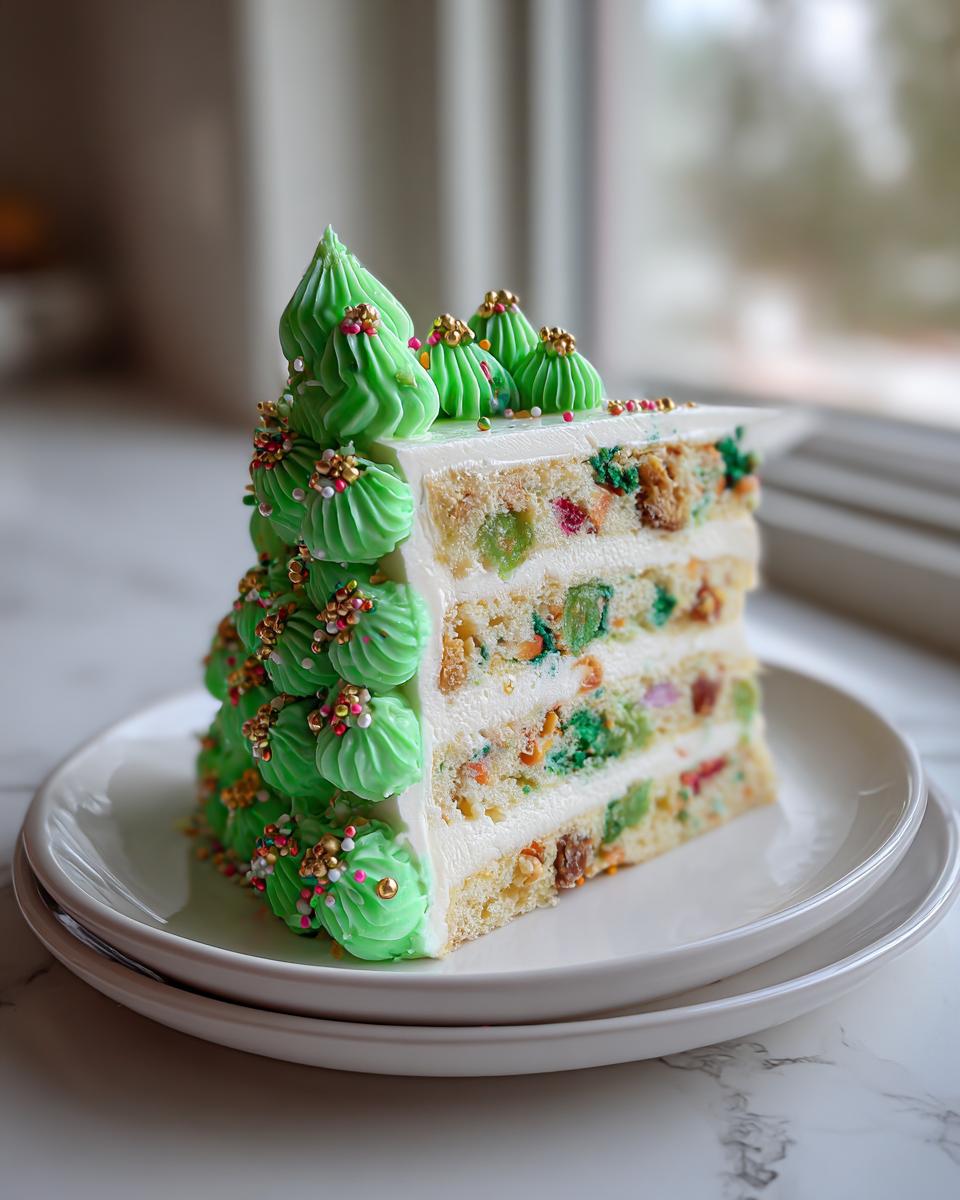
Now, transfer that gorgeous green whipped cream into your piping bag fitted with that star tip we talked about. Start piping at the very bottom edge of the cheesecake—this is your base layer. Pipe a small ring, then move up slightly inward and pipe another ring, overlapping the first one just a tiny bit. Keep working your way up in concentric circles, making each layer smaller until you reach a perfect little point at the top. It’s just like decorating a classic tiered cake, only this time, we’re aiming for an evergreen look!
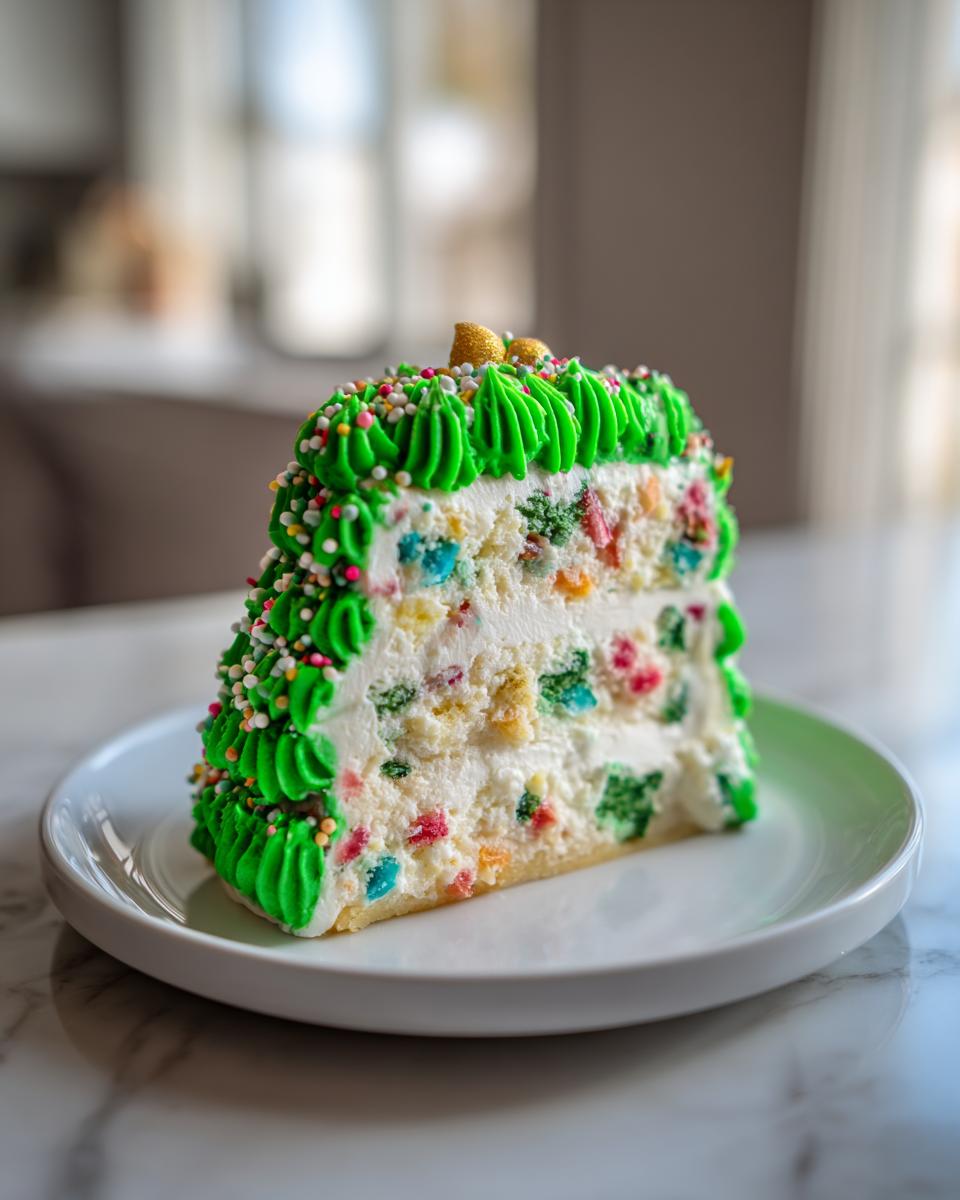
For the sparkle, generously shower your piped tree with your assorted holiday sprinkles. Think of them as little ornaments! Scatter some bright dots of white frosting around for ‘lights’ or snow drifts. And don’t forget those remaining chopped Little Debbie cakes! I like to crumble some around the base of the tree for texture, or place a few larger chunks strategically on the whipped cream for a fun, unexpected crunch. This decoration stage is what takes it from a great dessert to a true holiday masterpiece. If you need extra help visualizing the piping, check out the beautiful results on Debbie’s Christmas Tree Cheesecake for inspiration!
Tips for the Perfect Christmas Tree Cheesecake
You know, making a great cheesecake—especially one that’s going to be stared at during a holiday party—is all about managing the temperature. If you treat your ingredients right from the start, you save yourself so much heartache later on, especially when it comes to those notorious cheesecake cracks. My family baking legacy taught me that perfection comes from preparation!
Here are a few things I always double-check to ensure this Christmas tree cheesecake comes out smooth and beautiful every single time:
- Room Temperature Cream Cheese is Your Best Friend: I can’t stress this enough. If you try to beat cold cream cheese, you’re going to end up with tiny cream cheese rocks in your filling. They won’t dissolve in the oven, and you’ll spend forever trying to smooth them out with a spatula. Set it out early—it needs to be pliable when it hits the bowl.
- Go Easy on the Mixing: When you combine the cream cheese, sugar, and those delightful chopped Little Debbie cakes, mix only until just combined. Overbeating incorporates air, and too much air in a cheesecake translates directly to cracking when it cools because the air pockets collapse. We want dense and creamy, not fluffy!
- To Water Bath or Not To Water Bath? For a 9-inch cheesecake like this one, if you follow my slow-cooling method (oven off, door cracked for an hour), you usually don’t need a full water bath. A water bath adds extra humidity, which is great, but it gets messy unwrapping that foil later. However, if your kitchen is really dry or your oven runs hot, wrapping the pan securely in heavy-duty foil and placing it in a larger pan filled with an inch of hot water offers total insurance against fissures. It’s a judgment call based on your oven’s personality!
- Don’t Skip the Chill Time: Yes, it’s tempting to pull that beautiful green-topped dessert out of the fridge after four hours. Don’t do it! Cheesecake flavors integrate, and the structure firms up best when given that full six to eight hours, or preferably overnight. It makes slicing so much cleaner, too.
Variations: No Bake Christmas Tree Cheesecake Options
Listen, I get it. Sometimes the ovens are full of turkey, ham, or maybe you just don’t trust yourself with the whole baking process, especially during the holiday rush. That is completely okay! The absolute beauty of integrating those snack cakes is that they create a rich structure perfect for a no-bake version of the christmas tree cheesecake. You swap out the bake time for chilling time, and you still end up with that incredibly creamy Christmas dessert we both love.
If you’re going the no-bake route for your Festive Holiday Cheesecake, you need to skip a few key steps from the baked version, but the filling payoff is still amazing. Think of this as the speed-run version for your holiday baking calendar!
So, what changes? Mostly, we ditch the heat and rely on cold to set everything up.
- Ditch the Oven Time: You skip steps 1 (preheating), 4 (folding the cakes into the filling—we’ll add them later), 5 (baking), and 6 (the slow cooling inside the oven).
- Crust Adjustment: For the crust, you still mix the graham cracker crumbs and melted butter, but you don’t bake it for 10 minutes. Just press it firmly into the springform pan and stick it in the freezer for about 15 minutes while you get the filling ready. This helps it firm up faster without baking.
- Incorporating the Cakes: Instead of folding half the Little Debbie cakes into the filling before baking, you want to mix them in after the cream cheese and sugar are fully combined, just like a baked one, but you must mix slowly! For a no-bake version, I actually prefer to chop the cakes smaller so they distribute more evenly when chilled.
- Chill, Chill, Chill: This is your new curing process! Once the filling is smoothed over the crust, cover it gently (plastic wrap shouldn’t touch the surface) and stick it in the refrigerator. While the recipe suggests six hours, I honestly never trust a no-bake cheesecake until it has set overnight—a good twelve hours is my magic number for getting that perfect sliceable texture.
When it comes time to decorate, the green whipped cream topping goes on exactly the same way as the baked version. That topping doesn’t rely on the structure of the base, so you still get that gorgeous, towering tree shape on your platter. It’s a lifesaver when oven space is limited!
Storing and Serving Your Festive Holiday Cheesecake
Alright, you’ve made this masterpiece—this incredible, nostalgic Little Debbie Christmas Tree Cheesecake—and now you need to keep it perfect until the party, or maybe you have leftovers (which, let’s be honest, is rare, but we plan ahead!). Cheesecake handles storage beautifully, which is another reason I love it for big holiday spreads. You don’t have to rush to serve it the second it comes out of the oven; in fact, it’s better if you don’t!
If you decorated it with the green whipped cream tree the day you made it, that is totally fine, but be aware of how long it sits around. Whipped cream, even stabilized, doesn’t love being stored for days and days.
Here is my straightforward game plan for keeping this creamy Christmas dessert tasting amazing:
- Covering is Paramount: Once the cheesecake is totally chilled (after its minimum 6-hour rest), you need to protect it from grabbing fridge smells and drying out. Use plastic wrap, but here’s the trick: lightly tent it so the wrap doesn’t touch the beautiful green piping! If the plastic sticks to your topping, you’ll peel off half your tree when you unwrap it.
- Refrigeration Time: This is a dessert that actually *improves* after a day in the fridge. It tightens up, and all those sweet, vanilla notes from the snack cakes really meld into the cream cheese base. It keeps perfectly well for up to four days inside the refrigerator, covered well.
- Serving Temperature: Never, ever serve cheesecake straight from the cold fridge! It will taste dense, waxy, and the flavor just won’t pop. About 30 to 45 minutes before you plan to slice, take the whole thing out and let it sit on the counter, still loosely covered. You want it tempered slightly so it eats silky smooth. This is the secret to enjoying that ‘velvety’ texture everyone raves about!
- If You Decorated Later: Let’s say you’re making this a day ahead and don’t want the whipped cream topping to get dull. Bake and chill the plain cheesecake base for the full time. Then, on the day of serving, prepare the green cream, pipe your tree, and decorate right before serving. You can even crumble some extra Little Debbie pieces around the base just before bringing it to the table for maximum freshness!
Frequently Asked Questions About This Christmas Tree Cheesecake Recipe
I always get the same handful of questions when people try to make this show-stopping dessert for the first time. Honestly, it’s usually because they’re worried about messing up the visual impact! Don’t you worry about that; this recipe is pretty forgiving, even if you’re new to making a truly **creamy Christmas dessert**.
Can I use different snack cakes or cookies instead of the Little Debbie Trees?
That’s a fantastic question! While the **Little Debbie Christmas Tree Cheesecake** is designed specifically around the vanilla-citrus notes and slightly firmer texture of those iconic little wrapped cakes, you *could* substitute. If you can’t find them, your next best bet would be using vanilla sandwich cookies (like vanilla wafers or even Nilla Wafers) chopped up for the filling. If you use something chocolatey, know that you’ll lose that classic flavor profile, but it will still be a delicious base for your whipped cream tree topping. Just make sure whatever you swap in has a similar density so it won’t get totally mushy in the batter!
How far in advance can I prepare this festive holiday cheesecake?
This is one of the best secrets to reducing holiday stress: you can bake this cake entirely ahead of time! Since cheesecake flavors deepen and the texture sets better when chilled, I actually recommend baking it completely—crust, filling, and all—about two days before your event. Now, here’s the caveat for the decoration: if you pipe on the green whipped cream topping more than 12 hours in advance, the cream might start to weep a tiny bit. So, my best advice for the ultimate **Holiday Cheesecake Recipes** experience is to bake and chill the plain cheesecake base an entire day ahead, and then decorate it with the green cream and sprinkles on the morning of your party. That way, you are guaranteed the freshest look for your **Easy Christmas Dessert Centerpiece**!
What if I don’t have a 9-inch springform pan? Can I make a tree-shaped dessert another way?
The springform pan is crucial because it allows us to bake a perfect circle that we later decorate *into* a tree shape. If you absolutely don’t have one, you can try baking the cheesecake in a standard 9-inch round cake pan. You’d still need to line it really well with parchment paper so you can lift the whole disk out after chilling. Then, before you decorate, you’d trim the edges carefully to give it that tapered tree look before piping the topping. It takes more effort, but it’s certainly doable! Alternatively, look into using a large, oven-safe, tree-shaped bundt pan if you have one—though I’d still suggest checking out my tips for Christmas Sangria while waiting for the oven to cool after baking!
Is the green whipped cream topping required, or can I skip it?
The green whipped cream is what makes it a **Christmas Tree Cheesecake** rather than just a very festive cream-filled pie! While you *could* skip it and just dust the top with powdered sugar, you lose that visual storytelling element that makes this recipe so popular. The good news is that the topping is simple: heavy cream, vanilla, and a bit of coloring. If you are really pressed for time, you can buy pre-made whipped topping (like Cool Whip), add a few drops of green coloring, and pipe it on. It sets up a little stiffer, which some people even prefer for holding those sharp Christmas tree branch shapes!
PrintLittle Debbie Christmas Tree Cheesecake
Create a show-stopping holiday centerpiece with this rich and creamy Little Debbie Christmas Tree Cheesecake. This recipe combines a classic cheesecake base with the nostalgic flavor of Christmas Tree snack cakes for a festive dessert everyone will ask for.
- Prep Time: 30 min
- Cook Time: 60 min
- Total Time: 7 hours 30 min
- Yield: 10 servings 1x
- Category: Dessert
- Method: Baking
- Cuisine: American
- Diet: Vegetarian
Ingredients
- 180 g graham cracker crumbs
- 85 g unsalted butter, melted
- 675 g cream cheese, softened
- 100 g granulated sugar
- 1 package (13 oz) Little Debbie Christmas Tree Snack Cakes, chopped
- 1 cup heavy cream
- 1 teaspoon vanilla extract
- For decoration: Green food coloring, white frosting, assorted holiday sprinkles
Instructions
- Preheat your oven to 325°F (160°C). Prepare a 9-inch springform pan by lining the bottom with parchment paper.
- Make the crust: Mix the graham cracker crumbs and melted butter together. Press the mixture firmly into the bottom of the prepared springform pan. Bake for 10 minutes. Let cool completely.
- Prepare the cheesecake filling: In a large bowl, beat the softened cream cheese until smooth. Gradually add the granulated sugar and beat until fully combined.
- Fold in about half of the chopped Little Debbie Christmas Tree Snack Cakes into the cream cheese mixture.
- Pour the filling over the cooled crust. Gently tap the pan on the counter to release air bubbles.
- Bake the cheesecake for 50 to 60 minutes, or until the edges are set and the center has a slight jiggle.
- Turn off the oven, crack the door open slightly, and let the cheesecake cool inside the oven for 1 hour. This prevents cracking.
- Remove the cheesecake from the oven and let it cool to room temperature. Then, cover and chill in the refrigerator for at least 6 hours, or preferably overnight.
- Prepare the topping: Whip the heavy cream and vanilla extract until soft peaks form. Add a few drops of green food coloring and mix until you achieve a festive green color.
- Transfer the green whipped cream to a piping bag fitted with a star tip. Pipe the cream onto the chilled cheesecake in a tree shape, starting from the bottom and working your way up to create ‘branches.’
- Decorate the piped cream with white frosting dots (for snow or lights) and assorted holiday sprinkles. Arrange the remaining chopped Little Debbie cakes around the base or on top for extra texture.
- Slice and serve this creamy Christmas dessert.
Notes
- For a no-bake version, skip steps 1, 4, 5, 6, and 7. Chill the filling for at least 8 hours until firm.
- If you want a very smooth filling, ensure your cream cheese is truly at room temperature before mixing.
- Use a small star tip for the whipped cream to mimic realistic tree branches.
Nutrition
- Serving Size: 1 slice
- Calories: 450
- Sugar: 35g
- Sodium: 300mg
- Fat: 30g
- Saturated Fat: 18g
- Unsaturated Fat: 12g
- Trans Fat: 0.5g
- Carbohydrates: 40g
- Fiber: 1g
- Protein: 7g
- Cholesterol: 95mg