
I love finding those pantry staples that do double, maybe triple, duty in the kitchen! We all know sugar and flour are essential, but what about a can of bubbly pop? Trust me when I say that baking with soda—especially Dr Pepper—is a game-changer for adding deep, almost caramelized flavor and unbelievable moisture to your baked goods. Here at CravyBite, Jess Carter always talks about marrying time-honored techniques with modern shortcuts, and this Chocolate Dr Pepper Cake is the perfect example. It’s shockingly easy, especially since we use a box mix, but the liquid component unlocks a richness you just can’t get from plain water or milk. You’re going to see what I mean the minute you take that first bite of this moist, deeply chocolatey dessert! If you’re curious about other fun ingredient swaps, you should definitely check out my recipe for chocolate cherry cookies.
- Why This Chocolate dr pepper cake Recipe Stands Out (EEAT Focus)
- Gathering Ingredients for Your dr pepper cake
- Step-by-Step Instructions for the easy soda cake
- Tips for Baking the Best dr pepper cake (Expert Advice)
- Variations: From chocolate Dr Pepper cake to spice cake with soda
- Serving Suggestions for Your dr pepper cake
- Storage and Reheating Instructions for this unique cake flavor
- Frequently Asked Questions About Baking with Soda
- Estimated Nutritional Data for Your dr pepper cake
Why This Chocolate dr pepper cake Recipe Stands Out (EEAT Focus)
Honestly, anyone can make a chocolate cake mix, but adding Dr Pepper transforms it into something truly special. Why do I swear by this pairing? It’s all about maximizing flavor and moisture with minimal effort, which is exactly what Jess champions in our kitchen philosophy! For another deeply flavored bake that relies on clever additions, you might love my super moist spice cake recipe.
- The soda introduces subtle spice notes—cinnamon, vanilla, and cherry—that deepen the standard chocolate flavor beautifully.
- It keeps the crumb incredibly tender. The carbonation actually works with the flour to create a finer, lighter texture compared to using still liquids.
- It’s a fantastic shortcut! We get complexity without needing to fuss with extra extracts or cocoa powders.
Achieving the Perfect Moist Soda Cake Recipe Texture
When you mix that bubbly Dr Pepper into the batter, those tiny carbon dioxide bubbles help lift the batter slightly, even with the heavy chocolate mix. Then, when it bakes, the residual sugar and liquid in the soda work like a gentle acid, helping to tenderize the gluten structure. It’s baking science made simple! Using that reliable cake mix means you nail the structure every time, ensuring you get that moist soda cake recipe texture that stays fresh for days. It’s proof that sometimes the best tools are the ones already sitting in your fridge!
Gathering Ingredients for Your dr pepper cake
Okay, this is where we get serious! Because we’re relying on a fantastic base (that chocolate cake mix), the magic really comes from what we add to it, and how we finish it off. Don’t just grab any old soda; the temperature matters big time here! If you’re planning to dive into our vanilla buttercream frosting sometime soon, remember that room temp ingredients always mix better. Let’s get everything laid out so the process is smooth sailing.
Essential Components for the Cake Batter
For the actual cake part, we are keeping it cozy and simple. Make sure that Dr Pepper has been chilling on the counter for a bit before you start mixing. You want it room temperature!
- One box (about 15.25 ounces) of your favorite chocolate cake mix.
- One full cup of Dr Pepper soda—remember, room temperature is key for easy mixing!
- Half a cup of simple vegetable oil.
- Two large eggs – they bring everything together.
- Just one teaspoon of vanilla extract to round out that chocolate flavor.
Ingredients for the Warm dr pepper Glaze Tutorial
This warm glaze is poured right over the hot cake, and it soaks in just beautifully. It’s thin at first, but it sets up perfectly. This is a crucial step in our Dr Pepper glaze tutorial, so don’t skip it while the cake is cooling!
- A quarter cup of unsalted butter.
- A quarter cup of regular granulated sugar.
- Another quarter cup of Dr Pepper soda.
Components for the dr Pepper Frosting
Finally, we have the creamy topping. We use the last bit of Dr Pepper here to thin this out to the perfect spreadable consistency. Trust me, you’ll want to taste-test this!
- Two full cups of powdered sugar (you know, the stuff that always seems to get everywhere!).
- The last quarter cup of Dr Pepper soda.
- Half a teaspoon of vanilla extract to brighten it up.
Step-by-Step Instructions for the easy soda cake
If you’ve got all your ingredients laid out like we talked about, this process rushes by quicker than you think. Remember, this recipe is designed to be foolproof and efficient—we take the structure from the box and revolutionize the liquid! If you want to see a totally different but equally amazing sheet cake, you should take a look at my chocolate caramel toffee crunch cake once you’re done here.
Preparing the Pan and Mixing the dr pepper cake Batter
First things first, let’s get that oven fired up! Preheat it to 350 degrees Fahrenheit. When you’re ready to prep your 9×13 inch baking pan, make sure you grease it well and give it a light dusting of flour so we don’t have any sticking drama later. Now for the mixing: grab your biggest bowl. Dump in the dry cake mix first. Then, add the cup of room temperature Dr Pepper, the vegetable oil, and those two eggs. Beat this on medium speed with your electric mixer for a solid two minutes until everything looks nicely combined and just starting to puff up. Just pour in that teaspoon of vanilla extract and switch to stirring by hand for the last little bit!
Baking and Applying the Hot dr pepper Glaze Tutorial
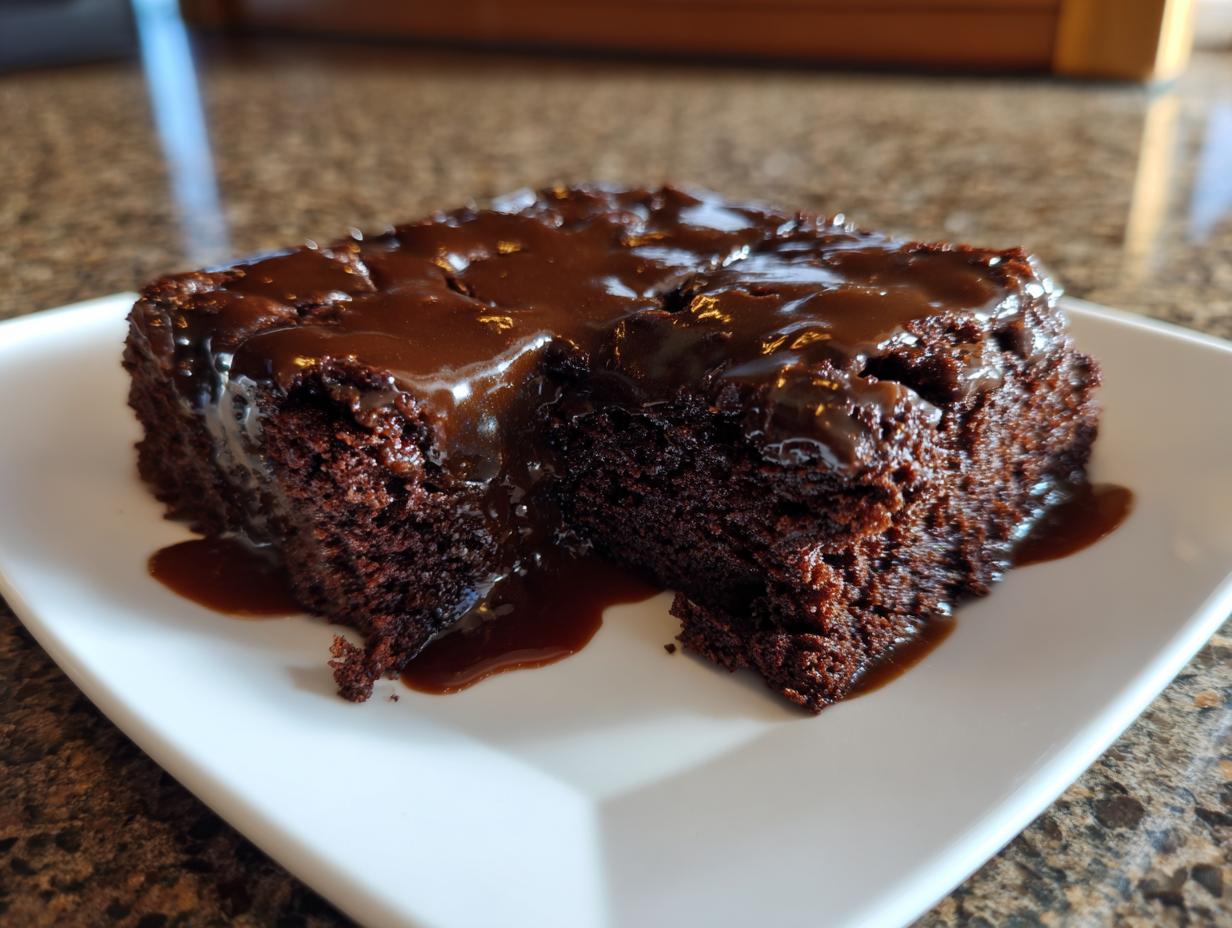
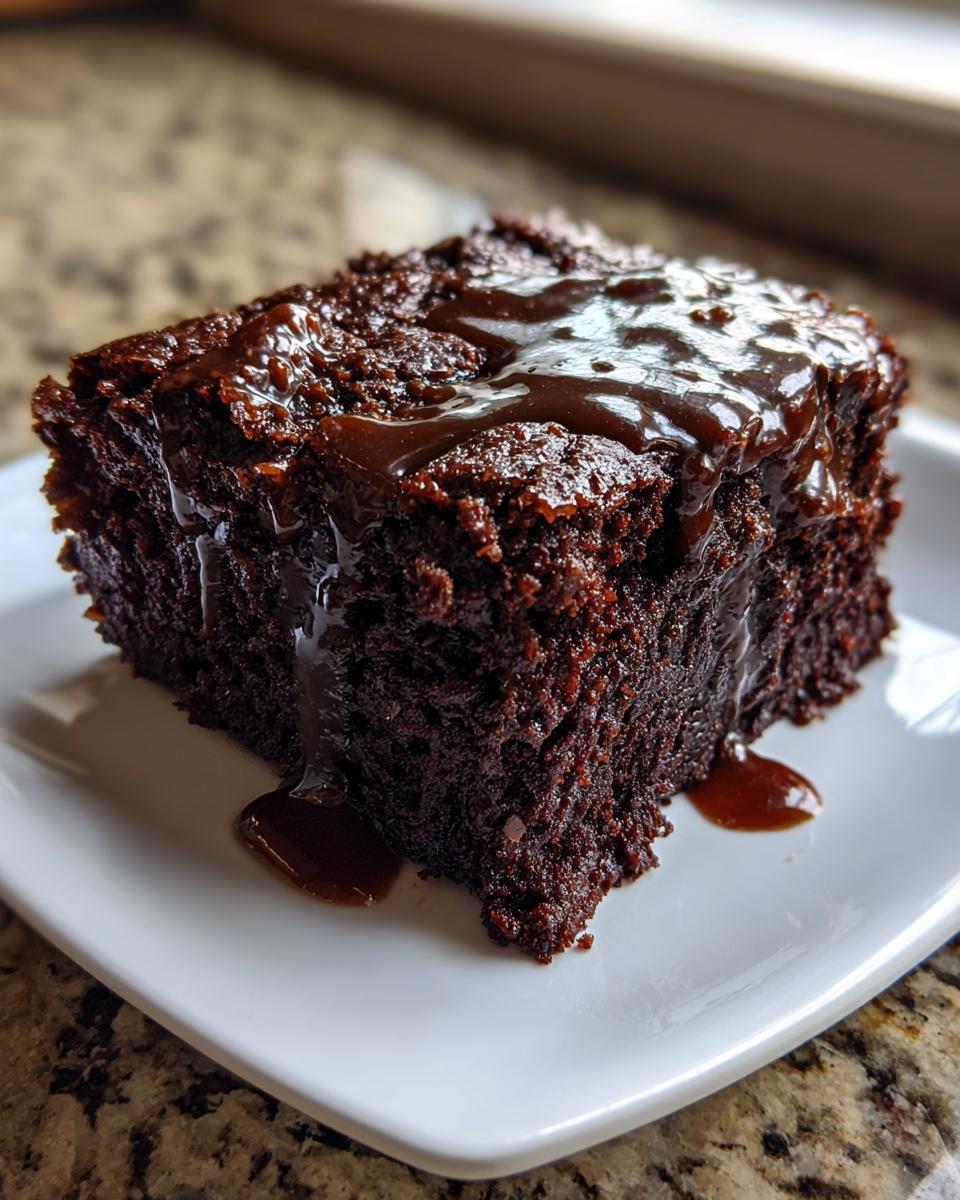
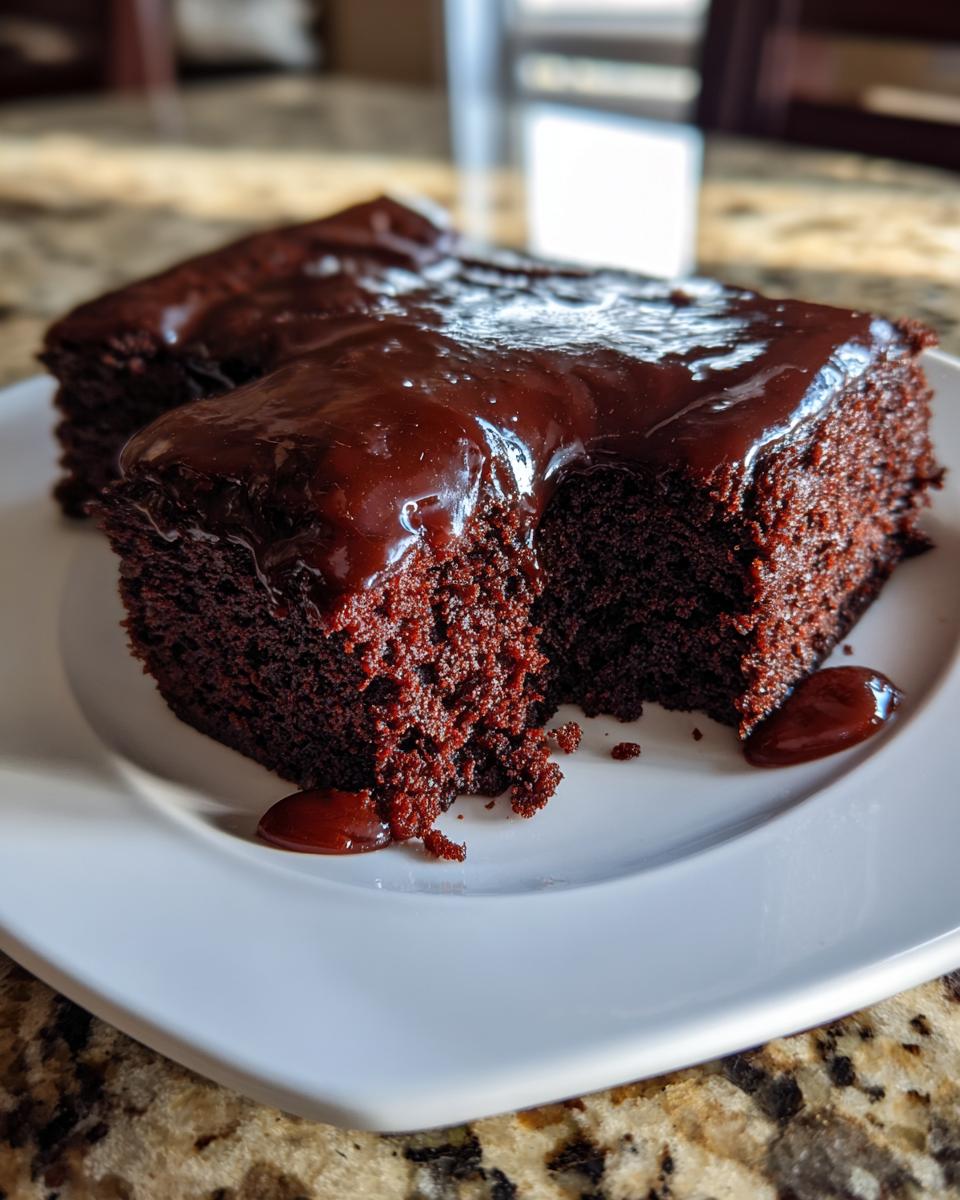
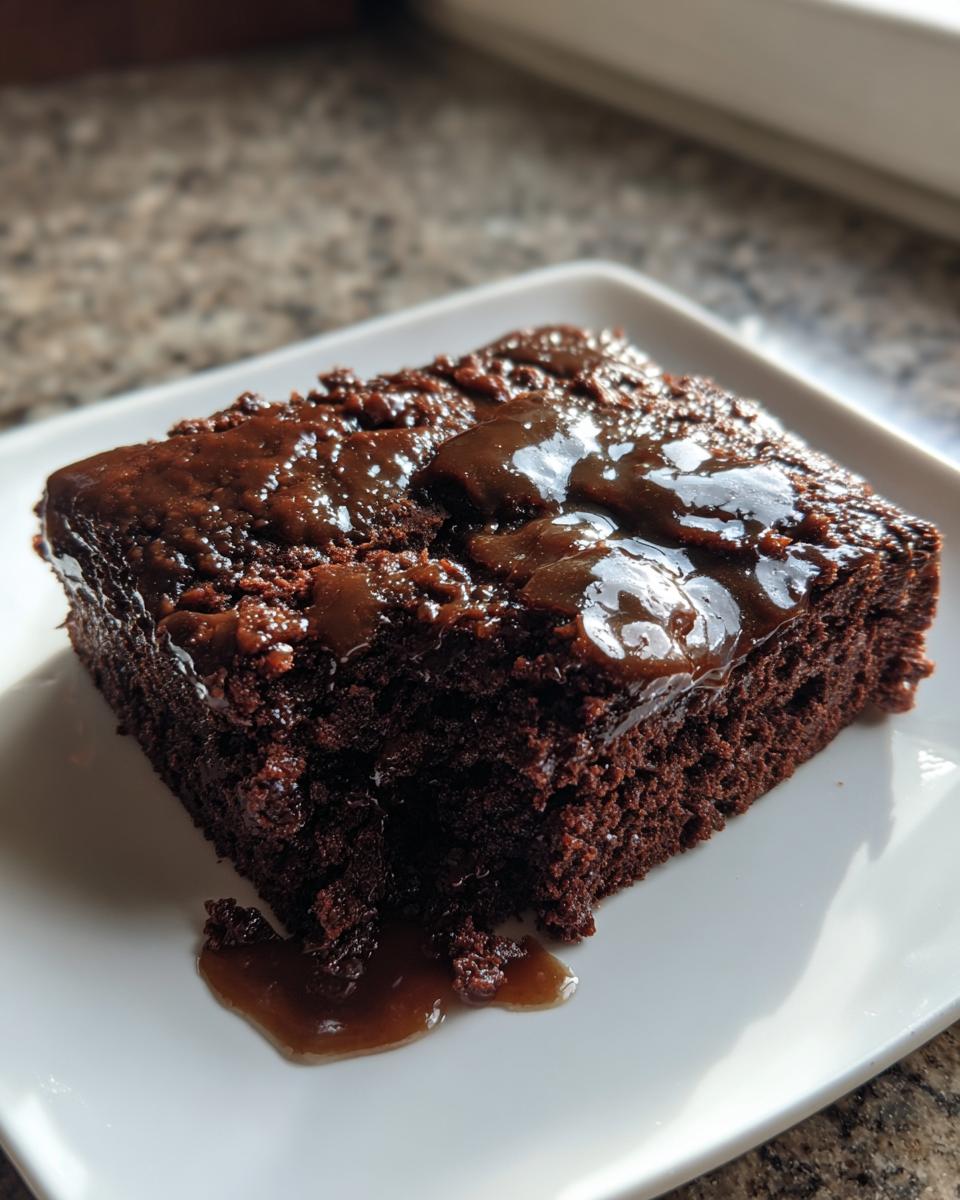
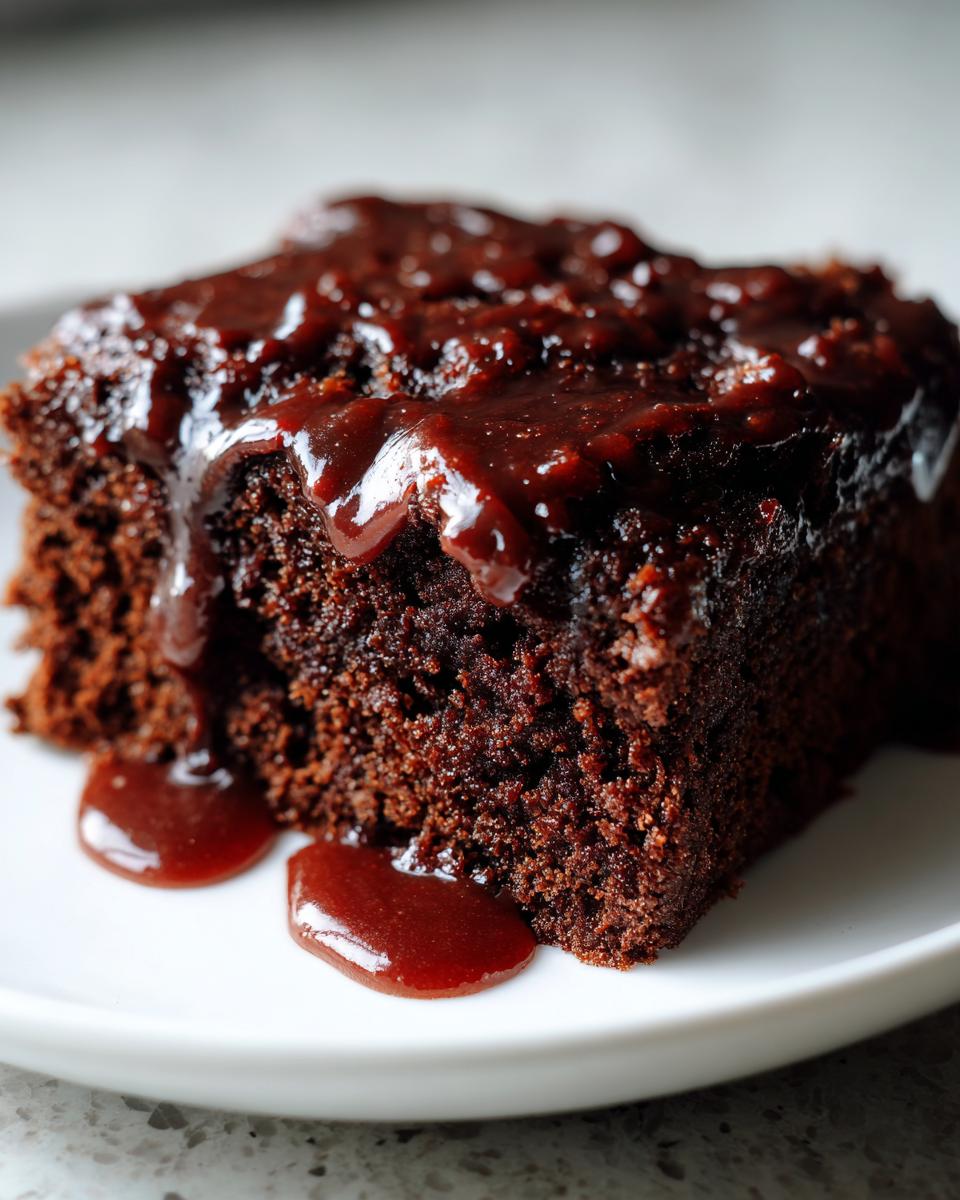
Pour that gorgeous, bubbly batter right into your prepared pan. It should fill it up nicely for that perfect thin layer we’re aiming for. Pop it into the oven for about 30 to 35 minutes. You know it’s done when you stick a wooden pick right in the center, and it comes out clean—no wet batter clinging to it! Here’s the crucial part for our Dr Pepper glaze tutorial: while that cake is baking and cooling down slightly, combine the butter, sugar, and the next quarter cup of Dr Pepper in a small saucepan. Bring that mixture to a boil, then immediately yank it off the heat. As soon as the cake comes out of the oven, pour this hot glaze evenly all over it! Let it soak in while the cake cools down.
Finishing with the dr Pepper Frosting
Now we move onto the creamy topping! Once the cake has cooled down a bit (it can still be slightly warm, just not piping hot), it’s frosting time. In a bowl, whisk together the powdered sugar, the final quarter cup of Dr Pepper, and that last half teaspoon of vanilla. You’re aiming for something smooth that spreads easily. Don’t panic if it seems too thick—just stir in a few extra drops of soda. If you accidentally made it too soupy, just whisk in a spoonful or two of extra powdered sugar until it’s perfect. Spread this lush Dr Pepper frosting evenly over the cooled cake, slice it up, and get ready for compliments!
Tips for Baking the Best dr pepper cake (Expert Advice)
You know, everyone follows the recipe card, but Jess always says that knowing the *why* behind the steps is what separates a good baker from a great one! Since we’ve got this fantastic base, I want to share a couple of insider tricks that really elevate this Dr Pepper cake from simple to spectacular. These little nuggets of wisdom came straight from reviewing her notes, and they make a huge difference in the final result!
Deepening Flavor: Simmering the Soda for Your dr pepper dessert recipes
This is the big secret for when you have a little extra time and you want that flavor to really punch through the chocolate. Remember how the recipe calls for a full cup of soda in the batter? Well, if you want to unlock maximum Dr Pepper intensity, you can actually simmer half of that cup down on the stovetop until it reduces by about half. It gets wonderfully syrupy and concentrated!
When you add that reduced syrup to your batter instead of the full cup of room-temperature soda, you cut down on excess liquid while packing in way more of that distinct cherry-spice flavor. It makes the cake incredibly rich and is genuinely one of the best ways to transform standard Dr Pepper dessert recipes into something truly gourmet. Be sure to let that reduced syrup cool before adding it to your wet ingredients, though!
Making This a Texas sheet cake variation
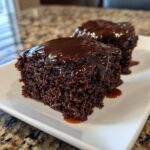
Look how easy this is—we’re baking this in a 9×13 pan! That immediately puts it into the territory of a classic, easy-to-serve sheet cake, perfect for parties or just feeding a crowd without the fuss of leveling layers. Because we pour that warm glaze right over the cake when it comes out, this recipe naturally becomes a wonderful Texas sheet cake variation.
The technique is nearly identical: the warm glaze melts into the porous, warm crumb, creating a super moist bottom layer, and then the final frosting sits on top once it cools. It’s sturdy, it travels well, and it cuts into perfect square servings. I love bringing this to potlucks because it travels so much better than a delicate layer cake! If you’re looking for another reliable, easy-to-serve baked good, I highly recommend checking out my guide on how to make sourdough starter from scratch—it’s a totally different beast, but equally rewarding when done right!
Variations: From chocolate Dr Pepper cake to spice cake with soda
Part of the joy of home baking, right? Taking a solid foundation—which this Dr Pepper cake absolutely is—and twisting it just slightly to match what you’re craving! While this recipe shines as a rich chocolate endeavor, it’s incredibly forgiving and adaptable for those who prefer warming spices.
If you’re tired of chocolate one day, swap that cake mix out! You can easily use a yellow cake mix or even a devil’s food mix if you want something even darker. For a truly classic, regional favorite, this works wonderfully as a spice cake with soda. Just grab a spice cake mix instead of chocolate. You might want to skip the warm glaze application, though, since that’s meant to complement the chocolate/cola notes.
If you go the spice cake route, here’s a trick: add a half teaspoon of extra ground cloves and a teaspoon of ground allspice right into the batter before mixing. That really leans into that rich, almost Southern cajun soda cake vibe. Then, skip the hot glaze entirely and immediately pour your frosting over the top while the cake is still warm so it melts just a little bit into the surface. Speaking of other flavor fun, if you’re into cookie versions of cake flavors, you have to see how I turn box mixes into red velvet cake mix cookies!
For those who love that intense chocolate, you can keep the chocolate mix but add a tablespoon of instant espresso powder when you mix the cake. It won’t taste like coffee, but it seriously deepens the cocoa flavor way beyond what you’d expect from a standard mix. No matter how you tweak it, remember that the Dr Pepper is doing the heavy lifting for the moisture!
Serving Suggestions for Your dr pepper cake
This Dr Pepper cake is already a showstopper because of that moist crumb and the rich chocolate flavor cut by the cherry notes of the soda, but serving it up right makes it memorable! Since we’ve got two layers of topping—that warm glaze that soaks in and the creamy frosting on top—you mostly want accompaniments that offer a textural contrast. It’s already quite rich, so sometimes simple is best.
My personal favorite way to serve a slice is slightly warm, which softens that frosting just enough. I always grab a scoop of good quality vanilla bean ice cream; the cold temperature against the slightly warm, spiced chocolate is just divine. I know Jess sometimes debates serving it with whipped cream, but the frosting we made is so good, it feels like cheating to cover it up!
If you’re looking for an easy topping that doesn’t involve making a whole separate batch of something, just a light dusting of cocoa powder or some chopped pecans sprinkled over the final frosting layer adds a nice crunch. If you happen to have some of that fantastic buttercream icing we talked about making some other time—you should check out the details on vanilla buttercream frosting recipe best stability—a thin swirl of that on top of the Dr Pepper frosting adds an extra layer of creamy sweetness!
But honestly, whether you serve it straight out of the pan after it cools, or dress it up dramatically for a party, this cake really stands on its own merit. It’s that satisfyingly old-fashioned, comforting flavor that just sings!
Storage and Reheating Instructions for this unique cake flavor
This is where the structure of baking with soda really pays off! Because this Dr Pepper cake is so incredibly moist thanks to the soda soaking in and that warm glaze, we have to be smart about how we store it so it doesn’t get sticky or dry out. Nobody wants sticky frosting, right? Trust me, proper storage keeps the texture we worked so hard to achieve intact.
For the best experience—especially if you have that lovely chocolate frosting on top—keep this covered tightly at room temperature for the first day or two. The butter/sugar content in the glaze and frosting is quite high, so it actually holds up really well on the counter. Just make sure it’s in a cool spot, away from any direct sunlight!
Refrigeration for Keeping Your Unique Cake Flavors Fresh
If you know you won’t finish the cake within two days, or if your kitchen is running hot, move it to the fridge. Cover it airtight with plastic wrap before putting the lid on your container. This stops it from absorbing any strange smells from your fridge—nobody wants their unique cake flavors tasting like last night’s leftovers! When you pull it out of the fridge, let it sit on the counter for a good hour before slicing. Chilling stiffens that frosting, and you need it to warm up just a little bit to get that lovely gooey texture back.
How to Reheat a Single Slice Without Ruining the Toppings
This is my favorite tip for enjoying dessert all week long! I never reheat the whole cake; I just take one slice. If you own a microwave, you need to be careful, because that sugar content heats up fast. Pop a slice onto a plate and microwave it for just 10 to 15 seconds on Medium power. This warms the cake part up beautifully without melting the entire frosting layer into a puddle.
If you’re patient, the oven is even better! Place your slice on a baking sheet lined with foil and warm it at about 300 degrees Fahrenheit for about five minutes. This brings the moisture back out just slightly, making it taste like it was pulled fresh from the oven. Just watch the edges so the frosting doesn’t get too runny. Seriously, these little reheat tricks ensure every single piece tastes just as spectacular as the first one!
Frequently Asked Questions About Baking with Soda
When you start messing around with pantry staples like soda instead of milk, questions are bound to pop up! I totally get it. When I first started experimenting with Jess’s recipes, I had a list a mile long. We want to make sure this bubbly magic works perfectly for you every single time, whether you’re aiming for intense flavor or just a really easy weeknight treat. If you’re looking for actual weeknight recipes instead of dessert tips, check out the guide Jess put together on quick easy weeknight dinners!
Can I substitute Dr Pepper with another cola in this dr pepper cake recipe?
Oh, you absolutely can, but you need to know what you’re getting into! Dr Pepper has that signature combination of 23 flavors, giving our cake that perfect underlying spice note. If you swap it out for plain Coke, you’ll get a much sweeter, more straightforward caramel flavor. Root Beer makes it surprisingly good—a little earthy and robust. Cherry cola, on the other hand, amps up the fruitiness! So yes, you can swap it in your dr pepper cake recipe, but just know the final flavor profile will shift a bit based on the soda’s unique ingredient blend. It’s all good experimentation!
How does using soda affect the overall sweetness of the cake?
This is a great question because you might think you’re adding a ton of sugar, right? Well, what the soda (whether it’s full sugar or diet) brings to the table is mostly flavor complexity and moisture, not primary sweetness. Sweetness is still controlled almost entirely by the sugar already in your cake mix and especially by the powdered sugar in that lovely frosting we make.
The soda just blends in, adding hints of vanilla, cherry, or brown sugar tones that make the chocolate taste richer. It never tastes overtly sweet or fizzy; think of it like adding a splash of highly flavored, room-temperature water that just happens to also tenderize the crumb. So don’t worry—it won’t ruin the sweetness balance!
What is the best way to make a Dr Pepper Glaze tutorial if I want it thinner?
We talked about this briefly when we made the warm glaze, but it bears repeating when you’re working on the final frosting! If your glaze ends up too stiff for your liking—maybe you just can’t get that nice pourable quality for your Dr Pepper glaze tutorial—the solution is always the liquid. Take a small measuring spoon and add just a half teaspoon of extra Dr Pepper soda at a time. Whisk thoroughly after each addition.
You have to add it slowly, though, because soda is thin, and it’s super easy to overdo it. If you add too much and it gets runny, don’t panic! Just whisk in a tablespoon of extra powdered sugar until it thickens back up to your desired consistency. It’s all about those tiny adjustments!
Estimated Nutritional Data for Your dr pepper cake
Now, while I’m all about relying on love and spoonfuls of intuition in the kitchen—that’s the CravyBite way!—when you’re making something this decadent, it’s only fair to get a general idea of what you’re serving up. Since this recipe relies on a standard cake mix, eggs, oil, and that rich frosting, these numbers are solid estimates based on averages.
Remember, these figures are just a guide based on standard ingredient calculations, not a formal lab analysis! If you use a diet soda in the glaze or skip the frosting, your numbers will obviously change. But for the full-glory, double-topped Dr Pepper cake we made, here’s the breakdown per slice—and doesn’t it look delicious?
- Serving Size: 1 slice
- Calories: Approximately 350
- Fat: Around 16g (with 5g coming from saturated fat)
- Carbohydrates: About 50g
- Sugar: This is where it gets sweet! We’re looking at about 45g of sugar per slice.
- Protein: Roughly 3g
- Cholesterol: Estimated around 30mg
See? It’s an indulgent, unique cake flavor that’s perfectly suited for celebrating! Knowing the basics helps when you’re planning a gathering, but honestly, who can stop at just one slice of this amazing Dr Pepper cake anyway?
PrintMoist Chocolate Dr Pepper Cake with Glaze
Bake a rich, moist chocolate cake using Dr Pepper soda for a unique depth of flavor and tender crumb. This recipe includes a simple, complementary Dr Pepper glaze.
- Prep Time: 15 min
- Cook Time: 35 min
- Total Time: 50 min
- Yield: 12 servings 1x
- Category: Dessert
- Method: Baking
- Cuisine: American
- Diet: Vegetarian
Ingredients
- 1 box (15.25 ounces) chocolate cake mix
- 1 cup Dr Pepper soda, room temperature
- 1/2 cup vegetable oil
- 2 large eggs
- 1 teaspoon vanilla extract
- 1/2 cup granulated sugar
- 1/4 cup unsalted butter
- 1/4 cup Dr Pepper soda
- 2 cups powdered sugar
- 1/4 cup Dr Pepper soda
- 1/2 teaspoon vanilla extract
Instructions
- Preheat your oven to 350 degrees Fahrenheit. Grease and flour a 9×13 inch baking pan.
- In a large bowl, combine the chocolate cake mix, 1 cup of Dr Pepper, vegetable oil, and eggs. Mix with an electric mixer on medium speed for two minutes until well combined. Stir in the vanilla extract by hand.
- Pour the batter into the prepared baking pan.
- Bake for 30 to 35 minutes, or until a wooden pick inserted into the center comes out clean.
- While the cake bakes, prepare the glaze. In a small saucepan, melt the butter over medium heat. Stir in the 1/4 cup of Dr Pepper and the granulated sugar. Bring the mixture to a boil, then remove from heat.
- Pour the hot glaze evenly over the warm cake immediately after removing it from the oven. Let the cake cool slightly.
- To make the frosting, whisk together the powdered sugar, 1/4 cup of Dr Pepper, and vanilla extract until smooth. If the glaze is too thick, add a few more drops of soda. If it is too thin, add more powdered sugar.
- Spread the frosting over the cooled cake. Slice and serve this unique cake flavor.
Notes
- Using room temperature soda helps the cake batter mix more evenly.
- This recipe works well as a Texas sheet cake variation.
- For an even deeper flavor, reduce the 1 cup of soda used in the batter by simmering it on the stove until it reduces by half before adding it to the mix.
Nutrition
- Serving Size: 1 slice
- Calories: 350
- Sugar: 45g
- Sodium: 300mg
- Fat: 16g
- Saturated Fat: 5g
- Unsaturated Fat: 11g
- Trans Fat: 0g
- Carbohydrates: 50g
- Fiber: 1g
- Protein: 3g
- Cholesterol: 30mg