
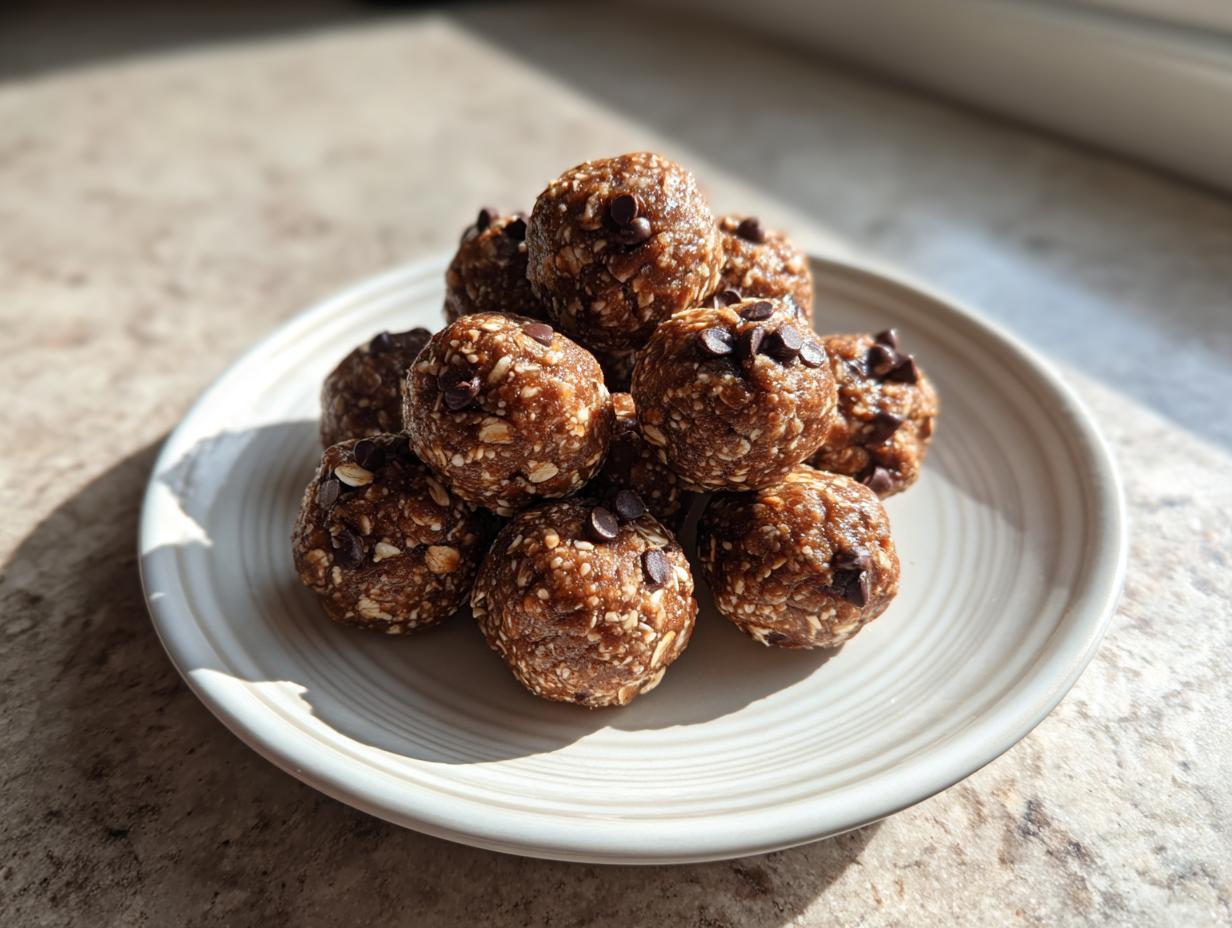
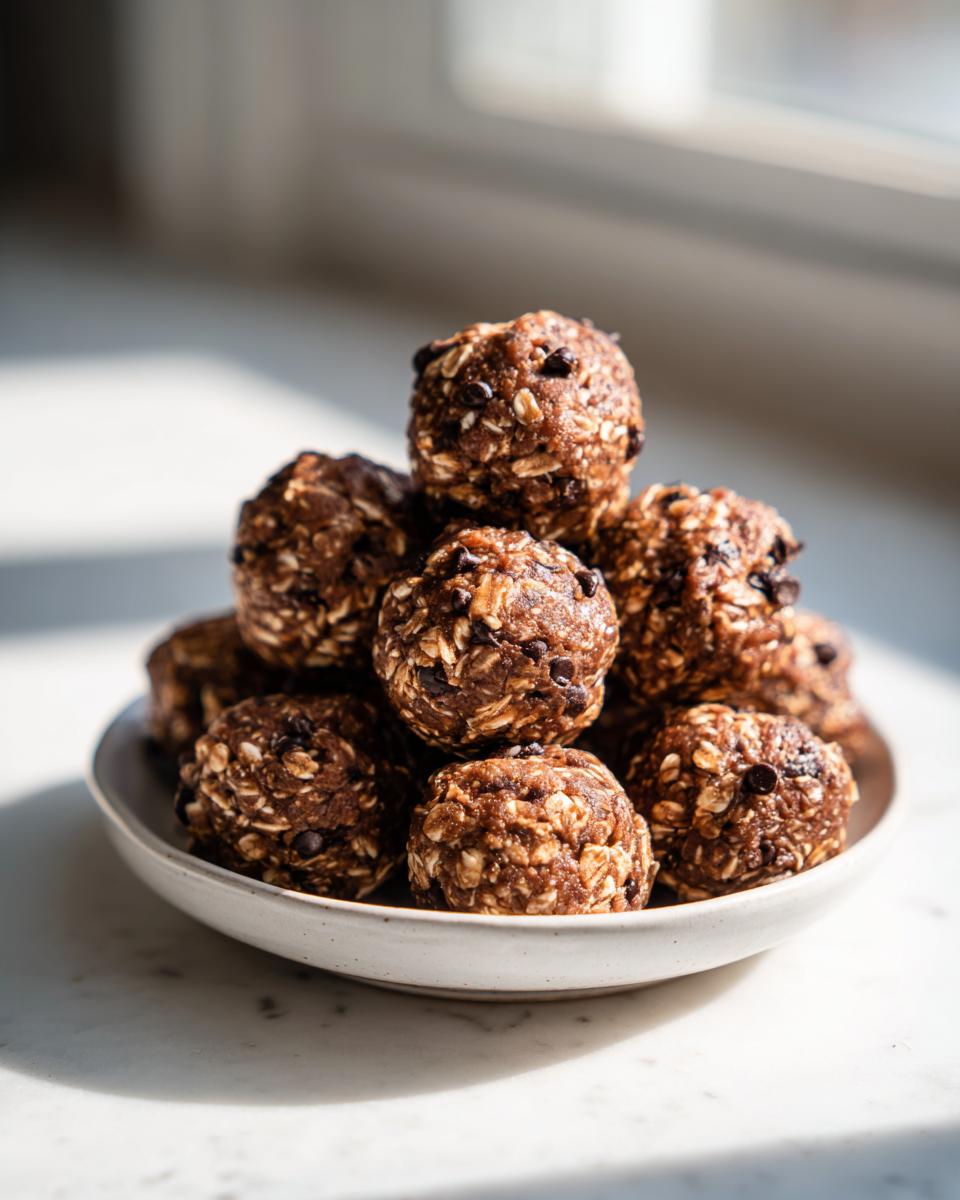
Do you ever hit that 3 PM wall where your brain turns to mush, but you just can’t justify another sugary coffee? Trust me, I know that feeling! With my background in nutrition, I’m always searching for real fuel that doesn’t derail my healthy eating goals. That’s why I live and breathe these protein balls. I mean, they are the absolute easiest, most satisfying snack you can whip up. We’re talking No-Bake Chocolate Peanut Butter Protein Balls that come together faster than ordering takeout. Seriously, they are my secret weapon for staying energized when the day gets hectic. You are going to love how simple and genuinely nourishing these little bites are!
- Why You Need These No-Bake Chocolate Peanut Butter Protein Balls
- Gathering Ingredients for Perfect Protein Balls
- How to Prepare Your Quick Protein Snacks
- Making Ahead Energy Booster: Storage for Your Protein Balls
- Variations on Classic Protein Balls
- Serving Suggestions for Post Workout Fuel Ideas
- Frequently Asked Questions About Protein Balls
- Estimated Nutrition for These Healthy No Bake Snacks
- Share Your Homemade Protein Balls Experience
Why You Need These No-Bake Chocolate Peanut Butter Protein Balls
Honestly, these little guys are a lifesaver when life gets busy. I keep a batch ready in the fridge because I never want to be caught without a healthy option. They hit every mark you could possibly need in a quick snack!

- They are completely no-bake, meaning zero oven time, which I love on a hot day.
- We skip the refined junk, making these true refined sugar free snacks.
- They are the ultimate grab-and-go option—perfect for tossing into gym bags or lunchboxes as easy meal prep snacks.
You get that perfect chewy texture from the oats and that amazing flavor boost from the peanut butter, all in one easy bite.
Gathering Ingredients for Perfect Protein Balls
Okay, one of the best parts about this recipe is that it uses stuff I almost always have lying around. We are keeping this super simple, so feel free to judge my pantry staples! For the perfect, chewy texture in these energy bites recipes, you need a good base. I always make sure to use certified gluten-free rolled oats if I’m avoiding gluten, though regular ones are just fine too.
Here is the lineup. Remember, the quality of your protein powder really makes or breaks the final result—a cheap one can sometimes go powdery, and we are aiming for chewy!
- 1 cup rolled oats
- 1/2 cup peanut butter (I use creamy Jif, don’t judge my childhood favorites!)
- 1/4 cup protein powder (I prefer vanilla whey for this one)
- 2 tablespoons honey or maple syrup
- 1/4 cup mini chocolate chips
- 1 tablespoon chia seeds (if you’re feeling extra healthy!)
Ingredient Notes and Substitutions for Your Protein Balls
You’ve got options here, which is why I love this recipe! If you can’t do the honey, maple syrup works like a charm. Also, swap out that peanut butter for almond butter or sunflower seed butter if you need to—just make sure whatever nut butter you use isn’t super oily. And seriously, the protein powder matters; use one you actually like the taste of!
How to Prepare Your Quick Protein Snacks
The best news? These are completely no-bake! That means we skip all the fuss and go straight to the mixing bowl. This process is so straightforward, it’s impossible to mess up, but paying attention to the texture is everything. First things first, dump all your dry ingredients—oats, protein powder, chia seeds if you’re using them—into a good-sized bowl.
Next up, add the binders: your peanut butter and your sweetener, whether you chose honey or maple syrup. Now, here’s where you have to work! You need to mix this until it looks like one big, uniform, sticky dough. Don’t stop when it looks crumbly; you really need to work it until everything holds together. Sometimes I use a sturdy spoon, but honestly, once it gets tough, I just dive in with my hands! Once it’s combined, fold in those adorable mini chocolate chips gently.

Once those chips are mixed in, we roll! Measure out about a tablespoon of mixture and roll it firmly between your palms into a little ball, about an inch across. Then, get them onto parchment paper. Don’t skip the last step: stick them in the fridge for at least 30 minutes. Chilling is essential so they firm up properly before you grab them for quick protein snacks!
Tips for Rolling Uniform Protein Balls
If you find your mixture is just too sticky to handle, don’t panic or throw in more oats! I always have a tiny bowl of water nearby, and I just wet my hands slightly before rolling. It stops the dough from sticking to you and helps create a really nice, smooth surface on your finished protein balls. For perfect presentation, try to keep them all the same size—I usually aim for the size of a golf ball, or slightly smaller for little hands!
Making Ahead Energy Booster: Storage for Your Protein Balls
This is where these rockstars really shine for meal prep! Since they are no-bake, they need a little chill time, but once they set, they are ready to go. You must store these homemade protein balls in an airtight container. That keeps them fresh and prevents them from absorbing any weird fridge smells. Honestly, they stay perfectly delicious in the refrigerator for about one full week. That means you can roll a big batch on Sunday and have your fuel ready for almost the entire work week. Easy peasy!
Variations on Classic Protein Balls
Now, I know you might look at this basic peanut butter chocolate chip recipe and think, “That’s great, but what else can I do?” Because this base is so perfect, it takes on almost any flavor you throw at it! That’s how we get amazing alternatives to standard peanut butter protein bites.
If you want a richer chocolate vibe—and who doesn’t?—swap out 1/4 cup of your oats for high-quality unsweetened cocoa powder. Make sure you add an extra teaspoon of sweetener to balance the bitterness. Another favorite in my house for a textural change is shredding in some unsweetened coconut. It makes them taste almost like a healthy haystack cookie, which is divine.
Also, I frequently change up the binder. If you use almond butter instead of peanut butter, suddenly you have a completely different, nuttier flavor profile. It really keeps things interesting when you’re making wholesome snack recipes every week.
Serving Suggestions for Post Workout Fuel Ideas
When you pull these out of the fridge, they are the perfect dense little package of energy. They taste amazing as a direct homemade protein bars alternative, especially right after a tough sweat session. I usually grab two balls alongside a cold glass of water or maybe even a black coffee when I’m fighting that afternoon crash.
If you want a slightly bigger snack, try stuffing one into a piece of fruit, like half an apple. It makes for a fantastic pre-hike setup or just a really satisfying little dessert that won’t leave you feeling heavy!
Frequently Asked Questions About Protein Balls
I always get a ton of questions when people see me making these—and that’s fair! When you are making a new staple like these protein balls, you want to make sure you get them right the first time. Here are the things folks ask me most often about keeping these quick protein snacks perfect!
Can I freeze these protein balls?
Yes, absolutely! Freezing is actually my top recommendation if you make a giant batch. Pop them into a freezer-safe container with parchment paper between the layers so they don’t stick together. They last for ages in the freezer, probably a couple of months, easily. When you want one, just pull however many you need and let them sit on the counter for maybe 10 or 15 minutes. They thaw really fast and are perfect that way!
What is the best protein powder for chewy protein balls?
This is a big one that affects texture! If you are looking for the chewiest result, I find that a high-quality whey protein, especially a vanilla flavor, works the best because it mixes in so smoothly. However, plant-based powders like pea protein are great too, but they tend to soak up more moisture. If you use a plant-based powder, especially for these oatmeal energy balls, you might need to add just an extra teaspoon of honey or maybe a splash of almond milk to get that perfect sticky dough texture for rolling.
Estimated Nutrition for These Healthy No Bake Snacks
I always get asked about the nutrition breakdown for these, especially since I use them for post workout fuel ideas. Remember, since we’re using honey and whatever brand of peanut butter you love, these numbers are just an estimate per serving size, which is two delicious little balls.

- Serving Size: 2 balls
- Calories: 180
- Protein: 10g
- Fat: 10g
- Carbohydrates: 18g
- Sugar: 7g (Mostly from honey/sweetener!)
Keep in mind these are generally refined sugar free snacks if you stick strictly to the honey or maple syrup listed. The exact count will shift slightly depending on your specific protein powder choice, but this gives you a great target for these healthy no bake snacks!
Share Your Homemade Protein Balls Experience
That’s really it! We’ve covered how to mix them, chill them, and why they work so perfectly as a go-to snack. Now, it’s your turn to take these simple ingredients and make them your own. I truly believe the best recipes are the ones that we adapt just a little bit to fit our own lives and tastes.
I would absolutely love to hear what you think! Did you stick with the classic chocolate chip, or did you try adding dried cherries or maybe some coconut flakes? Please jump down below and leave a rating so others know how much you loved these **protein balls**. If you snap a picture of your batch—maybe you made them for your kids as kid friendly healthy snacks—tag me on social media!
Every time you whip up a batch of these, you’re embracing that simple, honest approach to food that CravyBite Kitchen is all about. Happy rolling!
PrintNo-Bake Chocolate Peanut Butter Protein Balls
Make these no-bake protein balls for a quick, healthy snack. They use simple ingredients and are perfect for post-workout fuel or meal prep.
- Prep Time: 10 min
- Cook Time: 0 min
- Total Time: 10 min
- Yield: 12 servings 1x
- Category: Snack
- Method: No-Bake
- Cuisine: American
- Diet: Vegetarian
Ingredients
- 1 cup rolled oats
- 1/2 cup peanut butter
- 1/4 cup protein powder (vanilla or unflavored)
- 2 tablespoons honey or maple syrup
- 1/4 cup mini chocolate chips
- 1 tablespoon chia seeds (optional, for extra fiber)
Instructions
- Combine the rolled oats, peanut butter, protein powder, honey, and chia seeds (if using) in a medium bowl.
- Mix all ingredients together thoroughly until a uniform, slightly sticky dough forms. You may need to use your hands to fully incorporate everything.
- Fold in the mini chocolate chips.
- Roll the mixture into small, bite-sized balls, about 1 inch in diameter.
- Place the finished protein balls on a plate or baking sheet lined with parchment paper.
- Refrigerate for at least 30 minutes to help them firm up before serving.
Notes
- Store these homemade protein balls in an airtight container in the refrigerator for up to one week.
- If the mixture seems too dry, add a teaspoon of water or almond milk until it holds together.
- For a different flavor, substitute peanut butter with almond butter or sunflower seed butter.
Nutrition
- Serving Size: 2 balls
- Calories: 180
- Sugar: 7
- Sodium: 85
- Fat: 10
- Saturated Fat: 2
- Unsaturated Fat: 8
- Trans Fat: 0
- Carbohydrates: 18
- Fiber: 3
- Protein: 10
- Cholesterol: 0