
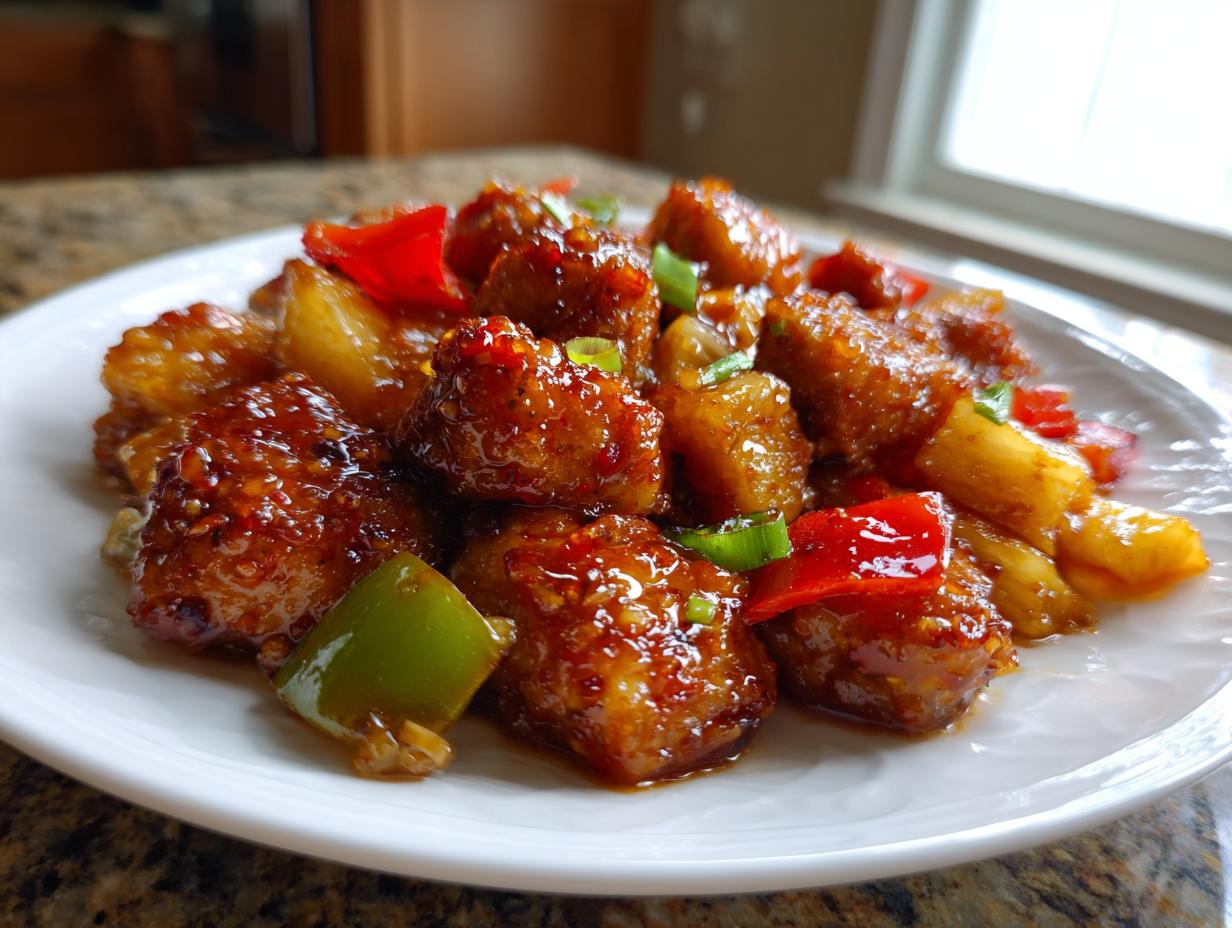
Oh, friend, let’s talk weeknights for a second. Are you staring into the fridge at 5:30 PM, already dreading the mountains of pots and pans waiting for you? I absolutely know that feeling. Back when I was consulting full-time, the last thing I wanted after a long day was a five-dish disaster. That’s why I live and breathe for solutions like the hawaiian chicken sheet pan dinner. This isn’t just a recipe; it’s my peace treaty with my own sink! We harness that amazing sweet-savory tropical flavor—pineapple, tangy glaze, juicy chicken—and cook it all on one single, beautiful piece of foil. It’s everything CravyBite Kitchen stands for: big flavor meeting minimal cleanup. If you need a wildly satisfying tropical chicken meal that practically cleans itself up, trust me, you’ve found your new go-to. You can learn more about keeping my meals quick and easy over at my page for quick, easy weeknight dinners.
- Why This hawaiian chicken sheet pan Recipe is Your New Weeknight Hero
- Gathering Ingredients for the hawaiian chicken sheet pan Dinner
- Step-by-Step Instructions for Your Sheet Pan Chicken Recipe
- Expert Tips for the Perfect hawaiian chicken sheet pan
- Serving Suggestions for Your One Pan Dinner
- Storage and Reheating Instructions for hawaiian chicken sheet pan Leftovers
- Common Questions About Sheet Pan Dinners for Families (FAQ)
- Nutritional Snapshot of This hawaiian chicken sheet pan
- Share Your Tropical Chicken Meal Experience
Why This hawaiian chicken sheet pan Recipe is Your New Weeknight Hero
I know you see ‘Hawaiian’ and think it means hours marinating and complex steps, right? Wrong! This hawaiian chicken sheet pan dinner is the anti-fuss meal I developed specifically because I wanted that amazing tropical flavor without the aftermath. When you’re busy, practicality is just as important as taste, and this recipe ticks every single box we need for a real weeknight win.
Trust me when I say this specific Sheet Pan Chicken Recipe has earned its spot in my regular rotation for a few key reasons. It’s not just about throwing stuff on a pan; it’s about technique that guarantees delicious results every time. Check out why this becomes your new favorite One Pan Dinner:
- It delivers massive flavor with ingredients you likely already have—we skip the obscure items!
- It truly qualifies as a 30 Minute Dinner when you count active time. Seriously satisfying food shouldn’t take all evening.
- You get gorgeous color and texture from the roasting method, making it look way fancier than the effort required.
- Cleanup is almost nonexistent, which means more time relaxing after dinner! You can see how much I love simple cooking in my easy one-pan creamy rice casserole too.
Quick Prep and Roasting Time for Your hawaiian chicken sheet pan
Let’s talk numbers, because that’s what matters on a Tuesday night. Prep time is shockingly fast—just about 15 minutes. That’s chopping up your peppers and onions, cubing the chicken, and whisking together that incredible glaze. Once everything is on the pan? Pop it in the oven! The total cooking time is only about 25 minutes. That combination of quick prep and fast bake time solidly lands this dish in the Quick Chicken Dinner category. You’ll be sitting down to eat before the kids even finish setting the table!
Achieving Juicy Baked Chicken with Minimal Cleanup Meals
The secret to keeping that chicken breast from drying out is twofold: the sauce components (hello, honey!) and the high heat of roasting. When the chicken, pineapple, and veggies roast together, they steam slightly in their own delicious juices, creating that Juicy Baked Chicken you’re dreaming of. But the real magic? Parchment paper! I call this the ultimate hack for Minimal Cleanup Meals. We line the entire sheet pan before we even start. When it’s done, you just carefully fold up the paper, toss it, and maybe wipe down the pan if a little sauce dripped over. That’s it! No scrubbing baked-on glaze.

Gathering Ingredients for the hawaiian chicken sheet pan Dinner
Okay, planning is half the battle when it comes to an hawaiian chicken sheet pan dinner, right? Having everything ready means we can jump straight into that 15-minute prep time with zero hunting around the pantry. I love how straightforward the ingredient list is; it’s all quality, simple stuff that packs a huge flavor punch. When you’re working with fresh ingredients, you build trust in the final product, and that’s key for my family recipes. You’ll want a nice big sheet pan for this! If you’re looking for other easy recipes built around pantry staples, be sure to check out my guide on homemade cream of chicken soup.
Here is everything you need to grab before we preheat that oven. Keep your chicken and veggies separate from your glaze mixture until we get to the assembly step!
- 1.5 lbs boneless, skinless chicken breasts, cut into 1-inch cubes
- 1 large red bell pepper, cut into 1-inch pieces
- 1 large green bell pepper, cut into 1-inch pieces
- 1 medium red onion, cut into 1-inch wedges
- 1 cup fresh or canned pineapple chunks, drained if canned
- 1 tablespoon olive oil
- Salt and black pepper to taste
The Sweet and Savory Glaze Components
Now, this glaze is where the tropical magic happens! It’s got that perfect push-pull of sweet and salty that makes the hawaiian chicken sheet pan so addictive, and it’s so simple to whip up. We’re using standard pantry items here for a fantastic Sweet and Savory Glaze that coats everything beautifully.
Grab these for the sauce base:
- 1/2 cup low-sodium soy sauce (using low-sodium keeps the final dish from tasting too salty once roasted)
- 1/3 cup pineapple juice (this provides that essential fruity tang!)
- 1/4 cup honey (this is our primary sweetener)
- 2 cloves garlic, minced
- 1 teaspoon ground ginger
And here is the one component you need to prepare just before you start mixing: the thickener! You’ll need 1 teaspoon of cornstarch mixed with 1 tablespoon of cold water. This is called a slurry. We’ll mix this into *half* the glaze later on. Why do we do this? Because this slurry is what transforms our thin sauce into a thick, sticky coating that perfectly caramelizes onto the chicken and veggies during baking. Without it, the sauce just runs off! We reserve the other half of the glaze to brush on later or serve alongside if we want extra sauce.
Step-by-Step Instructions for Your Sheet Pan Chicken Recipe
Alright, let’s get this tropical dinner moving! This is the part where we turn those beautiful raw ingredients into a mouthwatering hawaiian chicken sheet pan dinner. Since we are relying on high heat roasting, precision matters. Follow these steps closely, and I promise you’ll get that perfect Sheet Pan Chicken Recipe result every single time. If you want more reliable roasting guidance, sometimes I use tips from my garlic parmesan chicken bake for general oven knowledge!
Preparing the Glaze and Oven Setup
First things first, let’s get the oven hot and ready to go! Preheat your oven to a solid 400°F (200°C). This high heat is crucial for getting a nice sear on the vegetables and chicken quickly. Next, grab your largest rimmed baking sheet—the one you use for cookies works great—and line it completely with parchment paper. This is your key to minimal cleanup, so don’t skip this line of defense!
Now for the glaze! In a small bowl, whisk together the soy sauce, pineapple juice, honey, minced garlic, and ground ginger. This smells amazing already, right? Here’s the crucial part: Set aside about half of this glaze mixture right now. We keep that half separate because we’re going to turn it into our finishing sauce later. The other half is what we’ll barely brush on during the cooking process.
Assembling and Initial Roasting of the hawaiian chicken sheet pan
Time to bring the party together! In a separate, large mixing bowl—the bigger the better so you don’t fling ingredients everywhere—toss your cubed chicken, red and green bell peppers, red onion wedges, and pineapple chunks. Give it a light drizzle of olive oil and season it just lightly with salt and pepper. Remember, the glaze is salty, so we don’t want to overdo it on the seasoning now. Toss everything really well to make sure every piece is lightly coated.
Once everything is mixed, dump it all out onto your parchment-lined sheet pan. And I mean *dump it*. But then, here’s my standard operating procedure: spread it all out into a single, even layer. This is vital for a successful hawaiian chicken sheet pan. If you pile the chicken on top of the veggies, the chicken steams instead of roasting, and we want that gorgeous roasted flavor!
Slide that pan into your 400°F oven and let it roast away for 15 minutes. Don’t peek too much—let that heat do its job!
Finishing the Juicy Baked Chicken and Veggies
While your first 15 minutes are cruising by, take that reserved half of the initial glaze mixture and thicken it up. Put it back into that small bowl and whisk in the cornstarch slurry (that cornstarch mixed with cold water). Gently heat this mixture in a little saucepan over medium heat, stirring constantly. It will get thick fast, probably in just a minute or two. Once it coats the back of a spoon, take it off the heat immediately. That’s your finishing sauce!
After the chicken has roasted for 15 minutes, pull the pan out. Take a brush (a clean silicone one is best here) and brush *half* of that thickened finishing sauce directly over the chicken and vegetables on the pan. Back into the oven it goes! Roast for another 8 to 12 minutes. You are looking for the chicken to be opaque all the way through and hit an internal temperature of 165°F (74°C). Always check the thickest piece to guarantee food safety—we don’t want any worries with our Easy Weeknight Chicken!
When it comes out looking beautiful and caramelized, drizzle that last bit of thickened sauce right over the top. That final drizzle gives you that extra shiny, sticky glaze that truly makes this Tropical Chicken Meal shine!
Expert Tips for the Perfect hawaiian chicken sheet pan
You know, making a recipe once is good, but making it *great* consistently? That’s what separates a tasty experiment from a reliable staple. Since this hawaiian chicken sheet pan is one of my core rotation meals, I’ve picked up a few tricks over the years to ensure it’s juicy and perfectly balanced every time we make it. Using these tips elevates it from simply being an easy option to becoming a true showstopper, even though the cleanup is still tiny!
We rely on the standard recipe notes to keep things streamlined, but I’ve added my own personal touch based on years of trial and error. If you want to substitute things or just make sure the flavor explodes, here are my key takeaways. For more reliable roasting knowledge, especially for heavier meats like pork, check out my post on the juicy oven roasted pork loin.
Ingredient Notes and Substitutions for Tropical Chicken Meal
First, let’s talk about the chicken itself. The recipe calls for breasts, and they work wonderfully because they cook fast alongside the veggies. However, if you happen to have chicken thighs sitting around—the boneless, skinless kind—please use those! Thighs have a little more fat, so they are nearly impossible to overcook, ensuring extra Juicy Baked Chicken for your Tropical Chicken Meal. If you swap, just keep an eye on them; they might take 2–3 minutes longer than the breasts.
The veggies are flexible too! The recipe calls for red and green bell peppers, which look beautiful, but hey, use what’s on sale! Yellow or orange peppers are fantastic additions for extra visual pop. If you’re worried about your onions burning—onions caramelize faster than chicken—try cutting them into slightly larger wedges, or tuck them underneath some of the chicken pieces when you first spread everything onto the pan.
And one final tip from me, Jess, regarding the pineapple: While canned pineapple is totally fine for speed (and I’ve used it plenty of times!), if you can swing it, use fresh pineapple chunks. Fresh pineapple has a sharper, brighter tang that cooks down into the sauce so beautifully. It just tastes *fresher* when you bite into it. Plus, draining the canned stuff well is key, because excess water slows down that crucial roasting process we need for this Sheet Pan Chicken Recipe.
Serving Suggestions for Your One Pan Dinner
So, the hawaiian chicken sheet pan is coming out of the oven—sticky sauce, tender chicken, beautiful roasted veggies! What do we serve it with? We’ve got a lot of rich, sweet, and savory flavor happening on that pan already, so the best pairings are usually simple bases that let the chicken be the star. This is often where most people stop, but trust me, the side dish steps up this meal!
When I dish this up for a weeknight, I usually aim for something that soaks up that extra delicious glaze, or something crisp to cut through the sweetness. If you’re looking for the perfect base, I highly recommend learning how to make my best fluffy rice pilaf recipe. It is ridiculously light and fluffy and catches every bit of sauce!
Here are a few ideas to make this a complete meal:
- Steamed White or Brown Rice: This is the classic binder. Simple steamed rice is perfect for soaking up every drop of that Sweet and Savory Glaze.
- Coconut Rice: Want to lean into the tropical vibes? Cooking your rice with a splash of coconut milk makes this a truly transportive Tropical Chicken Meal.
- Simple Greens: If you’re trying to keep things lighter, go for a quick side salad with a light vinaigrette, or even some steamed, lightly salted broccoli or green beans. The fresh crunch balances the richness of the roasted pineapple and chicken.
And if you are planning ahead—because that’s always smart!—this hawaiian chicken sheet pan does wonders for Simple Meal Prep Chicken containers. Once it cools slightly, portion out your chicken and veggies over a bed of rice into airtight containers. Keep the extra glaze in a very small, separate container. When you reheat the chicken in the microwave tomorrow, just drizzle a tiny bit of that extra sauce over the top before eating to refresh that beautiful glaze!

Storage and Reheating Instructions for hawaiian chicken sheet pan Leftovers
Don’t you hate when leftovers taste sad the next day? That’s the real test of a great recipe, right? Luckily, because our hawaiian chicken sheet pan recipe is already designed to maximize moisture—thanks to the pineapple and that thick glaze—it holds up *really* well! This is such a lifesaver when I’m planning out my meals, making it perfect for Sheet Pan Meal Prep.
The key to keeping this tropical goodness tasting fresh is storage. You want to get those leftovers tucked away as soon as they cool down enough to handle. Pop whatever you haven’t eaten into a truly airtight container. I’ve found that glass containers work the best for reheating later, but any good sealed container will do the trick. In the fridge, this Sheet Pan Chicken Recipe stays fantastic for about three to four days max. I rarely have leftovers past day three because we crush them!
The Best Way to Reheat Your Sheet Pan Chicken Recipe
Now, how to reheat? This is where many people go wrong and end up with dry chicken. If you microwave it straight from the fridge, you risk steaming the chicken to rubber status. We want to avoid that sad, rubbery texture at all costs!
I have two preferred methods, depending on how much time I have:
- My Preferred Method (The Oven Refresh): If I have 10 minutes to spare, I always use the oven. Preheat it to a nice low temperature, maybe 300°F (150°C). Spread the leftovers directly onto a clean section of parchment paper on a baking sheet. This gentle heat warms everything evenly without drying out the chicken or burning the sugars in the glaze onto the pan. It tastes almost made-from-scratch again!
- The Fastest Fix (Microwave Magic): If you absolutely need Easy Chicken Dinner Ideas on the table in 90 seconds flat, go for the microwave. Place your portion in a microwave-safe dish and lay a damp paper towel lightly over the top of the food. That little bit of steam trapped by the towel helps rehydrate the chicken and vegetables. Microwave in short bursts—maybe 45 seconds, stir, then another 30 seconds—until it’s just heated through. Don’t overheat it, or you’ll lose all that juice we worked so hard to keep in there!
No matter how you warm it up, avoid reheating the entire batch multiple times. For the best flavor and texture, reheat only what you plan to eat right away. Keeping those leftovers pristine means your next easy meal is ready to go!
Common Questions About Sheet Pan Dinners for Families (FAQ)
I always get so many questions when people try a new Sheet Pan Chicken Recipe, and that’s wonderful! It means you’re serious about making this hawaiian chicken sheet pan a regular feature in your rotation. Answering these questions helps make sure you get that consistently juicy, flavorful, weeknight victory every time you pull the pan out of the oven. Addressing these concerns upfront is how we build trust in the recipe, so let’s get into the nitty-gritty that makes these Sheet Pan Suppers work so well for families!
Can I use chicken thighs instead of breasts in this hawaiian chicken sheet pan?
Oh, yes, absolutely! I mentioned this in my expert tips, but it deserves its own mention here because it’s such a great substitution. If you prefer dark meat, boneless, skinless chicken thighs are actually *ideal* for this hawaiian chicken sheet pan. They have a higher fat content, which means they stay incredibly moist and tender, even if you accidentally leave them in an extra few minutes while the veggies finish!
The only adjustment you might make is the time. Chicken breasts are leaner and cook faster. If you swap to thighs, I would suggest adding about 5 to 7 minutes to your total roasting time. Since the recipe calls for 1-inch cubes for expediency, you are still looking at a very short cook time overall—maybe 30–32 minutes total cook time, peaking at that safe 165°F internal temperature.
What vegetables work best for this roasting method?
The beauty of using 400°F for our Roasting Chicken and Veggies is that it’s hot enough to cook firm vegetables quickly without turning them to mush. Peppers and onions are my go-to because their sweetness really complements the Hawaiian glaze, but you have so much flexibility here for making this a truly healthy meal!
If you’re looking to expand beyond peppers and onions for your One Pan Dinner, here are a few other fantastic choices that hold up beautifully on a sheet pan at this temperature:
- Broccoli Florets: Toss them in oil! They get crispy edges which are just heavenly against the sticky sauce. Add them mid-way through so they don’t burn before the chicken is done.
- Zucchini or Yellow Squash: Cut these a little thicker—say, 1.5 inches—because they release more water. They absorb the sauce flavor wonderfully.
- Small Cubes of Sweet Potato (Use Caution!): Sweet potatoes are great for that earthy sweetness, but they take longer to cook than chicken breast. If you use them, cut them smaller than your chicken pieces (maybe 3/4 inch cubes) or give them a 10-minute head start in the oven before you add the chicken and peppers.
I always suggest grabbing whatever seasonal veggies look best at the market, as long as they are dense enough to handle the heat. If you’re exploring other slow-cooker methods instead of roasting, I have some great ideas for easy crock-pot creamy chicken tortilla soup that might interest you too!
Do I need to use parchment paper for this hawaiian chicken sheet pan?
Honestly, you *can* skip it, but why would you want to? Ha! I strongly advocate for using parchment paper every single time you make this hawaiian chicken sheet pan. The glaze we use has honey and sugar, which loves to caramelize quickly and cement itself permanently to your pan. If you don’t use parchment, you end up scrubbing baked-on sugar residue for twenty minutes later. That defeats the entire purpose of a Minimal Cleanup Meal!
If you’re out of parchment, you can use aluminum foil, but make sure you spray it *very* generously with cooking spray, as sugar can sometimes stick fiercely to foil too. My absolute last resort is just using a well-seasoned, non-stick pan that has been thoroughly greased with oil, but I still recommend that parchment paper shield!
Can I make this recipe spicier?
I love that you’re thinking about cranking up the heat! This recipe leans naturally sweet and savory, which is why families love it, but adding a little kick is super easy. When you are mixing up your Sweet and Savory Glaze base (before you separate any out), simply whisk in 1/2 teaspoon of red pepper flakes or about a teaspoon of your favorite hot sauce, like Sriracha. You can even mince up half a jalapeño and toss it in with the onions and peppers! This keeps the tropical flavor profile intact while adding that delightful heat we sometimes crave.
Nutritional Snapshot of This hawaiian chicken sheet pan
As someone who spent years studying nutrition, I totally get why you’re curious about the numbers behind your favorite meals! While CravyBite Kitchen focuses on flavor and ease, we always want to give you a good idea of what you’re eating. This hawaiian chicken sheet pan dinner is actually pretty fantastic for a healthy dinner! It’s leaning toward low fat due to the lean chicken breasts we used in the main recipe, and it packs a big protein punch to keep you full for hours.
Remember, these figures are just estimates, okay? They are based purely on the ingredients listed in the recipe above—like using low-sodium soy sauce and boneless, skinless breasts. If you swap to chicken thighs or use a regular soy sauce, those numbers will definitely shift. Also, these figures don’t include the rice or any extra garnish you might add on the side, so keep that in mind if you’re tracking closely!
Here’s the quick rundown for one serving:
- Calories: About 380 kcal
- Protein: A whopping 38 grams! Great for muscle and satiety.
- Carbohydrates: 35 grams (mostly from the pineapple and honey in the glaze)
- Total Fat: Only 8 grams, with just 1.5 grams being saturated fat. So satisfying for just 8 grams of fat!
- Sugar: 22 grams (This is why we keep the sauce light and use mostly honey, not refined sugars!)
It’s a really well-balanced meal, especially for a Friday night when you want something delicious but don’t want to feel weighed down. Knowing the nutrition empowers you in the kitchen, which is why I love sharing it! If you’re looking for more meals optimized for good health, I always share my ideas over on my healthy breakfast ideas page.
Share Your Tropical Chicken Meal Experience
Whew! We made it! Now that you’ve experienced the pure joy and absolute ease of this hawaiian chicken sheet pan dinner, I really, truly want to hear all about it. Honestly, knowing that someone else out there has an easier Tuesday evening because they tried one of my family’s favorite recipes is why I love doing this so much.
Did you manage to get those perfect caramelized bits on the pineapple? Did your kids actually eat the onions for once? Tell me everything!
Please take a minute to leave a star rating for this Sheet Pan Chicken Recipe right below this section if you can. Knowing what you thought helps other busy home cooks trust this simple method. And if you snapped a photo of your finished, minimally cleaned-up pan, tag me on social media! I get such a kick out of seeing how our kitchens connect across the country.
If you have any further questions about substitutions, or if you’ve cooked up other amazing Sheet Pan Suppers since trying this one, head over to my contact page and let me know! Happy cooking, and I hope this Quick Chicken Dinner brings some tropical sunshine into your week!
PrintEasy Hawaiian Chicken Sheet Pan Dinner with Pineapple and Peppers
Make this sweet and savory Hawaiian chicken sheet pan dinner for a flavorful meal with minimal cleanup. Juicy chicken, pineapple, and colorful vegetables roast together on one pan.
- Prep Time: 15 min
- Cook Time: 25 min
- Total Time: 40 min
- Yield: 4 servings 1x
- Category: Dinner
- Method: Baking
- Cuisine: American/Tropical
- Diet: Low Fat
Ingredients
- 1.5 lbs boneless, skinless chicken breasts, cut into 1-inch cubes
- 1 large red bell pepper, cut into 1-inch pieces
- 1 large green bell pepper, cut into 1-inch pieces
- 1 medium red onion, cut into 1-inch wedges
- 1 cup fresh or canned pineapple chunks, drained if canned
- 1 tablespoon olive oil
- Salt and black pepper to taste
- For the Glaze:
- 1/2 cup low-sodium soy sauce
- 1/3 cup pineapple juice
- 1/4 cup honey
- 2 cloves garlic, minced
- 1 teaspoon ground ginger
- 1 teaspoon cornstarch mixed with 1 tablespoon cold water (slurry)
Instructions
- Preheat your oven to 400°F (200°C). Line a large rimmed baking sheet with parchment paper for easy cleanup.
- In a small bowl, whisk together the soy sauce, pineapple juice, honey, minced garlic, and ground ginger for the glaze. Set aside half of the glaze mixture to use as a finishing sauce later.
- In a large bowl, combine the cubed chicken, bell peppers, onion, and pineapple chunks. Drizzle with olive oil and season lightly with salt and pepper. Toss to coat evenly.
- Spread the chicken and vegetable mixture in a single layer onto the prepared sheet pan.
- Place the sheet pan in the preheated oven and roast for 15 minutes.
- While the chicken roasts, return the reserved half of the glaze mixture to the small bowl. Whisk in the cornstarch slurry. Heat this mixture gently in a small saucepan over medium heat, stirring constantly until it thickens slightly, about 1-2 minutes. This is your finishing sauce.
- After 15 minutes of roasting, remove the sheet pan from the oven. Brush half of the thickened finishing sauce over the chicken and vegetables.
- Return the sheet pan to the oven and roast for another 8 to 12 minutes, or until the chicken is cooked through and reaches an internal temperature of 165°F (74°C).
- Remove the pan from the oven. Drizzle the remaining thickened finishing sauce over the hot chicken and vegetables.
- Serve your Hawaiian chicken sheet pan immediately over rice or enjoy as is.
Notes
- For extra color, substitute half of the bell peppers with yellow or orange peppers.
- If you prefer thicker chicken pieces, cut them into 1.5-inch cubes and add 5 minutes to the initial roasting time.
- This recipe is excellent for meal prep; store leftovers in an airtight container in the refrigerator for up to 3 days.
Nutrition
- Serving Size: 1 serving
- Calories: 380
- Sugar: 22
- Sodium: 750
- Fat: 8
- Saturated Fat: 1.5
- Unsaturated Fat: 6.5
- Trans Fat: 0
- Carbohydrates: 35
- Fiber: 3
- Protein: 38
- Cholesterol: 105