

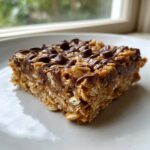
I don’t know about you, but on busy mornings or when that 3 PM slump hits, I need something satisfying immediately! That’s why I’m obsessed with these Chewy No-Bake Chocolate Peanut Butter Oatmeal Bars. Truly, they are my go-to recipe when I need instant gratification because there is zero oven time involved. As someone who respects both good flavor and nutrition, balancing those quick treats has always been important to me. My background in nutrition helps me ensure that while this recipe is indulgent, it still uses whole ingredients like oats. You can trust that these oatmeal bars, born from my family’s love for easy snacks, will become a staple in your kitchen too. If you’re looking for more great ways to start your day right, you have to check out my list of healthy breakfast ideas! Plus, these bars are the ultimate grab and go snacks!
- Why You Will Make These Chewy No-Bake Oatmeal Bars Again and Again
- Essential Ingredients for Perfect No Bake Oatmeal Bars
- Step-by-Step Instructions for Chewy Chocolate Oatmeal Treats
- Tips for Making the Best Oatmeal Bars Every Time
- Storage and Make Ahead Breakfast Options for These Oatmeal Bars
- Variations on Classic Oatmeal Bars
- Serving Suggestions for Your Wholesome Oat Desserts
- Frequently Asked Questions About Easy Oatmeal Bars
- Nutritional Estimates for These Peanut Butter Oatmeal Bars
- Share Your Experience Making These Oatmeal Bars
Why You Will Make These Chewy No-Bake Oatmeal Bars Again and Again
When you need a treat that comes together faster than preheating an oven, these bars are your answer. They hit that perfect trifecta: satisfyingly sweet, delightfully chewy, and unbelievably fast. Honestly, I whip these up when I realize I forgot to prep lunchbox snacks!
Key Benefits of Our Easy Oatmeal Bars
- They are completely no bake! Just mix and chill.
- The texture is spot-on—chewy and dense without being hard.
- They are absolutely fantastic grab and go snacks for busy mornings.
- You only need a handful of pantry staples to mix them up.
- The chocolate and peanut butter combo is pure comfort!
Essential Ingredients for Perfect No Bake Oatmeal Bars
The beauty of these treats is how few things you need. Seriously, check your pantry—you probably have everything already! We aren’t baking anything, so the quality of our binders matters a lot. Remember, these need to hold together like champs when you toss them in a bag for later.
- 2 cups rolled oats (Please use old-fashioned rolled oats, not the instant kind; they give you the necessary chew!)
- 1 cup creamy peanut butter (This is the backbone of our bar!)
- 1/2 cup honey or maple syrup (Your sticky binder.)
- 1 teaspoon vanilla extract
- 1/4 teaspoon salt
- 1 cup semi-sweet chocolate chips
- 1/4 cup powdered sugar (Only if you decide to dust the top—totally optional!)
Ingredient Notes and Substitutions for Your Oatmeal Bars
To get that perfect structure, we rely on creamy peanut butter. If you have a nut allergy, don’t stress—I mention in my notes that you can absolutely swap this out for almond butter or sunflower seed butter. Also, while we get to the instructions, make sure you have parchment paper ready to line your 8×8 inch pan. That overhang is a lifesaver when it comes time to lift these babies out cleanly!
Step-by-Step Instructions for Chewy Chocolate Oatmeal Treats
Okay, let’s get making these, because I know you’re already hungry! Since these are no-bake, the technique is all about properly melting our binders so everything sticks together without getting greasy. Remember, we want dependable oatmeal bars that don’t crumble the second you pick them up. For an easy cleanup later, line that 8×8 pan with parchment paper first, making sure you leave a nice overhang on two sides. That’s my trick for getting them out in one perfect square! If you’re prepping these for lunchboxes, you can explore some other ideas over at my simple lunch recipes too.
Preparing the Base for Your Homemade Snack Bars
Next up is the sticky stuff. Combine your peanut butter and honey right in a saucepan over super low heat. I mean low! You just want it melted and smooth—if it boils, you’ve gone too far and it might get hard when it cools. Once it’s silky smooth, pull it off the heat right away and stir in your vanilla and that pinch of salt. Now, dump in those two cups of rolled oats and mix like crazy until every single oat is coated in that sweet, nutty mixture. Take about two-thirds of that oat mix and press it *firmly* into the bottom of your prepared pan. Use the bottom of a flat glass or a measuring cup to really pack that base down tight.
Layering and Chilling Your No Bake Oat Bars
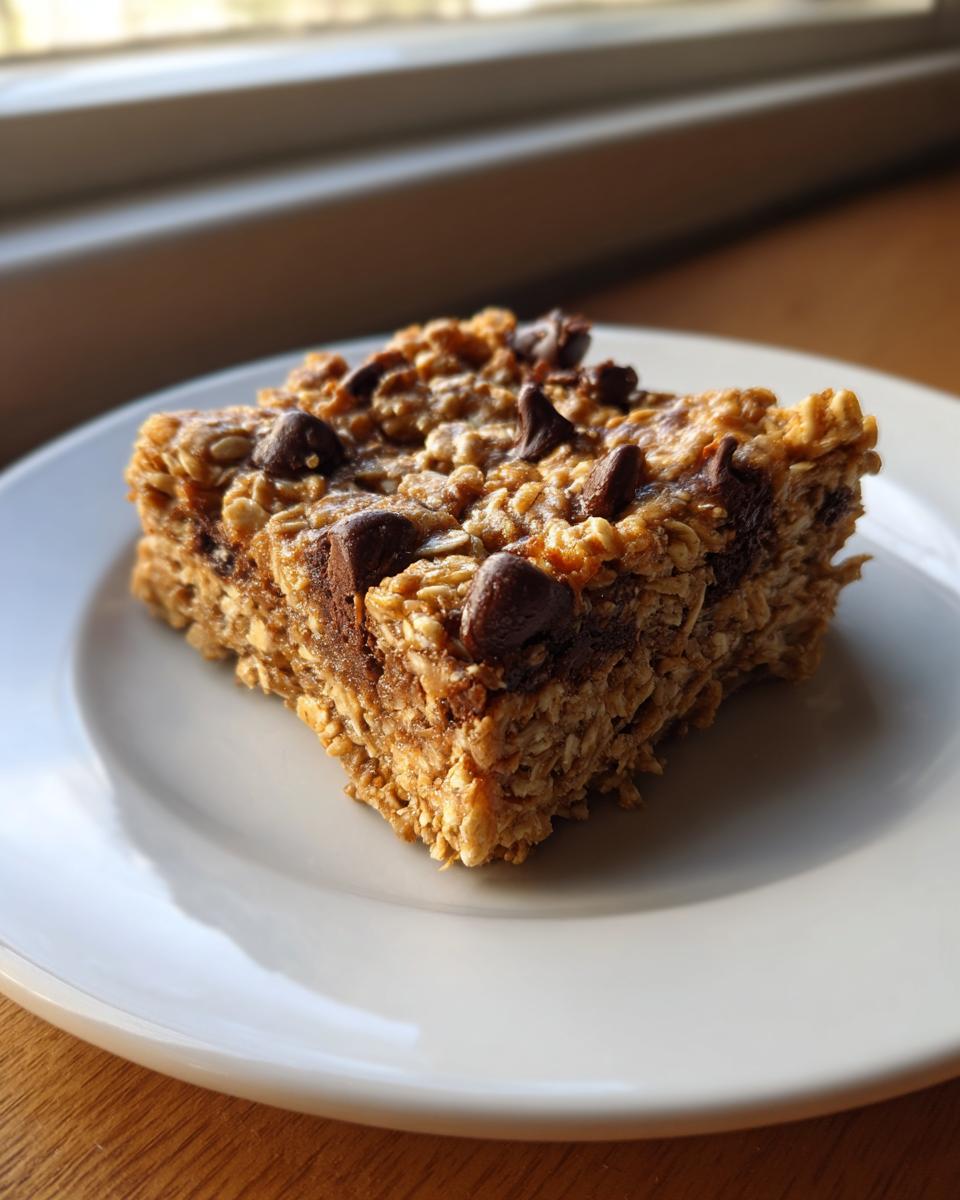
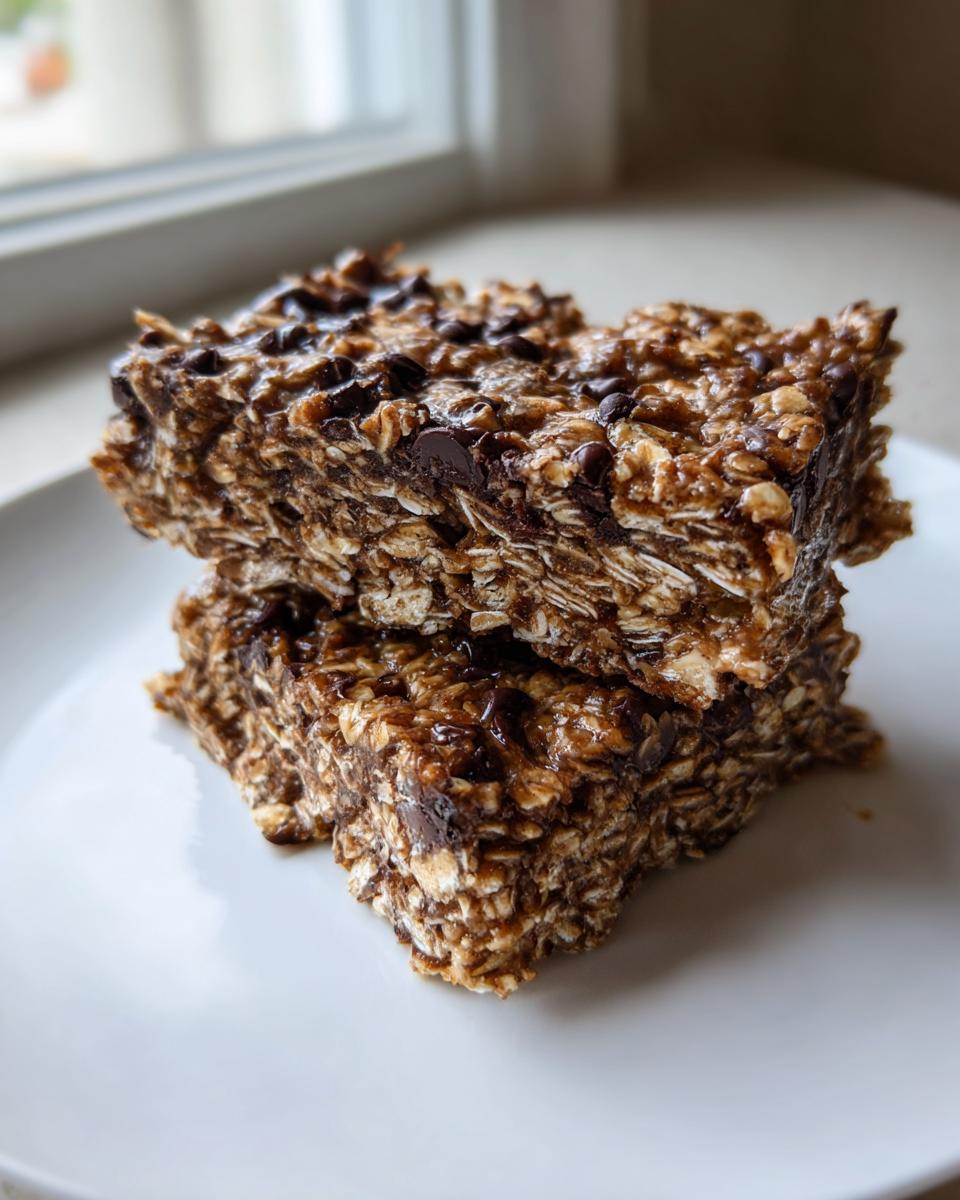
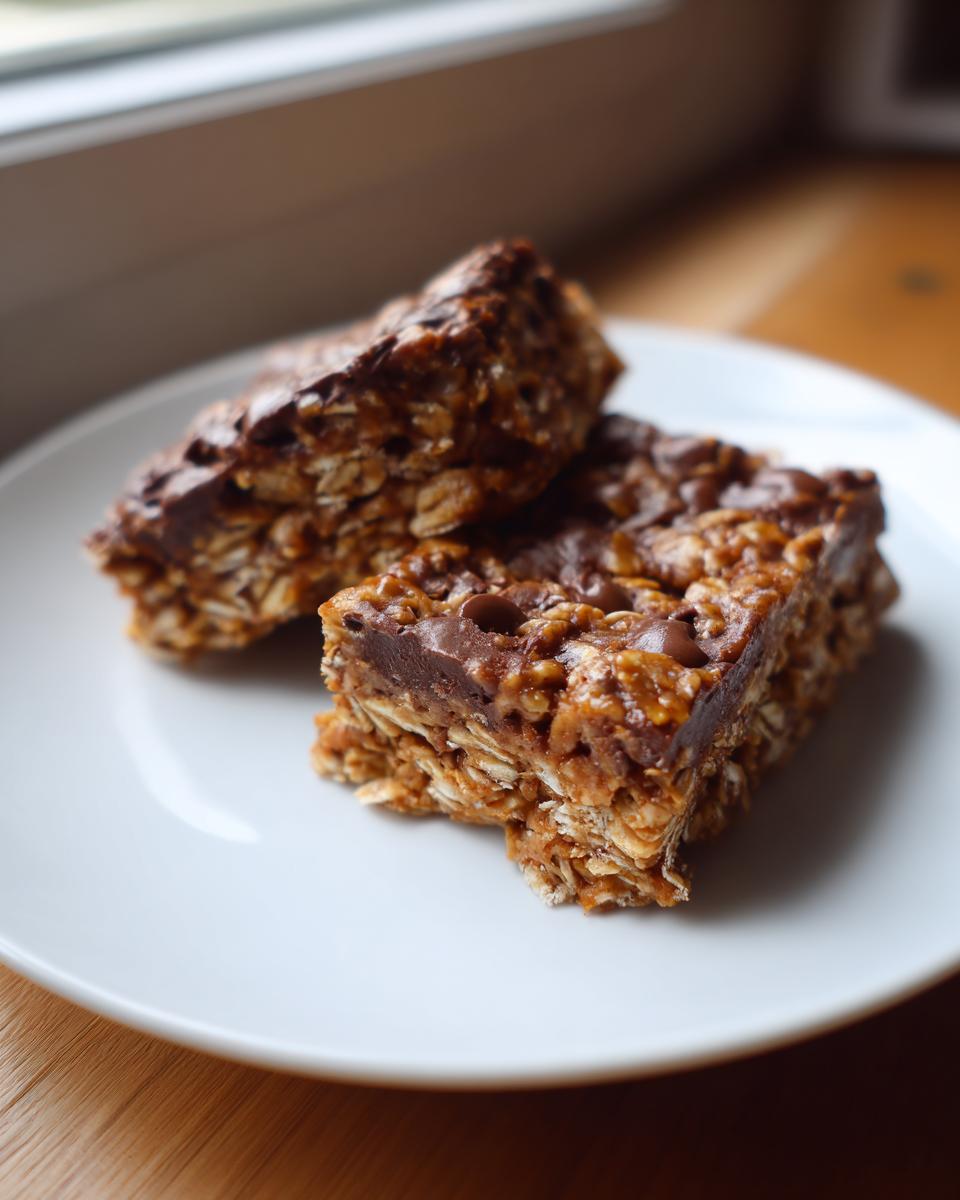
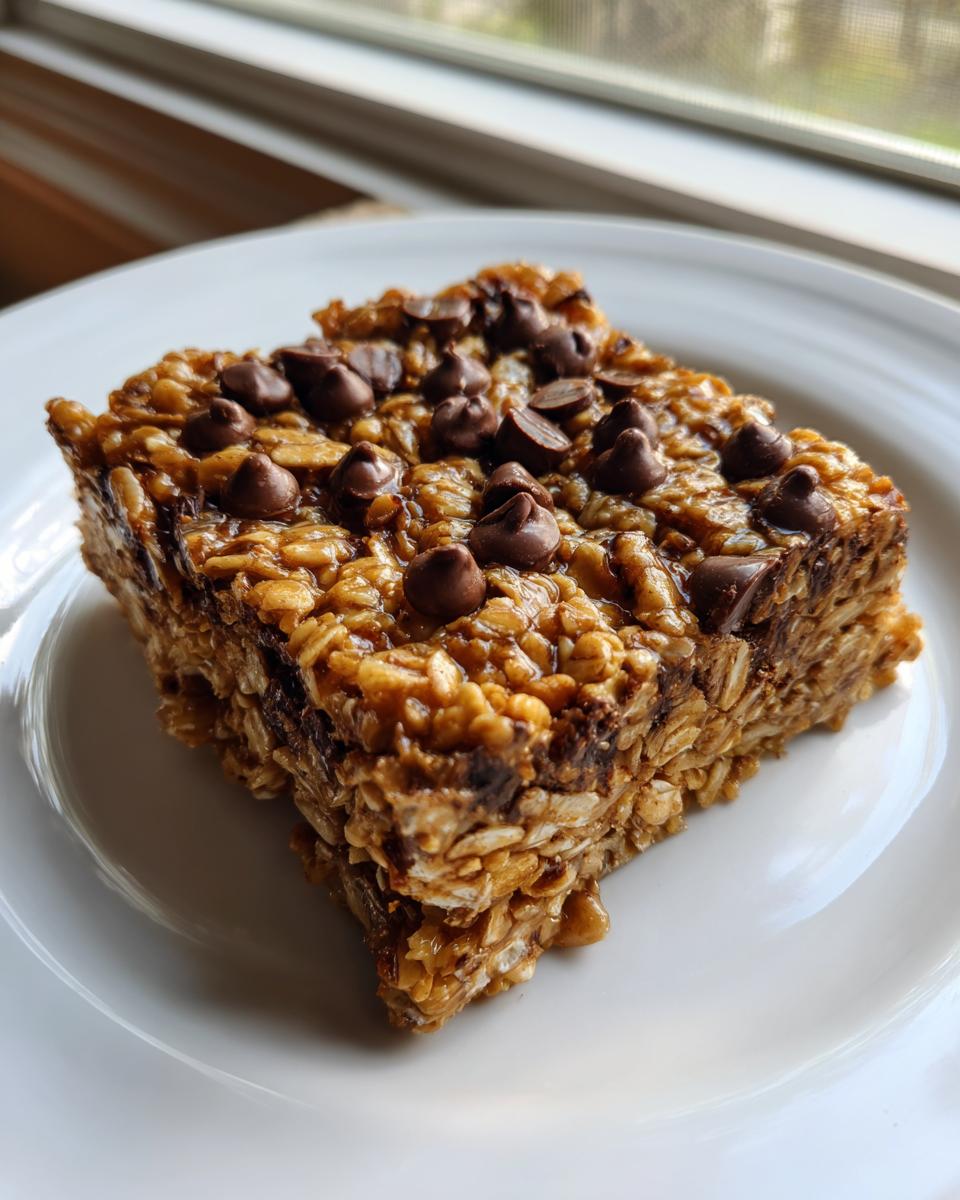
This is the fun part! Sprinkle those chocolate chips evenly right over your tightly packed base layer. Now, take the remaining oat mixture and gently press it right over the chocolate. You don’t want to crush the chocolate layer into oblivion, just lightly press it down enough so the top oat layer sticks to the bottom. Then, the hardest part: patience! These no bake oat bars need to chill in the fridge for at least two full hours—don’t rush this! If you skip the chilling time, they will definitely fall apart. Once they are rock solid, use those parchment paper handles to lift the whole block out, move it to a cutting board, and slice into 16 pieces. Serve them plain or dust them with a little powdered sugar if you’re feeling fancy.
Tips for Making the Best Oatmeal Bars Every Time
Even though these bars are so simple, paying attention to a few little details is what takes them from “pretty good” to absolutely addictive. You want that perfect density, right? If you want truly satisfying chewy oat snacks that don’t feel like a loose pile of granola, you need to remember these tricks I picked up over many batches.
First, let’s talk about pressing. When you pack that base layer down, I mean *really* press it. Use the heel of your hand or a specialized measuring cup to compress it firmly into the pan. This compression is what locks everything in place when it chills. If you leave it loose, it will crumble when you cut it later, guaranteed!
Second tip involves temperature management. When you melt your peanut butter and honey, pull the pan off the heat *as soon as* it’s smooth. If that mixture gets too hot, it can actually start to crisp up the oats slightly, which ruins that wonderful, deep chew we are aiming for. We want soft, coated oats, not baked oats!
Finally, don’t skimp on the chilling time! I know waiting two hours feels like forever when you’re craving chocolate, but that refrigerator time is non-negotiable. It’s the cold that solidifies the peanut butter and honey binder completely. If you try to cut them after just one hour, they’ll look nice on top, but the middle will ooze out. Give them the full two hours—or even three—and they will slice beautifully into perfect squares every single time.
Storage and Make Ahead Breakfast Options for These Oatmeal Bars
One of the best things about these no bake oat bars is how fantastic they are for planning ahead. Seriously, this is a champion make ahead breakfast solution! Since there’s no traditional baking involved, they actually keep really well, maintaining that lovely chewy texture.
You must store these bars in the refrigerator. I learned this the hard way once when I left a batch on the counter overnight—they got super soft and a little greasy the next morning. Keep them in a sturdy, airtight container. If you stack them, make sure you put a small piece of parchment paper or wax paper between the layers. That way, when you grab one in the morning, it separates cleanly from the next!
In the fridge, they generally last up to a week. I’ve even successfully frozen them, which is perfect if you want to double the batch and save some for stressful weeks down the road. Just wrap individual bars tightly in plastic wrap, pop them into a freezer bag, and they should be good for about two months. When you want one, just pull it out and let it thaw on the counter for about 15 minutes, or eat it straight from the freezer if you like them extra firm!
If you’re trying to streamline your mornings even further, you might appreciate some help with dinner too—check out my quick, easy weeknight dinners for inspiration when your snack bar supply runs low later in the week!
Variations on Classic Oatmeal Bars
While I stand by the chocolate peanut butter version as the absolute best—it’s a classic for a reason!—sometimes you just crave something different, right? The base recipe for these oatmeal bars is so sturdy and neutral that it practically begs you to start experimenting. Don’t be afraid to switch things up; that’s how the best recipes evolve!
I always keep a few flavor combinations in my back pocket for when the craving hits:
- The Morning Spice Upgrade: If you want something that screams “breakfast” but still tastes like a treat, skip the chocolate chips entirely. Instead, stir in one teaspoon of ground cinnamon and half a teaspoon of nutmeg when you add the vanilla and salt. Then, layer a generous half-cup of dried cranberries and raisins over the first oat layer. This gives you warm, spiced, fruit filled oatmeal bars that feel cozy, even if they haven’t seen an oven!
- White Chocolate Macadamia Dream: This one travels fancy! Swap out the semi-sweet chips for white chocolate chips and toss in about half a cup of chopped macadamia nuts with the oats. The buttery crunch of the nuts pairs unbelievably well with the sweet white chocolate. You can even add a tiny bit of lemon zest to that layer if you want a brighter flavor profile.
- Double the Chocolate Goodness: For the truly chocolate-obsessed (that’s me!), don’t just stop at chips! Melt half a cup of cocoa powder into the peanut butter/honey mixture when you melt it down. Then, when you layer, use white chocolate chips on top of the oat base, and then a layer of chopped dark chocolate alongside the white chips. It adds depth and prevents it from tasting artificially sweet.
These little tweaks keep the process quick while ensuring you never get bored with your new favorite pantry staple!
Serving Suggestions for Your Wholesome Oat Desserts
Just because these are designed to be grab and go snacks doesn’t mean they can’t be enjoyed leisurely! Sometimes you want to treat yourself a little more nicely than just grabbing it out of the fridge on your way out the door. That’s where a few simple serving ideas come in handy for transforming these into something a bit more special.
When I have a quiet morning or I’m making a batch just for the house, I have a couple of favorite ways to enjoy these wholesome oat desserts:
- The Coffee Companion: These bars are dense and rich with peanut butter, so they pair perfectly with a hot drink. I like to cut mine into smaller, two-bite squares when serving them with coffee. The richness of the bar really cuts through a strong, black cup of coffee beautifully.
- Yogurt Crumble Upgrade: If you want a breakfast bowl that feels decadent but is still quick, try crumbling half a bar right over a bowl of Greek yogurt! It adds sweetness, texture, and those whole oats for satisfying fiber. It’s amazing stirred into plain yogurt because it softens slightly in the cold yogurt, making it less chewy and more like a comforting topping. For a fun, slightly sweet side dish, you could even serve it with a side of my easy stovetop homemade applesauce!
- A Touch of Warmth: If you absolutely *must* have a baked-good feel, microwave one square for about 10 to 15 seconds. It won’t be the same as a fresh-from-the-oven cookie, but warming it up just slightly melts those chocolate chips inside into gooey perfection. Be careful not to overdo it, though; we don’t want soup!
The point is, use them how they fit your day—quick fuel or a nice little moment of indulgence!
Frequently Asked Questions About Easy Oatmeal Bars
I know when you try a new simple oat recipe, you always have a few little questions floating around. This is the section where I answer everything I always get asked about these oatmeal bars! Whether you are trying to perfect the texture or figure out how to sneak them into lunchboxes, I’ve got your back.
Can I make these peanut butter oatmeal bars vegan?
Oh, you absolutely can! Because this recipe is no bake, the binder is the only thing we need to swap. If you use maple syrup instead of honey, you’ve instantly made these bars vegan-friendly! Maple syrup works just as well to hold things together beautifully. Honestly, sometimes I use maple syrup anyway just because I love that faint extra layer of flavor it adds to the final product. It keeps them firmly in the category of flourless oat bars, too!
Why are my no bake oat bars crumbly?
This is the most common issue, and it almost always comes down to two things, but mostly one: chilling! If your easy oatmeal bars are crumbly when you cut them, it means the binder (the peanut butter/honey mix) wasn’t fully set. Did you chill them for the required two hours? If you didn’t, they will break apart. If you *did* chill them thoroughly, then you might need just a *tiny* bit more binder next time, or make sure you pressed the base layer down super firmly. Compression is everything in a no-bake recipe!
Are these good as a breakfast oat bars option?
Yes, yes, and a thousand times yes! These are one of my favorite make ahead breakfast items. Because they are packed with rolled oats, they give you slow-releasing energy rather than a quick sugar spike. They work perfectly as a quick portable breakfast idea when you’re running out the door. They are hearty enough to really keep you full until lunch—especially if you add some seeds!
Nutritional Estimates for These Peanut Butter Oatmeal Bars
I always want to be transparent about what we’re eating in the kitchen, which is why I appreciate having a background in nutrition. I wanted to share the estimated nutritional breakdown for these chocolate oatmeal treats so you know exactly what you’re getting when you enjoy one bar. Now, remember, this is based on the recipe using honey and standard semi-sweet chips, cutting it into 16 pieces, and not using the optional powdered sugar dust.
When you are making adjustments, like swapping peanut butter for almond butter or using maple syrup, the final numbers will shift slightly, just keep that in mind! But for a quick, satisfying snack, the payoff here is wonderful.
- Serving Size: 1 bar
- Calories: 220
- Sugar: 15g
- Sodium: 110mg
- Fat: 12g
- Saturated Fat: 4g
- Unsaturated Fat: 8g
- Trans Fat: 0g
- Carbohydrates: 27g
- Fiber: 3g
- Protein: 6g
- Cholesterol: 0mg
We’re getting a solid 6 grams of protein and 3 grams of fiber per serving, which is fantastic for something that tastes this much like dessert! It makes these bars truly worthy of being called energy bars with oats.
Share Your Experience Making These Oatmeal Bars
I truly hope these Chewy No-Bake Chocolate Peanut Butter Oatmeal Bars bring as much easy joy to your kitchen as they do to mine! Now that you’ve got the recipe, I really want to know what you thought. Did they turn out chewy? Did you add any fun mix-ins?
Please take a second to leave a star rating right below this! It helps other folks see just how reliable this recipe is. And if you tweaked things—maybe you swapped out the peanut butter or tried a dark chocolate chip—please drop a comment below! I absolutely love hearing about your kitchen experiments.
If you end up sharing a picture on social media, please tag me! I adore seeing my recipes come to life in your homes. Knowing that these little squares of goodness are fueling your busy lives means the world to me. If you want to learn more about my philosophy on home cooking and real food, you can always pop over to my About Jess Carter page. Happy snacking!
PrintChewy No-Bake Chocolate Peanut Butter Oatmeal Bars
Make these simple, chewy no-bake oatmeal bars packed with chocolate and peanut butter. They are a perfect grab-and-go snack or easy breakfast treat.
- Prep Time: 15 min
- Cook Time: 0 min
- Total Time: 2 hours 15 min
- Yield: 16 bars 1x
- Category: Snack
- Method: No Bake
- Cuisine: American
- Diet: Vegetarian
Ingredients
- 2 cups rolled oats
- 1 cup creamy peanut butter
- 1/2 cup honey or maple syrup
- 1 teaspoon vanilla extract
- 1/4 teaspoon salt
- 1 cup semi-sweet chocolate chips
- 1/4 cup powdered sugar (for dusting, optional)
Instructions
- Line an 8×8 inch baking pan with parchment paper, leaving an overhang on the sides for easy removal.
- In a medium saucepan over low heat, combine the peanut butter and honey (or maple syrup). Stir constantly until the mixture is smooth and fully melted. Do not let it boil.
- Remove the saucepan from the heat. Stir in the vanilla extract and salt.
- Add the rolled oats to the peanut butter mixture. Stir well until all the oats are evenly coated.
- Press about two-thirds of the oat mixture firmly and evenly into the bottom of the prepared pan.
- Sprinkle the chocolate chips evenly over the oat base.
- Gently press the remaining one-third of the oat mixture over the chocolate chips. Press down lightly to help the layers adhere.
- Chill the pan in the refrigerator for at least 2 hours, or until the bars are firm enough to cut.
- Lift the bars out of the pan using the parchment paper overhang. Place on a cutting board.
- Cut into 16 equal squares. Dust lightly with powdered sugar before serving, if desired.
Notes
- For a firmer bar, chill the mixture for 30 minutes before pressing the first layer into the pan.
- You can substitute almond butter or sunflower seed butter for peanut butter if you have nut allergies.
- Store these **easy oatmeal bars** in an airtight container in the refrigerator for up to one week.
Nutrition
- Serving Size: 1 bar
- Calories: 220
- Sugar: 15g
- Sodium: 110mg
- Fat: 12g
- Saturated Fat: 4g
- Unsaturated Fat: 8g
- Trans Fat: 0g
- Carbohydrates: 27g
- Fiber: 3g
- Protein: 6g
- Cholesterol: 0mg