
Listen, sometimes you just need that intensely sweet, creamy hit right now, and the thought of turning on the oven feels like too much work—especially when it’s hot outside! I totally get it. That’s why these easy no-bake peanut butter bars are seriously my go-to for instant gratification. Growing up, my background in nutrition taught me balance, but my heart belongs to that classic, simple American home cooking tradition, and nothing screams comfort quite like a decadent bar dessert!
These aren’t just any dessert bars; they are the best easy no-bake peanut butter bars you’ll ever try. The base is unbelievably smooth, and that thick, fudgy chocolate topping? Forget about it. They come together faster than you can decide what to watch on TV. If you’re looking for something quick, rich, and truly satisfying, stick with me. We’re whipping up these incredible bars using just a handful of pantry staples, and trust me, the results are spectacular. You can check out some of my other delicious desserts and sweet treats, but trust me, this recipe is going straight to the top of your favorites list.
- Why These Are the Best Easy Peanut Butter Bars You Will Ever Make
- Gather Your Ingredients for Addictive Peanut Butter Bars
- Step-by-Step: How to Prepare Your No Bake Peanut Butter Bars
- Tips for Perfect Peanut Butter Bars Every Time
- Storage and Reheating Instructions for Homemade Dessert Bars
- Variations on Classic Peanut Butter Bars
- Frequently Asked Questions About These Peanut Butter Bars
- Nutritional Estimates for Rich Peanut Butter Squares
- Share Your Experience Making These Indulgent Peanut Butter Dessert
Why These Are the Best Easy Peanut Butter Bars You Will Ever Make
Honestly, these rise above all the other chocolate peanut butter treats out there because they nail that craving every single time. We aren’t messing around with confusing steps or complicated chilling times here. These are seriously my favorite kind of quick sweet treats because the payoff is huge for almost zero effort. When I formulated this recipe, I kept that Midwest sensibility in mind: make good, honest food that tastes amazing but doesn’t drain your entire afternoon.
If you’re familiar with my philosophy, you know I value simplicity—and these peanut butter bars are the definition of simple done right. They are dangerously good, and I think you’ll see why they become a staple in everyone’s kitchen once you try that first bite.
No Oven Required: Perfect for Last Minute Dessert Ideas
This is huge! Since these are true no bake dessert bars, you never have to worry about heating up the kitchen. That 15-minute prep time means you can literally decide you need dessert after dinner and have them ready to chill before you finish cleaning up the kitchen. They are absolutely the best last minute dessert ideas for unexpected guests or surviving a summer heatwave.
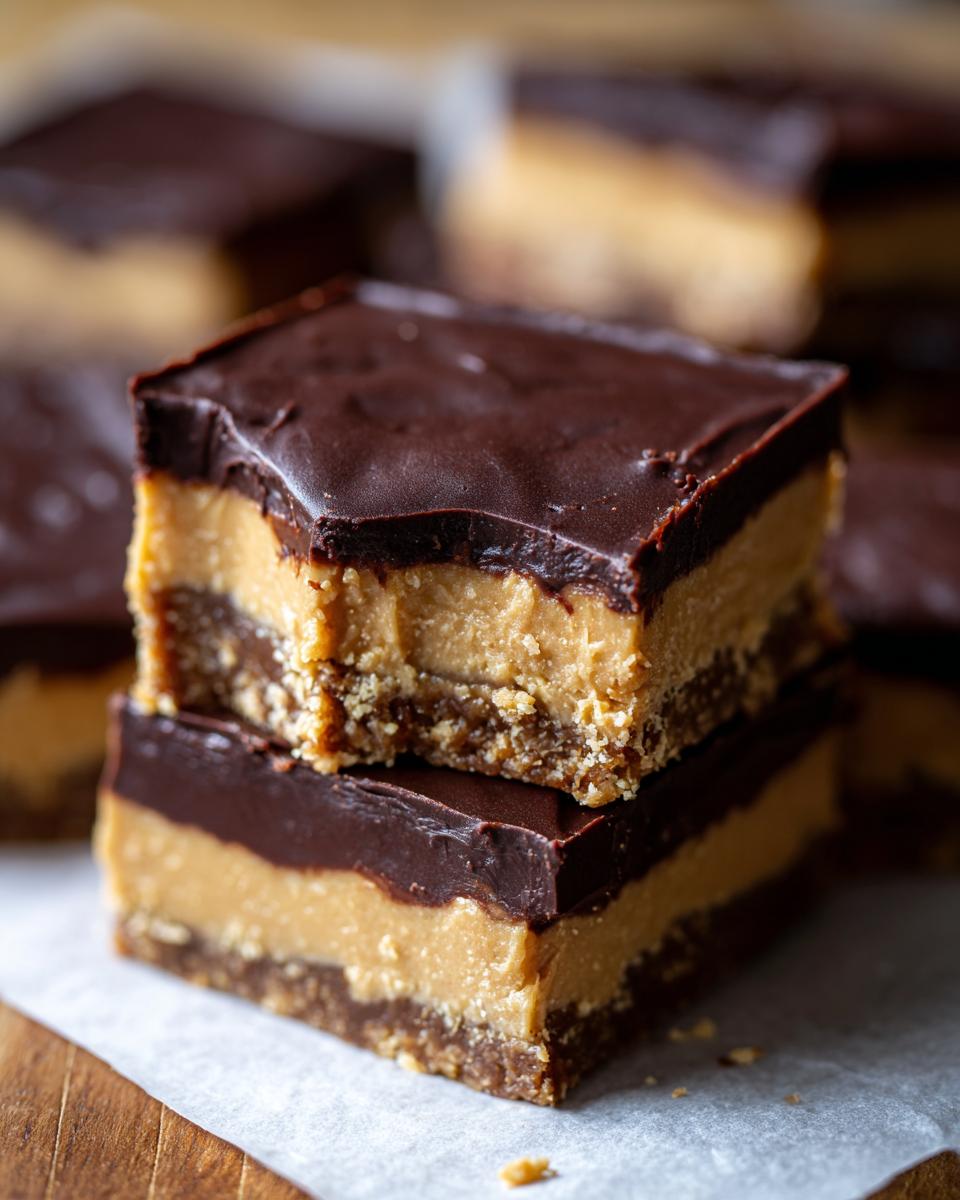
The Ultimate Creamy Peanut Butter Dessert Texture
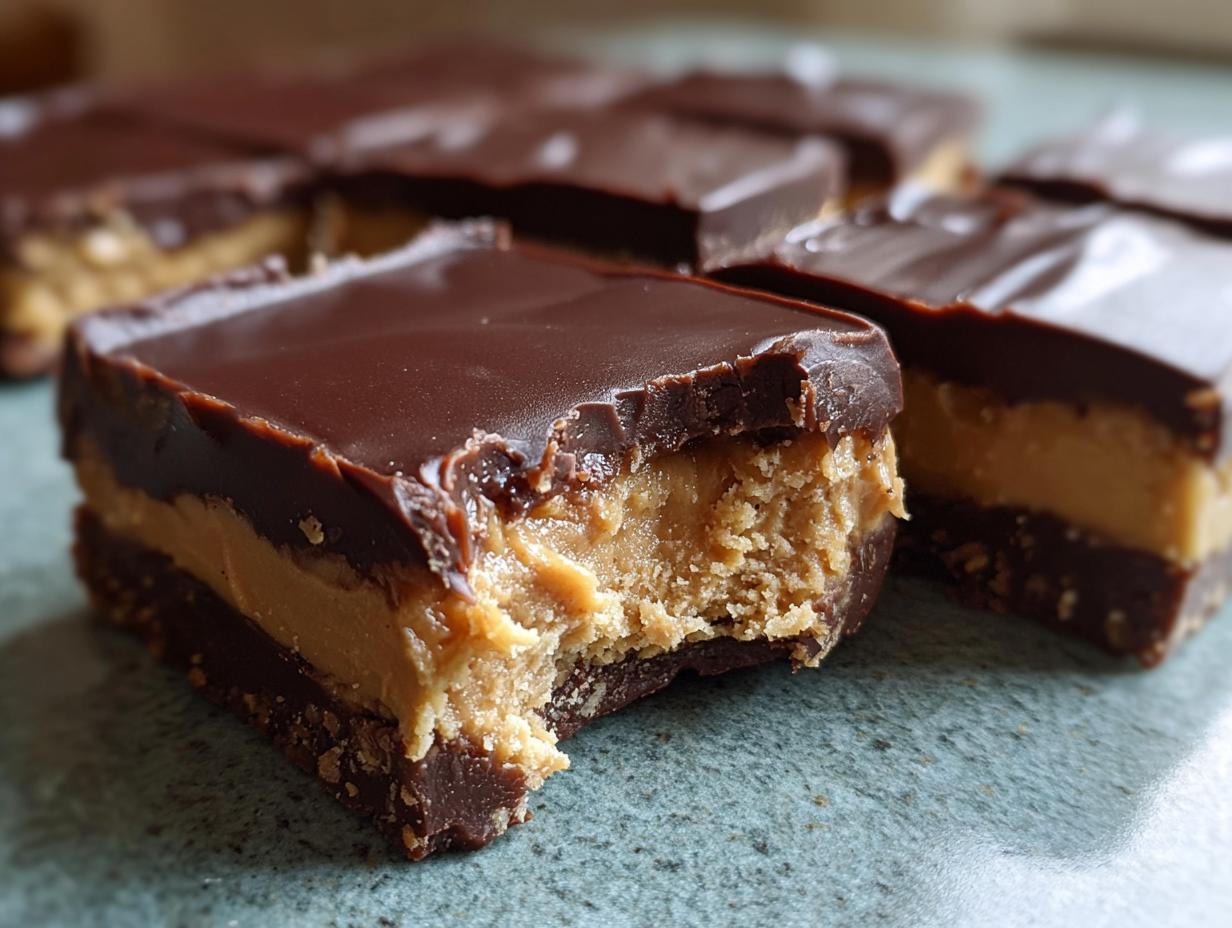
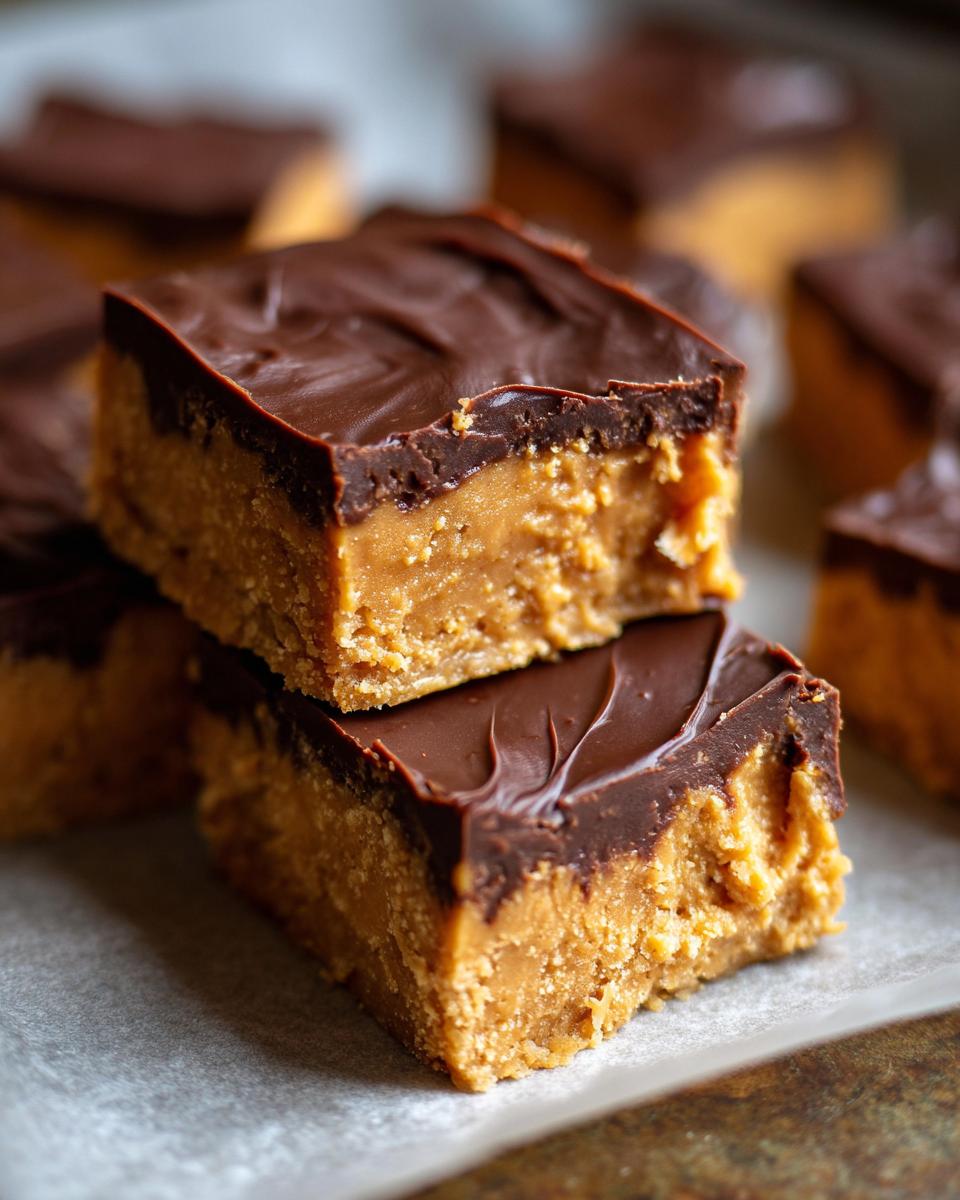
What sets these apart is that beautiful textural contrast. The bottom layer isn’t too hard or crumbly; it’s dense, rich, and melts in your mouth because we use softened butter and the right amount of powdered sugar. It truly delivers that creamy peanut butter dessert experience. Plus, if you use a good quality, classic creamy peanut butter, you get that unmistakable Reese’s peanut butter bars copycat flavor we all secretly crave. That smooth base topped with the set chocolate? Perfection!
If you’re looking for more ways to keep things easy during the week, you should check out my tips for quick and easy weeknight dinners, too, because who has time for fussy cooking every day?
Gather Your Ingredients for Addictive Peanut Butter Bars
Okay, I love that you want to make these! Since these are such simple bar recipes, you probably have most of what you need already. That’s the beauty of these homemade dessert bars—no specialty grocery runs required. We are dividing our simple list into two parts: the creamy foundation and the chocolate crown.
When you gather these items, make sure your butter is actually soft; I mean really soft, not straight out of the fridge. That small detail makes a massive difference in how smooth your base comes together. Before you start mixing, get your 8×8 pan lined up and ready to go!
For the Creamy Peanut Butter Base
- 1 cup unsalted butter, softened
- 1 cup creamy peanut butter (the kind that doesn’t separate!)
- 2 cups powdered sugar, sifted if it’s super lumpy
- 1 teaspoon vanilla extract
For the Silky Chocolate Topping
- 1 1/2 cups semi-sweet chocolate chips
- 2 tablespoons shortening or coconut oil
Now, let’s talk about that crucial shortening or coconut oil for your topping. If you try to melt chocolate chips straight on the stove or in the microwave without adding fat, it tends to seize up or bake hard and crack when you cut it. Adding that little bit of shortening or coconut oil keeps the chocolate glossy and helps it set perfectly smooth, maintaining that luxurious feel when you bite into these indulgent peanut butter dessert squares.
Step-by-Step: How to Prepare Your No Bake Peanut Butter Bars
This is where the magic happens, and I promise you, it’s barely work at all! Following these directions turns simple pantry items into those amazing peanut butter bars everyone fights over. Since we aren’t baking anything, our main goal is layering correctly and giving the bars enough time to set up properly. These simple bar recipes shine because of this easy assembly. Grab that parchment paper and let’s get started!
Preparing the Pan and Mixing the Base
First thing’s first: get your 8×8 pan ready. Line it with parchment paper, making sure you leave a generous overhang—that’s your handle for lifting the whole thing out later! In your mixing bowl, beat the softened butter and creamy peanut butter together until they look absolutely smooth. Don’t rush this; creamy means creamy! Next, slowly work in the powdered sugar and vanilla. You want it all incorporated, then press this thick mixture firmly and evenly into your prepared pan. Really pack it down so you get a sturdy foundation for your topping.
Creating the No Bake Chocolate Topping
Now for the best part, the chocolate! In a microwave-safe bowl, combine your chocolate chips and that shortening or coconut oil. This fat is key to a beautiful, sliceable topping. You absolutely must microwave this in 30-second intervals, stirring vigorously between each burst. If you try to rush it on high, the chocolate will scorch, and then we’re in trouble! Keep stirring until it’s completely glossy and lump-free.
Assembling and Chilling Your Peanut Butter Bars
Once your chocolate is perfect, gently pour it right over that peanut butter base. Use an offset spatula to spread it carefully right to the edges—we want full coverage! Once it’s flat, pop the whole pan into the refrigerator. I know patience isn’t always easy when dessert is staring at you, but you must let these chill for a minimum of two hours. That chilling time is what makes these easy peanut butter bars cut cleanly, giving you those beautiful, sharp squares. If you leave it on the counter, you’ll end up with a chocolatey mess when you try to slice them!
For cutting tips, don’t forget to check out my favorite dessert ideas for serving!
Tips for Perfect Peanut Butter Bars Every Time
Now that you know the basics, let’s talk about making these peanut butter bars absolutely legendary. As someone who deeply respects the science behind ingredients—thanks to my nutrition background—I can tell you those little tweaks matter hugely for texture. If you follow these extra pointers, you’ll master these simple homemade dessert bars in no time.
Achieving That Fudgy Peanut Butter Dessert Finish
Remember when we used that shortening or coconut oil in the topping? If you really, really want that slightly softer, almost fudgy center in the chocolate layer—like the best versions of those old-school lunch lady bars recipe—then slightly reduce that fat! Maybe drop it to just one tablespoon instead of two. This makes the topping set a little less firmly, giving you a softer bite, which is just divine when paired with that rich peanut butter base. Remember, texture is everything when you’re seeking out the best peanut butter bars recipe!
Making These Simple Bar Recipes Crowd Pleasing
Here is the trick I use when I know I need perfect squares because I’m taking these along to a party. For the cleanest cuts possible, especially through that set chocolate, you need a little heat. Run your sharp knife under very hot water for about 30 seconds, wipe it completely dry, and then slice. Do this for every single cut, reheating and wiping the blade clean in between. This technique melts the chocolate just enough to glide through without cracking or dragging, guaranteeing beautiful, professional-looking rich peanut butter squares!
Storage and Reheating Instructions for Homemade Dessert Bars
The best part about these no bake dessert bars is that they are built to last, which is great because I guarantee you won’t eat them all in one day. Since they don’t have any eggs or dairy that might spoil quickly (besides the butter), they are really straightforward to store.
The official rule in my kitchen is that leftovers go into an airtight container right away. You want them kept in the refrigerator for up to one week. Keeping them cool preserves that lovely, firm snap of the chocolate topping and keeps that peanut butter layer perfectly set. Honestly, they taste even better on day two when the flavors have really settled in together!
Can You Freeze These Quick Sweet Treats?
Absolutely! Since these are completely no oven dessert recipes, they freeze like a charm. If you know you won’t get through them in a week, you can totally freeze batches. I suggest cutting them into squares first, just like you plan to serve them.
Wrap those individual easy peanut butter bars tightly—I usually use plastic wrap first, then pop them into a freezer-safe zip-top bag just to be safe against freezer burn. They keep beautifully for about two months. When you’re craving one, just pull it out and let it thaw on the counter for about 15 to 20 minutes. They go from frozen solid to perfectly creamy in no time at all!
Do I Need to Reheat Them?
Nope! Please don’t heat these up unless you want a melted puddle of chocolate and peanut butter goo, which might be yummy, but it certainly won’t be a bar! These are meant to be served cool or at cool room temperature. If they feel too hard right out of the fridge, just give them 10 minutes on the counter. That slight softening just releases all that rich flavor. Trying to reheat rich peanut butter squares in the microwave is just asking for disaster, trust me on this one!
Variations on Classic Peanut Butter Bars
While I stand firmly behind this specific recipe because it delivers that perfect creamy bar texture, I know home cooks love to tinker! These peanut butter bars are sturdy enough to handle a few fun additions. Think of this as a launchpad for your own creativity. You can definitely lean into those slightly chewier, more substantial textures sometimes found in that classic lunch lady bars recipe vibe, or you can change up the sweetness factor entirely.
I always encourage people to save this base recipe first, see how much you love that satisfyingly rich texture, and then start experimenting. After all, making food your own is what home cooking is all about!
Adding Texture: The Crunchy Peanut Butter Bars Option
If you like a little crunch in your life—and who doesn’t love a bit more texture in their chewy peanut butter dessert?—you have a couple of great options here. First, and this is the easiest fix, just swap out the creamy peanut butter when mixing the base for the crunchy kind. Boom! Instant texture.
Alternatively, if you want to keep the base super smooth but add a nice surprise, try folding in about half a cup of finely chopped peanuts or even toasted pecans right before you press the mixture into the pan. They stand up beautifully to the chilling process and give you a lovely little break from all that creamy goodness. It takes these from simple to sophisticated really quickly!
Flavor Twist: White Chocolate Peanut Butter Treats
If you want to go completely different, let’s play with the topping, shall we? Instead of the semi-sweet chocolate chips for the topping, try using white chocolate chips! It creates a completely different vibe, turning these into something almost like a Buckeye candy square, but in bar form. It’s fantastic.
If you go the white chocolate route, you might also want to consider adding a tiny splash—maybe half a teaspoon—of almond extract to the peanut butter base along with the vanilla. The almond and white chocolate combination is just divine. These white chocolate peanut butter treats are incredibly popular in my house, especially when I need a fun twist on a reliable dessert for a crowd.
The Addition of Oats for Chewiness
For those who really crave that oat-based, chewy texture in their dessert bars, this is a simple modification. When you are mixing your base ingredients (butter, peanut butter, sugar), don’t change any of those amounts, but fold in about 1/2 cup of quick-cooking rolled oats right before you press it into the pan. Make sure you press it down really hard so those oats get nice and compacted. This creates a lovely, slightly chewy texture that holds up well under that chocolate topping. It adds just a little bit of complexity without making things complicated!
Frequently Asked Questions About These Peanut Butter Bars
I know sometimes questions pop up after you’ve read the main recipe, especially when you’re aiming for easy peanut butter bars that turn out perfect. Since these are fantastic no oven dessert recipes, a couple of specific inquiries always come my way. I’ve gathered the ones I hear most often right here to make sure you feel totally confident before you start mixing!
Can I use natural, oily peanut butter instead of standard creamy?
That’s a great question that touches on the science of texture! I really advise against using natural peanut butter where the oil separates on top. Because this recipe relies on the thicker consistency of standard commercial creamy peanut butter (like Jif or Skippy) to hold its shape with the powdered sugar, the natural kind won’t bind properly. You’ll end up with a very soft, oily base that won’t hold up when you try to cut those beautiful squares. Stick to the stabilized kind for the best results!
Do I *have* to use shortening or coconut oil in the chocolate topping?
Here’s where I channel my inner food scientist from my nutrition days: Yes, you really should include that fat! If you just melt chocolate chips alone, they tend to set up very hard and brittle, which means they crack and shatter the minute you try to slice into your peanut butter bars. Adding the shortening or coconut oil lowers the melting point just enough to create a topping that sets firm but still yields to a knife. It keeps that chocolate layer smooth and rich, not hard and fussy.
What is the best way to store these homemade dessert bars?
Since these are no bake dessert bars, they love the cold! The best place for them is an airtight container in the refrigerator. They hold up really well in the fridge for about a week—though I’ve never personally confirmed a full week because they usually disappear faster! This keeps the base firm and the topping snappy. If you need to store them longer, definitely freeze them as I mentioned previously, tightly wrapped.
How long do I need to chill the bars before cutting?
You absolutely cannot rush the chilling process, or you’ll ruin those gorgeous layers! While you might want to eat them immediately—who wouldn’t?—I insist you give them a minimum of two full hours in the refrigerator. If your kitchen is warm, aim for three hours. That cooling time allows the butter in the base to re-harden and lets the chocolate topping set completely. If you try to cut them early, the base just smears up the knife, and you end up with a messy puddle instead of perfect squares to share. It’s worth the wait, I promise!
If you ever want to compare notes or share your success with this amazing no-bake recipe, feel free to reach out!
Nutritional Estimates for Rich Peanut Butter Squares
Now, I know many of you look at these indulgent peanut butter dessert squares and think, “These must be packed with sugar!” And honestly, they are a treat! As a gal with a background in nutrition, I believe we should never feel guilty about enjoying real, honest food when we make it ourselves. However, it’s important to know what you’re putting into your body.
Please remember these are just estimates—they change wildly if you use different types of peanut butter or chocolate. This data applies to one delightful square cut from the 8×8 pan:
- Serving Size: 1 bar
- Calories: 280
- Sugar: 25g
- Fat: 18g (mostly good fat from quality peanut butter!)
- Protein: 6g
If you’re watching your sugar, remember that this recipe is fantastic for sharing, so those 25g are spread across happy faces! Enjoy these rich peanut butter squares knowing you made them with love, not preservatives.
Share Your Experience Making These Indulgent Peanut Butter Dessert
Wow! We made it through the whole process, and now you have a beautiful, no-bake pan of decadent goodness sitting in your fridge, ready to be sliced. I truly hope these peanut butter bars give you a moment of perfect, sweet joy.
Now, this is where I need your help! In my kitchen, the best compliment is knowing that someone else loved a recipe I shared. Did these turn out as creamy and dreamy for you as they did for me? I want to hear all about it!
Please take a moment to leave a rating and a quick comment letting me know what you thought. Were they the perfect fix for that last-minute craving? Did you use peanut butter or crunchy? Maybe you even tried one of the variations we talked about?
I absolutely love seeing your creations! If you snap a quick picture of your finished, perfectly sliced bars, tag CravyBite Kitchen over on social media. It means the world to me to see my family recipes living on in your kitchens.
If you ever run into an issue or have a question while you’re putting these together, don’t hesitate to reach out! You can always find my contact information right here at the CravyBite contact page. Happy snacking!
PrintEasy No-Bake Chocolate Peanut Butter Bars
Make dessert simple with these easy no-bake peanut butter bars. They are creamy, rich, and always a crowd favorite. You need no oven for this quick sweet treat.
- Prep Time: 15 min
- Cook Time: 0 min
- Total Time: 2 hours 15 min
- Yield: 16 servings 1x
- Category: Dessert
- Method: No-Bake
- Cuisine: American
- Diet: Vegetarian
Ingredients
- 1 cup unsalted butter, softened
- 1 cup creamy peanut butter
- 2 cups powdered sugar
- 1 teaspoon vanilla extract
- 1 1/2 cups semi-sweet chocolate chips
- 2 tablespoons shortening or coconut oil
Instructions
- Line an 8×8 inch baking pan with parchment paper, leaving an overhang on the sides for easy removal.
- In a large bowl, beat the softened butter and peanut butter together until smooth.
- Gradually add the powdered sugar and vanilla extract, mixing until fully combined and creamy.
- Press this peanut butter mixture evenly into the prepared pan. This forms your base layer.
- In a microwave-safe bowl, combine the chocolate chips and shortening (or coconut oil).
- Microwave in 30-second intervals, stirring between each interval, until the chocolate is completely smooth.
- Pour the melted chocolate mixture over the peanut butter base and spread it evenly to cover the entire surface.
- Refrigerate the bars for at least 2 hours, or until the chocolate topping is firm.
- Use the parchment paper overhang to lift the bars from the pan. Cut into squares before serving.
Notes
- For a Reese’s peanut butter bars copycat flavor, use a good quality, commercial creamy peanut butter.
- If you prefer a fudgier topping, reduce the amount of shortening or coconut oil slightly.
- Store leftover bars in an airtight container in the refrigerator for up to one week.
- These are excellent last minute dessert ideas because they require no oven time.
Nutrition
- Serving Size: 1 bar
- Calories: 280
- Sugar: 25
- Sodium: 110
- Fat: 18
- Saturated Fat: 7
- Unsaturated Fat: 11
- Trans Fat: 0
- Carbohydrates: 28
- Fiber: 1
- Protein: 6
- Cholesterol: 20