

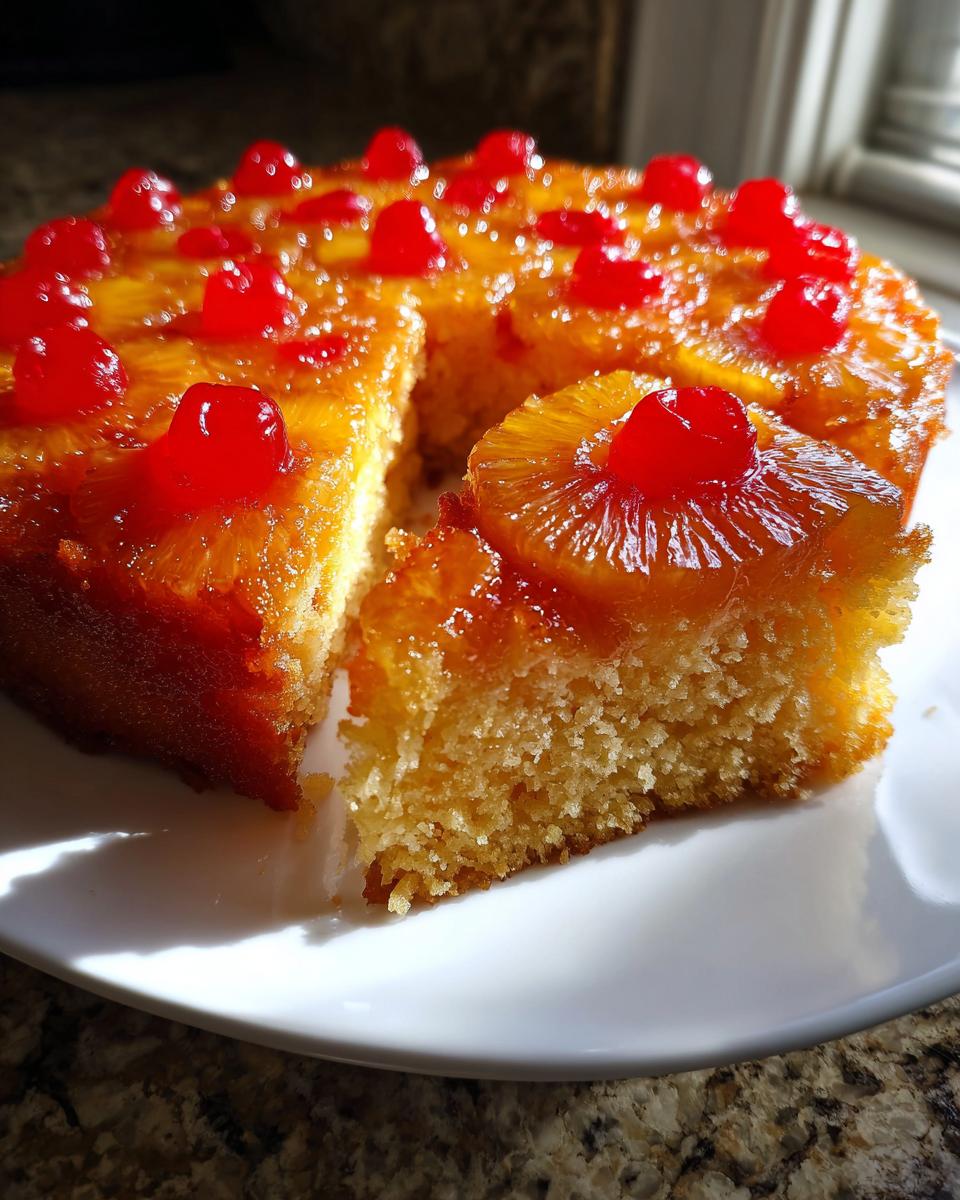
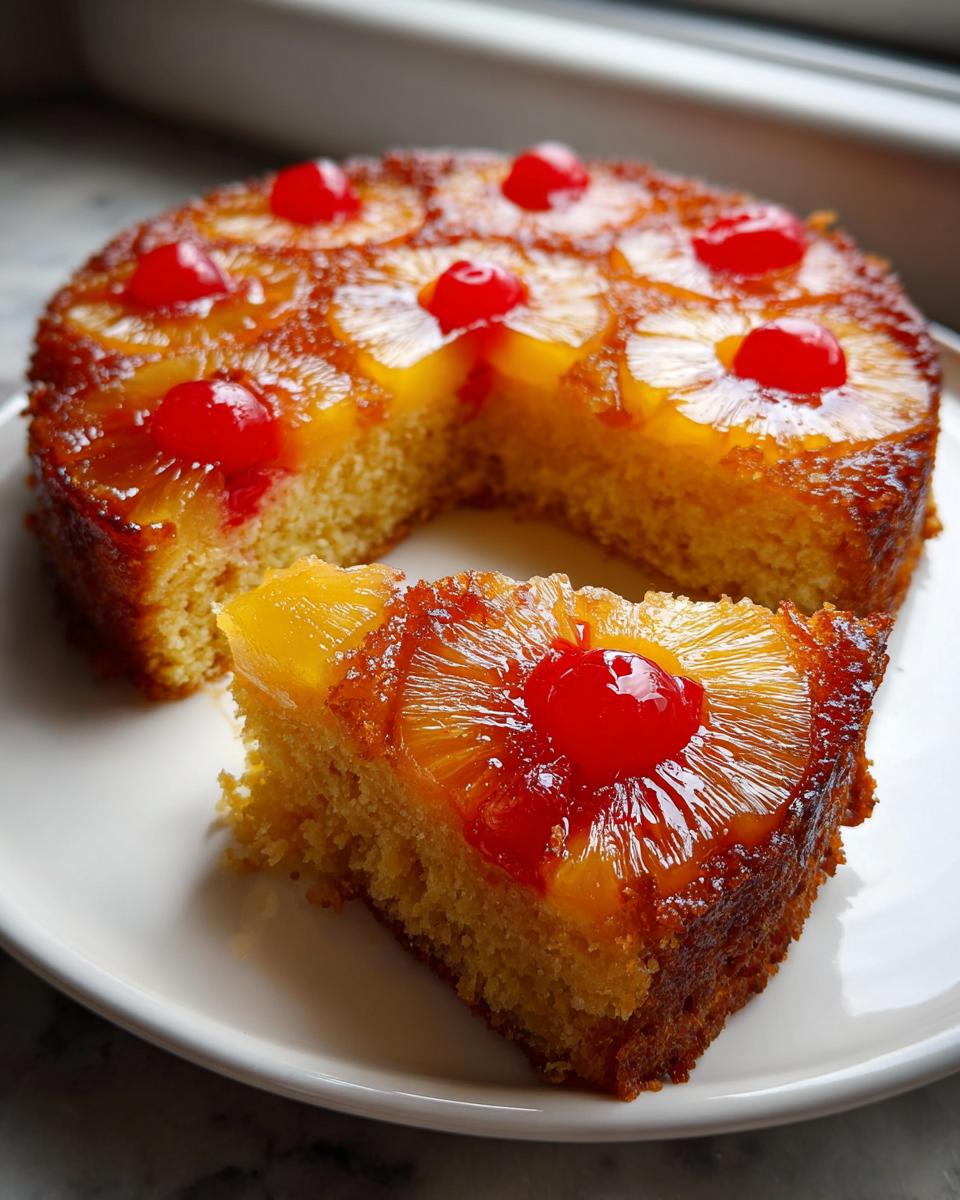
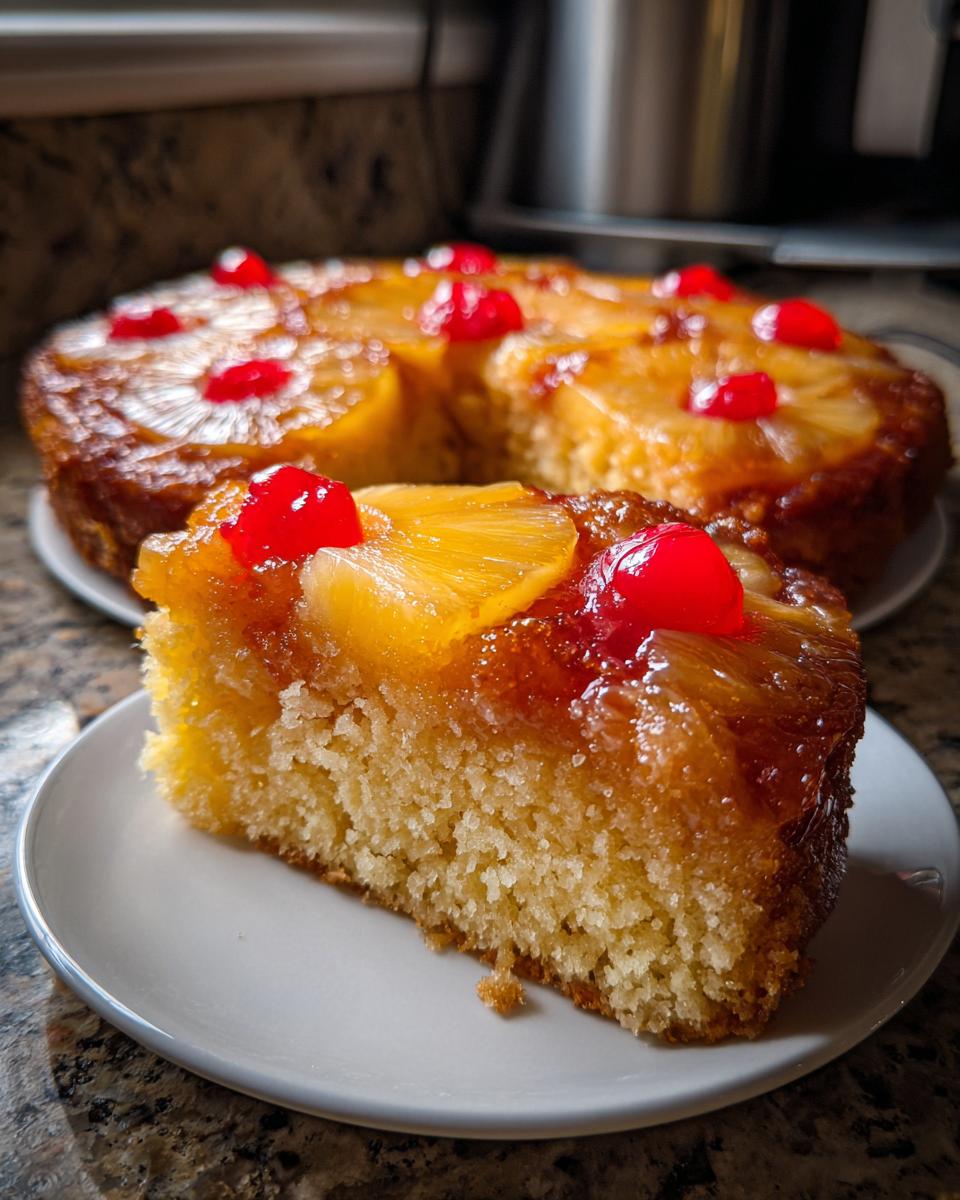
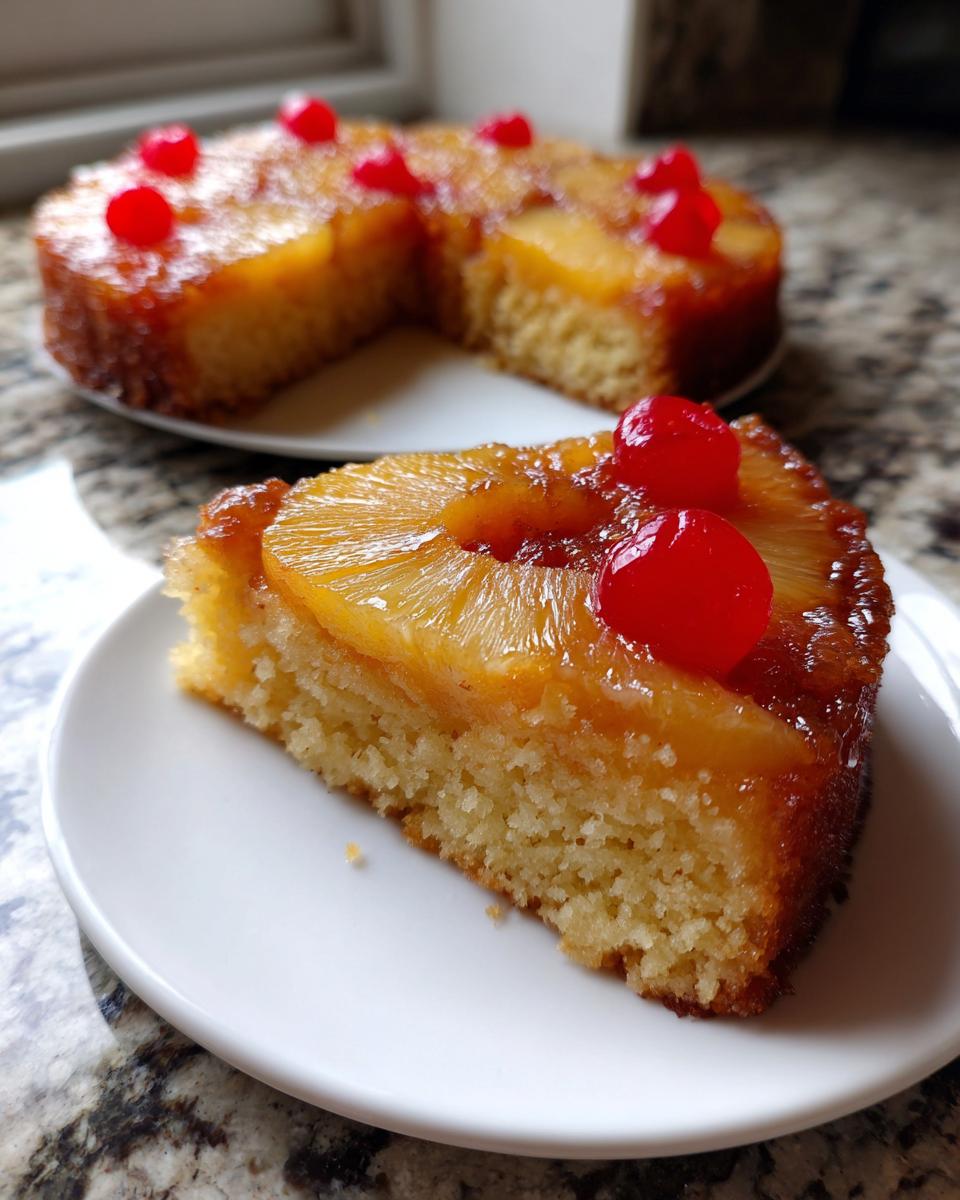
There’s something so wonderfully comforting about a dessert that instantly whisks you back to childhood celebrations, isn’t there? For me, that sweet sensory trip always leads straight to the golden, bubbling top of a perfect pineapple upside down cake. People often think making something this beautiful and glossy is complicated, but trust me, this classic recipe is one of the easiest, buttery showstoppers you’ll ever bake. Here at CravyBite Kitchen, we believe in real food made with heart. That’s why I, Jess Carter, take the foundational techniques from my family’s kitchen—the ones that make food delicious and satisfying—and pair them with the real-world efficiency needed today. This recipe bridges that gap perfectly, giving you that nostalgic flavor without any fuss. You’re going to love this traditional treat. For more about our journey in bridging honest home cooking with modern reliability, feel free to read a bit more about us over at CravyBite Kitchen’s story.
- Why This Classic Pineapple Upside Down Cake Recipe Works Every Time
- Gathering Ingredients for Your Homemade Pineapple Cake
- Step-by-Step Instructions for the Best Pineapple Upside Down Cake
- Tips for Success Making Your Easy Pineapple Dessert
- Serving Suggestions for This Retro Dessert Recipe
- Storage and Reheating Instructions for Pineapple Upside Down Cake
- Frequently Asked Questions About This Classic Pineapple Cake
- Estimated Nutritional Data for One Serving
- Share Your Baking Journey
Why This Classic Pineapple Upside Down Cake Recipe Works Every Time
Honestly, this pineapple upside down cake is the queen of simple elegance. What makes it foolproof time after time is how we tackle the two major components: the topping and the cake itself. You don’t need fancy tricks; you just need to trust the simple chemistry happening right there in the pan!
It’s all about that stunning caramelization you get from directly heating the sugar and butter first. It creates a beautiful, sticky glaze that melts right into the cake edges. Plus, we are smart about moisture retention here.
Achieving That Perfect Buttery Pineapple Glaze
Don’t even think about making a separate sauce! The magic happens when you melt the butter right in your cake pan and then mix in the brown sugar before anything else. That combination creates a molten, buttery pool. When that hot sugar meets the juices from the canned pineapple? Boom! You get an instant, deep caramel that coats every fruit ring perfectly. That reserved pineapple juice is golden, though—it goes straight into the batter to keep things tropical and moist!
The Secret to a Moist Pineapple Cake Batter
The cake part needs to be tender and light enough to soak up those juices without turning gluey. That’s why we stick to the classic creaming method—beating the softened butter and granulated sugar until it’s fluffy. That whips air into the base! Then, we gently alternate the dry flour mixture with the liquids. This keeps gluten development to a minimum, which means you end up with the most delightfully soft, moist pineapple cake that just melts in your mouth when you flip it over.
Gathering Ingredients for Your Homemade Pineapple Cake
Okay, let’s get organized! Having everything measured out ahead of time is the only way my baking flows smoothly. For this very classic pineapple cake, we have two main groups of ingredients: the beautiful topping that goes on the bottom, and the simple, buttery batter that sits on top. Don’t worry about fresh pineapples here; the canned slices in juice are actually our secret weapon for incredible moisture and caramelization!
Topping and Glaze Ingredients
This is what makes the stunning top layer. You’ll need:
- 1/2 cup unsalted butter, for melting directly in the pan
- 1 cup packed light brown sugar—make sure it’s packed in there tight!
- 1 (20 ounce) can pineapple slices in juice. We use the juice later, so keep it handy!
- 10 maraschino cherries. These are purely for looks, but they make such a difference! Place one right in the center of each pineapple ring.
The Cake Batter Ingredients for Pineapple Upside Down Cake
The dry stuff and the wet stuff that come together perfectly:
- 1 1/2 cups all-purpose flour
- 1 1/2 teaspoons baking powder and 1/2 teaspoon salt
- 1/2 cup unsalted butter, softened—remember, not melted, but nice and soft!
- 3/4 cup granulated sugar
- 2 large eggs, beaten nicely
- 1 teaspoon vanilla extract
- 1/2 cup milk, which we’ll mix with that reserved pineapple juice later for extra flavor!
Step-by-Step Instructions for the Best Pineapple Upside Down Cake
Now we move on to the fun part! Making this incredibly pineapple upside down cake is structured like building a beautiful layered mosaic, except the mosaic goes on the bottom! Just follow these steps exactly, and I promise you a glossy, spectacular dessert that looks way harder than it actually is. Remember, we need to move quickly once the topping is done so the sugar doesn’t set up too firm.
Preparing the Caramelized Pineapple Layer
First things first, get your oven warmed up to 350°F (175°C). You’ll need a good 9-inch round cake pan for this straight-ahead recipe. Next, take that 1/2 cup of butter meant for the topping and gently melt it right in the bottom of your cake pan, either on the stovetop over low heat or very carefully in the oven if you prefer. Once it’s liquid, pull the pan off the heat source. Sprinkle that packed brown sugar evenly over the melted butter—this is your start to the signature caramel glaze! Now, drain those pineapple slices, making absolutely sure you hold onto that juice! Arrange the pineapple rings over the brown sugar, and tuck one sweet maraschino cherry right into the center of every single ring.
Mixing the Moist Cake Batter
While your topping is chilling out, let’s make the cake batter. In a medium bowl, whisk together your flour, baking powder, and salt just to combine them well. Set that aside! In a separate large bowl, this is where we build aeration: cream the 1/2 cup of softened butter with the granulated sugar really well until it looks light and fluffy—it should almost double in volume. Beat in your two eggs, one at a time, making sure they’re fully incorporated after each addition, then stir in the vanilla. Now for the liquids: mix the reserved pineapple juice into your 1/2 cup of milk. Alternate adding the dry flour mixture and the liquid mixture into your butter base, starting AND ending with the flour. Mix gently! You only want it *just* combined. Seriously, that’s the most important instruction for a tender crumb!
Next, carefully spoon that lovely cake batter right over the neatly arranged fruit in the pan. Spread it gently so you don’t disturb the beautiful pineapple pattern underneath. I put this recipe in the queue so I can check on my bake time! Check out our privacy notes if you have any questions about data processing.
Baking and Inverting Your Pineapple Upside Down Cake
Bake the cake for about 35 to 40 minutes. You’ll know it’s done when a thin wooden pick poked into the center comes out clean. It’s essential you let it cool slightly—about 10 minutes in the pan on a wire rack. Any less, and the caramel is too liquid; any more, and it sets like cement! After those 10 minutes, place a large serving plate upside down over the cake pan. Holding both firmly together, take a deep breath, and flip the whole thing over in one swift motion! Gently lift the pan away. If a rogue cherry or piece of pineapple decided to stick to the pan instead of the cake, don’t panic! Just use a knife or spatula to gently nudge it back into place on the beautiful top of your pineapple upside down cake.
Tips for Success Making Your Easy Pineapple Dessert
We’ve nailed the classic method, but I always love sharing a couple of shortcuts for when life gets busy. Since this is such an easy pineapple dessert, it’s perfect for last-minute gatherings, and sometimes you just don’t have time to measure everything from scratch. My goal is always to get that gorgeous caramelized topping and moist cake, no matter what route you take!
Making a Pineapple Bundt Cake Version
If you want to make this cake look extra fancy in a decorative Bundt pan, you can absolutely do it! Because the Bundt pan has so much more volume than the 9-inch round, you’ll need to nearly increase the recipe by half. Just scale up all the ingredients proportionally. Keep in mind that a much deeper cake will take longer to bake through, so start checking it with that wooden pick around the 50-minute mark and go from there!
Quick Hack: Using Cake Mix for Pineapple Upside Down Cake
Okay, this is my secret for when I’m really in a rush but crave that tropical upside-down flavor. You can totally lean on a box mix! Substitute the flour mix, baking powder, salt, softened butter, granulated sugar, eggs, and vanilla with the corresponding ingredients from one box of yellow cake mix, following the package directions regarding creaming times. The trick here is to replace the liquid called for on the box with a combination of your reserved pineapple juice and milk. It keeps the flavor tasting homemade, even if the structure is box-assisted. So easy! Check out some inspiration for similar sweet fixes over at this lovely site.
Serving Suggestions for This Retro Dessert Recipe
This retro dessert recipe is such a classic showstopper, it barely needs anything extra! But if you’re serving it up for a special occasion or a fun potluck, a little something on the side really completes the plate. Since the cake itself is so rich and buttery, you want something cool and creamy to cut through that sweetness. I always reach for a big dollop of classic, unsweetened whipped cream—it’s lighter than icing and lets the caramel shine.
If you want to lean into that tropical vibe, a scoop of vanilla bean ice cream is unbeatable. The way the cold cream melts into the warm, sticky pineapple topping on your plate? Oh my goodness, it’s heaven. You can also add a tiny sprinkle of toasted coconut right on top of the whipped cream for extra texture. You can see some gorgeous ways others have styled this cake by visiting this site for inspiration!
Storage and Reheating Instructions for Pineapple Upside Down Cake
Good news! Unlike some cakes that dry out immediately, this one is resilient, thanks to all that fruit juice. If you happen to have any pineapple upside down cake leftover—which tells me you weren’t serving enough people—storing it is simple. Because of the high sugar content in that beautiful caramel top layer, you really don’t need to worry about refrigeration for a couple of days.
Just cover the cake pan (or the plate it’s inverted onto) tightly with plastic wrap or foil. You can keep it perfectly fine stored right on the counter at room temperature for up to three days. If you do chill it, just let a slice sit out for 20 minutes before eating so it softens up again. That buttery topping needs to be room temperature to really sing!
Frequently Asked Questions About This Classic Pineapple Cake
I know when you’re baking a visual showstopper like this classic pineapple cake, you want zero surprises! Folks often have questions about swapping ingredients or pan sizes, so let me clear up some common ones about making the best pineapple upside down cake.
Can I use fresh pineapple instead of canned for my pineapple upside down cake?
Oh, you certainly can! Fresh pineapple is delicious, but it has way more water content than the canned slices packed in syrup or juice. If you use fresh pineapple rings straight from the fruit, you run the risk of them releasing too much liquid while baking, which can thin out your beautiful brown sugar glaze. My advice? If you want that authentic caramelized look, slice your fresh rings and let them sit on paper towels for a bit to wick off excess moisture, or gently simmer them for a few minutes to reduce the water first. It takes a tiny bit more effort but tastes fantastic!
What is the best pan size for this recipe?
For this specific recipe—the one that yields that perfectly thick, moist cake layer—we tested it extensively using a standard 9-inch round cake pan. That size gives you the ideal ratio of topping to cake. If you use a larger pan, like a 10-inch, the batter will spread too thin, and you risk it drying out faster in the oven. You can always double the batch for a 9×13 baking dish or use muffin tins for mini pineapple upside down cakes, but stick to that 9-inch round pan for the very first time you try this recipe!
If you ever have trouble getting in touch or need recipe clarification, don’t hesitate to reach out via my contact page!
Estimated Nutritional Data for One Serving
As a baker who respects both soul-nourishment and the science of food, I always try to give you a picture of what’s in that amazing slice of cake. Remember, these numbers are just estimates, calculated based on the standard ingredients listed in the recipe using typical measurements. If you use margarine instead of butter, or splurge on extra cherries, your totals are going to shift just a bit! But this gives you a great baseline for this delicious homemade dessert.
- Serving Size: 1 slice
- Calories: 380
- Fat: 18g (with 11g of that being saturated fat)
- Carbohydrates: 53g
- Sugar: 35g (It’s worth every delicious grain of that brown sugar!)
- Protein: 4g
- Sodium: 250mg
- Cholesterol: 75mg
See? Worth every moment of that caramel creation! This is a treat meant to be enjoyed, not just counted. Enjoy your slice!
Share Your Baking Journey
I truly poured my heart into making this the most reliable, flavorful pineapple upside down cake recipe out there, and now it’s your turn!
When you bring this stunning, sticky classic to your table, I absolutely want to hear about it. Did the caramel set perfectly? Did your family devour it in five minutes flat? Don’t be shy—drop a rating right here in the comments below, and tell me how it went! Your feedback helps me know which traditional recipes to focus on next for CravyBite Kitchen.
Seriously, if you snap a picture of that beautiful layer transition once you flip it out, please tag me on social media! Seeing your kitchen creations is the absolute highlight of my week. I love seeing how you serve up these dessert for potluck favorites. Happy baking, and don’t forget to share your triumph with others! For more sweet ideas you might love, take a peek at this site for more inspiration: Tasty Crest.
PrintThe Ultimate Classic & Easy Pineapple Upside Down Cake (Moist & Caramelized)
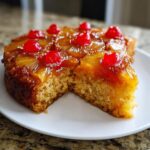
Make this classic Pineapple Upside Down Cake for a moist, buttery dessert with a perfectly caramelized pineapple topping. This easy recipe is a nostalgic crowd-pleaser perfect for family gatherings or potlucks.
- Prep Time: 15 min
- Cook Time: 40 min
- Total Time: 55 min
- Yield: 8 servings 1x
- Category: Dessert
- Method: Baking
- Cuisine: American
- Diet: Vegetarian
Ingredients
- 1/2 cup unsalted butter
- 1 cup packed light brown sugar
- 1 (20 ounce) can pineapple slices in juice, undrained
- 10 maraschino cherries
- 1 1/2 cups all-purpose flour
- 1 1/2 teaspoons baking powder
- 1/2 teaspoon salt
- 1/2 cup unsalted butter, softened
- 3/4 cup granulated sugar
- 2 large eggs
- 1 teaspoon vanilla extract
- 1/2 cup milk
Instructions
- Preheat your oven to 350°F (175°C). You will need a 9-inch round cake pan.
- Melt 1/2 cup of butter in the cake pan over low heat on the stovetop, or use a small saucepan.
- Remove the pan from the heat. Sprinkle the brown sugar evenly over the melted butter.
- Drain the pineapple slices, reserving the juice. Arrange the pineapple slices over the brown sugar mixture in the pan. Place one maraschino cherry in the center of each pineapple ring.
- In a medium bowl, whisk together the flour, baking powder, and salt. Set this dry mixture aside.
- In a large bowl, cream together the 1/2 cup softened butter and granulated sugar until light and fluffy. This step creates a buttery cake base.
- Beat in the eggs one at a time, mixing well after each addition. Stir in the vanilla extract.
- In a small bowl, mix the reserved pineapple juice with the milk.
- Alternate adding the flour mixture and the milk mixture to the butter mixture, beginning and ending with the flour. Mix only until just combined; do not overmix.
- Carefully spoon the cake batter over the pineapple and cherry layer in the pan, spreading it gently to cover the fruit evenly.
- Bake for 35 to 40 minutes, or until a wooden pick inserted into the center comes out clean.
- Let the cake cool in the pan on a wire rack for 10 minutes.
- Place a serving plate upside down over the cake pan. Carefully invert the cake onto the plate. Lift the pan away slowly. If any topping sticks, gently replace the fruit onto the cake.
- Serve warm or at room temperature.
Notes
- For a Bundt cake format, increase the recipe by half and adjust baking time as needed.
- If you want a quick hack, you can substitute the dry ingredients and wet ingredients (except the pineapple juice/milk mixture) with one box of yellow cake mix prepared according to package directions, using the reserved pineapple juice and milk for moisture.
- This cake keeps well for up to three days at room temperature when covered.
Nutrition
- Serving Size: 1 slice
- Calories: 380
- Sugar: 35g
- Sodium: 250mg
- Fat: 18g
- Saturated Fat: 11g
- Unsaturated Fat: 7g
- Trans Fat: 0.5g
- Carbohydrates: 53g
- Fiber: 1g
- Protein: 4g
- Cholesterol: 75mg