

When that chilly evening air creeps in, nothing beats curling up with a bowl of pure comfort, right? That’s why I’m thrilled to share what I truly believe is the ultimate roasted cauliflower soup recipe. Forget those thin, watery veggie soups you might have tried before. Roasting the cauliflower until those edges get nutty and sweet transforms the whole dish, giving us a naturally thick, velvety texture—and here’s the best part—we skip the heavy cream! At CravyBite Kitchen, I always aim to honor those timeless home cooking traditions while keeping things simple. This soup proves you can use honest, wholesome ingredients to achieve a deeply satisfying flavor that feels incredibly luxurious.
- Why This Roasted Cauliflower Soup Recipe Stands Out
- Gathering Ingredients for Your Creamy Roasted Cauliflower Soup
- How To Roast Cauliflower for Soup and Garlic
- Building Flavor: Sautéing and Simmering Your Roasted Cauliflower Soup
- Achieving Velvety Texture in Your Roasted Cauliflower Soup
- Finishing Touches for the Perfect Roasted Cauliflower Soup
- Tips for the Best Roasted Cauliflower Soup Experience
- Storage and Reheating This Easy Vegetarian Soup
- Frequently Asked Questions About Creamy Cauliflower Soup
Why This Roasted Cauliflower Soup Recipe Stands Out
You’re scrolling for a weeknight savior, I get it. You need something comforting that ticks all the boxes without demanding your entire evening. This roasted cauliflower soup is exactly that kind of recipe—tried, tested, and truly worthy of a spot in your rotation. It hits every mark you probably have noted for a perfect cozy meal.
Here is what makes this simple dinner soup different from the rest:
- Incredibly Creamy Texture (Naturally!): We rely on the pure, blended starches of the roasted cauliflower, thickened by the roasted garlic, to create that luxurious, heavy-cream feel. No need for mountains of dairy here!
- Total Time Under an Hour: From chopping board to serving bowl, you’re looking at about 55 minutes total. That’s fantastic for a soup that tastes like it cooked all day. You can find more amazing ideas for quick meals over at quick, easy weeknight dinners on our site.
- Depth of Flavor is Key: We aren’t just boiling cauliflower. Roasting is the secret sauce, caramelizing the edges and bringing out a rich, nutty profile that you simply can’t achieve boiling alone.
- Simple, Satisfying Dinner: This isn’t fussy food. It’s nourishing comfort food that fills you up beautifully, making it an ideal centerpiece for any cold evening.
Gathering Ingredients for Your Creamy Roasted Cauliflower Soup
Okay, the beauty of a truly good creamy cauliflower soup is that it starts with straightforward, honest ingredients. We’re not digging out obscure spices from the back of the pantry for this one. Most of this is probably already sitting in your fridge or on your counter. I laid out exactly what you need below for four generous servings of this deeply satisfying soup.
Remember, we’re relying on the roasting process to do most of the heavy lifting for flavor, so fresh vegetables are our friends. The main stars are simple:
- One large head of cauliflower, broken down into nice, even florets. We want them all to cook at the same rate, so try to keep them close in size!
- A whole head of garlic. Yes, the whole thing! Don’t worry, we only use the soft, sweet pulp once it’s roasted, which adds incredible depth of flavor to our roasted cauliflower soup without shouting ‘garlic’ at you.
- Two tablespoons of olive oil, split between the vegetables—this helps everything get golden brown and lovely.
- One medium yellow onion, roughly chopped. This provides the essential sweet, aromatic base flavor once we start cooking on the stovetop.
- Four cups of quality vegetable broth. Since this is the liquid base for everything, a good broth makes a real difference in the final taste.
- Salt and freshly ground black pepper, just to taste. You know my philosophy—we season as we go!
- And finally, one teaspoon of fresh lemon zest. This is my little secret weapon to brighten everything up right at the end.
See? Nothing fussy here. Just good, clean ingredients waiting for the oven to turn them into magic.
How To Roast Cauliflower for Soup and Garlic
Okay, this is where the magic truly starts for our roasted cauliflower soup. I know roasting feels like an extra step, but trust me, skipping this and just boiling your veggies? You’ll end up with a pale, bland liquid. We want deep, intense flavor, and roasting delivers 100% of that natural sweetness!
First things first, we need some heat. Preheat your oven to a solid 400 degrees Fahrenheit. This temperature is high enough to get a lovely surface caramelization on the cauliflower without burning it before it gets tender all the way through. Grab a sturdy baking sheet—you don’t want anything flimsy here—and get ready to toss your cauliflower florets. I use about one tablespoon of olive oil for this coating, along with just a dash of salt and pepper. Make sure every little piece gets kissed by the oil; oil is what transfers that heat beautifully and creates those brown spots.
Getting the Garlic Ready
Now for the roasted garlic head. This sounds intimidating, but it’s the easiest thing you’ll do all day. Slice the very top off the entire head of garlic—just enough so the cloves are exposed, like slicing the top off an egg. Place this exposed head right there on the baking sheet next to your cauliflower. Drizzle that remaining tablespoon of olive oil right over the exposed top. This bath of oil lets the garlic steam perfectly inside its own papery wrapper while getting that gorgeous roasted flavor.
The Waiting Game (The Delicious Part)
Slide that sheet pan into your hot oven. We’re looking at 25 to 30 minutes, usually. You’ll know they are ready when the cauliflower florets are tender when prodded—meaning a fork slides in easily—and you see those delicious little brown edges. That browning? That’s pure flavor building up! My only tip here is to give the pan a quick shake halfway through if you notice one side is browning much faster than the other. We want even color for the best overall taste in our final roasted cauliflower soup.
If you’re looking for other ways to maximize veggie flavor using high heat, check out my tips on how to roast broccolini! It uses a similar, high-heat principle to lock in flavor.

Building Flavor: Sautéing and Simmering Your Roasted Cauliflower Soup
Now that we have our golden, sweet vegetables pulled from the oven, it’s time to bring them together on the stovetop. This is the moment the building blocks of your deeply comforting roasted cauliflower soup really start to bond! Don’t rush this part; letting the flavors meld is key to that gourmet taste we’re aiming for.
First, grab a large, heavy-bottomed pot or, if you have one, your Dutch oven. Set that over medium heat. We need the pot warm enough to soften the aromatics. Toss in your chopped yellow onion. We’re just cooking these down for about five minutes until they turn translucent and sweet. We aren’t trying to brown them heavily here, just soften them up so they melt right into the final blend.
The Secret of Roasted Garlic Pulp
This next step is pure indulgence. Once your roasted garlic head is cool enough to handle (be gentle!), carefully squeeze the soft, caramelized pulp right out of the papery skin. Look at that; pure gold! Squeeze that sweet, mellow garlic right into the pot with your softening onions. Give it a little stir to combine. The roasted garlic, remember, is what gives this soup its incredible backbone, ensuring your roasted cauliflower soup tastes rich without being heavy.
If you’re looking for other ways a slow sauté can transform vegetables, you absolutely must check out my guide to caramelized onions. It’s the same principle: low and slow equals deep, wonderful flavor!
The Final Simmer
Time to add the stars of the show: those beautiful roasted cauliflower florets go right into the pot. Now pour over your four cups of vegetable broth. Bring that whole mixture up to a gentle simmer—don’t let it boil furiously, we aren’t making stock! Reduce the heat way down low, pop a lid on it, and just let it hang out for about 10 minutes. This crucial simmering step allows those earthy roasted notes from the cauliflower and the sweetness from the garlic and onion to fully infuse the broth before we go in with the blender. This gentle marriage of flavors is what guarantees that velvety result in our final roasted cauliflower soup.
Achieving Velvety Texture in Your Roasted Cauliflower Soup
Alright, we have simmered our roasted veggies into a fragrant pot of pure potential. Now comes the moment of transformation! Our goal here is that truly luxurious, unbelievably smooth, and velvety soup recipe texture, and we have two excellent ways to get there, depending on what equipment you like using most. Remember, since we are relying on the cauliflower itself for thickness, achieving smoothness is essential!
Using a Standard Blender
If you are using a standard countertop blender, you have to work in batches—and please be careful! Hot liquids expand like crazy in those tight spaces. Don’t EVER fill the blender jar more than halfway. Place a dishtowel lightly over the top, but leave a small opening for steam to escape. Hold that lid down firmly with one hand while you blend on the lowest speed setting first, gradually increasing the speed until it’s silky smooth. It might take a couple of runs, but the resulting texture is always fantastic. You can read more about getting the perfect smooth blend in other favorite recipes, like my creamy homemade tomato bisque guide.
The Immersion Blender Route (My Favorite Shortcut!)
If you have an immersion blender (stick blender), this is honestly the easiest way to go for any roasted cauliflower soup. Just plunge the head of the blender right into the pot and start blending! Keep the head fully submerged to avoid splattering hot soup all over your nice cabinets. It usually takes two to three minutes of focused blending in one spot, then moving around the pot, until you can’t see any remaining lumps or tiny bits of onion. It’s quick, clean, and incredibly effective for creating that velvety finish.

Adjusting Consistency
After blending, you might look at the soup and think, “Hmm, that’s a little too thick for my liking.” That’s totally normal! As the soup cools even slightly, it thickens up because the starch molecules tighten. If your soup looks like paste—don’t panic! This is why we kept the broth handy. Just ladle in a little more vegetable broth or even some hot water, stir it in well, and heat it gently again. Keep adding broth by the half-cup until you reach that perfect, comforting consistency that you are happy to dip a spoon into right away.
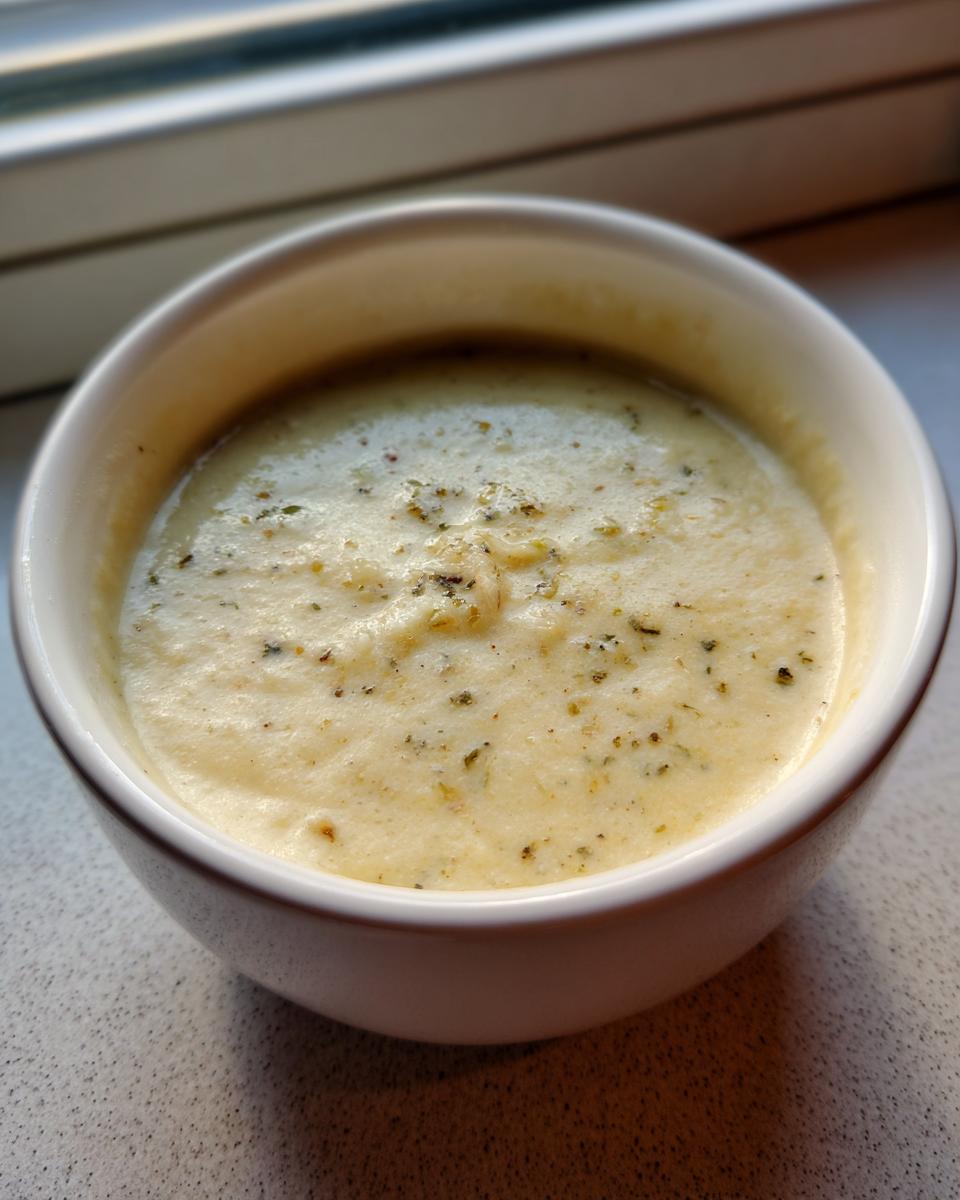
Finishing Touches for the Perfect Roasted Cauliflower Soup
You’ve done the roasting, you’ve done the simmering, and you’ve blended it all into that gorgeous, smooth texture we were aiming for! Congratulations, you are just seconds away from serving the most comforting bowl of roasted cauliflower soup. This final stage is all about polishing the flavor profile so it really sings on the palate. Trust me, skipping these last few steps is what separates a good soup from a truly memorable one.
First, taste it. Go ahead, grab a small spoon! Seasoning is personal, right? At this stage, the broth and the vegetables have married fully, so now you can accurately gauge what it needs. Do you want a little more sharpness from the pepper? Maybe a final small pinch of salt? Adjust those basic seasonings until it tastes balanced to *you*. Since we kept the seasoning light during the roasting phase, this is our moment to finalize that balance.
The Magic of Lemon Zest
Now, for the real pro move: the fresh lemon zest. Remember, we’re not adding lemon *juice*—that would be too acidic and could potentially curdle the velvety texture we worked so hard to achieve if it hits the hot soup too early. Instead, we’re just adding the bright, fragrant oils from the rind. Zest that teaspoon right over the top of the soup in the pot. Give it just one gentle stir. That’s it!
Why stir it in at the very end? Well, those delicate oils carry the brightness. If you boil zest for a long time, the flavor fades. By adding it right before you bring the pot to the table, you ensure every spoonful has that gorgeous, fresh lift that cuts through the richness of the roasted cauliflower. It makes the whole bowl feel lighter and much more sophisticated. It’s the simplest trick, but it elevates this roasted cauliflower soup from a weeknight meal to something you’d happily serve guests!

Tips for the Best Roasted Cauliflower Soup Experience
I always tell folks that while following a recipe is the starting point, knowing how to tweak it turns you from a recipe follower into a true kitchen commander! These little bits of insider knowledge—things I learned over years of making this roasted cauliflower soup for family dinners—are what ensure you get that deeply satisfying result every single time. Think of these as my personal authorizations for customizing your bowl!
We worked hard for that natural creaminess, but sometimes you want to layer in a little extra richness or depth depending on the day. Here are a few ways to customize this comforting dish:
Boosting the Broth for More Depth
The recipe calls for four cups of vegetable broth, which keeps us squarely in the vegetarian category, making it a fantastic easy vegetarian soup. However, if you aren’t sticking to vegetarian rules for the evening, I highly recommend a simple swap for a flavor upgrade. Try substituting *half* of that vegetable broth with a good quality chicken broth. The chicken broth adds a subtle savory backbone that just makes the cauliflower taste even richer.
I know, I know, it’s simple, but sometimes the best flavor adjustments aren’t about adding ingredients, but about swapping one liquid base for another that has a little more punch! It really complements the roasted flavors beautifully.
The Optional (But Highly Recommended) Cheesy Finish
Let’s talk cheese for a moment. If you’re enjoying this as a hearty, truly decadent comfort food soup and don’t mind an extra dairy splash, stirring in cheese after blending is a game-changer. I suggest about half a cup of sharp cheddar cheese. You want something with a good, distinct flavor profile so it doesn’t get lost in the cauliflower. Make sure the soup is back on very low heat but *not* simmering when you add it!
Whisk that cheddar in slowly until it’s completely melted and incorporated. It takes that velvety texture and gives it a savory, slightly salty kick. If you want to see how serious I am about melted cheese in cozy food, you have to check out my guide over on ultimate creamy cheese fondue! It’s all about getting that perfect melt, which is the same technique we use here.
Don’t Forget About Freezing!
One of the biggest perks of making a big batch of this roasted cauliflower soup is knowing you have easy dinner inspiration ready to go later. This recipe freezes wonderfully! Just make sure you cool the soup completely down before transferring it into airtight containers. If you plan on freezing a large batch, maybe leave out the lemon zest until you reheat it, as fresh zest brightens best when added fresh.
When you’re ready to enjoy it again, just thaw it overnight in the fridge and gently reheat it on the stovetop. It keeps beautifully for up to three months, always ready for a sudden need for a warm, comforting bowl.
Storage and Reheating This Easy Vegetarian Soup
Part of making truly good home cooking practical is knowing how to save some for later! Since this recipe makes four lovely servings, chances are you might have leftovers, or maybe you just want to batch-cook for super simple lunches. That’s where this easy vegetarian soup shines because it is a fantastic candidate for freezing!
If you think you won’t eat it all within four or five days, definitely set aside some portions for the freezer right away. Just remember one tiny golden rule I mentioned earlier: make sure the soup is completely cooled down before you box it up. Hot soup creates steam, and that trapped moisture can turn into ice crystals, which ruins the texture when you reheat it later.
I usually pour mine into heavy-duty freezer bags, squeeze out as much air as possible, and lay them flat in the freezer. Once solid, you can stack them up neatly! If you’re looking for other great make-ahead meals that save you time later in the week, take a peek at my collection of simple lunch recipes.
Reheating to Cozy Perfection
When you’re ready to enjoy that cozy bowl again, the trick is gentle reheating. Pull the container out of the deep freeze and let it thaw overnight in the refrigerator first. This prevents thermal shock!
When it’s thawed, transfer the soup to a saucepan over medium-low heat. Stir it frequently as it warms up slowly. We definitely don’t want to bring this soup to a rolling boil once it’s been frozen; that can sometimes make the texture slightly grainy!
If you absolutely must speed things up, you can heat the soup in the microwave using short 60-second bursts, stirring thoroughly between each one. It’ll warm up fast, but keep an eye on it so you don’t accidentally scorch the bottom!
That Final Brightness Boost
Here’s a quick reminder about finishing touches: If you added lemon zest before freezing (which some folks do), you might find that brightness has muted a touch. That’s okay! When you reheat the soup, taste it again, and if you feel it needs a lift, just grate just a tiny bit more fresh zest right into the pot before serving. It only takes a minute, and it brings that beautiful fresh flavor right back to life!
Frequently Asked Questions About Creamy Cauliflower Soup
I know when you’re trying out a new recipe, especially one you hope will become a staple comfort food soup, you end up with little questions popping up. That’s completely normal! I’ve gathered some of the questions I hear most often about this specific creamy version. Hopefully, these quick answers give you total confidence heading into your kitchen!
How can I make this roasted cauliflower soup vegan?
This is a fantastic question, and I have great news! The base recipe for this roasted cauliflower soup is already inherently vegetarian because we use vegetable broth and skip the heavy cream entirely. So, you’re already 95% there! To make it completely vegan, you just need to skip the optional cheddar cheese addition mentioned in the tips section. That’s it! You still get all that amazing, velvety texture from the roasted cauliflower and garlic. If you’re looking for more pure plant-based inspiration, check out some great vegan ideas over at The Plant Based School.
Can I use different vegetables in this soup?
Absolutely! That’s the joy of a great base recipe—it’s begging for customization. Since we are relying on roasting to create deep flavor, you want vegetables that roast well. Carrots are a wonderful addition; they add a little sweetness and an even silkier texture. You could add in a couple of peeled, chopped potatoes along with the cauliflower for an even heartier stew-like consistency. When you blend them, you get a wonderful, complex roasted vegetable soup that still achieves that desired velvet finish. Just remember that if you add denser root vegetables, you might need an extra splash of broth during the simmering or blending phase.
What is the best way to serve this cozy soup recipe?
Serving this is half the fun because it enhances that wonderfully cozy soup recipe feeling! Honestly, you can serve it as is, piping hot, and it’s fantastic on its own. But if you want to go the extra mile without much effort, here are my go-to garnishes:
- Get Dipping: A thick slice of crusty, good-quality sourdough bread is practically mandatory. You need something sturdy to really soak up those rich flavors at the bottom of the bowl.
- A Bit of Green: A sprinkle of fresh herbs does wonders. I love using finely chopped chives or maybe even some fresh dill if you have some handy. It looks bright and adds a fresh counterpoint to the deep roast flavor.
- Oil Drizzle: Before serving, take a tiny bit of high-quality olive oil or even a flavored oil (like chili oil if you like a little warmth) and swirl just a few drops on top of each bowl. It adds a beautiful sheen and a final layer of flavor right before it hits the table.
Creamy Roasted Cauliflower Soup with Roasted Garlic

Make this comforting roasted cauliflower soup for a satisfying weeknight dinner. Roasting the cauliflower and garlic deepens the flavor, resulting in a velvety texture without heavy cream.
- Prep Time: 15 min
- Cook Time: 40 min
- Total Time: 55 min
- Yield: 4 servings 1x
- Category: Dinner
- Method: Roasting and Simmering
- Cuisine: American
- Diet: Vegetarian
Ingredients
- 1 large head cauliflower, cut into florets
- 1 head garlic, top sliced off
- 2 tablespoons olive oil, divided
- 1 medium yellow onion, chopped
- 4 cups vegetable broth
- 1/2 teaspoon salt, or to taste
- 1/4 teaspoon black pepper
- 1 teaspoon fresh lemon zest
Instructions
- Preheat your oven to 400 degrees Fahrenheit. Toss the cauliflower florets with 1 tablespoon of olive oil, salt, and pepper on a baking sheet. Place the whole garlic head, cut-side up, on the same sheet and drizzle the exposed top with the remaining 1 tablespoon of olive oil.
- Roast for 25 to 30 minutes, or until the cauliflower is tender and lightly browned at the edges.
- While the vegetables roast, heat a large pot or Dutch oven over medium heat. Add the chopped onion and cook until soft, about 5 minutes.
- Squeeze the roasted garlic pulp from the skin into the pot. Stir to combine with the onion.
- Add the roasted cauliflower florets and the vegetable broth to the pot. Bring the mixture to a simmer. Reduce the heat to low, cover, and cook for 10 minutes to allow flavors to meld.
- Carefully transfer the soup mixture to a blender, or use an immersion blender directly in the pot. Blend until completely smooth and velvety. If the soup is too thick, add a little more broth until you reach your desired consistency.
- Return the soup to the pot if necessary. Taste and adjust salt and pepper. Stir in the fresh lemon zest just before serving.
Notes
- For a richer flavor, substitute half of the vegetable broth with chicken broth.
- If you want a cheesy finish, stir in 1/2 cup of grated sharp cheddar cheese after blending.
- This soup freezes well for up to three months. Cool completely before storing in airtight containers.
Nutrition
- Serving Size: 1.5 cups
- Calories: 185
- Sugar: 6
- Sodium: 450
- Fat: 8
- Saturated Fat: 1
- Unsaturated Fat: 7
- Trans Fat: 0
- Carbohydrates: 23
- Fiber: 7
- Protein: 7
- Cholesterol: 0