
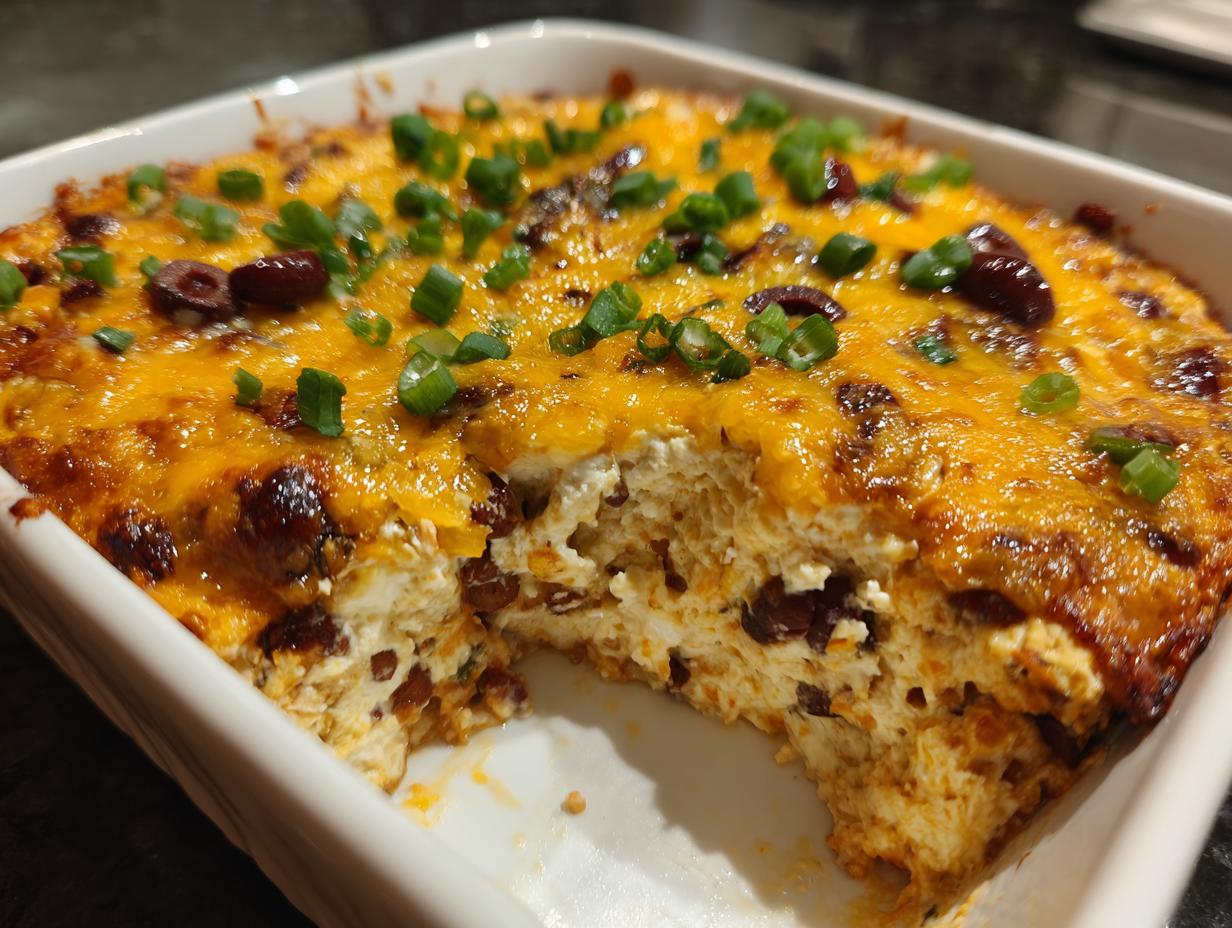
If you’re hosting game day or just need a guaranteed winner for a potluck, forget those sad, cold veggie trays. We all know the best gatherings revolve around something warm, cheesy, and wonderfully messy! That’s exactly what my Texas Trash Dip delivers. Seriously, this baked bean dip is legendary at our house because it’s pure, unadulterated savory comfort—it just *screams* Tex-Mex party food. As Jess Carter, I put my nutrition background to work to ensure this recipe tastes incredible while still being practical. It’s the ultimate crowd-pleasing appetizer because while it tastes gourmet, it comes together faster than you can set up your charcuterie board. Trust me, this is the dip you want people talking about at your next event.

- Why This Texas Trash Dip is Your New Favorite Party Food (Easy Tex Mex Appetizer)
- Gathering Ingredients for the Ultimate Texas Trash Dip
- How to Prepare Your Crowd Pleasing Dip Instructions
- Make Ahead & Storage for Your Texas Trash Dip
- Serving Suggestions for This Warm Bean Dip Recipe
- Troubleshooting Common Issues with Your Texas Trash Dip
- Frequently Asked Questions About Making Texas Trash Dip
- Estimated Nutritional Snapshot for Texas Trash Dip
- Share Your Experience Making This Irresistible Party Food
Why This Texas Trash Dip is Your New Favorite Party Food (Easy Tex Mex Appetizer)
I’ll be honest, when I first heard the name, I raised an eyebrow. But let me tell you, the taste is nothing like the name suggests! This isn’t just another dip; it’s the savior of last-minute party planning. This Texas Trash Dip is what I call comfort food that wears a sombrero.
Here is why you need to make this for your next Super Bowl party or tailgate:
- It’s incredibly fast! Prep time is maybe ten minutes, tops. That leaves you plenty of time to hang out while everything bakes.
- It is the definition of a crowd-pleasing dip. Seriously, I’ve never seen a batch last longer than 20 minutes once it hits the table. Everyone loves that warm, savory Tex Mex flavor.
- If you love a gooey cheese dip, this is your moment. We are talking about layers of melted, bubbly goodness that makes every scoop satisfying. Pair it with some of my other favorite cheesy dips for a real spread!
Forget complicated layering; this is straightforward but delivers maximum flavor payoff every single time. It’s proof that the easiest appetizer can often be the absolute best.
Gathering Ingredients for the Ultimate Texas Trash Dip
Okay, so you’re ready to make the best creamy cheesy dip known to party hosts? Fantastic! The great thing about this recipe—and why I love it for busy weekends—is that the ingredients are straight from the standard pantry setup. We aren’t seeking out any fancy imported items here. We want reliability! This is designed to be that go-to warm bean dip recipe that works every single time you need an easy Tex Mex appetizer.
Grab these simple components, and we’ll have this ready for the oven in under ten minutes. Remember, proper prep on the ingredients ensures that gorgeous, smooth texture we are aiming for!
Ingredient Notes and Substitutions for Your Texas Trash Dip
I want to give you a couple of quick pointers on what really makes the difference here. Don’t skip the softening step for the cream cheese; if it’s cold, you’ll end up with big clumps instead of that smooth, creamy base we need. That base is what stops the inevitable dry spot in the middle of a cheese party dip.
When it comes to the cheeses, please use a blend! Monterey Jack melts beautifully and gives you that glorious pull, while the sharp Cheddar provides the bold color and flavor punch. Don’t just stick to one block, okay? It makes such a difference in the final texture of this gooey cheese dip.
Also, notice the Rotel—you must drain those diced tomatoes and green chiles really well! Too much liquid equals a soupy dip, and nobody wants that. If you decide to make the meaty version (which is delicious, by the way!), just make sure you brown your meat first and drain off every drop of grease before mixing it into the bean base. That’s the secret to keeping this a true Texas Trash Dip and not a soggy mess.
How to Prepare Your Crowd Pleasing Dip Instructions
This is the fun part, where all that careful mixing pays off! Getting ready is super fast. First thing, get that oven preheated to 350 degrees Fahrenheit. While it’s warming up, take your 8×8 baking dish—I sometimes use a cast iron skillet for extra crispy edges, but any oven-safe dish works—and give it a light grease. We aren’t making something that sticks, thankfully!
In a giant bowl, you’ll blend your softened cream cheese, the sour cream, and that whole packet of taco seasoning until it’s happy and smooth. Don’t rush this part; we want it uniform. Then, fold in the refried beans and the drained Rotel. Remember, I stressed draining those tomatoes? This is why! Spread that mixture evenly across the bottom of your prepared dish. This is your foundation, so make sure it’s flat so your final Mexican inspired appetizer bakes evenly.

Now for the cheese magic! Mix those Monterey Jack and Cheddar cheeses together, then sprinkle *half* of it over the bean layer. Pop it into the oven for about 20 minutes. When it comes out, top it with the remaining cheese and bake for another 5 to 10 minutes. Total cook time gets you right around 30 minutes, and you get that amazing, bubbly top layer on your Texas Trash Dip.
Tips for Perfect Baking and Serving Your Texas Trash Dip
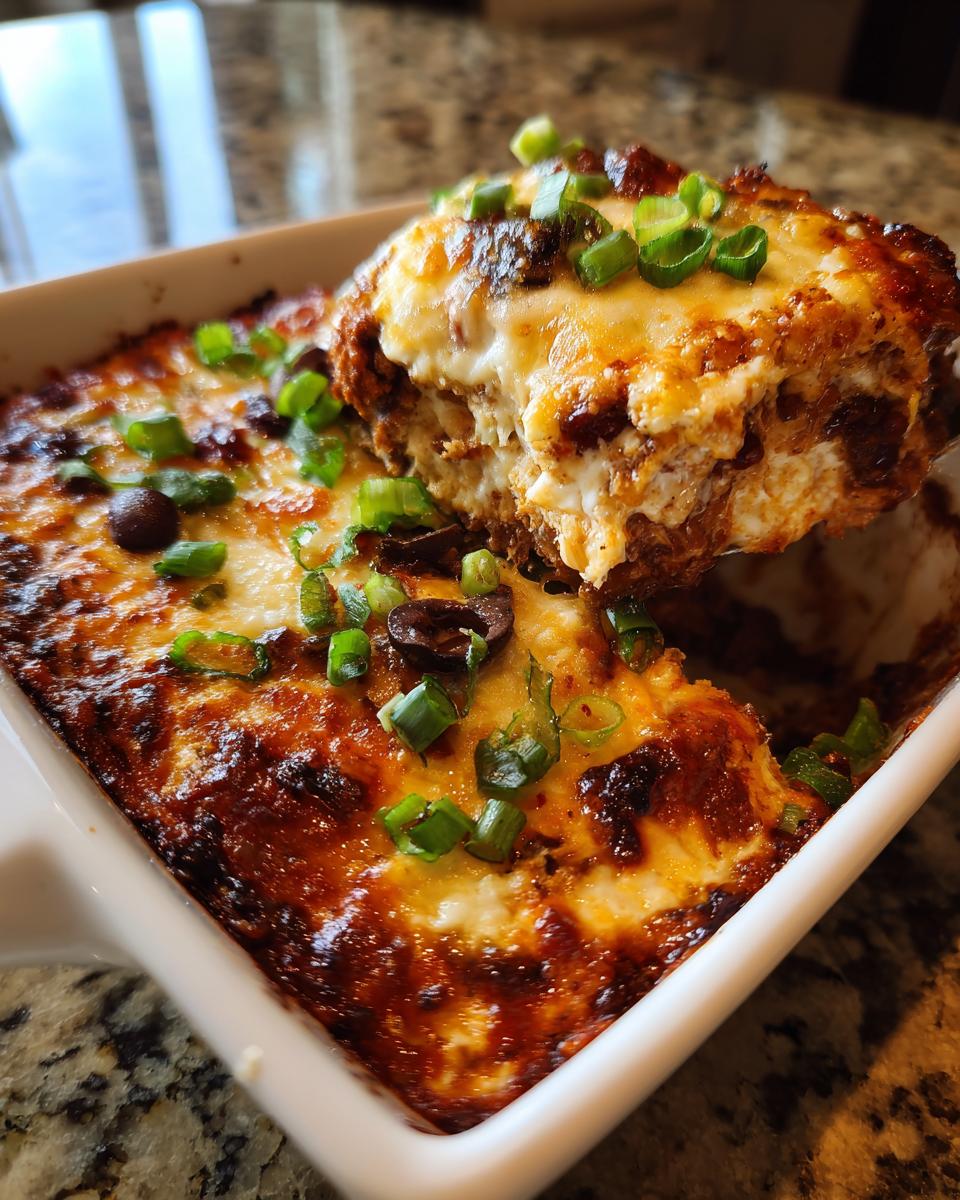
When that first 20 minutes is up, pull it out gently. If you don’t add the second layer of cheese right away, the base mixture can get a little too crusty, and you lose that beautiful cheesy pull along the edges. Make sure you spread that first bean layer evenly; if it’s lumpy, the dips on the edges will burn before the center of your savory comfort food dip is warm enough.
The key to serving this as the ultimate party potluck appetizer idea is timing. You want to serve it the second that top layer of cheese is fully melted and gorgeous. If it cools down too much, that creamy texture tightens up. Have your dippers ready to go right next to the hot dish, and you’ll be winning the appetizer game, folks!
Make Ahead & Storage for Your Texas Trash Dip
Hosting a huge group means you should never, ever try to do *everything* the day of the party. That’s just asking for trouble, right? One of the things I absolutely love about this Texas Trash Dip is how great it is for planning ahead. This recipe is totally robust, so you can absolutely assemble the entire thing up to 24 hours before you need to serve it!
Here is what you do: mix all your creamy base ingredients, spread it in the baking dish, top with that first layer of cheese, just like in the instructions—but don’t add the final sprinkle of cheese yet. Cover the whole thing securely with foil or plastic wrap. Keep it tucked away in the fridge. You can even prep your final cheese topping and keep that separate!
Now, pay attention here, because baking times change when things are cold. If you are baking this straight from the fridge, you need to add about 10 to 15 minutes to that initial baking time from Step 6. I usually keep the oven temp at 350°F, but you need that extra time to warm the cold cream cheese and beans through to the center. Don’t worry, it’s worth the wait!
What about the leftovers? Oh, there will be leftovers, I promise! This dish reheats beautifully. Cover it loosely with foil and bake it around 350°F until it’s warm and bubbly again—usually another 15 minutes depending on how much is left. It’s still amazing the next day. Seriously, this is why it’s such a fantastic make ahead party dip staple for me.
Serving Suggestions for This Warm Bean Dip Recipe
Okay, we’ve got this magnificent, hot, cheesy, bubbly masterpiece of a Texas Trash Dip ready to go. But honey, even the best dip needs the right vehicle! Because this recipe is so hearty—thanks to those refried beans and all that glorious cheese—you cannot get away with flimsy chips. We need sturdiness here!
When I serve this dip with refried beans and cheese, I always make sure I have options for dipping, catering to everyone who shows up ready to snack heavy for that big game. You want things that can handle the weight of this goodness without cracking under pressure. I learned that the hard way when I once served it with flimsy pita chips. Huge mistake!
Here are my absolute favorite things to put beside this glorious Tex-Mex creation:
- Sturdy Tortilla Chips: This is non-negotiable. Get the thick-cut ones, the ones that look like miniature shovels. They scoop up everything perfectly.
- Fritos Scoops: Oh my gosh, these are incredible. The salty corn flavor of the Frito pairs so well with the taco seasoning base. I always toss a bag out for good measure. They hold up great!
- Toasted Baguette Slices: If you want to feel a little bit fancy—maybe you’re having a holiday party instead of just a football watch—slice up a French baguette, brush it lightly with olive oil, and bake it for five minutes until crisp. These are wonderful for pairing with this cheesy party dip, much better than those soft crackers.
- Veggie Sticks: If you need something lighter to balance the richness, thick carrot sticks or robust bell pepper strips work nicely for dipping.
Honestly, sometimes I just stand over the dish with a spoon if nobody is looking, but for guests, stick to the sturdy stuff. Since this is such an irresistible party food, preparation is key, and having the right scoops ready means less frustration dipping!
Troubleshooting Common Issues with Your Texas Trash Dip
Even the most straightforward game day dip recipe can sometimes throw us a curveball. Don’t panic if your incredible-smelling Texas Trash Dip doesn’t come out exactly as you pictured straight from the oven. That’s normal! Cooking is learning, and that’s why I want to cover a few fixes so you can confidently serve up that gooey cheese perfection.
My goal, as someone who respects a good, hearty warm bean dip recipe, is to ensure you don’t waste a single scoop. If you run into trouble, here’s what I check first:
My Dip Seems Watery or Separated
This is the most common issue, and it almost always comes down to liquid management. Remember how adamant I was about draining the Rotel? That is usually the culprit! If your dip base looks a little soupy when you first spread it in the pan, it means there was too much liquid escaping from the tomatoes and chiles.
The Fix: If you catch it early, you can try sprinkling a tablespoon or two of flour or cornstarch lightly over the bean mixture before adding the first layer of cheese. Stirring it in gently can soak up some of that excess moisture. If it’s already baked and watery, don’t despair. You can still save it by increasing the oven temperature slightly—say, to 375°F—and baking it uncovered for another 7 to 10 minutes. This allows some of that excess moisture to evaporate slowly. Resist the urge to stir it while it’s baking, though, or you risk breaking up the base!
The Cheese on Top Isn’t Getting Gooey and Browned
If your dip is piping hot underneath, but the top cheese layer looks dull, dry, or hasn’t fully melted, we just need a final blast of heat. This usually happens if you cover the dip while baking that final stage, or if your oven runs a little cool.
The Fix: If you have 5 minutes left on your timer and the cheese looks sad, switch your oven over to the BROIL setting. But you have to watch this like a hawk! Broilers work fast, and you can go from perfectly melted to burnt in about 60 seconds. Keep the dish six to ten inches away from the heating element and watch for the edges of the cheese to start bubbling aggressively and getting spotty brown. As soon as it looks right, pull it out immediately. Nothing ruins a cheesy party dip faster than baked-on cardboard cheese!
My Dip Stays Cold in the Middle
This is generally only a problem if you skipped the make-ahead storage I mentioned earlier and put a totally chilled dip straight into a hot oven. Because the center is dense—that’s what makes it a great comfort appetizer—it takes time for the heat to penetrate.
The Fix: If your edges are already browning but the middle is still struggling, cover the entire dish tightly with aluminum foil. The foil traps the ambient heat, creating a mini-oven atmosphere that cooks the center without burning the edges. Let it sit covered for 10 minutes, then uncover and check the center temperature. It should be hot all the way through now, ready to be served as the ultimate super bowl appetizer.
Frequently Asked Questions About Making Texas Trash Dip
Can I use low-fat or fat-free dairy products in this Texas Trash Dip?
You totally can try it, especially if you’re tracking macros! But honestly, for this recipe—which is supposed to be the ultimate savory comfort food—the full-fat dairy is what gives it that rich, legendary mouthfeel. Sour cream and cream cheese rely on fat to create that beautiful, non-grainy texture when baked. If you use low-fat, you risk the dip getting a little watery when it heats up. If you must substitute, I’d suggest using light sour cream instead of fat-free, but keep the cream cheese full-fat if you can! It helps this cheesy party dip hold up better.
What happens if I skip the refried beans? Is it still a good game day dip recipe?
If you skip the refried beans, you are essentially making a very thick, baked cheese dip, not the classic Texas Trash Dip. The beans are vital here! They provide the body, the substance, and the earthiness that cuts through all that richness from the cheese and sour cream. If you skip them, you’ll likely have heavy separation between the dairy layers and the cheese on top. My suggestion? If you don’t like refried beans, swap them out for a can of black beans that you’ve mashed really well yourself. This keeps the structure that makes it such a successful party food!
Can I make this Texas Trash Dip in a slow cooker instead of the oven?
Yes! I know so many folks love keeping the party food warm right in the Crock-Pot, and this dip is perfectly set up for that. If you use a slow cooker, you’d skip the baking entirely. Just mix everything (except maybe the optional toppings) and spread it into the prepared insert. Cook on LOW for about 2 to 3 hours, stirring once halfway through, or until that cheese is nice and melty. It’s a fantastic, low-stress way to serve this easy appetizer for large groups, especially if you are hosting for a long day like the Super Bowl! It stays warmer longer, too.
Why does the recipe call for two stages of baking?
That two-stage bake is my little trick to ensure you get that perfect texture every time! The first 20 minutes bakes the bean and dairy base so it sets up firm enough to support the second layer. If you dump all the cheese on at once and bake for 30 minutes, you run a high risk of the cheese on top getting oily or burning before that dense base is hot all the way through. This two-step process guarantees you get that delicious, bubbly cheese top that makes this the ultimate game day snack!
Estimated Nutritional Snapshot for Texas Trash Dip
Listen, I know sometimes we want to know the breakdown, even if we’re fully embracing the joy of a decadent savory comfort food dip. While I spent years studying nutrition, let’s be real—this Texas Trash Dip is meant for celebrations, not daily consumption! But for transparency, I’ve pulled together the estimated nutritional information so you know generally what you’re serving up, especially if you have guests asking about macros.
Based on the ingredients list, here is the approximate snapshot per serving (which we calculated as 1/8th of the whole dish). Remember, this is calculated using standard estimations for dairy and beans, so your actual numbers might shift slightly depending on the brands you grab off the shelf!
- Serving Size: 1/8 of dip
- Calories: 320
- Fat: 24g
- Saturated Fat: 14g (Yes, it’s loaded with cheese!)
- Carbohydrates: 15g
- Fiber: 3g
- Protein: 14g
- Sodium: 650mg
The sodium is a little higher, mostly coming from the taco seasoning and the pre-shredded cheese, which is something to be aware of if you’re sensitive! But look at that protein content—it keeps you feeling satisfied longer, which is great when you’re trying to manage plates during a big game. I always say, knowing what’s in your food is half the battle, even if the battle is won by the sheer deliciousness of this ultimate game day snack!
A quick note from Jess: Please remember these figures are estimates! If you use low-fat sour cream, reduce the oil used to grease the pan, or choose low-sodium Rotel, your final count will change. These numbers are a guide, not gospel, for this fantastic gooey cheese dip.
Share Your Experience Making This Irresistible Party Food
Well, friends, we’ve done it! We’ve taken simple pantry items and turned them into the ultimate irresistible party food. I am so excited for you to take this Texas Trash Dip to your next gathering, whether it’s a huge family get-together or just a quiet night in with a stack of sturdy chips.
Now, I need to hear all about it! When you make this, please come back here and drop a rating in the comment section. Did it disappear in five minutes like mine always does? Which dippers did your crowd prefer—the salty Fritos or the crispy tortillas?
Honestly, seeing your photos and reading about the parties you’ve hosted using my favorite crowd pleasing dip recipes truly fuels me. It makes all the testing and tweaking worth it! Don’t be shy; share your victory stories, any modifications you tried, or just tell me how much everyone loved that ooey-gooey cheese!
Thank you for letting me share my kitchen secrets with you. Happy dipping, and I’ll see you in the comments!
PrintUltimate Texas Trash Dip: Cheesy, Warm Bean Appetizer

Make this Texas Trash Dip for your next gathering. This hot, cheesy, and creamy dip uses refried beans and taco seasoning for a bold Tex-Mex flavor that disappears fast.
- Prep Time: 10 min
- Cook Time: 30 min
- Total Time: 40 min
- Yield: 8 servings 1x
- Category: Appetizer
- Method: Baking
- Cuisine: Tex-Mex
- Diet: Vegetarian
Ingredients
- 1 (16 ounce) can refried beans
- 1 (8 ounce) package cream cheese, softened
- 1 cup sour cream
- 1 packet taco seasoning mix
- 1 (10 ounce) can diced tomatoes and green chiles (like Rotel), drained
- 2 cups shredded Monterey Jack cheese
- 2 cups shredded Cheddar cheese
- 1/2 cup sliced black olives, drained (optional topping)
- 1/4 cup sliced green onions (optional topping)
Instructions
- Preheat your oven to 350 degrees Fahrenheit. Lightly grease an 8×8 inch baking dish or a similar sized oven-safe skillet.
- In a large bowl, combine the softened cream cheese, sour cream, and taco seasoning. Mix until smooth.
- Stir in the refried beans and the drained diced tomatoes and green chiles until everything is well combined. This forms your base layer.
- Spread the bean mixture evenly into the prepared baking dish.
- In a separate bowl, mix the Monterey Jack cheese and Cheddar cheese together. Sprinkle half of the cheese mixture over the bean layer.
- Bake for 20 minutes, or until the dip is heated through and the cheese is beginning to melt.
- Remove the dish from the oven. Sprinkle the remaining cheese mixture over the top.
- Return the dip to the oven and bake for another 5 to 10 minutes, until the top layer of cheese is fully melted and bubbly.
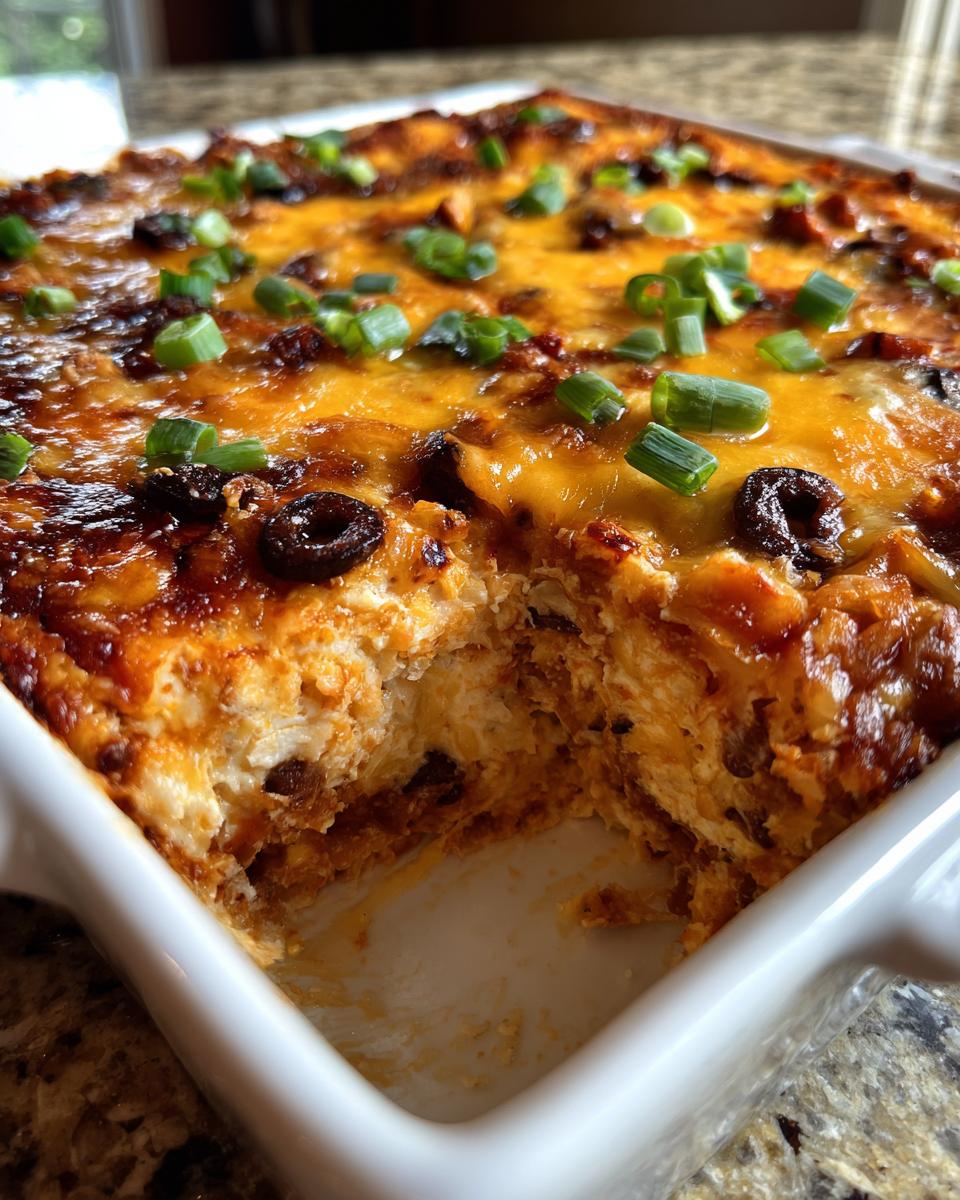
- Remove from the oven. If using, top with sliced black olives and green onions.
- Serve the Texas Trash Dip hot with sturdy tortilla chips or Fritos for scooping.
Notes
- For a meaty version, brown 1 pound of ground beef or sausage, drain the fat, and mix it into the bean base before spreading it in the dish.
- You can assemble this dip completely, cover it, and refrigerate it up to 24 hours ahead of time. Add 10 to 15 minutes to the initial baking time if baking from cold.
- Use your favorite taco seasoning blend for the best flavor in this crowd pleasing dip.
Nutrition
- Serving Size: 1/8 of dip
- Calories: 320
- Sugar: 3
- Sodium: 650
- Fat: 24
- Saturated Fat: 14
- Unsaturated Fat: 10
- Trans Fat: 0.5
- Carbohydrates: 15
- Fiber: 3
- Protein: 14
- Cholesterol: 55