
There’s something truly magical about wild yeast, isn’t there? It’s ancient, it’s powerful, and honestly, it feels a little bit like alchemy when you realize you can coax life out of simple flour and water! For me, starting a sourdough starter brings me right back to my grandmother’s kitchen. She taught me about patience and respecting the ingredients, and nothing screams heritage American cooking quite like using only natural fermentation for your bread.
Forget those intimidating sourdough books—I promise you, if you can mix a bowl of pancake batter, you can do this. This is my ultimate, simple, 7-day guide to creating your very own active, bubbly sourdough starter right from scratch. We’re keeping this beginner-friendly, I’m walking you through every single day so you can start your journey into honest, no-yeast bread making!
- Why You'll Love This Easy Sourdough Starter Guide
- Gathering Supplies for Your Sourdough Starter From Scratch
- Ingredients for the Perfect Sourdough Starter
- Step-by-Step: How to Create a Sourdough Starter Day by Day
- Sourdough Starter Tips and Tricks for Guaranteed Success
- Sourdough Starter Maintenance: How to Keep Sourdough Starter Alive
- Sourdough Starter Troubleshooting Common Issues
- Frequently Asked Questions About Your New Sourdough Starter
- Understanding the Science Behind Your Homemade Sourdough Culture
- Understanding the Science Behind Your Homemade Sourdough Culture
Why You’ll Love This Easy Sourdough Starter Guide
I know starting a homemade sourdough culture sounds intimidating, but trust me, this is the most reliable method out there for beginners. I’ve refined this over years of baking so you don’t have to guess!
- You’re creating your own natural levain—the key to incredible, chewy artisan bread.
- It’s just flour and water! No need for store-bought yeast or fancy additives.
- It sets you up perfectly for the world of no yeast bread making.
- We cover the whole 7-day timeline, so you know exactly what to look for each morning.
Gathering Supplies for Your Sourdough Starter From Scratch
Before we dive into the fun part—watching things bubble!—we need to make sure your kitchen is ready. The beauty of this flour and water starter is that you probably have most of this stuff already. No need for a fancy setup or specialty gadgets; we’re keeping it real and rustic here. Having the right tools ready means less fuss when Day 1 rolls around.
Essential Equipment for Your Homemade Sourdough Culture
The main thing I want to stress upfront is accuracy. This is one of my biggest sourdough starter tips and tricks: weighing matters way more than scooping!
- A Clean, Clear Jar: I use a quart-sized (32 oz) glass jar, like a Mason jar. It needs to be clean, clean, clean! You want to be able to see what’s happening on the sides and bottom, plus we need room for it to grow, because trust me, it will grow!
- A Kitchen Scale: Seriously, get one. Trying to measure 50 grams of flour with measuring spoons is a guessing game, and we want our yeast babies to have the perfect ratio every time. This makes the whole process reliable for beginners.
- Rubber Spatula or Spoon: Anything you use to mix it up will work, but make sure it’s metal or wooden, not plastic if you can help it—though plastic is totally fine if that’s what you have. Just make sure whatever you use is clean before you start mixing.
- A Loose Lid or Cloth: Your starter needs to breathe! Don’t seal the jar tight. Use a coffee filter, a loose lid, or just a piece of clean cloth secured with a rubber band. It needs airflow to do its wild yeast thing.
That’s it! See? Super easy setup. Now you’re prepared to start your adventure in creating an authentic homemade sourdough culture.
Ingredients for the Perfect Sourdough Starter
Okay, this next part is where people sometimes overcomplicate things, but honestly, keeping it simple is the very best beginner sourdough technique. We are only using two things—flour and water—but the *type* of flour and water makes a huge difference in how fast you get that active, bubbly starter you’re dreaming about.
You need to be precise with your measurements here. Remember what I said about the scale? Weighing everything out ensures we feed our little yeast colony just the right ratio of goodness. Don’t try to scoop, please!
Starting Flour vs. Maintenance Flour
I separate my flour choice into two categories depending on the day, and this is a huge one of my secrets for getting things going!
- The Activator (Whole Wheat or Rye Flour): For Day 1, I insist on using either whole wheat or rye flour. These flours still have the bran and germ attached, which means they are packed with more wild yeasts and bacteria just waiting to wake up. Think of it as giving your starter a hearty, natural breakfast to kick off the whole process. I use about 50g of this to start.
- The Maintainer (Unbleached All-Purpose Flour): Once we get past Day 2 and things are looking lively, we switch everything over to a good quality, unbleached all-purpose flour. Bleached flour just doesn’t have the nutrition your yeast needs to thrive long-term. We’ll be using 50g of this for every feeding going forward.
Water: Don’t Skip This Crucial Detail
This is where so many beginners run into trouble without realizing why! You absolutely must use unchlorinated water. Chlorine is designed to kill microbes, and guess what—we are trying to grow billions of beautiful little microbes!
- Temperature: The water needs to be room temperature, not cold from the fridge and definitely not hot. If it’s too cold, the yeast goes to sleep. If it’s hot, you zap ’em! Somewhere between 68°F and 72°F is perfect for our 7-day timeline.
- Source: If you use straight tap water, let it sit out in an open container overnight—this lets the chlorine naturally evaporate away. If you have well water or already use filtered water, you are good to go! Otherwise, grab a bottle of spring water. We need happy, healthy yeast for that long fermentation baking process, and happy yeast starts with clean water.
Keep these simple supplies ready, and you’re already halfway to baking artisan bread with your very own homemade sourdough culture!
Step-by-Step: How to Create a Sourdough Starter Day by Day
This is it—the big moment! We are officially making the actual sourdough starter culture right here. Don’t panic about the seven days; most of that time is just waiting for nature to do its thing. You’ll be actively mixing for less than ten minutes total over the whole week! I want you to treat this like a fun science project. We’re looking for life, and we’re going to feed it exactly what it needs daily so we end up with that gloriously active, bubbly starter ready for baking.
Keep your jar somewhere warm, ideally between 68°F and 75°F—that’s the sweet spot for our wild yeast buddies. If your kitchen is chilly, maybe put it on top of the fridge or in the oven with just the light on. I learned this when I first tried making this culture back in the winter; a little warmth goes a long way for your flour and water starter! If you ever want to dive deeper into my kitchen philosophy, I share a lot more about my journey over at the About Page.
Days 1 & 2: Activating Your Sourdough Starter for Beginners
Time to mix! Grab your jar. On Day 1, mix 50 grams of that whole wheat or rye flour (remember, that’s our initial boost!) with 50 grams of room temperature, unchlorinated water. Stir it until it looks like thick pancake batter. Cover it loosely and let it hang out for 24 hours.
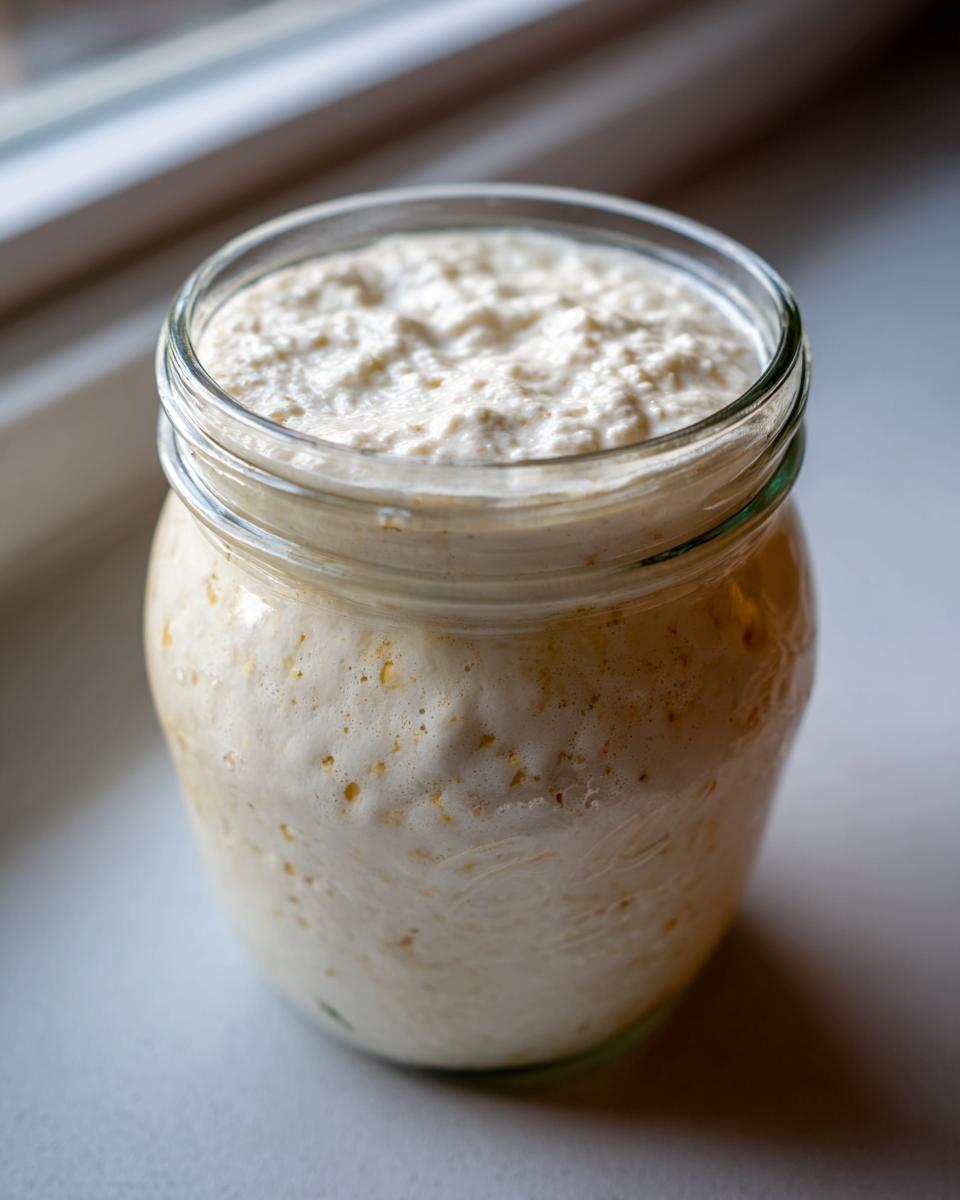
When you check on Day 2, you might see a few tiny specks of bubbles, or maybe absolutely nothing. And that is perfectly okay! Do not fret if nothing has happened. On Day 2, we do our first real maintenance: First, we discard about half of what’s in the jar. Yep, we throw some away! Then, we feed what’s left with 50 grams of all-purpose flour and 50 grams of water. Mix it well, loosely cover it, and wait another 24 hours. You’re already on your way to making a sourdough starter from scratch! Having a clear guide like this one helped me stay on track those first couple of days.
Days 3 & 4: Encouraging Activity in Your Flour and Water Starter
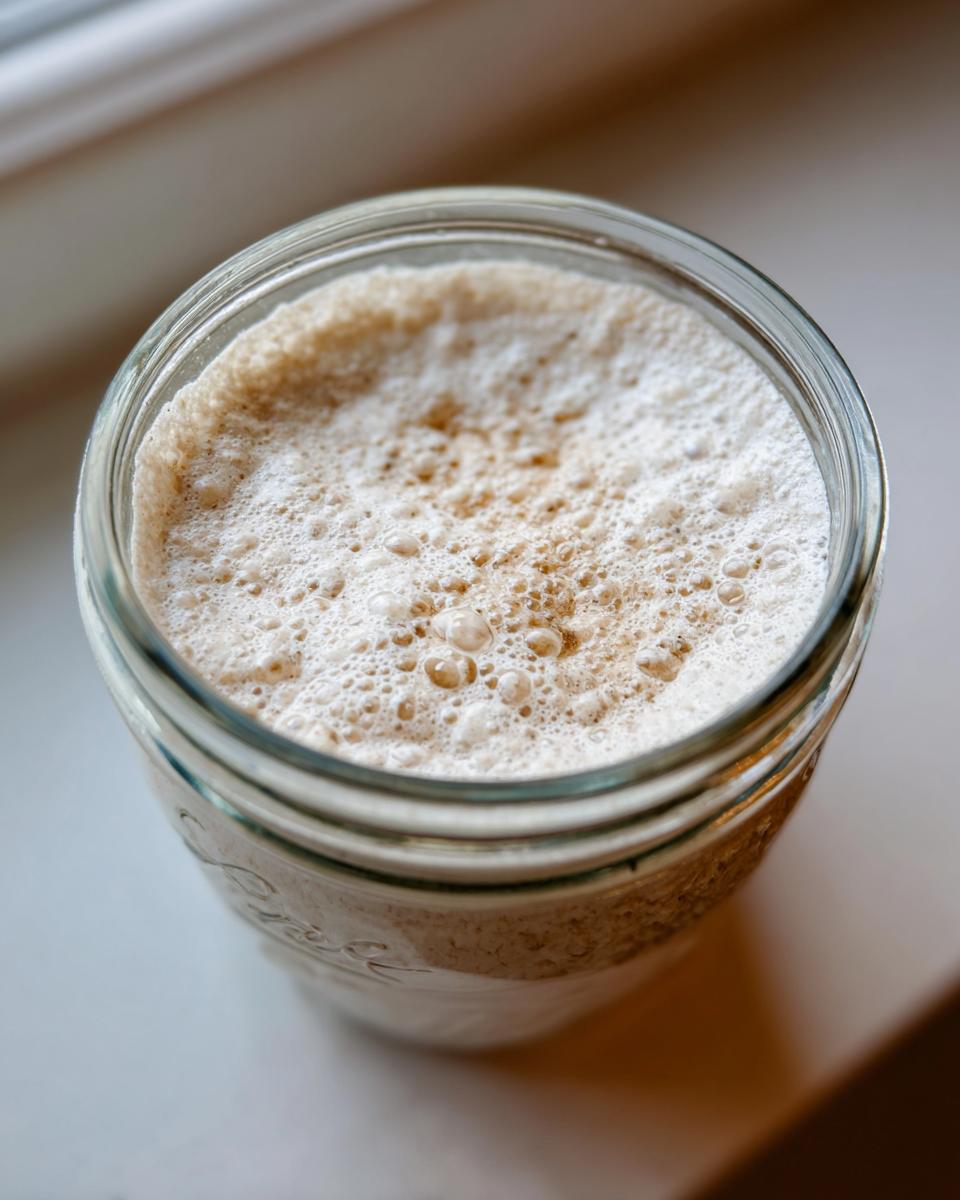
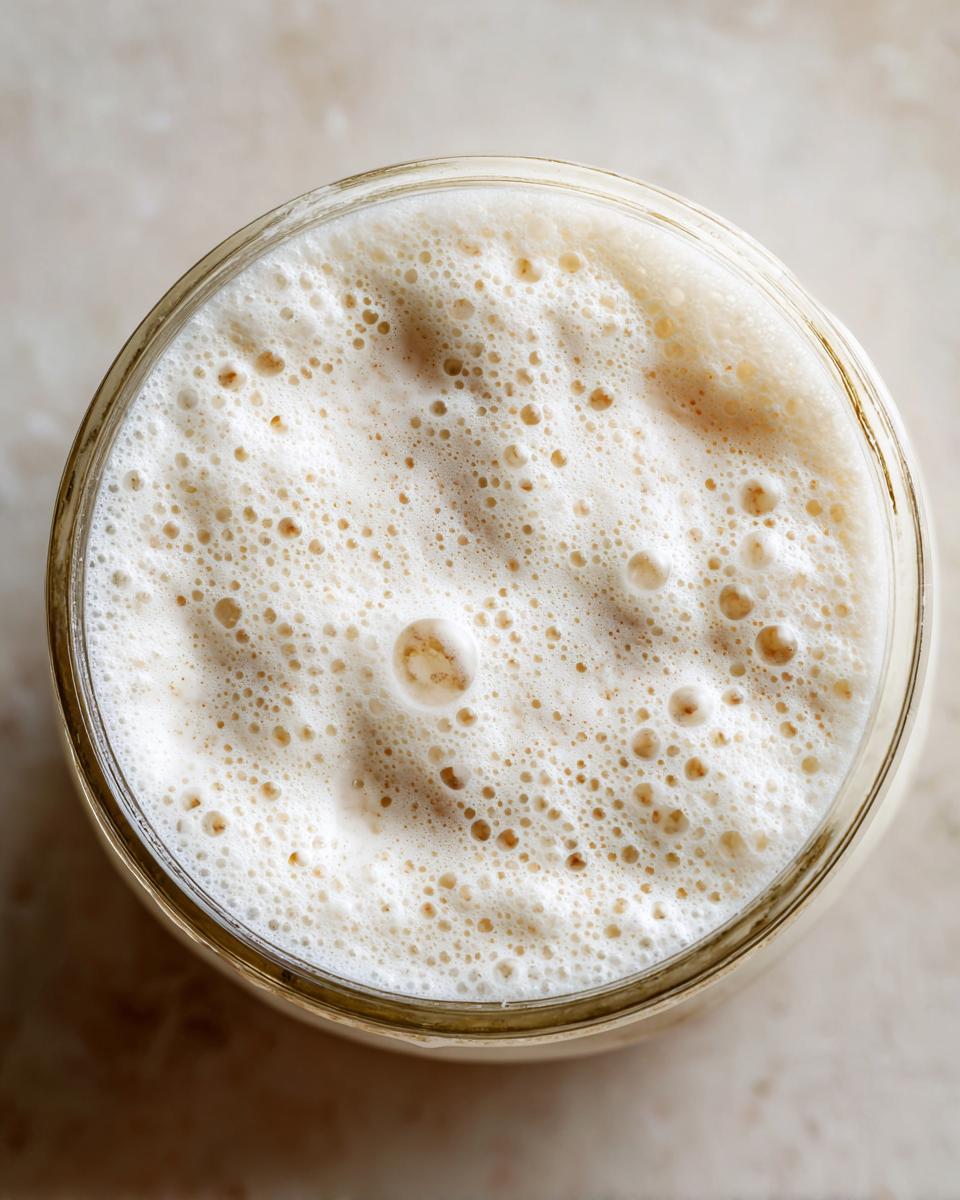
By Day 3, things should be getting interesting. You might notice a slightly funky, maybe slightly vinegary or cheesy smell, and you should definitely start seeing some bubbles. That sour scent is just part of the process for a homemade sourdough culture!
Just like Day 2, toss about half of the mixture, and then feed the remainder with 50g of all-purpose flour and 50g of water. Keep watching it closely. If by Day 4 you see the starter happily rising and falling significantly within 8-10 hours, that’s a sign your yeast is robust! If it seems super active, you can switch to feeding it twice a day (every 12 hours) to keep it happy and growing strong.
Days 5, 6, & 7: Establishing an Active Bubbly Starter
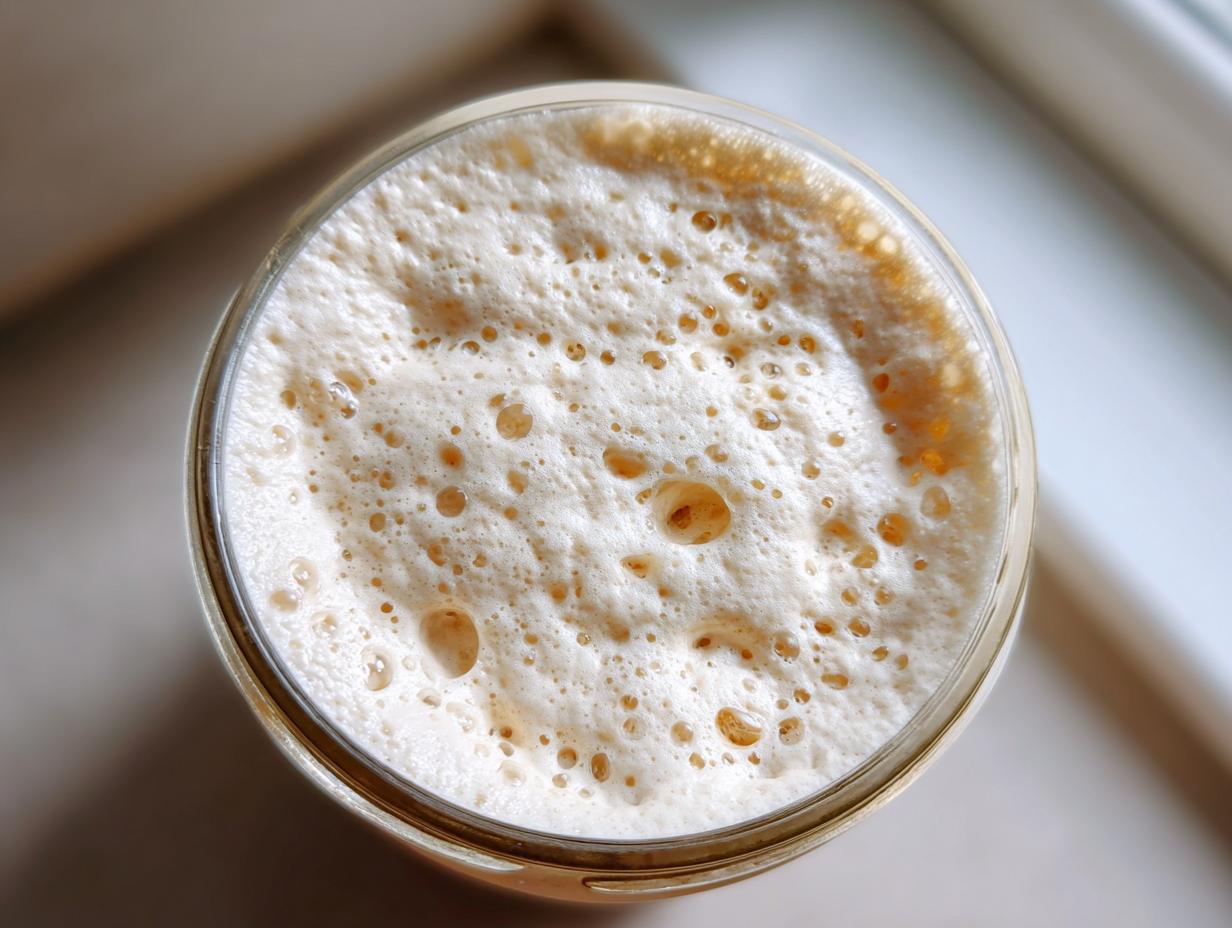
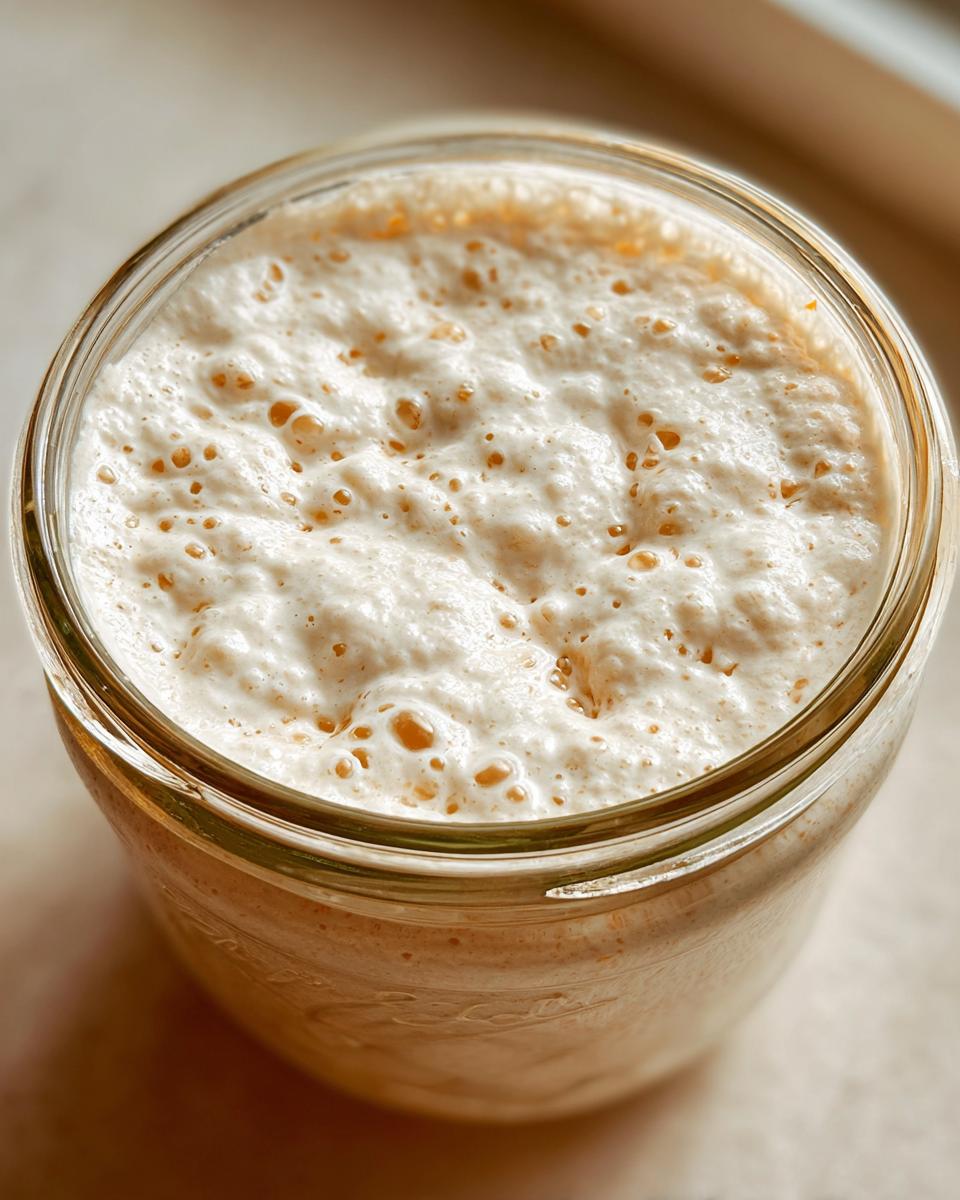
These final few days are all about consistency. Stick to the discard-and-feed schedule you settled into on Day 4. We are waiting for that beautiful visual cue: the starter must *reliably* double in volume within 4–8 hours after being fed. When it doubles, that means you’ve built up enough wild yeast and bacteria to really start baking with sourdough starter!
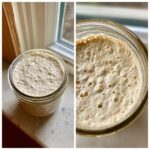
By Day 7, you should have an active, bubbly starter ready for action. When you feed it, watch it climb up the side of the jar. If it looks nice and spongy when you stir it, and it’s reliably doubling, congrats! You’ve successfully made your own wild yeast culture. This is the foundation for everything!
Sourdough Starter Tips and Tricks for Guaranteed Success
Look, even with the best step-by-step guide, making a sourdough starter from scratch can throw you some curveballs, especially in the first week. You’ve got wild yeast you’re dealing with, not packaged baker’s yeast, so it acts a little moody sometimes! I’ve put together a few things I learned the hard way to help you bypass the common roadblocks and get straight to that perfect, reliable rise. Trust me, understanding just a few key details makes all the difference between a weak culture and an absolute powerhouse for your artisan bread starter.
The biggest thing I want you to focus on is temperature control early on. If your kitchen is too cold, your progress will slow to a crawl, and you’ll start worrying that you did something wrong. Consistency really is the secret sauce when dealing with a new homemade sourdough culture.
Ingredient Notes and Substitutions for Your Sourdough Starter
We only use flour and water, but if those ingredients aren’t right, you’re fighting an uphill battle. Let’s talk about making sure you’ve given your microbial friends the best possible chance to thrive!
- Water Quality is Non-Negotiable: I mentioned this before, but it bears repeating because it trips so many beginners up! If you must use tap water, you absolutely have to let it sit out uncovered for at least 12 hours before mixing it with your flour. I’m serious about the chlorine—it can stop the wild yeast activity dead in its tracks. If you have an instant read thermometer, check that water temp; aim for about 75°F when you mix it in.
- Whole Grain Power-Up: Remember in the beginning we used rye or whole wheat? That’s strategic! Those grains have way more natural good stuff for the yeast to eat. Once your starter is active (around Day 4 or 5), you can switch completely to unbleached all-purpose, but if things slow down, temporarily switch back to using 50% whole wheat in your feedings to give it an extra boost.
- Hooch Happens: Sometimes you’ll see a layer of dark gray or black liquid form on top of your starter. That is called “hooch,” and it just means your starter is seriously hungry! Don’t panic; it’s not mold, and it won’t ruin anything. Just pour it off (or stir it back in if you like a tangier flavor!) and then immediately feed your starter. It’s your starter’s way of politely telling you, “Hey, I need breakfast!”
If you ever get stuck and need super deep dives into why things aren’t working, I always find this guide helpful for visualizing common starter issues.
And hey, once this guy is proven ready, those leftovers you discard? Don’t throw them out! That discard is perfect for whipping up quick things like fluffy pancakes or crackers. You can find some of my favorite ways to use up that discard over on my breakfast page!
Sourdough Starter Maintenance: How to Keep Sourdough Starter Alive
Congratulations! You’ve nurtured this wild yeast culture from scratch, and now it’s a vibrant, active part of your kitchen. But now comes the eternal question: How do I keep this thing alive without feeding it every single day forever?
You have two main options for sourdough starter maintenance, depending on how often you plan on baking. It’s really all about putting your starter into “storage mode” when you aren’t using it, which slows down its hunger and keeps the culture healthy until its next real feeding. I use both methods—one for when I’m baking every weekend, and one for when life gets crazy for a few weeks.
Daily Feeding: The Room Temperature Routine
If you plan on baking a loaf of artisan bread starter bread every day or every other day, you need to keep your starter on the counter at room temperature. This means you’re treating it like a house pet that needs food daily! You have to feed it every 12 to 24 hours, depending on how warm your house is.
When you feed it daily, you can afford to be a little stingier with your discard, but you still have to discard! I usually toss about half, then feed it again in equal parts flour and water (50g starter, 50g flour, 50g water is my standard maintenance feed). This keeps the volume manageable and ensures the yeast colony always has fresh food without getting too sour or too weak. Keep track of when you feed it so you don’t forget!
The Fridge Method: Weekly Feeding for Casual Bakers
This is my favorite trick for when I need a break from daily baking chores! If you only bake once a week or less, pop that jar right into the refrigerator. Cold temperatures slow down the metabolism of the yeast and bacteria count drastically—it becomes very sleepy.
When it’s in the fridge, you only need to feed your homemade sourdough culture once a week. Take it out, let it warm up for an hour or two, discard most of it down to about 50g, and give it a good feed (50g flour, 50g water). Wait about an hour or two until you see the first tiny hints of bubbles, then put it right back in the cold. Easy peasy! If you want to bake with it after it’s been chilling, take it out a day early and give it 1-2 room-temperature feedings before you try to use it in a recipe.
If you want to explore different types of starters—maybe you want a stiffer starter or you are curious about different flour combinations—check out this great overview of starter variations. Knowing the types helps you decide the best maintenance routine for you!
And hey, remember those leftover feedings? Make sure you save that discard! It’s perfect for making things like my famous fluffy pancakes instead of tossing it!
Sourdough Starter Troubleshooting Common Issues
Okay, let’s talk real life for a second. Even with the best intentions, your new creation might throw a tiny tantrum. It happens to everyone, even seasoned bakers! Don’t let a little hiccup scare you into throwing out your homemade sourdough culture. Most issues with a flour and water starter are simple fixes once you know what you’re looking for. I want you to look at this as part of the learning curve for wild yeast baking guide. When troubleshooting your sourdough starter from scratch journey, try these fixes first!
First thing: take a deep breath. You’re cultivating something alive here, and sometimes it needs a little nudge. If you’re seeing absolutely nothing after Day 4 or 5, don’t panic! That usually just means your environment isn’t warm enough, or maybe your flour isn’t very yeasty. I often find that just moving the jar to a warmer spot—like on top of my fridge—can wake things right up.
No Visible Activity After Day 4
This is super common, especially if your kitchen runs cool. If you’re only seeing tiny, lazy bubbles, or basically none at all, you need to boost the temperature slightly. Remember that sweet spot between 68°F and 75°F? That’s where the good bacteria and yeast work fastest.
- The Temperature Fix: Try keeping your starter in the warmest spot in your house for 24 hours. If necessary, use warm (not hot!) water for the next feeding to bring the mixture temperature up a bit.
- The Flour Boost: If you are still only using all-purpose flour, try feeding it just one round with 100% rye flour instead of AP. Rye is magic for jumpstarting sluggish starters! After that aggressive feed, switch back to your regular AP flour the next day.
Weak Rise or Smelling Too Sharp
If your starter seems to rise a little, but then deflates quickly, or if it smells overwhelmingly like nail polish remover or vinegar, it’s saying, “I’m starving!” This usually means it’s consuming the food too fast, which happens in warmer kitchens.
The fix here is simple: switch from feeding once every 24 hours to feeding every 12 hours. You are just giving it two small meals instead of one huge one. This will drastically reduce that sharp acidic smell and lead you to a much more active, bubbly starter. You can find some great visuals on what different smells mean using resources like this guide!
Spotting Mold on the Surface
This is the one time you should completely stop and start over. If you see fuzzy spots that look like they belong on old bread—green, pink, black, or fuzzy—that’s mold, and it means the environment wasn’t sterile or the yeast didn’t establish dominance fast enough. Mold spores are serious business, so do not try to scoop it off and keep feeding it.
We want happy, healthy cultures for our no yeast bread making, and that means tossing the whole batch if mold appears. Wash your jar thoroughly and start again! Don’t worry, you’re now that much smarter for the next attempt!
Frequently Asked Questions About Your New Sourdough Starter
I totally get it. When you’re deep into the process of making your first homemade sourdough culture, your head is probably swimming with questions! I’ve rounded up the answers to the things I get asked most often about moving past that initial 7-day creation period. Don’t worry if you still feel a little unsure about some steps—this is a learning curve, and I’m here to help keep you confident about your flour and water starter!
Can I use regular tap water for my sourdough starter?
This is such an important question for beginners! The short answer is: maybe, but only if you treat it first. Remember, chlorine is meant to kill bacteria, and we are trying to grow billions of beneficial, wild ones! If you use chlorine tap water, your starter might just sit there flat and lifeless for days. My number one sourdough starter tip is to use filtered or bottled spring water if you can. If you only have tap water, just fill up a pitcher on Day 1 and leave it on the counter uncovered overnight. That allows the chlorine gas to evaporate away before you use it for your feeding.
How long until I can bake real bread with my new starter?
This is the million-dollar question! You are ready for baking with sourdough starter once it reliably doubles in size after feeding, showing lots of lovely bubbles, and it does this consistently for two or three feedings in a row. For most folks following my 7-day guide, this happens right around Day 7 or Day 8. If you are seeing that consistent doubling within 4 to 8 hours after you feed it, you have an active bubbly starter ready to go! If it’s slower, just give it a few more days of consistent feeding to encourage that wild yeast growth.
What do I do with all the discard once my sourdough starter is mature?
Oh, the discard! People worry about waste, but honestly, once your starter matures, the discard is your secret weapon for amazing quick-bakes! You should never feel guilty throwing out starter, as that’s the most basic sourdough starter maintenance, but if you want to use it, grab a few ideas! Discard is fantastic because it already has that slight tang and leavening power built in, even though it’s not peak strength.
I use mine primarily for things that don’t require a huge rise, like waffles or quick breads. If you’re looking for some super simple ideas for quick meals using that leftover culture, I’ve got you covered over on my lunch page. Making pancakes or crackers with your discard is the perfect way to start experimenting!
Why does my starter smell like stinky cheese or vinegar sometimes?
Don’t panic! If you smell something really sharp, acidic, or vinegary—sometimes even a bit like strong cheese—it just means your starter is hungry! That sharp smell is the byproduct of the bacteria eating all the available flour. This is a normal sign when you are first establishing your culture. The fix is almost always to either switch to feeding it twice a day or increase the amount of flour you feed it next time. You want it to be happy and sweet, not starving and sour!
Understanding the Science Behind Your Homemade Sourdough Culture
It’s amazing to think about what’s really going on inside that jar. When you make a sourdough starter from scratch, you aren’t just mixing flour and water; you are intentionally cultivating a small ecosystem! This whole process, which forms the basis of wild yeast baking guide and long fermentation baking process, is all about capturing the wild yeast and friendly bacteria naturally present in your environment, on the flour itself, and in the air.
Specifically, we are growing strains of yeast and lactobacilli—friendly bacteria. The yeast is what produces the gas that makes your bread rise, giving you that airy crumb. The bacteria, especially the lactic acid bacteria, produces lactic and acetic acids. Those acids are what give sourdough its wonderful complex flavor and protect the dough during that long fermentation process. That’s the magic! When you feed it consistently day by day, you are ensuring the good guys outcompete any less desirable microbes, leading you to a highly reliable and flavorful homemade sourdough culture ready for anything!
If you want to read more about my philosophy and the science I bring into my traditional recipes, feel free to check out my Terms of Use page for background, but mostly, just enjoy the wild ride!
PrintThe Ultimate Beginner’s Guide: How to Make and Maintain an Active Sourdough Starter from Scratch (7-Day Timeline)
Learn how to create your own active, bubbly sourdough starter from scratch using only flour and water. This guide provides simple, day-by-day instructions perfect for beginners to establish a reliable wild yeast culture for artisan bread making.
- Prep Time: 5 min
- Cook Time: 0 min
- Total Time: 7 days (active time is minimal)
- Yield: 1 active starter culture 1x
- Category: Baking Foundation
- Method: Wild Fermentation
- Cuisine: American Home Cooking
- Diet: Vegetarian
Ingredients
- 100g Whole Wheat or Rye Flour (for initial activation)
- 100g Unbleached All-Purpose Flour (for subsequent feedings)
- 100g Unchlorinated Water (room temperature)
Instructions
- Day 1: Mix 50g of whole wheat or rye flour with 50g of room temperature water in a clean jar. Stir until fully combined. Cover loosely and let it sit at room temperature (68-75°F) for 24 hours.
- Day 2: You may see small bubbles or nothing at all. Discard half of the mixture. Add 50g of all-purpose flour and 50g of water to the remaining starter. Mix well, cover loosely, and wait 24 hours.
- Day 3: You should see some activity. Discard half. Feed with 50g of all-purpose flour and 50g of water. Mix and wait 24 hours.
- Day 4: Discard half. Feed with 50g of all-purpose flour and 50g of water. If the starter smells strongly acidic, you may switch to feeding twice a day (every 12 hours).
- Day 5 & 6: Continue the discard and feed process every 12-24 hours, using 50g flour and 50g water. Look for consistent doubling in size within 4-8 hours after feeding. This shows you have an active bubbly starter.
- Day 7: Your sourdough starter should reliably double in volume a few hours after feeding and show many bubbles. It is now ready to use for baking with sourdough starter.
- Maintenance: To keep your homemade sourdough culture alive, feed it daily if kept at room temperature, or once a week if stored in the refrigerator. Always use the discard for recipes like sourdough discard pancakes.
Notes
- Use unchlorinated water, as chlorine can inhibit wild yeast growth.
- Maintain a consistent temperature between 70-75°F for faster activity during the initial week.
- If you see mold, discard the entire batch and start over. Gray or dark liquid (hooch) on top means your starter is hungry; pour it off or stir it in before feeding.
- This process creates a wild yeast baking guide foundation for no yeast bread making.
Nutrition
- Serving Size: 100g (Unfed)
- Calories: 250
- Sugar: 0.5
- Sodium: 1
- Fat: 0.5
- Saturated Fat: 0.1
- Unsaturated Fat: 0.4
- Trans Fat: 0
- Carbohydrates: 55
- Fiber: 3
- Protein: 8
- Cholesterol: 0