
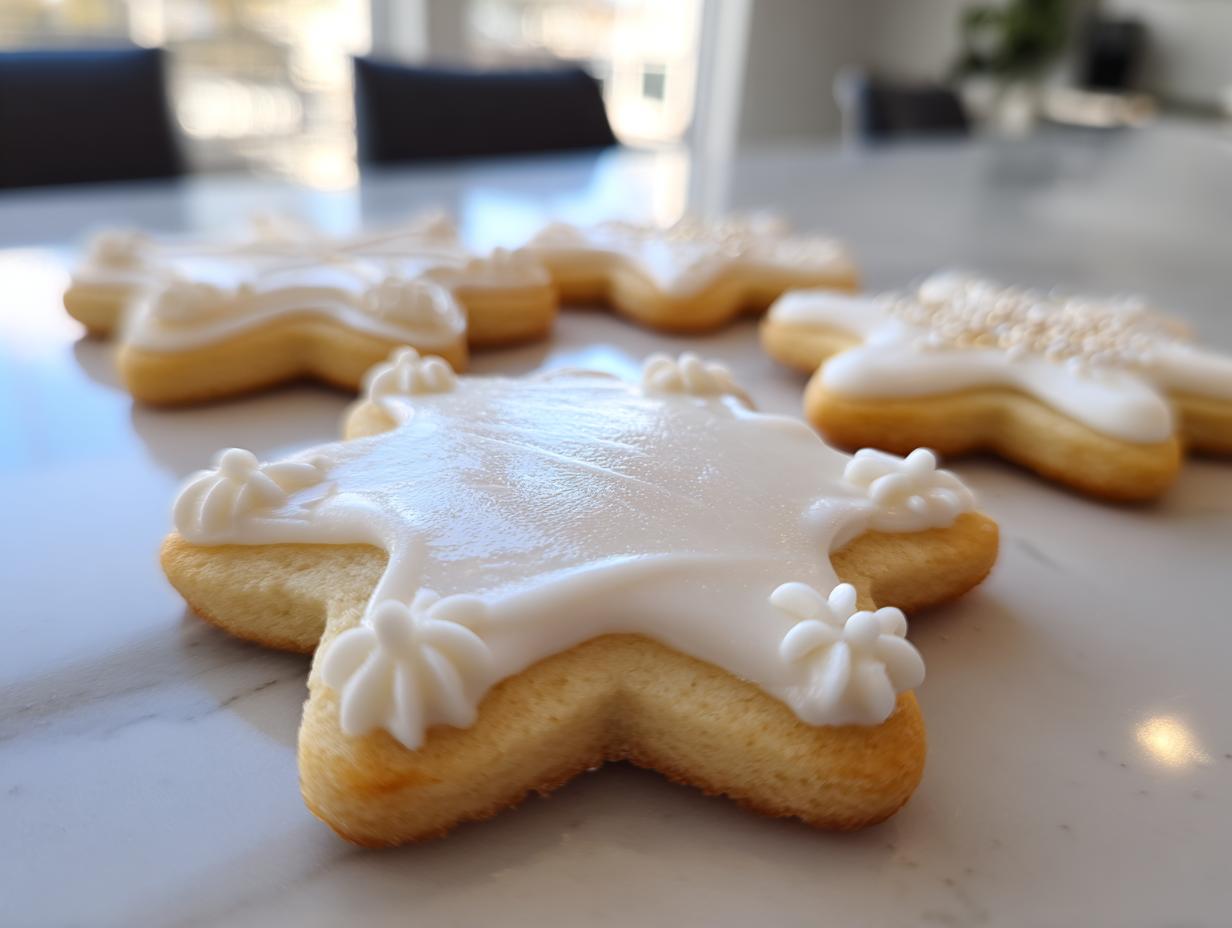
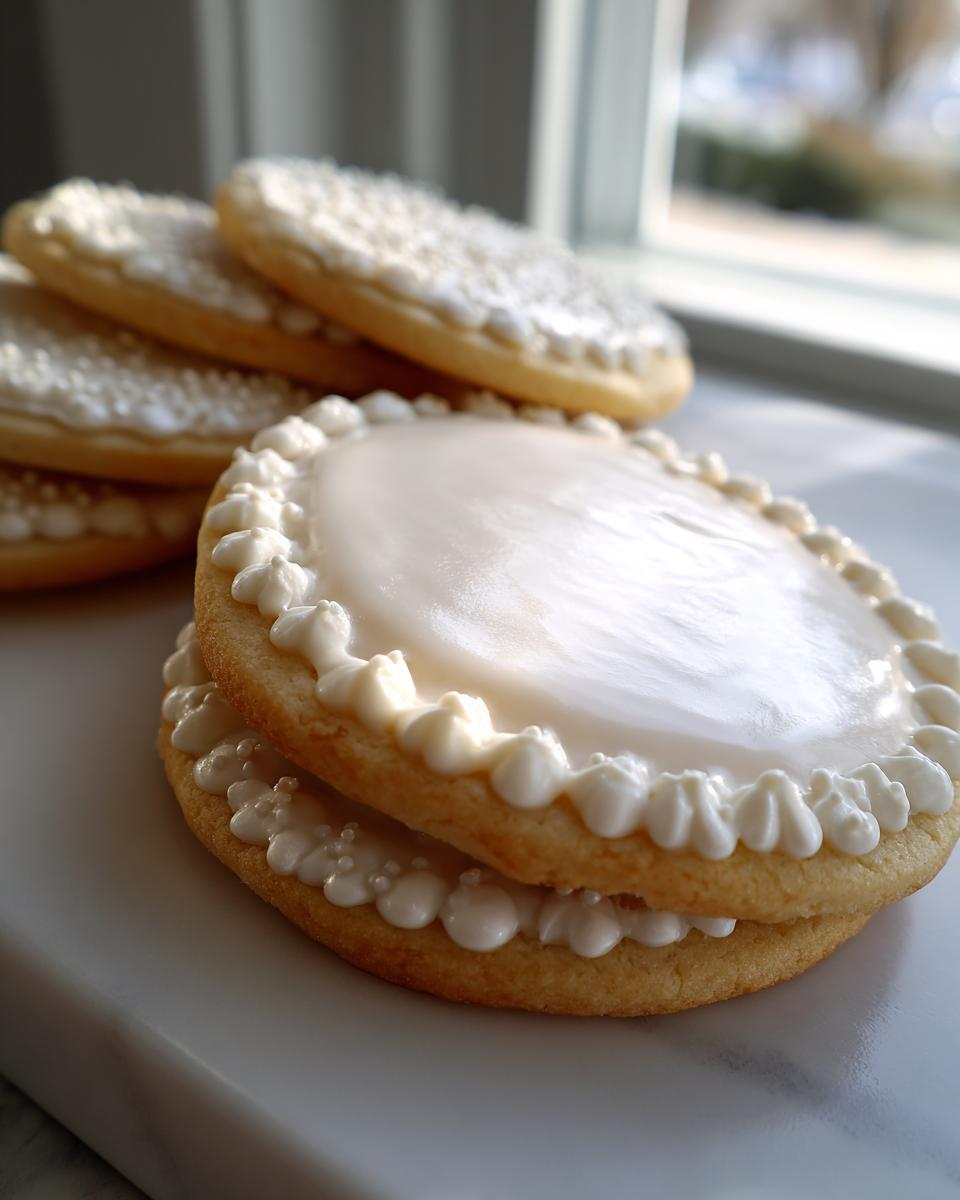
Oh, you know the panic—you’ve spent hours creating gorgeous cut-out sugar cookies, only for the cookie icing to stay soft, sticky, or totally absorb into the cookie surface. Trust me, I’ve been there, usually right before a big holiday drop-off! That’s why I developed what I call The Ultimate Sugar Cookie Icing That Hardens. This isn’t just some thin glaze; this is a rock-solid, smooth, and beautifully glossy royal icing.
As someone who blends my food science background with my family’s deep tradition of American baking, reliability is my absolute top priority. This recipe ensures your decorative work stays perfect, whether it’s going into a stack for gifting or sitting on a display platter. It’s just so dependable!
If you are looking for that bakery-style finish that sets up hard and won’t smudge, we’ve got you covered. You can see more about my approach to trustworthy home recipes over on my About Page.
- Why This Is The Best Sugar Cookie Icing Recipe For Decorating
- Ingredients for Your Hard Setting Cookie Icing Recipe
- How to Make Smooth Cookie Icing: Step-by-Step Royal Icing for Cookies Tutorial
- Tips for Success with Your Durable Cookie Topping Recipe
- Coloring and Detailing Your Cookie Icing
- Storage and Reheating Instructions for Leftover Cookie Icing
- Frequently Asked Questions About This Cookie Icing
- Estimated Nutritional Data for This Cookie Icing
- Share Your Beautiful Cookie Icing Creations
Why This Is The Best Sugar Cookie Icing Recipe For Decorating
Listen, when it comes to decorating sugar cookies, especially for gifts, you need a recipe that backs up its promises. This royal icing is my absolute go-to, the best sugar cookie icing recipe I teach because it never lets me down. It addresses the biggest problem everyone faces: soft frosting. This formula uses meringue powder which acts almost like a stabilizer, locking in that structure so your lines stay sharp and the whole thing dries hard.
I remember one truly chaotic Christmas Eve when my traditional glaze batch went totally soupy thanks to a damp day—disaster! But I whipped up this batch, and within hours, those cookies were stackable and perfect. It provides that incredibly smooth, professional look you want, making it the ultimate icing that hardens for cookies guaranteed.
If you want the cookies to survive the journey in a tin, you need this reliable structure underneath your designs. Check out the process for my Double Chocolate Peppermint Cookies—they use this same icing base!
Achieving That Perfect Hard, Glossy Cookie Icing Finish
The secret to that durable cookie topping that dries hard is truly the meringue powder. It introduces protein structures that create a firm, almost candy-like shell when dry. That’s what gives you that satisfying little crackle when you bite in! We aren’t just aiming for hard, though; we want shine. To get that lovely how to get shiny cookie icing result, make sure you are beating it long enough in the mixer to incorporate air, which lightens the color and boosts the gloss factor as it dries.
Ingredients for Your Hard Setting Cookie Icing Recipe
Alright, let’s get down to the nuts and bolts. Gathering these ingredients is really straightforward, but their quality matters in making this the best sugar cookie icing recipe. You absolutely have to start with sifted powdered sugar because that takes out any lumps before they become problems down the line.
We need three tablespoons of meringue powder to give us that structure that hardens beautifully. And here’s a little trick my mentor always taught me: add just a quarter teaspoon of cream of tartar. That little acid helps stabilize the mix—it keeps everything from weeping or getting grainy later on. Finally, we use cool water; not warm, not hot, just cool water, added slowly to bring it all together.
How to Make Smooth Cookie Icing: Step-by-Step Royal Icing for Cookies Tutorial
Getting this royal icing for cookies tutorial right means paying attention to two major mixing steps. Don’t just dump everything in and walk away! First, you combine the meringue powder, vanilla, and cream of tartar, then add the initial 6 tablespoons of cool water. Here’s where you need patience: you have to let that mixture sit for a full five minutes. This is the hydration step, and it’s critical so the meringue powder can fully bloom. If you skip that rest, your icing won’t be as smooth.
Next, slowly mix in all that sifted sugar, and then you beat it—really beat it! You need to run that mixer on medium-high for five to seven minutes. That long beating time is what builds the structure so it will eventually harden up nicely. We are actively trying to whip air into it to get that incredibly bright white color and that thick base for how to make smooth cookie icing that looks professional. I always feel like I’m mixing cake batter back in my family kitchen when I hit this stage!
Once it looks thick and holds sharp shapes when you lift the whisk, you can check the consistency. If you are making detailed borders, you want that stiff peak structure right out of the bowl. If you’re heading over to finish the cookies with a beautiful flood coat, you’ll need to thin it out a little more with water. For more general guidance, check out my recipe for homemade lasagna—it requires the same thoughtful layering!
Mastering Cookie Icing Consistency Guide: Piping vs. Flooding
This is where most beginners get tripped up, but once you get this piping consistency icing guide down, you’re set! For outlining your piped cookie borders, you need stiff peaks—it should just barely hold its shape when you pull the whisk out. For flooding the inside area, we use the classic 10-second rule. After you drizzle a bit of icing over the top of the bowl, wait ten seconds. If the trail that sinks back into the main bowl disappears in about ten seconds, it’s perfect for flooding. If it disappears instantly, it’s too thin and will run right off your cookie! Add a teaspoon of sugar and beat again if it’s too runny.
Tips for Success with Your Durable Cookie Topping Recipe
Even with the best recipe, sometimes things go a little sideways, right? Since I want everyone to feel confident using this durable cookie topping recipe, let’s talk quick fixes based on what I’ve learned over the years. My number one tip for that rock-hard finish? Honestly, just let the cookies dry completely uncovered at room temperature. Resist the urge to put them in a container too soon, even if they feel firm on top. They need that time to fully cure.
To keep that amazing shine while ensuring they set well, try to avoid over-beating the icing once you are happy with the smoothness; too much air incorporated late can sometimes mute the gloss later on. And if you notice your icing getting grainy—which usually means the sugar hasn’t fully dissolved—don’t panic! Just beat it for another minute or two, maybe adding a drop or two of water, and it usually smooths right out. Getting that perfect texture takes trust, but I promise this formula is worth the effort. I always save my extra tips when talking about my chewy chocolate chip cookies too!
Coloring and Detailing Your Cookie Icing
Once you have that perfect consistency—either piping thick or flood-ready thin—it’s time for the fun part! I have one very firm rule here: skip the standard liquid food coloring, please! If you add too much liquid dye, you’ll thin out your beautiful, hard-setting cookie icing, and you don’t want that, especially when you’re aiming for icing for detailed cookie decorating.
Always grab gel colors; they pack a massive color punch without adding unwanted wetness. When you color your batches, do it before you adjust for flooding. Start with a small amount of color in your piping consistency icing first. Then, use that thick batch for outlining all your cookies—giving that outline a good 15 to 30 minutes to set up firm enough to hold the liquid inside.
Once that border is dry enough to touch, you fill (flood) the center with your thinned icing. This two-step process is key to getting that smooth, glass-like surface! You can see how important layering and patience are discussed in my Cranberry Orange Cake notes as well.
Storage and Reheating Instructions for Leftover Cookie Icing
Now, what happens if you’ve made a huge batch of this amazing frosting and you’re all done decorating for the day? Don’t throw it out, because this stuff is too good! You need to store any unused royal icing right away in an airtight container. I mean, *really* airtight—think plastic wrap pressed directly onto the surface of the icing, then putting the lid on tight.
Here’s a little trick I use: I add just a tiny drop or two of very cold water right onto the surface of the icing before I seal it up. It keeps it from forming that hard crust on top overnight. If it feels a little stiff the next day, don’t worry! Just beat it on medium speed for a minute or two, and it usually comes right back to that perfect, workable consistency again. It’s so versatile!
Frequently Asked Questions About This Cookie Icing
I always get so many questions once people start practicing because decorating can feel a little tricky at first! Don’t worry if your first batch isn’t perfect; that’s just part of learning the process. Here are the questions I run into most often when folks are trying to get that beautiful, professional look for their holiday decorating.
How long does this cookie icing need to dry completely?
This is the big one! If you’re just glazing a simple cookie, you might feel it’s done in about 6 to 8 hours, but I always tell people to aim for at least 12 hours to be safe. If you plan on stacking or fitting your cookies into gift boxes, you absolutely need that full cure time—I push mine for a solid 24 hours. If it’s humid out, it definitely takes longer to set!
Can I use liquid food coloring in this hard setting icing for cookies?
Oh, please don’t! If you want that perfect, smooth, and hard setting icing for sugar cookies, you have to use gel food coloring. Liquid coloring is mostly water, and when you add enough of it to get deep colors, you are essentially turning your thick piping consistency into that runny mess we talked about earlier! Gel colors are highly concentrated, so you only need a tiny toothpick-tip to get vibrant color without messing up the consistency needed for it to dry hard.
What is the substitute for meringue powder in this cookie icing?
Meringue powder is my trusted friend because it’s pasteurized and so easy to measure, but I know not everyone keeps it on hand. If you need a substitute for this classic cookie icing recipe, you can use pasteurized egg whites. You’ll want about one large egg white for every three tablespoons of meringue powder called for in the recipe. Since we’re using eggs this way, please know that I rely on pasteurized ones for safety, given my background in nutrition science. You’ll still want to use that cream of tartar to help stabilize it!
If you try out this recipe and nail that beautiful, durable finish, please let me know in the comments below! I love seeing what you all create. Save this post so you have the recipe ready for your next big baking day, and check out my no-bake protein balls if you need a quick, no-fuss treat later!
Estimated Nutritional Data for This Cookie Icing
Now, I know some of you are interested in the numbers, and I always like to provide some insight thanks to my background in nutrition! Keep in mind these are just estimates for the icing itself based on my ratio, and obviously, the final count depends on exactly which brand of powdered sugar you use. You’ll find the general breakdown below for a serving size of about a quarter cup of prepared frosting.
We are looking at roughly 175 calories here, mostly coming from the sugar, with zero fat, which is great for a sweet decoration. If you want to see our full ingredient philosophy and policies, you can always peek at the Privacy Policy page. Happy decorating!
- Serving Size: 1/4 cup prepared icing
- Calories: 175
- Sugar: 43g
- Sodium: 35mg
- Fat: 0g
- Protein: 1g
- Carbohydrates: 44g
Share Your Beautiful Cookie Icing Creations
I truly hope this recipe gives you the confidence to create stunning, professional-looking cookies! Once you’ve finished your decorating, I’d be so grateful if you took a moment to rate this recipe down below—five stars if it hardened up perfectly for you! Tell me in the comments what you decorated; I love hearing success stories!
Don’t forget to save this essential post for your next batch of holiday cookie decorating icing needs. Seeing your beautiful, glossy finished products on social media makes my day! If you ever need to get in touch with questions, feel free to reach out through my Contact Page!
PrintThe Ultimate Sugar Cookie Icing That Hardens: Smooth, Glossy Royal Icing Recipe for Decorating

You need a reliable recipe for sugar cookie icing that hardens completely, giving your decorated cookies a smooth, glossy, and durable finish perfect for stacking and gifting. This guide shows you how to make professional-quality royal icing that sets beautifully.
- Prep Time: 15 min
- Cook Time: 0 min
- Total Time: 15 min
- Yield: Covers approximately 3 dozen standard cookies 1x
- Category: Baking
- Method: Mixing
- Cuisine: American
- Diet: Vegetarian
Ingredients
- 3 tablespoons Meringue Powder
- 1/2 teaspoon Vanilla Extract (or clear extract for pure white)
- 1/4 teaspoon Cream of Tartar
- 4 cups Powdered Sugar, sifted
- 6 to 8 tablespoons Water, cool
Instructions
- Combine the meringue powder, vanilla extract, and cream of tartar in the bowl of a stand mixer fitted with the whisk attachment.
- Add 6 tablespoons of cool water and mix on low speed until just combined. Let the mixture sit for 5 minutes to allow the meringue powder to fully hydrate.
- Add the sifted powdered sugar to the bowl. Start mixing on low speed until the sugar is incorporated, then increase the speed to medium-high.
- Beat the icing for 5 to 7 minutes until it is very thick, bright white, and holds stiff peaks. This develops the structure needed for hardening.
- Test the consistency. For piping details, the icing should be thick. For flooding, add water one teaspoon at a time until the icing flows slowly off the whisk and the trail sinks back into the bowl in about 10 seconds (this is the 10-second rule for flooding consistency).
- Divide the icing into bowls for coloring, if desired. Use gel food coloring for the best results without thinning the icing.
- Use the thick icing for outlining cookies. Let the outline dry for 15 to 30 minutes before filling (flooding) the center with the thinner consistency icing.
- Allow the decorated cookies to dry uncovered at room temperature for 6 to 12 hours, or until the icing is completely hard to the touch.
Notes
- To achieve a glossy finish, avoid over-beating once the icing is smooth. Adding a drop of clear vanilla extract helps maintain shine.
- If your icing is too thin for piping, add powdered sugar one tablespoon at a time until you reach piping consistency.
- If your icing becomes grainy, it means the powdered sugar was not fully dissolved. Beat the icing longer, or add a few drops of water and beat again.
- For the best results when stacking or gifting, allow the icing to dry for a full 24 hours in a dry environment.
Nutrition
- Serving Size: 1/4 cup prepared icing
- Calories: 175
- Sugar: 43g
- Sodium: 35mg
- Fat: 0g
- Saturated Fat: 0g
- Unsaturated Fat: 0g
- Trans Fat: 0g
- Carbohydrates: 44g
- Fiber: 0g
- Protein: 1g
- Cholesterol: 0mg