
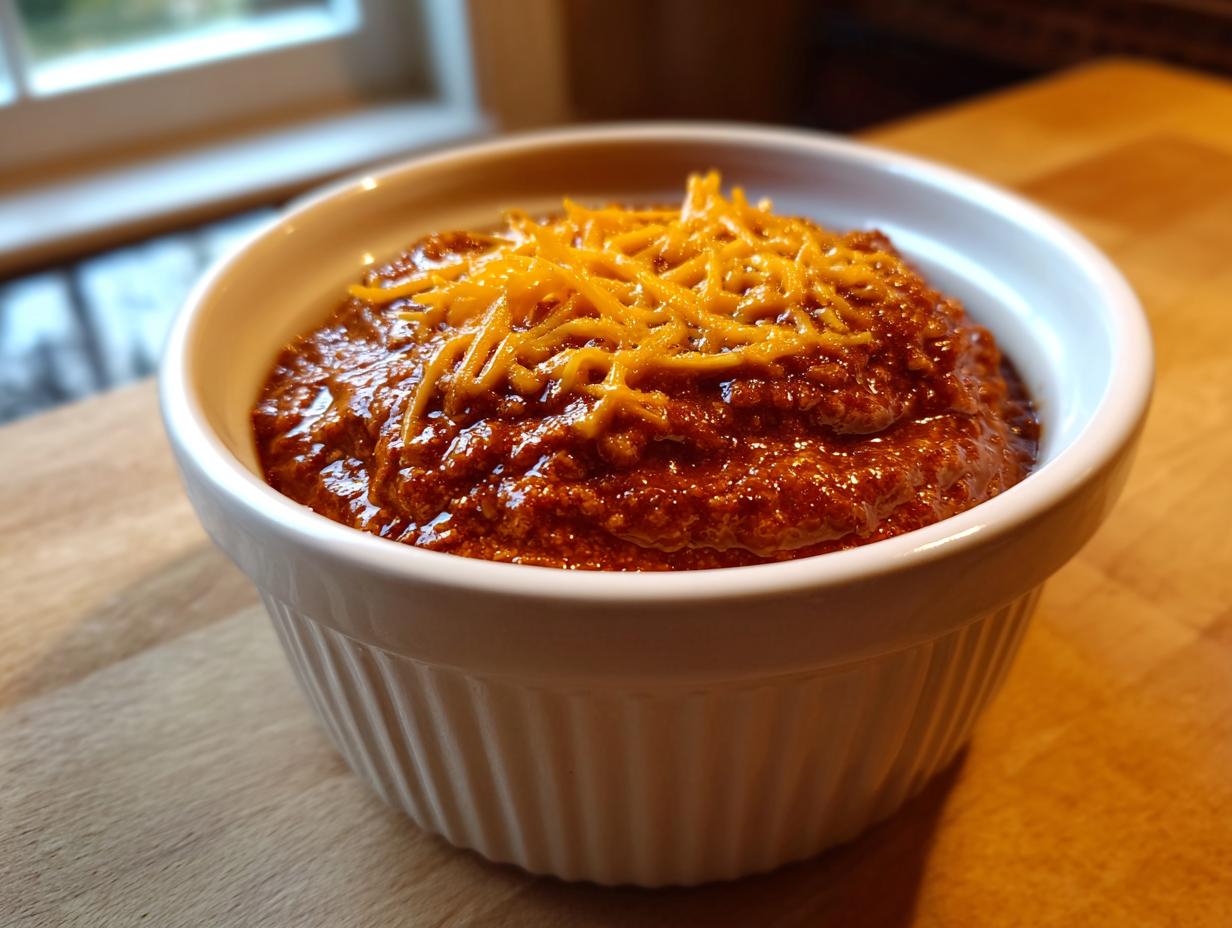
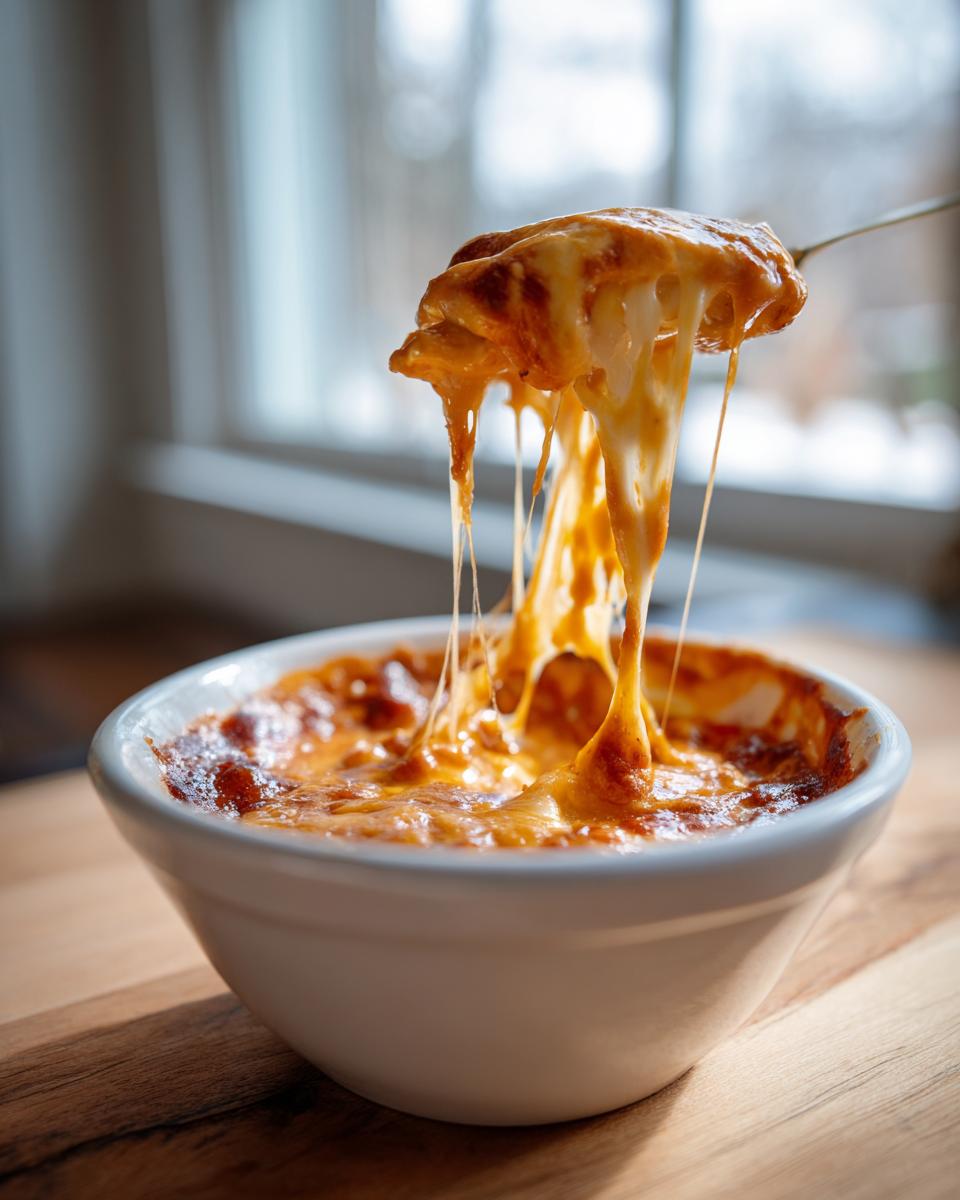
When you’re hosting a crowd, especially for the big game, the last thing you want to worry about is spending hours fussing over appetizers. Believe me, I’ve been there—we need food that appears magical but is secretly ridiculously easy. That’s why I’m sharing my absolute go-to for any party: The Easiest 3-Ingredient Chili Cheese Dip! We’re talking melt-in-your-mouth, warm, cheesy bliss ready in under 20 minutes. This isn’t some fussy, from-scratch recipe; this is the reliable, crowd-pleasing solution we all need when company shows up unexpectedly. It truly is the ultimate, simple chili cheese dip.
- Why This 3-Ingredient Chili Cheese Dip is Your New Game Day Favorite
- Gathering Ingredients for Your Easy Chili Cheese Dip
- How to Make the Ultimate Chili Cheese Dip Stovetop
- Alternative Cooking Method: Slow Cooker Chili Dip
- Serving Suggestions for Your Crowd Pleaser Dip
- Storage and Reheating Instructions for Leftover Dip
- Troubleshooting Common Issues with Hot Cheese Dip
- Frequently Asked Questions About This Chili Cheese Dip
- Nutritional Estimates for Your Appetizer in Under 30 Minutes
Why This 3-Ingredient Chili Cheese Dip is Your New Game Day Favorite
When I need a guaranteed hit for game day, I’m not messing around with complicated layering or fancy spices. This three-ingredient recipe is my secret weapon for stress-free entertaining. It’s what I turn to when I need quick easy weeknight dinners disguised as party food. It always disappears first!
- It’s ridiculously fast—we’re talking 20 minutes start to finish.
- Only three key players, meaning cleanup is an absolute breeze.
- It hits all the comfort food notes: warm, melty, and deeply savory. It’s one of the best Quick Cheesy Dips out there.
- These Simple Party Snacks require zero culinary skill, I promise!
Speed and Simplicity: The Ultimate Party Appetizer
Honestly, 20 minutes is barely enough time to get the chips out! The magic here, and why this homemade chili cheese dip is so fast, is relying on excellent quality canned chili. You don’t need to simmer meat for hours; just combine, melt, and serve hot. That’s the whole secret to making this a true party superstar.
Gathering Ingredients for Your Easy Chili Cheese Dip
The beauty of this recipe is right there in the title: it’s a 3 Ingredient Dip! Seriously, finding something this delicious with only three core components feels like cheating, but trust me, it works every single time. We are relying on two pantry staples and one powerhouse ingredient to make this perfect chili cheese dip.
Here is exactly what you’ll need. My one non-negotiable rule? Make sure that cream cheese is really, truly softened up before you start. Cold cream cheese means lumps, and we are aiming for smooth, velvety bliss here, just like you’d get with my easy homemade garlic butter recipe.
Ingredient Notes and Substitutions for Your Cream Cheese Chili Dip
Let’s talk specifics before you run to the store. For the chili, I always recommend going for the kind without beans; they just change the texture of this creamy Chili and Cheese Appetizer too much. If you love beef flavor, grab the meat version!
Now for the cheese. While I use sharp cheddar because I like that little tangy bite, if you prefer a super stretchy, mild pull, grab some Monterey Jack or even Colby Jack. That will guarantee you get that gorgeous, Melty Cheese Dip finish we are famous for.
How to Make the Ultimate Chili Cheese Dip Stovetop
Okay, time for the easy part! Since we aren’t using a slow cooker, we get to watch the magic happen right on the stove in about 15 minutes. This is where we transform simple cans into an instant classic. Remember, we are aiming for this famous chili cheese dip to be perfectly smooth, not grainy or chunky.
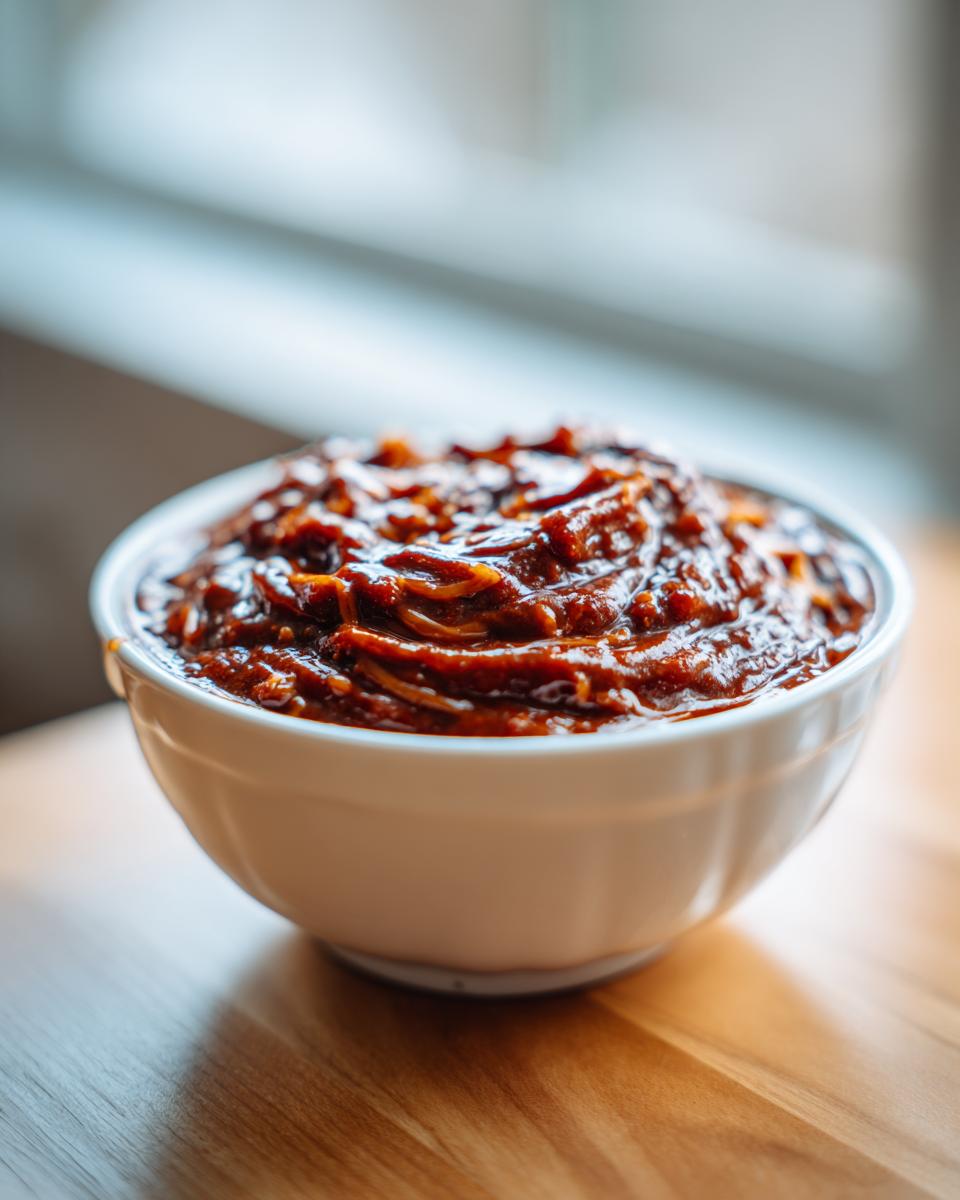
First up, grab your saucepan—medium size is perfect for this batch. Dump in your entire can of chili and all that luscious, softened cream cheese. Get in there and stir it up good until the cream cheese ribbons are nearly gone. It’ll look a little messy at first, but keep stirring until it starts turning into one unified, lovely reddish-orange base.
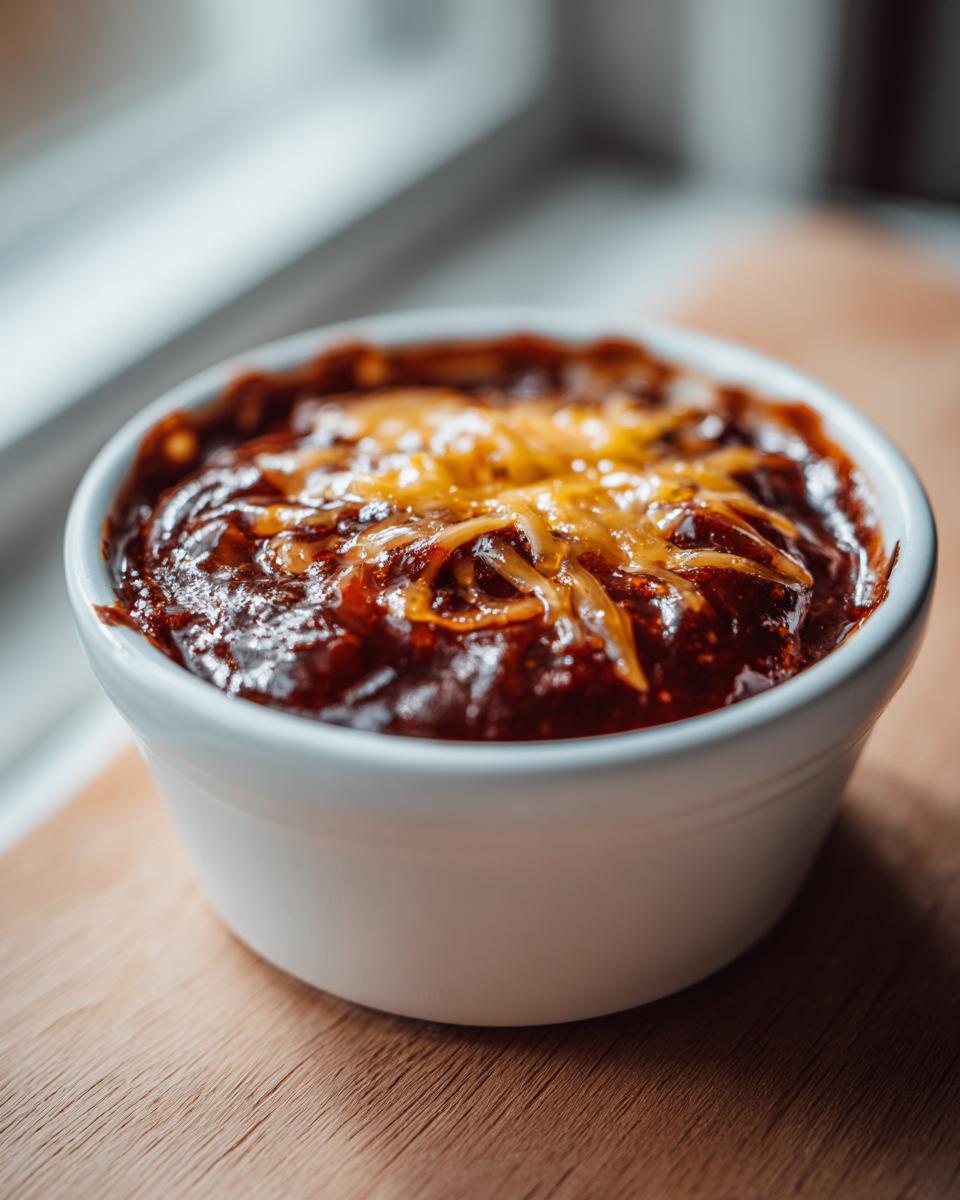
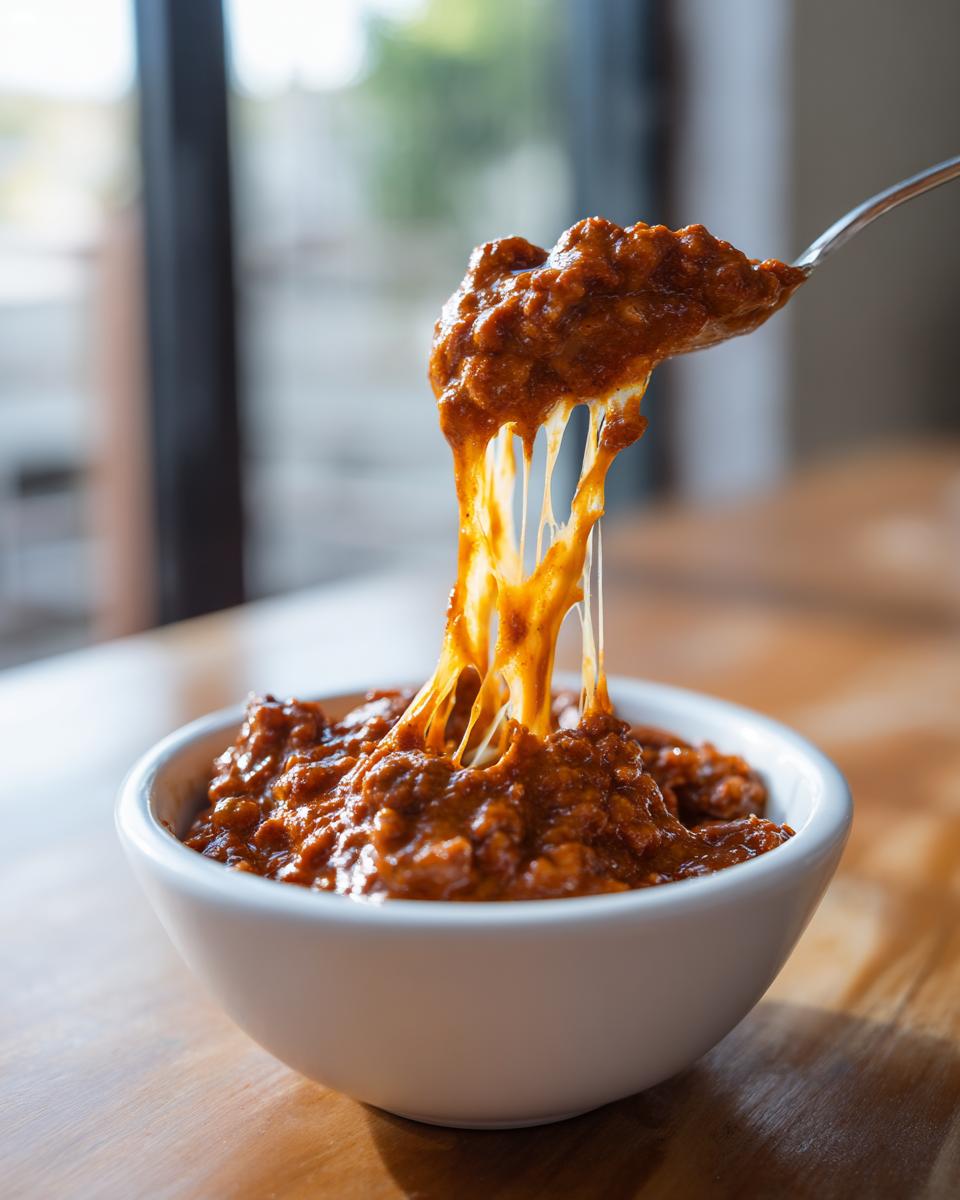
Next, this is crucial: turn the heat down to medium-low. Seriously, don’t crank it up! We need gentle heat here. Keep stirring constantly until that cream cheese is totally incorporated and the whole thing is smooth and hot. Once it’s nice and warm, toss in your cup of shredded cheddar. Stir that in until it melts completely and you have that amazing, bubbling texture. You’re basically done here—just transfer it to a serving dish and get those dippers ready!
Stovetop Tips for a Perfectly Smooth Chili Cheese Dip
I’ve learned this the hard way! The first time I ever tried to rush this Hot Cheese Dip, I got distracted by the commercials, and the bottom layer burnt onto the pan instantly. It’s a nightmare to clean, and the scorched flavor ruins the whole batch. Never, ever let this dip boil!
Boiling the mixture changes the texture of the dairy in the cream cheese and the chili stabilizers. If you boil it, you risk the whole thing separating into oily fat and chunky bits. Keep it low, keep it slow, and keep that spoon moving, especially around the edges of the pan. If you follow that one rule, your stovetop chili cheese dip will be restaurant-quality smooth. You can pair this dip with even my best garlic bread dip recipe ideas if you’re serving it with bread instead of chips!
Alternative Cooking Method: Slow Cooker Chili Dip
Now, if you’re prepping for a long tailgate or you just want this dip ready when you walk in the door after work, the slow cooker is your best friend. Seriously, using the crockpot makes this the easiest possible version of a chili cheese dip you can imagine. It’s fantastic for potlucks because you can keep it piping hot for hours without worrying about scorching the bottom.
The process is almost laughably simple. You just need a small slow cooker—I use a 1.5-quart one, which is the perfect size for this recipe. Dump in your can of chili and that softened cream cheese. Give it a quick stir just to combine the big chunks.
Set that slow cooker to LOW, and let it do its thing for about an hour. After that first hour, give it a real good stir. You’ll notice the cream cheese has melted beautifully into the chili. When it looks nice and creamy, stir in your shredded cheddar until it vanishes into the bubbling mass. That’s it! You’re done! This makes for the ultimate Slow Cooker Chili Dip.
Keep it on the ‘Keep Warm’ setting until everyone dives in. This method is great because you can easily double the batch too if you have a huge crowd coming over for the Super Bowl. Enjoy that warm, melty goodness!
Serving Suggestions for Your Crowd Pleaser Dip
Now that you have this glorious, steaming pot of chili cheese dip, the only task left is figuring out what to scoop it up with! This dip is so rich and satisfying that it deserves the perfect vehicle. I always try to offer a variety because everyone dips a little differently at my parties.
For the classic experience—the one where the bowl disappears in ten minutes—you absolutely have to have tortilla chips. I grab the thicker, restaurant-style ones because they can handle the weight of this hearty dip without immediately snapping off mid-scoop. Nobody wants a chip graveyard at the bottom of their bowl!
But we also need options for those folks who want something less carb-heavy, or maybe they are just tired of chips! These Dip Recipes for Gatherings shine with a few different textures. I find crackers work wonderfully, especially sturdy butter crackers or pretzels. They give a nice salty crunch that plays perfectly against the creamy chili.
If you’re wanting to balance out all that cheesy goodness, try offering some fresh veggies. Bell pepper strips, celery sticks, and even thick slices of cucumber are surprisingly good dippers. It makes me feel a little better knowing there’s something green happening on the platter! If you’re looking for something deep-fried alongside this, I highly recommend whipping up a batch of my fried pickles to go with it—it’s classic comfort food overload!
Storage and Reheating Instructions for Leftover Dip
It’s a rare event, but sometimes, just sometimes, there are leftovers of this amazing chili cheese dip. If you manage to keep any aside—which I sometimes intentionally make a double batch to ensure this happens—you’ll be happy to know storage is simple!
First things first: get it into an airtight container as soon as it cools down a bit. Remember, this is a dairy-heavy dip, so treating it right will keep it safe and tasty. You need to aim to get this stored in the refrigerator within two hours of the party ending. Properly covered, this dip holds up beautifully in the fridge for about three days. Three days of easy snacking? Yes, please!
When you’re ready for round two, you have two main options for reheating. The stovetop is my preferred method because you have the most control over the temperature. Scrape the leftover dip into your saucepan. You’ll likely notice it’s gotten significantly thicker—that’s normal as the cheese solidifies.
To bring it back to life, set the heat to low, just like we did originally. Here is my real secret: add a tiny splash of liquid while you stir. I mean maybe a tablespoon total! A little milk or even just water works perfectly to loosen everything up and re-emulsify that cheese and chili mixture. Stir constantly over low heat until it’s hot and velvety smooth again. Do NOT let it bubble or boil, or you’ll have to start again!
If you are in a total rush—say, you forgot you packed some away and now you need a quick snack—the microwave works fine. Scoop the amount you want into a microwave-safe bowl, add that secret splash of liquid we just talked about, and microwave in 30-second bursts, stirring vigorously between each burst. It heats up fast, but stirring is key so you don’t end up with a super-hot ring around a cold center. Enjoy those second-day flavors; sometimes, this chili cheese dip tastes even better the next day!
Troubleshooting Common Issues with Hot Cheese Dip
Even the easiest recipes, like our famous three-ingredient chili cheese dip, can sometimes run into little snags. Maybe you stepped away for too long, or maybe your pan runs hotter than mine, but don’t panic! Dealing with these small hiccups is just part of cooking, and knowing the quick fix makes you feel like a total kitchen pro. This is where having that reliable knowledge kicks in, just like when I’m walking someone through my creamy chicken alfredo recipe.
Let’s tackle the two most common things that go wrong with any stovetop Hot Cheese Dip.
What if my dip gets too thick while warming up?
This happens all the time, especially if you’re keeping it warm on the counter or if you refrigerated leftovers. All that wonderful cheese and thickening agent from the chili decide to get cozy and stiffen up. It turns into something you might call dip, but I’d call a very thick paste!
The fix here is simple aeration and gentle hydration. You’re going to need a splash of liquid. Remember that little bit of moisture we use when reheating? That’s what you need now! Grab a tablespoon of milk, water, or even a tiny splash of broth if you have some nearby. Put the dip back on the absolute lowest heat possible—we are talking ‘barely warm’ here.
Incorporate that liquid one teaspoon at a time, stirring gently but constantly. You’ll see it slowly release its thickness and become that perfect, scoopable texture again. Don’t rush this part; if you dump in too much liquid, you’ll end up with a runny mess, and that’s just as bad as one that’s too stiff!
Why did my chili cheese dip separate and look oily?
Ugh, the dreaded oil slick! This almost always means the temperature got too high, usually boiling, which causes the fat in the cheese and the cream cheese to separate from the solids. It’s disappointing, but it’s fixable about 90% of the time, so don’t throw it out!
First, immediately remove the pan from the heat source completely. We need to calm things down. Now, get a whisk out—yes, a whisk! Take a small spoonful of the oil/separated liquid from the top and put it into a separate small bowl. Whisk that separated liquid vigorously until it looks totally smooth and creamy again (it won’t look oily anymore). Then, slowly drizzle that reformed liquid back into the main pot of dip while whisking everything continuously.
If that doesn’t quite bring it back together, sometimes adding just one teaspoon of cornstarch mixed with a teaspoon of cold water (a slurry) into the lukewarm mixture and stirring over *very* low heat will help re-emulsify the fats and bring your rich chili cheese dip back to its beautiful, uniform state. Gentle heating and vigorous whisking are your friends when this happens!
Frequently Asked Questions About This Chili Cheese Dip
I get so many lovely messages after parties when people try this dip out, and usually, those messages turn into great questions! Since this recipe is supposed to be super easy, I want to make sure you have all the intel you need to feel totally confident serving up this incredible chili cheese dip. Here are a few things folks ask me all the time about this ultimate comfort snack!
Can I use vegetarian chili in this 3 Ingredient Dip?
Oh, absolutely you can! I completely understand wanting to make variations for everyone attending your gathering. If you swap the traditional meat chili for a good, hearty vegetarian chili, you’ll still get a fantastic result. Keep in mind that the texture will be slightly different because there won’t be any ground beef bits providing bulk, but it will still be wonderfully creamy thanks to that cream cheese base. It’s a delicious switch that keeps this a perfectly cozy 3 Ingredient Dip.
What makes this the best Game Day Dip Recipe?
For me, the title of “Best Game Day Dip Recipe” has to be earned through speed and reliability, and this one hits both marks perfectly. Honestly, it’s the time commitment—or lack thereof! Knowing I can pull this together in under 20 minutes means I can focus on cheering (or stressing!) about the game instead of being stuck stirring on the stovetop forever. Being a Crowd Pleaser Dip that uses only three ingredients? That’s a win in my book, every single time.
What is the best canned chili to use for this simple appetizer?
This is a fantastic question! Since canned chili is the backbone of this whole operation, the brand really matters for flavor profile. I always recommend using a well-known brand like Hormel, and I strongly lean towards their basic chili *without* beans, as I mentioned earlier. Beans absorb too much of that creamy texture and can make the dip feel grainy rather than smooth. If you can only find chili with beans, go ahead and use it—it’s still good!<—but for the absolute silkiest finish, skip the beans!
Can I make this dip ahead for a party?
You can definitely make this dip ahead! It’s one of the reasons it’s such a great Appetizer in Under 30 Minutes solution—you prep it early, and then just gently warm it when the guests arrive. Follow the stovetop method, but instead of serving, put the finished dip into an airtight container and refrigerate. The next day, you’ll want to reheat it slowly on the stove, as I described in the storage section. It comes back to life beautifully!
Nutritional Estimates for Your Appetizer in Under 30 Minutes
Let’s quickly chat about the numbers, just in case you needed to know! Because this incredible chili cheese dip uses pantry staples like canned chili and cream cheese, the sodium content is naturally a bit higher—that’s just something to be aware of when you’re making any Hot Cheese Dip.
The estimates below are based on dividing the entire recipe into six equal servings, just as noted in the recipe card. Please remember, these are just ballpark figures! The exact values will definitely shift based on the specific can of chili you grabbed off the shelf or whether you used a sharp vs. mild cheddar. But hey, for a game day snack this satisfying, it’s totally worth keeping the tracking light!
- Serving Size: 1/6 of recipe
- Calories: Approximately 320 per serving
- Total Fat: 24g (14g Saturated)
- Carbohydrates: 12g
- Protein: 16g
- Sodium: 750mg (Yes, that’s the high number I mentioned!)
- Sugar: 6g
- Cholesterol: 65mg
My focus is always on flavor and ease, but I always want you to have the full picture before you dive into this ultimate Crowd Pleaser Dip. Enjoy every single cheesy, savory bite!
PrintThe Easiest 3-Ingredient Chili Cheese Dip (Ready in 20 Minutes for Game Day)

Make this simple, crowd-pleasing chili cheese dip using only three ingredients. It is warm, cheesy, and perfect for game day parties or quick snacks, ready in under 20 minutes.
- Prep Time: 5 min
- Cook Time: 15 min
- Total Time: 20 min
- Yield: 6 servings 1x
- Category: Appetizer
- Method: Stovetop
- Cuisine: American
- Diet: Vegetarian
Ingredients
- 1 (15 ounce) can of chili (no beans recommended, like Hormel)
- 1 (8 ounce) package of cream cheese, softened
- 1 cup shredded cheddar cheese (or your favorite melting cheese)
Instructions
- Combine the chili and the softened cream cheese in a medium saucepan.
- Heat the mixture over medium-low heat, stirring constantly until the cream cheese is fully melted and the dip is smooth and combined. Do not let it boil.
- Stir in the shredded cheddar cheese until it is completely melted and the dip is hot and bubbly.
- Transfer the dip to a serving bowl. Serve immediately with tortilla chips or crackers for your game day gathering.
Notes
- For a slow cooker method, combine all ingredients in a small slow cooker and cook on LOW for 1 to 2 hours, stirring occasionally until smooth and hot.
- If you prefer a spicier dip, use a spicy variety of canned chili or add a dash of hot sauce during the final stirring stage.
- This dip is best served warm. If you need to keep it warm for a party, transfer it to a small slow cooker set to the ‘Keep Warm’ setting.
Nutrition
- Serving Size: 1/6 of recipe
- Calories: 320
- Sugar: 6
- Sodium: 750
- Fat: 24
- Saturated Fat: 14
- Unsaturated Fat: 10
- Trans Fat: 1
- Carbohydrates: 12
- Fiber: 2
- Protein: 16
- Cholesterol: 65