
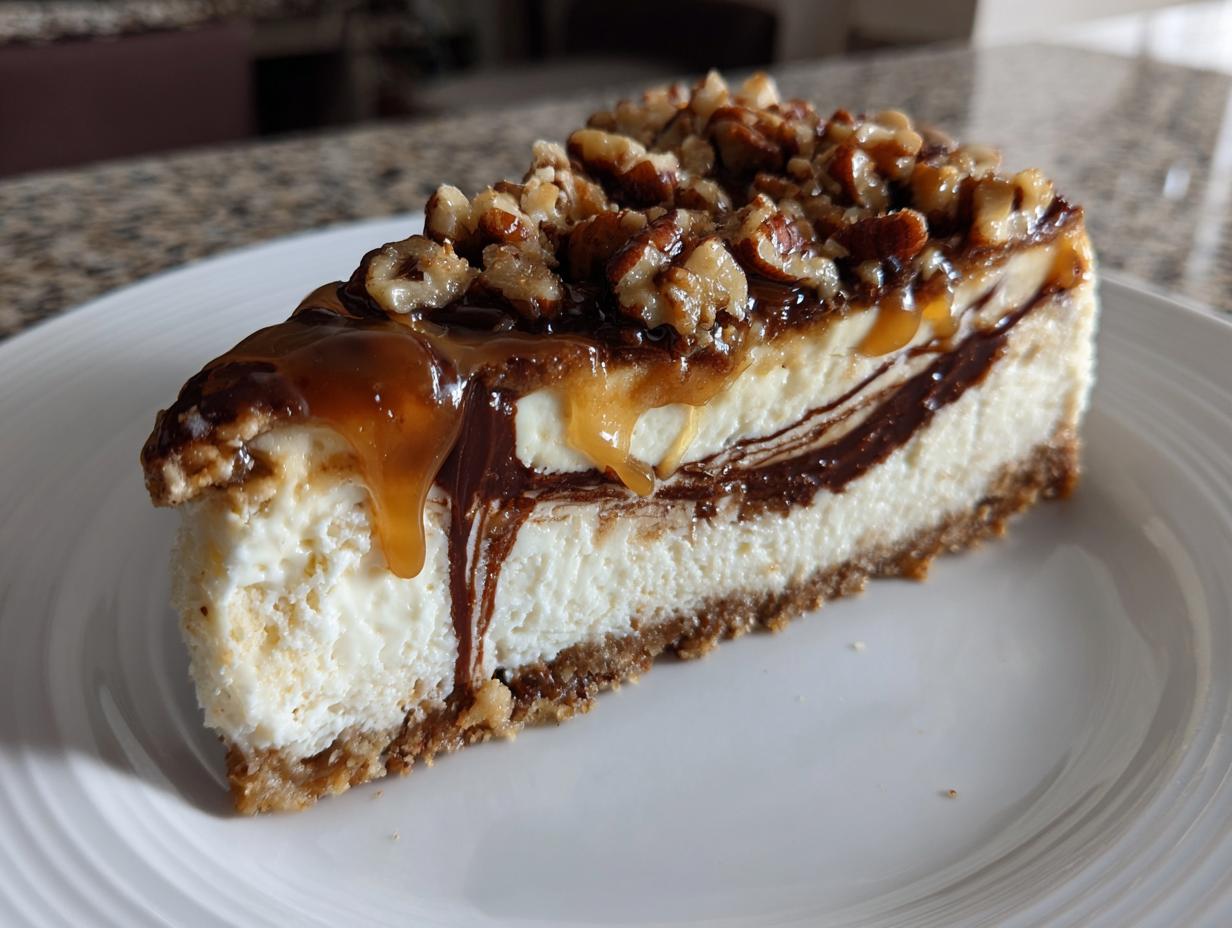
Oh, hello there! If you, like me, believe that some moments in life call for something truly over-the-top—something unapologetically rich—then you are in exactly the right place. Forget simple weeknight fare for a minute, because today we are tackling the ultimate showstopper dessert: the incredible, unbelievable turtle cheesecake. This isn’t just a dessert; it’s a celebration on a platter! Back in my family’s kitchen, we prided ourselves on making treats that felt special, and this one carries that spirit forward. We’re blending creamy texture, dark chocolate, gooey salted caramel, and crunchy pecans into one spectacular bite.
Making an utterly decadent cheesecake like this might sound scary, but trust me, Jess Carter is going to walk you through every single step. It’s about honoring those traditional American cooking techniques while making sure you don’t spend three days cleaning up! We are going after bakery quality with totally approachable steps. Once you pull this beauty out of the oven, you’ll be ready to show it off at any holiday gathering. You can’t let a treat this good stay secret, so check out all the amazing delicious dessert recipes we have, and let’s get baking!
- Why This Decadent Turtle Cheesecake Recipe Works
- Gathering Ingredients for Your Turtle Cheesecake
- Step-by-Step Instructions for Homemade Turtle Dessert
- Mastering the Pecan Cheesecake Topping and Finishing Touches
- Ingredient Notes and Substitutions for Your Turtle Cheesecake
- Serving Suggestions for This Rich Chocolate Caramel Pecan Dessert
- Storage and Reheating Instructions for Leftover Turtle Cheesecake
- Frequently Asked Questions About Making Turtle Cheesecake
- Sharing Your Ultimate Turtle Dessert Experience
Why This Decadent Turtle Cheesecake Recipe Works
When you’re aiming for a true showstopper, you need reliability. This turtle cheesecake recipe isn’t just tasty; it’s built on solid baking fundamentals that ensure you get that picture-perfect result every single time. We’ve cracked the code on what makes a cheesecake truly decadent and, more importantly, how to keep it smooth as silk.
- It delivers that deep, satisfying chocolate, salt, and caramel punch!
- It guarantees a rich, dense, yet unbelievably creamy cheesecake interior.
- It walks you through the necessary steps for a beautiful, crack-free presentation.
Achieving the Ultimate Creamy Cheesecake Texture
Listen, if your cream cheese is cold from the fridge, you’re already setting yourself up for lumps. Really and truly, the biggest factor for a smooth texture is letting your cream cheese and those four large eggs sit out until they are completely at room temperature. Then, when you’re mixing, be gentle! As soon as those eggs are incorporated, stop the mixer. Overmixing whips too much air in, and that air expands too fast in the oven, which is the number one cause of weeping and cracking later on. Slow and steady wins this race!
The Secret to a No Crack Cheesecake Finish
Here’s where we pull out the big guns to ensure your turtle cheesecake is gorgeously smooth: the water bath. I know, I know, wrapping that springform pan in heavy-duty foil feels like an extra chore, but it’s worth it. The hot water surrounding the pan acts like a gentle, humid oven. It regulates the temperature so drastically and keeps the cheesecake from drying out at the edges. Because the heat transfer is so even, we get that beautiful, utterly **no crack cheesecake** finish you see in all the fancy bakeries.
Gathering Ingredients for Your Turtle Cheesecake
Okay, now that we know *how* to keep this beauty creamy, we need to talk about the cast of characters. Getting the right stuff makes all the difference in this turtle cheesecake recipe. Remember what I always say about room temperature? It applies doubly here for the cheese and eggs, so make sure you plan ahead! We’re using full-fat cream cheese—don’t even think about low-fat if you want that rich flavor we are after. Everything else comes together beautifully to create that classic *chocolate caramel pecan dessert* flavor profile.
Before you start mixing, take a peek at this list. Having everything measured and sitting out at room temperature will make the process so much smoother for you. It’s like prepping for battle, except your enemy is lumps!
Ingredient Clarity: Crust and Filling Components
You’ll need 1½ cups of graham cracker crumbs for the base, mixed with 6 tablespoons of melted butter and a quarter cup of sugar to hold it all tight. For the filling, remember we need three full 8-ounce packages of full-fat cream cheese, all softened up nice! Then we need 1½ cups of sugar, a teaspoon of vanilla, and just a pinch of salt to balance the sweetness. We’re using four large eggs—room temperature, remember?—and a half-cup of heavy cream to make it luxurious.
The “turtle” part comes next! Make sure you have your caramel ready to go—we’re using a full cup of salted caramel sauce, divided, because we need some for swirling and some for drizzling later. Chop up a cup of raw pecans; you’ll want to toast those beauties up separately before they go on top. Don’t forget the melted semi-sweet chocolate chips for that gorgeous contrast swirl. If you’ve got everything prepped according to this list, you’re halfway to making the best cheesecake recipe!
Step-by-Step Instructions for Homemade Turtle Dessert
Alright, it’s time to put all that planning to work! We’re moving fast now, so make sure those ingredients are ready. The process flows smoothly if we stick to the sequence. We want that perfect base, a silky-smooth batter, and then we treat that batter gently so it bakes up like the **showstopper dessert** it’s meant to be. Don’t rush the cooling, though—that’s the trickiest part!
Preparing the Crust and Setting Up the Water Bath
First things first: get that oven preheated to 325°F. Before you even start crumbling crackers, you need to secure your 9-inch springform pan. Grab some heavy-duty foil—the standard stuff tears too easily—and wrap the outside of the pan absolutely tightly. Serious advice: use two or three layers! This foil is our shield against the water bath leaking in and ruining our graham cracker crumbs. Once wrapped, press your crumb mixture firmly into the bottom, bake it for ten minutes, and then let it cool down while you tackle the filling.
Mixing the Creamy Cheesecake Filling Correctly
This is where patience really matters for that creamy cheesecake texture. Beat your room-temperature cream cheese until it’s totally smooth—no chunks allowed! Then slowly add the 1½ cups of sugar, the vanilla, and the salt. Scrape down the sides of the bowl often! Next, mix in the heavy cream gently. Now for the eggs: add them ONE at a time, mixing only until you see that they’ve just disappeared into the batter. Seriously, the second it’s incorporated, stop mixing! We are deliberately keeping the air bubbles out.
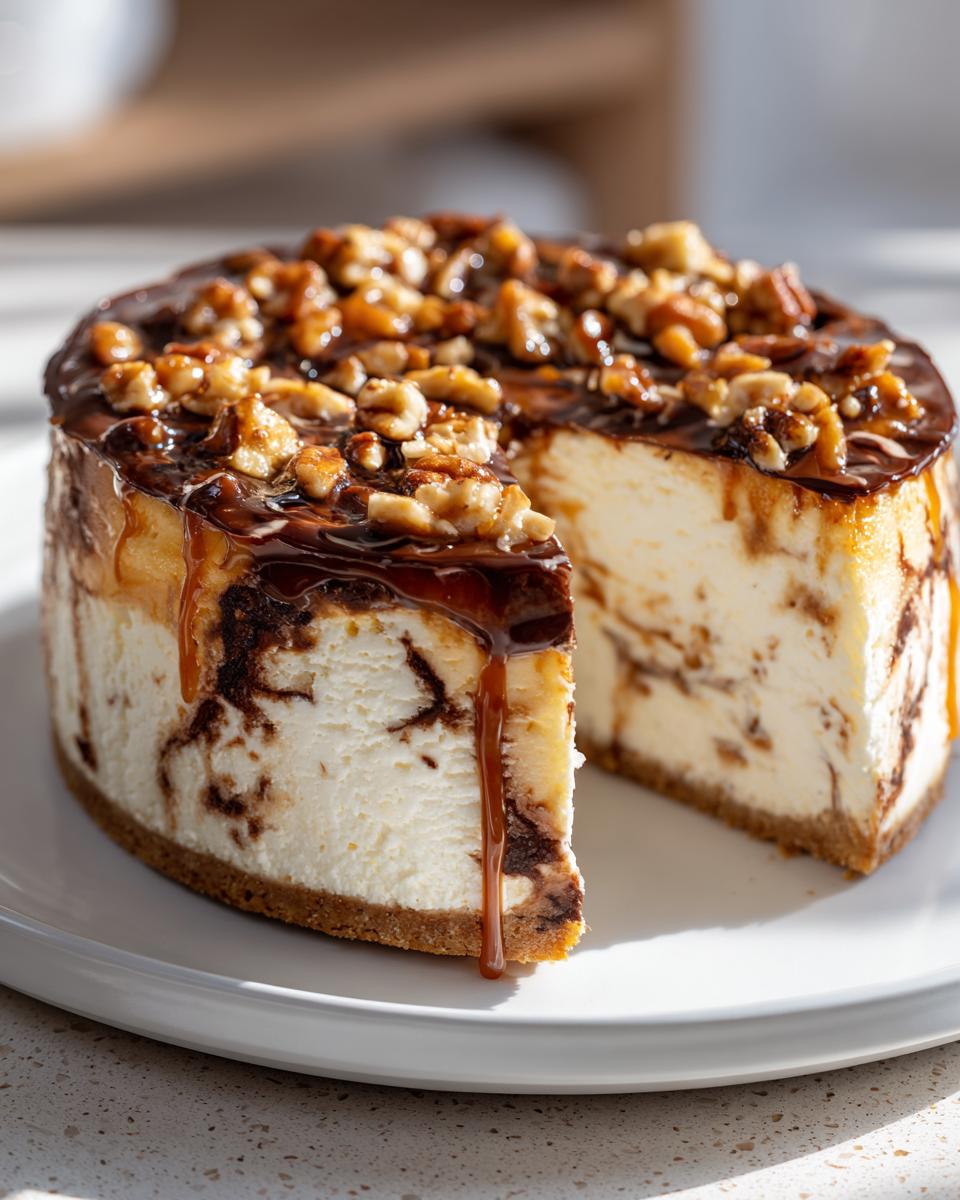
Swirling Chocolate and Caramel into the Turtle Cheesecake
Pour about two-thirds of that beautiful batter over your cooled crust. Now, take half of your melted chocolate chips and half of your salted caramel sauce, and drop them randomly over the top of that first layer of batter. Use a knife or a skewer—just a gentle figure-eight motion is perfect for a nice swirl. You aren’t trying to combine them; you’re just creating veins of flavor! Repeat this process with the remaining batter, chocolate, and caramel on top. Those beautiful ribbons are what make this a true turtle cheesecake!
Baking and Slow Cooling the Showstopper Dessert
Carefully place your foil-wrapped pan into a larger roasting pan. Now, pour hot water into the roasting pan until it comes about halfway up the side of your springform. That water bath insulation is vital for our baking guide success! Bake it for about 60 to 75 minutes. When the edges are set but the center still jiggles a bit, it’s done! Turn the oven off, prop the door open just a crack, and let it hang out in that warm environment for a full hour. This slow transition is what guarantees that perfect, flat top for your **showstopper dessert**. After that hour, take it out, remove the foil and water bath, and let it fully cool on the rack before chilling.
For more helpful techniques on creating amazing texture, check out this guide on baking perfect cheesecakes!
Mastering the Pecan Cheesecake Topping and Finishing Touches
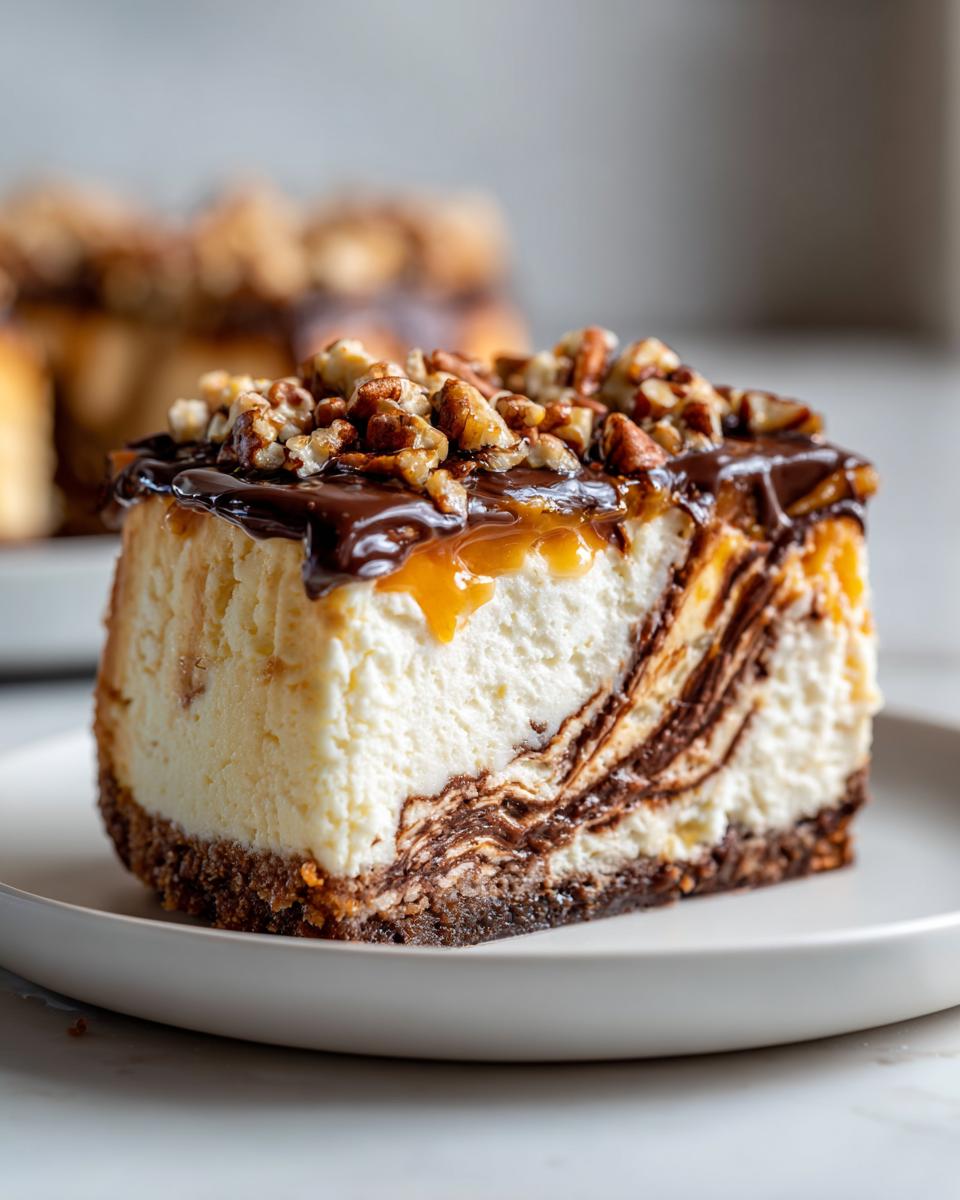
After all that patient baking and cooling—which, honestly, is its own kind of torture—we finally get to the best part! Once your turtle cheesecake is completely chilled (and trust me, you have to let it sit in the fridge for at least six hours, or preferably overnight), it’s time for that glorious final assembly. This is what turns it from a great cake into a true showstopper dessert.
First, make sure those pecans are ready. If you haven’t already, toast them! A quick trip to the oven for 5 to 7 minutes at 350°F makes them crunchy and brings out all their nutty flavor. Don’t forget to watch them carefully; pecans go from perfect to burnt shockingly fast. You can find some great tips on making amazing pecan pie cupcakes, which will give you an idea of how important toasting is!
Once chilled, carefully remove the springform sides. Now use the rest of your salted caramel sauce—drizzle it generously over the top. Don’t worry if some drips down the side; that just adds to the decadent look! Sprinkle those crunchy, toasted pecans everywhere. If you want even more inspiration for high-end desserts, Julian Maxwell has some stunning ideas over at his site.
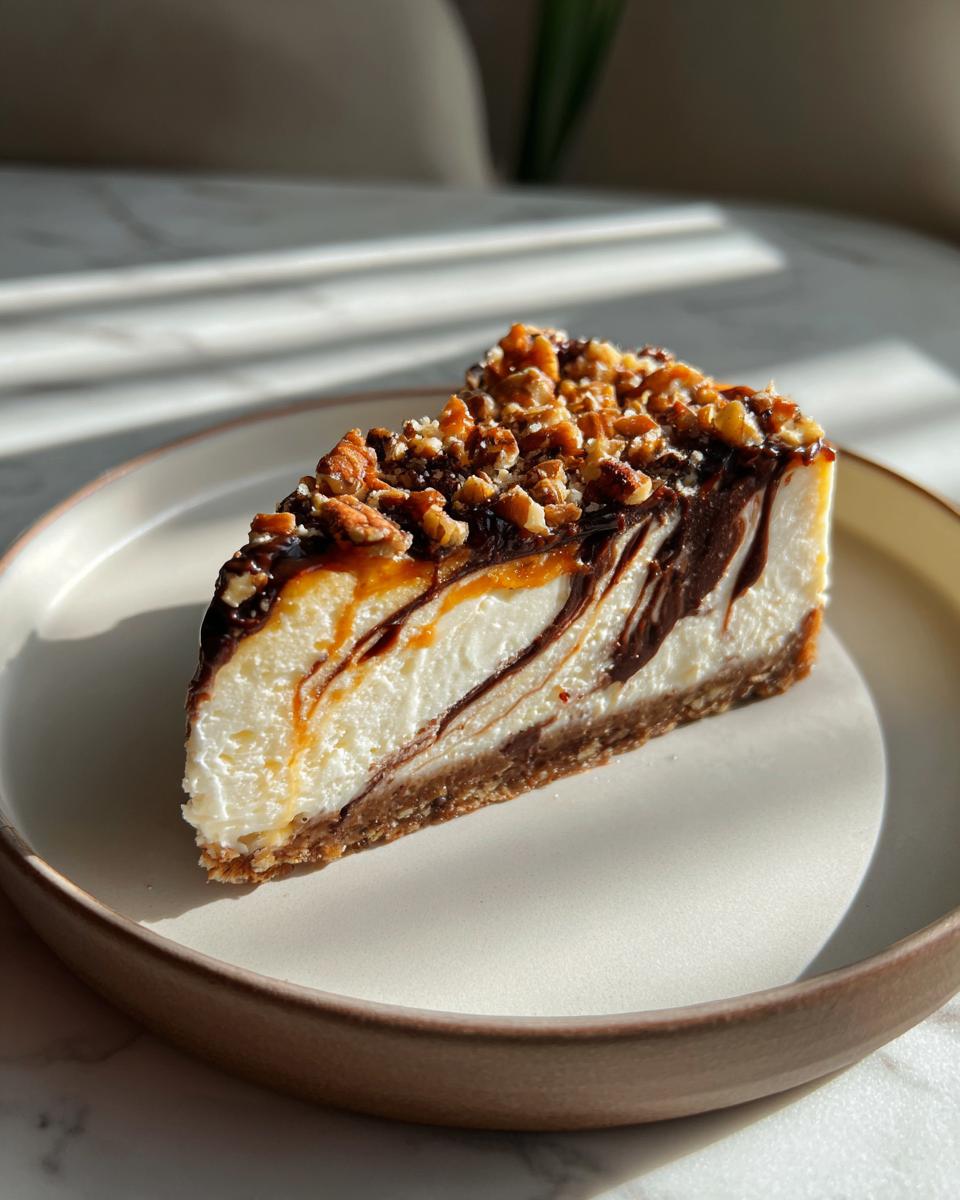
Slice it up, and wow—that chocolate swirl peeking through next to the glistening caramel and nuts? Perfection! This is going to be the best homemade turtle dessert anyone has ever tried.
Ingredient Notes and Substitutions for Your Turtle Cheesecake
I always get questions about substitutions, and that’s fair! When you’re diving into a recipe this rich, you want assurance that whatever you use will work perfectly with the main event—your gorgeous, creamy turtle cheesecake. Building trust means being honest about ingredients. For example, if you decided to skip the graham cracker crust for some reason? Absolutely use chocolate wafer crumbs instead for a richer base! That only enhances the chocolate notes we have going on in the filling.
But let’s talk caramel. That salted caramel sauce is crucial for the beautiful ribbons and the topping. If you’re using store-bought, it might be a bit stiffer or runnier than ours. And that’s okay! We need it to be just cooperative enough to swirl without disappearing entirely into the batter.
Tips for Perfect Salted Caramel Cheesecake Sauce
If your caramel sauce seems too thick when you try to drizzle or swirl it—maybe it’s been chilling in the fridge too long—don’t panic! You can gently warm a few tablespoons in a very small saucepan over the absolute lowest heat setting, or even pop it in the microwave for just five seconds at a time. You just want it loose enough to move easily, not hot enough to cook the cheesecake batter. If it seems too thin, try stirring in just a tiny bit of powdered sugar off the heat until it thickens up slightly. This simple tweak ensures every ribbon looks fantastic. This kind of attention to detail is what separates a good homemade turtle dessert from an unforgettable one. If you really love caramel swirls, you might also want to look at my recipe for chocolate caramel toffee crunch cake!
Serving Suggestions for This Rich Chocolate Caramel Pecan Dessert
Wow, you made it! This rich chocolate caramel pecan dessert is incredibly indulgent on its own, but sometimes, something simple on the side can just elevate the whole experience, especially after such a heavy meal. Since the cheesecake carries so much richness, I always lean toward something bright and fresh to provide a little contrast. Don’t worry about complex sides; this beauty is the star!
A small scoop of high-quality vanilla bean ice cream is perfection. The cold temperature plays so nicely against the dense, room-temperature slice of cheesecake. Alternatively, if you want something fresh, a side of tart raspberries or sliced strawberries cuts through that sweetness like a dream. You can even drizzle a tiny bit of chocolate sauce over the berries—why not go all out? Speaking of amazing pairings, if you’ve ever loved chocolate and cherry together, you must try my chocolate cherry cookies recipe sometime!
Storage and Reheating Instructions for Leftover Turtle Cheesecake
So, there’s a chance—and I mean a small chance, because this homemade turtle dessert is addictive—that you might have a slice or two left over. If that happens, we have to treat our cheesecake right! Cheesecake is funny because it really hates temperature swings, so we need to keep it stable during storage. First, you absolutely must cover it tightly. Use plastic wrap, but make sure that plastic isn’t touching the topping if you can help it, especially if you have those beautiful pecans sitting there looking crunchy. If you can’t avoid contact, gently place a piece of parchment paper over the top before wrapping it in plastic or foil.
Stick that wrapped masterpiece right into the refrigerator. It’s perfect there for about three to five days. Now, I know some people try to microwave leftovers, but please don’t try to reheat cheesecake! That water bath and slow cooling process locks in a specific texture that heat will just ruin. It will turn soupy or grainy, and we worked way too hard to avoid cracks just to microwave it!
The best way to enjoy leftovers is cold, straight from the fridge. If you really want to enhance it, let it sit on the counter for just 15 minutes before serving. That slight temperature lift allows the flavors to wake up a bit without letting the structure collapse. If you ever get into making homemade candies to go on top—maybe you try my easy homemade marshmallows recipe idea—remember to store those separately if they are very soft before topping the chilled cheesecake later!
Frequently Asked Questions About Making Turtle Cheesecake
Whenever I share a recipe this decadent, I always expect a flood of great questions! It’s totally normal, especially when you’re trying to nail down that perfect texture for your turtle cheesecake. I’ve pulled together a few of the things I hear most often. Hopefully, this helps you feel confident making what will surely become your new favorite **best cheesecake recipe**!
Can I make this turtle cheesecake recipe without a water bath?
Oh, I really, really advise against skipping the water bath if you can manage it. If you’re looking for an **easy turtle cheesecake**, I understand the temptation to skip a step, but the water bath is the absolute key to achieving that gorgeous, pristine surface. Without that humid, gentle heat source, the edges cook much faster than the middle, leading to dryness and, you guessed it, cracks. If you absolutely cannot use a water bath, you must bake it at a much lower temperature—maybe drop it down to 300°F—and rely heavily on that slow cooling inside the turned-off oven. But for that guaranteed smooth, **no crack cheesecake**, the water bath is our best friend!
What is the best way to toast pecans for the topping?
Toasting the pecans is non-negotiable for this pecan cheesecake topping, trust me! You want them crunchy and fragrant, not soft and raw. The easiest way I know, and the one that guarantees evenness, is to spread them in a single layer on a simple baking sheet. Pop them into your 350°F oven—the temperature we use for many of my other creamy cheesecake recipes. Keep an eye on them; they only take about 5 to 8 minutes. You’ll know they’re ready when you can really smell that nutty aroma filling your kitchen. Pull them out the second they look golden brown, because they will keep cooking just a little bit once they are out of the heat!
Sharing Your Ultimate Turtle Dessert Experience
Phew! We made it! Pulling off a decadent cheesecake like this truly feels like an accomplishment, doesn’t it? I put so much love into crafting this recipe to be reliable and honestly breathtaking in the end. Now that you’ve taken the plunge and created your own ultimate turtle dessert, I really, really want to hear about it!
Did it come perfect? Did the caramel swirl look exactly how you hoped?
Please, please take a minute after you’ve served those glorious slices and head over to the comments section below. Leaving a rating and sharing your experience helps other bakers who might be scared to try a big project like this cheesecake feel more confident. If you snapped any pictures of your beautiful, finished masterpiece—especially that gorgeous pecan topping—share them! Tag me when you post them online; I absolutely love seeing your creations.
If you have any lingering questions or need a little troubleshooting tip, don’t hesitate to reach out through my contact page. Happy baking, and enjoy every single rich, creamy bite!
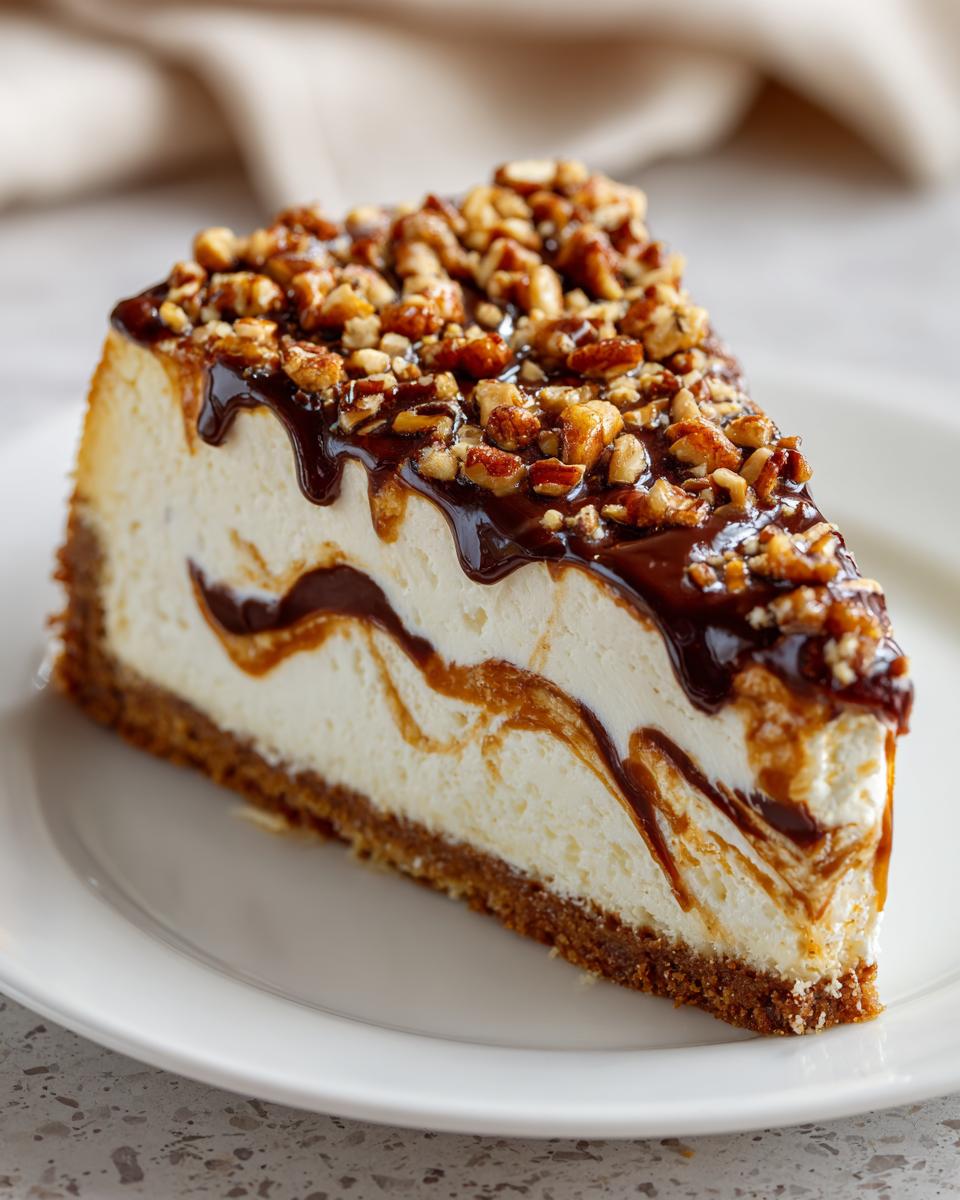
PrintDecadent Homemade Turtle Cheesecake with Salted Caramel Swirl
Make this rich, creamy Turtle Cheesecake at home. This showstopper dessert features a smooth cream cheese filling, a salted caramel swirl, chocolate elements, and crunchy toasted pecans for an ultimate indulgence.
- Prep Time: 30 min
- Cook Time: 75 min
- Total Time: 105 min
- Yield: 12 servings 1x
- Category: Dessert
- Method: Baking
- Cuisine: American
- Diet: Vegetarian
Ingredients
- 1 1/2 cups graham cracker crumbs
- 1/4 cup granulated sugar (for crust)
- 6 tablespoons unsalted butter, melted
- 3 (8 ounce) packages full-fat cream cheese, softened
- 1 1/2 cups granulated sugar (for filling)
- 1 teaspoon vanilla extract
- 1/4 teaspoon salt
- 4 large eggs, room temperature
- 1/2 cup heavy cream
- 1/2 cup semi-sweet chocolate chips, melted
- 1 cup salted caramel sauce, divided
- 1 cup chopped pecans, toasted
Instructions
- Preheat your oven to 325°F. Wrap the outside of a 9-inch springform pan tightly with heavy-duty aluminum foil to prepare for a water bath.
- Make the crust: Combine graham cracker crumbs and 1/4 cup sugar. Mix in melted butter until the mixture resembles wet sand. Press firmly into the bottom of the prepared springform pan. Bake for 10 minutes. Let cool.
- Prepare the cheesecake filling: Beat the softened cream cheese with 1 1/2 cups sugar, vanilla extract, and salt until completely smooth. Scrape down the sides of the bowl.
- Beat in the heavy cream until just combined. Add eggs one at a time, mixing only until each egg is incorporated. Do not overmix.
- Pour two-thirds of the batter over the cooled crust.
- Gently swirl in half of the melted chocolate chips and half of the salted caramel sauce into the batter using a knife or skewer.
- Pour the remaining batter over the top. Swirl in the remaining chocolate chips and caramel sauce.
- Place the foil-wrapped springform pan into a larger roasting pan. Pour hot water into the roasting pan until it reaches halfway up the sides of the springform pan. This water bath helps prevent cracks.
- Bake for 60 to 75 minutes, or until the edges are set but the center still has a slight jiggle.
- Turn off the oven, crack the oven door open slightly, and let the cheesecake cool inside the oven for 1 hour. This slow cooling prevents cracking.
- Remove the cheesecake from the water bath and foil. Cool completely on a wire rack. Chill in the refrigerator for at least 6 hours, preferably overnight.
- Before serving, top the chilled cheesecake with the remaining salted caramel sauce and the toasted pecans.
Notes
- To toast pecans, spread them on a baking sheet and bake at 350°F for 5 to 8 minutes, watching closely to prevent burning.
- For a truly crack-free cheesecake, ensure all your dairy ingredients, especially the eggs and cream cheese, are at true room temperature before mixing.
- If you prefer a chocolate cookie crust, substitute chocolate wafer crumbs for the graham crackers.
Nutrition
- Serving Size: 1 slice
- Calories: 550
- Sugar: 45
- Sodium: 350
- Fat: 38
- Saturated Fat: 22
- Unsaturated Fat: 10
- Trans Fat: 0.5
- Carbohydrates: 50
- Fiber: 2
- Protein: 10
- Cholesterol: 120