
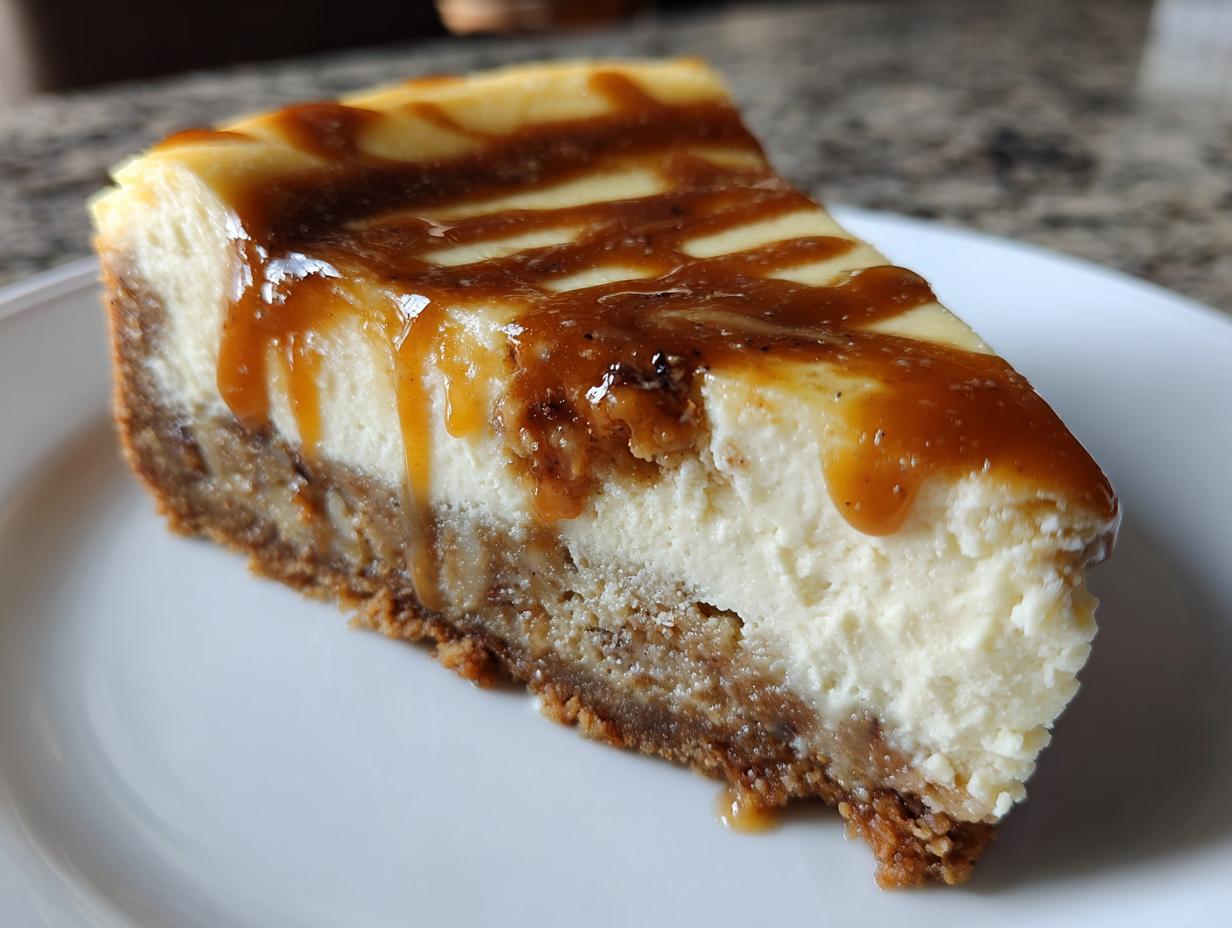
There is just something magical about finding the perfect dessert mashup, isn’t there? When two classics decide to become one incredible bite? Well, I’ve done it, and trust me, it’s the centerpiece your next holiday gathering needs. We’re talking about the Easy Baked Apple Pie Cheesecake with Salted Caramel Swirl! This recipe takes everything you love about spiced apples and pairs it with the pure decadence of baked cheesecake. Here at CravyBite Kitchen, Jess Carter and I believe that impressive desserts shouldn’t involve a culinary degree. We bring you techniques rooted in real American home cooking that make complex-looking food totally achievable right in your own kitchen. Get ready for the best apple pie cheesecake of your life!
- Why This Easy Baked Apple Pie Cheesecake is a Showstopper Dessert
- Ingredients for the Perfect Apple Pie Cheesecake
- How to Prepare Your Salted Caramel Apple Pie Cheesecake
- Tips for Success with Your Apple Pie Cheesecake Recipe
- Ingredient Notes and Substitutions for Creamy Apple Cheesecake
- Storage and Reheating Instructions for This Dessert
- Serving Suggestions for Your Apple Pie Cheesecake
- Frequently Asked Questions About Apple Pie Cheesecake
- Share Your Best Apple Dessert Fusion Creation
Why This Easy Baked Apple Pie Cheesecake is a Showstopper Dessert
When I tell people this is an apple pie cheesecake, they usually stop mid-sentence. It’s not just a pie, it’s not just a cheesecake—it’s both, and honestly, it’s kind of epic. It’s the kind of Decadent Apple Dessert that makes people think you spent two whole days in the kitchen, even though the steps are totally manageable!
Here is why this creation is perfect for your table, especially when the weather starts getting crisp:
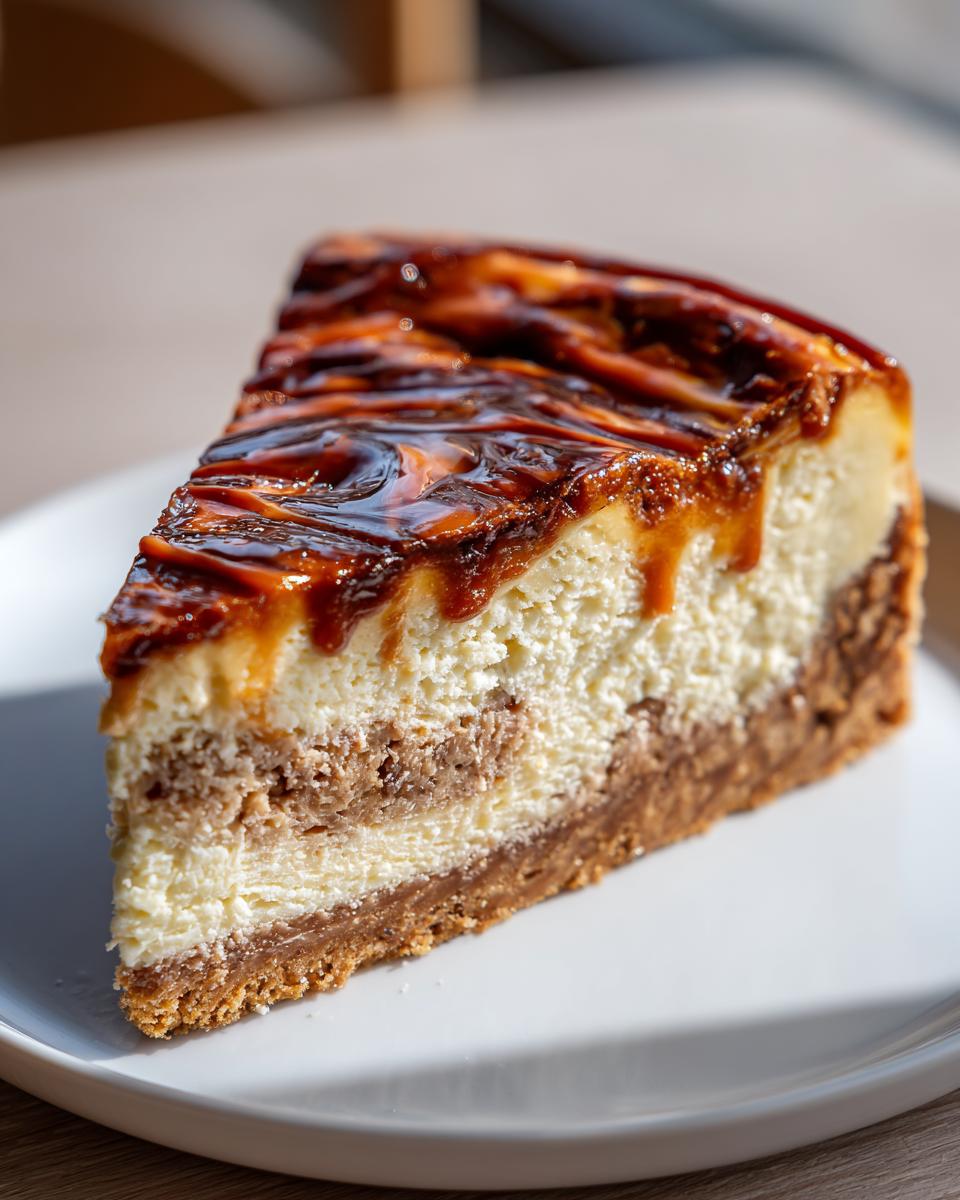
- It’s the ultimate Holiday Cheesecake Idea because it checks all the boxes: Creamy, spicy, sweet, and topped with that incredible salty caramel.
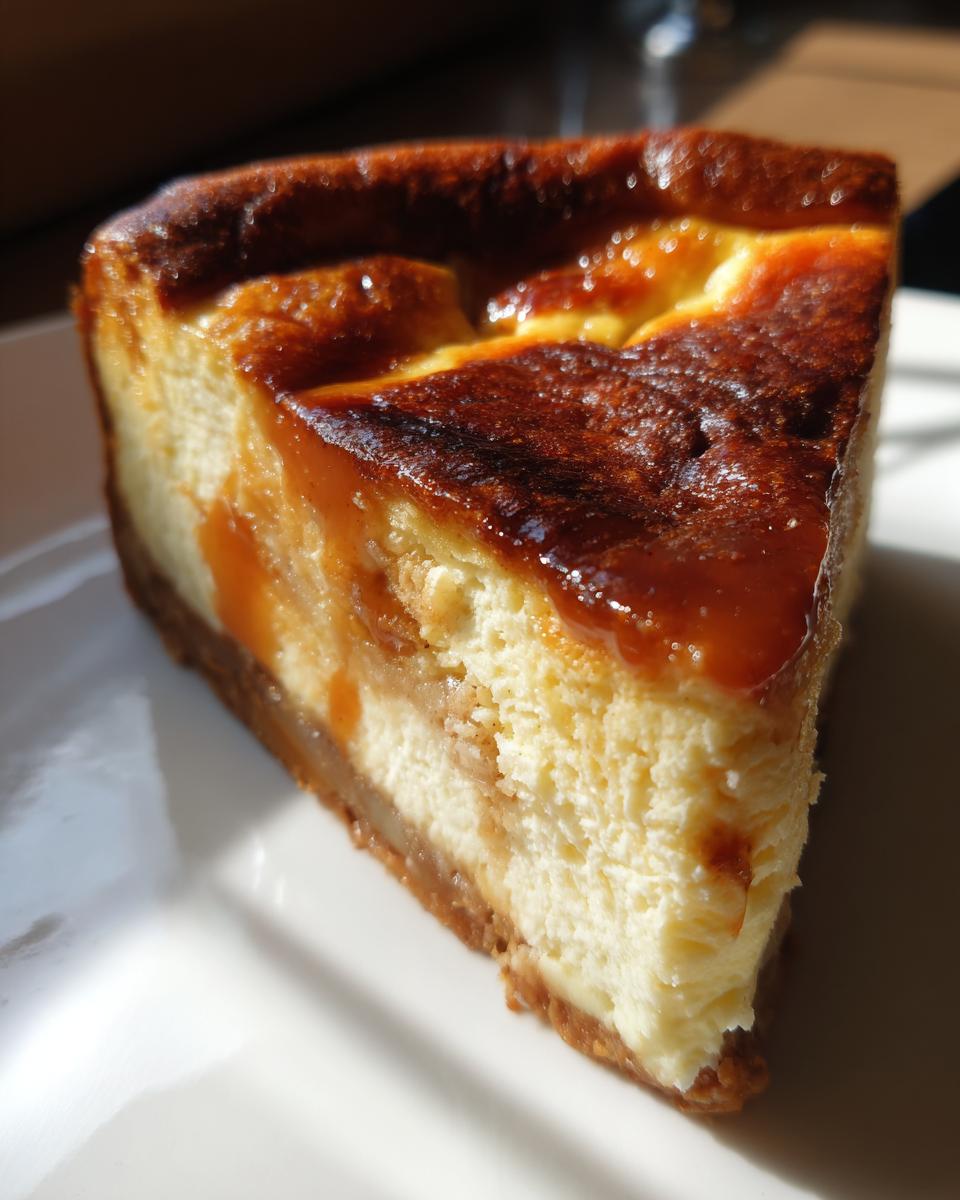
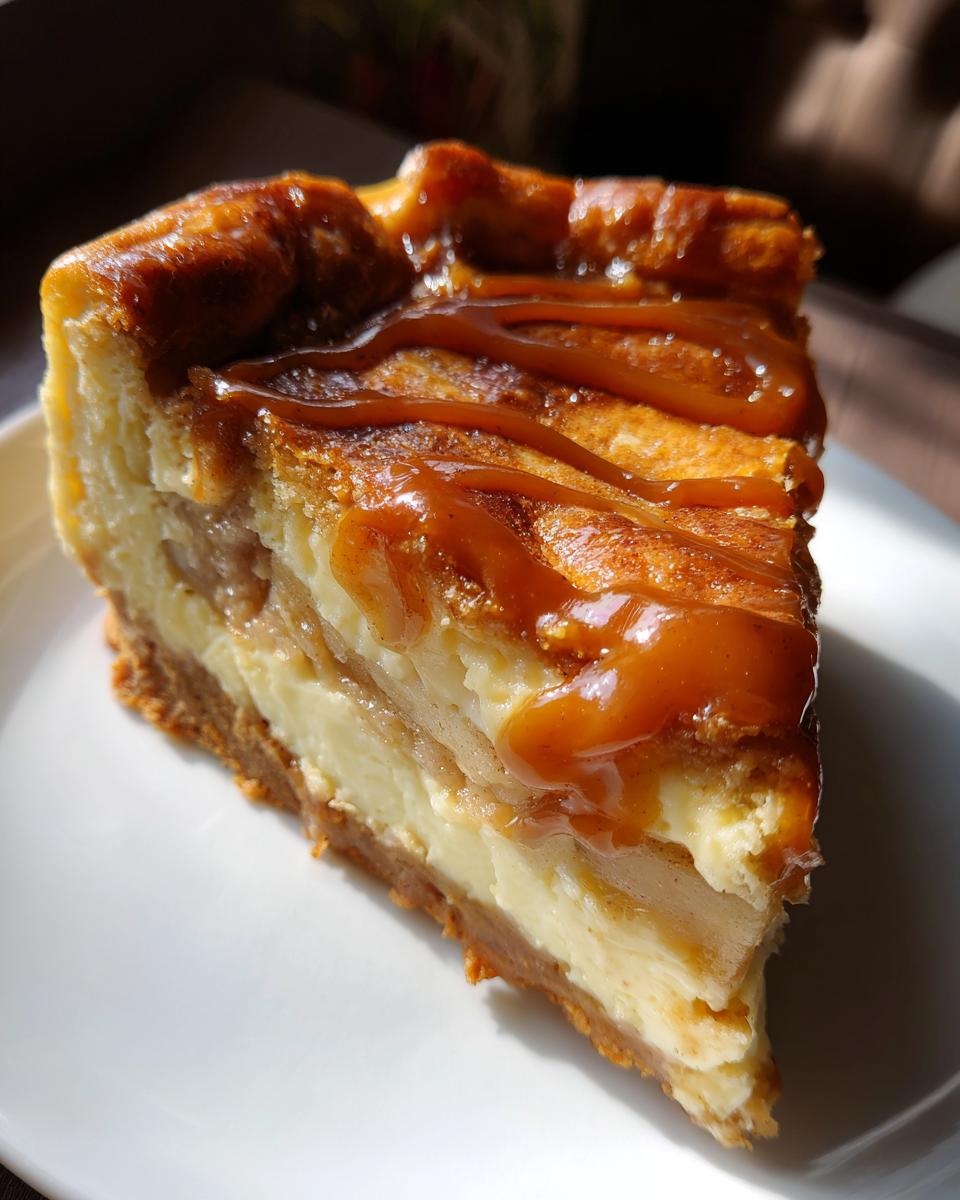
- The texture contrast is just *everything*. You get that smooth, velvety cheesecake next to the soft, spiced apples. Seriously satisfying!
- It’s a true fusion that feels special enough for Thanksgiving but easy enough for a random Tuesday craving. You can find a cool variation of a spiced streusel topping over on my apple cheesecake bars recipe, but honestly, the caramel swirl here is where it’s at.
The Ultimate Apple Dessert Fusion
We take the spiced apple filling—the kind that smells like pure autumn—and layer it right in the center of our creamy base. The cheesecake batter melts around the apples as it bakes, creating this beautiful, comforting flavor that tastes exactly like fall holidays. It’s the apple pie cheesecake flavor profile you dream about.
Simple Cheesecake Baking for Any Occasion
Don’t let the water bath scare you! I know baking a creamy apple cheesecake sounds intimidating, but this is one of my favorite beginner-friendly baked recipes. By focusing on room-temperature ingredients and slow cooling, the odds of getting a perfect, crack-free top for your apple pie cheesecake are way, way up. You get that rich, professional look without the typical bake-day panic. It’s the easiest way to pull off a showstopper dessert!
Ingredients for the Perfect Apple Pie Cheesecake
Alright, let’s talk about what you need to pull off this incredible apple pie cheesecake. Remember, the secret to creaminess is having your cream cheese and those four big eggs totally relaxed—that means room temperature! If they’re cold, you’ll end up with lumps, and we absolutely want that velvety texture everyone expects from a great dessert.
You’ll also need to prep your topping ingredients ahead of time, especially that caramel drizzle. If you’re feeling fun, you can try making a homemade toffee crumble to sprinkle on top, kind of like my easy toffee recipe variation, but for this version, we’re keeping it purely caramelized.
For the Graham Cracker Crust
- 1 1/2 cups graham cracker crumbs
- 1/4 cup granulated sugar
- 6 tablespoons unsalted butter, melted
For the Creamy Apple Cheesecake Filling
Remember, soften that cream cheese! Trust me on this one.
- 3 (8 ounce) packages cream cheese, softened
- 1 1/2 cups granulated sugar
- 1 teaspoon vanilla extract
- 1/4 teaspoon salt
- 4 large eggs (room temperature, please!)
- 2 cups prepared spiced apple pie filling (use the good stuff!)
- 1/2 cup salted caramel sauce (for swirly goodness)
How to Prepare Your Salted Caramel Apple Pie Cheesecake
Okay, deep breaths! This is the fun part, but we need to move with a little intention so our apple pie cheesecake comes out beautifully flat and creamy. We start with the oven and get everything organized before mixing that delicate batter. Remember, patience pays off big time here!
Preparing the Crust and Oven Setup
First things first, get that oven warmed up to 325 degrees Fahrenheit. Then, grab your 9-inch springform pan—this is essential! Wrap the entire outside, bottom and sides, really tightly with heavy-duty aluminum foil. You will need extra protection later for the water bath, so don’t skimp on this wrapping step. While that’s heating, mix your crust ingredients: graham cracker crumbs, that 1/4 cup of sugar, and the melted butter right in a bowl. Press that mixture down super firmly into the bottom of your wrapped pan. Pop that crust into the oven and bake it for just 10 minutes. Let it cool down a bit while you go whip up the filling.
Mixing the Creamy Cheesecake Batter
This technique is where you build that silken texture. Start by putting your softened cream cheese into a big bowl and beat it until it is utterly smooth—no lumps allowed! Slowly beat in the 1 1/2 cups of sugar, vanilla, and salt until everything is happily combined. Now, the eggs: add them one single egg at a time, mixing only until you see it disappear into the batter. I cannot stress this enough: you want to mix as little as possible once those eggs are in. Overmixing incorporates air, and air means cracks later!
Assembling and Baking the Apple Pie Cheesecake
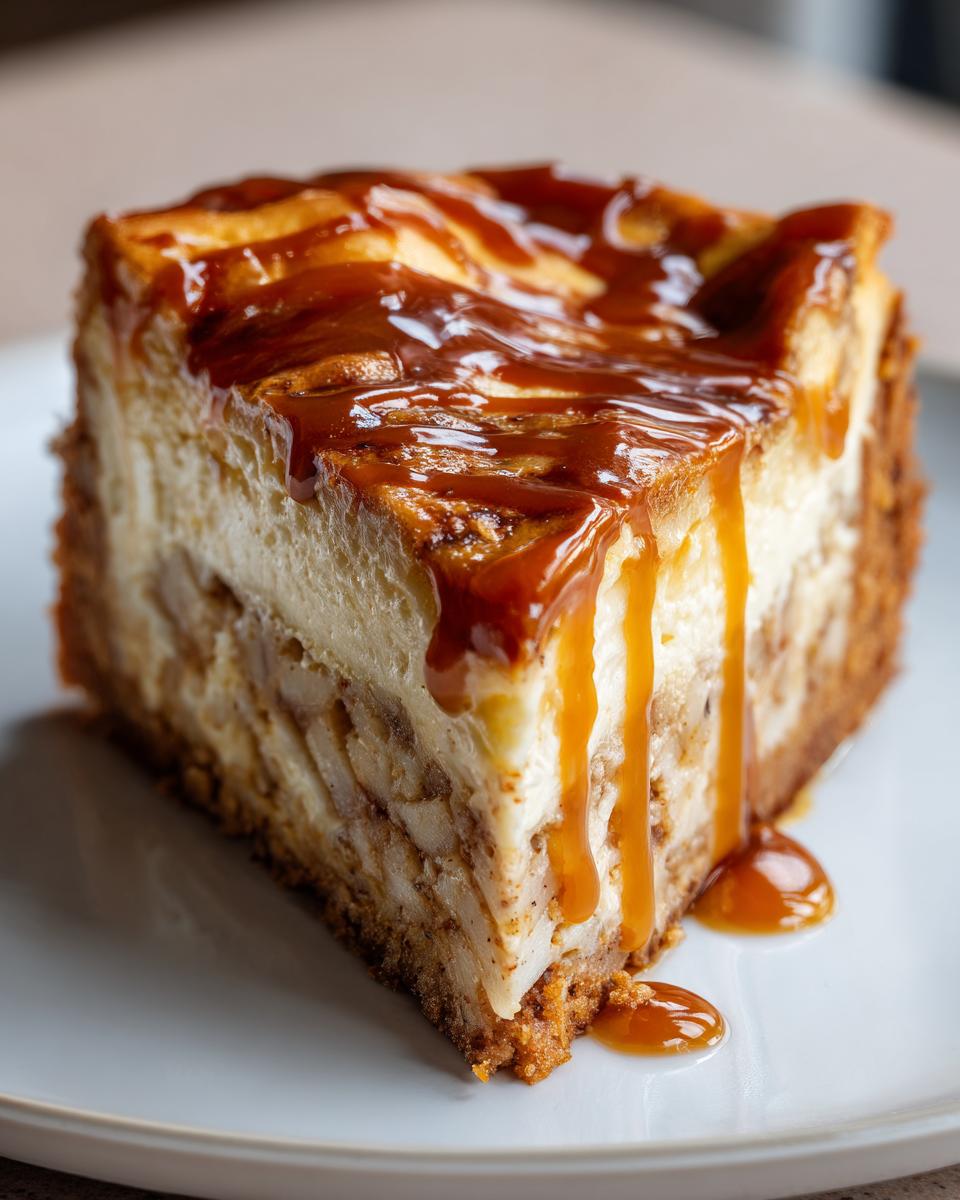
Pour half of that perfect cheesecake batter onto your cooled crust. Next, spoon your 2 cups of spiced apple pie filling right over that layer. Then, gently pour the remaining batter over the apples. Now for the swirl! Drizzle about half of your salted caramel sauce over the top. Take a knife—a thin one works best—and just gently drag it through the batter to create those gorgeous ribbons. If you want a bonus look, you can check out how I build flavor when making caramel apples; that same slow layering adds depth here too!
Next, get your roasting pan ready. Set the foil-wrapped springform pan inside the larger roasting pan. Here’s the trick for that creamy texture: pour *hot* water into the roasting pan until it comes about halfway up the sides of your springform. Bake this whole setup for 60 to 75 minutes. When it’s done, the edges will be set, but the center should still wiggle a bit—it’s called residual cooking!
Do not pull it out yet! Turn the oven off, prop the door open just a crack, and let the Salted Caramel Apple Pie Cheesecake chill in that warm oven for a full hour. Seriously, don’t skip this slow cool-down. Then, take it out, remove the foil, let it cool on the counter, and then chill it overnight before you drizzle the rest of that amazing caramel on top!
Tips for Success with Your Apple Pie Cheesecake Recipe
Look, I know cheesecake can feel temperamental, but this apple pie cheesecake is pretty forgiving if you treat those ingredients right! The biggest secret, besides the water bath we talked about, is the temperature of everything going into the batter. If your cream cheese is straight from the fridge, you’re asking for lumps, and nobody wants a curdled-looking creamy apple cheesecake.
Also, remember that note my sources made about making sure your eggs are at room temperature? That’s the other half of the equation for that super smooth texture we’re aiming for. When it comes time to check if it’s done, don’t just rely on a toothpick! Yes, the edges should look set, but gently nudge the entire pan—if the center jiggles like thick Jell-O, it’s perfect. It needs that jiggle to finish setting up beautifully outside the oven. If you want a deep dive into keeping things crack-free, I break down all my secrets for a classic New York-style cheesecake, and those rules apply 100% here!
Ingredient Notes and Substitutions for Creamy Apple Cheesecake
Let’s get real about ingredients for a second, because this apple pie cheesecake is all about synergy. If you have a treasured family recipe for spiced apple filling, absolutely use that! Homemade is always going to pack a flavor punch that you just can’t get from the jar, but if you’re pressed for time, grabbing a quality store-bought spiced apple pie filling is totally fine. I’ve done it on hectic weeknights, and it still comes out tasting fabulous!
Now, about that crust. We went with graham crackers because they mimic the base flavor of a traditional pie, but you shouldn’t feel locked in! If you have vanilla wafers sitting around, crush those bad boys up; they make a wonderful, slightly different base that pairs nicely with the caramel. You get a real textural surprise for your creamy apple cheesecake that way.
The only thing I tell you *not* to mess with too much is the ratio of cream cheese to sugar and eggs. That ratio is what ensures that dense, rich, yet perfectly smooth final product, so stick to those amounts for the best cheesecake recipe for beginners. Everything else, like the vanilla or even the type of caramel sauce if you make your own, is fair game for tweaking to your taste!
Storage and Reheating Instructions for This Dessert
Okay, now comes the hardest part of making an apple pie cheesecake: waiting! Seriously, you cannot rush this part. While the baking and swirling are fun, the truly amazing texture develops while it chills. You absolutely must keep this covered tightly—I usually use plastic wrap, but make sure it isn’t touching the top once it’s completely cool—in the refrigerator for at least six hours. Honestly, if you can hold out until the next day, that overnight chill makes it even better. That’s when the filling firms up perfectly and the cheesecake sets into that unbelievable sliceable wedge.
When it comes to leftovers (which is only if you actually have any!), keep it covered in the fridge. It holds up beautifully for four or five days. The apples stay moist, and the crust stays crisp enough. If you happen to freeze any slices, wrap them *super* tightly in plastic wrap, then foil. Thaw them overnight in the fridge before eating.
Now, about reheating—I’ll be honest, reheating cheesecake isn’t really my thing. It’s designed to be served cold or maybe just slightly cooler than room temperature to keep that great, dense texture. If you absolutely *must* warm up just a slice (maybe because you really love warm apple pie filling), I’d suggest a quick 10-second burst in the microwave, but no more. You risk drying out the cream cheese layer fast, and we want this Easy Apple Cheesecake Dessert to stay as luscious as possible!
Serving Suggestions for Your Apple Pie Cheesecake
Once you finally slice into this beauty, you need to think about how you’re going to serve it, right? Because what’s already an amazing apple pie cheesecake can always get a little extra sparkle! Honestly, this is one of those stunning Thanksgiving Desserts that needs minimal fuss, but a little something extra just takes it over the moon.
My go-to is a simple, high-quality scoop of vanilla bean ice cream melting right next to the slice. The warm caramel and the cold ice cream are just divine together. Or, if you’re not a fan of the melt factor, you can’t go wrong with a generous dollop of freshly whipped cream—maybe drizzle a *tiny* bit more of that famous salted caramel sauce right over the top of the whipped cream. It’s simple, it complements everything, and it makes that impressive presentation last just a little longer! Check out some of my savory inspiration on my garlic butter recipe post for inspiration on how small additions make a huge difference!
Frequently Asked Questions About Apple Pie Cheesecake
I always get asked a few repeat questions when people try this recipe for the first time, especially since it combines two legendary desserts! People want to know if they can cheat or how to avoid the dreaded crack. Here are the answers to the most common issues with making your apple pie cheesecake.
Can I make a No Bake Apple Pie Cheesecake instead?
Oh, I know the temptation! Who doesn’t love skipping the oven, right? You absolutely *can* make a No Bake Apple Pie Cheesecake, and I even have some recipes floating around that take that route, maybe check out my thoughts on easy no-bake pies for general inspiration. However, for this specific recipe—the one with the rich, creamy texture that melts in your mouth—baking is key. The baking process with the eggs gives you that incredibly dense, luxurious foundation. If you try to skip it, you’d need to swap out the eggs for a stabilizer like gelatin or a lot more stabilized whipped topping, and I promise you, the texture just won’t have that true, decadent cheesecake feel.
How do I prevent my cheesecake from cracking?
This is the number one fear when making any cheesecake, even our wonderful Salted Caramel Apple Pie Cheesecake! It almost always comes down to two things that we covered in the main instructions. Number one: Do not overmix the batter once those eggs are in there. You’re just activating the air bubbles, and when those bubbles rise and collapse during baking, boom—crack city. Number two, and this is huge: that slow, gentle cooling process you perform inside the oven (turning it off and cracking the door) is non-negotiable! Rapid temperature change shrinks the outside faster than the middle can set, causing that signature split. Stick to the slow cool method, and you’ll get that perfectly smooth top for your creamy apple cheesecake.
What if I don’t have a springform pan?
Honestly, the springform pan is the easiest way to get those clean, straight sides, but life happens! If you don’t have one, you can still make this dessert. Your best bet is to use a standard 9-inch pie dish. You will still need to wrap the *outside* bottom and sides of the pie dish securely in heavy-duty foil before placing it in the water bath, just to keep water creeping in. Just know that when it comes time to release it, you won’t get those perfect clean sides, but the flavor of your apple pie cheesecake will still be absolutely dynamite!
My caramel swirl got totally lost in the batter, help!
That happened to me once when I got too enthusiastic with my knife swirling! If you want those defined ribbons of caramel in your finished apple pie cheesecake dessert, you need to be gentler and less comprehensive when swirling. After you pour the final layer of batter on top of the apples, drizzle the caramel across in, say, four or five lines. Then, take your knife and just gently pull it through those lines once, maybe twice at most. Think ‘drag,’ not ‘mix.’ That preserves the contrast between the pale batter and the dark caramel, making for a prettier slice!
Share Your Best Apple Dessert Fusion Creation
Now that you have the full rundown for the Easy Apple Cheesecake Dessert, I honestly cannot wait to hear what you think! This apple pie cheesecake recipe is one of my favorites to share because it truly combines the best parts of two worlds, and I truly hope it makes your kitchen smell incredible.
When you bake this up for your next dinner party or holiday—and I hope you do, because what’s better than a festive Thanksgiving Dessert that tastes this good?—please come back and let me know how it went! Did your caramel swirl look as gorgeous as you hoped? Did you try adding a pinch of extra cinnamon to your apples?
Drop a rating for the recipe right here on the page; it helps other home cooks like us know this is a winner! And if you took a picture of your final, stunning creation, please tag me on social media. I absolutely love seeing your success stories. Seeing your beautiful bakes is what CravyBite Kitchen is all about—bringing that joy of cooking from my family’s kitchen to yours. If you want to know more about our baking philosophy, you can always check out our About page!
PrintEasy Baked Apple Pie Cheesecake with Salted Caramel Swirl
Create a showstopper dessert by combining creamy baked cheesecake with spiced apple pie filling and a rich salted caramel swirl. This recipe offers the best of two classic American desserts in one satisfying dish.
- Prep Time: 30 min
- Cook Time: 75 min
- Total Time: 125 min
- Yield: 12 servings 1x
- Category: Dessert
- Method: Baking
- Cuisine: American
- Diet: Vegetarian
Ingredients
- 1 1/2 cups graham cracker crumbs
- 1/4 cup granulated sugar (for crust)
- 6 tablespoons unsalted butter, melted
- 3 (8 ounce) packages cream cheese, softened
- 1 1/2 cups granulated sugar (for filling)
- 1 teaspoon vanilla extract
- 1/4 teaspoon salt
- 4 large eggs
- 2 cups prepared spiced apple pie filling (store-bought or homemade)
- 1/2 cup salted caramel sauce (for topping)
Instructions
- Preheat your oven to 325 degrees Fahrenheit. Wrap the outside of a 9-inch springform pan tightly with heavy-duty aluminum foil to prepare for a water bath.
- Prepare the crust: Mix graham cracker crumbs, 1/4 cup sugar, and melted butter in a bowl. Press the mixture firmly into the bottom of the prepared springform pan. Bake for 10 minutes. Let the crust cool while you prepare the filling.
- Prepare the cheesecake filling: In a large bowl, beat the softened cream cheese with an electric mixer until smooth. Gradually beat in 1 1/2 cups sugar, vanilla extract, and salt until fully combined. Beat in the eggs one at a time, mixing just until each egg is incorporated. Do not overmix.
- Assemble the cheesecake: Pour half of the cheesecake batter over the cooled crust. Spoon the 2 cups of spiced apple pie filling evenly over the batter layer. Pour the remaining cheesecake batter over the apples.
- Create the swirl: Gently drizzle half of the salted caramel sauce over the top of the batter. Use a knife or skewer to gently swirl the caramel into the batter.
- Bake the cheesecake in a water bath: Place the foil-wrapped springform pan into a larger roasting pan. Carefully pour hot water into the roasting pan until the water reaches about halfway up the sides of the springform pan.
- Bake for 60 to 75 minutes, or until the edges are set but the center still has a slight jiggle.
- Cool the cheesecake: Turn off the oven, crack the door open slightly, and let the cheesecake cool in the oven for 1 hour. Remove the cheesecake from the water bath, remove the foil, and let it cool completely on a wire rack.
- Chill: Cover the cheesecake and refrigerate for at least 6 hours, or preferably overnight, before serving.
- Serve: Before serving, warm the remaining salted caramel sauce slightly and drizzle it over the top of the chilled cheesecake. Slice and serve this decadent apple dessert fusion.
Notes
- For the creamiest texture, ensure your cream cheese and eggs are at room temperature before mixing.
- If you prefer a crisp topping, reserve 1/4 cup of the graham cracker crust mixture and sprinkle it over the apple layer before adding the final layer of batter.
- If you do not have a springform pan, you can bake this in a 9-inch pie dish, though the texture may be slightly less uniform.
Nutrition
- Serving Size: 1 slice
- Calories: 450
- Sugar: 45g
- Sodium: 300mg
- Fat: 28g
- Saturated Fat: 17g
- Unsaturated Fat: 11g
- Trans Fat: 0.5g
- Carbohydrates: 48g
- Fiber: 1g
- Protein: 7g
- Cholesterol: 110mg