
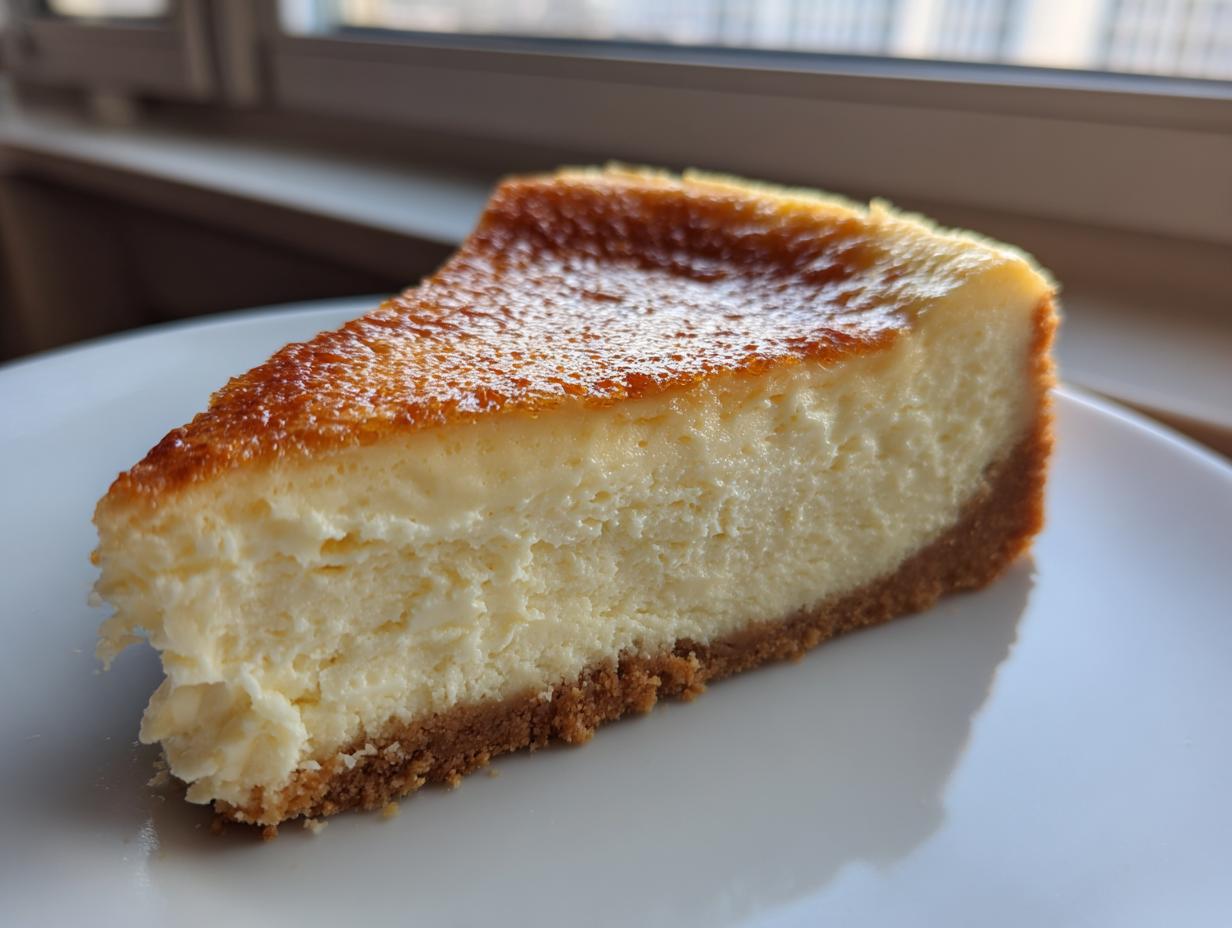
If you’ve ever dreamt of a dessert that tastes like pure velvet but you always worried about that dreaded oven crack, I see you! Baking a perfect white chocolate cheesecake sounds intimidating, but that’s where CravyBite Kitchen steps in. My goal, stemming from my background in nutrition and years of testing classic American desserts, is making things like this reliable and joyful for you. Today, we are tackling the big one: the Ultimate Creamy Baked White Chocolate Cheesecake (No Cracks Guarantee).
Forget rubbery edges or sunken centers. This recipe is built on simple physics to ensure that rich, delicate texture you crave in every single slice. We’re going to create a showstopper dessert that’s ready for your biggest holidays and gatherings, all while keeping that beautiful, smooth top intact. Trust me, once you see how simple the technique is, you’ll be making these all the time. We’ll use that buttery graham cracker base we love, which you can see in my recipe for Oreo Cheesecake Recipe, but the filling is where the magic truly happens.
- Why This is the Best White Chocolate Cheesecake Recipe
- Ingredients for Your Creamy White Chocolate Cheesecake
- Step-by-Step Instructions for Baked White Chocolate Cheesecake
- Tips for Success with Your White Chocolate Cheesecake
- Elegant Serving Suggestions and White Chocolate Ganache Topping
- Variations on the White Chocolate Cheesecake
- Storage and Reheating Instructions for Your Decadent White Chocolate Dessert
- Frequently Asked Questions About This White Chocolate Cheesecake
- Sharing Your CravyBite Kitchen Creation
Why This is the Best White Chocolate Cheesecake Recipe
So, why should you trust this recipe over the dozens of others out there? Because it guarantees that luxurious, velvety bite every time. This isn’t just any dessert; it’s my approach to the best white chocolate cheesecake recipe that stands tall and proud. We tackle the cracking issue head-on with a temperature-controlled bake, making it an absolute showstopper dessert for your parties. You get that deep, rich cream cheese flavor without any surface drama. If you’ve mastered my chocolate chip cheesecake cookie bars, you already know about my attention to creamy detail!
Achieving the Ultimate Cheesecake Texture
The secret weapon for that ultimate cheesecake texture is all about stillness and patience with your ingredients. I cannot stress this enough: your cream cheese, eggs, and sour cream need to be at true room temperature. When they hit the mixer, we only mix on a low speed. We are incorporating air gently to create a perfect smooth cheesecake recipe, not whipping up meringue! Warm ingredients blend smoothly, preventing those pesky lumps that ruin that beautiful, velvety mouthfeel.
Ingredients for Your Creamy White Chocolate Cheesecake
Making this ultimate white chocolate cheesecake really comes down to quality ingredients, just like in my family’s recipes. Since this dessert is so simple otherwise, we can’t afford to cut corners on what goes into that glorious filling. Everything has to be spot-on before we even think about mixing!
For the Graham Cracker Crust
We want a sturdy base that can hold up to this decadent filling. Please use good, flavorful graham crackers—the cheap ones just don’t crush up the same way! Don’t forget to check out my recipe for easy raspberry jam if you want to swirl some fruit into the topping later!
- 1 1/2 cups graham cracker crumbs
- 1/4 cup granulated sugar (for crust)
- 6 tablespoons unsalted butter, melted
For the Rich Cream Cheese Dessert Filling
This is where the magic happens! Remember what I said about room temperature? It’s non-negotiable here, especially for that smooth finish. Also, please use high-quality white chocolate—the cheap stuff has too many additives and can taste waxy, which will totally ruin our rich cream cheese dessert!
- 3 (8 ounce) packages full-fat cream cheese, softened to room temperature
- 1 1/2 cups granulated sugar
- 1 teaspoon vanilla extract
- 1/4 teaspoon salt
- 1 cup heavy cream
- 12 ounces high-quality white chocolate, melted and slightly cooled
- 4 large eggs, room temperature
- 1/4 cup sour cream, room temperature
Step-by-Step Instructions for Baked White Chocolate Cheesecake
Okay, deep breaths! This is the part where we turn those beautiful ingredients into the white chocolate cheesecake of your dreams. It looks complicated, especially with the water bath instruction, but I promise, following these steps exactly is what keeps everything smooth and crack-free. Trust me, I’ve learned the hard way that rushing these steps leads to textural disaster! If you’ve tried the classic New York style before, you’ll find similar careful temperature rules apply here for the best result with this cheesecake recipe.
Preparing the Crust and Pan
First things first, we need a sturdy base. Preheat that oven to 325°F (160°C). Mix up your graham cracker crumbs, the small bit of sugar, and the melted butter until it looks like wet sand. Press that mixture firmly into the bottom of your 9-inch springform pan. We’re going to give it a quick 10-minute head start in the oven. Once it’s done that, pull it out and let it cool down before we add the filling.
Mastering the Creamy Filling Mix
This is where we earn that smooth top! Using your mixer—but keep that speed on medium or low—beat the room-temperature cream cheese until it is absolutely void of any lumps. Scrape those sides down constantly! Then, add the sugar, vanilla, and salt, followed by the heavy cream. Finally, after your slightly cooled melted white chocolate is mixed in, add your eggs—and this part is critical—add them ONE AT A TIME, mixing only until you just see the yolk disappear. Add the sour cream last and stop mixing the second it looks uniform! We are aiming for a wonderfully smooth cheesecake recipe here, not an over-aerated sponge.
Baking and Preventing Cracks in Your White Chocolate Cheesecake
To get those fantastic No Cracking Cheesecake Tips to work, we need a water bath. Wrap that springform pan—bottom and sides—super tightly in two layers of heavy-duty foil. Place that wrapped pan into a larger roasting pan. Pour hot water into the roasting pan until it comes halfway up the sides of the cheesecake pan. Bake for about 60 to 75 minutes. The edges should look set, but the very center should still have a little bit of a jiggle left. Then, turn the oven OFF, crack the door open just a tiny bit, and leave that beautiful white chocolate cheesecake inside for a full hour while it cools slowly. This gentle temperature descent is the secret sauce!
Tips for Success with Your White Chocolate Cheesecake
Even with the best recipe, sometimes things can go sideways in the oven, right? Baking a perfect white chocolate cheesecake is all about respecting the dairy and managing temperature. If you follow these few pro tips, you’ll nail that incredible texture and keep those frustrating cracks away. These are the little tricks I learned over years making this dessert for family events—they are part of my best No Cracking Cheesecake Tips! If you love soft, chewy cookies, you have to try my snickerdoodle recipe; it requires the same tenderness in handling!
Ingredient Temperature and Melting White Chocolate
Seriously, let’s talk room temperature one more time, because it is vital for a truly creamy white chocolate cheesecake. If your cream cheese is even slightly cool, it won’t blend smoothly with the sugar, and you’ll get those tiny, stubborn lumps. I usually pull everything out at least two hours before I plan to start mixing. Don’t skip that step!
Now for the white chocolate itself. If you melt it too fast or get it too hot, it *seizes* up—it gets grainy and weird, and we certainly don’t want that grainy disaster in our smooth filling! Melt it gently. I use the microwave in 20-second bursts, stirring well between each blast. When it looks mostly melted, I just stir it for another minute until the residual heat finishes the job. It’s much safer than a double boiler if you’re still getting the hang of it. Remember, we need high quality here to ensure the flavor shines through!
Alternative Baking Method (No Water Bath)
I know, I know. Some of you are shaking your heads already, saying, “I hate the foil wrapping; it takes forever!” I get it. If you absolutely must skip the water bath for your easy white chocolate cheesecake, you need to adjust your heat strategy drastically. Instead of 325°F, drop your oven down to 300°F (150°C). You’ll need to bake it a little bit longer, maybe hitting 70 to 80 minutes total, but the lower, slower heat is much gentler on the batter. Just be totally diligent about the slow cooling process inside the turned-off oven afterwards, okay? That part can’t be skipped!
If you want to see some truly stunning variations that use fruit swaps, check out the ideas over at Easy Yummy Recipes—they always have great ideas for topping treatments!
Elegant Serving Suggestions and White Chocolate Ganache Topping
Once your white chocolate cheesecake has chilled overnight—trust me, this is the hardest but most crucial step—it’s time to make it truly shine! This dessert is naturally a showstopper dessert, but toppings take it into the stratosphere of elegant dessert recipes. You deserve something special for all that patience, right?
My absolute favorite way to finish this is with a smooth White Chocolate Ganache Topping. It’s so luxurious! You just melt down some good quality white chocolate with heavy cream—maybe half and half—until it’s pourable, then let it cool slightly before drizzling it artfully over the top. You can find my quick recipe for homemade chocolate syrup that you can actually adapt for a white chocolate version if you ever get stuck!
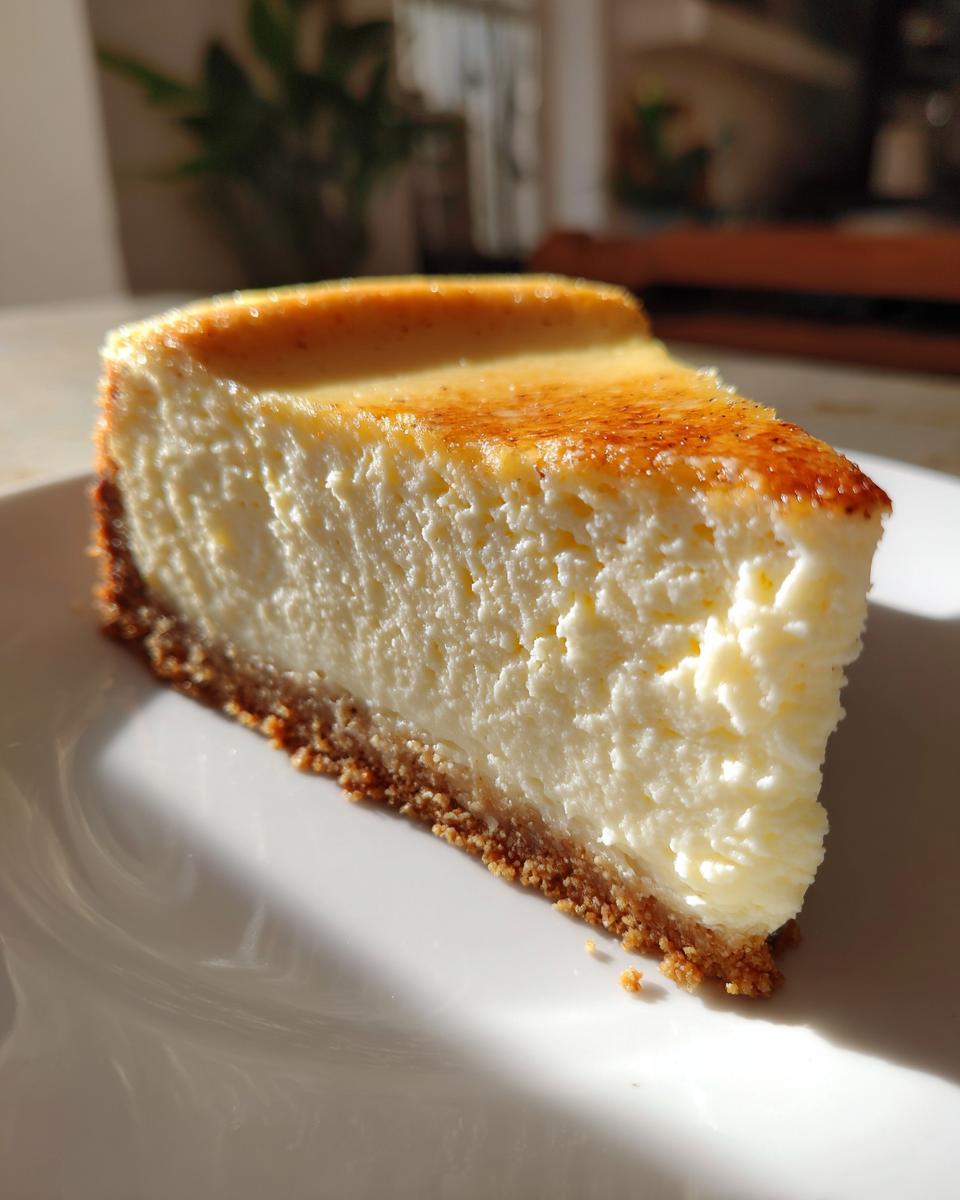
If ganache feels like too much, don’t fret. Fresh raspberries or a tart cranberry swirl—like the ideas you see over at Amazing Cooking Recipes—will cut through the richness beautifully. A simple dusting of finely shaved white chocolate works wonders too. It’s all about presentation!
Variations on the White Chocolate Cheesecake
Even though this recipe produces the ultimate creamy white chocolate cheesecake, I always love encouraging you to make my recipes your own! Baking should be fun, and sometimes a classic needs a little twist to keep things exciting. Since we built such a solid, reliable base here, it takes kindly to extra flavors. Think of it as your canvas for those spectacular holiday cheesecake recipes.
If you’re looking for something bright and fruity, you’ve got to try incorporating raspberries. A swirl of raspberry puree makes for a stunning presentation, turning this into a beautiful White Chocolate Raspberry Cheesecake. I usually make a quick, tangy puree from fresh raspberries and a touch of sugar—you can find tips on making simple fruit sauces over at my no-bake bruschetta dip post that explain how to thicken fruit bases.
For something truly festive that screams “special occasion,” a cranberry swirl is just divine. The tartness of the cranberry cuts through that amazing richness of the cream cheese perfectly. I saw some gorgeous results from Recipes Safari where they incorporated that holiday flavor. It’s just the thing to bring a little unexpected zest to your dessert table when you need a real centerpiece.
Storage and Reheating Instructions for Your Decadent White Chocolate Dessert
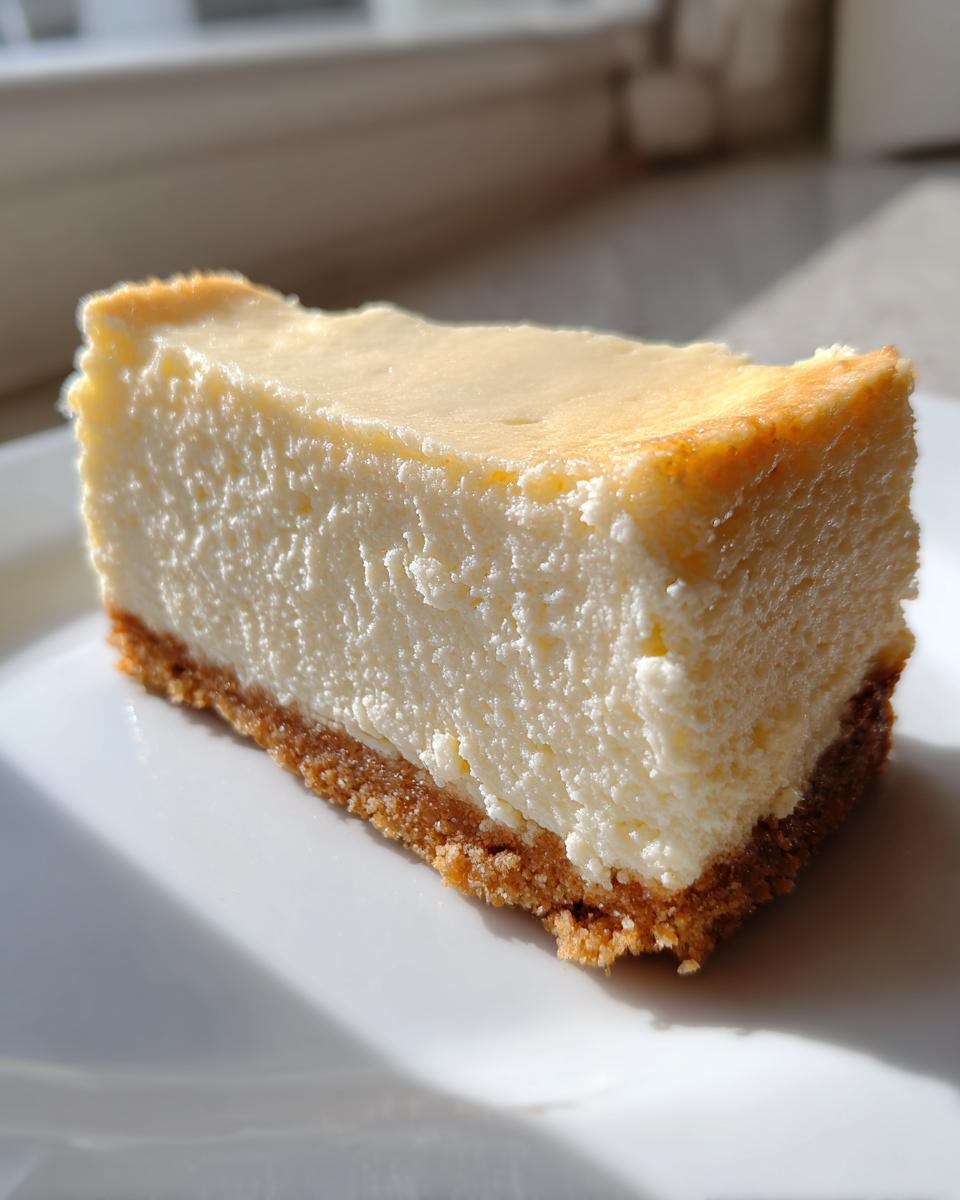
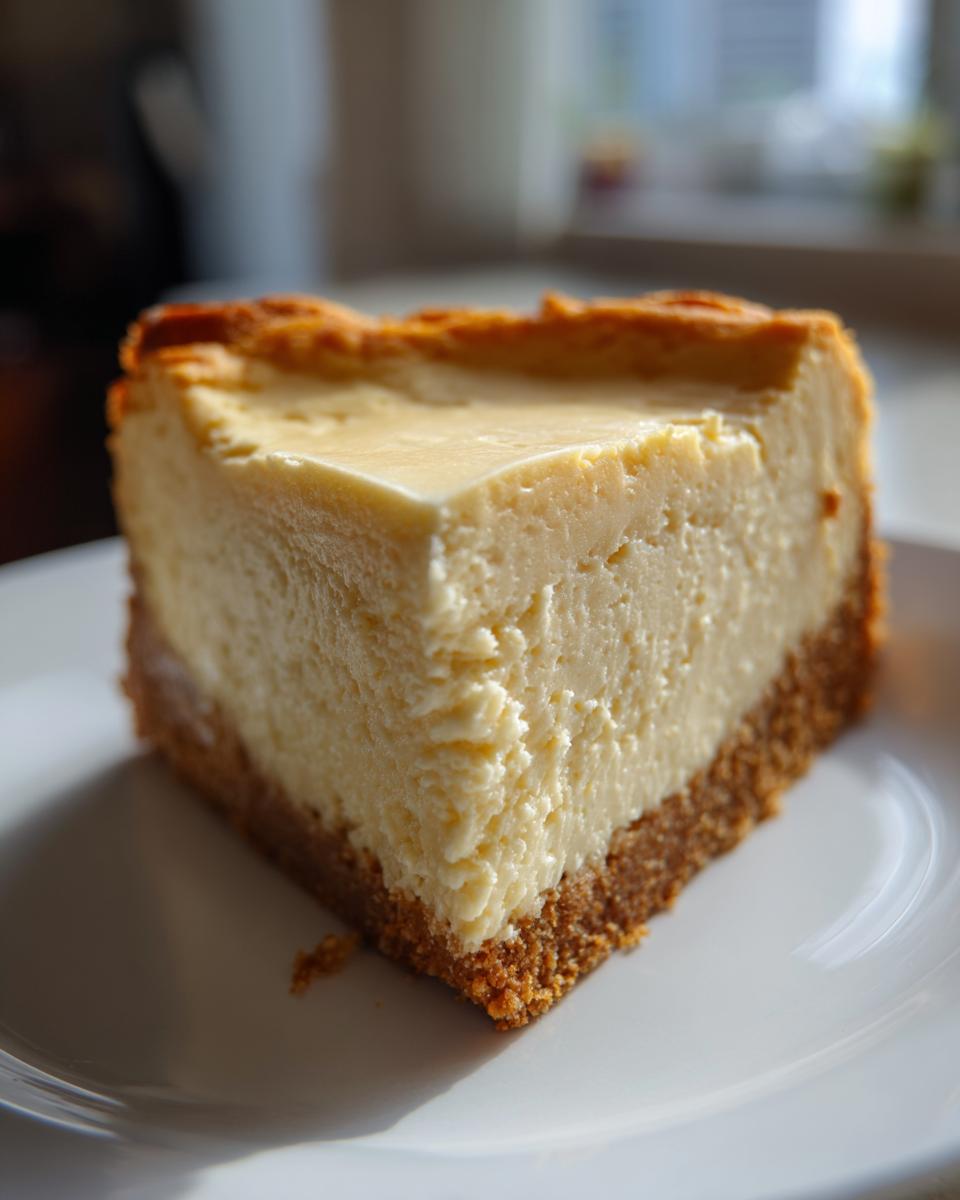
Now that you’ve poured your heart into creating the ultimate creamy white chocolate cheesecake and it has set perfectly, the very last—and arguably hardest—step is waiting! You absolutely must let this rich cream cheese dessert chill completely. Patience here ensures that beautiful, sliceable texture. If you try to cut it too soon, you’ll just end up with a puddle of gorgeous, melted filling.
I always insist on a minimum of 6 hours, but honestly, overnight chilling is when this cake really transforms. It lets the white chocolate fully set up and integrates all those lovely, subtle dairy flavors. Think of that chilling time as essential curing time for the best slice possible!
When storing leftovers, you want to maintain that smooth texture we worked so hard for. You can wrap the entire cheesecake, or any remaining slices, tightly in plastic wrap. I like to put the wrapped cake inside an airtight container just for extra protection against any lingering fridge odors. This keeps your decadent white chocolate dessert fresh and ready to go for about 4 to 5 days.
As for reheating? That’s the simple part! You don’t! This cheesecake is designed to be served perfectly chilled. If you pulled it out of the fridge and it feels a little too firm right away, just set it on the counter for about 15 to 20 minutes before slicing. That little bit of time allows the creamy interior to soften just enough to glide right onto your plate. Serving it chilled keeps the integrity of that crust and the smooth filling exactly as they should be. If you’re curious about other chilled treats, you might want to check out my recipe for some great red velvet cake mix cookies—they are surprisingly good cold, too!
Frequently Asked Questions About This White Chocolate Cheesecake
I know that when you’re setting out to make a showstopper like this, you might have a few last-minute jitters! Because CravyBite Kitchen is all about building confidence, let’s clear up these last few common questions about achieving that perfect texture in your white chocolate cheesecake.
Can I make this a No Bake White Chocolate Cheesecake?
That’s a very common question! This specific recipe is designed around the science of baking—we rely on the structure created by the eggs and the controlled heat of the oven to set that dense, creamy filling. If you are set on a no-bake version, you’ll need a recipe specifically designed for it, usually relying on stabilizers like gelatin or whipped topping to set the filling in the fridge. They are wonderful for quick fixes, but they deliver a much lighter texture than this baked powerhouse. If you love quick and easy chilling desserts, you might want to check out my no-bake ice cream pie recipe for an alternative!
For excellent dedicated no-bake options, I often recommend looking up specialized guides, like the interesting collection found over at Flerra.
What is the best way to serve this rich cream cheese dessert?
To get that incredible, sliceable, yet intensely creamy mouthfeel we worked so hard for, you simply have to serve it chilled! Remember how much patience we spent on the slow cool-down process? That needs to finish in the fridge. This is the secret to maintaining that ultimate cheesecake texture and ensuring you get clean slices. Don’t even think about serving it straight out of the oven, obviously! But definitely try to pull your chilled slices out of the fridge about 15 minutes before serving. That little bit of warmth takes the chill off the dairy just enough so you can truly taste the richness of the white chocolate without it being stiff.
Sharing Your CravyBite Kitchen Creation
Wow! We did it. You have wrestled that decadent, creamy batter into the pan, navigated the water bath like a pro, and patiently waited for that perfect chill. Now comes the best part: sharing this showstopper with the world (or at least your family!). I put all my best techniques into this white chocolate cheesecake recipe, and I truly hope you loved the results.
When you pull that first perfect slice out, go ahead and snap a picture! I absolutely live for seeing your creations across social media. Tell me how it went! Did your slow cooling process work like a charm? Did you manage to get that perfectly smooth top that never cracks? Please hop down in the comments below and let me know all the details. Your feedback helps me keep building honest, reliable recipes here at CravyBite Kitchen!
If you have feedback, suggestions for variations, or just want to send a virtual high-five, you can always reach out directly through my contact page. Happy baking, and enjoy every single velvety bite of that incredible dessert!
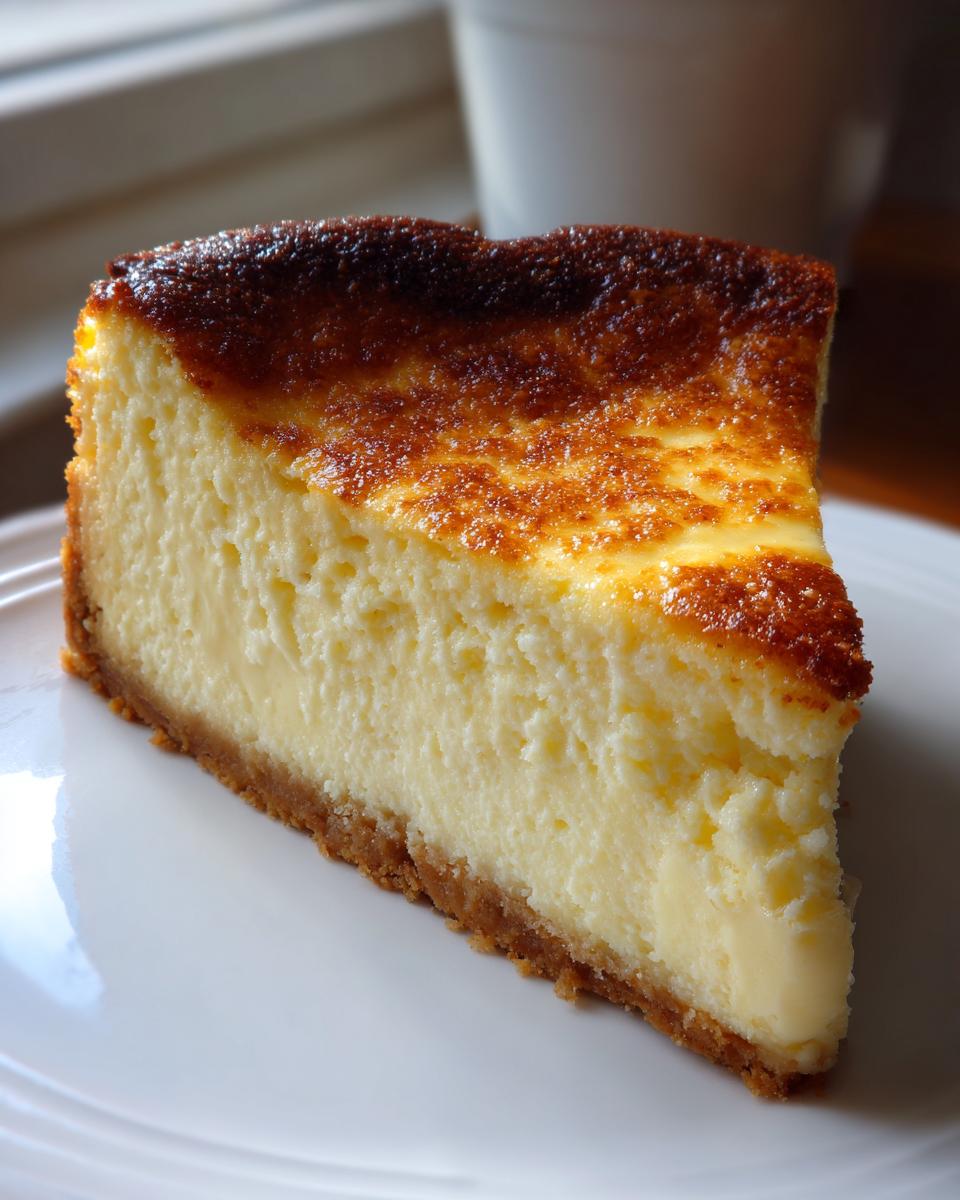
PrintUltimate Creamy Baked White Chocolate Cheesecake (No Cracks Guarantee)

Make a restaurant-quality, showstopper white chocolate cheesecake that is unbelievably smooth and creamy. This recipe uses techniques to prevent cracking, giving you a perfect, elegant dessert for any celebration.
- Prep Time: 30 min
- Cook Time: 75 min
- Total Time: 145 min
- Yield: 12 servings 1x
- Category: Dessert
- Method: Baking
- Cuisine: American
- Diet: Vegetarian
Ingredients
- 1 1/2 cups graham cracker crumbs
- 1/4 cup granulated sugar (for crust)
- 6 tablespoons unsalted butter, melted
- 3 (8 ounce) packages full-fat cream cheese, softened to room temperature
- 1 1/2 cups granulated sugar (for filling)
- 1 teaspoon vanilla extract
- 1/4 teaspoon salt
- 1 cup heavy cream
- 12 ounces high-quality white chocolate, melted and slightly cooled
- 4 large eggs, room temperature
- 1/4 cup sour cream, room temperature
Instructions
- Prepare the crust: Preheat your oven to 325°F (160°C). Mix graham cracker crumbs, 1/4 cup sugar, and melted butter. Press the mixture firmly into the bottom of a 9-inch springform pan. Bake the crust for 10 minutes. Let it cool completely.
- Prepare the water bath: Wrap the outside bottom and sides of the springform pan tightly with two layers of heavy-duty aluminum foil. This prevents water from leaking in. Place the wrapped pan inside a larger roasting pan.
- Melt the white chocolate: Gently melt the white chocolate using a double boiler or in short bursts in the microwave, stirring until smooth. Set aside to cool slightly. Do not let it get too hot or it can curdle the cream cheese.
- Make the filling: In a large bowl, beat the softened cream cheese with an electric mixer on medium speed until completely smooth, scraping down the sides often. This step is key for ultimate smoothness.
- Gradually beat in 1 1/2 cups sugar, vanilla extract, and salt until just combined. Do not overmix.
- Slowly beat in the heavy cream. Then, mix in the slightly cooled melted white chocolate until fully incorporated.
- Add the eggs one at a time, mixing on low speed only until each egg is just blended into the batter. Mix in the sour cream last. Stop mixing as soon as the batter is uniform.
- Pour the batter over the cooled crust in the springform pan.
- Bake using the water bath: Carefully pour hot water into the roasting pan until the water reaches halfway up the sides of the springform pan. Bake for 60 to 75 minutes. The edges should look set, but the center 2 inches should still jiggle slightly.
- Cool the cheesecake slowly: Turn off the oven, crack the oven door open slightly, and let the cheesecake cool inside the oven for 1 hour. This slow cooling prevents cracking.
- Remove the cheesecake from the water bath and foil. Let it cool completely on a wire rack at room temperature.
- Chill: Cover the cheesecake loosely and refrigerate for at least 6 hours, or preferably overnight, before serving.
Notes
- For the creamiest texture, ensure all dairy ingredients (cream cheese, eggs, sour cream) are at true room temperature before mixing.
- To avoid lumps from the white chocolate, make sure it is melted smoothly and cooled slightly before adding it to the cream cheese mixture.
- If you skip the water bath, bake at 300°F (150°C) for 70-80 minutes and follow the slow cooling process in the oven.
- Top with fresh raspberries or a simple white chocolate ganache before serving for an elegant dessert.
Nutrition
- Serving Size: 1 slice
- Calories: 450
- Sugar: 35g
- Sodium: 250mg
- Fat: 30g
- Saturated Fat: 18g
- Unsaturated Fat: 12g
- Trans Fat: 0.5g
- Carbohydrates: 40g
- Fiber: 1g
- Protein: 8g
- Cholesterol: 120mg