
Oh, you know those days. The ones where only a very specific, slightly nostalgic, utterly cheesy comfort food will do? For me, that craving always screams one name: Mexican Pizza. Forget the drive-thru line! My goal here at CravyBite Kitchen is to bring those iconic flavors right into your home, and trust me, making the legendary Taco Bell copycat version is easier than you think. We aren’t messing around with fussy techniques here; we are layering up authentic flavor fast. This recipe delivers the authentic, crispy-meets-cheesy experience you remember, all built on those perfectly crisp flour tortillas. It’s my joy as a home cook to show you how reliable and delicious these nostalgic favorites are when you make them yourself. If you’re looking to make fast food history in your own oven, you can find tons of inspiration in my guide to quick, easy weeknight dinners!
- Why You Will Crave This Homemade Mexican Pizza Recipe
- Essential Ingredients for Your Best Mexican Pizza
- How to Make the Perfect Copycat Taco Bell Mexican Pizza
- Tips for Achieving Crispy Tortilla Pizza Perfection
- Serving Suggestions for Your Easy Mexican Pizza Dinner
- Storage and Reheating Instructions for Leftover Mexican Pizza
- Frequently Asked Questions About Making Mexican Pizza at Home
- Nutritional Estimate for This Cheesy Mexican Pizza
- Share Your Homemade Mexican Pizza Creations
Why You Will Crave This Homemade Mexican Pizza Recipe
Listen, I know you have a million dinner options, but this particular recipe hits different. It’s fast, it tastes exactly right, and it makes cleanup a breeze compared to ordering takeout. I promise this creation is about to jump to the top of your rotation!
- Speed Demon Dinner: We’re talking under 40 minutes total, start to finish. This is a prime example of a Quick Tex Mex Dinner that feels like a treat but comes together faster than you can decide on takeout menus.
- That Iconic Crunch: The secret weapon is the crispy tortilla. When you bake or fry them just right, you get that authentic texture that makes this mexican pizza so addictive.
- Kid-Approved Perfection: Seriously, this became a Family Favorite Mexican Food night tradition instantly. My kids inhale this stuff, and I love that I control the salt and spice levels!
- Ultimate Cheesy Experience: This isn’t just ‘some cheese.’ It’s layers of gooey, melted goodness holding savory beef and creamy beans together. You just can’t beat that cheesy pull.
- Better Than Takeout: Because you use your favorite store-bought enchilada sauce and taco mix, the flavor hits the spot, but you know exactly what’s going into your food. It’s pure nostalgia without the fast-food guilt!
Essential Ingredients for Your Best Mexican Pizza
Okay, assembling this mexican pizza is surprisingly straightforward because most of the big flavor comes from things we buy ready-made! That’s what makes it such a fantastic weeknight lifesaver. When I show you the list, don’t panic—it’s mostly just layering items we already love from taco night. For truly authentic results, you want to make sure you grab a decent quality red enchilada sauce and smooth refried beans. Those two items are the backbone of that classic flavor, so don’t cheap out on them if you can help it!
- 12 small flour tortillas (I use the 6-inch size, they fit perfectly in a regular pan!)
- 1 pound ground beef (80/20 works great for flavor, but drain the fat well!)
- 1 packet taco seasoning mix (or about 2 tablespoons of your favorite homemade blend)
- 1 cup water
- 1 (16 ounce) can refried beans, warmed until smooth
- 1 cup red enchilada sauce
- 2 cups shredded Mexican cheese blend (I like the one with Monterey Jack mixed in)
- 1 tablespoon vegetable oil (for frying, if you choose that route)
- For Toppings: Diced tomatoes, sliced black olives, and sliced green onions—don’t skip the green onions!
Ingredient Notes and Substitution Tips for Mexican Pizza
Here are a few little details I keep in mind when grabbing supplies. It really helps nail that restaurant flavor without adding extra work.
First, let’s talk tortillas. Frying them makes them unbelievably crispy, which is what my inner child demands. You only need a little bit of oil, just enough to coat the bottom of the pan. However, if you need a slightly healthier route or don’t want the fryer mess, just skip the oil! Pop those tortillas directly onto a baking sheet and bake them at 375°F (190°C) for about 6 to 7 minutes per side until they are stiff and lightly browned. They still get crispy, just not quite as bubbly looking.
For the taco seasoning, a store-bought packet is totally fine for this quick Tex Mex dinner. It’s fast, and the ratios are already balanced. If you are making your own mix, aim for something heavy on the chili powder, cumin, and a little garlic powder. Don’t stress about making it fancy; store-bought works beautifully when we’re in a hurry to make this easy Mexican pizza dinner!
How to Make the Perfect Copycat Taco Bell Mexican Pizza
Alright, let’s get cooking! This part is where all that chopping and opening cans pays off. We are moving fast here because the goal is maximum flavor in minimum time, making this the best kind of Mexican Pizza Dinner for a busy night. We aren’t messing around with fussy techniques here; we are layering up authentic flavor fast. This recipe delivers the authentic, crispy-meets-cheesy experience you remember, all built on those perfectly crisp flour tortillas. It’s my joy as a home cook to show you how reliable and delicious these nostalgic favorites are when you make them yourself. If you need another idea for a hearty, quick main dish after you demolish this pizza, check out my guide for easy black bean chili recipe!
Preparing the Seasoned Ground Beef Mexican Pizza Filling
First up, we tackle our hearty filling. Set a standard skillet over medium heat and toss in your ground beef. You want to brown that meat until there’s no pink left. Now, here is a crucial step if you want that clean, flavorful bite: drain off every bit of excess fat! We want flavor, not grease, holding our layers together.
Once drained, pour in that packet of taco seasoning and the cup of water. Bring it up to a simmer and let it cook down for about five to seven minutes. It should reduce nicely and cling right to the beef. Take that delicious meat off the heat and set it aside. That’s one component done!
Next, we create our crispy shell foundation. You have two choices here. If you’re deep-frying, heat about a tablespoon of oil in that same large skillet until it shimmers a bit. Fry those little tortillas (about 30 seconds per side is all it takes!) until they look golden and feel stiff. If you want to skip the oil, go ahead and bake them on a sheet pan at 375°F (190°C) for about 6 or 7 minutes per side until they are rock solid. Either way, blot them really well on paper towels so they stay wonderfully crisp.
Assembling and Baking Your Layered Mexican Pizza
Now for the fun part—stacking! Grab a baking sheet—no need to grease it since the tortillas are already crisp. Lay down that first crispy tortilla. Spread half of your warmed refried beans right over the top. Don’t be shy, but keep it mostly contained inside the edge!
Sprinkle half of your seasoned ground beef evenly over those beans. Then, grab that red enchilada sauce—use half of what you measured out—and spoon it over the beef. Finally, hit it with half of your Mexican cheese blend. This is Level One!
Take your second crispy tortilla and gently place it right on top of all that delicious cheese. Repeat the layering process: the remaining beans, the rest of the beef, another good drizzle of enchilada sauce, and then top the whole masterpiece with the last of your shredded cheese. This double layer is what makes our mexican pizza so satisfying.
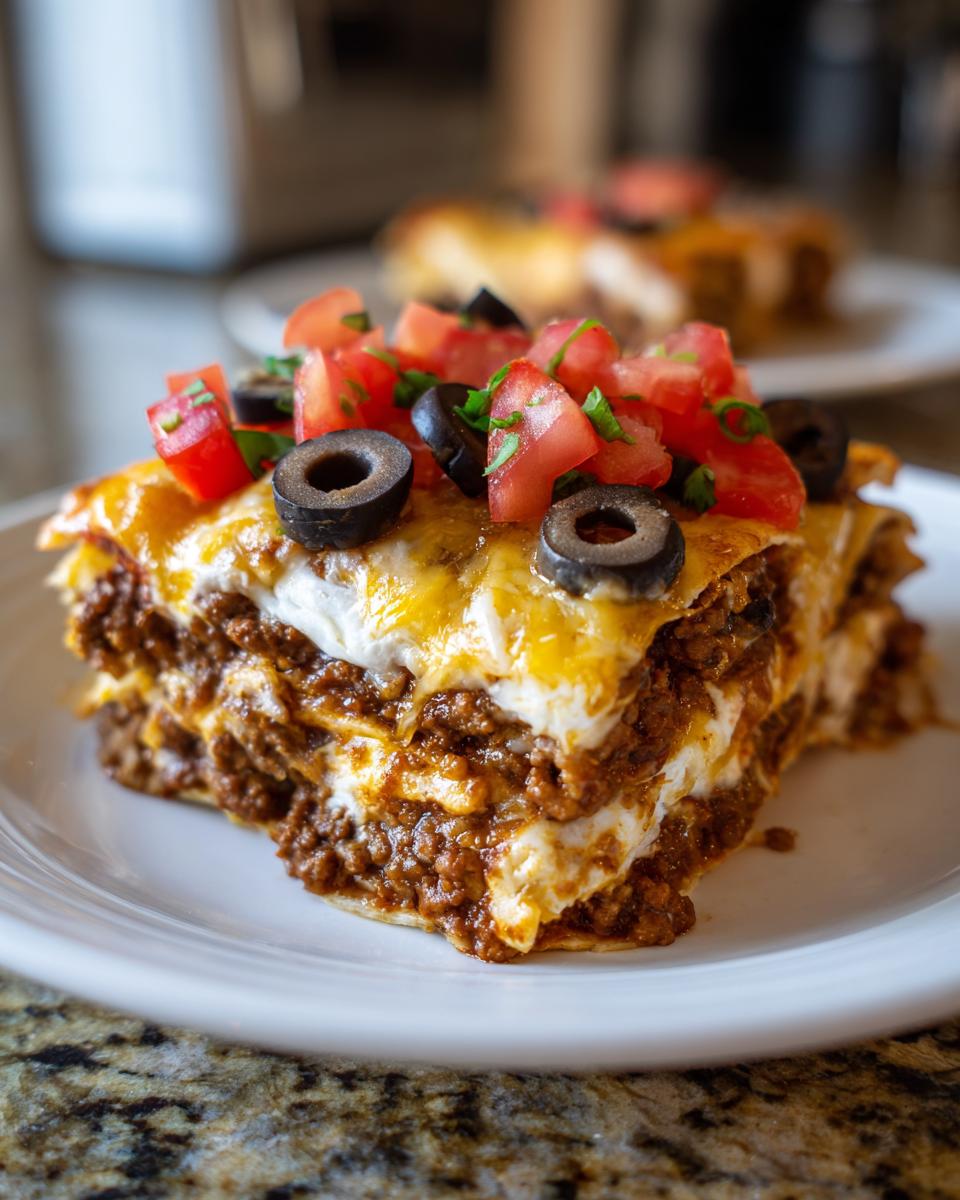
Slide that pan into your preheated 375°F (190°C) oven. We bake this for just 8 to 10 minutes. You are mostly looking for that cheese to get completely melted, bubbly, and just starting to turn golden brown at the edges. We want perfection without overcooking those crispy shells!
Tips for Achieving Crispy Tortilla Pizza Perfection
Okay, we all know the structural foundation of a great mexican pizza is that satisfying *crunch*. If your tortillas end up soggy or floppy, well, it’s just not the same experience, is it? Since we are aiming for that genuine fast-food imitation—that glorious Crispy Tortilla Pizza—I have a few more pro tips that go beyond just “fry them until golden.” These little tricks make all the difference in getting that perfect snap in every single bite.
First, let’s talk oil management if you are frying. You don’t need a deep fryer situation, just enough oil to cover the bottom of your pan by about an eighth of an inch. Crucially, the heat needs to be right! If you drop those tortillas in cold oil, they’ll soak it up like a sponge and get greasy—that’s the quickest route to a sad, limp crust. You want the oil hot enough that the tortilla starts bubbling almost immediately. If you toss a tiny corner in and it starts frying right away, you’re golden.
When they come out, whether they were fried or baked, do not skip the paper towel drain phase! I usually lay them out in a single layer on a big stack of paper towels—I even pat the tops lightly. Removing that surface oil or moisture immediately stops carry-over cooking and keeps them stiff. I learned this trick back when I was trying to perfect homemade potato chips; the same rule totally applies here for preventing that dreaded sogginess later on when the warm beans start softening them up. If you’re looking for another recipe where crispness is king, you’ve got to check out my guide on homemade crispy potato chips.
Another thing people overlook is assembly speed. Because the refried beans are warmed, they start to soften the tortilla immediately upon contact. You need to work briskly once you start layering. Get that first layer done, get the cheese on top of the second layer, and get the whole thing into the oven fast. We want the heat to quickly melt the cheese and heat everything through *before* the moisture from the beans has time to soak into the lower tortilla layer.
Lastly, try not to overload the center. When you’re spreading the beans and beef, keep them relatively spread out and thinner near the edges. If you dump a huge pile of wet ingredients right in the middle, you create a soggy epicenter. A thinner layer distributed evenly across the surface guarantees that satisfying crisp edge that makes this mexican pizza so iconic. If you want to see another fantastic way people are perfecting this at home, check out this great source for the homemade Mexican pizza!
Serving Suggestions for Your Easy Mexican Pizza Dinner
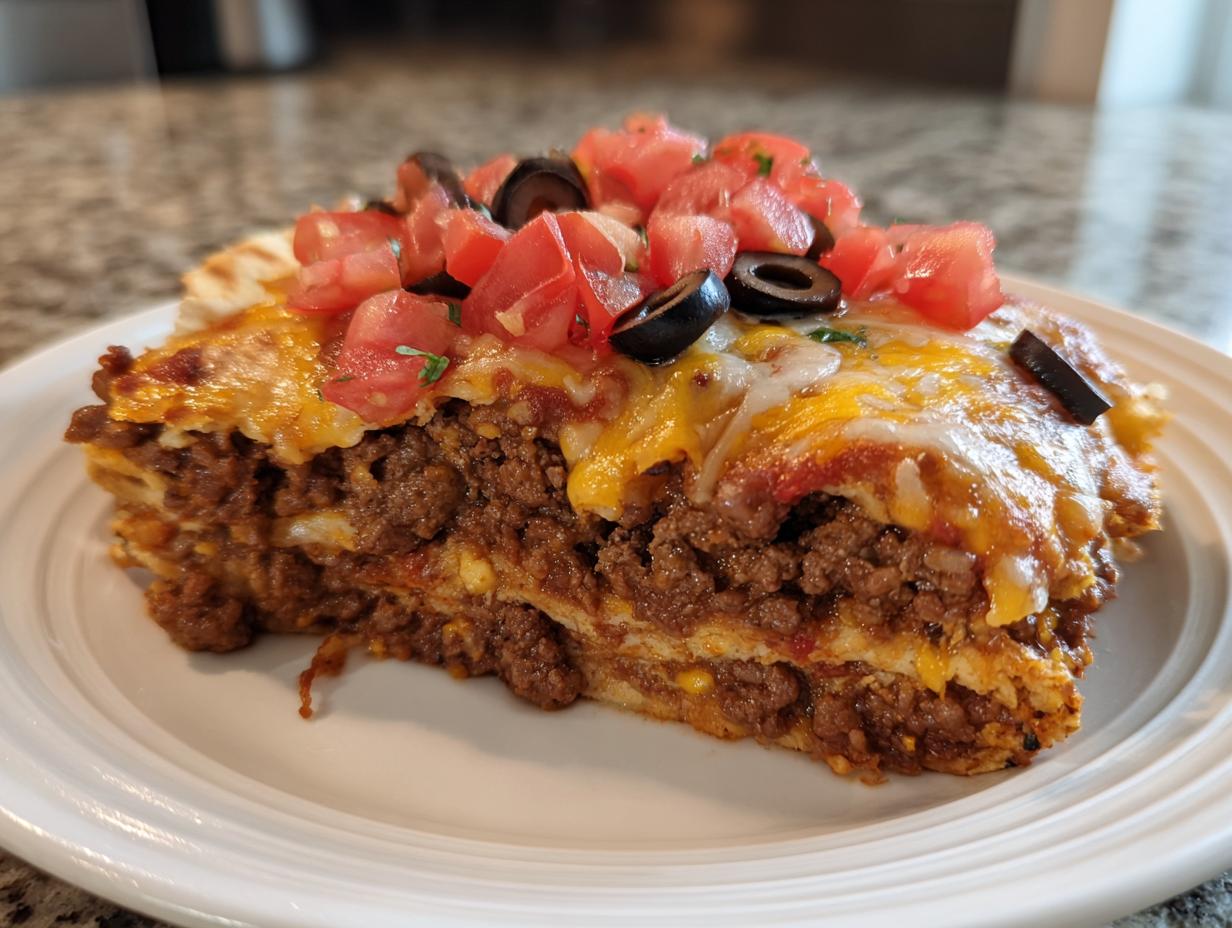
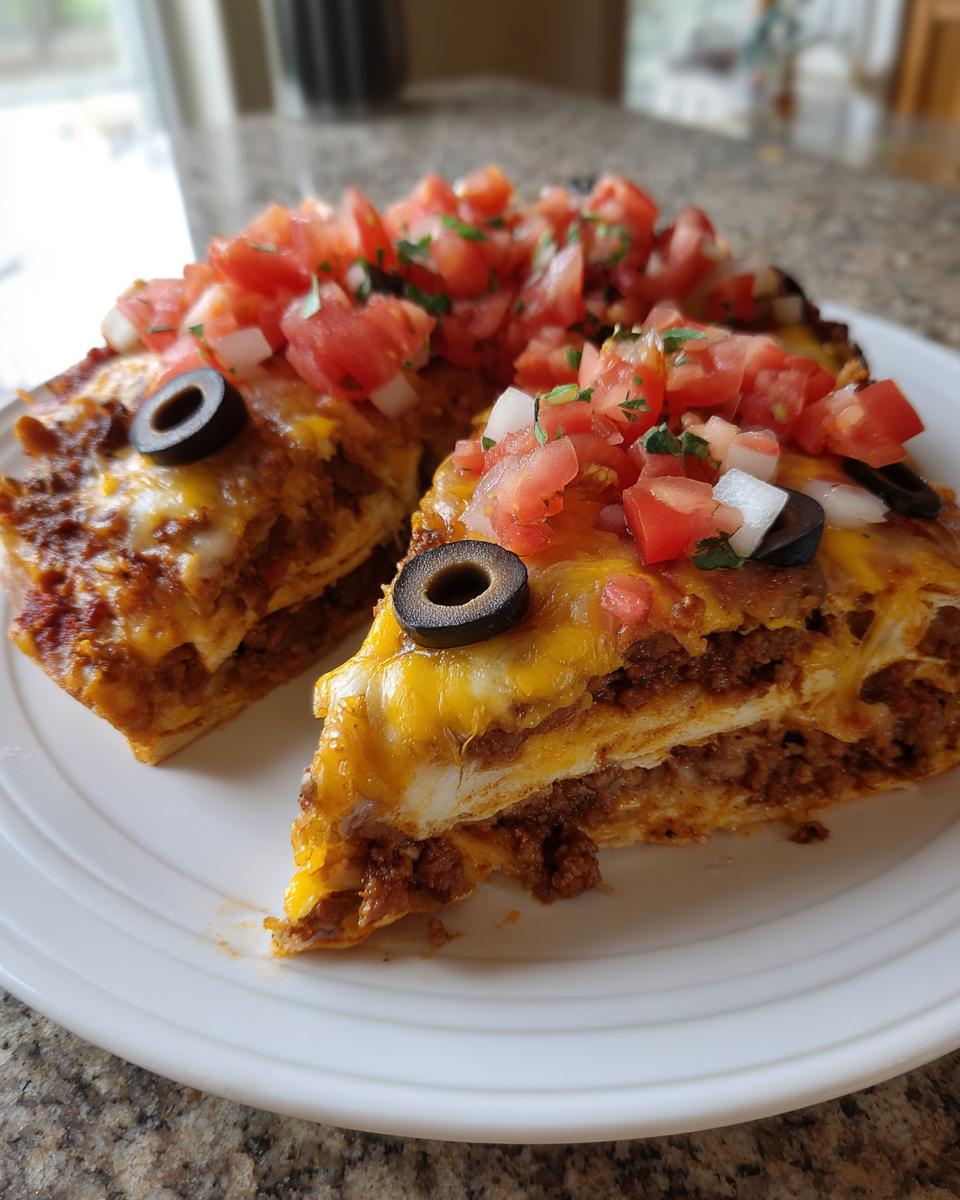
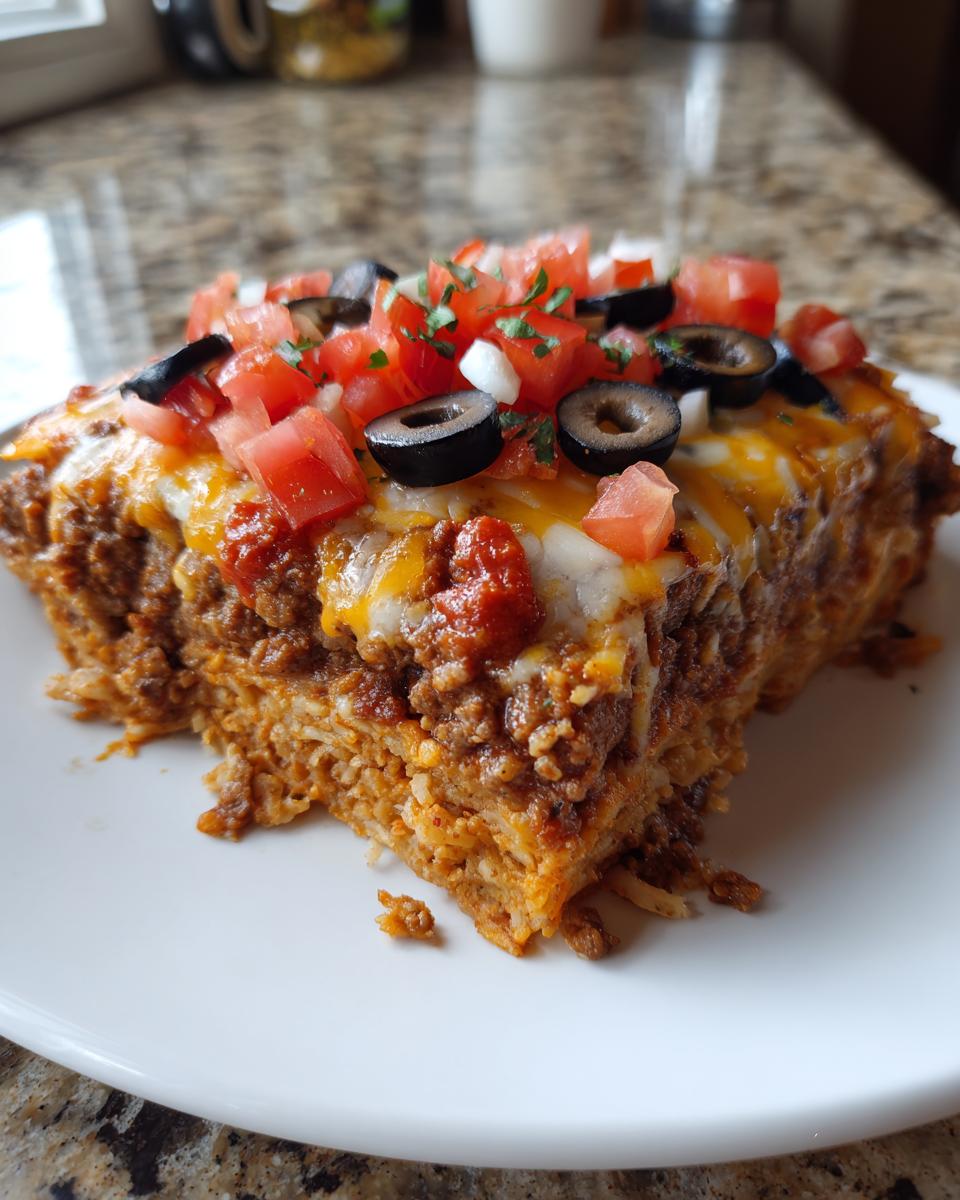
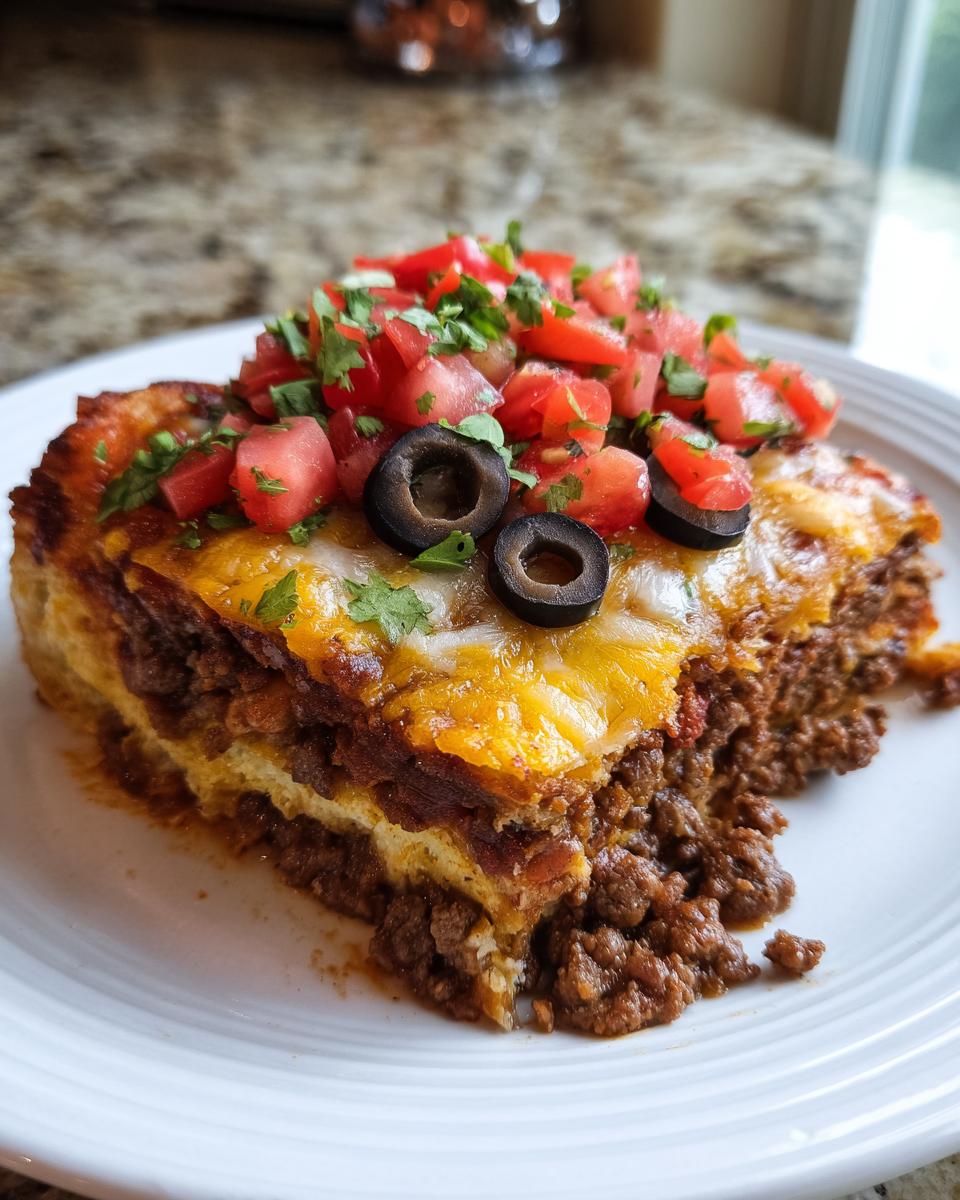
Okay, your mexican pizza is out of the oven! It’s bubbly, it smells incredible, and now it’s time for the finishing touches that really take it from “copycat” to “absolute showstopper.” Remember those simple toppings listed in the recipe? They aren’t just suggestions; they are non-negotiable for hitting that true flavor profile!
First things first, you must top it while it’s piping hot. That residual heat melts the final layer of cheese just a little more and warms up the fresh ingredients perfectly. Take those diced tomatoes—look for small, bright red ones if you can—and scatter them over the top edge. Next come the sliced black olives. I know olives can be polarizing, but they add a salty, savory depth that you really need here for the full experience. Finish with a generous sprinkle of thinly sliced green onions. That sharp bite cuts right through the richness of the beans and cheese. Honestly, that combination is the signature look of a perfect Easy Mexican Pizza Dinner.
If you want to kick this up a notch, a dollop of sour cream or even a drizzle of your favorite mildly spicy salsa right on top of the tomato/olive layer makes it feel gourmet. It just mellows the richness perfectly.
Now, if you’re planning this for a true family meal and need a side dish that ties into that Tex-Mex vibe without being another heavy dish, I have a suggestion for you! Since this pizza is pretty satisfying on its own, something lighter and bright works best. Have you ever tried my easy chicken tortilla soup? It’s warm, it’s zesty, and it makes the whole dinner feel complete but not overly stuffed. It’s the perfect counterpoint to the crispy, cheesy goodness of this pizza. Trust me, soup and pizza together? It’s unexpectedly brilliant!
Storage and Reheating Instructions for Leftover Mexican Pizza
Now, I know what you’re thinking: leftovers? There shouldn’t be any, right? But let’s be real, sometimes we make too much, or maybe you’re smart enough to save one slice for lunch the next day. When it comes to this double-decker mexican pizza, storage matters significantly if you want to keep that satisfying crunch intact for round two!
If you do have slices leftover, the absolute best approach is to let them cool down fully before you even think about putting them away. If you toss warm food into an airtight container, you trap steam, and steam is the sworn enemy of crispy tortillas. Once completely cool, wrap each individual slice loosely in plastic wrap first, and then tuck those wrapped pieces into a sturdy, airtight container. This layering prevents the toppings from sticking together and keeps things neat. You can keep them in the fridge for about three days, tops. Any longer than that, and the tortillas start getting a little too soft, even in the fridge.
Reheating is the key moment to rescue that texture! Please, please, please skip the microwave if you can. You know what the microwave does to tortillas? It makes them rubbery—we absolutely cannot have rubbery pizza shells here! The best method, hands down, is using the oven or even better, a toaster oven. Set your oven to about 350°F (175°C).
Place those slices directly on a wire rack set inside a baking sheet. If you don’t have a wire rack, parchment paper will do in a pinch, but the rack lets the heat circulate all the way around the tortilla, which allows moisture to escape and crispness to return. Pop them in for about 8 to 12 minutes. You’ll see the cheese start to glisten again, and when you carefully lift one edge with a fork, you should hear that satisfying little crackle. That tells you the tortilla is crisping back up beautifully. It takes a little longer than nuking it for 30 seconds, but honestly, eating a slightly crispy homemade mexican pizza is worth the extra six minutes of waiting!
Frequently Asked Questions About Making Mexican Pizza at Home
I hear from so many of you after you try this recipe, and usually, the questions center around tweaks or simple swaps! It’s wonderful hearing how you’re customizing this mexican pizza for your family. Because this is such a nostalgic recipe, people want to make sure their homemade version honors the original while fitting their lifestyle. Here are some of the common things I get asked about!
Can I make this Mexican Pizza vegetarian?
Oh, absolutely you can! This is meant to be a fun, adaptable dinner, not a rigid rule book. Swapping out the ground beef is super simple. My absolute favorite way to do this is by using a can of black beans—just rinse them really well, mash about half of them lightly with a fork (this helps them act like a binder, similar to the refried beans), and then mix the rest in whole. You can season them right along with your taco seasoning and a splash of water. Lentils work great too if you like that heartier texture! The best part is, the core structure of the mexican pizza—the crispy shell, the creamy beans, the saucy, cheesy top—remains totally intact. It’s just as delicious, I promise.
What is the best sauce to use for this copycat recipe?
For that authentic, slightly tangy flavor that really makes this recipe shine as a Taco Bell Mexican Pizza Copycat, you need a good quality red enchilada sauce. Don’t use salsa; salsa is thinner and will soak through the tortilla too quickly! Enchilada sauce has that perfect thickness and savory depth.
When you’re shopping, look for a standard mild or medium red sauce. If you love a little kick, medium is definitely the way to go. If you are making this for little kids or spice-averse folks, keep it mild! You don’t want to accidentally drench it in hot sauce during the layering phase, as we are aiming for that classic profile that relies more on the seasoning and the cheese.
If you find yourself wanting to branch out into other easy Tex-Mex territory after mastering this, I have a great guide for an easy puff pastry chocolate croissant—okay, okay, not Tex-Mex, but you need dessert sometimes! And if you want a good savory side, check out what the fervent mama suggests to go alongside their version!
Nutritional Estimate for This Cheesy Mexican Pizza
I always get questions about the details, and while I rely on verified information for these estimates, remember that these numbers are just a guide! Since we are using store-bought components like seasoning mixes and canned beans, the exact breakdown can vary slightly depending on the brands you grab off the shelf. It’s just good practice, you know? Transparency is part of building trust in the kitchen. We calculate this estimate based on the recipe yielding four good-sized servings.
So, for one serving slice of this incredible, cheesy mexican pizza, here is what you can generally expect:
- Serving Size: 1 slice
- Calories: about 450
- Fat: 25g (with 12g being saturated fat)
- Carbohydrates: 35g
- Protein: 24g
- Sodium: 750mg (This is typical for Tex-Mex due to the seasoning and cheese, so keep that in mind if you watch your sodium intake!)
- Sugar: 3g
- Fiber: 4g
See? High in protein and satisfying enough to keep you full until dinner the next day! Knowing this information helps you make these fun quick Tex Mex dinners fit into your overall eating plan. It feels good when comfort food is also relatively balanced, right?
Share Your Homemade Mexican Pizza Creations
That’s it, friend! You’ve successfully transformed simple pantry staples into the ultimate tribute to salty, crispy, cheesy fast-food comfort. Now that you’ve got your very own homemade Mexican pizza masterpiece cooling on the counter, I really, really want to see it!
This is where the community part of CravyBite Kitchen comes alive. Did you try frying those tortillas or did you stick to the oven bake? Did you add extra black olives, or maybe you tried a totally different topping? I want to know what modifications you made to make this Mexican pizza your own personal signature dish.
Please, go ahead and leave a star rating right below this section—it helps so many others who are nervous about trying a new recipe take that leap! And if you took a picture of your gorgeous, cheesy layers, tag me on social media! Seeing your success is genuinely what makes me want to keep sharing these decades-old family methods tweaked for modern life.
If you ever have a question while you’re cooking or want to suggest another nostalgic favorite you think I absolutely must tackle next, don’t hesitate to reach out to me directly through the contact page here. Happy eating, and enjoy every crunchy bite of your incredible Easy Mexican Pizza Dinner!
PrintCopycat Taco Bell Mexican Pizza: Crispy, Cheesy Comfort at Home

Make the iconic Taco Bell Mexican Pizza at home. This recipe delivers crispy tortillas layered with seasoned ground beef, refried beans, and melted cheese for a satisfying, quick weeknight dinner.
- Prep Time: 15 min
- Cook Time: 20 min
- Total Time: 35 min
- Yield: 4 servings 1x
- Category: Dinner
- Method: Baking
- Cuisine: Tex-Mex
- Diet: Vegetarian
Ingredients
- 12 small flour tortillas (about 6-inch diameter)
- 1 pound ground beef
- 1 packet taco seasoning mix
- 1 cup water
- 1 (16 ounce) can refried beans, warmed
- 1 cup enchilada sauce (red)
- 2 cups shredded Mexican cheese blend
- 1 tablespoon vegetable oil (for frying tortillas)
- Toppings: Diced tomatoes, sliced black olives, sliced green onions, sour cream (optional)
Instructions
- Prepare the seasoned beef: Brown the ground beef in a skillet over medium heat. Drain excess fat. Stir in the taco seasoning mix and water. Simmer for 5 to 7 minutes, or until the liquid reduces. Set aside.
- Crisp the tortillas: Heat the vegetable oil in a large skillet over medium-high heat. Fry the tortillas one at a time for about 30 seconds per side until they are golden brown and crisp. Alternatively, bake them on a baking sheet at 375°F (190°C) for 5-7 minutes per side until crisp. Drain on paper towels.
- Assemble the first layer: Place one crispy tortilla on a baking sheet. Spread half of the warmed refried beans evenly over the tortilla. Top the beans with half of the seasoned ground beef.
- Add sauce and cheese: Spoon half of the enchilada sauce over the beef layer. Sprinkle half of the shredded cheese over the sauce.
- Create the second layer: Place the second crispy tortilla on top of the cheese layer. Spread the remaining refried beans, seasoned beef, enchilada sauce, and top with the remaining shredded cheese.
- Bake: Bake the pizza in a preheated oven at 375°F (190°C) for 8 to 10 minutes, or until the cheese is fully melted and bubbly.
- Serve: Remove from the oven. Slice the Mexican pizza into wedges. Top each slice with diced tomatoes, black olives, and green onions. Serve immediately with sour cream if desired.
Notes
- For a healthier option, bake the tortillas instead of frying them to achieve a crispy texture.
- Use your favorite store-bought salsa or enchilada sauce for speed.
- This recipe is a great base for a family favorite Mexican food night.
Nutrition
- Serving Size: 1 slice
- Calories: 450
- Sugar: 3
- Sodium: 750
- Fat: 25
- Saturated Fat: 12
- Unsaturated Fat: 13
- Trans Fat: 0.5
- Carbohydrates: 35
- Fiber: 4
- Protein: 24
- Cholesterol: 65