
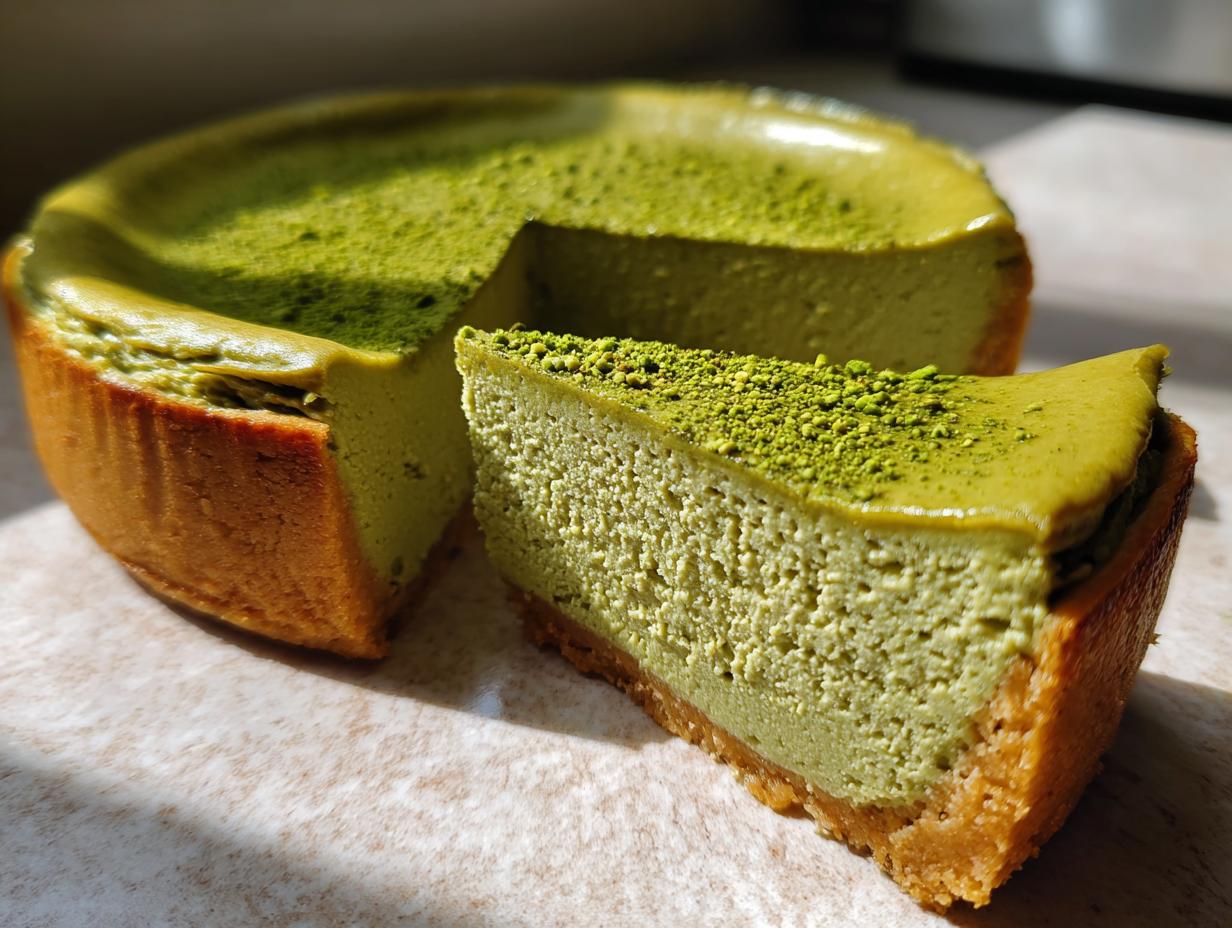
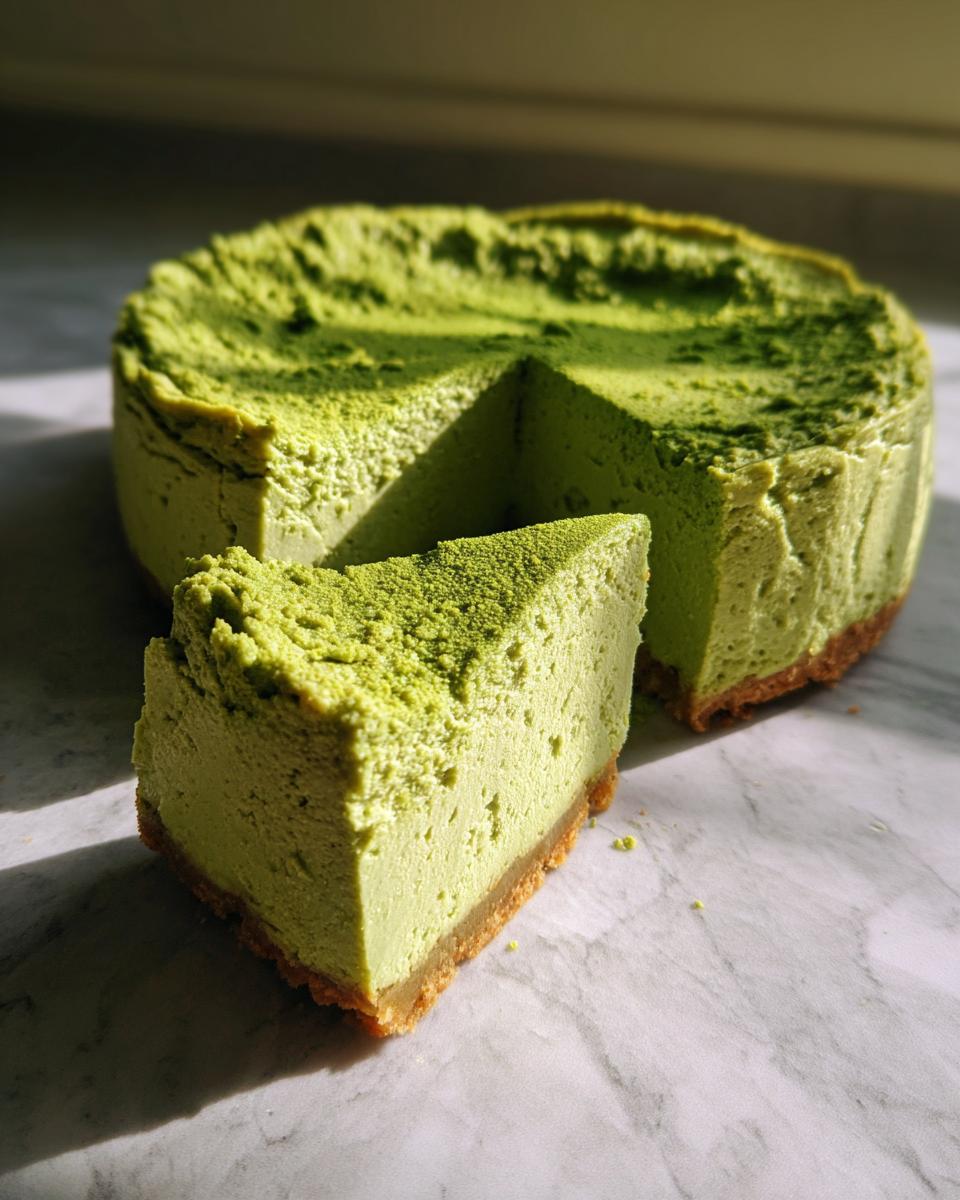
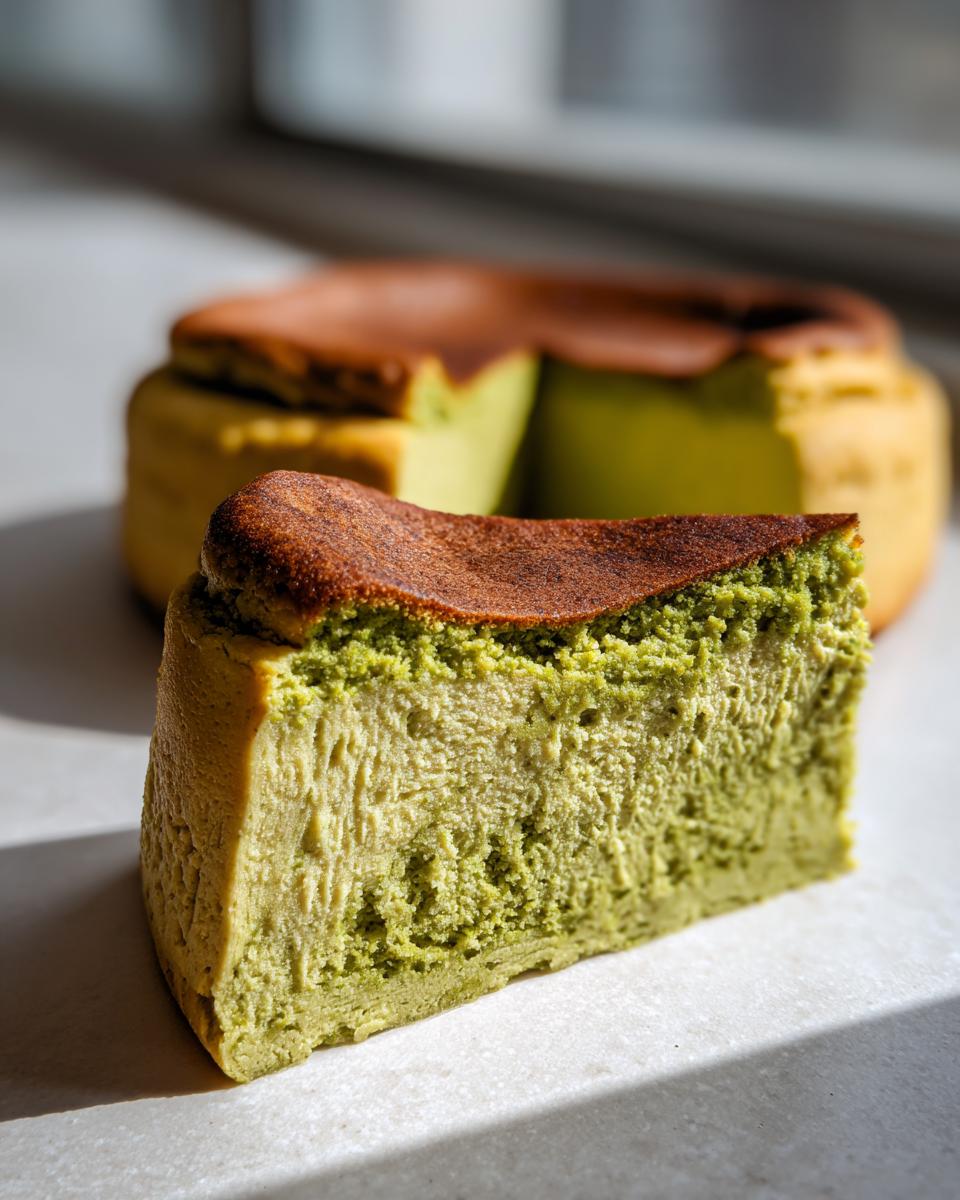
When you need a dessert that truly says, “This is a special occasion,” you skip the ordinary and dive straight into decadence. Seriously, nothing beats slicing into a perfectly rich, impossibly smooth baked creation. That’s exactly what we’re doing today with my take on a cheesecake: the ultimate pistachio cheesecake. This isn’t some overly sweet, grainy concoction; this is a vibrant green, New York style bake that Jess Carter developed by blending old-school patience with modern kitchen science. Trust me, achieving that deep, nutty flavor and that signature creamy texture is easier than you think!
- Why This Creamy Pistachio Cheesecake Recipe Works (E-E-A-T Focus)
- Gathering Ingredients for Your Baked Pistachio Cheesecake
- Step-by-Step Instructions for Perfect Pistachio Cheesecake
- Tips for Success When Baking Your Pistachio Cheesecake
- Crust Ideas for Cheesecake Variations
- Storage and Reheating Instructions for Pistachio Cheesecake
- Frequently Asked Questions About This Pistachio Cheesecake Recipe
- Serving Suggestions for Your Gourmet Pistachio Desserts
- Estimated Nutritional Data for Cheesecake with Ground Pistachios
Why This Creamy Pistachio Cheesecake Recipe Works (E-E-A-T Focus)
I’ve baked enough cheesecakes to know that failure usually comes down to rushing the setup. This creamy pistachio cheesecake recipe relies heavily on two non-negotiable steps if you want that perfect, luxurious texture. First, everything—and I mean *everything*—must be completely at room temperature. Cold cream cheese doesn’t blend; it clumps, and clumps mean grainy cheesecake. No thank you!
Second, we use the water bath. I know, it sounds fussy, but that hot water setup creates steam inside the oven. This steamy environment is what keeps the filling from drying out and guarantees that smooth, dense, New York style finish we want. It’s the oldest trick in the book for beautiful results, and it’s why my cheesecake almost never cracks.
Achieving the Best Homemade Pistachio Cheesecake Flavor
You simply cannot hide weak pistachios in a cheesecake because the flavor is front and center! For the best homemade pistachio cheesecake, seek out high-quality, unsalted nuts. I lightly toast mine before grinding them super fine—this wakes up all those essential oils. If you’re feeling extra decadent—and trust me, you should be—a splash of pistachio liqueur adds an amazing, deep note that white sugar alone just can’t touch.
Gathering Ingredients for Your Baked Pistachio Cheesecake
Okay, let’s get down to business! Getting the right components ready beforehand makes this whole process fly by, which is vital for any from scratch cheesecake filling. Remember, if you’re using the oven method, we need everything prepped before we even turn the pilot light on! Here’s the lineup for this rich dessert.
For the Crust:
- 1 1/2 cups graham cracker crumbs
- 1/4 cup granulated sugar
- 6 tablespoons unsalted butter, melted
For the Filling:
- 24 ounces cream cheese, softened to room temperature (yes, the full blocks!)
- 1 1/2 cups granulated sugar
- 1/2 cup sour cream (also room temp!)
- 1 teaspoon vanilla extract
- 1/4 cup all-purpose flour
- 1/2 cup finely ground pistachios (unsalted, please!)
- 1/4 cup pistachio liqueur (this is optional, but I highly recommend it!)
- 4 large eggs, at room temperature
- Green food coloring (optional, but we are going for that striking look!)
For the Topping:
- 1/2 cup chopped pistachios, for topping
Ingredient Notes and Substitutions for Your Pistachio Cheesecake
The single most important ingredient here is the cream cheese—you absolutely must use the full-fat blocks, like the classic Philadelphia brand. Don’t try the low-fat tubs; they have too much water and will sabotage your texture. For the color, if you want that vibrant green pistachio cheesecake look, a tiny drop or two of quality green food coloring mixed in with the liqueur really makes the pistachios pop. If you skip the liqueur, maybe add a tiny bit of almond extract to boost the nutty taste. Stick to unsalted nuts everywhere you can so you control the salt!
Step-by-Step Instructions for Perfect Pistachio Cheesecake
Now we get to the actual magic! Baking a gourmet pistachio dessert like this requires following the steps closely, especially around the oven time and cooling. Don’t worry if the slow cool-down sounds weird; it’s the secret weapon to an uncracked top you can be proud of. Let’s get this delicious batter into that crust! If you are ever curious about making things from scratch, the methodology of precise mixing certainly applies here too.
Preparing the Crust and Setting Up the Water Bath
First things first: preheat your oven to 325 degrees F. Get a 9-inch springform pan and wrap the outside bottom tightly with heavy-duty foil—we need that to be watertight! Mix those graham cracker crumbs, sugar, and melted butter until they look like wet sand. Press that mixture firmly into the bottom of your prepared pan. Pop that crust into the oven for 10 minutes until it smells slightly toasted, then let it cool down while you focus on the filling. This is step one on how to make perfect cheesecake!
Creating the From Scratch Cheesecake Filling
In your biggest bowl, beat that softened cream cheese until it’s genuinely smooth—no lumps allowed! Now, slowly stream in the 1 1/2 cups of sugar while beating until you get that light, fluffy texture we talked about. Next, gently mix in the sour cream, vanilla, and flour. This is where we fold in the flavor: stir in your finely ground pistachios and that optional liqueur. Finally, drop in the eggs one by one, mixing only until the yellow disappears. Keep your mixer speed low; we don’t want airy batter.
Tips for Success When Baking Your Pistachio Cheesecake
Okay, we’ve got the water bath set up and the batter is poured; now we talk about the great escape! The number one reason people get frustrated with a baked New York style pistachio cheesecake is cracks appearing as it cools down. That happens because of a sudden temperature shift. We fight that by letting the cake relax slowly before it meets the real world.
Once the 60 to 75 minutes are up and the edges look set but the middle still wiggles slightly, turn the oven OFF. Seriously, turn the heat off completely. Then, crack the door open just a tiny bit—maybe wedge a wooden spoon in there if you have to. Let that beautiful pistachio cheesecake hang out in that barely warm environment for a full hour. I know it tests your patience, but I promise this gradual cooling is the key to achieving that flawless top. If you’re worried about it, check out my tips on how to make perfect cheesecake that smiles back at you!
Crust Ideas for Cheesecake Variations
Look, I know graham crackers are the reliable workhorse of the cheesecake world, and our recipe uses them perfectly well, but sometimes you want to spice things up! Since we are already making a super flavored cheesecake, why not make the base match the intensity? I love experimenting with different crust ideas for cheesecake.
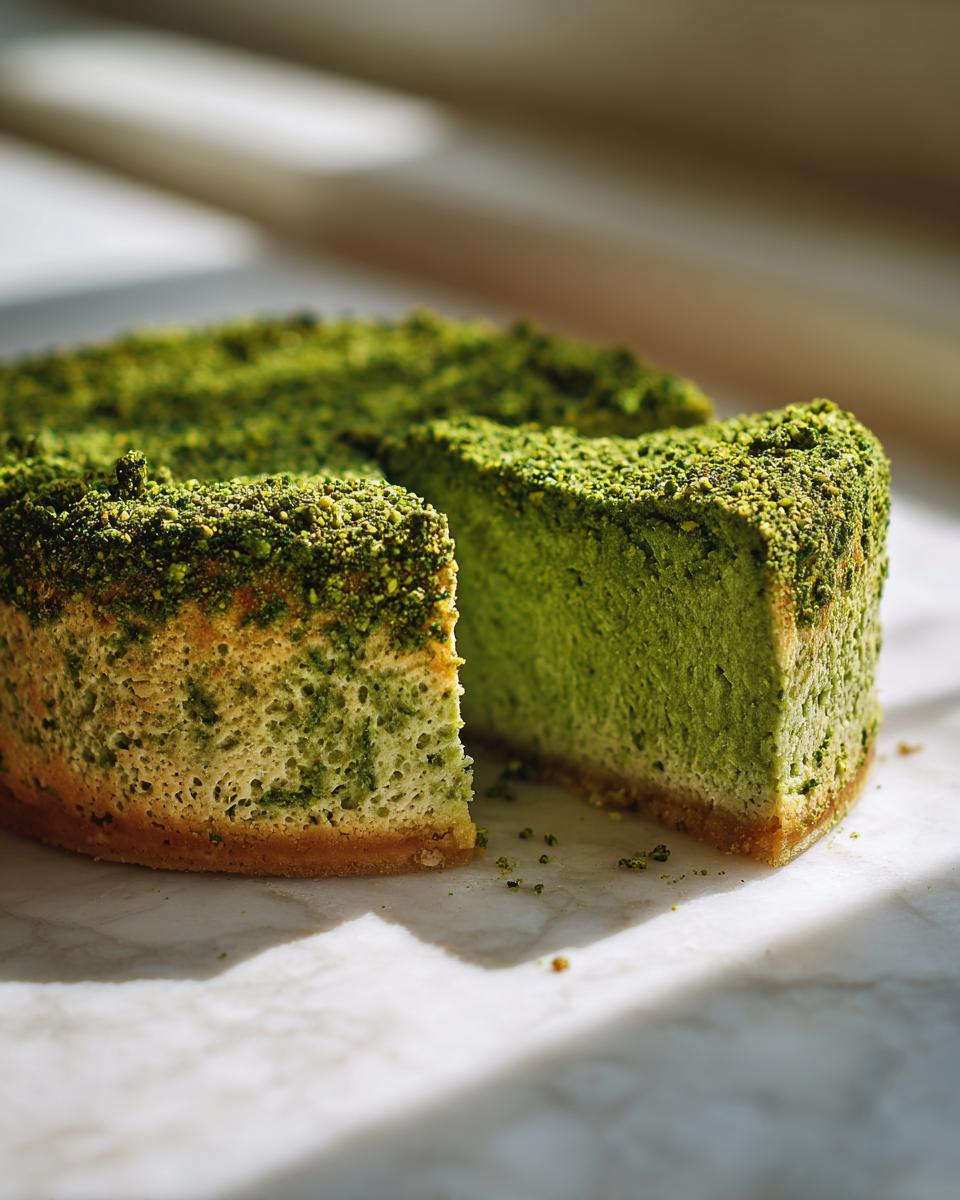
If you want to lean fully into that gorgeous green nut, try swapping out the graham crackers entirely. You can use finely crushed shortbread cookies—they add a buttery richness that plays so nicely with the cream cheese base. Or, for true pistachio overload, take about a cup of extra shelled, unsalted pistachios and grind them up really fine in your food processor instead of using crumbs.
You still mix that ground nut with a little sugar and melted butter, as you would with the graham crackers, but the flavor payoff is huge! It feels incredibly gourmet, and it sets the stage perfectly for that rich filling to sit on top. Don’t forget, you still pre-bake any of these variations for about 10 minutes to help them set up nicely.
Storage and Reheating Instructions for Pistachio Cheesecake
Once you’ve wrestled that stunning cheesecake out of the oven and it’s successfully chilled (seriously, don’t rush that part!), storage is easy work. You need to keep this beauty covered tightly in the refrigerator for a minimum of six hours, but believe me, overnight makes this pistachio cheesecake taste ten times better. It firms up perfectly!
Leftovers keep wonderfully for about five days when stored sealed. If you happen to freeze any slices—which I doubt you’ll have any left to freeze—let them thaw slowly in the fridge first. Honestly, I prefer it cold straight from the fridge, so reheating isn’t really something I recommend. Enjoy it chilled!
Frequently Asked Questions About This Pistachio Cheesecake Recipe
I know when you’re staring down a big recipe like this, you always have a few last-minute questions bubbling up. Don’t stress! Whether you’re worried about that lovely green color or whether you can skip the oven, I’ve got you covered right here. Let’s get those last details sorted so you can focus on enjoying your amazing cheesecake with ground pistachios!
Can I make this an easy no bake pistachio cheesecake?
That’s a great question! While this recipe is designed to give you that decadent, dense texture only available via baking—think true gourmet pistachio desserts—you absolutely can go the no-bake route if time is tight. However, you can’t just skip the steps in this recipe. A no-bake version requires different stabilizers, usually things like gelatin or sometimes a whipped cream structure to hold up. If that sounds more up your alley today, you should definitely check out my dedicated guide for an easy no bake pistachio cheesecake for the right proportions!
How do I get the vibrant green color without artificial taste?
This is my favorite part! If you use good quality nuts, the natural color will be beautiful, but definitely pale—more khaki or pale green. If you want that stunning, eye-catching color that really makes it a showstopper for your next gathering, a tiny bit of green food coloring is the way to go. Think of it like tinting dough when you bake sugar cookies; it just enhances the look! Mix just a drop or two into your wet ingredients just before adding the eggs. It makes this a perfect holiday pistachio cheesecake idea!
Why is the texture of my cheesecake grainy after chilling?
Graininess almost always comes back to the cream cheese temperature. If you used cold cream cheese, even if you thought you beat it long enough, those little chunks don’t dissolve during baking or chilling—they just solidify. For that smooth, melt-in-your-mouth sensation you expect from a creamy pistachio cheesecake recipe, you have to let those blocks sit out for at least two hours before starting! Seriously, trust me on the temperature check.
Can I use salted pistachios in the crust?
Please, please stick to unsalted pistachios for the ground filling and the topping. If you’re using salted crackers in the crust, you can get away with a little salt there, but for the nuts themselves, they often have an off-flavor profile when baked into something sweet. We are aiming for rich, nutty sweetness, not a salty crunch! Using high-quality unsalted nuts ensures you get the pure flavor of the pistachio shining through in your cheesecake with ground pistachios.

Serving Suggestions for Your Gourmet Pistachio Desserts
You’ve made a true masterpiece, so let’s talk about how to present these gourmet pistachio desserts! Since this cheesecake is so rich and nutty, you want toppings that add brightness or complement that earthy flavor. It’s wonderful on its own, of course, but a little something extra makes it perfect for any party.
For simple elegance—maybe for a spring gathering since these are fantastic spring time cheesecake recipes—a very light drizzle of high-quality honey or even a thin lemon glaze works wonders. If you are planning ahead for the holidays, think about pairing a slice with a dark chocolate ganache. That deep chocolate flavor is dynamite against the bright green pistachio. And just a thought: serve this up alongside a glass of that festive cranberry orange sangria—you deserve a good drink after all that careful baking!
Estimated Nutritional Data for Cheesecake with Ground Pistachios
Look, I know some of us are just trying to enjoy a totally decadent slice of the best homemade pistachio cheesecake without worrying about the details, but Jess—with her nutrition background—insisted we include this general data! Remember, because this is baked from scratch and includes nuts, the numbers are going to be richer than your average dessert.
These figures are just estimates calculated based on the standard ingredients in this creamy pistachio cheesecake recipe, not accounting for specific brands or exact portion sizes. If you’re watching macros closely, you might want to check out lighter options like a protein cheesecake instead, but for this gourmet treat, here’s what you’re looking at per standard slice:
- Calories: 450
- Sugar: 35g (That’s the good flavor working!)
- Fat: 30g
- Saturated Fat: 18g
- Carbohydrates: 40g
- Protein: 9g
It’s a rich dessert, pure and simple! That fat content is what gives us the unbelievable texture, and the protein comes mostly from that wonderful cream cheese and the nuts. Enjoy every bite; you earned it!
PrintCreamy Baked Pistachio Cheesecake
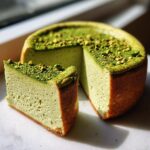
Make a decadent, New York style pistachio cheesecake from scratch with a buttery crust. This recipe yields a vibrant green, rich dessert perfect for celebrations.
- Prep Time: 25 min
- Cook Time: 75 min
- Total Time: 100 min
- Yield: 12 servings 1x
- Category: Dessert
- Method: Baking
- Cuisine: American
- Diet: Vegetarian
Ingredients
- 1 1/2 cups graham cracker crumbs
- 1/4 cup granulated sugar
- 6 tablespoons unsalted butter, melted
- 24 ounces cream cheese, softened
- 1 1/2 cups granulated sugar
- 1/2 cup sour cream
- 1 teaspoon vanilla extract
- 1/4 cup all-purpose flour
- 1/2 cup finely ground pistachios (unsalted)
- 1/4 cup pistachio liqueur (optional, for flavor)
- 4 large eggs
- Green food coloring (optional, for vibrant color)
- 1/2 cup chopped pistachios, for topping
Instructions
- Preheat your oven to 325 degrees Fahrenheit. Wrap the outside of a 9-inch springform pan tightly with heavy-duty aluminum foil.
- Prepare the crust: Mix graham cracker crumbs, 1/4 cup sugar, and melted butter until combined. Press the mixture firmly into the bottom of the prepared pan. Bake for 10 minutes. Let cool.
- Prepare the filling: In a large bowl, beat the softened cream cheese until smooth. Gradually add 1 1/2 cups sugar, beating until light and fluffy.
- Mix in the sour cream, vanilla extract, and flour until just combined. Do not overmix.
- Stir in the finely ground pistachios and pistachio liqueur, if using. Add a few drops of green food coloring if you desire a more vibrant green color.
- Beat in the eggs one at a time, mixing only until each egg is incorporated. Scrape down the sides of the bowl as needed.
- Pour the filling over the cooled crust. Place the springform pan into a larger roasting pan. Carefully pour hot water into the roasting pan until it reaches halfway up the sides of the springform pan (this is a water bath).
- Bake for 60 to 75 minutes. The edges should look set, but the center should still have a slight jiggle.
- Turn off the oven, crack the oven door open slightly, and let the cheesecake cool inside the oven for 1 hour. This prevents cracking.
- Remove the cheesecake from the water bath and foil. Cool completely on a wire rack. Once cool, cover and refrigerate for at least 6 hours, or preferably overnight.
- Before serving, carefully remove the sides of the springform pan and top with chopped pistachios.
Notes
- For the best texture, bring your cream cheese, eggs, and sour cream to room temperature before starting.
- If you do not want to use a water bath, bake at 300 degrees Fahrenheit for 70-85 minutes and cool slowly in the turned-off oven.
- Use high-quality, unsalted pistachios for the best flavor in the filling.
Nutrition
- Serving Size: 1 slice
- Calories: 450
- Sugar: 35g
- Sodium: 280mg
- Fat: 30g
- Saturated Fat: 18g
- Unsaturated Fat: 12g
- Trans Fat: 0.5g
- Carbohydrates: 40g
- Fiber: 2g
- Protein: 9g
- Cholesterol: 95mg