
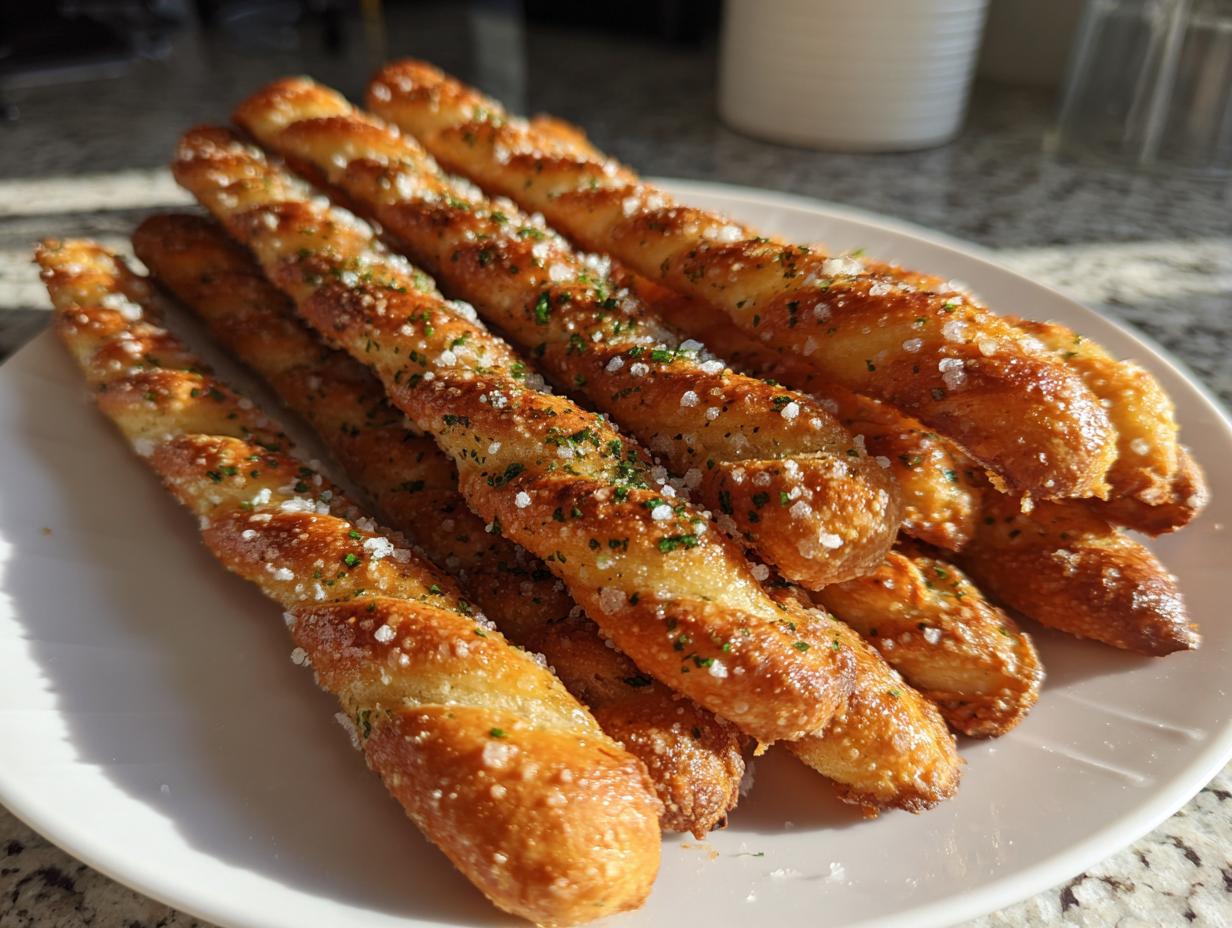
Oh, that sour smell of starter sitting just a little too long in the fridge? We’ve all been there! Trust me, as Jess Carter, I feel that little pang of guilt every time I have extra starter that needs to be fed or discarded. That’s why I’m so excited to share my absolute favorite, go-to method for busting that waste: sourdough discard breadsticks! Forget complicated overnight bakes; these are fast, flavorful, and use up that unfed starter perfectly. If you’re looking for an easy breadsticks recipe that screams savory goodness, you’re in the right spot. This simple appetizer proves that what looks like waste can turn into the best snack on the table. You can read more about my philosophy on reducing kitchen waste over on my About Page!
- Why You Will Love These Savory Sourdough Discard Breadsticks
- Essential Ingredients for Perfect Sourdough Discard Breadsticks
- Equipment Needed for This Easy Breadsticks Recipe
- Step-by-Step Instructions for Homemade Breadstick Recipe
- Tips for Success with Savory Sourdough Discard Baking
- Serving Suggestions for Your Simple Sourdough Appetizer
- Storage and Reheating Instructions for Leftover Sourdough Discard Breadsticks
- Frequently Asked Questions About Using Active Sourdough Starter Discard
- Next Steps After Making Your Quick Sourdough Discard Snack
Why You Will Love These Savory Sourdough Discard Breadsticks
I’ve gone through so many sourdough discard recipes over the years, but these breadsticks always win because they check every box for a busy home cook. Seriously, they shine because they are just so convenient!
- They are incredibly fast! We’re talking about a genuine quick sourdough discard snack that takes minutes to pull together.
- No yeast required, folks! This is a fantastic base for no yeast breadsticks since the discard acts as a gentle leavener alongside the baking powder.
- The flavor is incredible. We amp up the garlic and herbs for real savory sourdough discard baking results that rival any restaurant.
For more quick meal ideas that fit perfectly into a busy week, check out my favorite collection of quick and easy weeknight dinners!
Essential Ingredients for Perfect Sourdough Discard Breadsticks
When we talk about the ratio of discard to flour here, we keep it super simple so you can use whatever you have left over. This recipe is designed to be really forgiving, but using unfed discard is the trick that keeps these from tasting overly sour, which is key for a savory snack!
- One cup of that wonderful, tangy sourdough discard (make sure it’s unfed for this batch!)
- One cup of all-purpose flour
- One teaspoon of baking powder—this gives us the lift since we aren’t waiting for a real rise.
- Half a teaspoon of salt
- Two tablespoons of good olive oil
- About a quarter cup of water, added slowly
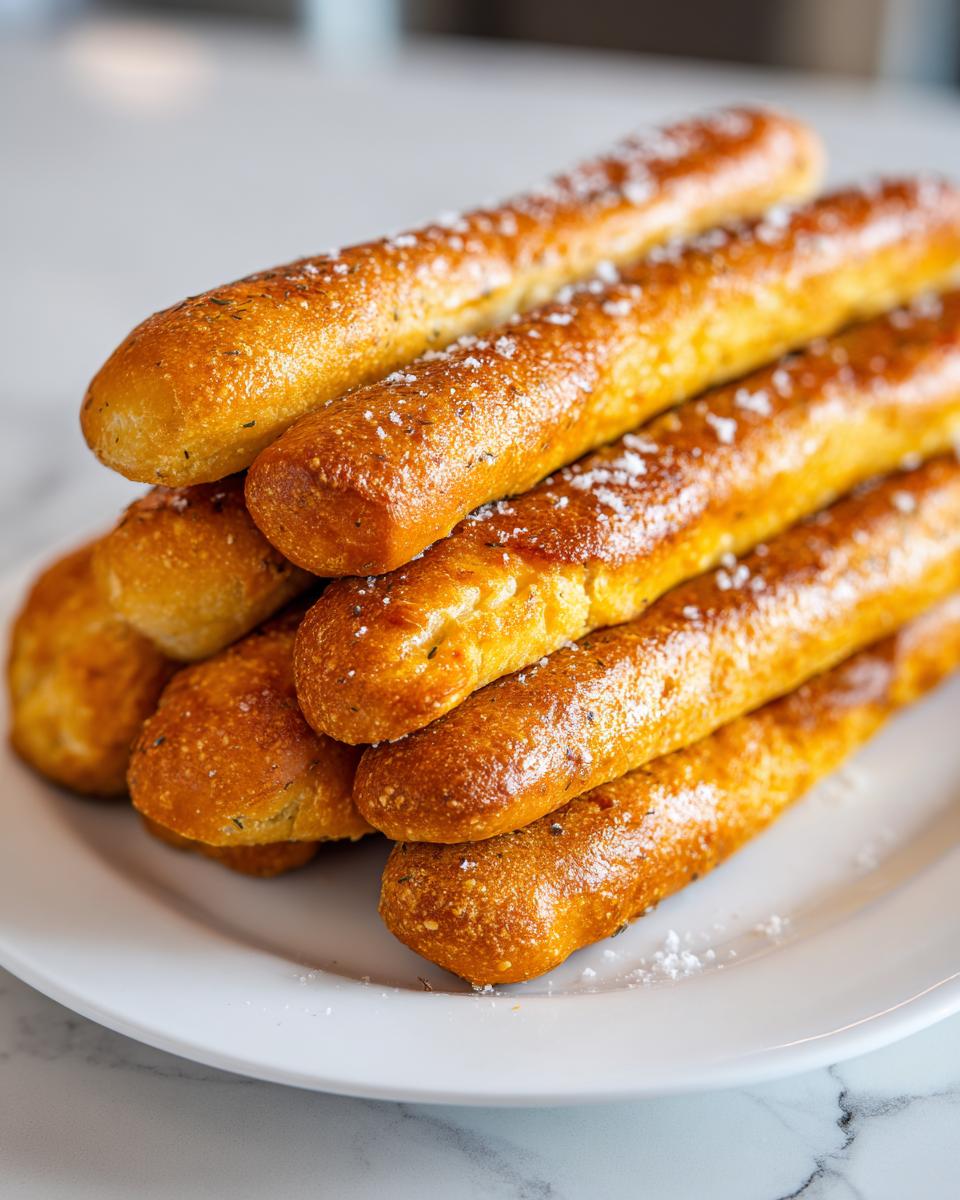
For the topping, you’ll need two tablespoons of melted butter, one teaspoon of garlic powder, half a teaspoon of dried Italian herbs, and just a pinch of coarse salt to make them sparkle when they come out of the oven.
Ingredient Notes and Substitutions for Your Sourdough Discard Breadsticks
Listen, using the unfed discard—that is, the starter right before you feed it—is what keeps the flavor mild. If you use a really active, recently fed starter, these sourdough discard breadsticks might puff up too much or taste slightly sharper than I want for this simple appetizer.
Now, a quick word on flavor! If garlic powder isn’t your jam, or if you’re making these for a party, you absolutely have to try adding Parmesan cheese. Just sprinkle about a quarter cup of finely grated Parmesan right over the butter topping before these go into the heat. It melts beautifully and adds an incredible salty kick! That little adjustment makes them taste gourmet, but they are still just as easy.
Equipment Needed for This Easy Breadsticks Recipe
You don’t need a ton of fancy gear for these! Since this is designed to be a super straightforward, easy breadsticks recipe, most of the items you need are probably sitting in your utensil drawer already. Getting organized upfront saves so much mess later on.
Here is my short list of essentials for making sure this goes smoothly:
- One medium-sized mixing bowl for combining the dough ingredients.
- A smaller bowl specifically for mixing up that herby melted butter topping later.
- A sturdy baking sheet. I always use a standard half-sheet size!
- Parchment paper is non-negotiable here. It keeps cleanup to practically zero, which I love.
- A rolling pin to get that thin, even dough.
- A pizza cutter or a sharp knife for cutting the strips. Honestly, a pizza cutter is the fastest way to get even-looking sticks without crushing the edges.
That’s it! No stand mixer needed, which means less clean-up time for you. See? Cooking should be a pleasure, not a chore!
Step-by-Step Instructions for Homemade Breadstick Recipe
Okay, let’s get these flavorful sticks into the oven! Because we aren’t relying on yeast for a long, slow rise, this whole process is wonderfully fast—perfect for when you need a simple sourdough appetizer *now*. Before you do anything else, get that oven set to 400 degrees Fahrenheit and get your baking sheet lined with parchment. That preheating step is crucial for getting that nice, immediate bake!
We start by mixing the wet and dry components together gently. We aren’t developing gluten for a giant loaf here; we just want everything *combined*. Once you add the olive oil, you’ll notice it starts looking shaggy—that’s totally normal! If your dough looks dry, add water just a teaspoon at a time until it just hugs itself into a ball when you press it. Remember, these sourdough discard breadsticks come together quickly, so no need to wait for them to rise!
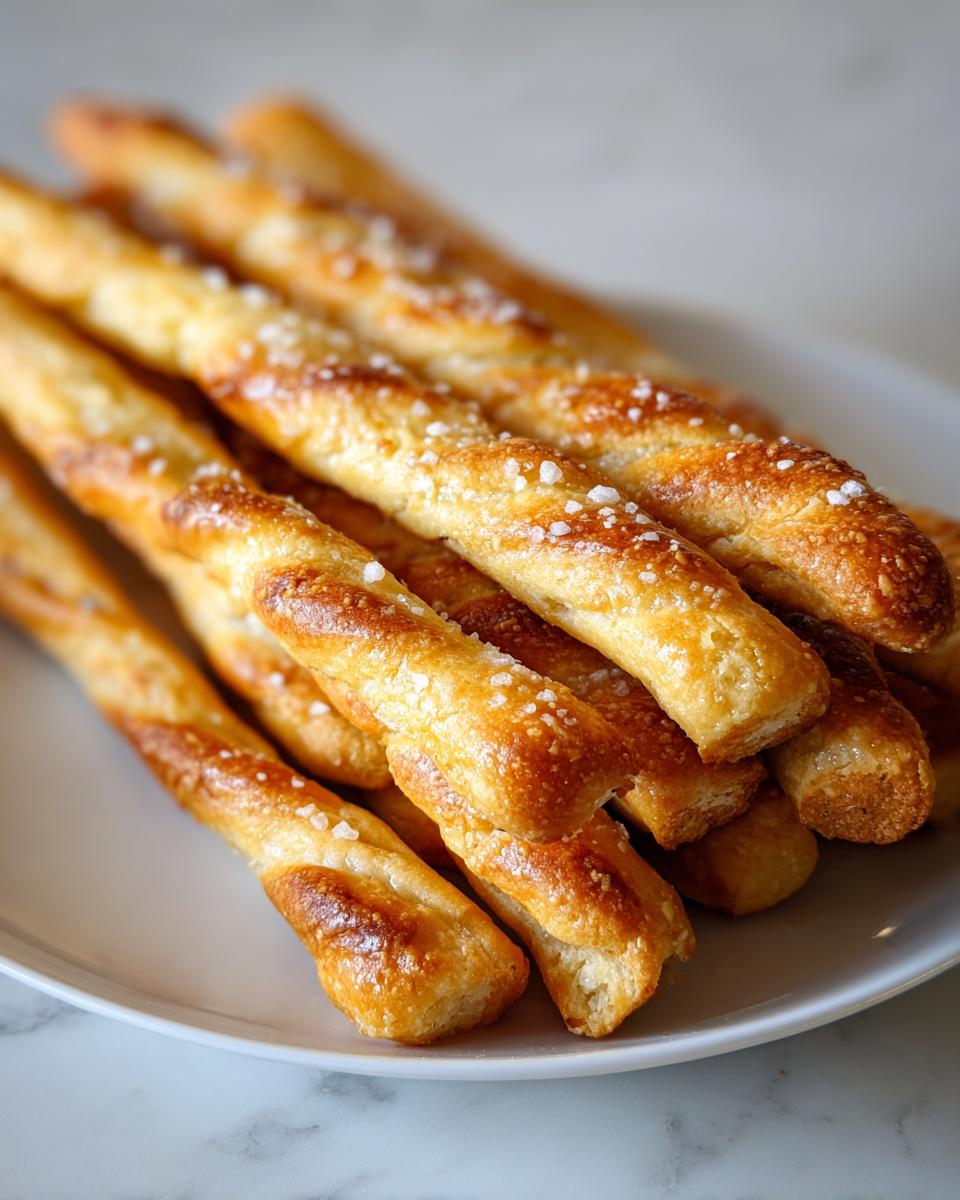
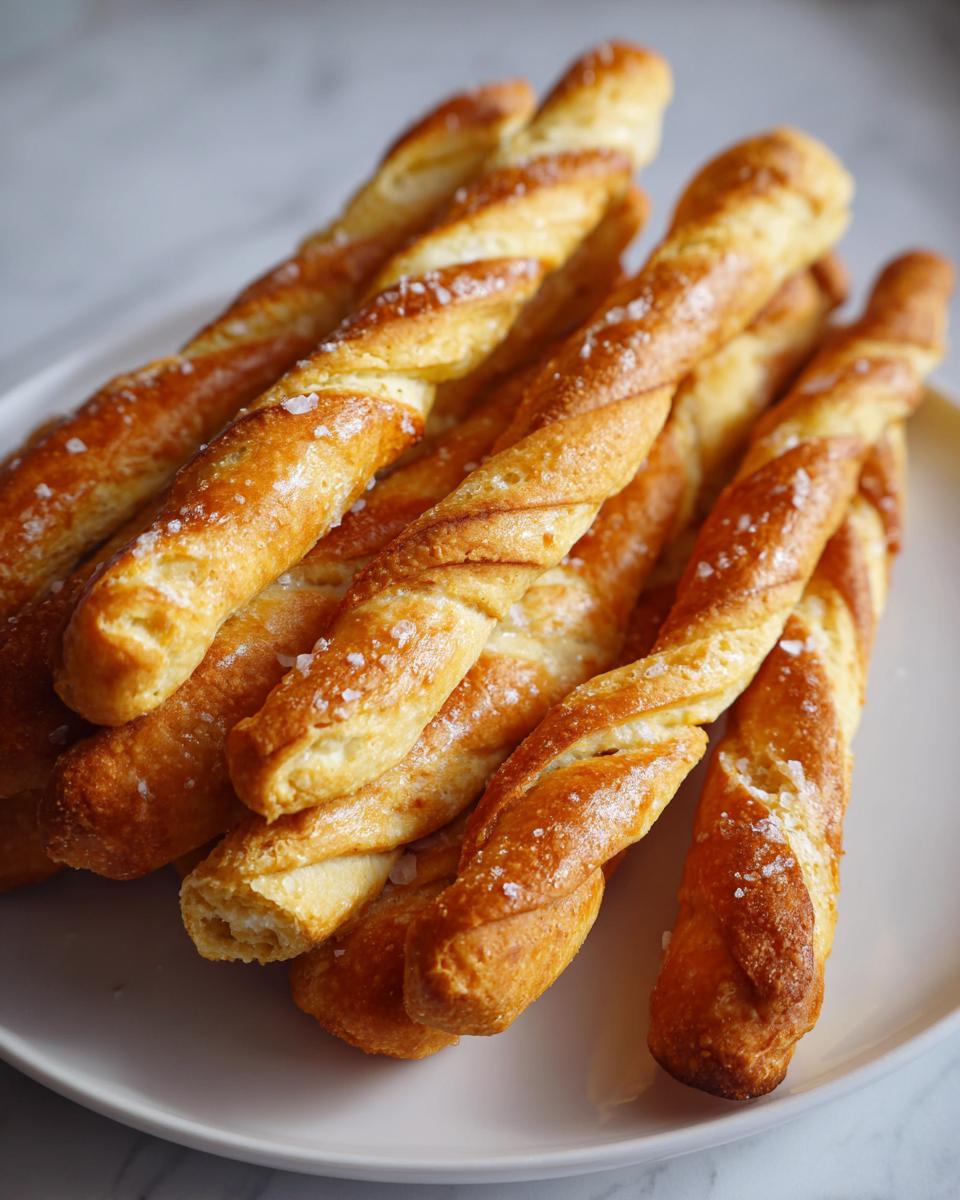
Once the dough is formed, turn it out onto the counter and knead it, but only for about one minute—just enough to make it smooth. Then, roll it out thin, aiming for about 1/8 of an inch thick so you get that great crispy exterior. Cut those strips and get ready for the best part!

If you want more guidance on making beautiful garlic flavors, I have a dedicated post on easy garlic breadsticks recipe techniques! Let’s finish these off.
Preparing the Dough and Shaping Your Sourdough Discard Breadsticks
When you mix the dry ingredients (flour, baking powder, salt) with the sourdough discard, don’t over-mix it! I look for a texture that’s just barely coming together—what I call a “shaggy dough.” If you overwork it now, you risk ending up with tough sticks instead of those slightly chewy sourdough discard breadsticks we want.
The addition of water is where you feel the ratio. You might need slightly less or slightly more than the 1/4 cup listed, depending on how wet your discard was. Stop adding water the second the dough stops looking crumbly and starts holding its shape when pressed gently between your fingers. Roll it out thin—seriously thin, like a sheet of firm cardboard, about 1/8 of an inch. This thinness delivers the ultimate crunch factor!
Flavoring and Baking for Crusty Breadstick Tutorial
Melted butter is your friend here! Whisk it up quickly with the garlic powder and Italian herbs. Use a pastry brush to paint every strip generously. Don’t be shy about the topping! That seasoned butter doesn’t just add flavor; it helps the exterior crisp up beautifully during baking.
Remember that sprinkle of coarse salt? That’s your finishing touch—it pops against the savory herbs. Get these on the 400°F sheet pan and slide them in. They bake fast, usually between 10 to 14 minutes. You’re looking for deep golden brown edges. Pull them out the second they look perfect, because they will continue setting up slightly as they cool.
Tips for Success with Savory Sourdough Discard Baking
When you’re working with discard, especially in a fast recipe like these sourdough discard breadsticks, a few small tweaks can make a huge difference in the final texture. This isn’t like baking a big, bubbly loaf where you wait hours for flavor development; this is about immediate payoff!
My biggest piece of advice, straight from my kitchen testing, is to pay attention to how thick you roll the dough. If you’re aiming for that perfectly crisp bite that snaps when you dip it, stick closely to the 1/8-inch thickness. It really bakes up into a fantastic, crunchy texture.
But, I totally get it—sometimes you want something softer, maybe closer to a dinner roll in texture, even if it’s shaped like a stick. If that’s you, go thicker! Rolling the dough out to about 1/4 of an inch will keep the interior softer and chewier. You might need to bake them a minute or two longer to ensure the center is cooked through, but it’s an easy adjustment.
Also, remember this is a straightforward savory sourdough discard baking method, meaning there’s no long proofing time required. That’s the beauty of using baking powder alongside the discard! Don’t be tempted to let the dough sit around waiting for bubbles; the dough might just relax too much, making it incredibly hard to handle and cut cleanly later on.
If you are interested in other quick baking projects that skip the long fermentation times, you might enjoy checking out my tutorial on easy puff pastry chocolate croissants! It uses a totally different approach but highlights that speed doesn’t mean sacrificing deliciousness.
Serving Suggestions for Your Simple Sourdough Appetizer
What is a perfect, crisp breadstick without something amazing to dunk it into? Honestly, these sticks are the perfect delivery system for all sorts of flavorful sauces! Since we loaded these up with garlic and herbs, they pair beautifully with things that have a little tang or richness.
My very favorite way to serve these is alongside a big pot of homemade spaghetti or lasagna. But you don’t need a whole meal planned to enjoy them! They make an excellent stand-alone snack when you’re craving something savory.
Here are a few dipping recipes that I always keep on hand when I know I’m whipping up a batch of these:
- Classic Marinara: A warm, slightly chunky marinara sauce is always a winner. It picks up those herb flavors so nicely.
- Cheesy Goodness: Try a thick, warm queso or a simple cheddar cheese sauce. If you’re feeling fancy, a creamy Alfredo sauce is just divine for dipping.
- Simple Olive Oil Dip: Sometimes, less is more! Mix high-quality olive oil with a splash of balsamic vinegar, a pinch of salt, and maybe some fresh cracked black pepper. It’s so easy, and it really lets the sourdough flavor shine through.
If you are looking for a spectacular cheese sauce recipe that rivals any movie theater butter dip, you absolutely have to see my recipe for the best garlic bread dip recipe. It’s phenomenal with these sticks!
Storage and Reheating Instructions for Leftover Sourdough Discard Breadsticks
Because these sourdough discard breadsticks bake up so wonderfully crisp, the number one thing to remember is that they are absolutely, 100% best eaten the day you make them. That beautiful shatter you get right out of the oven usually softens up within about 12 hours, especially if it’s humid where you live! You’re looking for that initial snap, and after that, we need a little kitchen magic to bring them back to life.
If you do have leftovers—and it happens, even though I swear they vanish instantly in my house—storage is super important. Do *not* put them in a sealed plastic bag. That traps moisture, and you might as well be storing them in a sponge! Instead, let them cool completely to room temperature first.
Once cool, store them in a container that is airtight, but where they aren’t getting squished. I prefer a rigid plastic container or a thick zip-top bag where I let a tiny corner stick open—just enough air to circulate so they don’t turn totally soft.
Reheating is the secret handshake here to bring back that crusty breadstick tutorial perfection. Forget the microwave—it might make them warm, but it will turn them instantly gummy and sad! You want to use dry heat.
My preferred method is popping them back into a 350°F oven for about 4 to 6 minutes. You’ll hear them crisping up again. If you’re only reheating one or two, you can sometimes use a toaster oven, but watch them like a hawk since they are so thin and will burn faster!
Frequently Asked Questions About Using Active Sourdough Starter Discard
I know that when you start keeping a starter, the question immediately becomes, “Okay, what to make with sourdough discard besides pancakes?” It’s a very common hurdle! I get tons of questions about this specific recipe because people are worried they’ll mess up the ratios. Don’t you worry your head about it; I’ve collected the ones I hear most often right here!
Can I use fed (active) starter instead of discard for these sourdough discard breadsticks?
You absolutely *can*, but I generally steer people toward unfed discard for this specific recipe. When you use unfed discard, you are relying almost entirely on the baking powder for lift, which keeps these no yeast breadsticks recipe fast. If you use a bubbly, *active* starter—one that you just fed a few hours ago—it still has a lot of lift power built in. This might make your dough spread more than expected during rolling, or the texture could end up being slightly more porous, closer to a traditional bread than a crisp stick. For the fastest, most reliable results for these sourdough discard breadsticks, stick to the discard you were planning to toss!
How do I ensure my breadsticks are chewy breadsticks from scratch, not just hard crackers?
This is all down to thickness and topping saturation! If you follow the rolling out instruction and get them down to that thin 1/8-inch layer, they will bake up crispy, which is what most people want for dipping. If you want that satisfying chew, you need two things:
- Roll the dough thicker, closer to that 1/4-inch mark we talked about. This leaves more soft dough in the middle to remain chewy after baking.
- Make sure you brush that seasoned butter mixture generously over the entire surface! The fat traps a little bit of moisture and keeps the exterior from drying out completely into a hard cracker texture.
If you want to troubleshoot your starter journey overall, I wrote a deep dive on how to get going from scratch over here: how to make sourdough starter from scratch. Happy baking!
Why are these sourdough discard breadsticks so much faster than other sourdough recipes?
The reason these are such a delightful, quick sourdough discard snack is right in the ingredient list! We aren’t waiting for the natural fermentation power of the starter to create all the gas we need. We use baking powder as our primary leavener, and the discard just adds moisture, flavor, and a touch of tenderizing acidity. Think of the discard here more like buttermilk than a true yeast agent. We mix, shape, top, and bake—no hours of waiting required!
Can I skip the olive oil or the melted butter topping?
You technically can, but I strongly advise against it if you want these to turn out well! The olive oil mixed into the dough helps keep the dough pliable and adds richness that balances the saltiness. The melted, herbed butter on top is even more crucial—it’s what toasts the outside beautifully and prevents them from drying out into flavorless crackers. That fat is essential for that crusty breadstick tutorial outcome we are looking for!
Next Steps After Making Your Quick Sourdough Discard Snack
Whew, now that your kitchen smells incredible and you have a pile of warm, savory sticks cooling down, I truly want to know what you think! Honestly, seeing how you all adapt the recipes is half the fun of running CravyBite Kitchen. Did you go wild with the toppings? Maybe you tried a spicy ranch for dipping, or perhaps you stuck with the classic garlic butter?
Don’t be shy! Head down to the comments section below and let me know how your batch turned out. I love hearing all about your successes—especially when someone tries one of my little tips, like sprinkling on that extra Parmesan!
If you followed along and loved getting rid of that leftover starter with such a simple appetizer, please take a moment to give this recipe a rating. It genuinely helps other bakers find their new favorite way to use up that discard!
For any questions that didn’t get answered here, or if you just want to send me a picture of your beautiful baked goods, feel free to reach out via my Contact Page. Until next time, keep those kitchens full of love and great smells!
— Jess Carter
PrintSavory Sourdough Discard Breadsticks

Make quick, flavorful breadsticks using your leftover sourdough discard. These are easy to prepare and bake up crispy on the outside and slightly chewy inside.
- Prep Time: 15 min
- Cook Time: 14 min
- Total Time: 29 min
- Yield: About 18 breadsticks 1x
- Category: Appetizer
- Method: Baking
- Cuisine: American
- Diet: Vegetarian
Ingredients
- 1 cup sourdough discard (unfed starter)
- 1 cup all-purpose flour
- 1 teaspoon baking powder
- 1/2 teaspoon salt
- 2 tablespoons olive oil
- 1/4 cup water (or as needed)
- 2 tablespoons melted butter
- 1 teaspoon garlic powder
- 1/2 teaspoon dried Italian herbs
- Pinch of coarse salt for topping
Instructions
- Preheat your oven to 400 degrees Fahrenheit (200 degrees Celsius). Line a baking sheet with parchment paper.
- In a medium bowl, mix the sourdough discard, flour, baking powder, and salt until just combined.
- Add the olive oil and mix until a shaggy dough forms. Add water one tablespoon at a time until the dough comes together and is manageable but not sticky. You are making a simple sourdough appetizer dough.
- Turn the dough out onto a lightly floured surface. Knead briefly, about 1 minute.
- Roll the dough out to about 1/8 inch thickness. Use a pizza cutter or knife to cut the dough into strips about 1/2 inch wide and 6 to 8 inches long.
- Place the breadstick strips on the prepared baking sheet.
- In a small bowl, mix the melted butter, garlic powder, and Italian herbs. Brush this mixture evenly over the breadsticks. Sprinkle with coarse salt.
- Bake for 10 to 14 minutes, or until the breadsticks are golden brown and crisp.
- Remove from the oven and let cool slightly before serving. These are great for dipping recipes.
Notes
- For a cheesy flavor, sprinkle 1/4 cup of grated Parmesan cheese over the tops before baking.
- If you prefer a softer breadstick, roll the dough slightly thicker, about 1/4 inch.
- These are a quick sourdough discard snack and do not require a long proofing time.
Nutrition
- Serving Size: 3 breadsticks
- Calories: 150
- Sugar: 0.5
- Sodium: 250
- Fat: 7
- Saturated Fat: 2
- Unsaturated Fat: 5
- Trans Fat: 0
- Carbohydrates: 19
- Fiber: 1
- Protein: 3
- Cholesterol: 5