
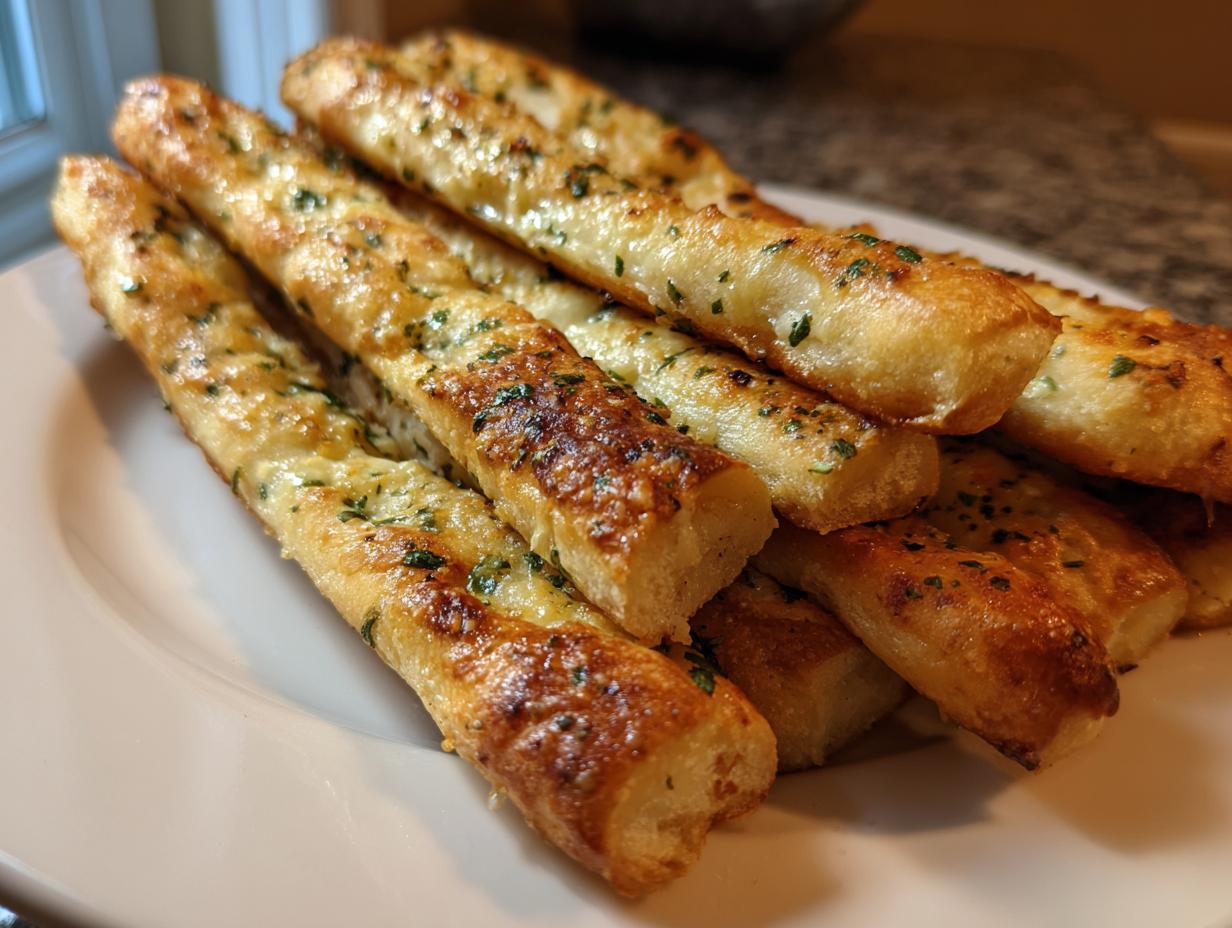
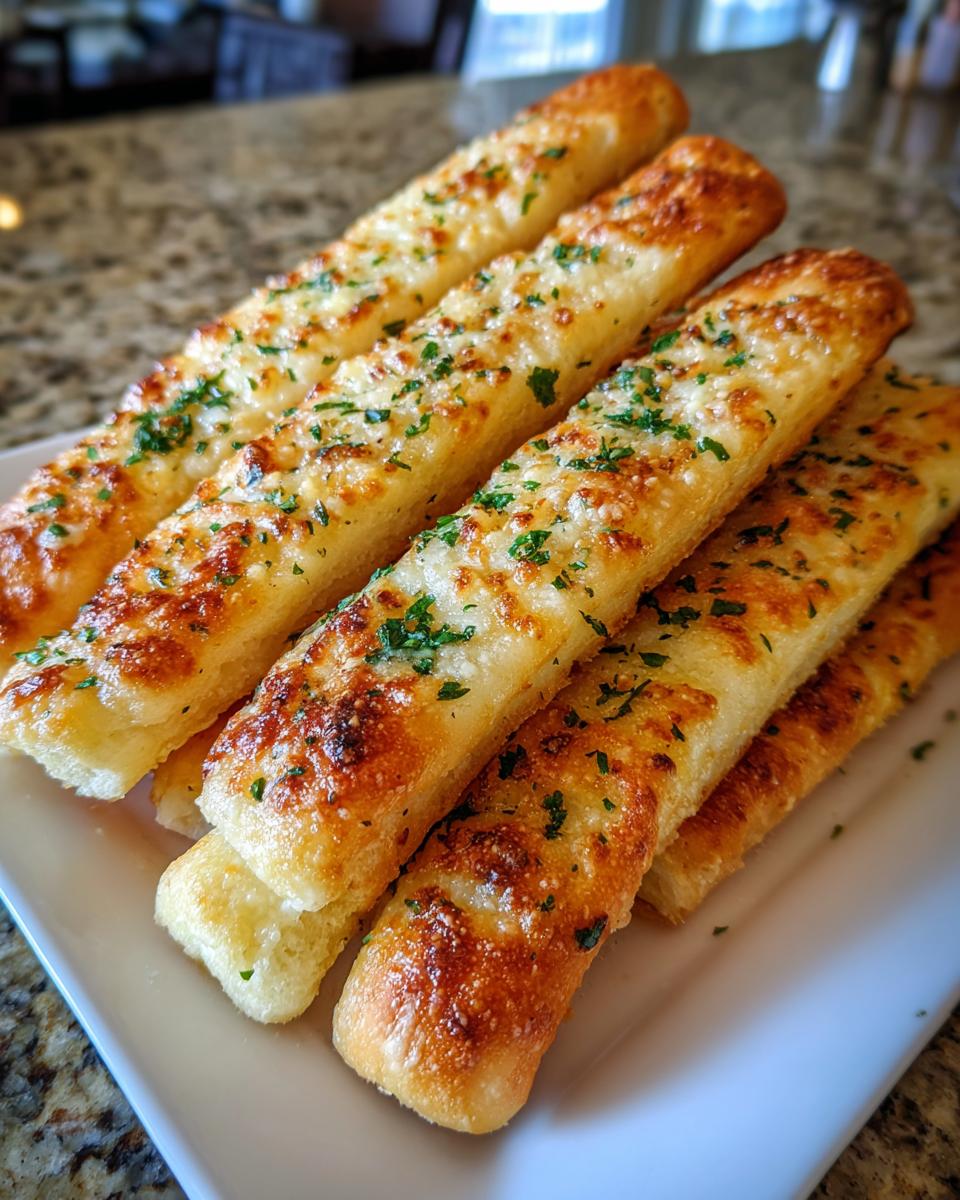
Oh, I know that feeling! You’re sitting down to a massive bowl of pasta, and all you can think about is those impossibly soft, warm, buttery restaurant sides. Seriously, who can resist them? Well, stop dreaming, because I’m sharing the recipe that finally cracked the code: The Ultimate Soft & Chewy Olive Garden Copycat Breadsticks. After years of testing—blending my background in nutrition with the pure joy of heritage home cooking—I’ve perfected this dough to be chewy, tender, and absolutely smothered in the best garlic Parmesan butter you’ve ever tasted. Forget those hard, dry stick recipes; these perfect breadsticks will make your dinner table feel instantly special.
- Why You Will Make These Soft Breadsticks Every Time
- Ingredients for The Ultimate Soft & Chewy Olive Garden Copycat Breadsticks
- How to Make Restaurant Style Breadsticks: Step-by-Step Instructions
- Tips for Perfect Chewy Breadsticks
- Ingredient Notes and Substitutions for Your Breadsticks
- Storage & Make Ahead Breadsticks Instructions
- Serving Suggestions for These Buttery Breadsticks
- Frequently Asked Questions About Homemade Breadsticks Recipe
- Estimated Nutrition for Garlic Parmesan Breadsticks
- Share Your Homemade Breadsticks Creations
Why You Will Make These Soft Breadsticks Every Time
Honestly, these aren’t just *good* breadsticks; they are the ones you’ll keep coming back to. I promise! They hit every single craving note you have when you picture that perfect restaurant side dish. Trust me, they are worth the tiny bit of effort.
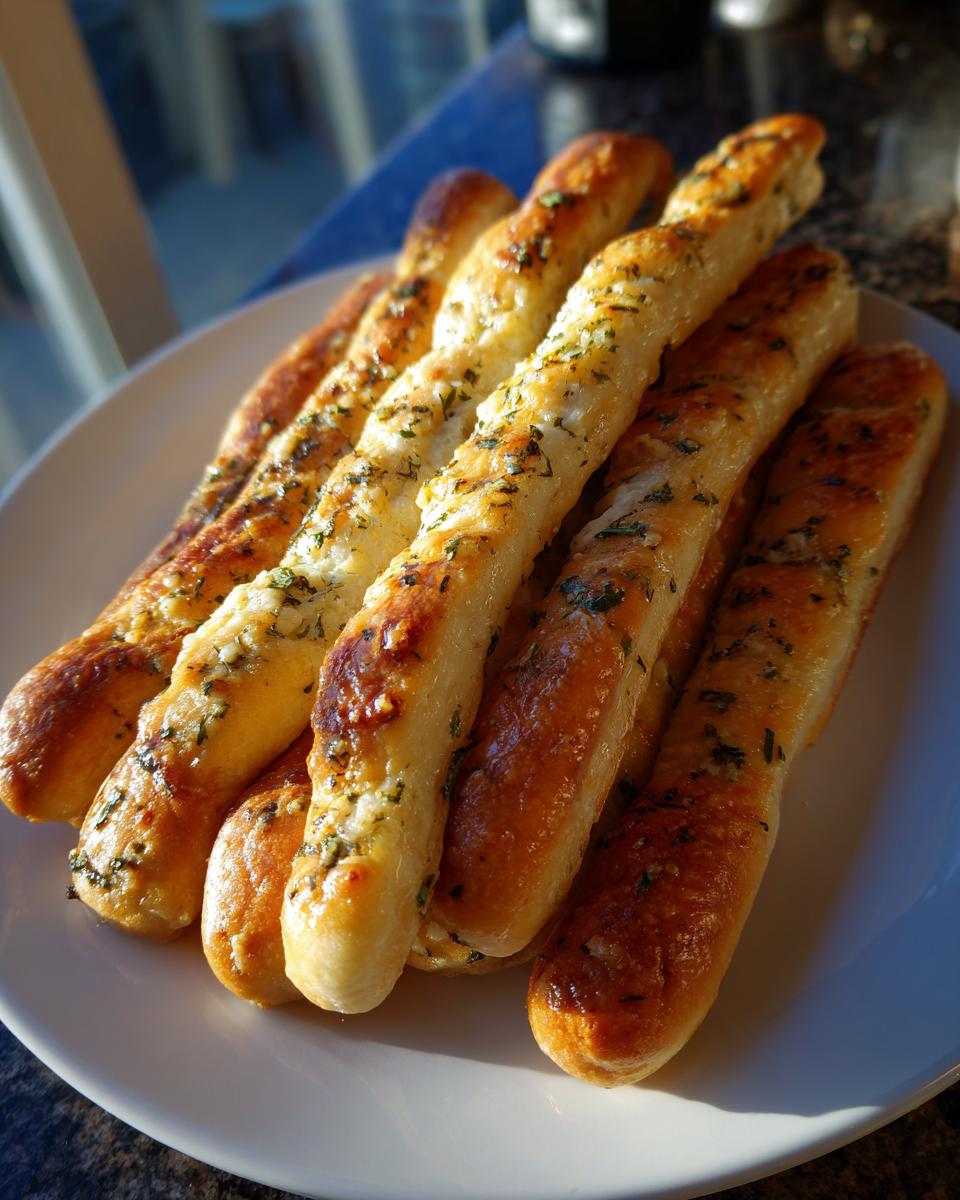
- Incredibly Soft and Chewy: We’re talking pillowy, tender centers that melt in your mouth. They are the definition of soft breadsticks!
- That Signature Garlic Parmesan Flavor: That famous topping? We nailed it. It’s rich, savory, and you apply it while they’re still hot so the butter sinks right in.
- Speedy Dough Time: While they need time to rise, the active prep work is minimal. You can get these done in about an hour total if you use the quick rise method.
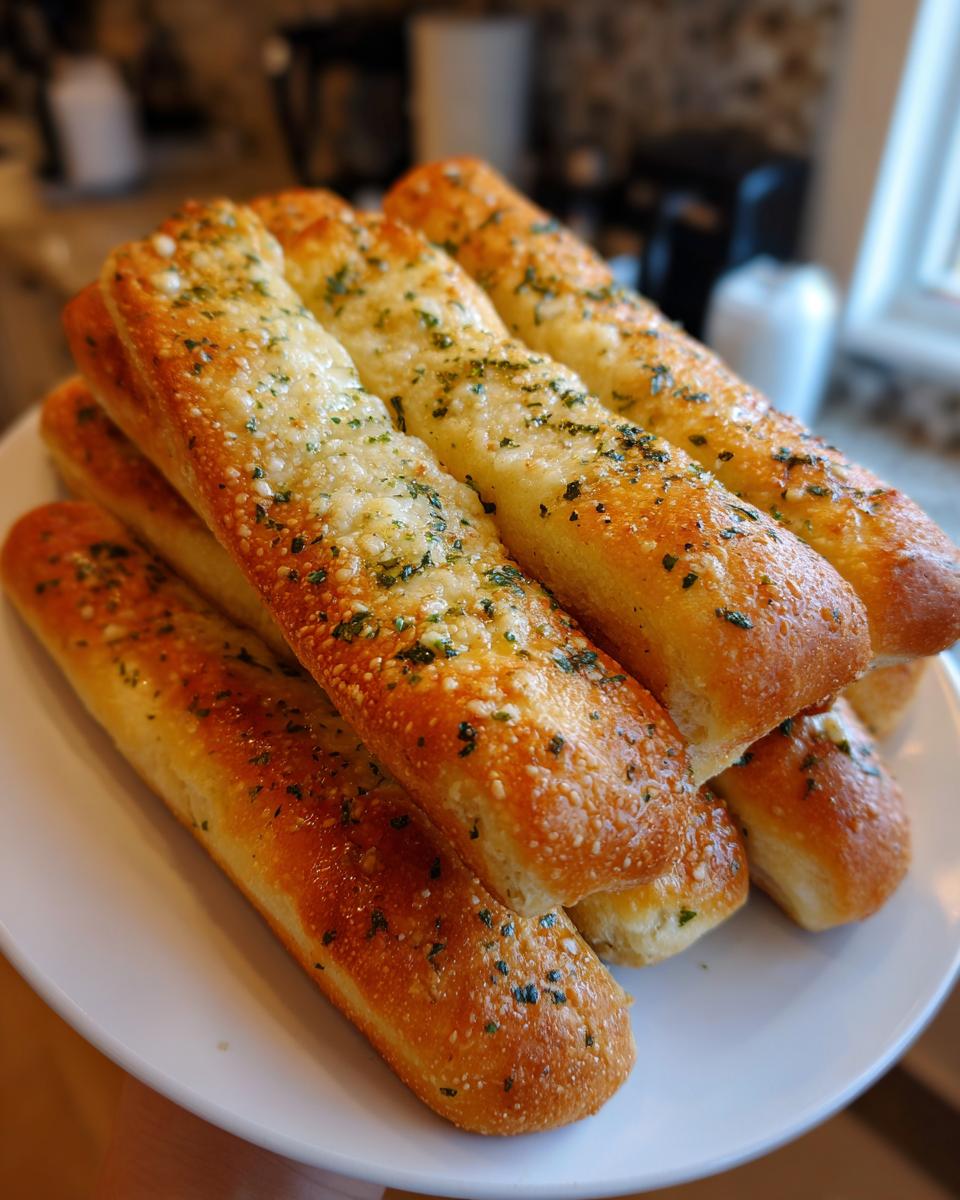
- They Taste Like the Real Deal Copycat: If you’ve been searching for the perfect Olive Garden Breadsticks Copycat, this is it. Seriously, neighbors always ask if I bought them!
- Perfect for Dipping: Their sturdy-yet-soft structure holds up perfectly when dipped into marinara sauce or soup—a fantastic dinner side dish bread.
- Versatile Texture: They are yeasty and light, making them miles better than those hard, cracker-like Italian breadsticks you find sometimes.
Ingredients for The Ultimate Soft & Chewy Olive Garden Copycat Breadsticks
Okay, list time! This is where we build the magic. Getting these measurements right is key, especially for that yeast activation step that gets us the best texture for soft breadsticks. Don’t try to eyeball the water temperature—it matters! I’ve laid everything out clearly below so you can grab everything you need before you even turn on the mixer.
For the Homemade Dough Recipe
This dough is what separates a good appetizer bread stick from a truly great one. Remember, happy yeast equals happy bread!
- 1 1/2 cups warm water (about 110 degrees F—warm to the touch, not hot!)
- 2 1/4 teaspoons active dry yeast
- 2 tablespoons granulated sugar
- 4 cups all-purpose flour, plus more for dusting
- 1 teaspoon salt
- 1/4 cup vegetable oil, plus more for greasing
For the Garlic Parmesan Breadsticks Topping
This rich brushing of flavor is what makes them famous. Be generous, you won’t regret it!
- 1/2 cup (1 stick) unsalted butter, melted
- 4 cloves garlic, minced (get it nice and fine!)
- 1 teaspoon dried Italian seasoning
- 1/2 teaspoon salt
- 1/4 cup grated Parmesan cheese (the finely grated kind works best for sticking!)
How to Make Restaurant Style Breadsticks: Step-by-Step Instructions
If you’ve ever struggled to get that perfect, fluffy rise in your homemade dough, follow these steps exactly. It’s all about timing! We want these buttery breadsticks to bake up beautifully golden, soft on the inside, and ready fast enough for a weeknight dinner. Everything hinges on getting the yeast happy first. If you like rustic Italian bread sometimes, you might want to check out my easy crusty Italian bread recipe later on, but for these soft guys, yeast is key!
Activating Yeast and Mixing the Breadsticks Dough
First things first: grab a big bowl. This is where the yeast wakes up. Mix your warm water, yeast, and sugar together. You have to let this sit for about 5 to 10 minutes, no peeking! It needs to get foamy on top—that tells you the yeast is ready to work its magic. Once it’s bubbly, toss in the flour, salt, and your 1/4 cup of oil. Mix it until it just comes together into a rough, shaggy ball. That’s it for the wet/dry mixing part!
Kneading and Allowing the Dough to Rise
Now, dust your counter lightly because it’s time to knead. Turn that shaggy dough out and work it for a good 5 to 7 minutes. You’re looking for elasticity; it needs to feel smooth and bouncy when you poke it. Once it feels right, pop it into an oiled bowl, turn it over once to coat, and cover it up tight. Let it sit somewhere warm for 1 to 1.5 hours until it has doubled in size. Jess’s Tip: If your kitchen is cold, put the covered bowl in your turned-off oven with the light on—it creates the best little warm incubator!
Shaping and Baking Your Easy Breadsticks
Preheat your oven to 400 degrees F right before that dough finishes rising. Line two big sheets with parchment paper—trust me, it saves cleanup time later! Gently punch down the risen dough and divide it in half. Roll each half out until it’s about 1/4 inch thick across the dough. Then, cut those rectangles into 12 long strips each. That gives us 24 pieces! Cover those shaped strips loosely and let them rest for just 15 minutes while the oven finishes heating up. Bake for 10 to 12 minutes until they just start turning golden around the edges.
Applying the Signature Garlic Butter Topping
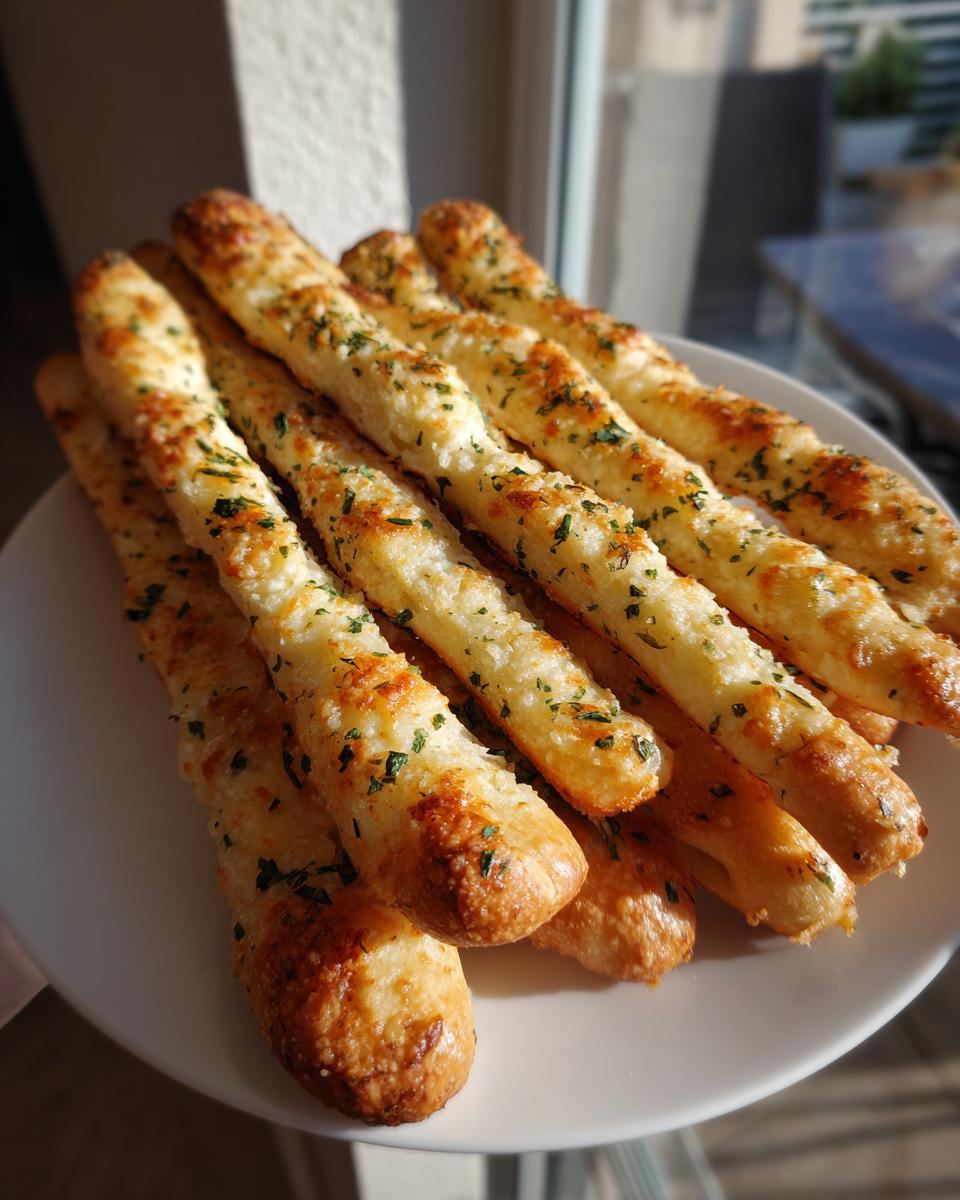
Get ready for the best part! While those beauties are baking, melt your stick of butter and mix in your minced garlic, Italian seasoning, and salt in a small bowl. The second those hot breadsticks come out of the oven, you must brush them generously with this garlic butter. If you wait, they won’t soak up the flavor properly! Brush them all over, then take your grated Parmesan cheese and sprinkle it everywhere before the butter sets. You can see the exact technique for making this coating over at this site, but my version just uses a little more seasoning!
Tips for Perfect Chewy Breadsticks
Achieving that signature soft and chewy texture takes a tiny bit more attention than just whipping up a quick dough, but trust me, the results are worth the extra check-in during the process. These tips are what I learned over testing dozens of batches until I got that perfect, doughy pull, just like the ones everyone raves about. When you’re aiming for restaurant style breadsticks that melt in your mouth, technique is everything!
Don’t Skip the Kneading Time
When you think you’ve kneaded enough, go for two more minutes. Seriously! That 5 to 7 minutes of kneading develops the gluten structure we desperately need. If you under-knead, your breadsticks will be crumbly instead of wonderfully chewy. When I first started, my dough felt too sticky, so I added extra flour, making the finished product taste cakey instead of bready. Resist the urge to add too much flour; just keep working it until it smooths out. Remember, that lovely elasticity traps the gas from the yeast, which gives you that gorgeous, airy chew.
The Importance of the Slow Rise (If You Have Time!)
The recipe calls for a 1-hour rise, and that’s great for a fast weeknight side dish! But if you really want to elevate these into the *best* homemade breadsticks recipe, give the dough a cold, slow rise. After you knead it (Step 3), grease the bowl, cover it tightly, and stick it in the fridge overnight—say, for 8 to 12 hours. This slow fermentation develops a much deeper flavor. When you take it out the next day, let it warm up on the counter for about 45 minutes before proceeding to the shaping step. It makes an incredible difference in the final flavor and texture!
How to Make Sure They’re Cheesy Breadsticks
I know so many of you are looking for that next-level cheesy breadsticks experience, and it’s super easy to sneak in! If you want gooey mozzarella breadsticks, you’ll want to add cheese during the last part of the baking process. After the breadsticks have been baking for about 8 minutes, pull the pan out (carefully!) and quickly sprinkle about a tablespoon of shredded mozzarella over each strip. Pop them back in for the last 2 to 4 minutes until the cheese is bubbly. Then, immediately brush with the garlic butter and Parmesan. It’s an extra step, but oh man, it’s worth the indulgence!
For another creamy side variation, if you like cheesy grits sometimes, you’ll appreciate how cheese makes everything better! You can see my favorite way to handle cheese in this ultimate creamy cheese grits recipe.
For more tips on getting perfect home-baked bread, I often look at what other trusted bakers are doing, like what they mention here for basic homemade breadsticks.
Ingredient Notes and Substitutions for Your Breadsticks
I get it—sometimes you want those amazing, soft breadsticks on the table NOW, and waiting an hour for yeast to wake up just isn’t going to happen! So let’s talk shortcuts and ingredient swaps. I always push for the homemade dough because that’s what gives you that authentic, restaurant-style chew, but life happens, right?
If you are seriously pressed for time and need a true quick bread recipe, using store-bought refrigerated pizza dough is totally acceptable. Hey, I’ve done it myself during a chaotic weeknight! If you opt for that, just unroll the dough, cut it into strips, and proceed directly to the 15-minute resting period before baking. Save yourself the yeast fuss!
Now, let’s talk fat. Notice in the main recipe list, I call for vegetable oil in the dough itself and butter for the topping. That’s intentional! The vegetable oil is neutral in flavor and helps keep the dough incredibly soft and pliable during kneading and rising, resulting in a softer final mouthfeel. Butter, however, tastes like heaven when brushed on top of hot bread. Using butter for both would make the dough greasy and potentially heavy, and it’s expensive for the volume you need inside the dough.
If you are out of vegetable oil, you can substitute it with canola oil or even melted, cooled coconut oil if you don’t mind a hint of coconut flavor, though I find neutral oil safest for a true copycat taste. But please, please, for the topping? Stick to butter. Nothing replaces that rich, savory flavor when paired with the garlic!
Storage & Make Ahead Breadsticks Instructions
My family never seems to have leftovers because everyone devours them instantly, but when we do, I have a few tricks up my sleeve to make sure the second day breadsticks are almost as good as the first! Meal prepping these is a lifesaver when you know a busy week is coming. Since these are such a great dinner side dish bread, I often make a double batch on Sunday.
If you want to prep ahead, the best way is to make the dough, let it have its first rise, and then punch it down, toss it in an oiled bowl, and seal it tightly before popping it in the fridge overnight. That slow chill develops so much flavor! You can keep the dough like that for up to 2 days. When you’re ready to bake, just leave it on the counter for about an hour until it warms up enough to shape.
Reheating is Key to Softness
Never, ever reheat these in the microwave if you want them soft! Microwaving turns these buttery breadsticks tough and rubbery almost instantly—it just doesn’t respect their delicate, chewy structure. If you want that soft texture back, you need the oven.
Wrap any leftover breadsticks loosely in foil—just enough to trap some steam but not so tight they mold. Pop them into a 350-degree oven for about 8 to 10 minutes. This warms them through slowly and steams them gently, bringing back that fresh-baked softness. If you plan on having them with something saucy, like my favorite crock pot chicken and rice recipe, the foil keeps them ready for dipping!
Freezing for Later
Yes, you absolutely can freeze these! Baked breadsticks freeze beautifully. Once they are completely cooled, place them in a freezer-safe bag or airtight container. They are good in the freezer for up to three months. To reheat from frozen, just increase that oven time slightly—maybe 12 to 15 minutes in the foil. They come out perfect every time, which saves so much time when you need a fast appetizer!
Serving Suggestions for These Buttery Breadsticks
Okay, now that you’ve got twenty-four sticks of pure fluffy, garlicky happiness, the next big question is: What do we eat them with? These aren’t just a random snack; they are designed to be the ultimate dinner side dish bread. They truly elevate the simplest weeknight meal into something that feels like a special occasion.
The most obvious pairing, right? Anything tomato-based! These breadsticks are practically begging to mop up extra sauce from lasagna, baked ziti, or a big bowl of spaghetti and meatballs. Dipping these soft treats into a rich tomato sauce is just heavenly. It’s comfort food perfection, plain and simple.
But don’t stop at pasta! They are absolutely fantastic alongside a hearty, comforting soup. Think creamy tomato soup, a rich minestrone, or even a beef stew. They are softer than croutons but still sturdy enough to handle getting dipped into broth. When I make my creamy Tuscan chicken skillet, I always pass these around as the main dipping vehicle while we eat!
If you’re having a slightly lighter meal, like a big salad, they work beautifully there too. Imagine slicing them a bit thinner and using them like savory breadsticks for dipping into ranch or Caesar dressing. And, of course, if you decide to make them extra decadent and turn them into cheesy breadsticks—like the ones here—they become a show-stopping appetizer all by themselves!
Honestly, any meal that benefits from a warm, carb-loaded friend on the side is a good pairing for these doughy little guys. Don’t be afraid to serve them alongside grilled chicken or steak if you want a non-Italian twist, either!
Frequently Asked Questions About Homemade Breadsticks Recipe
I know you might have a few lingering questions popping up—it always happens when you attempt a beloved copycat recipe! It takes a little precision to nail that perfect texture we are aiming for. Here are the things I get asked most often about achieving superior Garlic Breadsticks Recipe results at home.
How do I make my breadsticks extra chewy like the restaurant version?
This is the million-dollar question, isn’t it? The chewiness comes from two main places. First, don’t rush the kneading! You need to work that dough for the full 5 to 7 minutes we talked about so the gluten develops strong strands to trap the air. Second, if you have the time, the slow, cold rise in the fridge makes a huge difference. It slows down the yeast activity just enough to develop a deeper structure that translates to that perfect chewiness in the final product. Skipping those steps means you end up with something closer to a soft dinner roll than a restaurant-style stick!
Can I make these breadsticks without yeast?
Oh, I totally get wanting to skip that step, especially if you’re looking for a *super* quick bread recipe! However, for these specific Olive Garden Breadsticks Copycat sticks, yeast is non-negotiable if you want that signature texture. Yeast creates those big, elastic air pockets that make them soft and slightly springy. If you switch to baking powder (like you would for a quick biscuit), you’ll end up with something dense and cakey, not light and chewy. It just won’t mimic that restaurant style we’re going for!
What is the best cheese for cheesy breadsticks?
If you’re going for the full experience and want cheesy breadsticks (and why wouldn’t you?), stick with a blend of low-moisture mozzarella and Parmesan. Mozzarella gives you that glorious, stretchy pull when you snap the stick in half. Parmesan, which we use in the topping anyway, adds a salty bite that cuts through the richness of the butter. Just sprinkle it on a few minutes before the breadsticks are done baking so it melts perfectly without burning underneath all that garlic butter!
If you want another idea for weeknight ease, you can always check out my tips for quick and easy weeknight dinners, but trust me, making these breadsticks is worth the small detour!
If you want the deep-dive into how other trusted sources approach this, I always check out details like the ones found over here when I’m perfecting my copycat ratios.
Estimated Nutrition for Garlic Parmesan Breadsticks
Alright, let’s chat numbers for those who track things closely! We all know that smothering them in garlic butter and Parmesan means these buttery breadsticks clock in as a delicious indulgence, not exactly a low-calorie snack, but goodness gracious, worth every bit of it!
Here is the approximate nutritional breakdown based on the recipe yielding 24 sticks. Keep in mind, these are solid estimates for two breadsticks served as a single portion. Remember to adjust if you go heavy on the butter brush!
- Serving Size: 2 breadsticks
- Calories: 180
- Fat: 8g
- Saturated Fat: 4g
- Carbohydrates: 23g
- Protein: 4g
- Sugar: 1g
- Sodium: 350mg
I always encourage folks to check out my resources for lighter meals later in the week, like this handy guide to healthy breakfast ideas, because you know we need balance after devouring these!
A little disclaimer from Jess: Since we’re cooking at home and brands vary wildly—especially with how much Parmesan you sprinkle on top!—these figures should be used as a general guide. Your actual nutrition content might shift slightly depending on the specific flour or oil you use to make these fantastic homemade breadsticks.
Share Your Homemade Breadsticks Creations
Now that you’ve seen how simple it is to nail that iconic soft, chewy texture, I really, really want to hear from you! Seriously, the best part of running CravyBite Kitchen is seeing what you all recreate in your own homes. Did they come out perfect? Did your family fight over the last one? I absolutely love knowing that my family’s favorite side dish is now part of your traditions too!
When you make these Garlic Parmesan Breadsticks, please come back here and give the recipe a star rating—five stars if you’re feeling generous! And if you took a picture of them looking gorgeous next to your pasta bowls, tag me on social media! Seeing your perfectly golden, butter-brushed breadsticks truly makes my day.
If you ran into a snag, or maybe you tried adding mozzarella and want to brag about your cheesy breadsticks creation, drop a comment below. I check in often to make sure everyone is finding success with this recipe. And if you need to reach out directly about a variation or just want to say thanks for the recipe, you can always find my contact info right here. Happy baking, friends!
PrintThe Ultimate Soft & Chewy Olive Garden Copycat Breadsticks with Garlic Parmesan Butter
Make soft, chewy, restaurant-style breadsticks at home. This easy recipe replicates the famous Olive Garden breadsticks, topped with a rich garlic Parmesan butter sauce.
- Prep Time: 20 min
- Cook Time: 12 min
- Total Time: 1 hour 32 min
- Yield: 24 breadsticks 1x
- Category: Appetizer
- Method: Baking
- Cuisine: American
- Diet: Vegetarian
Ingredients
- 1 1/2 cups warm water (about 110 degrees F)
- 2 1/4 teaspoons active dry yeast
- 2 tablespoons granulated sugar
- 4 cups all-purpose flour, plus more for dusting
- 1 teaspoon salt
- 1/4 cup vegetable oil, plus more for greasing
- 1/2 cup (1 stick) unsalted butter, melted
- 4 cloves garlic, minced
- 1 teaspoon dried Italian seasoning
- 1/2 teaspoon salt
- 1/4 cup grated Parmesan cheese
Instructions
- Activate the yeast: In a large bowl, combine the warm water, yeast, and sugar. Let this mixture sit for 5 to 10 minutes until it becomes foamy.
- Prepare the dough: Add the flour, 1 teaspoon of salt, and 1/4 cup of vegetable oil to the yeast mixture. Mix until a shaggy dough forms.
- Knead the dough: Turn the dough out onto a lightly floured surface. Knead for 5 to 7 minutes until the dough is smooth and elastic.
- First rise: Lightly grease a large bowl with vegetable oil. Place the dough in the bowl, turning to coat. Cover the bowl with plastic wrap or a clean towel and let it rise in a warm place for 1 to 1.5 hours, or until doubled in size.
- Shape the breadsticks: Preheat your oven to 400 degrees F. Line two large baking sheets with parchment paper. Punch down the risen dough gently. Divide the dough into two equal pieces. Roll each piece into a large rectangle about 1/4 inch thick. Cut each rectangle into 12 long strips, creating 24 breadsticks total. Place the strips on the prepared baking sheets.
- Second rise: Cover the shaped breadsticks loosely and let them rest for 15 minutes while the oven finishes preheating.
- Bake: Bake for 10 to 12 minutes, or until they are lightly golden brown.
- Make the garlic butter topping: While the breadsticks bake, combine the melted butter, minced garlic, Italian seasoning, and 1/2 teaspoon of salt in a small bowl.
- Coat the breadsticks: Immediately after removing the hot breadsticks from the oven, brush them generously with the garlic butter mixture.
- Finish: Sprinkle the grated Parmesan cheese evenly over the buttered breadsticks. Serve warm as a delicious dinner side dish or appetizer bread.
Notes
- For an extra soft texture, you can let the dough rise slowly in the refrigerator overnight after the first rise.
- If you want cheesy breadsticks, sprinkle mozzarella cheese over the tops during the last 2 minutes of baking before applying the garlic butter.
- You can use refrigerated pizza dough as a quick substitute for the homemade dough recipe if you need a faster result.
Nutrition
- Serving Size: 2 breadsticks
- Calories: 180
- Sugar: 1
- Sodium: 350
- Fat: 8
- Saturated Fat: 4
- Unsaturated Fat: 4
- Trans Fat: 0
- Carbohydrates: 23
- Fiber: 1
- Protein: 4
- Cholesterol: 15