
There is just something truly magical about tearing into a loaf of authentic artisan bread, right? The crackle of the crust, the smell of yeast and flour—it’s pure comfort, especially when you realize you made it yourself! Here at CravyBite Kitchen, my whole goal is to take recipes that seem intimidating, like a true ciabatta, and make them absolutely foolproof for your home oven. Forget those flat, dense loaves you make by accident; I’m sharing my tried-and-true method for achieving that signature, open, airy crumb that screams Italian bakery.
This recipe relies on a slight overnight rest and a whole lot of water, which sounds scary, but please trust me. As Jess Carter, I promise that if you follow these steps carefully, you’ll nail this high-hydration bake every time. We’re going to unlock the secrets to this wonderful crusty Italian bread right now!
- Why This Authentic High-Hydration Ciabatta Bread Recipe Works
- Ingredients Needed for Perfect Ciabatta
- How to Make Ciabatta Dough: Step-by-Step Instructions
- Baking Your Homemade Artisan Bread: Oven Setup
- Tips for Success When Making Ciabatta
- Storage and Reheating Instructions for Ciabatta
- Frequently Asked Questions About Ciabatta
- Serving Suggestions for Your Fresh Ciabatta
- Nutritional Estimate for Ciabatta Bread
Why This Authentic High-Hydration Ciabatta Bread Recipe Works
Okay, so why bother with this technique when store-bought bread exists? Because this isn’t just bread; this is an experience! This authentic ciabatta recipe works because we aren’t fighting the dough; we’re coaxing it. We use a very wet dough, which builds incredible structure slowly and gently.
- The long fermentation from the poolish creates that unmistakable, complex flavor profile that you just can’t rush.
- We use folding instead of aggressive kneading, which preserves the precious gas bubbles inside the dough.
- This high water content ensures the inside texture stays incredibly open and soft, even after it cools down.
When you master handling this wet dough, you’ll be unstoppable in the kitchen. You won’t need any fancy tricks other than patience.
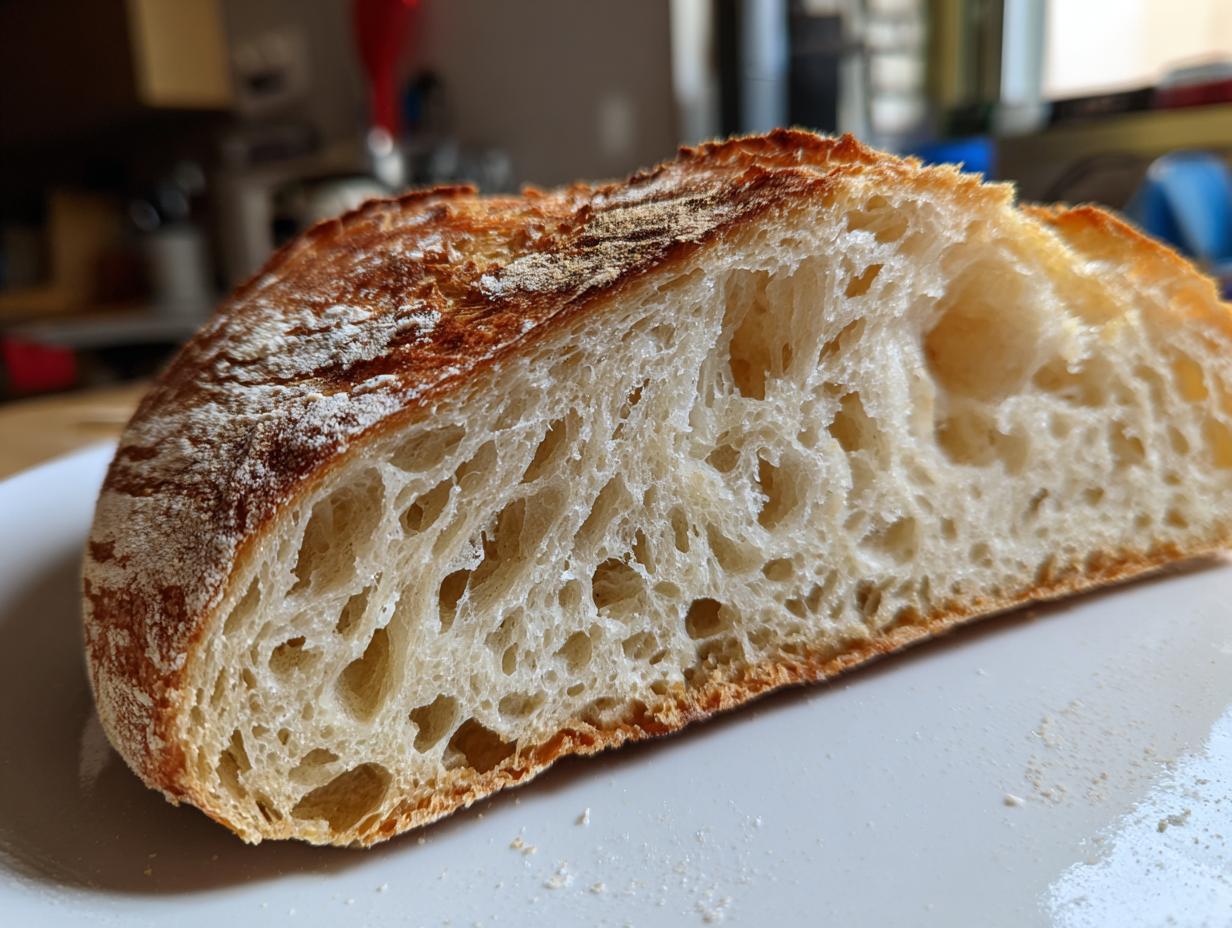
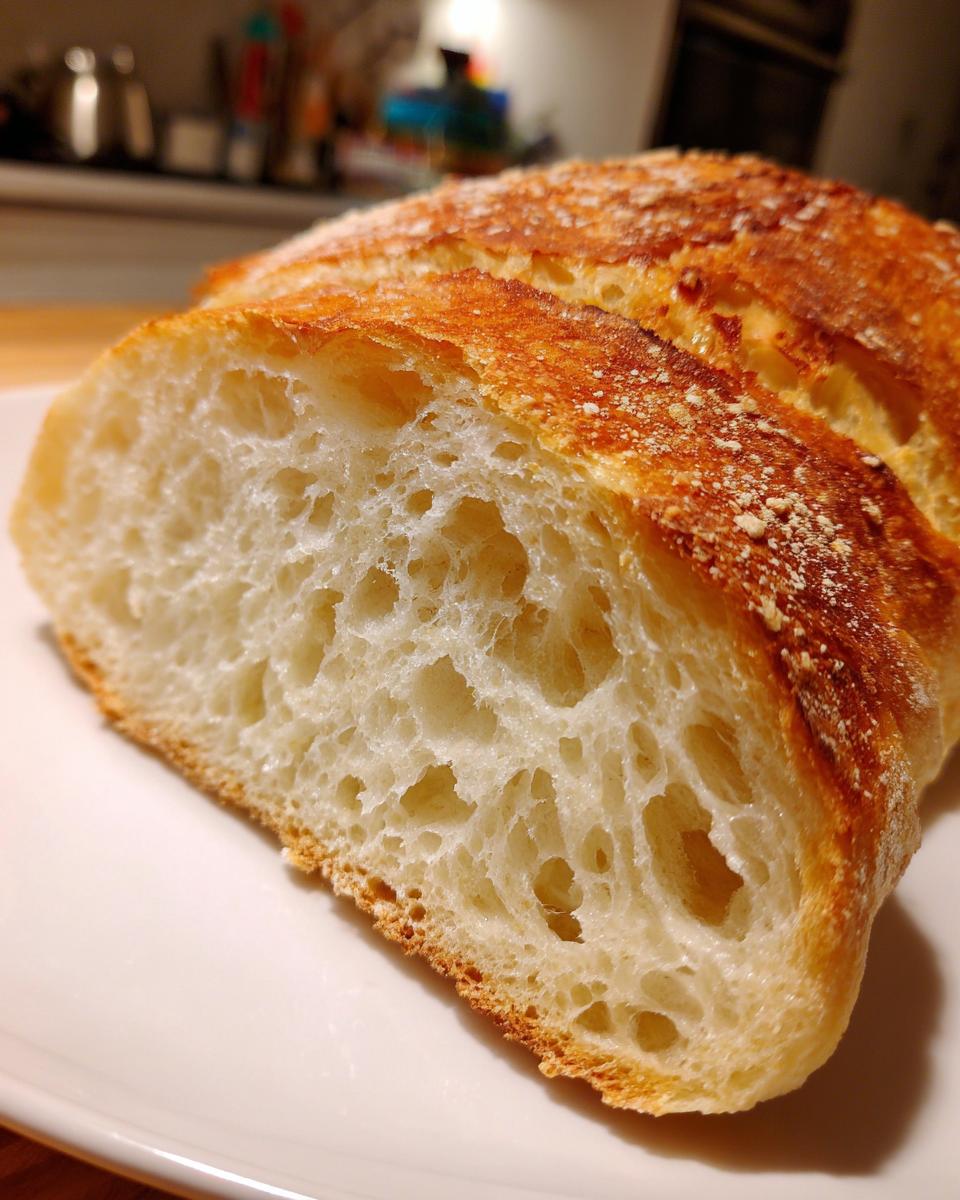
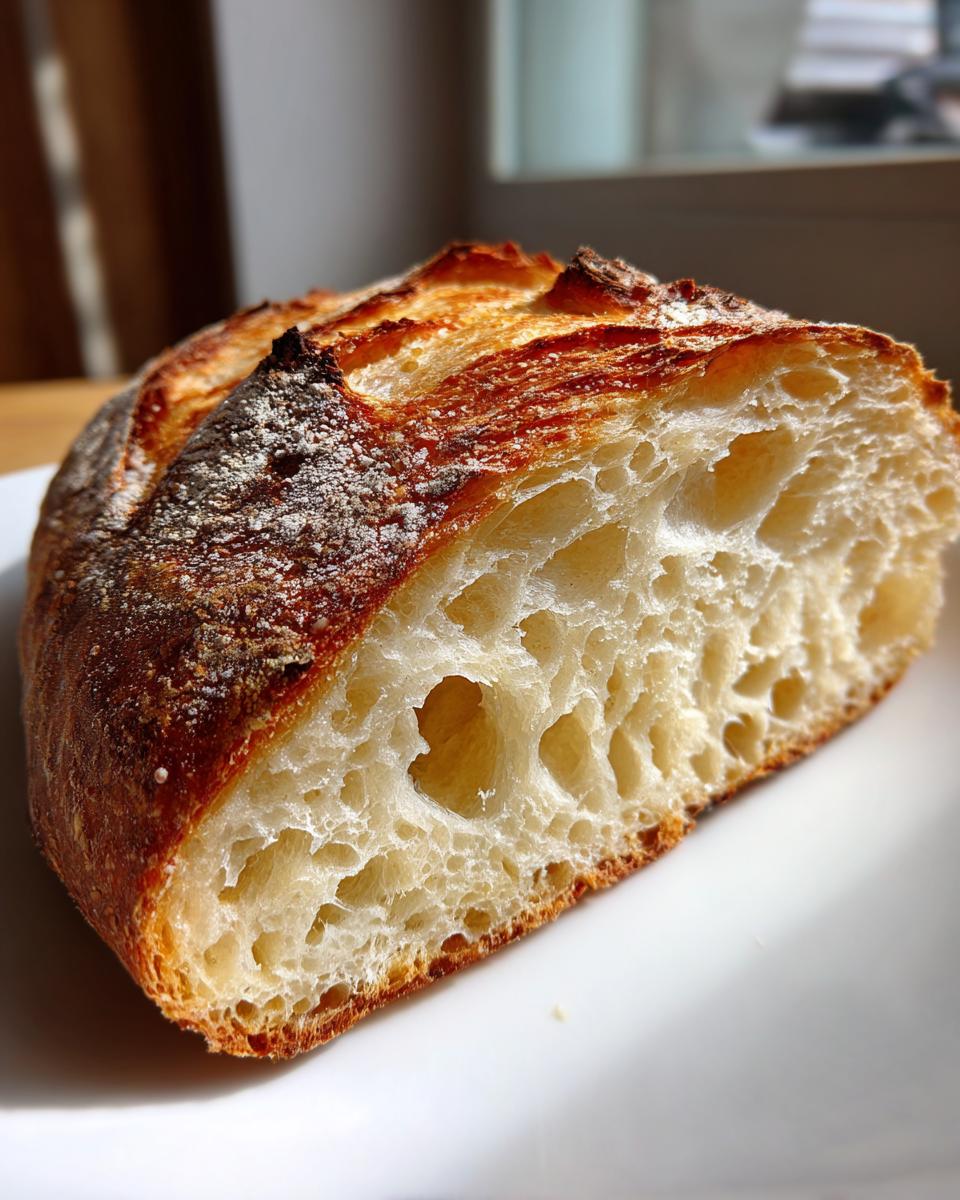
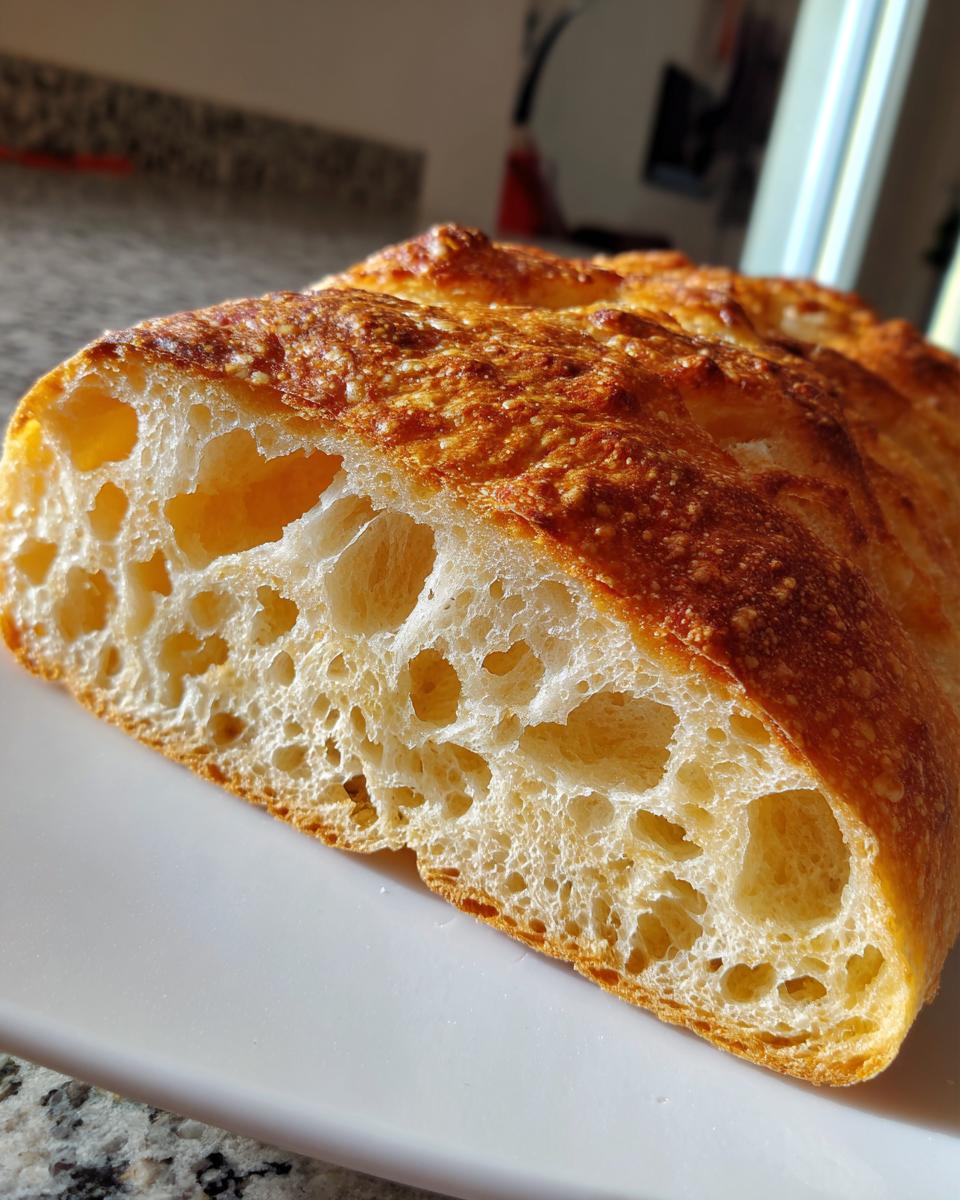
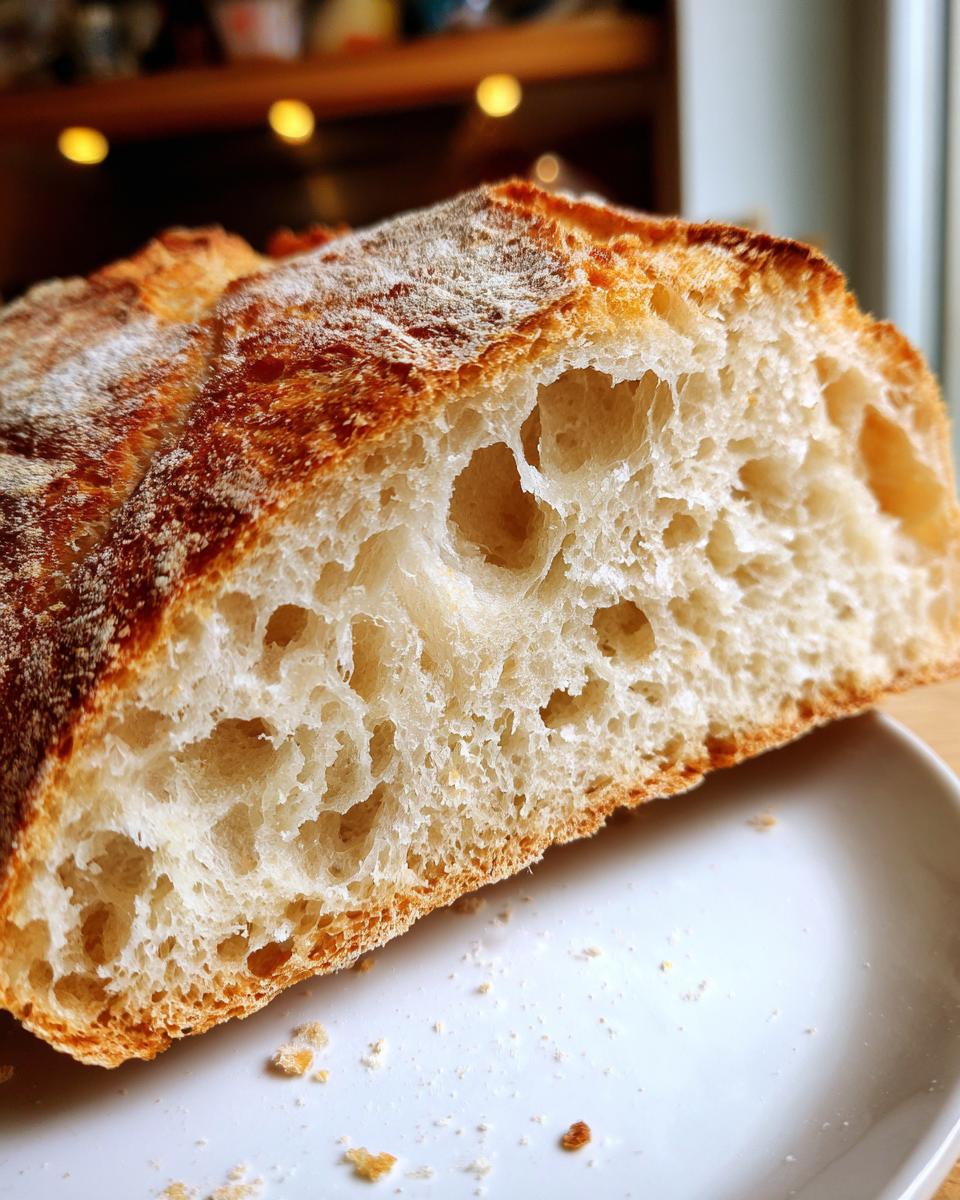
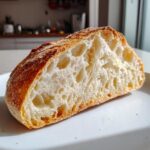
Achieving Airy Bread with Big Holes
This is everyone’s main goal when they start making ciabatta, and it all comes down to two things: hydration and handling. Because we use so much water—that’s what we call high hydration—the gluten strands develop loosely. If you punch the dough down, you destroy all the pockets of gas we worked so hard to create.
We use gentle folds to build strength slowly. That lets us achieve the most gorgeous, airy bread with big holes where the crust just shatters when you bite into it. It’s heaven!
Flavor Depth Using a Poolish for Ciabatta
You might notice the first step takes overnight. That wait is not extra work; it’s flavor development! We make a poolish, which is basically a starter using just a tiny bit of yeast. This pre-ferment breaks down the starches slowly, creating a depth of flavor that you simply don’t get in a quick mix.
My ciabatta tastes so rich now because of that overnight rest. It transforms basic flour and water into something truly rustic and special.
Ingredients Needed for Perfect Ciabatta
Gathering your ingredients is the first real step toward that beautiful bread, and honestly, there aren’t many things you need! That’s one of the reasons I love this classic Italian bread recipe so much. When you’re dealing with such a wet dough, the quality of what you put in really shines through.
For this recipe, you need flour, water, yeast, and salt. That’s it for the main dough. But I have to give a huge shout-out here to the flour. You absolutely have to use high-protein bread flour if you want that signature structure and chewiness. Anything else and you risk ending up with a flat mess!
Ingredient Notes and Substitutions for Ciabatta
Let’s talk specifics, because the details matter tremendously when you’re working at this high hydration level. The water absolutely must be room temperature—think cool tap water, not cold from the fridge. If it’s too cold, it slows down that crucial overnight poolish activation.
Remember how I mentioned the sourdough alternative? If you want to skip the yeast and give your ciabatta a real tangy kick reminiscent of a great sourdough, you can swap the tiny bit of yeast for an equal weight of active sourdough starter instead of using the poolish method entirely. For the flour, stick to bread flour; the extra protein builds the strong nets needed to trap all that air!
How to Make Ciabatta Dough: Step-by-Step Instructions
Alright, here we go—the part where we turn that bubbly, delicious poolish into actual bread! You’ll start by pouring that entire bubbly mixture right into your big mixing bowl. Next, we add the remaining pinch of yeast and the salt. I want you to pour in about half a cup of that room temperature water and start mixing slowly with a sturdy wooden spoon. Don’t try to use your hands yet; we’re just coaxing things together.
The mixture is going to look weird. It’ll be sticky, shaggy, and frankly, it might look like soupy soup more than proper ciabatta dough, but that’s exactly what we want in this classic Italian bread recipe! Once it comes together into one mass, we cover it up and let it rest for 30 minutes. This rest period is essential, so don’t skip it!
Managing High Hydration Bread Baking Through Folds
This isn’t your typical kneaded dough, remember? We build strength using gentle stretches. After that first 30-minute rest, it’s time for our first set of four gentle stretch and folds. You’re basically reaching under one side, gently pulling it up high, and folding it right over the middle. Rotate the bowl and do that three more times—four folds total. Cover it, rest for 30 minutes, and repeat this two more times.
This gentle movement is the secret to great high hydration bread baking because it aligns the gluten strands without knocking out all the air. After the last set of folds, let it sit for a long, final rest—about an hour and a half. You want to see it look visibly puffy and full of breath.
Gentle Ciabatta Shaping Guide
When it’s time to shape, grab your flour! This dough will stick to everything, so be generous dusting your counter. Gently scrape the whole airy mass out onto the flour. I mean gently—don’t punch it, don’t press it. The air bubbles are everything!
Using your bench scraper, cut the dough into two or three rough rectangles. This is where a ciabatta shaping guide comes in handy because we aren’t doing fancy business. Just gently stretch each piece into a rough rectangle. Place them on heavily floured parchment paper and cover them loosely. The goal here is to preserve every single gas pocket we created in the poolish and fermentation!
Baking Your Homemade Artisan Bread: Oven Setup
This is the moment of truth! All that hard work resting and folding finally pays off when the bread hits the heat. To get that massive oven spring—that beautiful puffiness that makes ciabatta look so impressive—you can’t cheat on the preheating. Seriously, stick to this: get your baking stone or, my personal favorite for great results, your Dutch oven completely screaming hot inside the oven at 475°F (245°C).
Getting that initial blast of heat and steam is what creates the perfect crust on this classic Italian bread recipe. You want to transfer your puffy dough (still on that floured parchment paper) right onto that blazing surface. The first 20 minutes are crucial, baking it covered to trap all the moisture the dough released. That trapped steam keeps the crust soft long enough for the loaf to expand to its maximum size before we strip the cover off to get that beautiful golden finish!
Tips for Success When Making Ciabatta
I know that dealing with such a wet dough for ciabatta can feel like wrestling a runaway blob, but a few tricks make all the difference. My number one piece of advice? Embrace the stickiness! Do not be tempted to add tons of extra flour during the shaping phase. Adding too much flour just makes a denser loaf, and we are aiming for airiness!
If you are struggling with the dough sticking, use plenty of flour and semolina mixture on your cutting board and parchment paper, but try not to let that flour build up too much on the dough itself. Also, if you find your loaves keep deflating, you might need to check your final proofing time; sometimes an extra 15 minutes of rest before baking does the trick. I wrote down some specific advice on why your ciabatta might be flat if you run into trouble!
Finally, and this is non-negotiable: you must let the bread cool completely on a wire rack. Slicing into that hot, steamy ciabatta before it has set is a crime against bread structure. Give it at least an hour. Seriously, walk away!
Storage and Reheating Instructions for Ciabatta
Now that you’ve got your perfect loaf, you have to treat it right! Real, rustic ciabatta doesn’t hang around looking good for days; that lovely open crumb can dry out fast. The best way to keep it overnight is to wrap it loosely in a clean tea towel and leave it on the counter. Don’t seal it airtight, or the crust will get chewy!
If you have leftovers, don’t let them go to waste! The best way to bring day-old bread back to life is a quick blast in the oven. Just spritz the loaf lightly with a little water, wrap it loosely in foil, and stick it in a 350°F oven for about 10 minutes. That crackle comes right back, and it tastes almost freshly baked!
Frequently Asked Questions About Ciabatta
I know you’ve put in the work for this bread, so let’s make sure any last-minute confusion is cleared up! Knowing the answers to these common questions will help you feel really confident about your next loaf. I want you to feel like you’ve been baking sourdough ciabatta alternative styles for years!
Can I use all-purpose flour instead of bread flour for my ciabatta?
Oh, I really prefer you don’t, especially when you’re trying to nail that open, airy crumb!
Bread flour has a higher protein content, which is essential because that protein forms the strong gluten network needed to trap all the large gas bubbles that make ciabatta famous. If you use all-purpose, the gluten structure just won’t be strong enough to hold up to all that water, and you’ll likely end up with a flatter, denser loaf. Stick to bread flour for this recipe, trust me!
What is the difference between a poolish and a biga for ciabatta dough?
This is a great question for anyone diving into homemade artisan bread! Both a poolish and a biga are preferments, meaning we mix a small part of the flour, water, and yeast ahead of time. The main difference is the hydration level.
A poolish, which we use here, is very wet—it’s 100% hydration (equal parts flour and water by weight). A biga, commonly used for other Italian breads, is stiff and much lower hydration, almost like a thick dough. Because ciabatta loves high hydration, the poolish works perfectly to get that super bubbly flavor going.
How do I get a crispier crust on my homemade artisan bread?
The secret to a professional-level crackly crust on your homemade artisan bread comes down to steam, steam, steam during the first part of the bake. Remember how we covered the Dutch oven or added a pan of hot water to the bottom of the oven? That moisture is crucial!
When the dough hits that steamy environment, it keeps the outside surface soft for just long enough to fully expand before it sets. If you bake it dry, the crust sets too early, and your bread can’t puff up. Make sure that steam source is generating a lot of moisture for those first 20 minutes!
Serving Suggestions for Your Fresh Ciabatta
Congratulations! You have just made a beautiful, airy loaf of ciabatta. Now for the best part—eating it! These open pockets are just begging to soak up flavor. They are absolutely incredible when drizzled with good quality olive oil and balsamic vinegar for dipping. That’s the classic Italian bakery approach, and it’s hard to beat.
But if you’re looking for something more substantial, this bread makes the king of all sandwiches. The way the crust holds up against wet ingredients is phenomenal. For sandwich ideas, check out my guide on how to build the ultimate ciabatta sandwich loaf—it’s perfect for heavy fillings!
Nutritional Estimate for Ciabatta Bread
Okay, so you’ve made this beautiful loaf of rustic Italian bread, and while honestly, I bake for joy and not for tracking macros, I know some of you are curious about what you’re eating! Since this recipe uses just flour, water, yeast, and salt, it’s naturally quite lean, which is fantastic.
Please remember that these numbers are just an estimate based on the ingredients in the recipe card. They are calculated based on a serving size of one slice, which is a pretty decent-sized slice for a rustic loaf like this ciabatta. The high hydration means the finished weight is much higher due to the water content!
- Serving Size: 1 slice
- Calories: 180
- Total Fat: 0.5g
- Saturated Fat: 0.1g
- Trans Fat: 0g
- Cholesterol: 0mg
- Sodium: 250mg
- Total Carbohydrates: 37g
- Dietary Fiber: 1.5g
- Sugars: 0.5g
- Protein: 6g
See? Nothing scary in there! It’s truly just honest ingredients transformed into something amazing. Enjoy every single bite of your homemade artisan bread!
PrintAuthentic High-Hydration Ciabatta Bread: Achieving the Perfect Open Crumb
Make classic Italian ciabatta bread at home using this detailed recipe. You will learn the technique for managing the wet dough to achieve the signature large, airy holes.
- Prep Time: 20 min
- Cook Time: 40 min
- Total Time: 14 hours 0 minutes
- Yield: 2 large loaves 1x
- Category: Bread
- Method: Baking
- Cuisine: Italian
- Diet: Vegetarian
Ingredients
- 1 cup bread flour (high protein)
- 1 cup water (room temperature)
- 1/4 teaspoon instant dry yeast
- 1/2 teaspoon fine sea salt
- Extra flour for dusting
Instructions
- Prepare the Poolish: In a medium bowl, combine 1 cup of bread flour, 1 cup of room temperature water, and 1/4 teaspoon of instant dry yeast. Mix until just combined. Cover the bowl tightly with plastic wrap and let it sit at room temperature (about 70°F) for 12 to 16 hours until very bubbly and active. This is your poolish.
- Mix the Final Dough: In a large mixing bowl, pour in all of the active poolish. Add the remaining 1/4 teaspoon of instant dry yeast and 1/2 teaspoon of fine sea salt. Gradually add 1/2 cup of water, mixing slowly with a wooden spoon or spatula until the dough comes together. The dough will be very wet and sticky; this is correct for high hydration bread baking.
- First Rise (Bulk Fermentation): Cover the bowl and let the dough rest for 30 minutes. Perform a set of stretch and folds: gently stretch one side of the dough up and fold it over the center. Rotate the bowl 90 degrees and repeat three more times (four folds total). Cover and rest for 30 minutes. Repeat this stretch and fold process two more times, resting 30 minutes between each set. After the final set, let the dough rest undisturbed for 1 to 1.5 hours, or until it has increased in volume by about 50% and looks airy.
- Shape the Loaves: Generously dust a work surface with flour. Gently scrape the dough out of the bowl onto the floured surface. Do not punch it down. Lightly dust the top of the dough. Using a bench scraper, gently divide the dough into two or three equal pieces. Do not handle the dough aggressively; you want to preserve the air bubbles.
- Final Proof: Gently stretch each piece into a rough rectangle shape. Place the dough pieces onto parchment paper dusted heavily with flour or semolina. Cover loosely with plastic wrap or a clean kitchen towel. Let them proof at room temperature for 45 to 60 minutes. The dough should look puffy.
- Preheat and Bake: About 30 minutes before baking, place a baking stone or Dutch oven inside your oven and preheat to 475°F (245°C). If using a Dutch oven, place the dough and its parchment paper inside. If using a baking stone, carefully slide the dough onto the hot stone using the parchment paper as a sling.
- Bake: Bake covered (lid on Dutch oven or with steam added to the oven) for 20 minutes. Remove the lid or steam source. Reduce the temperature to 450°F (230°C) and bake for another 15 to 20 minutes, until the crust is deep golden brown.
- Cool: Transfer the finished ciabatta loaves to a wire rack and allow them to cool completely before slicing to set the crumb structure.
Notes
- Use high-protein bread flour for the best structure in this high hydration bread baking recipe.
- If you prefer a sourdough ciabatta alternative, substitute the poolish with an equal weight of active sourdough starter.
- For a rustic Italian bread tutorial feel, use a baking stone and introduce steam by pouring hot water into a pan placed on the bottom rack during the first 20 minutes of baking.
Nutrition
- Serving Size: 1 slice
- Calories: 180
- Sugar: 0.5
- Sodium: 250
- Fat: 0.5
- Saturated Fat: 0.1
- Unsaturated Fat: 0.4
- Trans Fat: 0
- Carbohydrates: 37
- Fiber: 1.5
- Protein: 6
- Cholesterol: 0