

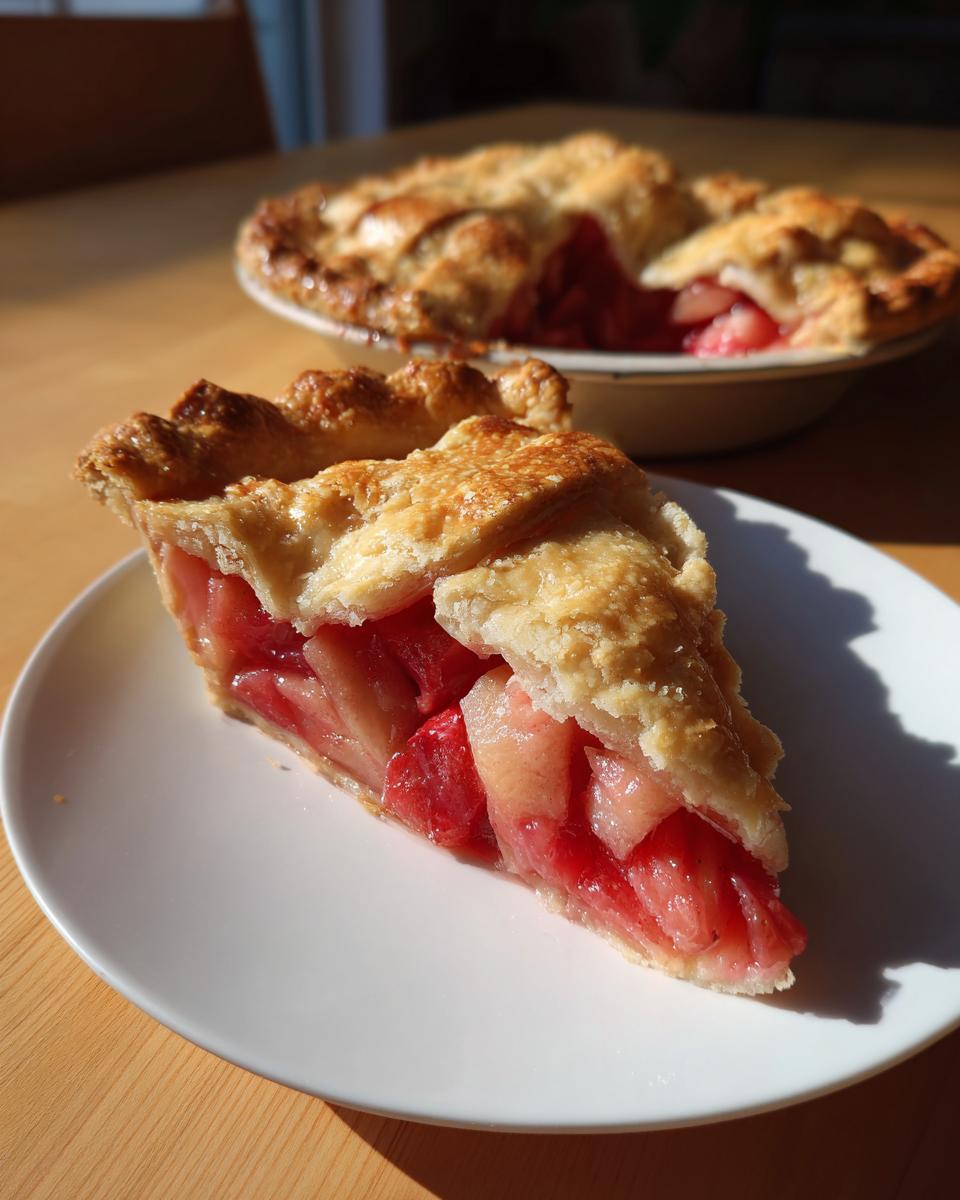
If you ask me about the sound of true comfort, it’s the gentle clink of a fork against a perfectly baked pie plate, right before the first bite of something made the old-fashioned way. My kitchen echoes with those sounds often, especially when rhubarb season hits! There is nothing—and I mean *nothing*—that beats a homemade rhubarb pie, but the real secret, the part Jess Carter insists on mastering, is the crust. We’re talking about the ultimate flaky, tender texture you only get when you respect tradition. This recipe for Grandma’s Rhubarb Pie with Lard Crust isn’t just a dessert; it’s a tangible piece of our baking heritage, bringing that unbeatable, crisp layer to your table. If you want to know more about how we bring these time-honored methods to life at CravyBite Kitchen, check out our our story here.
- Why This Grandma's Rhubarb Pie with Lard Crust Stands Apart
- Gathering Ingredients for Grandma's Rhubarb Pie with Lard Crust
- Step-by-Step: How to Make Pie Crust with Lard for Your Grandma's Rhubarb Pie with Lard Crust
- Preparing the Nostalgic Rhubarb Pie Filling
- Assembling and Baking Your Traditional Fruit Pie
- Tips for Success with Grandma's Secret Pie Techniques
- Storage and Reheating Instructions for Leftover Grandma's Rhubarb Pie with Lard Crust
- Frequently Asked Questions About This Heirloom Dessert Recipe
- Sharing Your Family Recipe Rhubarb Pie Experience
Why This Grandma’s Rhubarb Pie with Lard Crust Stands Apart
You’ve probably had rhubarb pie before, but trust me, this one hits differently. It’s the one that transports you straight back to childhood picnics. When I follow this deeply cherished recipe, every result is spectacular because we focus on what truly matters: amazing texture and balanced flavor. It’s a labor of love, but one that pays off instantly!
- This is your ticket to the Best Lard Pie Crust Recipe you will ever touch. Seriously, lard is king for flakiness.
- It honors the authentic taste of an Old Fashioned Rhubarb Dessert; we don’t load it up with fake flavors.
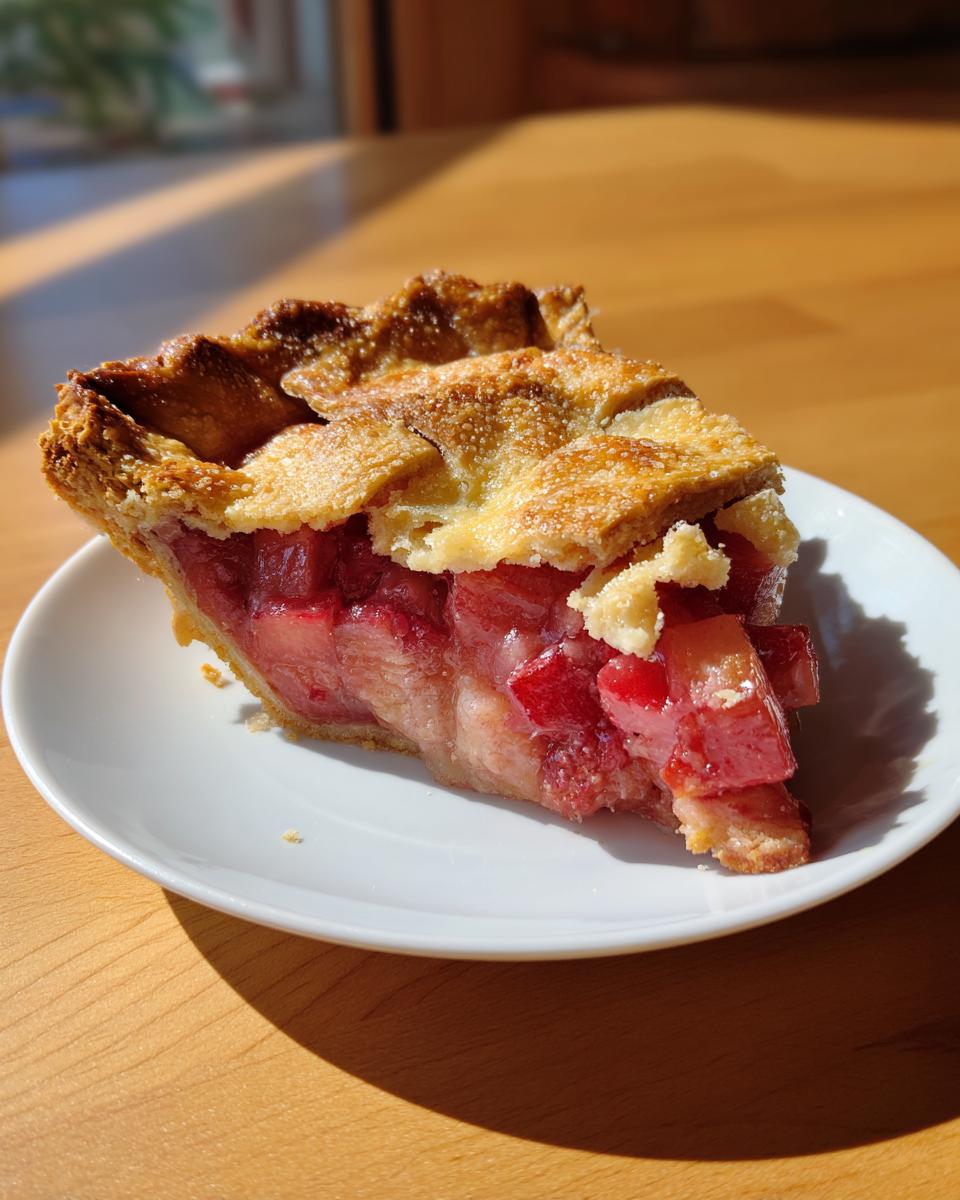
- The crust bakes up incredibly tender and flaky, a stark contrast to tough, overworked doughs.
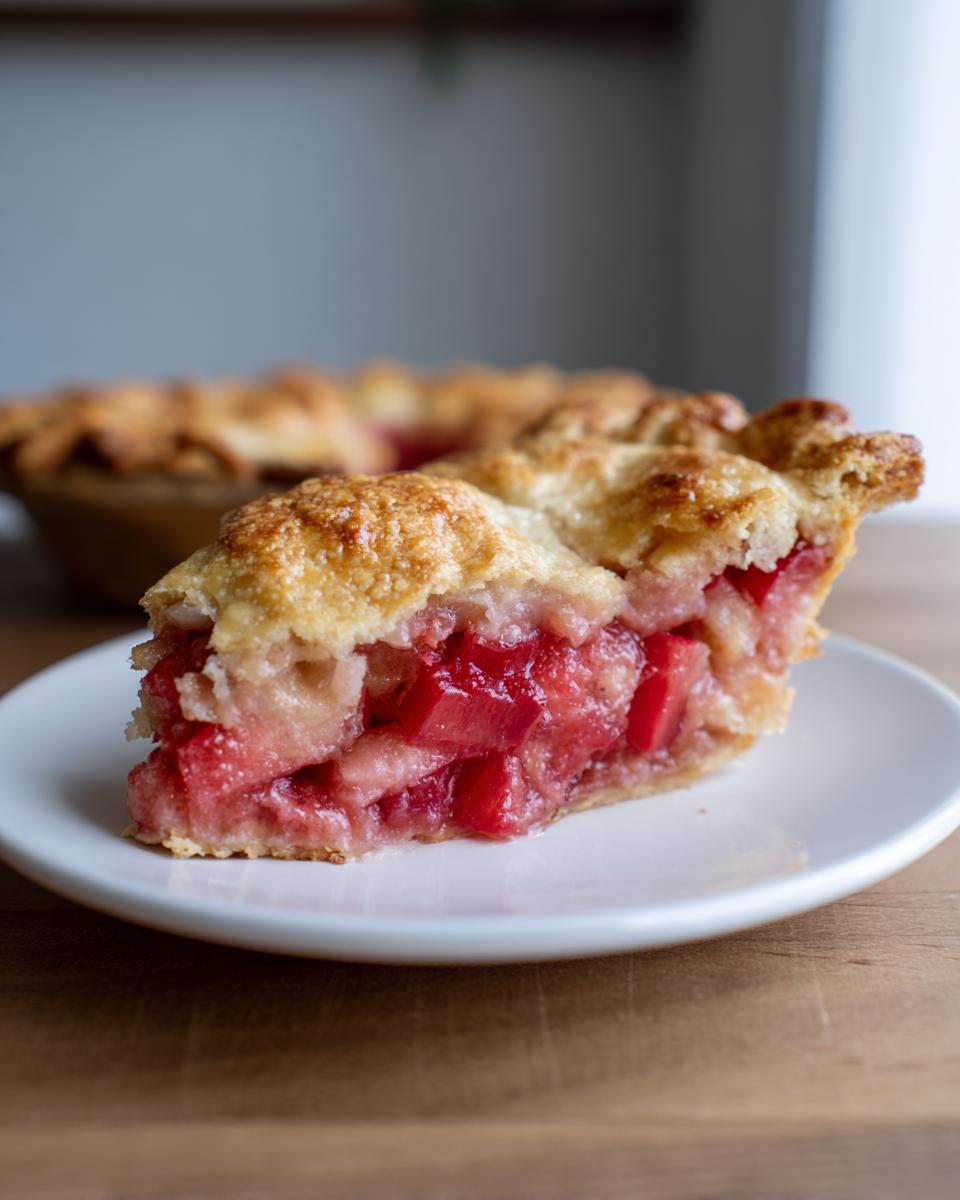
- We nail that crucial balance between the rhubarb’s natural tartness and just enough sweetness.
- You get the ultimate integrity in the structure of your Grandma’s Rhubarb Pie with Lard Crust—no soggy bottoms here!
The Secret to the Best Lard Pie Crust Recipe
People get scared of lard nowadays, but they shouldn’t be! Lard melts at a lower temperature than butter, and that’s the game-changer. When you bake it, those cold pockets of fat turn to steam instantly, creating massive, defined layers of flakiness. Butter tastes great, sure, but lard creates *the* structure. Keeping that lard rock-solid cold until the second it hits the flour is rule number one in Jess’s book!
Achieving Perfectly Balanced Homemade Rhubarb Filling
Rhubarb is wonderfully tart, isn’t it? That’s why this recipe uses just enough sugar to take the edge off without turning it into sugary mush. The little bit of flour we toss it in isn’t just for bulk; it actively grabs the juices bubbling up while baking, making sure your filling sets up beautifully. You won’t have soup in the bottom of your plate, I promise!
Gathering Ingredients for Grandma’s Rhubarb Pie with Lard Crust
Okay, before we dive into the fun part—making that incredible crust—we need to get our ducks in a row ingredient-wise. For this Old Fashioned Rhubarb Dessert, the quality of what you use truly matters, especially the fat! This isn’t a place where you can cheat on temperature, trust me.
Here is everything you need on your counter before you start mixing everything for the pie:
- For the Crust: You absolutely need 2 1/2 cups of all-purpose flour and just 1 teaspoon of salt.
- The Magic Fat: 1 cup (that’s 8 ounces) of cold lard. I mean ice-cold! We cut it into little pea-sized pieces, so make sure it’s firm right when you start.
- Liquid: 1/2 cup of ice water, plus potentially a tablespoon or two more if your dough looks crumbly—always use ice for that flakiness!
- For the Filling: We need about 6 cups of fresh rhubarb, already chopped into 1-inch pieces.
- Sweetness & Thickener: 2 cups of granulated sugar—taste your rhubarb first, you might need a bit more or less! We pair that with 1/4 cup of all-purpose flour to keep things from getting soupy.
- Flavor Pop: 1 tiny teaspoon of vanilla extract. It pulls all the fruit flavor together beautifully.
- The Finish: One large egg beaten with just 1 tablespoon of milk for that gorgeous, shiny egg wash on top.
Seriously, the most important takeaway here is that lard and water must stay frigid. If your kitchen is warm, pop the lard bowl in the freezer for ten minutes before cutting it in. That chill is the foundation for the Best Lard Pie Crust Recipe!
Step-by-Step: How to Make Pie Crust with Lard for Your Grandma’s Rhubarb Pie with Lard Crust
Alright, let’s get down to the real architecture of this pie—the foundation! If you’re aiming for that ultra-flaky texture that just shatters when you bite into it, you need to respect the science of the fat. This part of the process for learning How to Make Pie Crust with Lard is non-negotiable, and it comes before we even think about the filling. We want the lard to stay in distinct little pieces so it can create steam pockets later. Grab your pastry blender or just use your clean fingertips—whatever feels right to you!
You’re whisking the flour and salt, and then you cut in that beautifully cold lard until it looks like coarse crumbs, but you must leave some of those pea-sized chunks visible. Don’t try to blend it smooth! After that, we gently trickle in the ice water, one tablespoon at a time, just until the dough starts clinging together. Stop stirring the second it holds its shape! Overworking this dough instantly kills the flakiness. If you need a refresher on handling doughs, check out how I approach making the base for my fluffy buttermilk biscuits; the principle of minimally handled dough is the same.
Mixing the Dough and Chilling Requirements
Remember, the key to a successful lattice or top crust really relies on what happens next. Once that dough barely comes together, you immediately divide it in half. Flatten each half into a sturdy disk—this makes rolling it out far easier later on—wrap it up tight in plastic wrap, and get it into the fridge. You need a minimum of one full hour of chilling time for this Best Lard Pie Crust Recipe. That hour lets the gluten relax and ensures the lard is perfectly rigid again, setting you up for success when you roll it out for your Grandma’s Rhubarb Pie with Lard Crust!
Preparing the Nostalgic Rhubarb Pie Filling
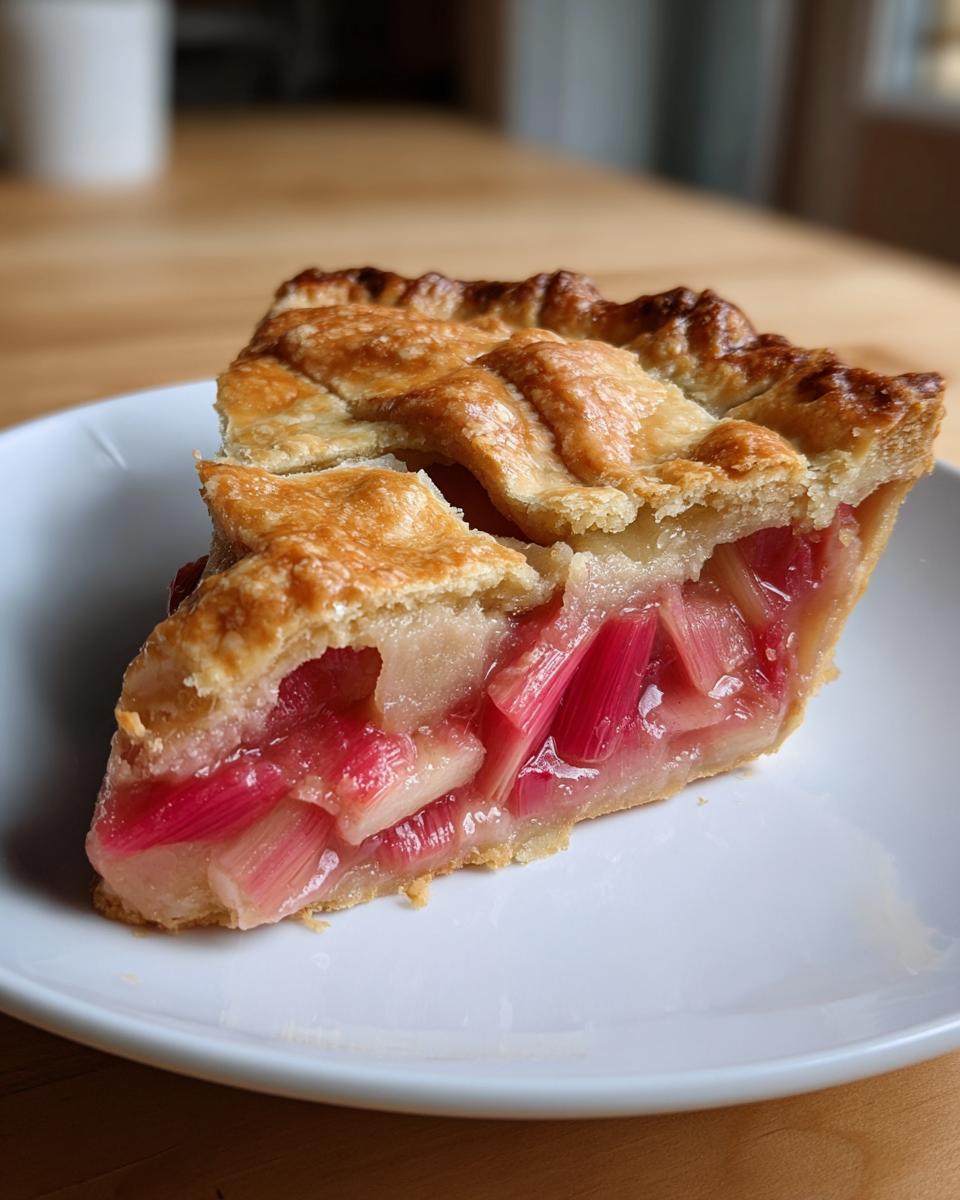
While that beautiful dough is chilling—don’t peek!—we move onto the heart of this Heirloom Dessert Recipe: the filling. Rhubarb is so wonderfully bracingly tart, which is why I love it so much. In a separate bowl, we combine those beautiful, chopped rhubarb pieces with the granulated sugar and our measured flour.
Now, here’s a little trick for your Grandma’s Rhubarb Pie with Lard Crust: gently toss everything together, don’t mash it! We want the rhubarb to keep its integrity, not turn to mush before it even sees the oven. The flour’s job is critical here; it’s going to absorb the juices as they cook down. If your rhubarb came straight from the garden and tastes extremely sour, you can certainly nudge that sugar up by a quarter cup, but always taste a tiny piece raw first!
Finally, swirl in that teaspoon of vanilla extract—it seems small, but it really pulls the sharp fruit flavor together into something complex. If you want an in-depth look at balancing fruit flavors, my guide on cherry pie filling touches on similar flavor principles!
Assembling and Baking Your Traditional Fruit Pie
Now that the chilling is done and the filling is mixed, it’s time for the fun part—putting it all together! This is where all that patience pays off. Dust your counter lightly with flour and roll out one disk of that beautiful, chilled dough until it’s big enough to drape into your 9-inch pie plate. Handle it gently; remember, we want flaky, not tough!
Carefully lay the bottom crust in, pour in your wonderful rhubarb mixture, and then roll out that second disk for the top. Trim the overhang, seal those edges tight, and give it your best crimp—Grandma always used her thumb and forefinger to make little waves, a true sign of Grandma’s Rhubarb Pie with Lard Crust! Don’t forget to slice a few vents into the top crust so steam can escape. If you want to see a really gorgeous way to handle the top crust, check out how I do the lattice on my blackberry pie here.
For an expert touch that guarantees you avoid a soggy bottom—a huge pet peeve of mine—pop the entire pie onto a baking sheet that you heated in the oven while it was preheating! Brush the top crust generously with that egg wash (egg mixed with just a splash of milk) so it gets golden and shiny.
Temperature Changes During the Baking Process
This pie needs a nice blast of heat to set that amazing Lard Crust right away. So, we start hot! Slide that sheet pan right into your 425-degree oven and let it bake for about 15 minutes. This initial high heat sets the structure.
After that initial blast, ease the temperature back down to 375 degrees F. Now, you let it settle in and bake for another 40 to 50 minutes. You’re looking for two things to confirm it’s done: the crust must be deep golden brown, and you should see the filling bubbling thickly up through those steam vents. If you notice the edges getting too dark—which they tend to do—grab a small piece of foil and loosely tent just the edges. That keeps the crust happy while the middle finishes cooking!
Tips for Success with Grandma’s Secret Pie Techniques
Making a truly spectacular pie, the way Grandma taught us, isn’t just about following the steps; it’s about respecting the ingredients and the timing. Jess insists that baking is science mixed with intuition, and these little known tricks are probably the main reason her pies never fail. Follow these notes, and you’ll be turning out perfect results every single time.
First off, let’s reiterate: keep everything cold! If you feel your fingers warming up the lard while you’re cutting it into the flour, just stop. Pop the bowl back into the freezer for five minutes! Those distinct, solid pieces of fat are what gives you that shattering flakiness we talked about. It’s the most important part of any From Scratch Pie Baking session.
Another thing you’ll notice is that we bake this pie right on a preheated baking sheet. This might seem like extra work, but trust me, transferring that hot sheet into contact with the bottom of the crust cooks it intensely and quickly. This is how we prevent the dreaded soggy bottom, a common issue when dealing with juicy fruit fillings. Pop over and read about the silky base in my banana cream pie recipe—the principle of using cool temperatures to support a delicate base is the same!
But perhaps the biggest test of patience comes *after* the oven mitts come off. You absolutely must let this pie cool for a minimum of three to four hours. Seriously, set a timer and walk away! If you cut into it early, all that gorgeous filling you worked so hard to thicken will simply run out onto the plate. It needs that time to fully set up. If you can manage those two things—cold fat and proper cooling—you’ve mastered the most fundamental Flaky Pie Crust Secrets!
Storage and Reheating Instructions for Leftover Grandma’s Rhubarb Pie with Lard Crust
Okay, let’s be real for a second: sometimes, miracles happen, and you actually have leftovers of this heavenly Grandma’s Rhubarb Pie with Lard Crust. How you store it really determines if that incredible crust stays crisp or turns soggy overnight! Since this pie has a rich fruit filling, we need to be smart about how we treat it.
First, if you simply cannot wait and have to slice it while it’s still slightly warm—which I completely understand—leave the slice uncovered on a plate for about 30 minutes to let any residual heat escape before wrapping it. If the whole pie is cool, you can leave it sitting on the counter, covered loosely with foil or plastic wrap, for about 24 hours. The high sugar content in the filling helps act as a natural preservative. But honestly, I find the texture of that Lard Crust degrades quickly at room temperature.
For anything longer? Into the fridge it goes! Keep it wrapped tightly to prevent it from drying out or absorbing fridge smells. It will stay delicious for up to four days wrapped up tight. Now, here’s the crunch tip: if you reheat a slice, toss that little piece right back into a moderate oven—say 350 degrees F—for about 8 to 10 minutes. That warmth crisps the lard right back up! Please, for the love of flaky crust, do not stick it in the microwave. That heats the moisture in the crust and guarantees you end up with something chewy instead of shattering!
Frequently Asked Questions About This Heirloom Dessert Recipe
It’s totally normal to have questions when moving away from standard recipes, especially when dealing with fats like lard! People often worry about flavor or texture, but honestly, once you follow these steps for Grandma’s Rhubarb Pie with Lard Crust, you’ll be hooked. I’ve gathered the questions I get asked most often about mastering this pie.
Can I substitute butter for lard in this flaky pie crust recipe?
Oh, you can certainly try, but I have to tell you right up front: it won’t be the same! Butter tastes amazing, and it gives you flavor, but lard is superior when it comes to that light, airy flakiness. Lard has a higher melting point than butter when combined with water, which means it stays solid longer in the oven, creating those big, defined layers of crust. Butter melts sooner, which often results in a crust that is more tender but less defined and flaky. If you want the *absolute* Best Lard Pie Crust Recipe texture, stick to the lard. If flavor trumps texture for you, then butter is an okay substitution, but adjust your expectations!
My rhubarb filling is too runny. What went wrong?
This is such a common heartbreak, but usually, it’s an easy fix! First, did you use the exact amount of flour called for in the recipe? That 1/4 cup flour works hard to thicken all the juices released by the rhubarb. If you used less, it will be runny. Second, and this is the biggest culprit: Did you cut the pie while it was still hot? Remember what I said about cooling? If you slice into the pie before it has set for at least three or four hours, the moisture hasn’t gelled yet, and it spills right out. Make sure you let it rest completely!
Is this pie adaptable into a Classic Rhubarb Crumble Topping Alternative?
That’s a great idea for a twist! While this recipe is designed around that thick, flaky lard crust, you absolutely could swap the top crust layer for a standard crumble topping if you wanted. Just whip up your favorite mix of oats, flour, brown sugar, and cold butter, and sprinkle it over the filling before baking. Keep in mind that for a crumble, you might want to check the filling sooner, as the exposed fruit cooks slightly faster than under a solid crust. You get a completely different experience, but it’s certainly delicious!
Why is it called a Nostalgic Rhubarb Pie Recipe?
Because it just tastes like stepping back in time! This isn’t some fancy new take on rhubarb; it’s exactly how people baked years ago before ingredients like commercial shortening or stabilizers were common. We use simple, honest ingredients—flour, fat, fruit, sugar—and that simplicity shines through. If you love looking at other vintage pie recipes, you’ll appreciate how straightforward this classic is. It’s baking stripped down to its pure, comforting essence!
Sharing Your Family Recipe Rhubarb Pie Experience
I truly hope making this pie brings back as many wonderful kitchen memories for you as it does for me! Now that you’ve conquered the Best Lard Pie Crust Recipe, I need to know—how did it turn out? Drop a comment below: Did you stick strictly to Grandma’s method, or did you try a little swirl of your own? I adore seeing your bakes! If you have feedback or questions, don’t hesitate to reach out through our contact page. Happy baking, everyone!
PrintGrandma’s Rhubarb Pie with Lard Crust

Make an authentic, flaky rhubarb pie using a traditional lard crust recipe passed down through generations. This recipe delivers a tender, tart filling encased in the best lard pie crust.
- Prep Time: 45 min
- Cook Time: 65 min
- Total Time: 110 min
- Yield: 8 servings 1x
- Category: Dessert
- Method: Baking
- Cuisine: American
- Diet: Vegetarian
Ingredients
- 2 1/2 cups all-purpose flour
- 1 teaspoon salt
- 1 cup (8 ounces) cold lard, cut into pea-sized pieces
- 1/2 cup ice water, plus more if needed
- 6 cups fresh rhubarb, cut into 1-inch pieces
- 2 cups granulated sugar (adjust to rhubarb tartness)
- 1/4 cup all-purpose flour (for thickening)
- 1 teaspoon vanilla extract
- 1 large egg, beaten with 1 tablespoon milk (for egg wash)
Instructions
- Prepare the Lard Pie Crust: In a large bowl, whisk together the flour and salt. Cut in the cold lard using a pastry blender or your fingers until the mixture resembles coarse crumbs with some pea-sized pieces of lard remaining.
- Gradually add the ice water, one tablespoon at a time, mixing until the dough just comes together. Do not overmix. Divide the dough in half, flatten each half into a disk, wrap in plastic, and chill for at least 1 hour.
- Prepare the Filling: In a separate bowl, gently toss the cut rhubarb with the sugar and 1/4 cup of flour until evenly coated. Stir in the vanilla extract.
- Assemble the Pie: Preheat your oven to 425 degrees F (220 degrees C). On a lightly floured surface, roll out one dough disk to fit a 9-inch pie plate. Carefully place the bottom crust into the plate.
- Pour the rhubarb filling into the bottom crust.
- Roll out the second dough disk for the top crust. Place it over the filling. Trim the edges, seal, and crimp the edges decoratively. Cut several slits in the top crust to allow steam to escape.
- Brush the top crust with the egg wash mixture.
- Bake the Pie: Place the pie on a baking sheet. Bake at 425 degrees F for 15 minutes. Then, reduce the oven temperature to 375 degrees F (190 degrees C) and continue baking for 40 to 50 minutes, or until the crust is golden brown and the filling is bubbly. If the edges brown too quickly, cover them loosely with foil.
- Cool Completely: Let the pie cool on a wire rack for at least 3 to 4 hours before slicing. This allows the filling to set properly.
Notes
- For the flakiest lard crust, keep all ingredients, especially the lard and water, very cold.
- If your rhubarb is very tart, you may increase the sugar slightly, but taste the raw mixture first.
- Baking the pie on a preheated baking sheet helps ensure a crisp bottom crust.
Nutrition
- Serving Size: 1 slice
- Calories: 450
- Sugar: 35g
- Sodium: 250mg
- Fat: 25g
- Saturated Fat: 10g
- Unsaturated Fat: 15g
- Trans Fat: 0g
- Carbohydrates: 55g
- Fiber: 4g
- Protein: 5g
- Cholesterol: 40mg