
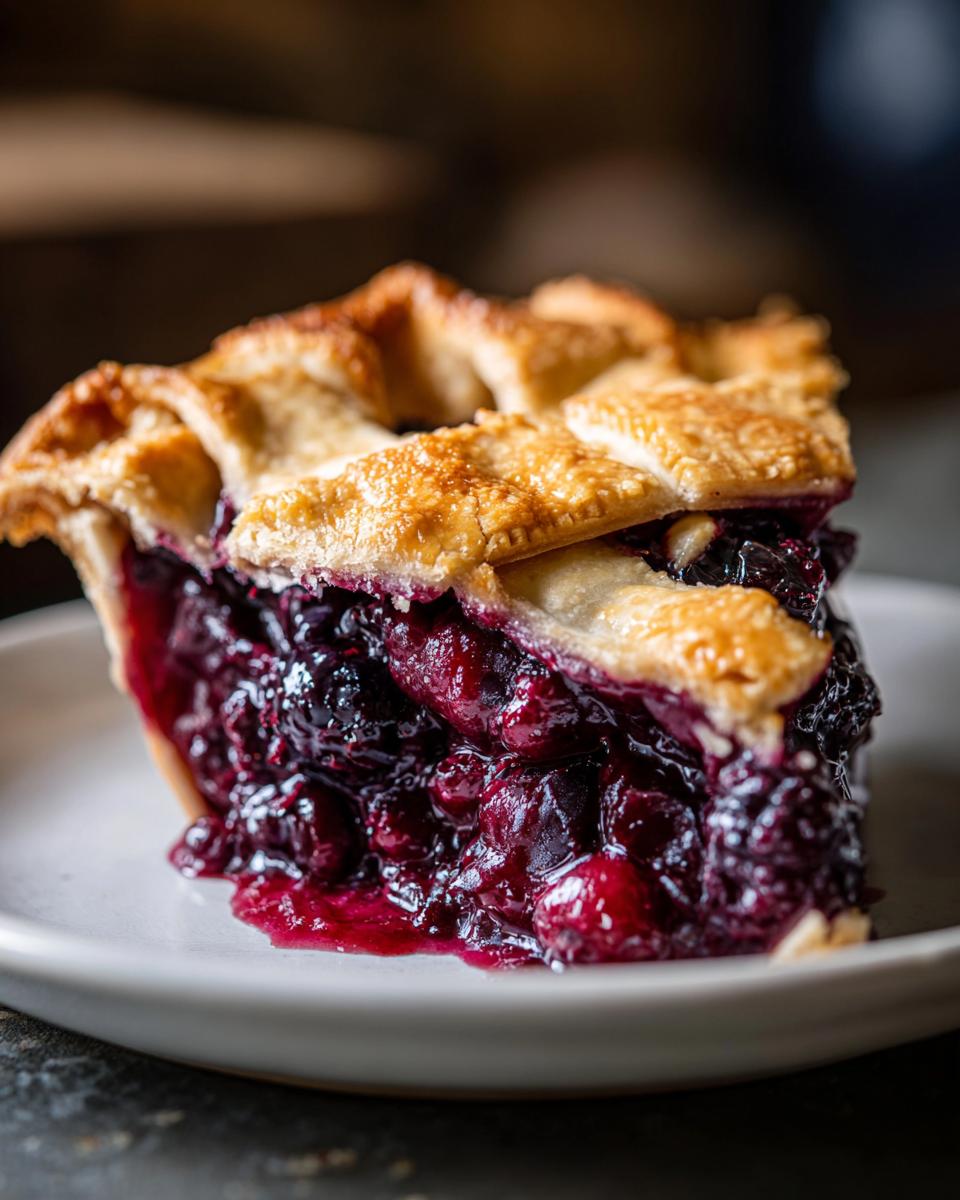
Oh, summer baking! There’s nothing quite like pulling a pie out of the oven when the berries are at their absolute peak. Forget fussy recipes you need a degree to master; I’m handing you my absolute favorite, foolproof blackberry pie recipe. This isn’t just any pie, either—this is the one designed to give you that crackly, flaky crust and a filling so perfectly set you can slice it neatly every single time. Seriously, say goodbye to that watery mess at the bottom! As Jess Carter, I combine my family’s rich baking heritage with what I learned about ratios and structure through my nutrition background. Trust me, this classic American comfort food is going to be your reliable centerpiece for every picnic and Sunday dinner.
- Why This Homemade Blackberry Pie Recipe Works
- Ingredients for the Best Blackberry Pie
- Step-by-Step Instructions for Classic Blackberry Pie
- Tips for the Perfect Blackberry Pie Success
- Variations on the Classic Blackberry Pie Recipe
- Storage and Reheating Instructions
- Frequently Asked Questions About Blackberry Pie
- Estimated Nutritional Information
- Share Your Homemade Blackberry Pie Creations
Why This Homemade Blackberry Pie Recipe Works
I know what you’re thinking: Another Homemade Blackberry Pie recipe? What makes this one different? Well, while I respect all the gooey fruit desserts out there, I’ve worked hard to solve those classic baking headaches. This whole method is geared toward reliability, so you get the glory without the gummy, undercooked mess.
Here are the two big wins we’re going for here:
- It guarantees a No Soggy Bottom Pie experience, every single time. We use a few tricks to make sure that crust stays crisp!
- You get that desirable, buttery tenderness in the crust. If you want to try some other showstoppers, check out my recipe for amazing apple pie cheesecake.
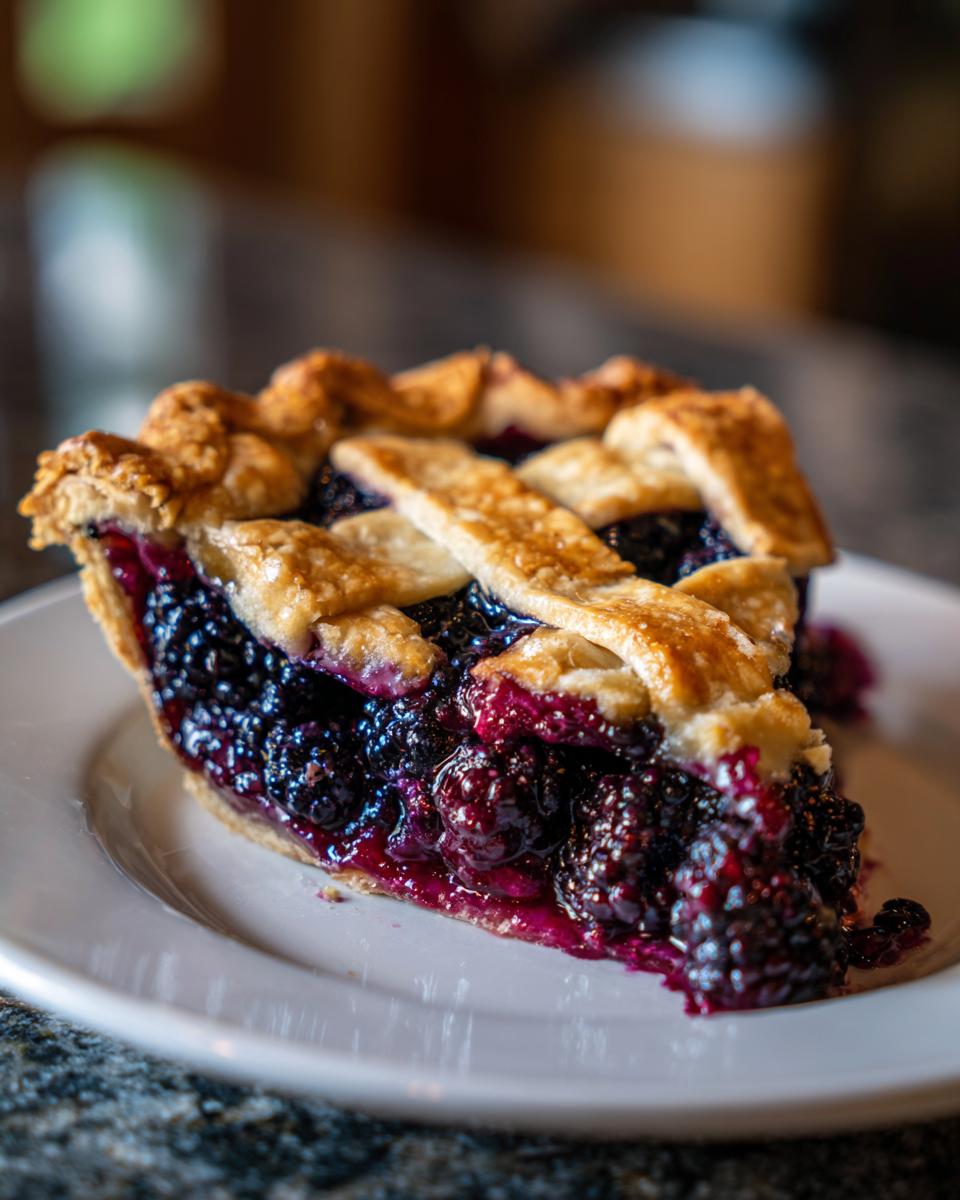
Achieving the Flaky Pie Crust Secret
The secret to a truly Flaky Pie Crust isn’t just the recipe; it’s the temperature! We are using 100% cold, unsalted butter. When that little cold cube hits the hot oven, it steams and creates those beautiful, separate layers that make the crust shatter when you cut into it. If your kitchen is warm, just pop your flour and butter in the freezer for 15 minutes before you start mixing!
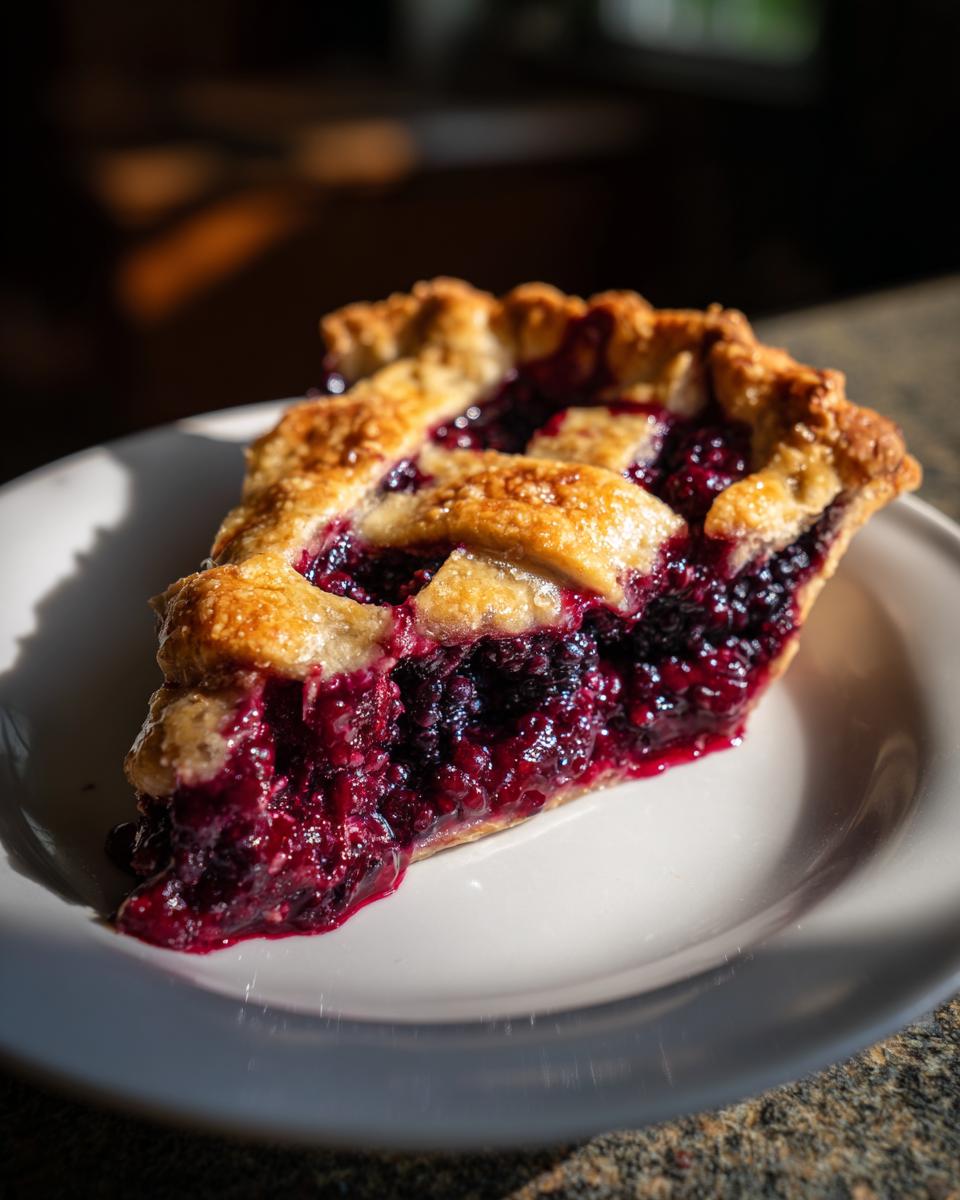
Perfectly Set Blackberry Pie Filling
Runny filling is the enemy! That’s why we rely heavily on precision with our cornstarch. It’s the thickening workhorse here. It needs just enough time in the oven to cook out that starchy taste, which is why we use that two-temperature baking method later on. Good news: this method works like a charm whether you use gorgeous fresh summer berries or pull a bag of them straight from the freezer.
Ingredients for the Best Blackberry Pie
Okay, baking is science, but great baking is deeply intuitive! Getting the ingredients right for this blackberry pie is half the battle won. I’ve broken down what you need so you can easily pull everything together before you start the assembly process. Remember, chilling that dough is not optional—it sets the foundation for that lovely, shatteringly crisp base. If you love the sound of a tender, melt-in-your-mouth crust like this, you absolutely must check out my recipe for fluffy buttermilk biscuits too!
For the Flaky Pie Crust
- 2 1/2 cups all-purpose flour
- 1 teaspoon salt
- 1 cup (2 sticks) cold unsalted butter, cut into cubes
- 1/2 cup ice water, plus more if needed
For the Blackberry Pie Filling
- 6 cups fresh or frozen blackberries
- 1 1/2 cups granulated sugar
- 1/4 cup cornstarch
- 1 tablespoon lemon juice
- 1/2 teaspoon ground cinnamon
- 1 large egg, beaten (for egg wash)
- 1 tablespoon coarse sugar (for sprinkling)
Step-by-Step Instructions for Classic Blackberry Pie
Alright, let’s get into the action! Making this blackberry pie is really about process management. We aren’t rushing anything, especially that crust. Once you get the hang of the chilling, it flows together surprisingly fast. This detailed method is how we guarantee that incredible texture we talked about earlier, so please don’t skip the waiting parts—they pay off big time! If you ever feel like getting inventive after mastering this, you can try making a batch of my homemade garlic butter!
Making the Flaky Pie Crust Dough
First things first: the dough. Whisk your flour and salt together. Then, you need to cut in that super cold butter. You’re looking for texture here—coarse crumbs with bits of butter the size of small peas. Those pea-sized butter chunks are your steam pockets, so don’t mash them too small! Slowly add that ice water, just until it barely holds together. Seriously, stop adding water when you think you still might need one more splash. Divide it into two flat disks, wrap them up tight, and tell them to chill out in the fridge for at least an hour. Patience is the secret ingredient here!
Assembling the Blackberry Pie Filling
While your dough is relaxing, mix up the filling. In a separate bowl, gently toss your blackberries with the sugar, the cornstarch (our anti-soggy superhero!), lemon juice, and cinnamon. Don’t stir this too aggressively; we want whole berries, not jam! Once those berries are nicely coated, grab one disk of dough and roll it out for the bottom crust. Lay it gently into your pie plate and trim the edges. Pop the whole thing back into the fridge while you prep the top. Chilling the bottom crust is one of my non-negotiable steps for avoiding that watery base!
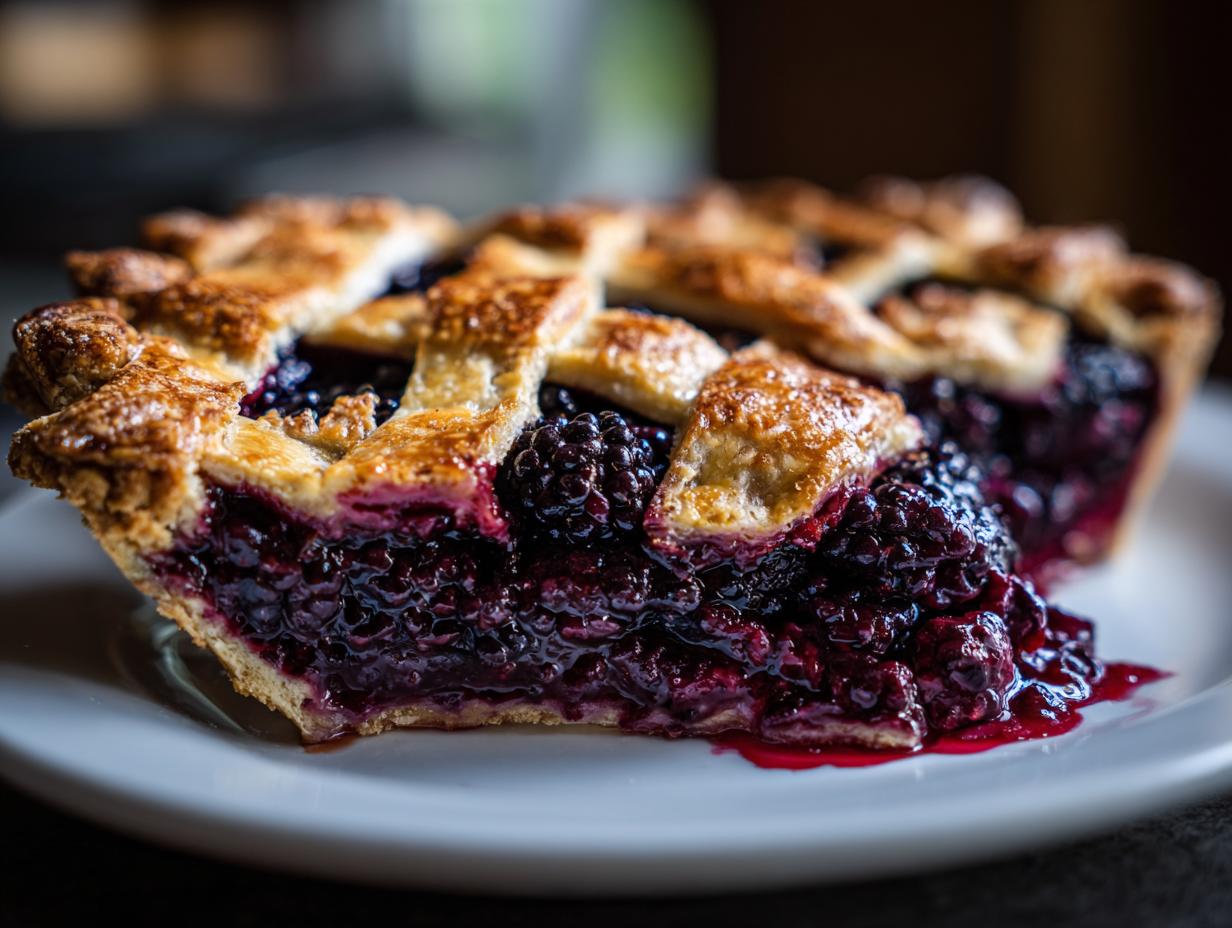
How to Create the Lattice Top Pie
Time for the showpiece! Roll out your second dough disk and cut it into strips that are about 3/4-inch wide. This is where you get creative, but if you want a classic look, weave them into a beautiful Lattice Top Pie pattern. Once woven, fold that excess overhang from your bottom crust up and over the lattice ends, then crimp the edge decoratively. Don’t forget to brush it with an egg wash and sprinkle on that coarse sugar for a beautiful shine!
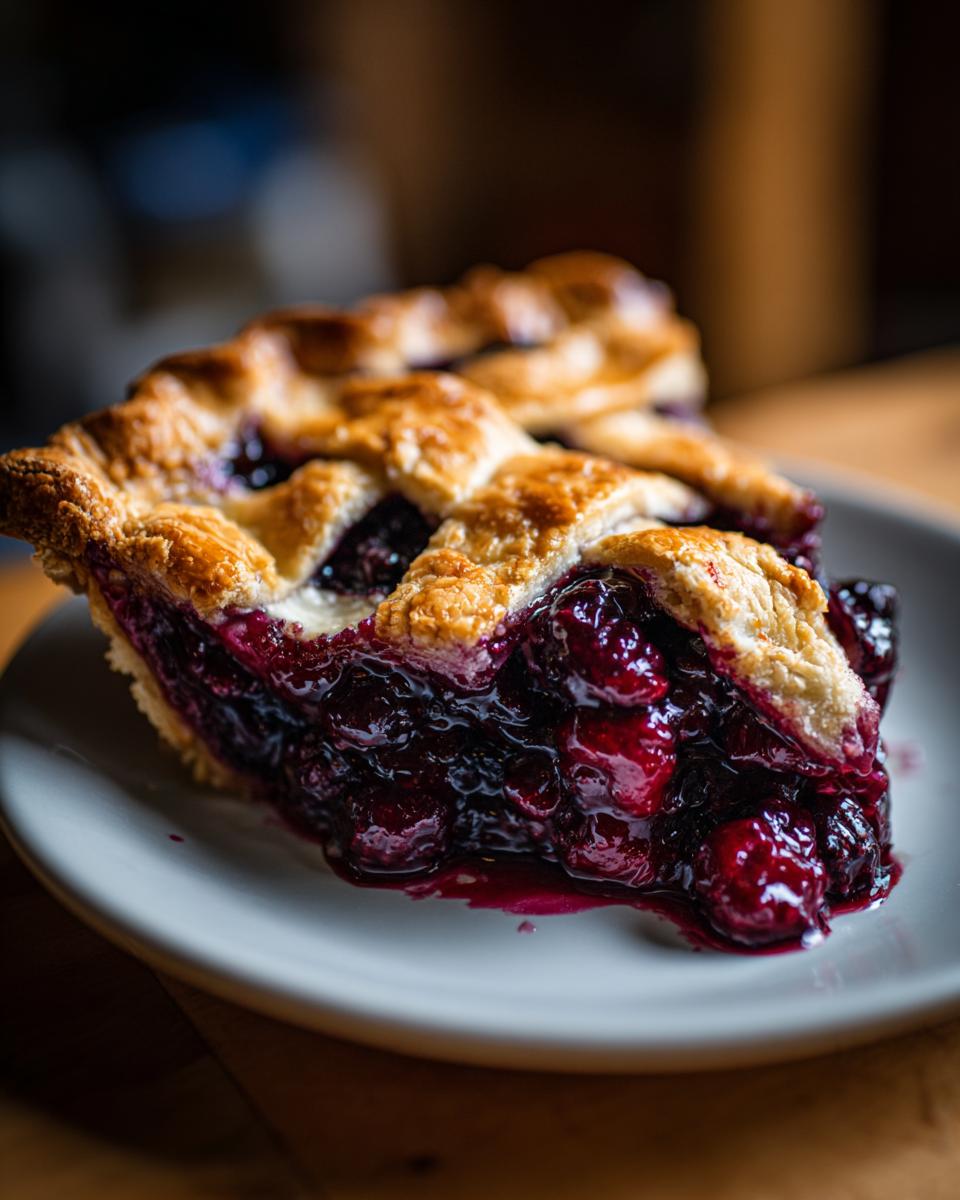
Baking and Setting Your Blackberry Pie
This two-step heat process is key. Preheat your oven to a ripping hot 425°F and bake the pie for 20 minutes on a baking sheet (this catches any drips—wise move!). Then, immediately drop the temperature to 375°F and bake for another 35 to 45 minutes until that filling is boiling thick and the crust is golden. If the edges look too dark, just shield them with foil. The single most important rule left? You HAVE to let it cool completely—at least four hours. Cooling lets the cornstarch finish its job. For more inspiration on fruit pies, check out this lovely recipe!
Tips for the Perfect Blackberry Pie Success
Now that you’ve married the dough and the filling inside that beautiful lattice, we need to talk about keeping things perfect when real life interferes! Baking is rarely just about following steps; it’s about flexing a little when you need to. I’ve learned a few things baking batches of this blackberry pie over the years. The first time I tried this recipe for a summer potluck, I completely forgot to chill the second dough disk before weaving the lattice—it looked more like a tangled net than a beautiful design! Learn from my mistakes, even when it comes to this easy recipe.
Troubleshooting Common Blackberry Pie Issues
Don’t panic if things look a little “off” coming out of the oven. Here are my go-to fixes for the problems I see most often:
- Filling is Too Runny: If you cut into it and it looks watery, it usually means you underbaked it or didn’t let it cool long enough. If you *must* serve it hot, try scooping a very small amount of cornstarch (maybe half a teaspoon) into a spoonful of water, stirring hard, and drizzling that slurry lightly over the visible filling bubbling through the vents. Bake for another 5 minutes. For future bakes, make sure you’re using the full 1/4 cup called for!
- Crust Edges are Burning: This is super common because pie edges are thinner and cook faster than the center. When you see gorgeous golden-brown color around the rim while the middle still needs time, just mix up a little strip of aluminum foil (this is way better than a dedicated pie shield, honestly) and gently lay it over the edge. It protects that crust while the inside finishes bubbling happily.
- Shrinking Dough: If your crust seems to have shrunk away from the edges of the plate, you probably skipped resting the dough or didn’t let the bottom crust get cold enough before filling. Next time, work that dough gently, don’t stretch it when placing it in the pan, and always give it a good 15-minute chill before adding the filling.
If you want even more tips on getting perfect results from your baked goods, I share a lot of my baking secrets, including how I get my bakery-style chocolate chip cookies so chewy every time! I also highly recommend reading this guide on flaky crust methods for another perspective.
Variations on the Classic Blackberry Pie Recipe
While I absolutely adore the elegant, woven beauty of a Lattice Top Pie, I know baking is all about personal preference! Sometimes you just want maximum crumble topping, or maybe you want to lean into that cozy, Old Fashioned Blackberry Pie feel. Good news: this base recipe is so solid, it handles variations like a champ. You can easily pivot from a classic pie to something a little more rustic without changing the filling one bit. If you’re looking for another twist on fruit desserts, you have to try my decadent pecan pie cupcakes!
Making a Blackberry Crumble Pie Topping
If fiddling with strips sounds like too much work after a long day, let’s ditch the lattice and go straight for a Blackberry Crumble Pie! You simply leave off the top dough disk. Instead, you make a quick streusel topping. Just mix together about 1 cup of flour, 1/2 cup of packed brown sugar (that molasses flavor is magic!), and 1/2 cup of cold butter (cut into tiny pieces). Use your fingers to mix it until it looks like wet sand. Sprinkle that glorious crumble mixture evenly over your filled, single-crust pie bowl before baking. It gives you a crunchy, buttery top instead of flaky strips, and honestly, kids usually love it even more!
Serving Suggestions for Your Summer Berry Pie
A warm slice of this pie isn’t really complete naked, trust me. These blackberry pies are perfect for showcasing that incredible, juicy filling, and the temperature contrast with a cool topping is just heavenly. This flavor profile really sings when paired with something cold and creamy.
For that true Southern Dessert hospitality vibe, you absolutely have to serve it with:
- A big scoop of high-quality vanilla bean ice cream. That slow melt mingling with the warm berry juice? Perfection.
- A generous dollop of homemade whipped cream, maybe lightly sweetened with a touch of maple syrup instead of plain sugar.
- If you want to keep it lighter, a tart crème fraîche cuts through the sweetness beautifully.
Remember, whether you call it a Summer Berry Pie or a classic country dessert, the goal is pure, simple deliciousness, and these pairings make that happen!
Storage and Reheating Instructions
So, you’ve made the most perfect blackberry pie known to humankind, and there’s *gasp* leftovers! Congratulations, because a slice of this pie tastes even better the next day, provided you store it the right way. The goal, always, is to keep that bottom crust from getting soggy, which is our number one enemy in the fruit pie world.
For general storage, my rule is simple: If it has a full crust (like our lovely lattice top) and you set it on the counter immediately after cooling completely, it’s good for about two days. Just cover it loosely with foil or plastic wrap so the crust doesn’t dry out completely. Don’t put it in the fridge unless you absolutely have to; the moisture in the fridge is what turns a crisp crust soft and sad.
If you need to keep it longer than 48 hours, *then* you should refrigerate it. Make sure it’s tightly wrapped—plastic wrap pressed directly against the exposed filling helps immensely. It will keep well for up to four days in the cold.
Waking Up That Crust Texture
If you refrigerated your slice, it’s going to be cold and the crust will be slightly firm. You cannot eat it straight from the fridge, trust me on this! To revive that beautiful flaky texture, you need gentle heat.
The best way to reheat a single slice of blackberry pie is definitely in the oven or an air fryer. Preheat your oven to just 350°F (175°C). Place the slice on a small baking sheet lined with parchment paper. Heat for about 8 to 10 minutes. This warms the berries perfectly and gives the crust just enough dry heat to crisp up again. If you’re in a tearing hurry, a thirty-second zap in the microwave is okay for taste, but it will definitely sacrifice the crispness of that lovely crust you worked so hard on. Save the microwave for warming leftovers of savory recipes!
Frequently Asked Questions About Blackberry Pie
I get so many questions after people try this recipe! Everyone wants to know their options, especially when dealing with unpredictable summer weather or busy schedules. Baking a gorgeous Homemade Blackberry Pie shouldn’t cause any stress, so here are the quick answers to the sticking points I hear about most often. If you want to learn more about my philosophy and why I bake the way I do, check out my About page!
Can I use frozen blackberries in this blackberry pie recipe?
Absolutely, yes! You can use frozen berries, and they work surprisingly well, thanks to that cornstarch ratio we dial in. Here’s the critical part, though: Do not thaw them first! Use those frozen blackberries straight from the freezer and toss them right into the sugar and cornstarch. If you thaw them, they release all their extra juice before you even get the filling into the crust, and that’s the express lane to a soupy mess. Frozen straight into the bowl keeps everything stabilized.
How far ahead can I assemble this pie?
That’s a great question for planning big summer gatherings! You have a couple of options here, depending on which component you want to prepare early. The dough itself is the best thing to prep ahead. You can make the dough disks, wrap them tightly, and keep them chilled in the fridge for up to three days. They usually need about 30 minutes on the counter before you can roll them out again.
As for assembling the whole blackberry pie, I never recommend assembling it more than 6 hours ahead of time, even if you bake it later. If you have to do it ahead, assemble the whole thing, place it in the freezer for 30 minutes (like we do before baking), then cover it tightly with plastic wrap and freeze it completely. When you’re ready to bake, pull it out of the freezer, let it sit on the counter for about 20 minutes while the oven preheats, and bake it cold. That initial freeze really helps lock in that bottom crust structure!
Estimated Nutritional Information
Now, I know many of you are balancing healthy eating with the pure joy of baking comfort food, and that’s totally where I come from! As someone who studied nutrition, I always want you to know what you’re serving up. Keep in mind that since we are using a glorious amount of butter for that flaky pie crust, these numbers reflect a traditional slice of this decadent dessert.
This information is based on cutting the recipe into 8 generous servings. This is always an estimate, of course, because whether you use wild berries or store-bought ones, or how thick you roll your crust, will make a little difference. But this gives you a great idea!
For a single slice of this wonderful blackberry pie:
- Calories: 410
- Fat: 22g
- Carbohydrates: 52g
- Protein: 4g
- Sugar: 38g
If you’re looking for lighter options to balance things out during the week, I have some really fantastic ideas over on my page about healthy breakfast ideas! But honestly, a treat like this Summer Berry Pie is always worth it.
Share Your Homemade Blackberry Pie Creations
Wow, I hope you enjoyed making this classic blackberry pie! Honestly, seeing what you all create is the best part of running CravyBite Kitchen. I put everything I know about achieving that perfect flaky crust and non-soggy filling into these steps, and I can’t wait to hear how it turned out for you.
Did you manage to get those perfect lattice strips woven? Did you prefer it warm with ice cream, or did you wait until it set up fully?
If you loved this recipe and it became a new family favorite, please take a second to leave a quick star rating right here on the page. It really helps other home cooks see that this is a reliable, tried-and-true recipe!
And of course, I absolutely live for seeing photos! If you share your beautiful, bubbling summer dessert creation on Instagram or Facebook, please tag me! Knowing that my recipe has brought a little bit of joy and homemade goodness into your kitchen—that’s what keeps me inspired to write the next one.
If you ever have questions that weren’t covered, or maybe you want to collaborate or send me some feedback, you can always reach out directly through my contact page. Happy baking, friends!
PrintClassic Homemade Blackberry Pie with Foolproof Flaky Lattice Crust

Make the best homemade blackberry pie using fresh or frozen berries. This recipe focuses on achieving an all-butter, flaky pie crust and a perfectly set, juicy filling to guarantee no soggy bottom.
- Prep Time: 45 min
- Cook Time: 60 min
- Total Time: 105 min
- Yield: 8 servings 1x
- Category: Dessert
- Method: Baking
- Cuisine: American
- Diet: Vegetarian
Ingredients
- 2 1/2 cups all-purpose flour
- 1 teaspoon salt
- 1 cup (2 sticks) cold unsalted butter, cut into cubes
- 1/2 cup ice water, plus more if needed
- 6 cups fresh or frozen blackberries
- 1 1/2 cups granulated sugar
- 1/4 cup cornstarch
- 1 tablespoon lemon juice
- 1/2 teaspoon ground cinnamon
- 1 large egg, beaten (for egg wash)
- 1 tablespoon coarse sugar (for sprinkling)
Instructions
- Prepare the Pie Dough: In a large bowl, whisk together the flour and salt. Cut in the cold butter using a pastry blender or your fingers until the mixture resembles coarse crumbs with some pea-sized pieces of butter remaining. Gradually add the ice water, one tablespoon at a time, mixing until the dough just comes together. Do not overmix. Divide the dough in half, flatten each half into a disk, wrap in plastic, and chill for at least 1 hour.
- Prepare the Filling: In a separate bowl, gently combine the blackberries, granulated sugar, cornstarch, lemon juice, and cinnamon. Toss until the berries are evenly coated. Set aside while you roll out the bottom crust.
- Assemble the Bottom Crust: On a lightly floured surface, roll out one disk of dough into a 12-inch circle. Carefully transfer the dough to a 9-inch pie plate. Trim the edges, leaving a 1-inch overhang. Place the pie plate in the refrigerator.
- Create the Lattice Top: Roll out the second disk of dough into an 11-inch circle. Cut the dough into even strips, about 3/4-inch wide.
- Fill and Top the Pie: Pour the blackberry filling into the chilled bottom crust. Arrange the dough strips over the filling in a lattice pattern. Trim the ends of the strips, fold the bottom crust overhang over the lattice edges, and crimp the edges to seal.
- Chill and Bake: Brush the lattice top with the beaten egg wash and sprinkle with coarse sugar. Place the pie in the freezer for 15 minutes before baking to help prevent a soggy bottom. Preheat your oven to 425°F (220°C).
- Bake the Pie: Place the pie on a baking sheet (to catch drips). Bake for 20 minutes at 425°F (220°C). Reduce the oven temperature to 375°F (190°C) and continue baking for another 35 to 45 minutes, or until the crust is golden brown and the filling is bubbly. If the edges brown too quickly, cover them loosely with foil.
- Cool Completely: Let the pie cool on a wire rack for at least 4 hours before slicing. This allows the filling to set properly.
Notes
- For the flakiest crust, keep all your butter and water extremely cold.
- If you use frozen blackberries, do not thaw them first; use them straight from the freezer.
- If you prefer a rustic look, skip the lattice and use the second dough round as a solid top crust, cutting several vents for steam release.
Nutrition
- Serving Size: 1 slice
- Calories: 410
- Sugar: 38g
- Sodium: 210mg
- Fat: 22g
- Saturated Fat: 14g
- Unsaturated Fat: 8g
- Trans Fat: 0.5g
- Carbohydrates: 52g
- Fiber: 4g
- Protein: 4g
- Cholesterol: 55mg