
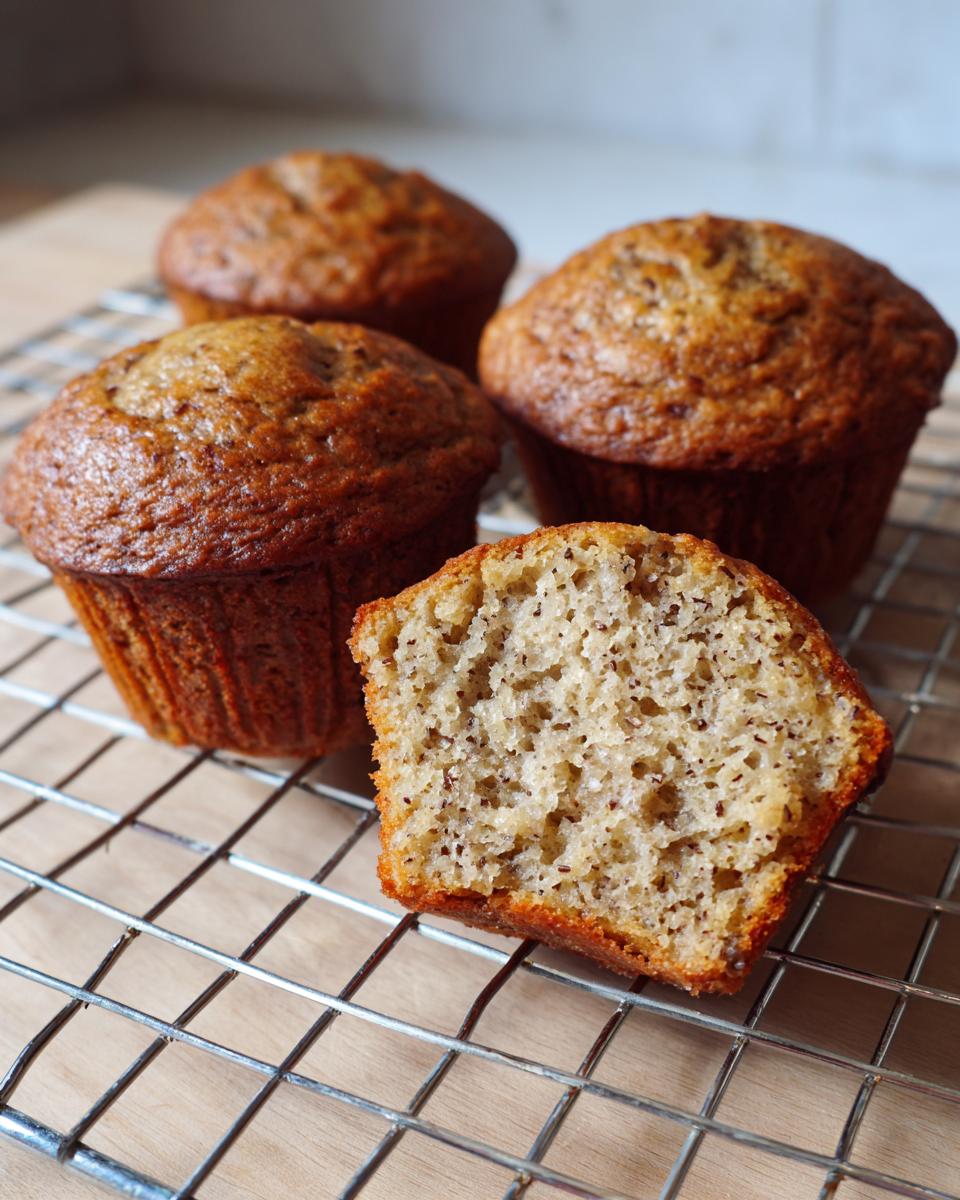
We all know the struggle, right? You want a breakfast that’s wholesome, that’s packed with fiber, and that tastes incredible, but too often you end up with dry, crumbly bricks masquerading as bran muffins. Well, stop right there! I’m Jess Carter, and I’ve taken my background in nutrition and mixed it with years of testing my family’s best American baking traditions to solve this problem forever. These aren’t just any bran muffins; these are hands-down the moist bran muffins you will ever bake. They are high fiber, naturally sweetened for your morning routine, and—my absolute favorite part—they are perfectly freezer friendly for those super chaotic weeks. Let’s get baking so you can have a truly satisfying grab and go breakfast ready to go.
- Why These Are the Best Bran Muffins for Your Kitchen
- Gathering Ingredients for Your Homemade Bran Muffins
- Simple Muffin Baking: Step-by-Step Instructions for Moist Bran Muffins
- Baking Time and Temperature for Classic Bakery Muffins
- Tips for Success with Your Bran Muffins Recipe
- Make-Ahead and Storage for Freezer Friendly Muffins
- Variations on Healthy Breakfast Muffins
- Nutritional Snapshot of These Bran Muffins
- Questions About Making Bran Muffins
Why These Are the Best Bran Muffins for Your Kitchen
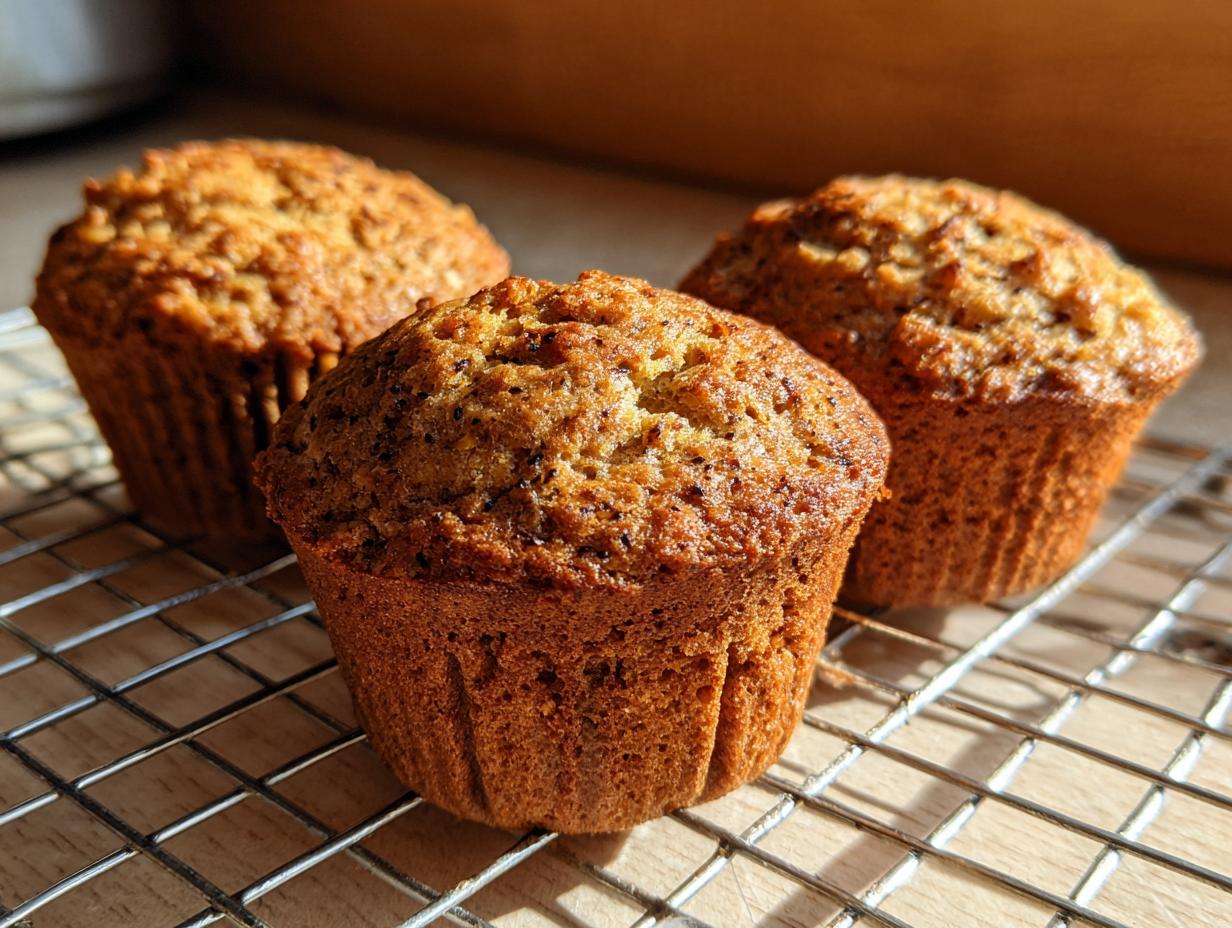
I know why you clicked here. You want flavor, but you *need* moisture. These are the **bran muffins** that actually deliver on that promise every single time. Honestly, they are my reliable go-to when I need something genuinely wholesome.
- They are incredibly reliable—no guesswork needed!
- They hold up beautifully when frozen and reheated.
- They satisfy that craving for something hearty and homemade.
Achieving Superior Moisture and Texture in Bran Muffins
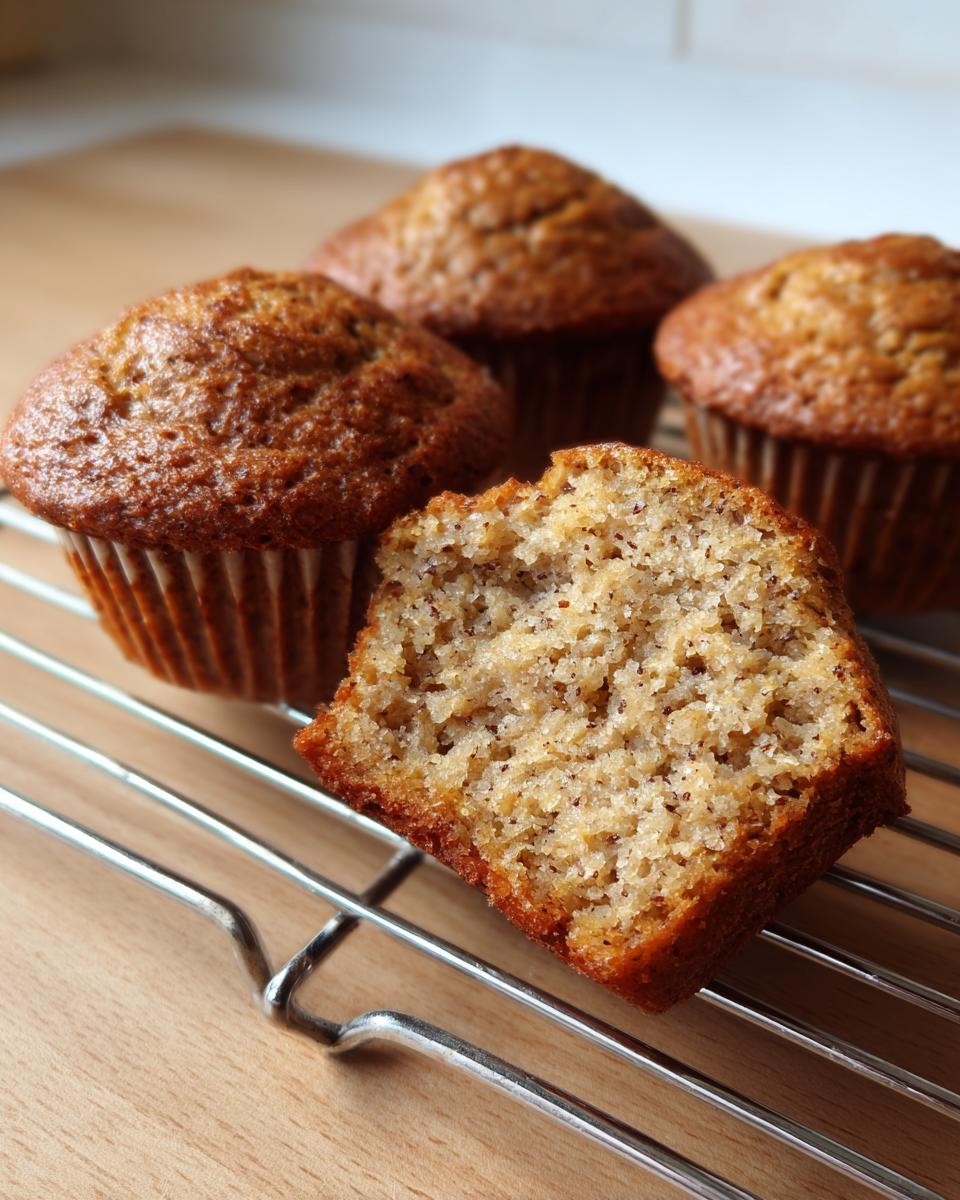
The secret to avoiding dry baked goods here rests on two things: buttermilk and applesauce. That initial 10-minute soak softens the bran perfectly. Trust me, these create the most incredible Moist Bran Muffins. They bake up tender and stay soft for days. It’s all about that hydration!
High Fiber Muffins for Wholesome Snacking
This recipe isn’t just about taste; it’s about what’s fueling you! I made sure to blend both oat bran and wheat bran in here. That combination gives you a fantastic dose of fiber, perfectly aligning with my CravyBite philosophy: food should be delicious and seriously good for you. These are the ultimate High Fiber Muffins for a guilt-free start.
Gathering Ingredients for Your Homemade Bran Muffins
Okay, let’s talk about what you need to pull off these amazing **bran muffins**. The beauty of this recipe is that it relies on pantry staples, nothing complicated! I love this ingredient list because it combines texture boosters with natural sweetness. Remember, the prep work here is super simple, which is why this becomes one of your new favorite, easy muffin recipes.
- 1 cup wheat bran
- 1 cup oat bran
- 1 3/4 cups buttermilk
- 1/2 cup unsweetened applesauce
- 1/2 cup honey
- 1/4 cup packed brown sugar
- 1 large egg
- 1/4 cup melted butter or vegetable oil
- 1 teaspoon vanilla extract
- 1 3/4 cups all-purpose flour
- 1 teaspoon baking soda
- 1/2 teaspoon salt
- 1/2 teaspoon ground cinnamon (optional)
Ingredient Notes and Substitution Ideas for Bran Muffins
Getting the bran mix right is key! We use both wheat and oat bran together for that double dose of fiber and texture. If you only have one type, feel free to adjust, perhaps exploring an Oat Bran Muffins Idea by swapping wheat bran for oat bran, but know it changes the chew slightly. Buttermilk is non-negotiable for that tang and tender crumb—don’t swap it with regular milk if you can help it! And that cinnamon? It’s totally optional, but I think it adds that warm, classic bakery scent.
Simple Muffin Baking: Step-by-Step Instructions for Moist Bran Muffins
Okay, now for the fun part—turning this beautiful bowl of ingredients into tender, perfect **bran muffins**! The process is genuinely quick, but there’s one step you absolutely cannot skip if you want that legendary moisture. I’ve laid out the steps below. Make sure your oven is preheated to 400°F (200°C) and your 12-cup tin is lined up. I always use paper liners; it just makes life easier, especially when pulling them out of that hot oven. Ready?
- First things first: grab that big bowl with your wheat bran and oat bran. Pour the buttermilk right over the top. Now, set a timer for 10 minutes and walk away! This soaking time is non-negotiable; it lets those fibers plump up beautifully so your muffins aren’t tough.
- While that’s soaking, mix all your liquid/sweetener stuff—applesauce, honey, egg, oil, vanilla—in a separate bowl until they look friendly together.
- Once the bran bath is done, pour in those wet ingredients and stir gently to combine.
- In your third bowl (yes, three bowls total, but it’s worth it!), whisk your flour, baking soda, salt, and cinnamon.
- Gently fold the dry mix into the wet mix. Stop mixing the *second* you don’t see white streaks anymore.
Mixing Technique for Perfect Bran Muffins Batter
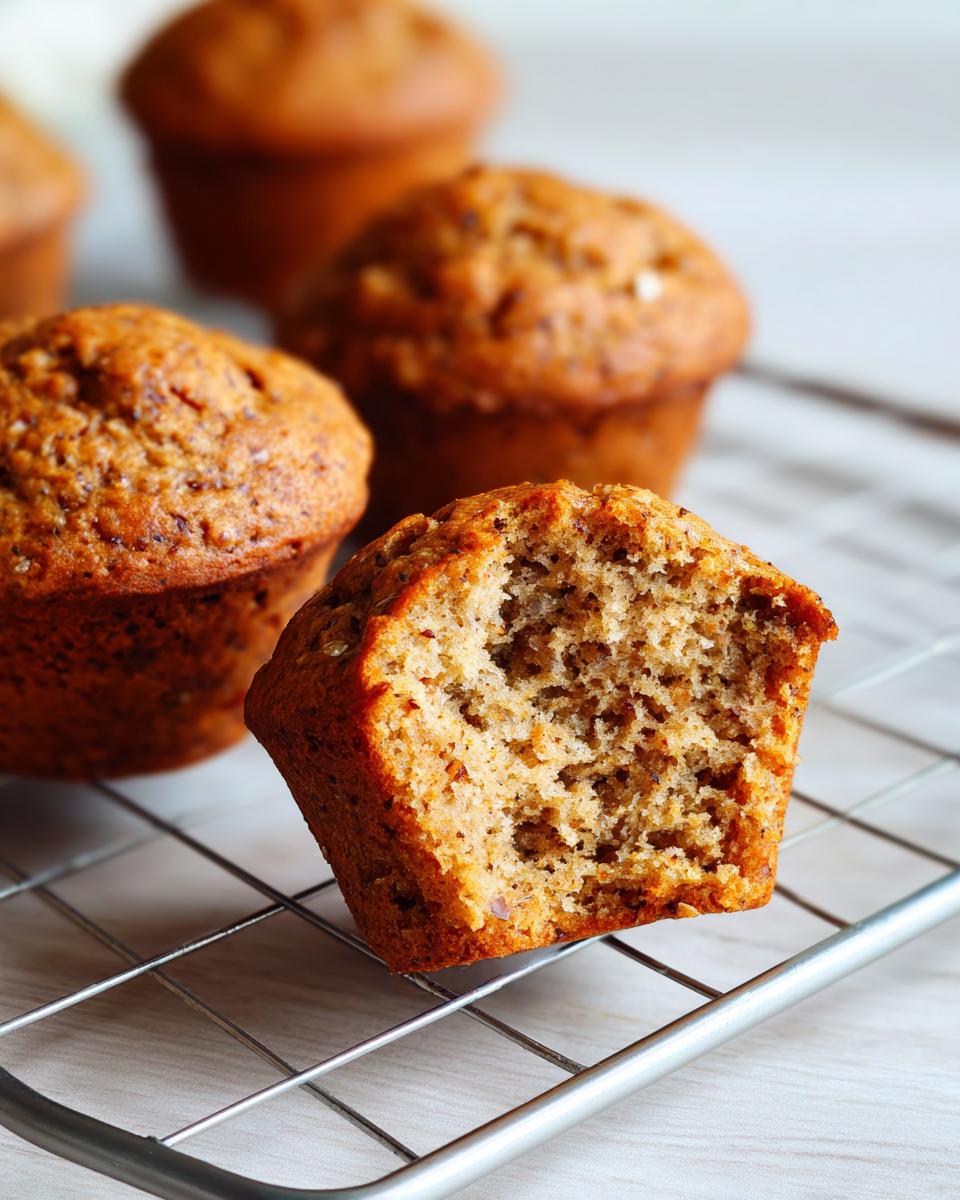
I cannot stress this enough: **Do Not Overmix!** This is the number one rookie mistake that turns these into hockey pucks. When you mix the flour in, stop when it just barely comes together. If you see a few lumps of flour or bran floating around, leave them! Those little lumps are your secret ingredient for achieving the softest texture possible in these Easy Muffin Recipes. Overmixing develops the gluten and ruins the tenderness we worked so hard for.
Once your batter is ready, divide it evenly, fill those cups right up to about three-quarters full, and we’re ready for the heat! If you want more tips on simple baking techniques, check out my guide to perfect homemade bread—the principles of careful mixing carry over!
Baking Time and Temperature for Classic Bakery Muffins
Alright, these bran muffins need a little blast of heat upfront to get that lift we want before they settle down. Make sure your oven is rockin’ and ready at 400°F (200°C) before these pans even hit the rack. Pop them in the middle of the oven for about 15 to 18 minutes total. Because we used buttermilk and applesauce, they brown beautifully!
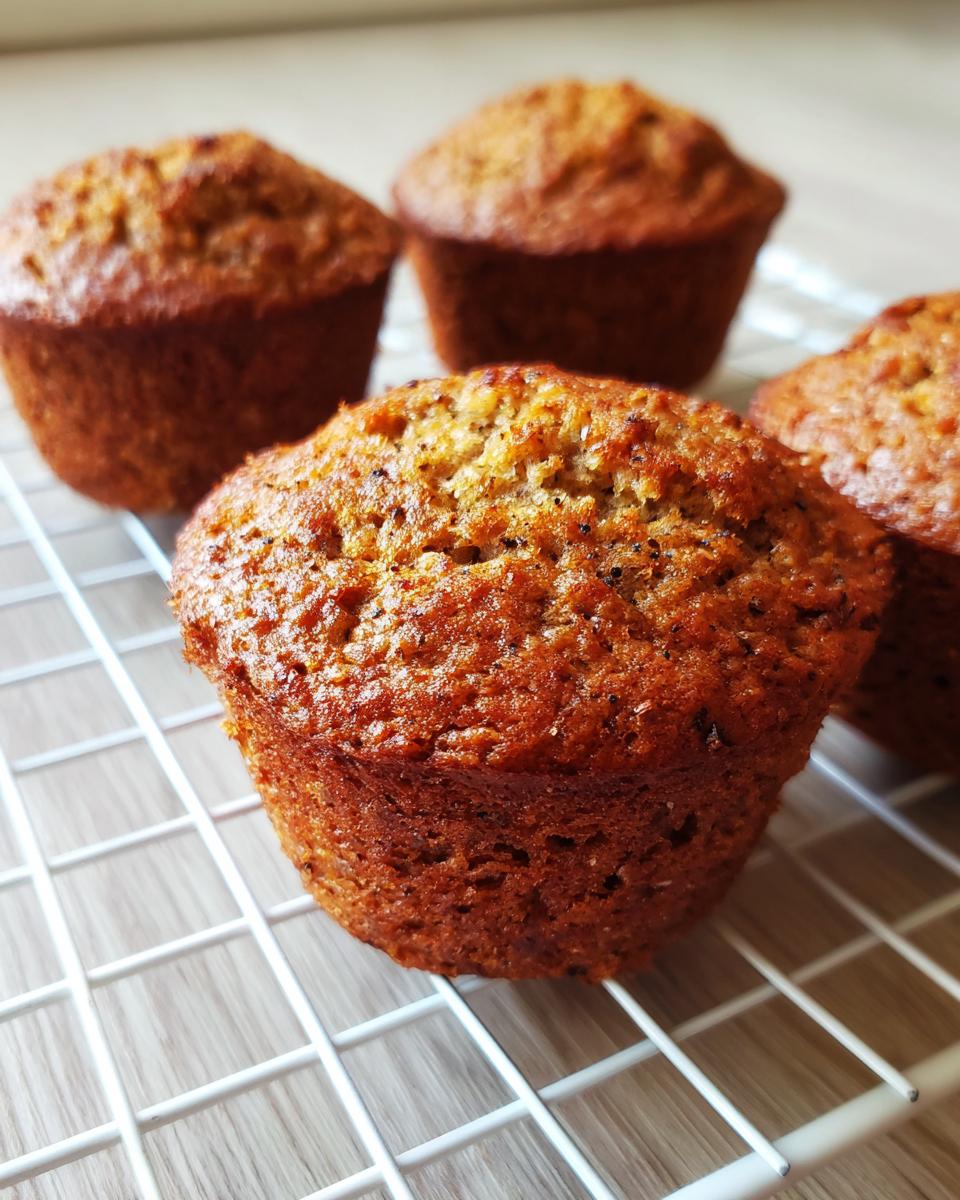
When you think they might be done, do the toothpick test right in the center. If it comes out clean, or with just a few moist crumbs clinging on—and I mean *moist* crumbs, not wet batter—they are golden. This precision is what separates a good muffin from truly Classic Bakery Muffins you’ll want to make again and again.
Tips for Success with Your Bran Muffins Recipe
Even though this recipe is straightforward, a few small tricks I picked up over the years really elevate these bran muffins from good to unforgettable. My background in nutrition definitely shows up here because I love maximizing flavor while keeping things wonderfully wholesome.
First, if you want them extra fragrant, try adding a big pinch of black pepper right along with the cinnamon. I know, I know! It sounds weird, but it really wakes up the spices and honey in a subtle way. Don’t worry, you won’t taste black pepper; you’ll just taste *more* muffin!
Also, remember that applesauce? If you’re trying to lower fat content even more, you can often replace up to half the melted butter or oil with extra applesauce. They stay moist, and you’ve swapped out some fat for fruit—win-win! For more ideas on keeping baked goods perfectly tender, take a peek at my guide for easy moist coffee cake; the science behind texture is similar.
Finally, for the best flavor payoff, let them cool completely before storing them, especially if you’re batch-baking. The flavor profile deepens overnight, and they handle freezing much better when they aren’t warm!
Make-Ahead and Storage for Freezer Friendly Muffins
One of my absolute favorite things about this recipe for **bran muffins** is how perfectly they hold up to batch baking. If you’re like me, you want healthy options ready when that 6 AM alarm goes off! These are genuinely terrific Freezer Friendly Muffins.
First, and this is vital: you must let them cool completely on a wire rack until they are stone-cold. If you wrap them warm, you’re just trapping steam, and that can lead to sogginess later, which defeats the whole purpose of a moist muffin!
Once cool, wrap individual muffins tightly in plastic wrap, then pop them into a heavy-duty freezer bag. They last great for up to three months. When you need one, just grab it right from the freezer!
Reheating is a breeze too. You can microwave them for about 20 to 30 seconds, and they come out almost as soft as fresh from the oven. For the very best texture after reheating, I actually like warming mine in a toaster oven if I have a few extra minutes. This brings back that nice, slightly crisp top that you get when they first come out of the oven. For more make-ahead baking tips, check out my post on moist date nut bread.
If you’re looking for more reliable recipes that stand up to freezer storage, check out the great advice on these bran muffins from a fellow recipe lover!
Variations on Healthy Breakfast Muffins
While this recipe is basically perfect as is—we are aiming for peak moisture, after all—I know my bakers like to customize! Adding a little fruit never hurt anyone, and it can boost those fiber counts even higher in your Healthy Breakfast Muffins.
My favorite quick addition is chopped apple. If you fold in about a cup of small, peeled apple chunks along with the dry ingredients, they steam right into the muffin, keeping the inside extra tender. Make sure you toss them lightly in a tiny bit of the reserved flour first, so they don’t sink to the bottom!
Another great option, if you’re looking for that apple-cinnamon vibe I mentioned earlier, you can check out how my friends at Savour Spot handle apple variations in their spiced bran muffins. Or, for a quick swap in our recipe, use mashed banana instead of applesauce. It makes them sweeter and fudgier, though you might want to cut back the honey slightly. It’s so fun to tweak these basics! If you need more inspiration for your breakfast lineup, look at my tips for fluffy pancakes too!
Nutritional Snapshot of These Bran Muffins
As a baker who respects nutrition, I always look at the macros, even in something hearty like these **bran muffins**. Keep in mind these numbers are estimates based on the ingredients listed above, without any extra toppings, okay?
- Calories: Around 210
- Fiber: A whopping 5g per muffin!
- Fat: Roughly 6g
- Protein: About 6g
That fiber content is why I love them for keeping you full! It proves wholesome baking really delivers.
Questions About Making Bran Muffins
I know when you look at a new recipe for **bran muffins**, questions pop up fast! That’s totally normal when you’re trying to nail that perfect texture. I want you to feel totally confident baking these up, so let’s clear up some common things folks ask me about!
Can I use regular milk instead of buttermilk?
Oh, I get asked this a lot! If you absolutely must skip the buttermilk, you can make a quick substitute. Just take 1 3/4 cups of regular milk and stir in about a tablespoon and a half of white vinegar or lemon juice. Let that sit for five minutes until it looks slightly curdled. It mimics that necessary acidity, which reacts with the baking soda to give you those fluffy tops. If you don’t use this acid, your **High Fiber Muffins** might turn out a bit flat, so please try to add the acid!
Why are my bran muffins dense instead of light?
If your results were dense, I bet you mixed the flour a little too enthusiastically. Remember what I said about those lumps? Overmixing develops gluten, which is great for bread but awful for tender muffins! Also, make sure you let that initial bran soak happen—if the bran hasn’t fully hydrated, it can suck moisture out of the final bake, leading to density. These are meant to be satisfying, but not rock-hard!
Can I leave out the brown sugar and rely only on honey?
Yes, you totally can create a more Naturally Sweetened Muffins version! Honey is fantastic, and it adds great moisture too. The only thing to watch out for is that brown sugar adds a deep molasses note that honey doesn’t quite replicate. If you skip the brown sugar, I recommend bumping the honey up just by a tablespoon or two to compensate for the lost moisture and flavor depth. For general advice on dependable baking, sometimes I just follow the crowd and check out reliable recipes like the ones on AllRecipes, but I still think my blend is better!
Do I really need both wheat bran and oat bran?
For the absolute Best Bran Muffins texture, yes! Wheat bran is usually coarser and gives you that classic chew, while oat bran is finer and tends to hold moisture better, keeping the crumb super soft. If you only have one—say you are tackling an **Oat Bran Muffins Idea**—you can usually substitute one for the other cup-for-cup, but remember the texture will change slightly. If you use only wheat bran, let it soak a little longer. If you need extra help keeping your kitchen organized, feel free to reach out via my contact page!
PrintMoist, High-Fiber Bran Muffins (Freezer-Friendly)
Bake a batch of these homemade bran muffins. They are moist, high in fiber, and perfect for a quick, wholesome breakfast or snack. This recipe is freezer-friendly for easy meal prep.
- Prep Time: 15 min
- Cook Time: 18 min
- Total Time: 33 min
- Yield: 12 servings 1x
- Category: Breakfast
- Method: Baking
- Cuisine: American
- Diet: Vegetarian
Ingredients
- 1 cup wheat bran
- 1 cup oat bran
- 1 3/4 cups buttermilk
- 1/2 cup unsweetened applesauce
- 1/2 cup honey
- 1/4 cup packed brown sugar
- 1 large egg
- 1/4 cup melted butter or vegetable oil
- 1 teaspoon vanilla extract
- 1 3/4 cups all-purpose flour
- 1 teaspoon baking soda
- 1/2 teaspoon salt
- 1/2 teaspoon ground cinnamon (optional)
Instructions
- Preheat your oven to 400°F (200°C). Line a 12-cup muffin tin with paper liners or grease well.
- In a large bowl, combine the wheat bran and oat bran. Pour the buttermilk over the bran mixture. Let this stand for 10 minutes to soften the bran.
- In a separate medium bowl, whisk together the applesauce, honey, brown sugar, egg, melted butter or oil, and vanilla extract until combined.
- Add the wet ingredients to the bran mixture and stir gently.
- In a third bowl, whisk together the flour, baking soda, salt, and cinnamon, if using.
- Add the dry ingredients to the wet ingredients. Mix only until just combined. Do not overmix; a few lumps are fine for moist bran muffins.
- Divide the batter evenly among the 12 prepared muffin cups.
- Bake for 15 to 18 minutes, or until a toothpick inserted into the center comes out clean.
- Let the muffins cool in the pan for 5 minutes before transferring them to a wire rack to cool completely.
Notes
- For a naturally sweetened version, you can increase the honey slightly and omit the brown sugar.
- These are excellent freezer friendly muffins. Cool completely, then place them in a freezer-safe bag or container. They reheat well from frozen in the microwave.
- If you prefer oat bran muffins specifically, substitute 1/2 cup of the wheat bran with more oat bran.
Nutrition
- Serving Size: 1 muffin
- Calories: 210
- Sugar: 15g
- Sodium: 240mg
- Fat: 6g
- Saturated Fat: 2g
- Unsaturated Fat: 4g
- Trans Fat: 0g
- Carbohydrates: 38g
- Fiber: 5g
- Protein: 6g
- Cholesterol: 25mg