
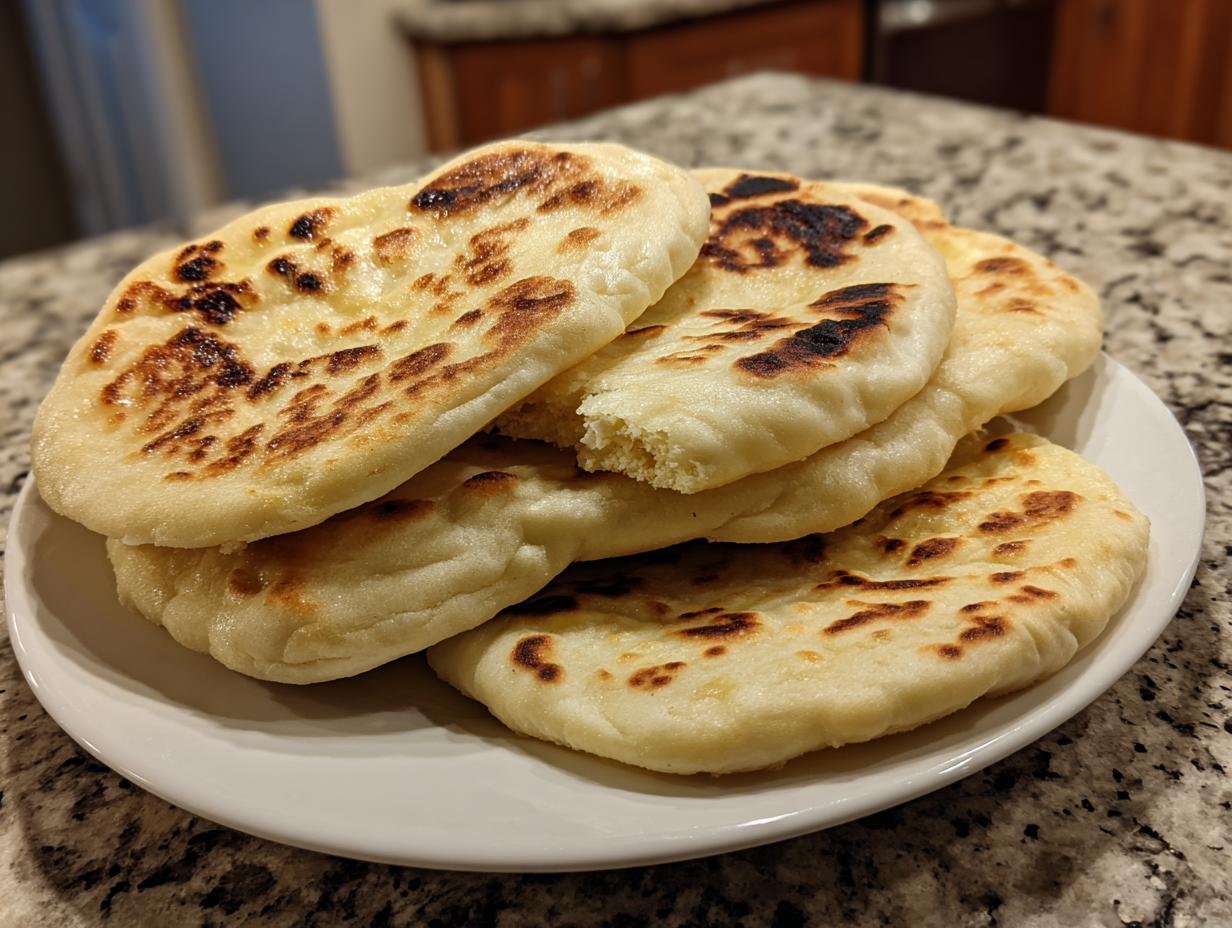
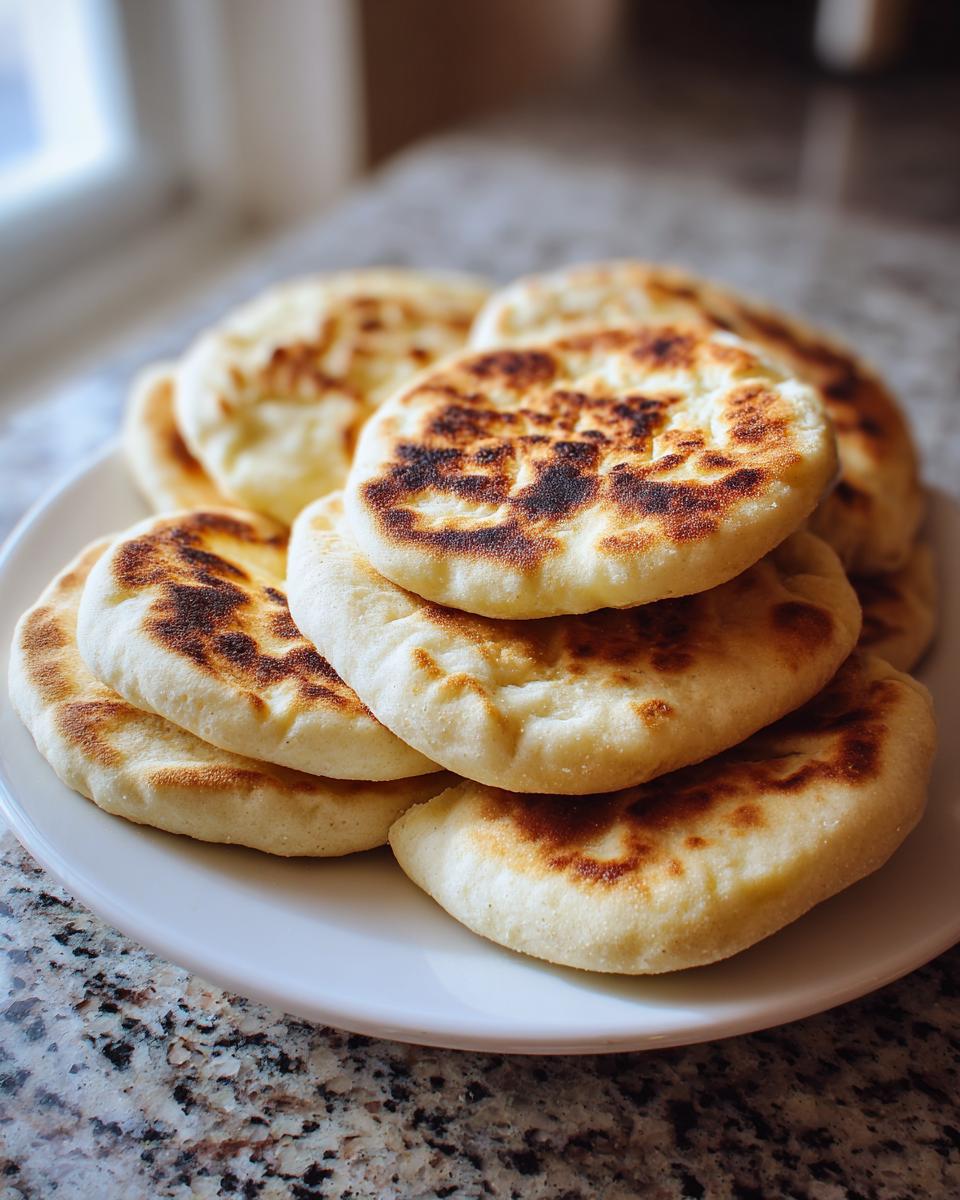
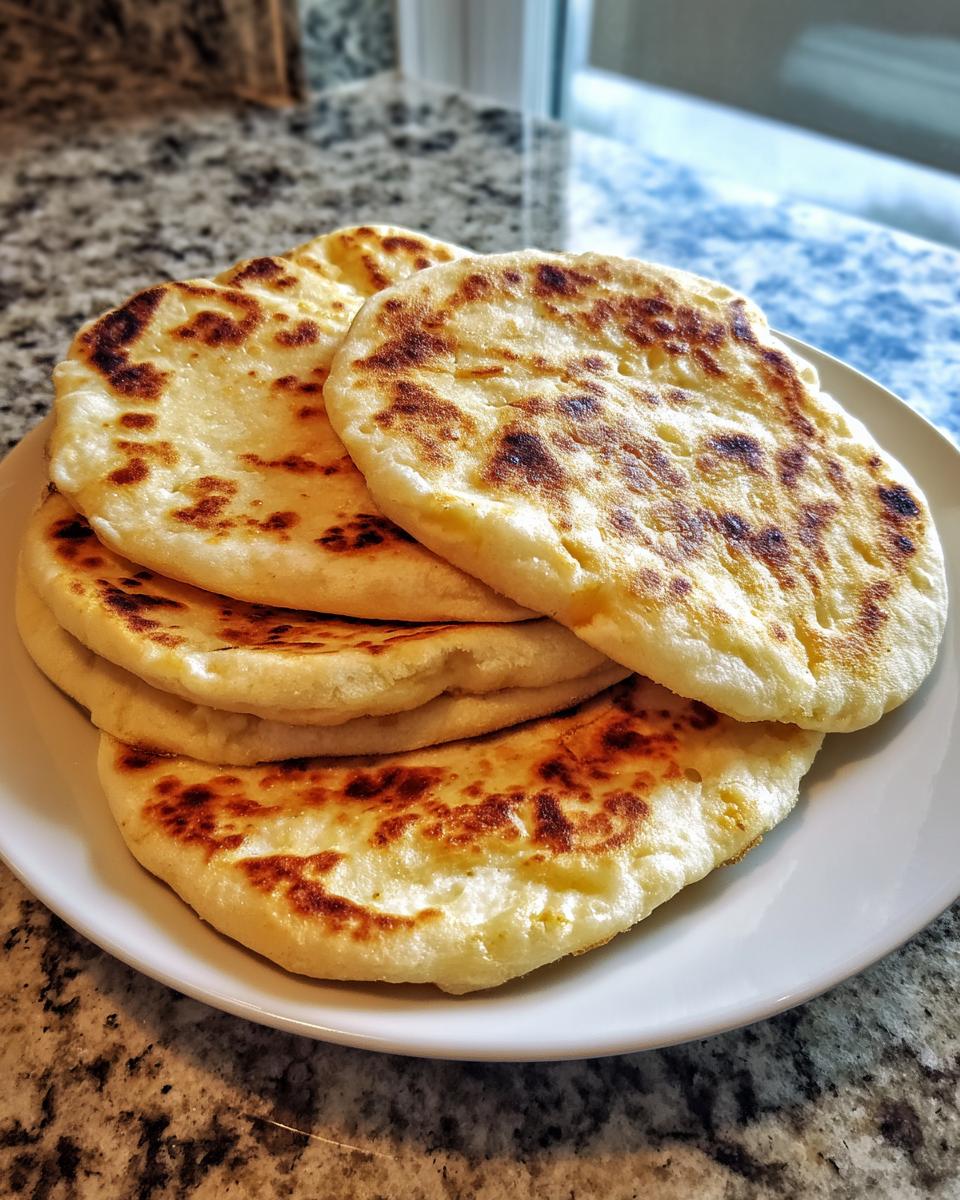
If you’re still buying those flat, sad packets of bread from the store, we need to talk. Honestly, that convenience isn’t worth missing out on the sheer joy of hot, fresh bread right from your skillet! Trust me when I say, making pita bread at home is shockingly simple, and the payoff is huge. We’re talking about incredibly soft, fluffy homemade pita bread that balloons up into those glorious, perfect pockets. It takes me back to my family kitchen; there’s just nothing better than pulling something this delicious out of your own pan. Get ready to transform your gyros and dips—this is the recipe you’ll lean on every single time.
- Why This Ultimate Fluffy Homemade Pita Bread Recipe Works
- Essential Ingredients for Perfect Pita Bread
- How to Make Pita Bread Pockets: Step-by-Step Instructions
- Oven Method for Homemade Pita Bread
- Tips for Success with Your Fluffy Flatbread
- Serving Suggestions for Fresh Baked Pita
- Storage and Reheating Instructions for Pita Bread
- Frequently Asked Questions About Making Pita Bread
- Nutrition Facts for Homemade Pita Bread
- Share Your Homemade Pita Bread Creations
Why This Ultimate Fluffy Homemade Pita Bread Recipe Works
I know you want that big, beautiful pocket, and honestly, this recipe delivers it nearly every time. That’s why I’m so proud to share it with you. It’s not just about making pita bread; it’s about mastering the puff!
- Guaranteed Puff Factor: The secret is using a screaming hot, dry skillet. That sudden blast of intense heat instantly turns the water in the dough to steam, forcing that perfect balloon shape.
- Unbeatable Softness: If you want incredibly soft pita bread recipe results, add the optional Greek yogurt. It adds a gentle tang and richness that keeps the bread pillowy even after it cools.
- It’s a Quick Pita Recipe: While there’s a little rising time, the active hands-on work is minimal, meaning you can be enjoying fresh flatbread in under an hour and a half. You can even check out my tips for other types of fast breads if you’re getting the baking bug!
Essential Ingredients for Perfect Pita Bread
When we talk about making truly exceptional homemade pita bread, it starts right here, with quality ingredients. You probably have most of this sitting in your pantry right now! Remember, fresh ingredients make for the best baking at home, and these form the backbone of our delicious Mediterranean flatbread.
- 3 cups all-purpose flour – standard stuff works great here!
- 1 cup warm water – this is specific, 105-115°F is the sweet spot.
- 2 1/2 teaspoons active dry yeast – don’t skimp here; this is what makes it rise!
- 1 teaspoon sugar – just a little food for our yeast friends.
- 1 teaspoon salt – essential for flavor, obviously.
- 1 tablespoon olive oil – this adds elasticity to the dough.
- Optional: 2 tablespoons Greek yogurt – if you want that extra, cloud-like softness, this is the key tweak!
Ingredient Notes and Substitutions for Soft Pita Bread Recipe
Let’s talk science real quick: that water temperature is everything for active dry yeast. If it’s too cold, the yeast won’t wake up. Too hot, and sadly, you’ll kill it. We want that active foamy top, okay? That tells us the yeast is ready to do its magic and give you the best puff. And hey, if you are looking to make vegan pita bread, just skip that optional Greek yogurt! The base recipe is naturally vegetarian and works beautifully without it, though the yogurt does give it a tender crumb.
How to Make Pita Bread Pockets: Step-by-Step Instructions
Alright, this is where the magic really happens! We’re turning that shaggy mess of dough into gorgeous, puffy pita bread. Don’t feel rushed, but definitely follow the timings. The resting and kneading stages are non-negotiable if you want that perfect pocket for your gyros or dipping! If you’ve ever tried making starter from scratch, you know patience is key here, and this bread is no different. You can check out my guide on making sourdough starter if you need a patience refresher!
Activating Yeast and Mixing the Pita Bread Dough
First things first, we wake up that yeast! Grab your little bowl, pour in that warm water—remember, 105 to 115 degrees, not too hot!—toss in the sugar and the yeast, and just wait about 5 to 10 minutes. You absolutely need to see foam on top. If it’s flat, your yeast is dead, and you’ll have sad, flatbread instead of fluffy flatbread, oops! Once it’s foamy, pour it into your flour and salt mixture along with the olive oil. Mix it all together until it looks messy, then it’s time to get your hands in there.
Turn that shaggy dough out onto your counter. We need to knead this for a good 5 to 7 minutes until it feels smooth and elastic—it should feel alive, not sticky. After you oil your bowl and let it rise for a full hour until doubled, gently punch it down. Divide it into 8 even pieces, roll ‘em into little balls, and let them chill out for 10 minutes. This relaxing time is important before rolling them thin, about 1/8 inch thick. Get those rolled portions ready!
The Key to the Puff: Stovetop Pita Bread Cooking Tips
Now, put your cast-iron skillet on the stove and crank the heat up to medium-high—I mean *screaming* hot! Do not add any oil to the pan. We need pure, dry heat for this trick. Carefully place one rolled-out dough round onto that sizzling surface. You should see bubbles forming almost immediately, usually within a minute. That’s the good stuff! Flip it quickly.
The second side is where the fun happens. This is the part that makes the stovetop pita bread famous: the whole thing will inflate like a balloon! Give it maybe another minute or two on that second side until it’s fully puffed up. Don’t let it sit too long, or those pockets will start to crisp up when you want soft bread. Pull it off immediately and wrap it in a clean kitchen towel. Covering them keeps the steam trapped, which is critical for maintaining that amazing softness. Repeat for all the rounds!

Oven Method for Homemade Pita Bread
I know most folks love the dramatic puff you get from the skillet, but sometimes I just don’t want to stand over the stove flipping bread that quickly. If that’s you, or if you’re batch-baking a huge amount of pita bread, the oven method is absolutely wonderful. It’s fantastic for those of you who just prefer classic baking bread at home!
The main difference here is using incredible, retained heat. You need to preheat your oven to a high 450°F (232°C). Now, this is important: you must place a pizza stone or a heavy, inverted baking sheet inside the oven while it preheats—let it get scorching hot! We need that intense heat radiating up toward the dough immediately.
Once your dough is rolled out thin (just like we did for the stovetop!), you carefully slide those rounds right onto the hot stone or sheet in the oven. They cook super fast, usually just 3 to 4 minutes total. Keep your eye on them because the high heat makes them puff up beautifully, giving you those sought-after pockets. Pull them out as soon as they achieve that perfect golden balloon shape. They are just as soft and delicious as their stovetop cousins, making them perfect pita bread for dipping!
Tips for Success with Your Fluffy Flatbread
Look, following the steps is great, but when you’re dealing with yeast and steam, a few little veteran tricks can take you from “pretty good” to “I’m never buying bread again!” These tips are things I picked up watching my grandmother turn out perfect loaves year after year. We want everyone succeeding at baking bread at home, so listen up!
First, about that rise. Yeast hates the cold! If your kitchen feels chilly—maybe it’s winter or you have those drafty old windows—the dough won’t double in size the way it should, and that means less puff later. My trick is to turn my oven off, put my oiled, covered bowl inside, and then just let it sit in the residual warmth. It’s the perfect little greenhouse for your dough to get happy and puffy. I use basically the same warming trick when I make my super soft dinner rolls, too!
Second, when you roll them out, think thin and even. If one spot is 1/4 inch thick and another is just a sheet of dough, the steam will rush to the thin part and leave the thick part dense. You want a consistent 1/8 inch thickness all the way across your circle. That uniform thickness is what forces the whole thing to balloon evenly across the surface. If you can see daylight clearly through the dough when you hold it up, you’re probably just about right.
Finally, don’t overcrowd your work surface when you’re rolling the rounds. Work one ball at a time, and make darn sure the remaining seven balls stay covered with a clean towel or plastic wrap. Dough dries out fast once it’s exposed to the air, and dry dough resists puffing. It’s that crucial moisture balance that keeps this fluffy flatbread tender and ready to inflate the second it hits that hot pan!
Serving Suggestions for Fresh Baked Pita
Okay, you’ve got these beautiful, warm, pliable pita bread rounds fresh off the skillet, and now you’re asking, “What next?” Honestly, these are so good, you could just break off a warm piece and eat it plain—but where’s the fun in that?
Since we’ve captured that wonderful, authentic Mediterranean flatbread feel, let’s stick with that vibrant cuisine! They are absolutely perfect for loading up. Forget those sad, pre-made gyros wraps; when my family makes Greek night, we use these big pockets as the base. They hold up so well to grilled chicken souvlaki, tender lamb slices, tomatoes, onions, and a generous drizzle of tzatziki. They truly are the best homemade bread for that job.
But they aren’t just sandwich holders! Don’t forget the appetizer potential. These homemade pockets are phenomenal when sliced into triangles and quickly toasted or baked until crisp. They become the ultimate vehicle for scooping up hearty dips. I swear by making a big batch of my fresh bruschetta dip—the slight acidity of the tomatoes cuts through the warm, yeasty flavor of the pita so beautifully. And if you’re feeling savory, a quick homemade sauce is a must. Whipp up a batch of my creamy garlic sauce; it’s seriously addictive when you dip those warm pockets in it.
No matter how you serve them—stuffed for lunch, toasted for snacking, or just alongside a big salad—these pitas elevate the entire meal. They make even the simplest dinner feel special!
Storage and Reheating Instructions for Pita Bread
So, you made a dozen glorious, puffy rounds of pita bread, and surprise, surprise, you have some leftovers! That’s a good problem, but how do we keep them from turning into sad, leathery disks by tomorrow? It’s all about trapping that moisture we worked so hard to create during the cooking process.
The absolute best way to keep your homemade pita bread soft is to store it correctly right after they come off the heat. As soon as they puff up on the skillet, pull them off and stack them up, wrapping the whole pile tightly in a clean dish towel, and then slide that bundle into a large zip-top bag. Squeeze out as much air as you can before sealing it. Storing them like this creates a humid environment that keeps them pliable and ready to eat for a good day or two!
If you need to keep them longer—say, for your meal prep—you can absolutely freeze them! They freeze like a dream. Lay them flat on a baking sheet to freeze individually first (this stops them from sticking into one big pita lump!), then transfer those frozen rounds into a freezer bag. They last great for about a month.

Now, for the best part: reheating! You want that initial fluffiness back, right? Do NOT microwave them unless you like chewy rubber. The best way to bring that pillowy texture back is exactly how we cooked them: with high, dry heat. You can use that same scorching hot cast-iron skillet for about 30 seconds per side—just enough heat to release the steam trapped inside. If you used the oven method, you can set your oven to 350°F and warm them directly on the rack for about 3 minutes. When they come out, they’ll be soft, warm, and ready for dipping or stuffing all over again!
Frequently Asked Questions About Making Pita Bread
I know these fluffy flatbreads can look intimidating, but most of the questions I get come down to a few crucial steps. Don’t worry if your first batch isn’t perfect! Troubleshooting is just part of the fun of baking bread at home. We want you to conquer that pocket!
Can I make this a quick pita recipe without yeast?
You certainly can try to make it quicker, but I have to be honest: it changes the character of the bread! Yeast is what provides that big, airy structure necessary for a true pocket. If you skip the yeast and rely only on baking powder or soda, you end up with something closer to a soda bread or a dense tortilla. It will be tasty, especially if you brush it with my favorite garlic butter, but it won’t achieve that classic, hollow puff you get from the yeast forcing gas into the dough.
How do I ensure my pita bread puffs every time?
This is the million-dollar question! If you want guaranteed pockets, you need three things working together perfectly. Number one: make sure your yeast bloomed properly—that foamy top is your insurance policy. Number two, give your dough enough time to rest and rise; don’t rush that hour! And number three, which is critical for stovetop pita bread success, your pan must be scorching hot before the dough hits it. If you hear a quiet sizzle instead of a sharp hiss, the pan isn’t hot enough to create instant steam! For more in-depth skillet secrets, I always point to this great guide on stovetop cooking tips.
Is this recipe suitable for vegan pita bread?
Yes, absolutely! I love that this recipe is naturally flexible. The core recipe—flour, water, yeast, oil, salt—is completely vegetarian and vegan-friendly. The 2 tablespoons of Greek yogurt I suggested are purely optional, added only to boost the softness and richness, just like some people add a little yogurt to their dinner rolls. If you skip that optional yogurt, you have a fantastic, authentic vegan pita bread that’s ready for all your favorite hummus and veggie wraps!
Nutrition Facts for Homemade Pita Bread
Now, I know some of you are tracking macros, or maybe you’re just curious about what’s in this delicious bread we’re making. Since we’re using basic pantry staples, we aren’t loading these full of scary additives you find in the store-bought stuff, which is a huge win! Please remember, because baking can vary slightly—how much flour you use, whether you added the optional Greek yogurt—these numbers below are my best estimates based on the ingredients list.
We calculate these numbers assuming the batter yields exactly 8 lovely pita bread rounds, as specified in the recipe. These are perfect for a healthy side or as the base for your next wrap!
- Serving Size: 1 pita
- Calories: 180
- Total Fat: 3g
- Saturated Fat: 0.5g
- Cholesterol: 0mg
- Sodium: 250mg
- Total Carbohydrates: 34g
- Dietary Fiber: 2g
- Sugar: 1g
- Protein: 6g
As you can see, these are relatively low in fat, and if you’re watching your sugar intake, this fluffy flatbread is quite reasonable! I always say, knowing exactly what goes into your food is half the battle, and with this recipe, you’re in total control. Enjoy these estimates, but treat them as a great guideline for your wonderful homemade pita bread!
Share Your Homemade Pita Bread Creations
Alright, my friends, we’ve done the work! We’ve activated the yeast, we’ve kneaded the dough, and you’ve witnessed the magic of those hot skillets creating perfect pockets. Now, the best part of home cooking, really, is sharing what we make. I truly want to hear how your pita bread adventure went!
Did you nail the puff on your first try? Or did you need a second round with a hotter pan? Don’t be shy! Jump down to the comments below and give this recipe a star rating—I rely on your feedback to know I’m steering you right. Tell me what you stuffed inside those fluffy flatbreads or what amazing dips you used them for!
If you snap a picture of your glorious, warm fresh baked pita—maybe you’ve got a big pile of Greek pita bread ready for a party, or you’re stuffing them for gyros—please tag me on social media! Seeing your beautiful kitchen creations always makes my day and fuels my passion here at CravyBite. If you have any last-minute questions that I didn’t cover, you can always pop over and use my contact form. Happy baking, and enjoy every single warm bite!
PrintUltimate Fluffy Homemade Pita Bread (Stovetop or Oven)
Make incredibly soft, fluffy homemade pita bread that puffs into perfect pockets using simple ingredients. This recipe works well on the stovetop or in the oven and is ideal for gyros, dipping, or sandwiches.
- Prep Time: 20 min
- Cook Time: 15 min
- Total Time: 1 hour 35 min
- Yield: 8 servings 1x
- Category: Bread
- Method: Skillet Cooking
- Cuisine: Mediterranean
- Diet: Vegetarian
Ingredients
- 3 cups all-purpose flour
- 1 cup warm water (about 105-115°F)
- 2 1/2 teaspoons active dry yeast
- 1 teaspoon sugar
- 1 teaspoon salt
- 1 tablespoon olive oil
- Optional: 2 tablespoons Greek yogurt for extra softness
Instructions
- In a small bowl, combine the warm water, sugar, and yeast. Let this mixture sit for 5 to 10 minutes until it becomes foamy. This shows the yeast is active.
- In a large bowl, mix the flour and salt. Add the foamy yeast mixture, olive oil, and optional Greek yogurt to the dry ingredients. Mix until a shaggy dough forms.
- Turn the dough out onto a lightly floured surface. Knead the dough for 5 to 7 minutes until it becomes smooth and elastic.
- Place the dough in a lightly oiled bowl, turning it once to coat. Cover the bowl with plastic wrap or a clean kitchen towel. Let the dough rise in a warm place for 1 hour, or until it has doubled in size.
- Gently punch down the risen dough. Divide it into 8 equal pieces. Roll each piece into a smooth ball. Cover the balls and let them rest for 10 minutes.
- Working with one ball at a time, roll it out into a thin circle, about 1/8 inch thick (roughly 6-7 inches in diameter). Keep the remaining dough covered while you roll.
- Heat a cast-iron skillet or heavy-bottomed pan over medium-high heat until it is very hot. Do not add oil to the pan.
- Place one rolled pita into the hot, dry pan. Cook for 1 to 2 minutes until bubbles appear on the surface. Flip the pita. Cook the second side for 1 to 2 minutes until it puffs up completely.
- Remove the puffed pita from the pan and place it on a clean towel. Cover it immediately to keep it soft. Repeat with the remaining dough rounds.
- Serve your fresh baked pita warm for the best texture.
Notes
- For the best pocket formation, ensure your pan is very hot before cooking each pita. High heat creates steam quickly, causing the bread to puff.
- If you prefer an oven method, preheat your oven to 450°F (232°C) with a pizza stone or baking sheet inside. Cook the rolled pitas directly on the hot stone/sheet for 3-4 minutes until puffed.
- These homemade pita bread pockets are best eaten the day they are made.
Nutrition
- Serving Size: 1 pita
- Calories: 180
- Sugar: 1
- Sodium: 250
- Fat: 3
- Saturated Fat: 0.5
- Unsaturated Fat: 2.5
- Trans Fat: 0
- Carbohydrates: 34
- Fiber: 2
- Protein: 6
- Cholesterol: 0