
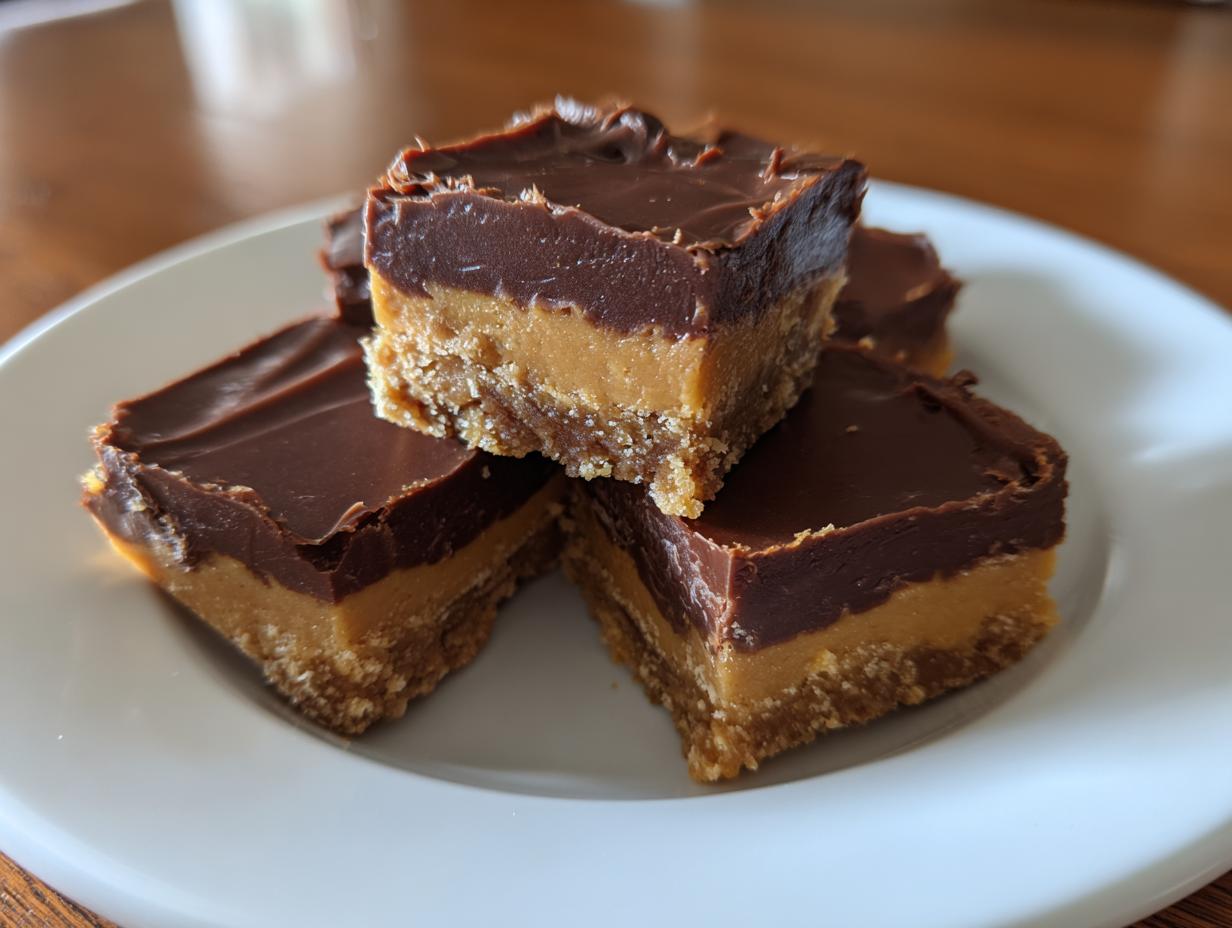
Oh my goodness, are you ready for a classic American sweet that takes the fuss out of fudge-making? We all adore those little peanut butter buckeye balls, right? Well, I’ve taken that incredible flavor—that perfect creamy peanut butter mixed with a layer of rich, dark chocolate—and streamlined the whole thing into what I think is the ultimate version: **buckeye fudge**. This is where tradition meets modern kitchen convenience. I’m Jess Carter, and coming from a background where nutrition science meets deep family cooking roots, my goal is always to bring you food that satisfies the soul without taking up your entire afternoon. If you love treats like my easy no-bake chocolate peanut butter bars, you are going to absolutely adore this! Trust me, this no-bake recipe is going to fly off your dessert tray!
- Why You Will Make This Easy No-Bake Buckeye Fudge Recipe Often
- Gathering Ingredients for Your Buckeye Fudge
- How to Prepare Perfect Buckeye Fudge Step-by-Step
- Tips for Success with Your Peanut Butter Buckeye Treat
- Variations on Classic Buckeye Fudge
- Storage & Reheating Instructions for Buckeye Fudge
- Frequently Asked Questions About This Easy Fudge Recipe
- Estimated Nutritional Data for Buckeye Fudge
- Share Your Simple Homemade Candy Creations
Why You Will Make This Easy No-Bake Buckeye Fudge Recipe Often
When I show people this recipe, I always get the same look—that mix of ‘that looks amazing’ and ‘it can’t be that easy.’ Guess what? It totally is! This isn’t just any dessert; it’s the **Chocolate Peanut Butter Fudge** you dream about, coming together with almost no effort. It’s my go-to when company unexpectedly shows up!
- It’s Truly No-Bake Candy: Set the oven to ‘off’! Seriously, we skip all the fussy baking steps. You just need a stovetop burner for about five minutes to melt the chocolate layer. Instant gratification, folks!
- Speedy Prep Time: Including gathering ingredients, you are looking at maybe 20 minutes from start to finish before it heads into the fridge. That makes it a fantastic option for those last-minute **holiday fudge ideas**.
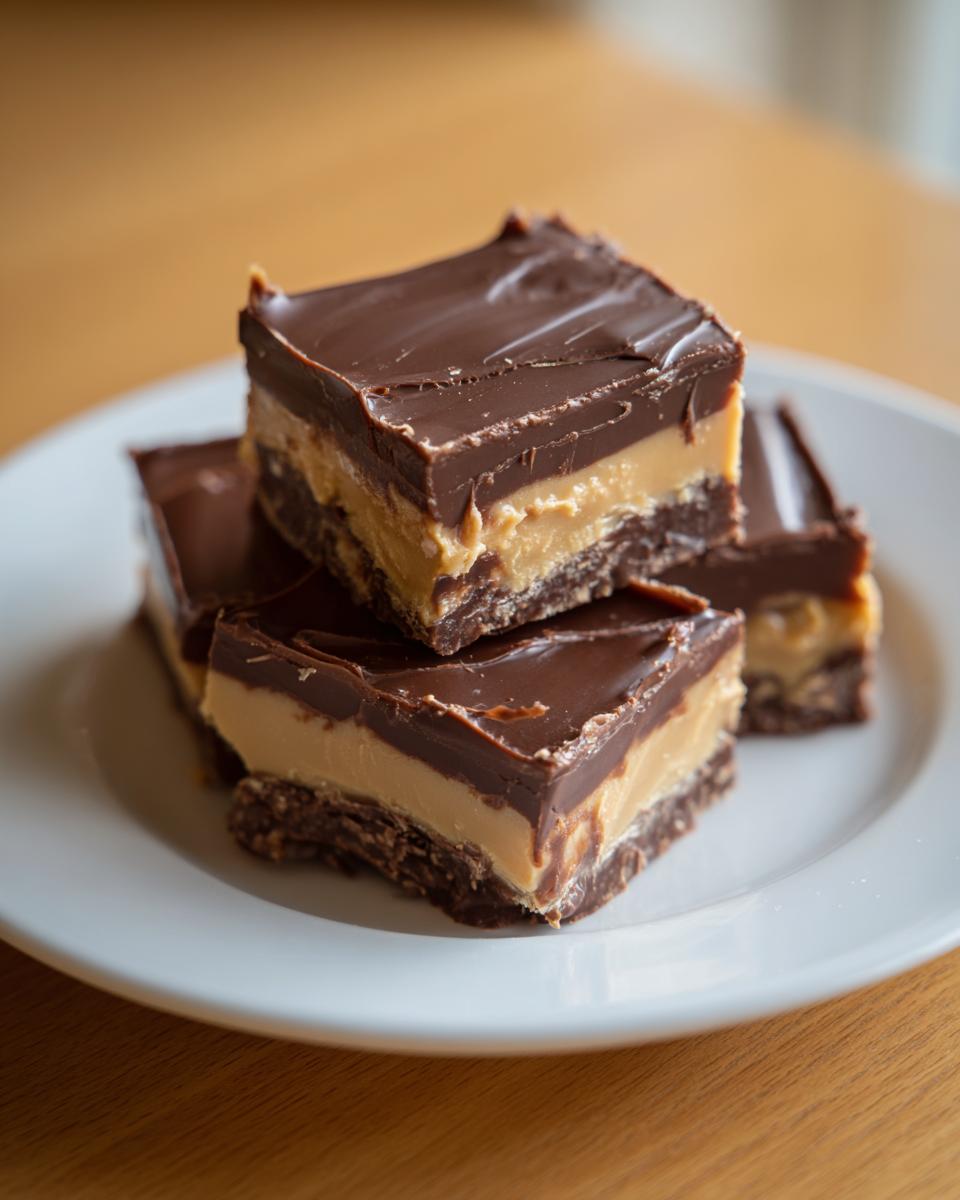
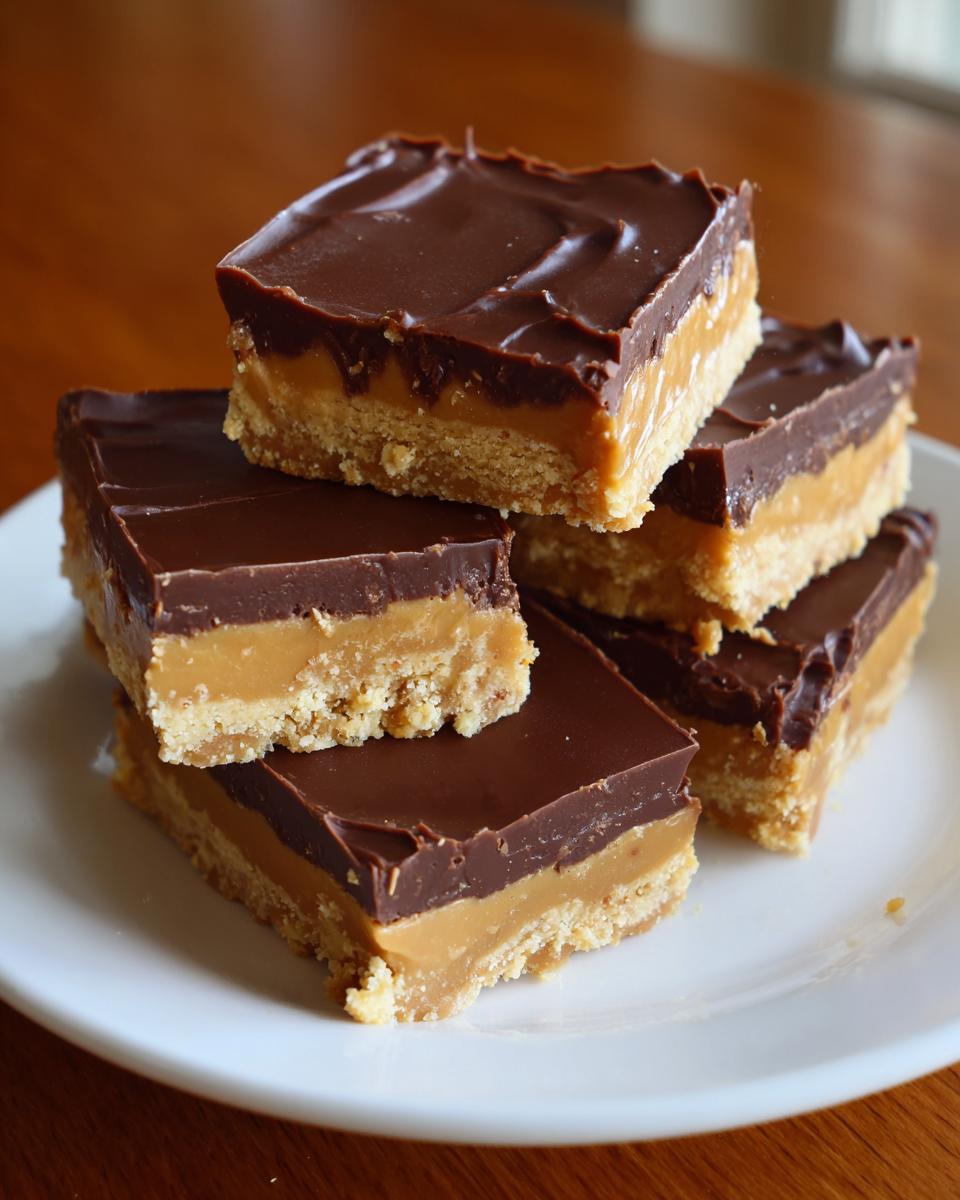
- That Perfect Flavor Combo: If you love peanut butter cups or the classic Buckeye candy, this delivers that unmistakable sweet, salty, creamy peanut butter perfectly balanced against that slightly bitter, rich chocolate top layer. It’s heaven!
- Amazing Yield for the Effort: We get 36 small squares out of one pan. That means you can make a big batch for a party or bake sale without breaking a sweat. If you love making a big batch of my chewy no-bake oatmeal bars, this fudge will be right alongside it on the tray!
- Ultimate Comfort Food: There is something deeply satisfying about homemade fudge. It feels rich and decadent but it’s actually one of the simplest **homemade fudge recipes** out there. It just feels good to make something sweet from scratch.
Gathering Ingredients for Your Buckeye Fudge
Okay, so this is where we set ourselves up for success! Because this is a no-bake recipe, the texture relies entirely on having the right ingredients at the right stage. We aren’t relying on baking chemistry to do the heavy lifting, so make sure you follow the butter rules! If you’ve ever struggled with a runny frosting or a grainy batch of homemade candy, usually the culprit is temperature or preparation. We’re keeping things simple, but precision matters here.
I have organized everything below so you can check your pantry before you start. If you’re making my copycat cinnamon butter next, you already know the secret to good mixing is starting with softened fat!
Peanut Butter Layer Ingredients for Buckeye Fudge
This is the foundation—the creamy, sweet center that screams “buckeye!” Remember, we want this nice and pliable, so make sure that butter is soft enough to mash easily with a fork.
- 1 cup unsalted butter, softened (not melted, friends, soft!)
- 1 ½ cups creamy peanut butter (that smooth kind works best for texture!)
- 1 teaspoon vanilla extract
- 3 ½ cups powdered sugar, sifted (Trust me, sifting the powdered sugar prevents those little lumps that ruin a smooth fudge!)
Decadent Chocolate Topping Ingredients
This is the rich, pourable chocolate shell that gives the fudge its gorgeous top layer. It sets up beautifully firm and glossy when chilled.
- 7 ounces sweetened condensed milk (that’s usually about half of a standard 14-ounce can—measure it out so you don’t accidentally dump the whole thing in!)
- 1 ½ cups semi-sweet chocolate chips (I prefer semi-sweet here to balance the sweetness of the base.)
- 2 tablespoons butter (just a little extra needed for melting smoothly with the chips)
How to Prepare Perfect Buckeye Fudge Step-by-Step
Now for the fun part! Since we are aiming for the best Buckeye Recipe that is simple and relies on no oven time, the real magic is less about baking and more about careful mixing and chilling. Follow these steps closely, and you’ll have these beautiful, decadent layers staring back at you in just a few hours. This is truly what I consider the ultimate, easy fudge recipe!
Preparing the Pan and Peanut Butter Base for Buckeye Fudge
First things first, get your home ready for this no oven dessert. Line that 8×8 inch pan with parchment paper, making sure you leave a good overhang on two sides—this is your built-in handle for lifting solidified fudge later. Don’t skip this, trust me!
Next, we tackle the base. In a large bowl, take that softened butter, the creamy peanut butter, and vanilla extract. Start beating them together. Don’t just mix until they’re combined; you want to beat them until they are visibly lighter in color and wonderfully fluffy. That initial creaming incorporates the air we need for that signature smooth, almost whipped texture!
Once light and fluffy, start adding that sifted powdered sugar slowly while your mixer is running on low. Once it’s all mixed in, scrape down the sides and beat it for thirty more seconds. Then, scrape this thick peanut butter mixture into your lined pan. Use a spatula or the back of a measuring cup to press it down firmly and evenly. You want a solid, flat base for your chocolate.
Creating the Rich Chocolate Fudge Layer
Time to melt the good stuff! Grab a small saucepan, keep the heat on low—and I mean *low*. Toss in your sweetened condensed milk, the chocolate chips, and that final two tablespoons of butter. This is crucial for **rich chocolate fudge** that won’t seize up on you.
Stir this mixture constantly. You must keep it moving so the bottom doesn’t scorch. Here’s my little trick, the one I learned after ruining one too many candy batches: Once you see only a few tiny, small lumps of chocolate remaining, pull the entire saucepan right off the heat. The residual warmth in the pan and the melted chips will finish melting the last bits perfectly. That heat control stops it from getting grainy or seizing up!
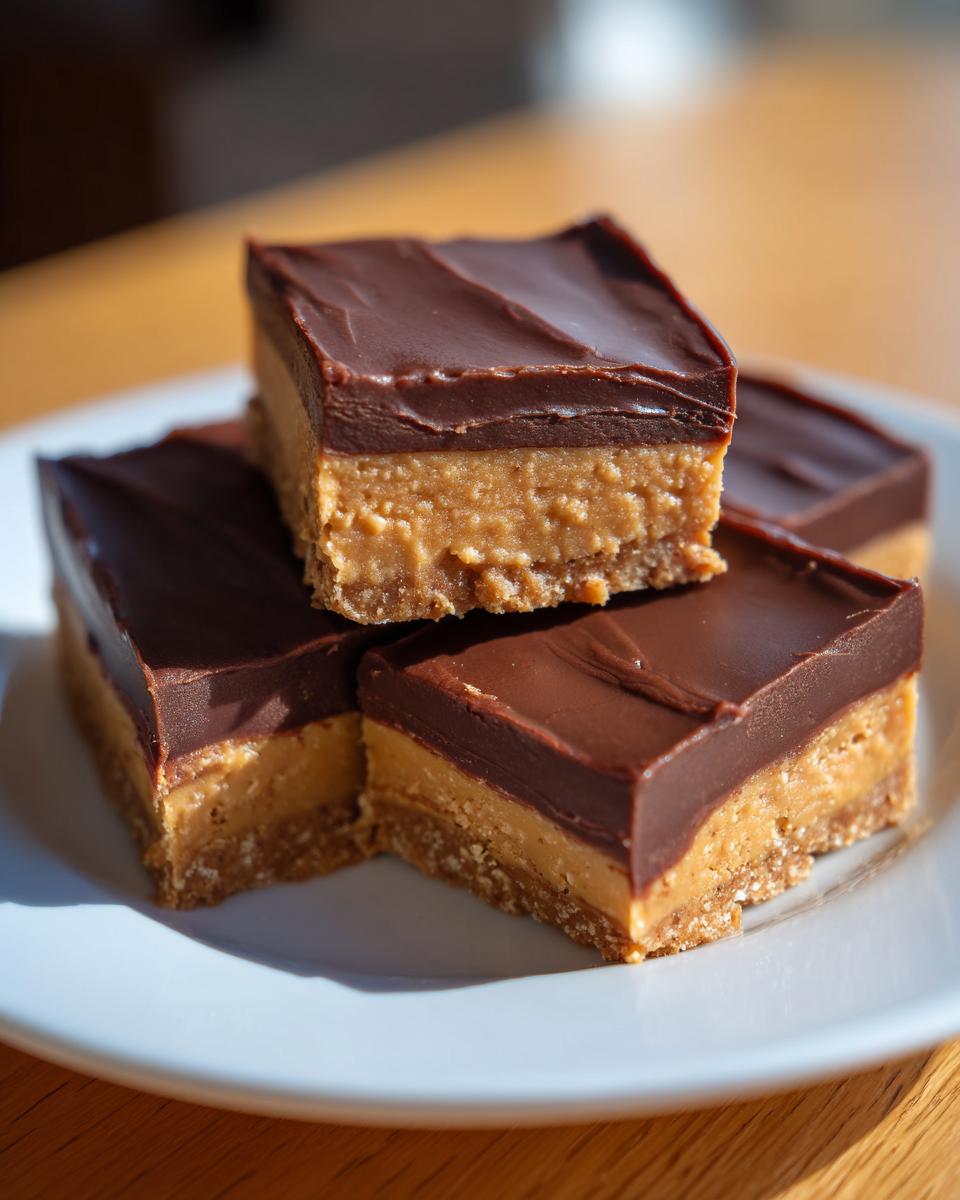
Gently pour this luscious chocolate mixture right over your peanut butter base. Take your time spreading it evenly across the top. If you rush and press too hard, you risk swirling the layers together, and we want distinct chocolate and peanut butter layers for that classic look.
Setting and Cutting Your Homemade Fudge Recipes
Now the hardest part: waiting! Place the pan carefully into the refrigerator. You absolutely must chill this for a minimum of three hours until it’s totally firm—I usually leave mine in there overnight if I can resist it. This is what allows us to get those clean slices that look like they came from a professional candy shop.
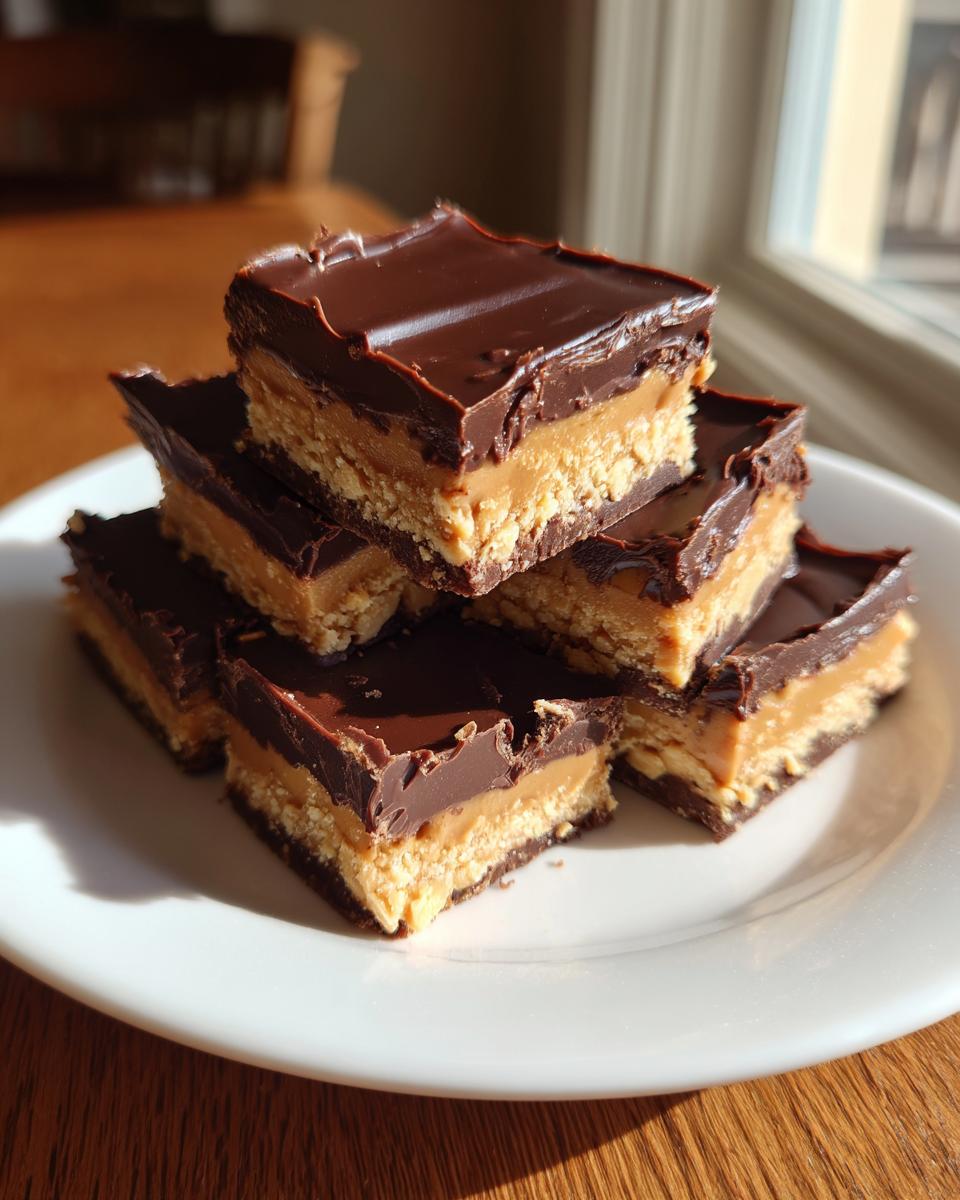
Once it’s rock solid, use those parchment paper tabs to lift the entire block out onto a cutting board. Wipe off your sharpest knife with a warm cloth between cuts, and slice it into small squares. Since this is such a decadent treat, aim for 36 small pieces. It’s the perfect size for sharing at holiday gatherings!
For more wonderful advice on making treats that shine, check out this great guide on how to use pastry techniques in your own kitchen!
Tips for Success with Your Peanut Butter Buckeye Treat
I always tell people that the difference between fudge that melts when you look at it and fudge that sets up beautifully for slicing is mastering just a couple of small details. Since this is a **simple homemade candy**, those little details really matter! I pulled these crucial pointers straight from my personal notes. Follow these and you’ll never have a gooey mess again!
First up, let’s talk about the butter for the base. My number one rule when making any creamy, no-bake candy is this: ensure your butter is truly softened, but absolutely not melted! If the butter is oily or warm, it won’t be able to hold the powdered sugar correctly when you beat it, and your entire peanut butter layer will lose its structure. That means letting it sit on the counter for about an hour before you even think about mixing. You should be able to press a finger into it easily without punching through.
Another fantastic little trick I picked up when I was messing around trying to perfect this exact recipe—which you can see in my post about easy peanut butter bar recipes—concerns the chocolate topping. Sometimes, depending on the humidity or the exact brand of chocolate chips I’m using, that thick chocolate mixture can still feel a tiny bit stiff right after melting.
If you find your melted chocolate isn’t as glassy and pourable as you’d like, try adding just one small teaspoon of vegetable oil to the chips while they are melting. Seriously, just one teaspoon! It smooths everything right out, giving you that professional, shiny glaze. I learned that trick when I was trying to get the perfect dip on actual buckeyes, and it works wonders here too. For more great no-bake ideas, check out what they are doing over at Miacookery!
Finally, storage is key to keeping this fudge tasting fresh. Store your leftover **rich chocolate fudge** in an airtight container right in the refrigerator. Because of all that glorious fat and sugar, it keeps wonderfully! I’ve kept mine perfectly good for a solid week this way. If you cut it into those small squares first, it’s much easier to grab just one (or two!) later on.
Variations on Classic Buckeye Fudge
Now, I know what some of you are thinking: “Jess, it’s perfect as is, but can I jazz it up a bit?” You bet you can! This base recipe for **buckeye fudge** is what I call bulletproof, which means it handles twists really well. While Grandma always taught me to leave tradition alone, I love seeing how you all adapt things to your own tastes. These little changes still keep the spirit of that glorious chocolate and peanut butter combo alive!
If you’re looking to elevate this beyond the standard recipe, here are a couple of simple tweaks that make a huge difference the next time you whip up a batch of this **easy fudge recipe**.
First, let’s talk about texture on the top layer. If you find plain melted chocolate a little too sweet, swap out your semi-sweet chips for dark chocolate chips in the topping. The slight bitterness of the dark chocolate really cuts through the sweetness of the peanut butter layer, creating a much more sophisticated flavor profile. It’s a small change, but oh boy, does it amp up the flavor!
You can also introduce a little flaky sea salt right on top of the chocolate layer, just after you’ve poured it on but before it starts setting up. A light sprinkle of flaky sea salt takes this from a simple sweet treat to something truly memorable. It balances the flavor profile perfectly, hitting that sweet/salty note that keeps you going back for one more square!
For the base layer, if you want a little extra depth in your peanut butter flavor, try swapping out half of your creamy peanut butter for natural peanut butter. Just make sure the natural peanut butter you use isn’t too oily, or you might need to add an extra dusting of powdered sugar to keep that structure firm. For more ideas on making rich, decadent treats, you should definitely check out my post on other simple no-bake layered desserts. Happy experimenting!
Storage & Reheating Instructions for Buckeye Fudge
Making a huge batch of this **rich chocolate fudge** is always my strategy, especially leading up to holidays, because honestly, who can stop at just one piece? The great news is that this is one of those fantastic treats that actually benefits from sitting around a little bit! It’s stable, it’s sturdy, and it’s easy to keep fresh.
Since this is a no-bake recipe relying on fats and sugar to hold its structure, we want to keep it cool. My rule of thumb, just like Grandma always said about her best pies, is to store it in the refrigerator. Pop your cut squares into a good, airtight container. If you stack them up, put a small piece of wax paper or parchment paper between the layers so they don’t stick together—that’s always a pain trying to peel them apart later!
You can absolutely keep this **buckeye fudge** looking and tasting like it just came out of the pan for up to a whole week stored this way. It’s perfect because it means you can make it on Sunday and it’ll still be perfect for sharing all the way until the next weekend!
Now, when it comes to serving, here is the critical detail for texture. Because it’s been chilled, the peanut butter layer will be quite firm right out of the fridge. While some folks prefer it that way—that satisfying dense crunch—I usually pull the fudge out of the refrigerator about 20 minutes before I plan on serving it. Letting it sit on the counter just slightly softens that peanut butter layer, bringing back that beautiful, creamy texture we worked so hard to achieve when we beat it! It should be slightly cool to the touch, but definitely not cold and hard. Honestly, I think it tastes 100% better when it’s *not* straight from the icebox.
Frequently Asked Questions About This Easy Fudge Recipe
It’s completely normal to have questions when you’re trying a new **homemade fudge recipe**! I get so many messages asking about substitutions or how to handle my quick **no bake candy** recipe when things go slightly off. I’ve gathered some of the most common ones here. Don’t worry if you can’t find exactly what a recipe calls for—we can almost always adjust!
Can I freeze this Buckeye Fudge?
Yes, you absolutely can freeze this! It freezes beautifully because of the high fat and sugar content. If you plan on freezing it, I strongly recommend cutting it into squares *before* you freeze it. Wrap the squares tightly in plastic wrap, and then place them into a heavy-duty freezer bag to prevent any freezer burn or absorbing other flavors in there. They keep great for about two months this way.
When you want to eat some, just pull out the amount you need and let it thaw right on the counter at room temperature for about an hour, or until it softens slightly. Remember, you want that creamy texture back, so don’t eat it rock-hard straight from the freezer!
What is the difference between Buckeye Fudge and Buckeye Balls?
That’s a fantastic question that gets right to the heart of why this recipe is so great! The traditional Buckeye Ball is a slightly firmer peanut butter ball that you roll by hand, leaving a small circle of peanut butter showing, then dipping almost completely into melted chocolate. It takes longer because you have to roll, chill, dip, and then chill again.
This **Buckeye Fudge**, however, is much easier! We don’t roll anything; we just mix the peanut butter base into a uniform layer in a pan, and then we pour liquid chocolate right over the top to create a solid, decadent chocolate cap. It gives you the same amazing sweet and savory combo but in a neat, sliceable format. It’s less fuss, less mess, and totally perfect when you just need that rich **Chocolate Peanut Butter Fudge** flavor pronto! For more quick treats, take a look at my recipe for easy no-bake protein balls.
Are you finding a good way to adapt the chocolate topping? Sarah over at Cooked by Sarah has some great ideas for using different types of melted chocolate if you want to experiment with the topping!
Estimated Nutritional Data for Buckeye Fudge
When we make recipes like this in the CravyBite Kitchen, I always want to show you what you’re working with! While I focus heavily on making sure the ingredients are wholesome and the cooking methods are real, I also respect that many of you watch dietary intake closely. Since this is a rich treat, know that these values are estimates based on the ingredient list provided—they can shift a little depending on the exact brands of chocolate or peanut butter you use, of course!
But as a starting point, here is the general profile we are looking at when you enjoy one square of this wonderful **buckeye fudge**:
- Serving Size: 1 square (Yield is 36 serving pieces)
- Calories: Approximately 185
- Total Fat: 11g (Note how much is Saturated Fat at 5g)
- Protein: 3g
- Total Carbohydrates: 20g
- Sugar: 18g (It’s a sweet treat, remember!)
- Sodium: 85mg
- Cholesterol: 15mg
This data confirms what we suspected: this is a dense, satisfying treat perfect for special occasions or when you just need a little something rich! I suggest keeping this handy for when you are planning out your holiday baking trays. Enjoy every bite!
Share Your Simple Homemade Candy Creations
Whew! We made it! You now have the inside scoop on making what I truly believe is the fastest, richest, and most satisfying **Chocolate Peanut Butter Fudge** out there. But the connection doesn’t end here, not by a long shot! In my kitchen, food is all about community and sharing that joy, and I absolutely love hearing from you all when you try one of these treasured family-style recipes.
If you made this batch of **buckeye fudge** and loved the creamy peanut butter meeting that rich chocolate topping, please, please let me know! Right below this section, you’ll find a spot for ratings—give it five stars if you think it deserves the bragging rights! And if you have a moment, drop a comment telling me if you tried one of my tricks, like adding flaky sea salt on top, or if you stuck strictly to the classic look. I read every single one, and your feedback helps me know what to share next!
And while you’re feeling proud of yourself for mastering this simple homemade candy, snap a quick picture! Tag me on social media. I dream of seeing these beautiful squares popping up on your holiday tables or just sitting in your fridge waiting for that afternoon coffee break. You can find me on all the major platforms—and if you ever need to reach out to the CravyBite Kitchen team directly for questions or collaboration ideas, head over to my contact page. Now go enjoy that fudge! If you want to see what other home cooks are up to with their speedy treats, check out the fantastic work over at Easy Cook Today!
PrintEasy No-Bake Buckeye Fudge Recipe
Make this simple, rich Buckeye Fudge that combines creamy peanut butter and decadent chocolate layers. This no-bake candy is perfect for holiday trays or any sweet craving.
- Prep Time: 15 min
- Cook Time: 5 min
- Total Time: 3 hours 20 min
- Yield: 36 small squares 1x
- Category: Dessert
- Method: No Bake
- Cuisine: American
- Diet: Vegetarian
Ingredients
- 1 cup unsalted butter, softened
- 1 ½ cups creamy peanut butter
- 1 teaspoon vanilla extract
- 3 ½ cups powdered sugar, sifted
- 7 ounces sweetened condensed milk (about half of a 14-ounce can)
- 1 ½ cups semi-sweet chocolate chips
- 2 tablespoons butter
Instructions
- Line an 8×8 inch baking pan with parchment paper, leaving an overhang for easy removal.
- In a large bowl, beat the softened butter, creamy peanut butter, and vanilla extract until smooth.
- Gradually add the sifted powdered sugar to the peanut butter mixture, beating until fully combined and thick.
- Press the peanut butter mixture evenly into the bottom of the prepared pan. Set aside.
- In a small saucepan over low heat, combine the sweetened condensed milk, chocolate chips, and 2 tablespoons of butter. Stir constantly until the chocolate is completely melted and the mixture is smooth. Do not let it boil.
- Pour the chocolate mixture evenly over the peanut butter layer in the pan. Spread gently to cover the entire surface.
- Refrigerate the fudge for at least 3 hours, or until firm enough to cut.
- Lift the fudge out of the pan using the parchment paper overhang. Cut into small squares for serving.
Notes
- For the best texture, ensure your butter is truly softened, not melted.
- If you prefer a slightly firmer chocolate topping, you can add 1 teaspoon of vegetable oil to the melted chocolate mixture.
- Store leftover Buckeye Fudge in an airtight container in the refrigerator for up to one week.
Nutrition
- Serving Size: 1 square
- Calories: 185
- Sugar: 18g
- Sodium: 85mg
- Fat: 11g
- Saturated Fat: 5g
- Unsaturated Fat: 6g
- Trans Fat: 0g
- Carbohydrates: 20g
- Fiber: 1g
- Protein: 3g
- Cholesterol: 15mg