
Oh, you know those days. The kind of day where only deep, dark, intensely chocolatey goodness can fix the world? I completely get it. That’s why I rely on my recipe for the Ultimate Fudgy Oreo Brownies with a Shiny, Crackly Top. This isn’t just another pan of something sweet; these oreo brownies are pure, comforting decadence made completely from scratch. Growing up, making these indulgent sweet treats was my favorite way to unwind after a long week. There is such a special kind of joy that comes from whipping up something this rich with your own two hands, and I promise you, the payoff is incredible. If you love a dense, chewy chocolate dessert, stick with me, because we’re making magic!
We’re making these bars with care, which is why I think they turn out so much better than anything you can get in a box. For more of my go-to indulgent recipes, check out my list of delicious desserts and treats. You won’t regret diving into this one!
- Why These Oreo Brownies Are the Best Dessert Recipes for Chocolate Lovers
- Gathering Ingredients for Ultimate Fudgy Oreo Brownies
- Essential Equipment for Your Oreo Brownies
- Step-by-Step Instructions: How to Make Perfect Oreo Brownies
- Tips for Success: Avoiding Common Oreo Brownies Mistakes
- Ingredient Notes and Substitutions for Cookies and Cream Bars
- Serving Suggestions for Indulgent Sweet Treats
- Storage and Reheating Instructions for Homemade Oreo Desserts
- Frequently Asked Questions About Making Oreo Brownies
Why These Oreo Brownies Are the Best Dessert Recipes for Chocolate Lovers
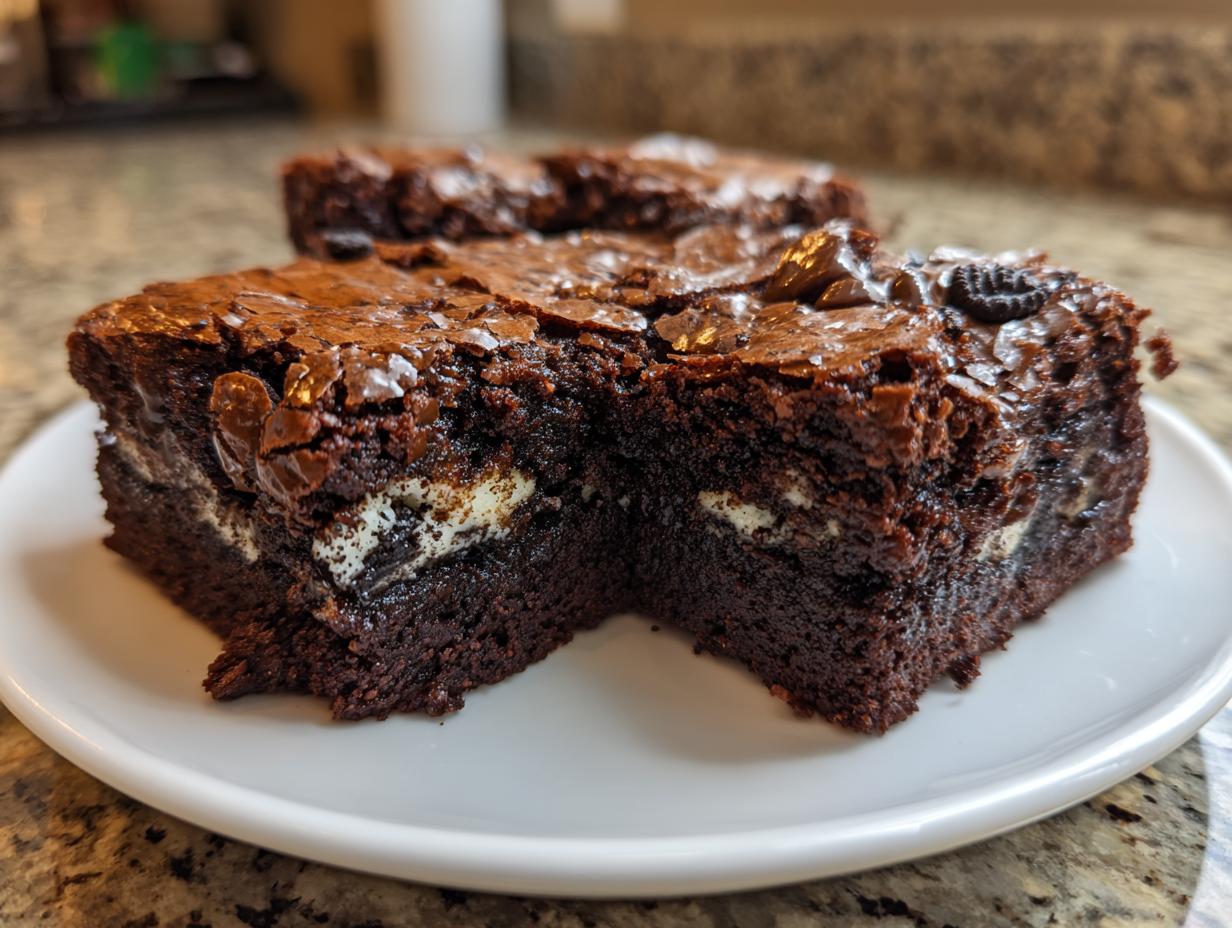
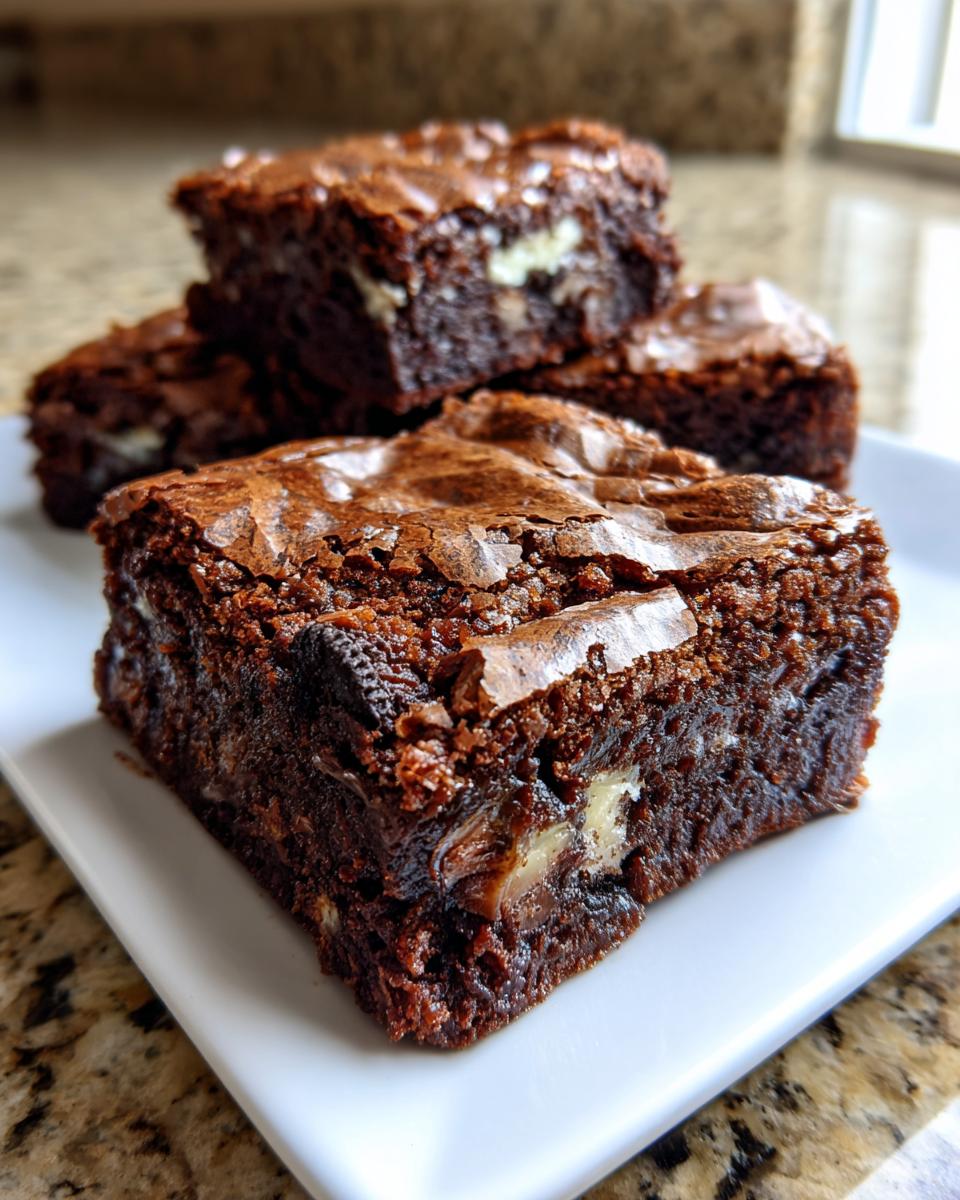
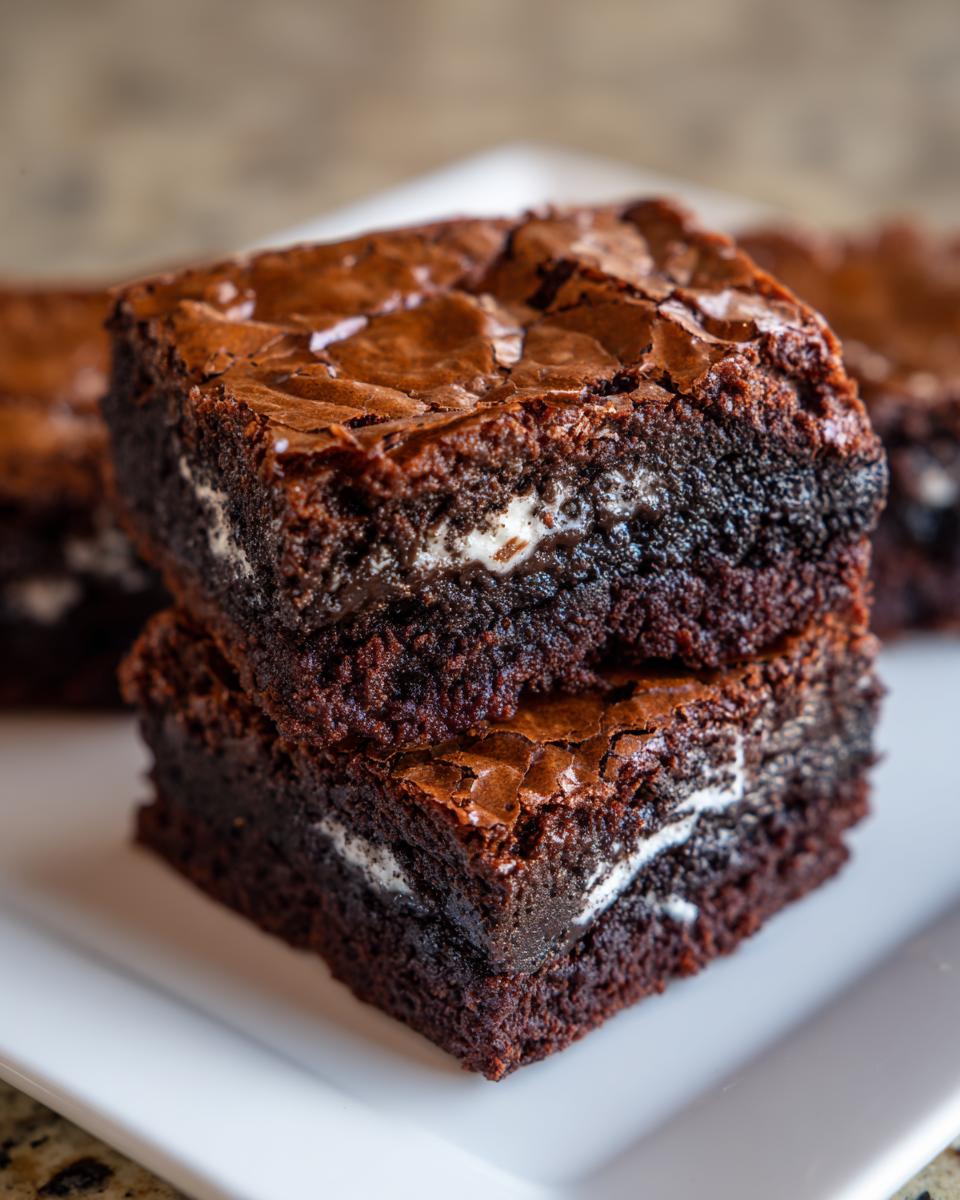
If you’re a true chocolate lover, you know that ‘brownie’ means different things to different people. For me, it has to be ultra-fudgy, intense, and loaded! These oreo brownies deliver on that promise every single time. You get all the texture you could ask for.
- That impossibly shiny, crackly top that looks like glass.
- A dense interior that qualifies as one of the best decadent chocolate treats you’ll ever make.
- Chunks of whole Oreos mixed right in!
If you’re looking for a set of layered bars that mimic this richness, check out my Buckeye Brownies too!
Achieving the Perfect Fudgy Brownie Recipe Texture
We skip adding extra leavening agents and keep the flour count low. That’s the simple trick to any great fudgy brownie recipe—we want richness over fluff! This gives you that amazing, dense bite that makes the whole thing a perfect chewy chocolate dessert. It’s all about the butter and sugar doing the heavy lifting here.
Gathering Ingredients for Ultimate Fudgy Oreo Brownies
Alright, let’s get our ingredients measured out! For the best oreo brownies, quality truly matters—especially that cocoa powder. We’re making these completely from scratch, so grab your measuring cups and let’s pull everything together. I highly recommend using a good, dark cocoa powder here to really deepen that chocolate flavor.
Here’s what you’ll need for our spectacular cookies and cream bars:
- 1 cup (2 sticks) unsalted butter
- 1 1/4 cups granulated sugar
- 1 cup packed light brown sugar
- 4 large eggs
- 1 tablespoon vanilla extract
- 3/4 cup unsweetened cocoa powder, natural or Dutch-process
- 1/2 cup all-purpose flour
- 1/2 teaspoon salt
- 1/4 teaspoon baking powder
- 1 cup semi-sweet chocolate chips
- 12 Oreo cookies, whole or crushed for batter
- 1 cup Oreo cookies, roughly chopped for topping
Having everything pre-measured—what we call mise en place—makes the process so smooth, especially since we want to mix quickly once we start combining the wet and dry stuff!
Essential Equipment for Your Oreo Brownies
Before you even think about melting the butter, we need to make sure your kitchen arsenal is ready! Having the right tools makes baking these rich brownies with cookies so much less stressful, and honestly, it helps ensure we nail those timings. You don’t need a fancy stand mixer for these, by the way—a good old-fashioned whisk and spatula will do the trick for getting that amazing, deep chocolate color.
Make sure you have these on hand for this easy oreo dessert:
- A 9×9 inch metal baking pan. Metal is best because it conducts heat evenly for that nice, chewy edge.
- Parchment paper. This is non-negotiable! We need an overhang so we can lift these thick bars out later without cracking them.
- A medium saucepan for gently melting the butter. Low and slow wins this race!
- A reliable whisk for whipping air into the sugars and eggs—that’s where the shiny top starts!
- A sturdy rubber spatula for folding everything together gently.
Seriously, getting your pan lined first is a game-changer. Nobody wants to wrestle a sticky, fudgy pan of homemade oreo desserts later on!
Step-by-Step Instructions: How to Make Perfect Oreo Brownies
Making these oreo brownies is more about technique than complicated steps, and that’s what ensures we get that heavenly, crackly top. Remember, we are aiming for fudgy perfection, so pay close attention when we start mixing the wet ingredients, alright? We’re following the process exactly as written here for the best results!
Preparing the Pan and Melting Fats for Fudgy Oreo Brownies
First thing, crank your oven up to 350°F (175°C). Next, take your 9×9 inch metal pan and line it with parchment paper. That overhang I mentioned earlier is crucial—it gives you little handles to lift these dense cookies and cream bars right out after they cool down. Lightly grease that parchment paper, just in case. Then, gently melt your butter in a medium saucepan over low heat. We want it melted smooth, not sizzling hot!
Creating the Shiny Top: Mixing Sugars and Eggs
Once the butter is off the heat, immediately whisk in both your granulated and brown sugars until everything looks totally combined. Now comes the part that builds that amazing shell! Whisk in your four eggs, one at a time, making sure each one is completely incorporated before adding the next. Stir in that vanilla extract. Vigorously whisking the sugar into the warm butter and eggs is one of my best brownie baking tips—it helps dissolve those sugar crystals, and that’s what gives us that sought-after shiny, crackly crust. Don’t skip the whisking!
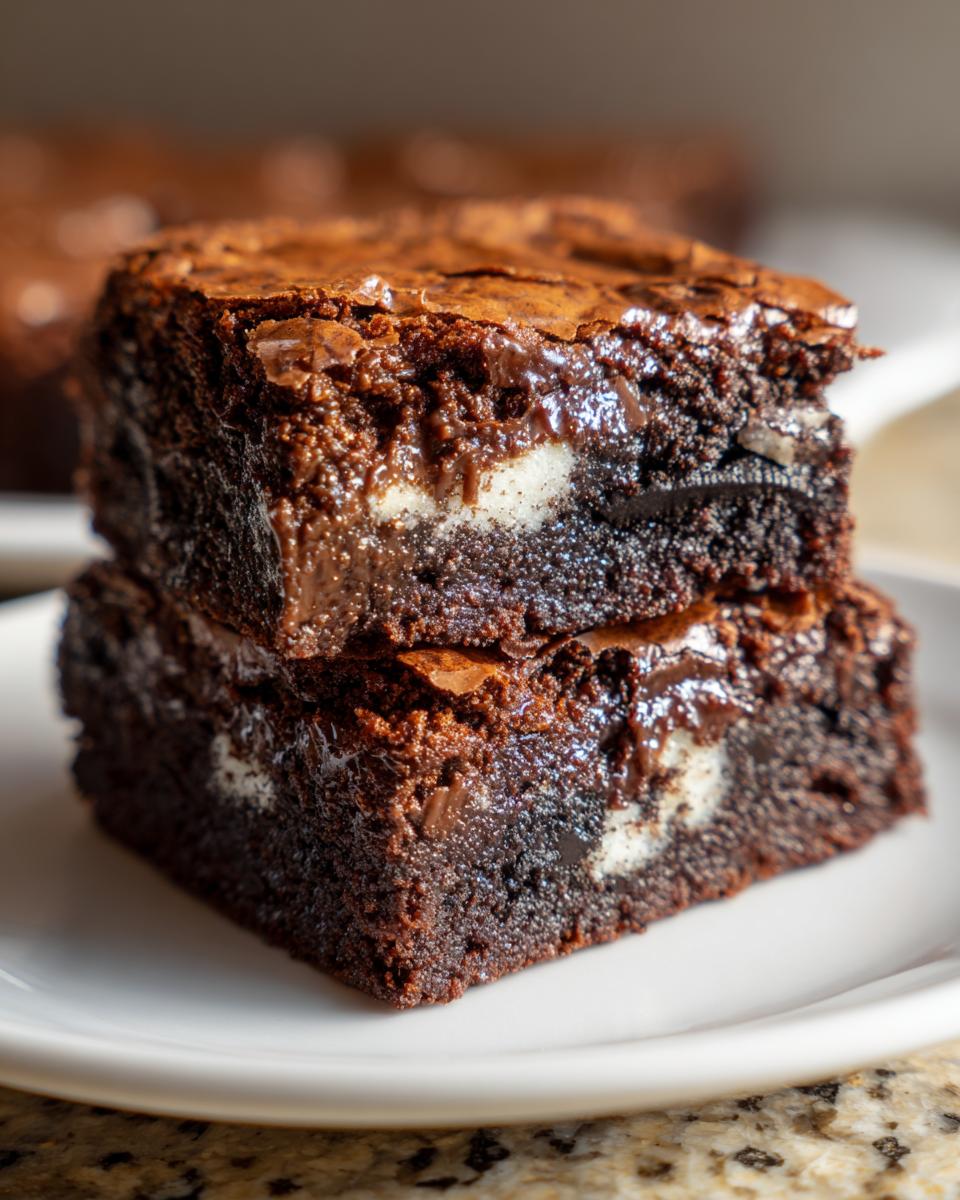
Folding in Dry Ingredients and Oreos for the Best Oreo Brownies
Time for the dry stuff: cocoa powder, flour, salt, and baking powder. Add these dry ingredients slowly to the wet mixture and mix *only* until you just see the flour disappear! Listen to me: this is where most people go wrong. Overmixing develops tough gluten, and we want fudgy, not cakey. Once it’s *just* combined, grab your chocolate chips and those 12 Oreos meant for the batter, and gently fold them in. Then—and this is key for later decoration—spread half the batter in the pan, gently place any whole Oreos you reserved on top of that layer, cover it with the rest of the batter, and finish by sprinkling those chopped Oreos over the very top before it goes into the oven for 30 to 35 minutes. Cool completely before slicing!
For more handy advice like this on ratios and timing, check out my full guide on brownie baking tips.
Tips for Success: Avoiding Common Oreo Brownies Mistakes
When you’re making something as decadent as these oreo brownies, you want them perfect! I’ve learned through trial and error that a few small hiccups can turn that desired fudgy texture into something more cake-like, and we certainly don’t want that. My goal here is giving you bulletproof brownie baking tips so you get that coveted, dense center every time.
If you are looking for something slightly different but equally cheesy, I have an amazing cottage cheese microwave brownie recipe that requires almost no effort!
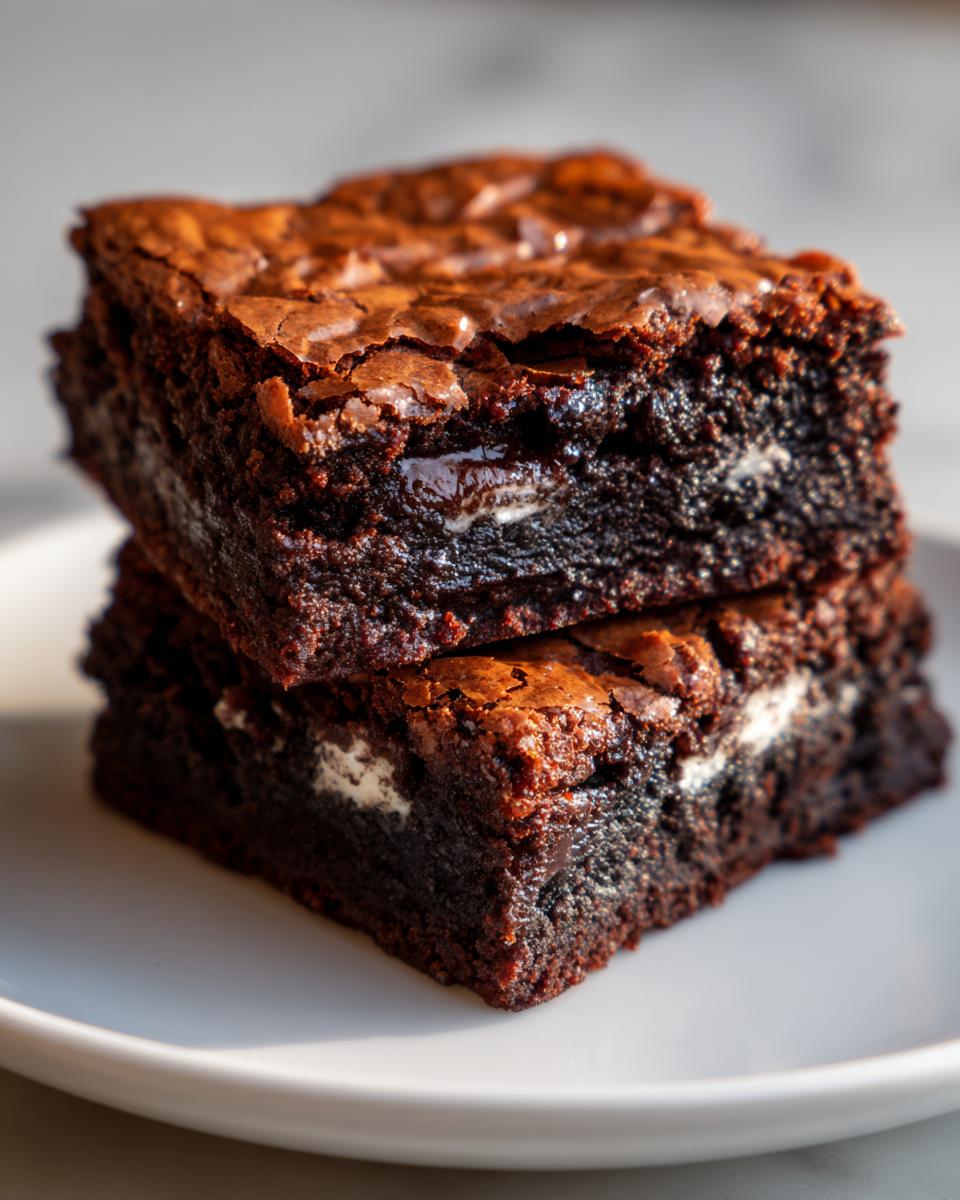
The Secret to a Crackly Top on Your Oreo Brownies
This is non-negotiable for me: A shiny top seals in all that fudgy goodness underneath! The absolute key here is not overbaking. Seriously, pull them out when they look just barely done. Remember, they continue to bake sitting in that hot metal pan after the oven turns off. If you wait until a toothpick comes out totally clean, you’ve waited too long! You want moist crumbs clinging to that toothpick—that’s how you guarantee you’re getting a wonderfully chewy chocolate dessert rather than something dry. Trust me on this; residual heat does the rest of the work setting up that gorgeous crust.
For even more incredible baking secrets, I always refer back to some of the foundational sources I admire, like The First Year Blog when developing my own techniques.
Ingredient Notes and Substitutions for Cookies and Cream Bars
When we make these cookies and cream bars, I want you to think about flavor depth. That’s why I specifically called out cocoa powder. If you want that super dark, classic look—especially if you are aiming for something visually stunning like those homemade oreo desserts you see online—try using Dutch-process cocoa. It gives a much richer, almost black color compared to natural cocoa, and the flavor is beautifully smooth.
Now, let’s talk Oreos. I wrote the recipe using standard ones, but if you love an extra creamy interior, absolutely use Double Stuf! Just know that you might need to add an extra tablespoon of cocoa powder to your dry mix to balance out the extra fluffiness from the cookies. It’s a small adjustment for maximum indulgence, right?
I also want to touch on that optional layer again. If you decide to transition this recipe into true layered dessert bars by adding a layer of cookie dough—which is delicious, by the way—make sure that dough is slightly chilled before you put the brownie batter on top. You don’t want the layers mixing together into one giant, messy blob. For more layered bar inspiration, you have to see my recipe for chocolate chip cheesecake bars!
Remember, using real butter versus margarine is a non-negotiable for me in any fudgy brownie recipe. It really impacts that final, chewy texture we are working so hard to achieve.
Serving Suggestions for Indulgent Sweet Treats
Okay, these oreo brownies are already pretty perfect standing on their own. I mean, they’re packed with chocolate and cookies, so they don’t exactly need much help! But since we went to all this trouble to make one of the most decadent chocolate treats possible, let’s talk about how to serve them up for maximum oomph. This is where we take a good dessert and turn it into an event!
When I serve these, especially when I have friends over, I like to keep the accompaniments simple—nothing that overshadows that beautiful, shiny top we worked so hard for.
- A Simple Scoop of Vanilla: You just can’t beat the classics. A scoop of good quality vanilla bean ice cream melting slightly against the warm or room-temperature brownie is heaven. The cold, creamy vanilla cuts right through the intense chocolate richness.
- The Perfect Pairing Drink: Forget fancy cocktails. These deserve milk, full-stop. A tall, cold glass of milk is the perfect partner for any rich, chewy chocolate dessert. If you’re having these after dinner, a strong, dark cup of coffee works wonders to balance the sweetness.
- A Dash of Elegance: If I am serving these to guests, sometimes I’ll drizzle them lightly with a melted chocolate sauce or, for a bit of fun, serve them alongside a simple, fruit-based dip. I have an amazing, quick creamy chocolate dip recipe that feels fancy but takes five minutes.
Honestly, sometimes I just break off a corner while they are still slightly warm (I know, I know, sacrilege when you’re waiting for them to cool!) and eat it plain over the sink. Don’t judge—we all have those moments during easy baking recipes!
Storage and Reheating Instructions for Homemade Oreo Desserts
You’ve done the hard part, and now you’re staring at a pan full of the most perfect oreo brownies ever created. Let’s make sure they stay perfect! These aren’t the kind of treats you want sitting out forever; we want to keep that beautiful, fudgy texture locked in, not let them dry out on the counter.
The good news is that because of all that butter and sugar we used in this fudgy brownie recipe, they hold up pretty well for a few days. Just try to resist eating them all on day one!
Room Temperature Storage:
- Once they are completely cooled—and I mean stone cold, which is crucial to prevent sweating—you can store your indulgent sweet treats in an airtight container right on the counter.
- I like to place sheets of parchment paper between the layers so that the sticky tops don’t glue themselves together. Trust me, trying to peel off stuck brownies is not fun.
- At room temperature, these homemade bars are best enjoyed within 3 days. After that, they start losing that perfect chewiness.
Refrigeration for Extended Life:
- If you think you won’t finish them in three days, pop the whole container into the fridge. They’ll firm up a bit more when chilled, which some people actually prefer if they like a really dense bite!
- They stay great in the fridge for about a week, though I usually prefer them nearer the 4-day mark.
A Quick Reheat Tip:
If you’ve chilled them and want to bring back a little gooeyness, microwave an individual square for about 10 to 12 seconds. It softens the chocolate chips beautifully, making it feel almost like they just came out of the oven. For more great tips on keeping bars fresh, I often look at trusted sources like Chop Notch to see how other bakers handle their rich desserts!
Frequently Asked Questions About Making Oreo Brownies
If you’ve read through my tips and still have a few lingering questions about your oreo brownies, don’t sweat it! We all have those moments when trying a new recipe, especially when chasing that perfect fudgy consistency. I put together some quick answers to make sure your baking experience is a breeze, turning this into your new favorite easy oreo dessert.
Can I use a boxed brownie mix for this recipe?
Oh, bless your heart for trying to save a few steps! While you absolutely can fold Oreos into a box mix, you won’t get that phenomenal shiny top or the dense, rich texture we worked for here. That shiny crust comes from melting the butter and aggressively whisking the sugar and eggs. Box mixes are designed for a cake-like result. If you want a truly great, chewy chocolate dessert, you really need to stick to the from scratch brownies method in this recipe.
How do I ensure my brownies are chewy and not cakey?
This is the number one question, I swear! The secret is in the measuring and the mixing. First, use packed brown sugar as written; the molasses content in brown sugar adds chewiness. Second, and this is vital: only mix the dry ingredients (flour, cocoa, etc.) into the wet until you see *just* no white streaks left. Stop mixing right there! Overmixing develops gluten, which leads straight to cakey territory. Keep it minimal, keep it fudgy!
Can I freeze these homemade oreo desserts?
Yes, you totally can! Once they are completely cooled and cut, they freeze beautifully. Wrap each individual brownie tightly in plastic wrap first, and then pop them all into a freezer-safe bag or container. They keep well in the freezer for up to three months. When you want to enjoy one, just thaw it on the counter for about an hour, or give it a quick 10-second zap in the microwave!
What’s the best way to chop the topping Oreos?
I like to use the same bag the Oreos came in or just a sturdy zip-top bag. Place the 1 cup designated for topping inside, seal it, and give it a good whack with a rolling pin or the bottom of a heavy saucepan. You want a mix of fine crumbs and some chunkier pieces for texture contrast—don’t crush them into fine dust! This makes your topping look rustic and delicious.
If you are always looking for more straightforward treats, you should bookmark my section on easy baking recipes for times when you need desserts fast!
PrintUltimate Fudgy Oreo Brownies with a Shiny, Crackly Top
Make these homemade Oreo brownies for the ultimate decadent chocolate treat. This recipe delivers dense, fudgy brownies with a perfect, shiny, crackly top, loaded with whole and crushed Oreo cookies.
- Prep Time: 15 min
- Cook Time: 35 min
- Total Time: 50 min
- Yield: 16 servings 1x
- Category: Dessert
- Method: Baking
- Cuisine: American
- Diet: Vegetarian
Ingredients
- 1 cup (2 sticks) unsalted butter
- 1 1/4 cups granulated sugar
- 1 cup packed light brown sugar
- 4 large eggs
- 1 tablespoon vanilla extract
- 3/4 cup unsweetened cocoa powder, natural or Dutch-process
- 1/2 cup all-purpose flour
- 1/2 teaspoon salt
- 1/4 teaspoon baking powder
- 1 cup semi-sweet chocolate chips
- 12 Oreo cookies, whole or crushed for batter
- 1 cup Oreo cookies, roughly chopped for topping
Instructions
- Preheat your oven to 350°F (175°C). Line a 9×9 inch metal baking pan with parchment paper, leaving an overhang on two sides for easy removal. Lightly grease the paper.
- In a medium saucepan over low heat, melt the butter. Remove from heat.
- Whisk the granulated sugar and brown sugar into the melted butter until fully combined.
- Whisk in the eggs one at a time, mixing well after each addition. Stir in the vanilla extract.
- In a separate bowl, whisk together the cocoa powder, flour, salt, and baking powder.
- Gradually add the dry ingredients to the wet ingredients, mixing only until just combined. Do not overmix.
- Fold in the chocolate chips and the 12 whole or crushed Oreos meant for the batter.
- Spread half of the batter evenly into the prepared pan. Arrange the remaining whole Oreo cookies over the batter layer if desired for a more distinct layer. Pour the remaining batter over the top and spread gently.
- Sprinkle the roughly chopped Oreo topping evenly over the surface.
- Bake for 30 to 35 minutes. For fudgy brownies, a toothpick inserted near the center should come out with moist, fudgy crumbs attached, not wet batter.
- Let the brownies cool completely in the pan on a wire rack before lifting out using the parchment overhang. Cut into squares.
Notes
- For the best shiny, crackly top, do not overbake the brownies. The residual heat will continue to set them as they cool.
- Use high-quality cocoa powder for the deepest chocolate flavor in your fudgy brownie recipe.
- If you prefer a layered dessert bars experience, you can press a thin layer of store-bought or homemade cookie dough onto the bottom before adding the brownie batter.
Nutrition
- Serving Size: 1 square
- Calories: 320
- Sugar: 30
- Sodium: 150
- Fat: 18
- Saturated Fat: 11
- Unsaturated Fat: 7
- Trans Fat: 0
- Carbohydrates: 38
- Fiber: 2
- Protein: 4
- Cholesterol: 75