
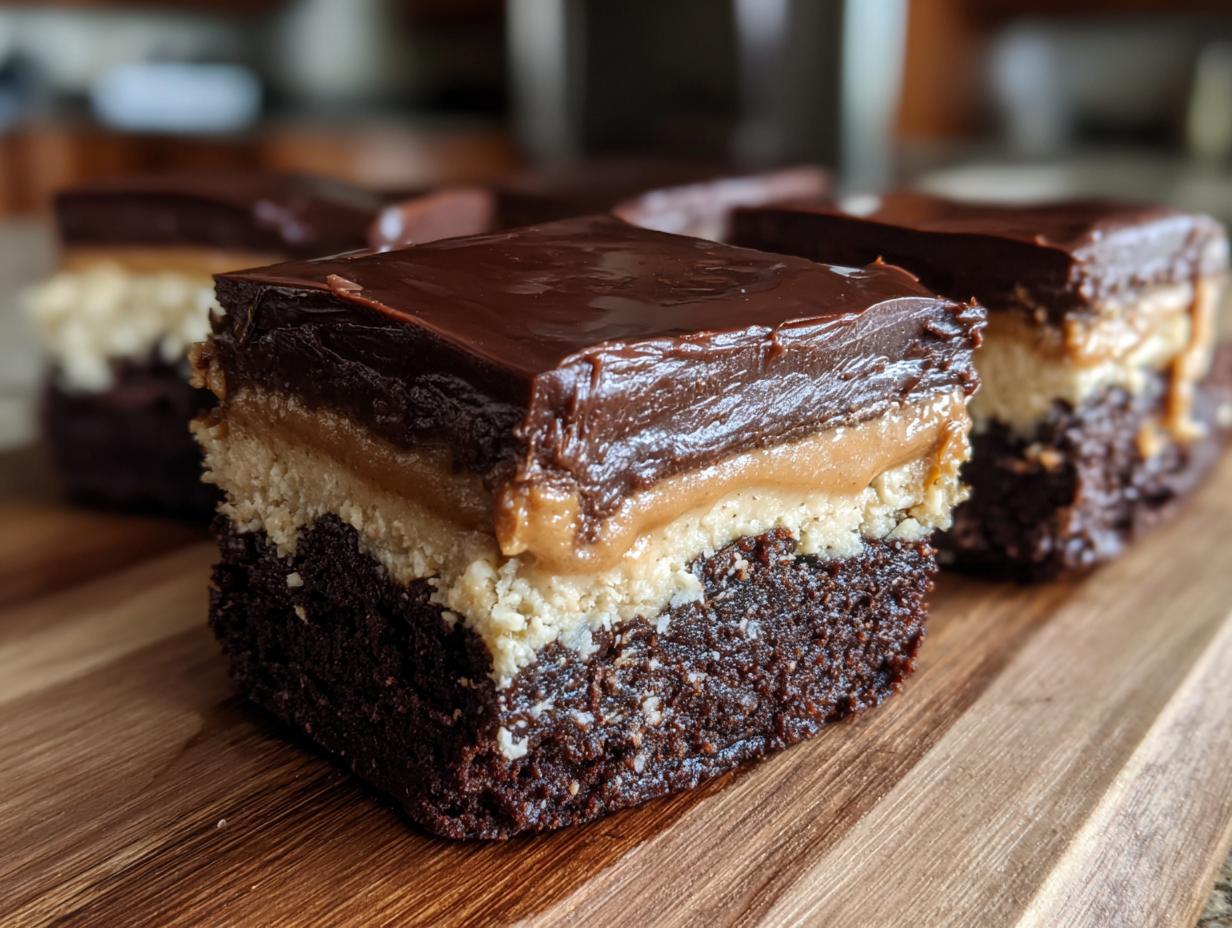
When you talk about the great American flavor duos, nothing beats thick, fudgy chocolate paired with creamy peanut butter, right? It’s just magic! That’s exactly what we’re capturing today with these ultimate buckeye brownies. Forget dipping candies; we’re taking that addictive taste and baking it right into a spectacular three-layer bar. Seriously, these are the best layered fudge brownies I’ve ever made. I remember making huge batches of these chocolate peanut butter bars when I was younger; my cousins practically inhaled them at nearly every family reunion. They are so reliably rich, crowd-pleasing, and honestly, they never last long on the counter!
- Why You Will Love These Buckeye Brownies
- Essential Ingredients for Perfect Buckeye Brownies
- Step-by-Step Guide to Making Layered Fudge Brownies
- Tips for Success with Buckeye Brownies
- Ingredient Notes and Substitutions for Peanut Butter Brownies
- Storage and Reheating Instructions for Chocolate Peanut Butter Bars
- Serving Suggestions for Crowd Pleaser Desserts
- Frequently Asked Questions About Buckeye Brownies
- Share Your Homemade Buckeye Brownies Experience
Why You Will Love These Buckeye Brownies
I swear, the beauty of this recipe is how it delivers massive flavor without making you spend all day in the kitchen. Since we are leaning on a boxed mix for the base, you get that instant gratification that every home cook deserves sometimes! These buckeye brownies are just phenomenal for feeding a crowd, too.
- They’re incredibly easy since we start with a box mix—no fuss, just pure, fudgy results.
- The flavor profile is the ultimate sweet and salty dessert combo: intense chocolate meets sweet, creamy peanut butter.
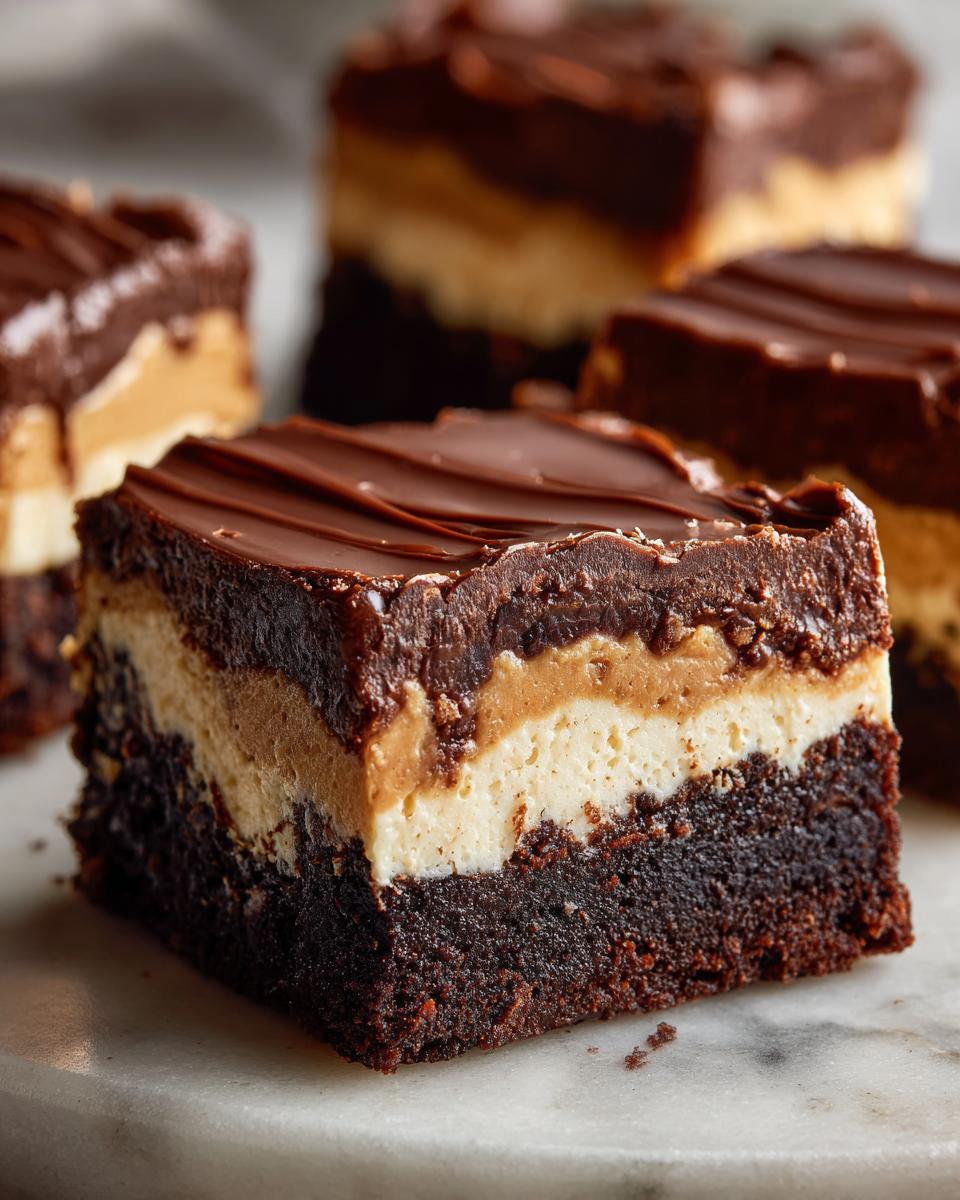
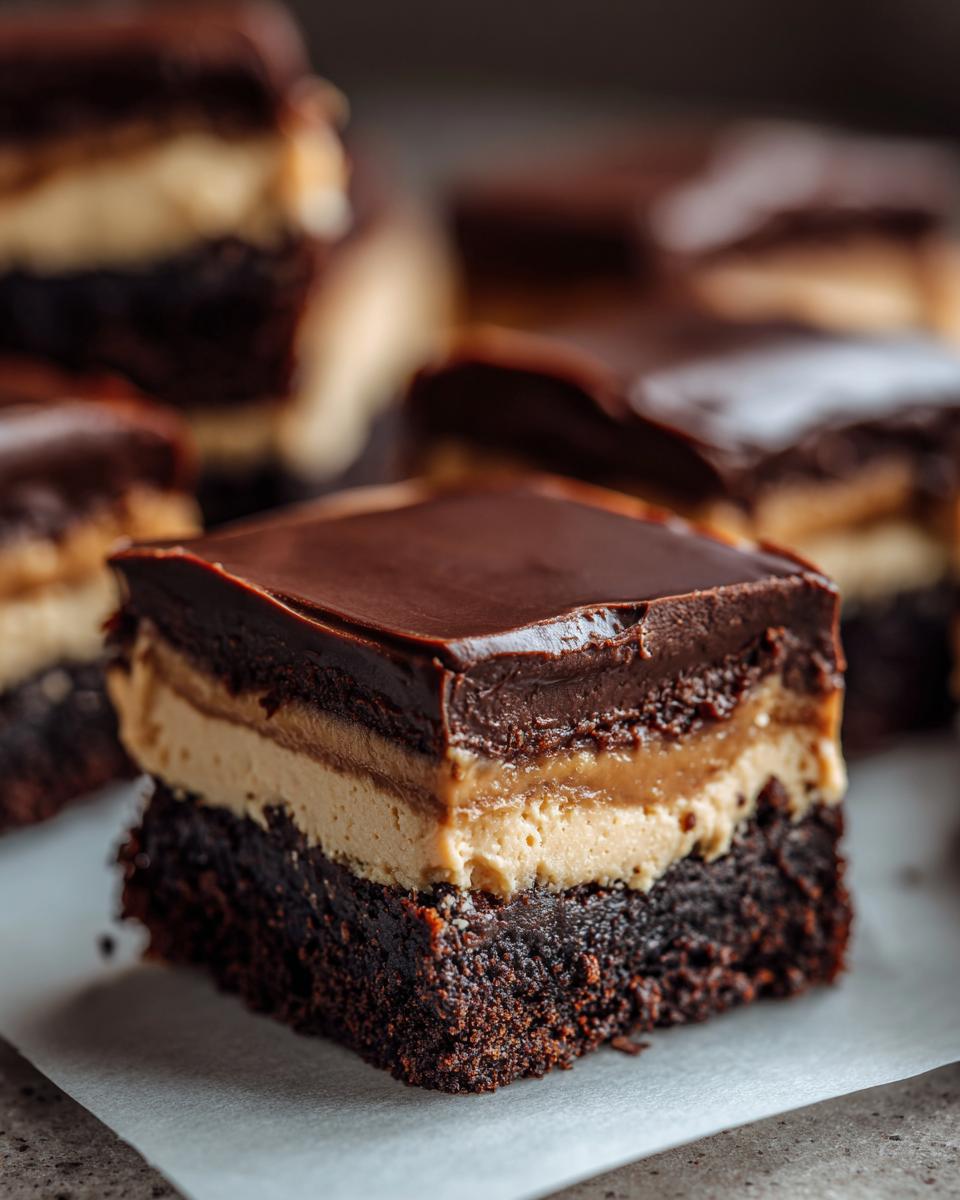
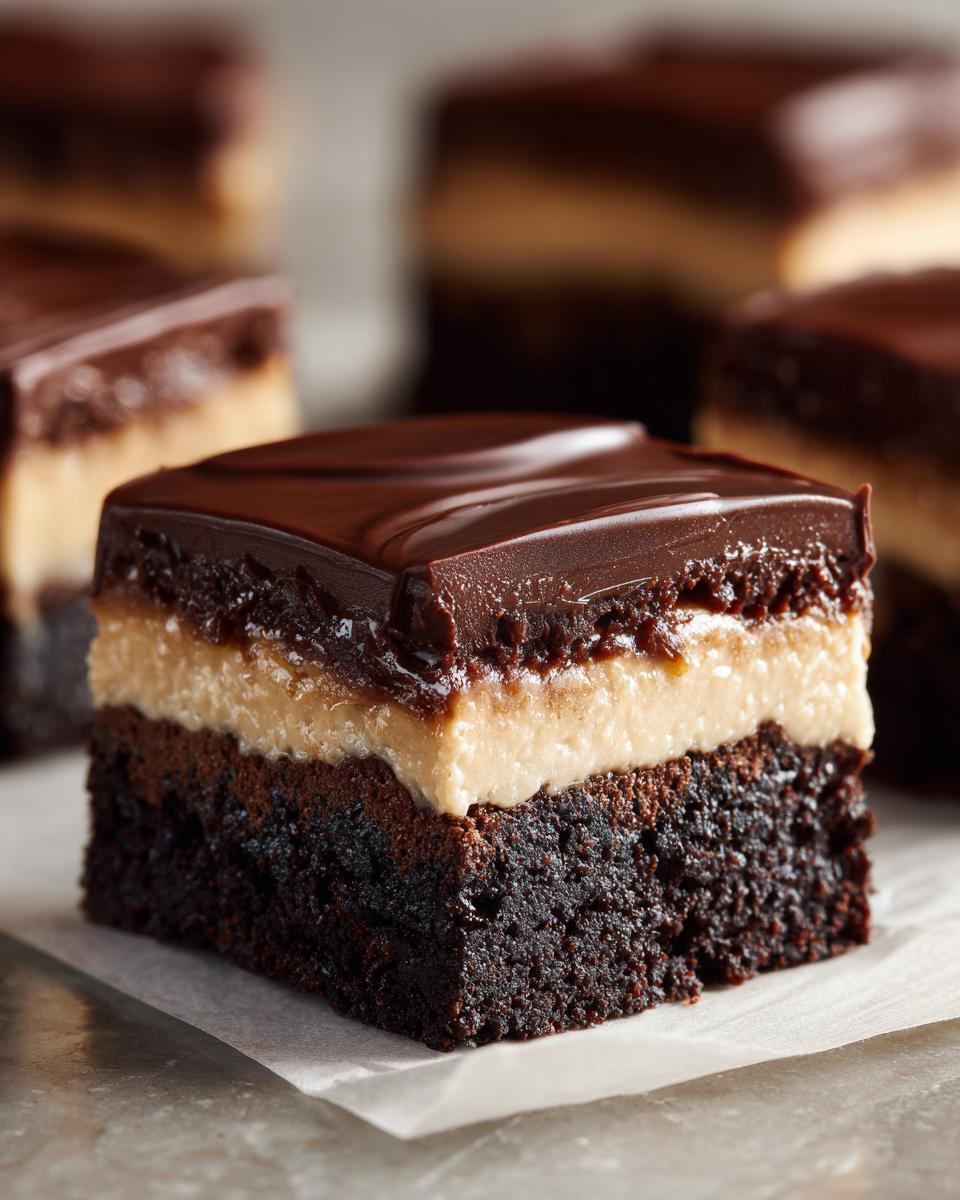
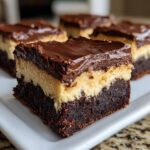
- You get a beautiful visual appeal with three distinct layers, making them real showstoppers among your potluck desserts.
- They bake up rich and chewy, giving you that satisfying, bakery-style brownie bar texture every time.
- These are the perfect holiday brownie treats because they look fancy but are secretly simple to whip up!
If you’re looking for more delicious dessert recipes like this one that bring joy without stress, check out my collection of delicious desserts and treats. You won’t regret trying these decadent chocolate desserts!
Essential Ingredients for Perfect Buckeye Brownies
When we make these buckeye brownies, we rely on really great, simple ingredients to build those three killer layers. Using a box mix for the base makes things speedy, but the fillings are where we put in the love! Always remember this tip: for the peanut butter layer to come out light and fluffy instead of dense, your butter absolutely must be softened—room temperature, not melted at all. That’s the secret to getting a beautiful filling that spreads like a dream on those fudgy brownie recipe bars!
For the Fudgy Brownie Base
Since we are going for ultimate fudginess, we stick to the basics:
- One 18.3-ounce box of your favorite fudge brownie mix (and whatever the box calls for—usually eggs, oil, and water).
For the Creamy Peanut Butter Layer
This layer needs to whip up nicely, so measure everything precisely!
- 1 cup (that’s two full sticks yesterday) of unsalted butter, softened!
- 1 cup creamy peanut butter—please, no chunks here.
- 3 cups powdered sugar, and you have to sift this, trust me, or you’ll get little sugar rocks.
- 1 teaspoon vanilla extract.
- 1/2 teaspoon salt to balance that sweetness.
For the Chocolate Ganache Topping
This finish is what seals the deal and makes it look bakery-style. The extra fat here keeps the chocolate shiny and smooth when it sets up.
- 1 cup semi-sweet chocolate chips.
- 2 tablespoons shortening or coconut oil—the shortening really helps that topping stay smooth rather than brittle.
Step-by-Step Guide to Making Layered Fudge Brownies
Alright, buckle up! Making these buckeye brownies is easier than you think, but precision in cooling and mixing is key to getting those show-stopping three layers. We start simple, and then we build that decadence layer by layer. Remember, we aren’t looking for a perfectly clean toothpick here—we want moist crumbs clinging to it, promise! If you need a refresher on nailing that fudgy base, I have a whole post on easy brownie recipes that might help you nail this first step.
Preparing and Baking the Brownie Layer
First things first, get your oven preheated to whatever temperature the box tells you! Grab a 9×13 inch pan and line it thoroughly with parchment paper, making sure you leave a nice overhang on the sides. This overhang is your handle later, so don’t skip it! Mix up that brownie batter exactly as directed and spread it evenly in the prepared pan. Bake it, but check it early. You want a toothpick to come out with moist crumbs attached, not wet batter, but definitely not dry. That little bit of wetness is what keeps your base fudgy. Once it’s out, walk away! This layer needs to cool completely—and I mean completely—before we mess with the peanut butter layer.
Creating the Peanut Butter Ganache Dessert Filling
Now for the fun part! In a nice big bowl, using your mixer, beat that softened butter and creamy peanut butter together until they look smooth and happy. Then, very slowly, add that sifted powdered sugar while the mixer is on the lowest speed. We are adding air here, so once it’s blended, crank that speed up to medium and beat it till it looks really light and fluffy—that texture is what sets these peanut butter brownies apart! Finish by mixing in your vanilla and salt.
Melting and Spreading the Chocolate Topping for Buckeye Brownies
For the final layer, we melt those chocolate chips with the shortening. I usually microwave this in short 30-second blasts, stirring really well between each burst until it’s silky smooth. If you’re nervous, use a double boiler! Pour that melted chocolate *gently* over the chilled peanut butter layer. Gently spread it right to the edges. It sets up fast, so work quickly but carefully so you don’t drag lines through the peanut butter underneath. Pop it in the fridge for about 30 minutes if you’re impatient (I am!), or just let it sit on the counter until the chocolate is completely firm.
Tips for Success with Buckeye Brownies
Getting these buckeye brownies perfect, especially those lovely distinct layers, takes just a couple of careful moves. My number one piece of advice, which I mentioned before but I’ll shout it again, is ingredient temperature. Make sure that butter for the peanut butter layer is truly softened, but not melty. If it’s too warm, the powdered sugar won’t whip up airy enough, and you’ll end up with dense bars instead of those light, fluffy peanut butter brownies.
To keep that shiny chocolate topping from cracking when you cut? Don’t try to rush the final set in the fridge! If you chill the chocolate too fast, it tightens up quickly and cracks. Let it set on the counter for 20 minutes first, then finish it off. And for the cleanest cuts possible, chill the entire pan until the top is firm, use a long, sharp knife, and wipe the blade clean between every single slice. It’s a little extra work, but it makes for beautiful chocolate peanut butter bars!
If you want more tips on making sure your peanut butter layers are perfectly smooth, check out my guide on making no-bake chocolate peanut butter bars—the filling science is similar!
Ingredient Notes and Substitutions for Peanut Butter Brownies
I get so many questions about tweaking recipes, and these Peanut Butter Brownies are no exception! Since we are dealing with three distinct layers here, sometimes substitutions can greatly impact texture, especially in the peanut butter filling. If you try to use natural peanut butter—the kind where the oil separates—you’re going to run into trouble. Natural peanut butter is much runnier, and that filling just won’t hold its shape or whip up fluffy for you. Stick to the standard, commercial creamy peanut butter because it has stabilizers that keep those air bubbles locked in when you mix in the powdered sugar.
Now, let’s talk chocolate coating for these Chocolate Peanut Butter Bars. I used semi-sweet chips in the recipe because I love that bit of bitter contrast against the super sweet peanut butter layer. But you absolutely can switch this up!
- If you prefer a sweeter top, go ahead and use milk chocolate chips instead. They melt beautifully but might get a little softer at room temperature.
- For a real deep, intense flavor that cuts through the sweetness, use dark chocolate chips. Just make sure they are high quality so you get that glossy finish we’re aiming for.
- Since this recipe is already so rich, I never recommend swapping the shortening/coconut oil in the ganache. That little bit of extra fat is what ensures the topping sets up perfectly smooth over the peanut butter layer and doesn’t seize up on you.
Don’t forget to check out my guide on simple peanut butter bars if you ever want to skip the baking part entirely!
Storage and Reheating Instructions for Chocolate Peanut Butter Bars
Because these buckeye brownies have that gorgeous, creamy peanut butter layer—which is essentially fudge, let’s be honest—we have to treat them properly when storing them. You can definitely let them sit out on the counter for a day or so, especially if your kitchen isn’t too warm, but I always recommend refrigeration for keeping them at their absolute best, especially after that chocolate topping is set.
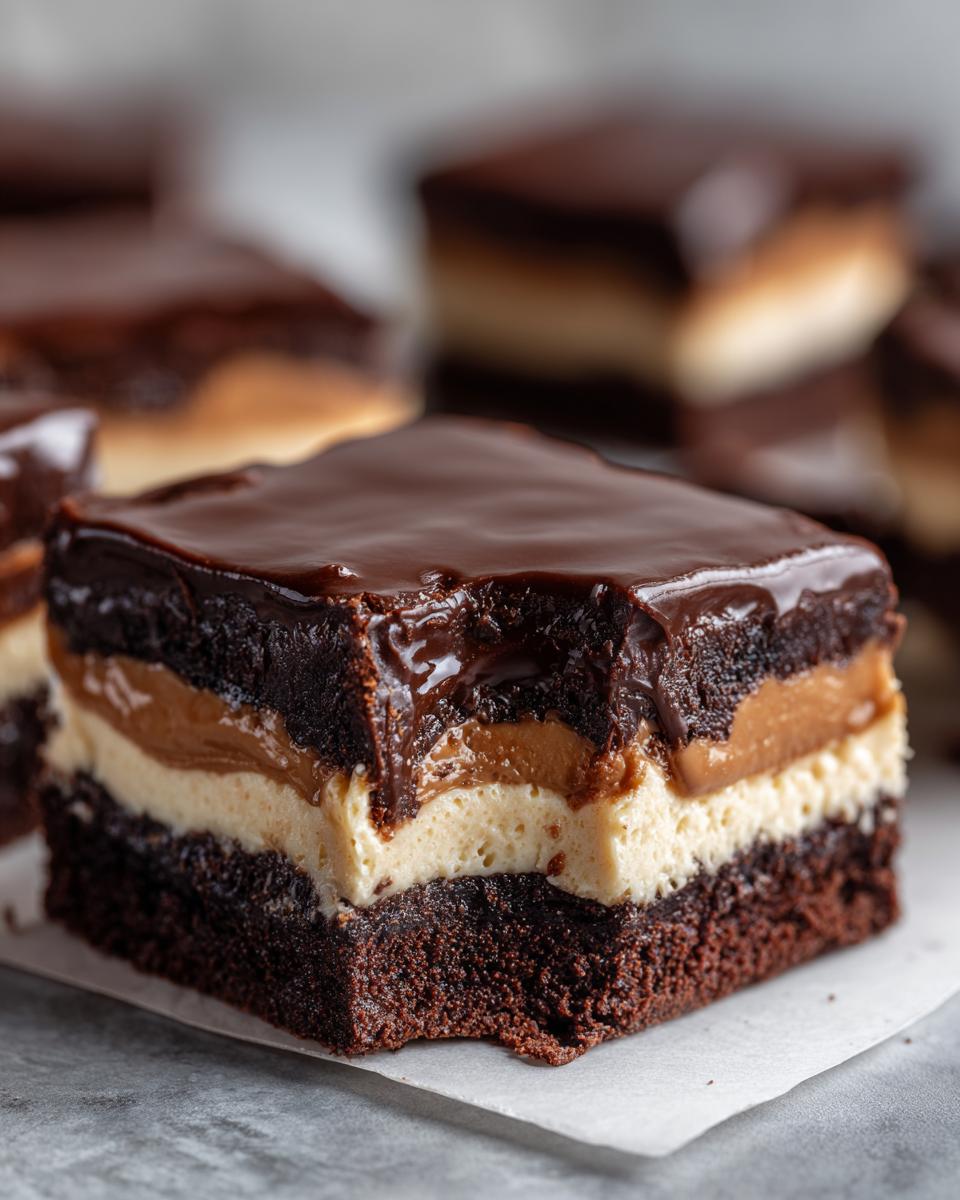
If you’re cutting them ahead of time, store your squares in an airtight container. I usually put a layer of parchment paper between the rows so the chocolate tops don’t stick together. They hold up great in the fridge for almost a full week! That chilling process after you first make them really helps them firm up nicely, which is perfect for clean slicing, just like you see in those bakery style brownie bars shots.
Now, the big question: Should you eat them cold or at room temperature? Honestly, it’s down to preference! If you like a really firm, super chewy bite, eat them straight from the fridge. But if you want that peanut butter layer to get a little softer and more luscious, let them sit on the counter for about 20 minutes before serving. That just softens the chocolate slightly so it melts right in your mouth alongside that peanut butter filling.
If you are looking for ways to store other similar treats, check out my tips on chewy no-bake chocolate peanut butter bars—it’s a different texture, but storage wisdom usually applies across the board!
Serving Suggestions for Crowd Pleaser Desserts
When you put out a tray of these incredible buckeye brownies, you are serving up a major crowd pleaser dessert, no question! The richness of the chocolate brownie base plus that sweet, salty peanut butter layer is pretty heavy, so think about what you serve alongside them to make the whole experience balanced. If I’m setting these out for a potluck or a holiday gathering, I try to offer things that cut through that decadent feeling just a little bit.
For beverages, you really can’t go wrong. Forget water! You need something strong to stand up to all that chocolate and peanut butter. A nice steaming mug of coffee is mandatory for me—the slight bitterness just sings against the sweetness. If it’s a summer party, I adore serving smaller squares alongside fresh strawberries; the tartness cuts right through the richness and provides a little fresh palate cleanser.
If you’re feeling ambitious and want to serve something warm alongside these chilled bars, I always love having something slightly spicy or savory nearby. It’s weird, but trust me on this one! For example, offering soft rolls spread with my amazing copycat cinnamon butter nearby means people can balance their plate. It sounds wild, but those sweet and salty cravings get satisfied in the best way!
Honestly, though, these chocolate peanut butter bars are so delicious on their own that they rarely need a garnish. Just stack them high, maybe dust the platter with a little cocoa powder for contrast, and watch them disappear. They are the definition of a simple dessert that packs a huge flavor punch!
Frequently Asked Questions About Buckeye Brownies
I always get so many messages after people try these! You guys are making up my favorite Three Layer Brownies ever, and I know you have questions about how to make them absolutely perfect every single time. Here are the ones I get asked the most often. Don’t worry if yours look a little different than mine at first; baking is all about practice and patience!
Why are my peanut butter layers crumbling instead of staying smooth?
Oh no, that happens when the butter wasn’t soft enough or you added the powdered sugar too fast! If your butter is too cold, it doesn’t create enough air pockets when you mix it with the peanut butter. The key to that plush, spreadable layer is creaming that butter and PB until it’s really light before you even think about adding the sugar. Try beating them together for a full two minutes on medium speed before you start dumping in the sugar slowly. If you need to know more about achieving perfect layers, check out my absolute best brownie recipes guide!
Can I use my favorite homemade fudgy brownie recipe instead of the box mix?
Absolutely, you totally can! While I love the ease of the box for these buckeye brownies, if you have a homemade recipe that yields a thick, rich, fudgy brownie base, go for it. Just make sure that homemade recipe bakes up relatively firm in a 9×13 pan. If your homemade recipe is super gooey, you might have trouble spreading that peanut butter layer on top without tearing up the brownie layer. A slightly firmer base is easier to work with for these chocolate peanut butter bars!
How can I make these nut-free for allergies?
That’s a really important question! Since these bars are built around the peanut butter flavor, making them truly nut-free is tricky because you need to eliminate the major component. You can, however, substitute sunflower seed butter (SunButter) for the creamy peanut butter. It has a similar texture! Be warned, though: the flavor won’t taste exactly like a classic buckeye candy, but you’ll still get the amazing texture of the layered fudge brownies. You’ll also need to make sure your chocolate chips are manufactured in a nut-free facility, too.
Why does the chocolate topping crack when I cut the squares?
That cracking is almost always due to temperature shock! If the peanut butter layer is really cold, and you pour hot, freshly melted chocolate on top, the temperature difference makes the chocolate contract too fast as it cools. To avoid this, let your brownies cool on the counter for about 20 minutes after you spread the chocolate before you even consider putting them in the fridge. If you’ve seen others that look smoother, like the ones on Meilani’s site, they likely let the chocolate warm up just a little before the final chill. It’s all about gradual cooling!
Share Your Homemade Buckeye Brownies Experience
Seriously, that’s it! You now have the blueprint for the most decadent and satisfying buckeye brownies ever to grace your baking pan. I truly hope you dive in and try this recipe the next time you need a serious chocolate and peanut butter fix. I poured all my family’s best shortcuts and tips into making this recipe foolproof for you.
Now, I just have to know—how did they turn out in your kitchen? Did that peanut butter layer get perfectly light and fluffy? Were you able to get those wonderfully clean cuts, or did everyone just dive right in with a fork? Please, please leave me a rating and tell me all about your experience in the comments below! Seeing your photos of these delicious dessert treats makes my day, so tag us if you share them online!
If you stick around CravyBite Kitchen, just remember we are always focused on making real cooking accessible and joyful. Before you go, you might want to peek at our Privacy Policy and our Terms of Use—just making sure we’re all on the same trustworthy page here at the kitchen counter. Happy baking, friends!
PrintDecadent Buckeye Brownies Recipe
Make these rich, fudgy Buckeye Brownies featuring three layers: a dense chocolate brownie base, a creamy peanut butter filling, and a smooth chocolate ganache topping. This recipe delivers bakery-style flavor that satisfies chocolate and peanut butter lovers.
- Prep Time: 20 min
- Cook Time: 30 min
- Total Time: 50 min
- Yield: 24 servings 1x
- Category: Dessert
- Method: Baking
- Cuisine: American
- Diet: Vegetarian
Ingredients
- 1 box (18.3 ounces) fudge brownie mix (plus ingredients called for on box)
- 1 cup (2 sticks) unsalted butter, softened
- 1 cup creamy peanut butter
- 3 cups powdered sugar, sifted
- 1 teaspoon vanilla extract
- 1/2 teaspoon salt
- 1 cup semi-sweet chocolate chips
- 2 tablespoons shortening or coconut oil
Instructions
- Prepare the brownie layer: Preheat your oven to the temperature specified on the brownie mix box. Grease and line a 9×13 inch baking pan with parchment paper, leaving an overhang on the sides for easy removal. Prepare the brownie batter according to the box directions. Pour the batter into the prepared pan and spread evenly. Bake according to the box directions for a 9×13 pan, or until a toothpick inserted near the center comes out with moist crumbs attached. Let the brownie layer cool completely in the pan.
- Prepare the peanut butter layer: In a large bowl, beat the softened butter and peanut butter together with an electric mixer until smooth. Gradually add the sifted powdered sugar, mixing on low speed until combined, then increase speed to medium and beat until light and fluffy. Beat in the vanilla extract and salt. Once the brownie layer is cool, spread the peanut butter mixture evenly over the top of the cooled brownies.
- Prepare the chocolate topping: In a microwave-safe bowl, combine the chocolate chips and shortening (or coconut oil). Microwave in 30-second intervals, stirring well after each interval, until the chocolate is completely melted and smooth. Alternatively, melt over a double boiler.
- Assemble the dessert: Pour the melted chocolate evenly over the peanut butter layer. Gently spread the chocolate to cover the entire surface. Allow the chocolate topping to set completely at room temperature, or chill in the refrigerator for about 30 minutes for faster setting.
- Cut and serve: Once the chocolate is firm, use the parchment paper overhang to lift the brownies from the pan. Place on a cutting board and cut into squares. These are excellent served as crowd pleaser desserts or holiday brownie treats.
Notes
- For a richer brownie base, substitute the boxed mix with your favorite homemade fudgy brownie recipe.
- If you prefer a firmer peanut butter layer, you can chill the brownies after spreading the peanut butter layer before adding the chocolate topping.
- Use high-quality chocolate chips for the best flavor in your chocolate peanut butter ganache dessert.
Nutrition
- Serving Size: 1 square
- Calories: 320
- Sugar: 35
- Sodium: 150
- Fat: 18
- Saturated Fat: 8
- Unsaturated Fat: 10
- Trans Fat: 0
- Carbohydrates: 38
- Fiber: 1
- Protein: 4
- Cholesterol: 25