
Oh, friend, if you could only smell my kitchen right now! Sometimes you just crave that perfect marriage of flavors, right? You know, the cozy warmth of a freshly baked slice of spiced apple pie, but you desperately need the icy, creamy relief that only ice cream can deliver. That’s exactly how this recipe for apple pie ice cream was born. I’m Jess Carter, and merging iconic American desserts is genuinely my favorite thing to do. Forget turning on that fussy ice cream maker; this is my secret weapon for achieving an impossibly rich, thick final product using a simple no churn recipe. Trust me, once you try this blend of buttery cinnamon swirls and cold, sweet cream, you’ll wonder why you haven’t made this all year. It’s pure magic in a scoop!
- Why This No Churn apple pie ice cream Recipe Works (EEAT Focus)
- Gathering Ingredients for Your Spiced apple swirl ice cream
- Preparing the Cinnamon Swirl for Your apple pie ice cream
- Creating the Creamy Base for homemade apple pie ice cream
- Assembling and Freezing the apple pie ice cream
- Tips for Perfect Creamy apple pie ice cream Texture
- Serving Suggestions for this Fall flavored ice cream
- Frequently Asked Questions About apple pie ice cream
- Share Your Homemade apple pie ice cream Creation
Why This No Churn apple pie ice cream Recipe Works (EEAT Focus)
I know so many of you love making ice cream, but honestly, hauling out the machine feels like a commitment sometimes! That’s why this no churn apple pie dessert is such a winner. It delivers that intense, baked-apple flavor without needing any fancy equipment—just a good hand mixer or stand mixer, which I know you already have. The richness of the sweetened condensed milk base is phenomenal here. It’s sturdy enough to support those chunky, spiced apple bits without becoming icy. I learned a lot about dairy structure over the years, and this ratio locks in the flavor beautifully.
Ingredient Quality for the Best apple pie ice cream
The secret to any good ice cream, machine-made or not, starts with cold ingredients. You absolutely have to make sure your heavy whipping cream and your sweetened condensed milk are fridge-cold—I mean, straight from the coldest part of the fridge! Cold cream whips up higher and faster, giving you that gorgeous volume that stops the final product from feeling dense. When it comes to flavor, I always lean toward Granny Smith apples for the swirl. Their tartness cuts right through the richness, which is key for making this taste like a proper pie. If you’re looking for more fun, easy ways to create amazing frozen treats, check out some of my other delicious dessert recipes!
Gathering Ingredients for Your Spiced apple swirl ice cream
Okay, let’s get what you need gathered! Because this is a two-part show—the creamy base and the cozy swirl—I wrote the list out in two groups. You’ll need two full cups of heavy whipping cream, and again, make sure it’s cold! For that buttery, spiced apple swirl, you need about one cup of diced apples and two tablespoons of real unsalted butter. Don’t skimp on the spices; that cinnamon and nutmeg are what make this taste like a genuine creamy apple spice dessert.
Ingredient Substitutions and Notes
If you have an emergency and only have frozen apples, thaw them *completely* and drain off almost all the liquid before cooking them down. Too much water ruins the sauce! If you totally run out of nutmeg, just use a tiny bit more cinnamon, but it won’t have that classic pie depth. Also, remember my note about texture? If you want a real crunch, fold in about a half-cup of crushed shortbread cookies right before the final freeze. It really mimics that crust element you get in a real pie filling!
Preparing the Cinnamon Swirl for Your apple pie ice cream
First things first—we have to create the soul of the pie flavor, which means cooking down those apples! Grab a small saucepan because we’re starting this on the stovetop. Melt those two tablespoons of wonderfully flavorful butter over medium heat. Once it’s shimmering away, toss in your diced apples, that brown sugar, cinnamon, and nutmeg. This is where that amazing baked apple cinnamon dessert aroma starts filling your entire house, so be prepared for compliments!
You’ll cook this mixture, stirring every so often, for about five to seven minutes. We aren’t trying to make applesauce; we only want the apples to soften up just a touch. After that, stir in just one tablespoon of water and let it bubble for two more minutes. That little bit of water helps create that perfect syrupy sauce that we want coating everything. Honestly, this step is what separates a good apple ice cream from a truly amazing one. Once it’s syrupy, take it straight off the heat.
Now for the most important instruction in this whole section: You must let the apple swirl cool completely. Seriously, I mean cool! If you try to swirl warm apples into your lovely whipped cream base, you’ll just melt all the air right out of it, and you’ll end up with a very hard, icy block. I usually make the apple mix first and then let it sit on the counter while I whip up the ice cream base. If you want a quick guide on handling apples on the stove, my recipe for homemade applesauce has some great tips on technique you can use here: easy stovetop homemade applesauce.
Creating the Creamy Base for homemade apple pie ice cream
Now that our apple swirl is hanging out, cooling down completely, it’s time to build the fluffy white clouds that will hold all that spiced goodness! This is where we learn exactly how to make ice cream taste like pie without turning it into a solid ice block. Get your heavy cream and sweetened condensed milk out of the fridge—they need to be ice cold!
The first big step is whipping that heavy cream. Pour those two lovely, cold cups into your mixer bowl. Start slow, then bring the speed up until you get stiff peaks. I mean *stiff*! You should be able to turn the bowl upside down without anything moving. This trapped air is the backbone of your entire dessert, so don’t stop too soon!
Next, in a separate bowl, just gently whisk together your cold condensed milk, that vanilla extract, and the salt. Don’t go crazy whisking here; we just want them combined. Now comes the careful part: folding. Take about a third of your stiff whipped cream and fold it into the milk mixture first. This lightens the heavy milk layer so it won’t deflate the rest of your beautiful air!
After that, gently fold in the remaining whipped cream in two additions. When I say fold, I mean cut down the middle, then scrape up the side. Stop right when you see no more white streaks. Over-mixing here is the enemy—it knocks all the air out, and we want this base to feel like velvet, not the bottom of a frozen yogurt cup! You can check out my tips on getting great structural stability in things like frosting, which uses the same principles of aeration here: vanilla buttercream frosting recipe for best stability. Keep that base light and fluffy!
Assembling and Freezing the apple pie ice cream
Okay, we have our cold, fluffy base and our completely cooled, syrupy apple swirl. It’s time for the fun part—making it look like an actual masterpiece! Grab a loaf pan, preferably metal, as it freezes evenly. You’ll want to line it with plastic wrap first, leaving some overhang on the sides. This is the trick that makes lifting it out later so easy—a total must for any easy no-bake ice cream pie recipe I make!
Start by spooning exactly half of your creamy ice cream base into the bottom of that prepared pan. Spread it out gently to make an even layer. Then, take half of your cooled apple swirl mixture and spoon dollops evenly over that first layer of base. Don’t try to spread it perfectly; we want the chunky bits sitting nicely!
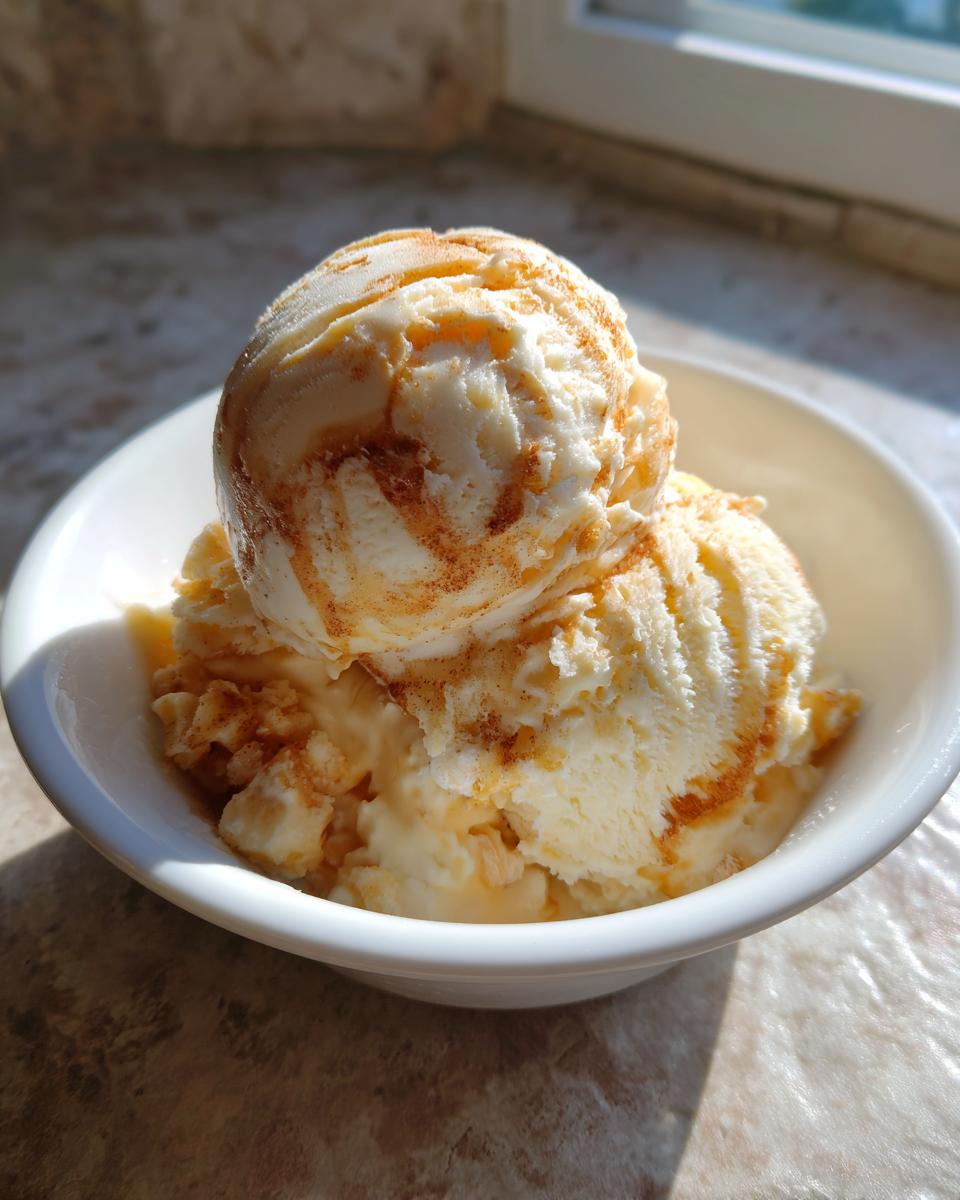
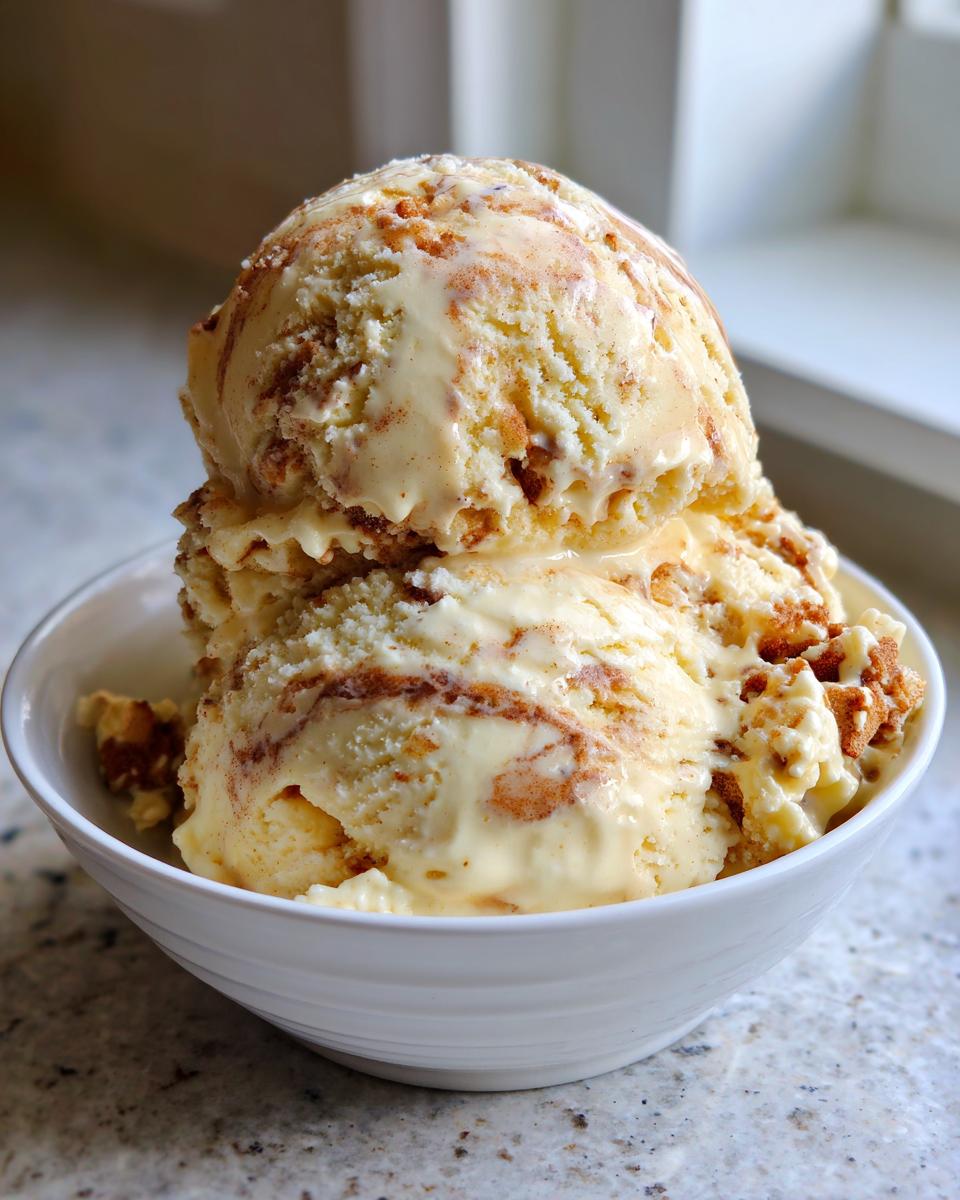
Next, pour the remaining half of the ice cream base right on top of the apples. Finally, scatter the rest of your incredible spiced apple mixture over the very top. Now for the swirl! Take a butter knife or a thin skewer, and gently drag it through the layers just once or twice. The goal isn’t to mix it all up into one muddy mess; we want ribbons of apple running through the white base. See how beautiful that marbled look is?
Once you’ve done your gentle swirling, cover that pan tightly. Plastic wrap right against the surface, then the lid, or a layer of foil. Pop this beauty into the deep part of your freezer for at least six hours, but honestly, overnight is always best. You need the air pockets to set completely so you get that perfect scoopable texture for your apple pie ice cream in the morning!
Tips for Perfect Creamy apple pie ice cream Texture
Achieving that luxurious, scoopable texture is the final hurdle, isn’t it? We want this apple pie ice cream to feel like it came straight from a high-end creamery, not like an icy fruit bomb. My biggest lesson learned over years of testing these no-churn recipes is that full-fat dairy is non-negotiable. Use heavy whipping cream—don’t even think about using half-and-half to cut calories, because those fat molecules are what keep the ice crystals at bay and make this a true creamy apple spice dessert.
Another little trick I picked up when testing my first batches is managing the frozen apple swirl. If the apple mixture wasn’t completely cooled, it would freeze into a rock-hard layer that shattered when you tried to scoop it. So, that cooling step is vital! When you pull it out of the freezer, don’t rush it. I know we all want ice cream right now, but let it sit on the counter for a good five to ten minutes. This slight softening ensures you can cut through the swirls easily without chipping your favorite scoop.
Storage and Reheating Instructions
Since this is such a rich treat, a little goes a long way, but you’ll definitely want leftovers! The key to airtight storage is minimizing air exposure. Make sure that plastic wrap you used during assembly is pressed right against the surface of the ice cream before you put the lid on the container. This stops those little ice crystals from forming on the top layer, which is what causes freezer burn.
Now, about reheating—well, this is ice cream, so we don’t reheat it, right? Ha! But we do need to soften it just enough to serve it beautifully. Follow that 5 to 10-minute counter rest every time. If you’re in a real pinch, you can sometimes dip your ice cream scoop into a tall glass of very hot water between scoops to get those perfectly round, clean servings. That’s my trick for showcasing that beautiful swirl!
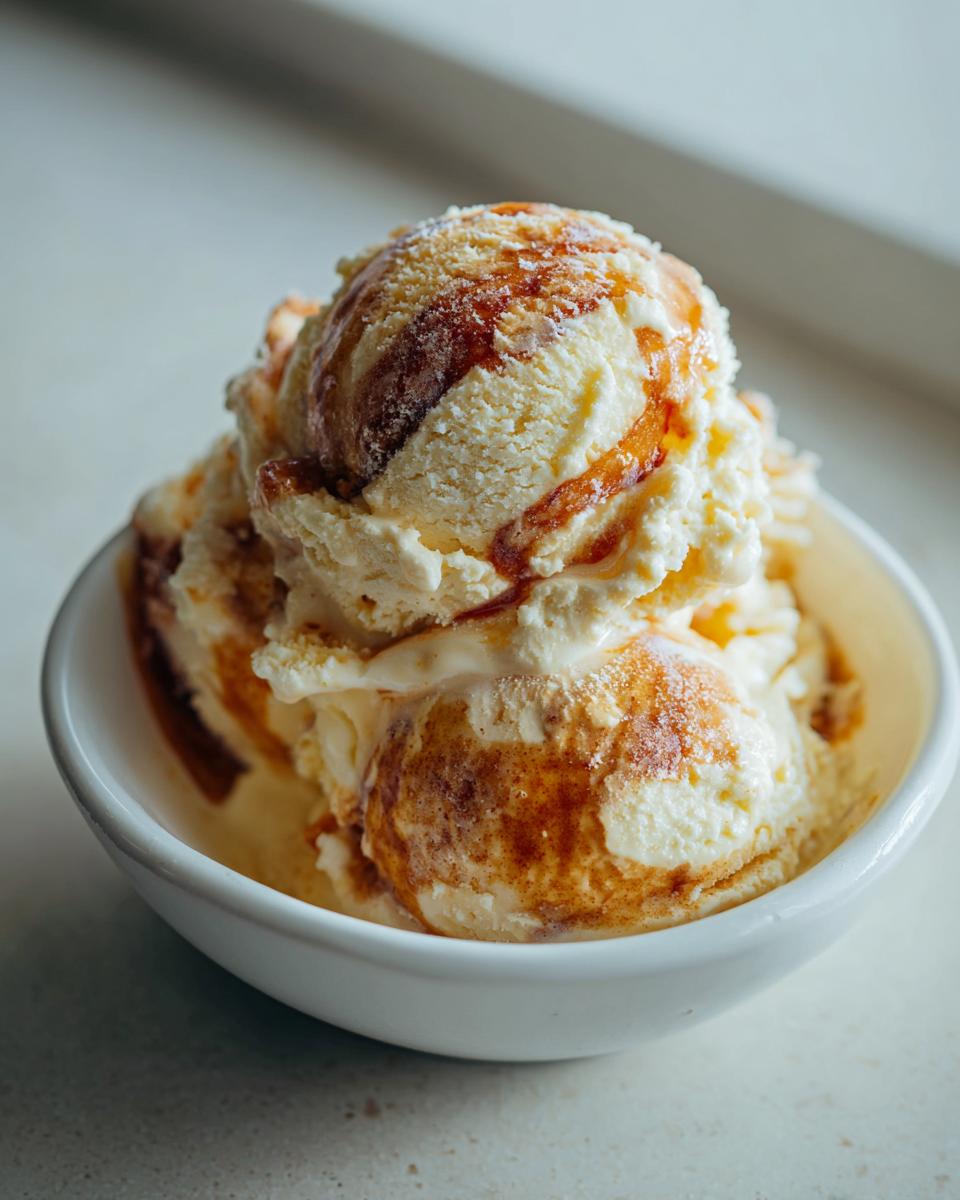
Serving Suggestions for this Fall flavored ice cream
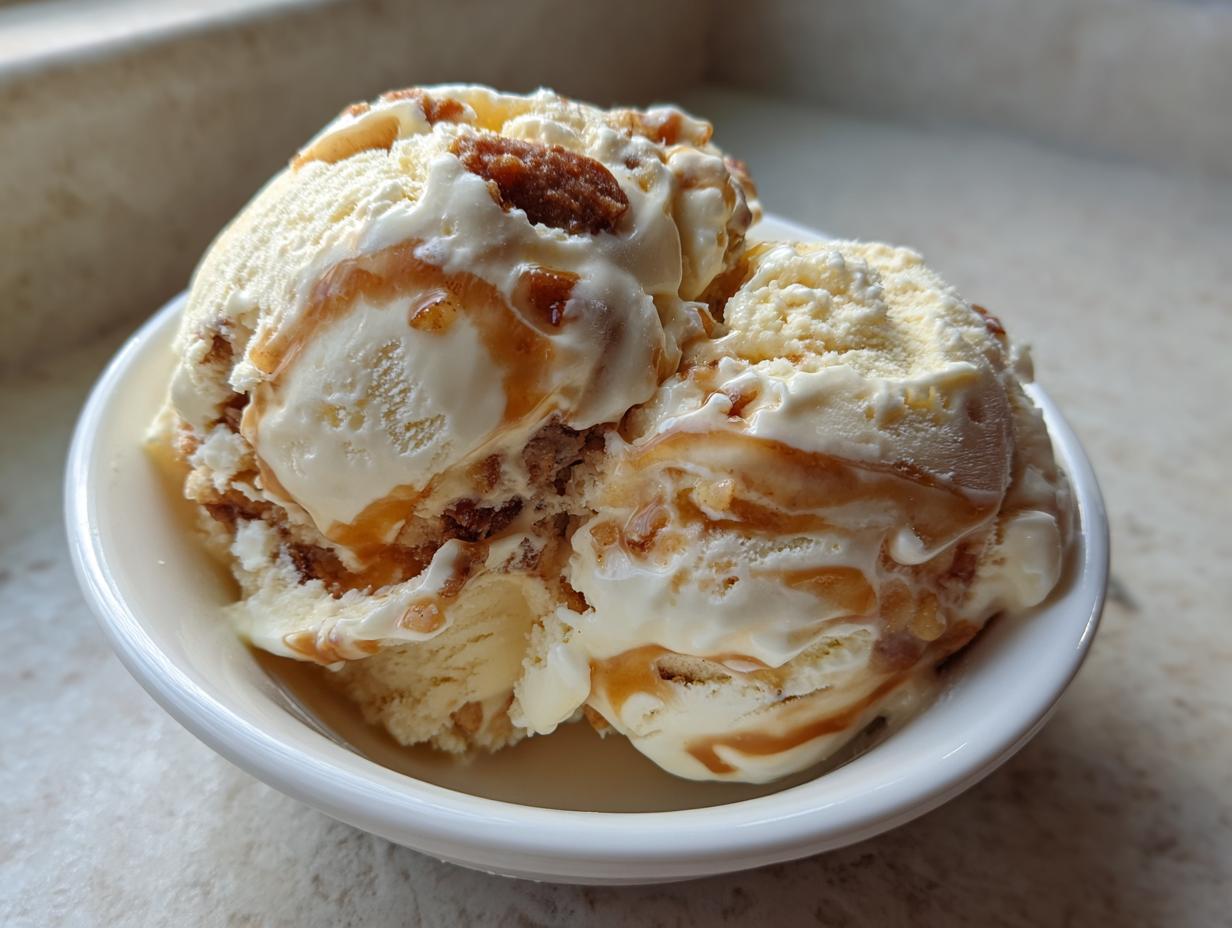
When you finally pull that incredibly flavorful apple pie ice cream out of the freezer, you deserve to serve it up like the rockstar dessert it is! Since we’ve already nailed the baked apple and crust flavor in the ice cream itself, we can use the toppings to add texture we might have missed. My absolute favorite way to present this decadent spoon treat is with a drizzle of really good, salted caramel sauce. That little hit of salt just pushes the brown sugar flavor over the top!
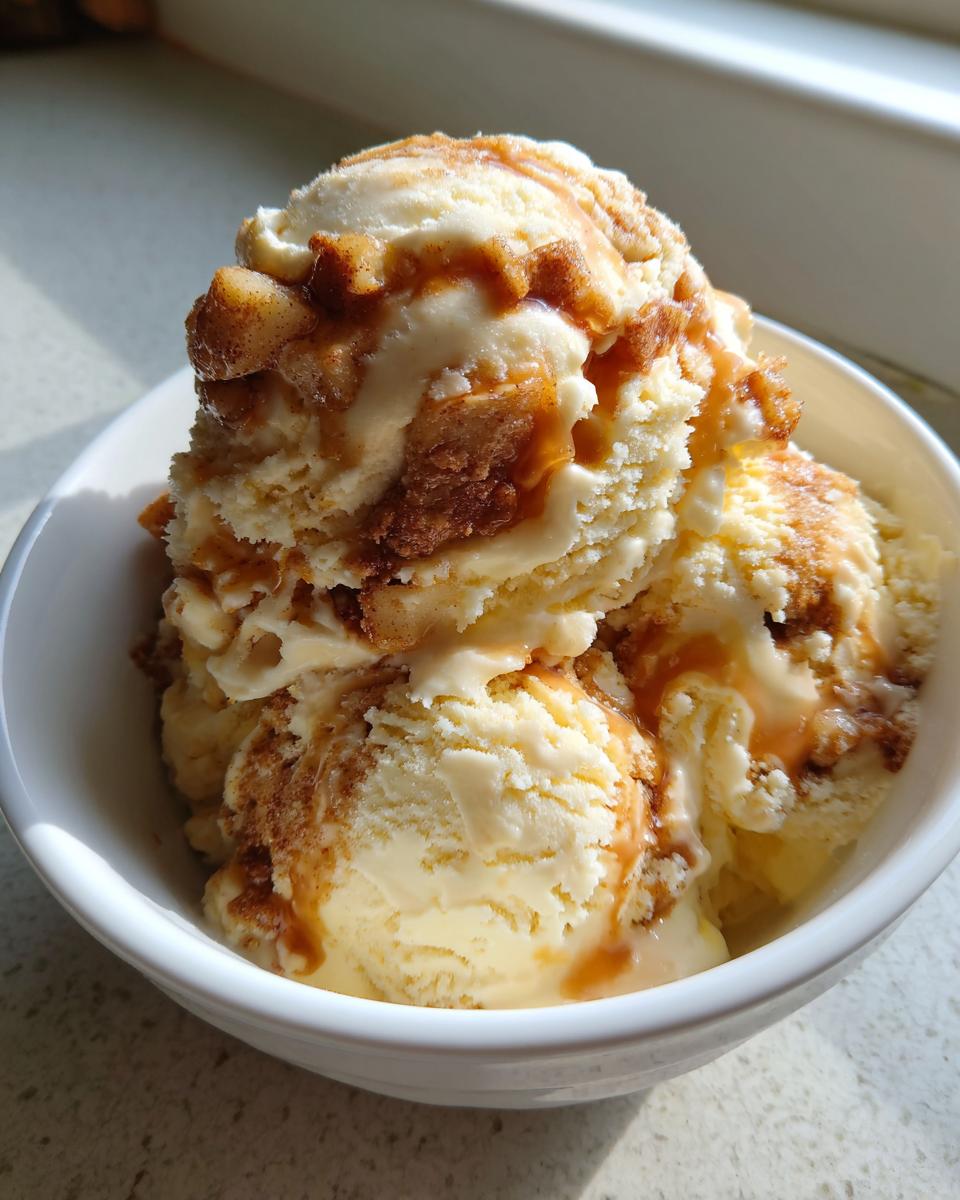
If you want an extra crunch that really drives home that pie crust feeling, try sprinkling some finely chopped, toasted pecans or walnuts right on top just before serving. Toasting them in a dry skillet for about three minutes wakes up their flavor immediately—it smells divine!
For those nights when you want to turn this into a full-blown sundae situation, I love serving a scoop (or two!) alongside a slightly warmed-up brownie or a slice of pound cake. The contrast between the warm, soft cake and the cold, rich ice cream is just heavenly. It feels wonderfully cozy, which is perfect for how much I love a good fall flavored ice cream. Speaking of seasonal favorites, if you’re looking for something savory to kick off your autumn meal, I have a fantastic salad recipe using seasonal produce that you might enjoy: fall harvest salad recipe with butternut squash.
Frequently Asked Questions About apple pie ice cream
I always get so many questions when people first try making a merger dessert like this! It’s natural, because we are going off-script from a traditional ice cream recipe. Here are the things I hear most often about nailing this cinnamon apple ice cream recipe, along with some advice from my time in the kitchen.
Can I just use jarred apple pie filling instead of making my own swirl?
Oh, I totally get wanting to save time! You certainly *can*, but be careful. Jarred fillings are often much runnier than the sauce we make here. If you use it straight from the jar, it can freeze rock hard or create watery pockets. If you go that route, dump the filling into a saucepan first, stir in an extra half-teaspoon of cinnamon, and cook it down until it’s noticeably thicker, like a jam. Then, you must cool it completely before swirling it in!
What’s the actual difference between this no-churn version and a custard base apple ice cream?
This is a great question for anyone wondering how to make ice cream taste like pie perfectly! A traditional custard base involves heating egg yolks and milk, which creates a very smooth, rich mouthfeel, almost like gelato. Our no-churn method relies on whipping air into the cream and using the sugar in the condensed milk to keep the texture soft. This version is faster and usually creamier/fluffier than a custard, but the custard base often has a deeper, richer vanilla note. Both are delicious, but the no-churn is far easier to manage, especially with chunky mix-ins like our apple pieces!
Can this recipe be made dairy-free?
It takes a little retooling, but yes! For the base, you’d substitute the heavy cream with a stabilized coconut cream (the thick part from a chilled can) and use a high-quality sweetened condensed coconut milk alternative. For the apple swirl, using a plant-based butter substitute works perfectly fine. Just make sure your substitutes whip up nicely. If you love creative twists on classic pies, you have to check out my recipe for apple pie cheesecake with salted caramel swirl!
Nutritional Estimate for apple pie ice cream
Here is a general estimate for a serving size of about 2/3 cup of this wonderful dessert. Please remember, these numbers are based on standard pantry ingredients and are just a guide!
- Serving Size: 2/3 cup
- Calories: 350
- Total Fat: 19g
- Saturated Fat: 12g
- Total Carbohydrates: 42g
- Sugar: 38g
- Protein: 5g
We aren’t kidding when we say this is a rich and satisfying fall flavored ice cream! It definitely uses real sugar and real cream to get that authentic taste.
Share Your Homemade apple pie ice cream Creation
Well, now you have my absolute favorite way to turn the classic comfort of pie into the cool delight of frozen sweetness! I pour my heart into these recipes, hoping they bring as much joy to your table as they do to mine. I really want to know how you liked making this apple pie ice cream. Did your swirl turn out perfectly marbled? Did the cinnamon really fill your house with that cozy smell?
Please, please come back here and leave me a star rating, and tell me all about your experience in the comments below. Hearing from you makes developing these recipes worth every single taste test. If you shared a photo of your incredible final product on social media, tag me! I absolutely love seeing your results, especially when you’ve nailed that perfect scoop of cinnamon apple ice cream recipe.
If you ever have a question while you’re cooking, or just want to share another kitchen triumph, you can always reach out to me directly via my Contact page. Happy scooping, everyone, and thank you for letting CravyBite Kitchen be a part of your homemade dessert making!
PrintCinnamon Swirl Apple Pie Ice Cream (No-Churn)

Make creamy, homemade apple pie ice cream without an ice cream maker. This no-churn recipe features a rich vanilla base swirled with spiced, baked apple chunks for a perfect frozen dessert.
- Prep Time: 20 min
- Cook Time: 10 min
- Total Time: 6 hours 30 min
- Yield: 6 servings 1x
- Category: Dessert
- Method: No-Churn Freezing
- Cuisine: American
- Diet: Vegetarian
Ingredients
- 2 cups heavy whipping cream, cold
- 1 (14 ounce) can sweetened condensed milk, cold
- 1 teaspoon vanilla extract
- 1/4 teaspoon salt
- 1 cup diced apples (such as Honeycrisp or Granny Smith)
- 2 tablespoons unsalted butter
- 1/4 cup packed light brown sugar
- 1 teaspoon ground cinnamon
- 1/4 teaspoon ground nutmeg
- 1 tablespoon water
Instructions
- Prepare the apple swirl: Melt the butter in a small saucepan over medium heat. Add the diced apples, brown sugar, cinnamon, and nutmeg. Cook, stirring occasionally, for 5 to 7 minutes until the apples soften slightly.
- Stir in the water and continue cooking for 2 more minutes until the mixture thickens into a syrupy sauce. Remove from heat and let the apple mixture cool completely.
- Prepare the ice cream base: In a large bowl, use an electric mixer to beat the cold heavy whipping cream until stiff peaks form. This takes about 3 to 5 minutes.
- In a separate medium bowl, whisk together the cold sweetened condensed milk, vanilla extract, and salt until combined.
- Gently fold about one-third of the whipped cream into the condensed milk mixture to lighten it. Then, gently fold in the remaining whipped cream until just combined, being careful not to deflate the mixture.
- Assemble the ice cream: Pour half of the ice cream base into a freezer-safe loaf pan (about 9×5 inches). Spoon half of the cooled apple swirl mixture over the top.
- Pour the remaining ice cream base over the apple layer, then top with the remaining apple swirl. Use a knife or skewer to gently swirl the layers together once or twice for a marbled effect.
- Cover the pan tightly with plastic wrap or a lid and freeze for at least 6 hours, or preferably overnight, until firm.
- When ready to serve, let the ice cream sit on the counter for 5 to 10 minutes to soften slightly before scooping.
Notes
- For a more intense pie flavor, you can fold in 1/2 cup of crushed shortbread cookies or graham crackers during the final swirl step.
- If you prefer a smoother texture, use a custard base recipe instead of this no-churn method.
- Ensure all dairy ingredients are very cold before whipping the cream for the best volume.
Nutrition
- Serving Size: 2/3 cup
- Calories: 350
- Sugar: 38
- Sodium: 110
- Fat: 19
- Saturated Fat: 12
- Unsaturated Fat: 7
- Trans Fat: 0
- Carbohydrates: 42
- Fiber: 1
- Protein: 5
- Cholesterol: 65