
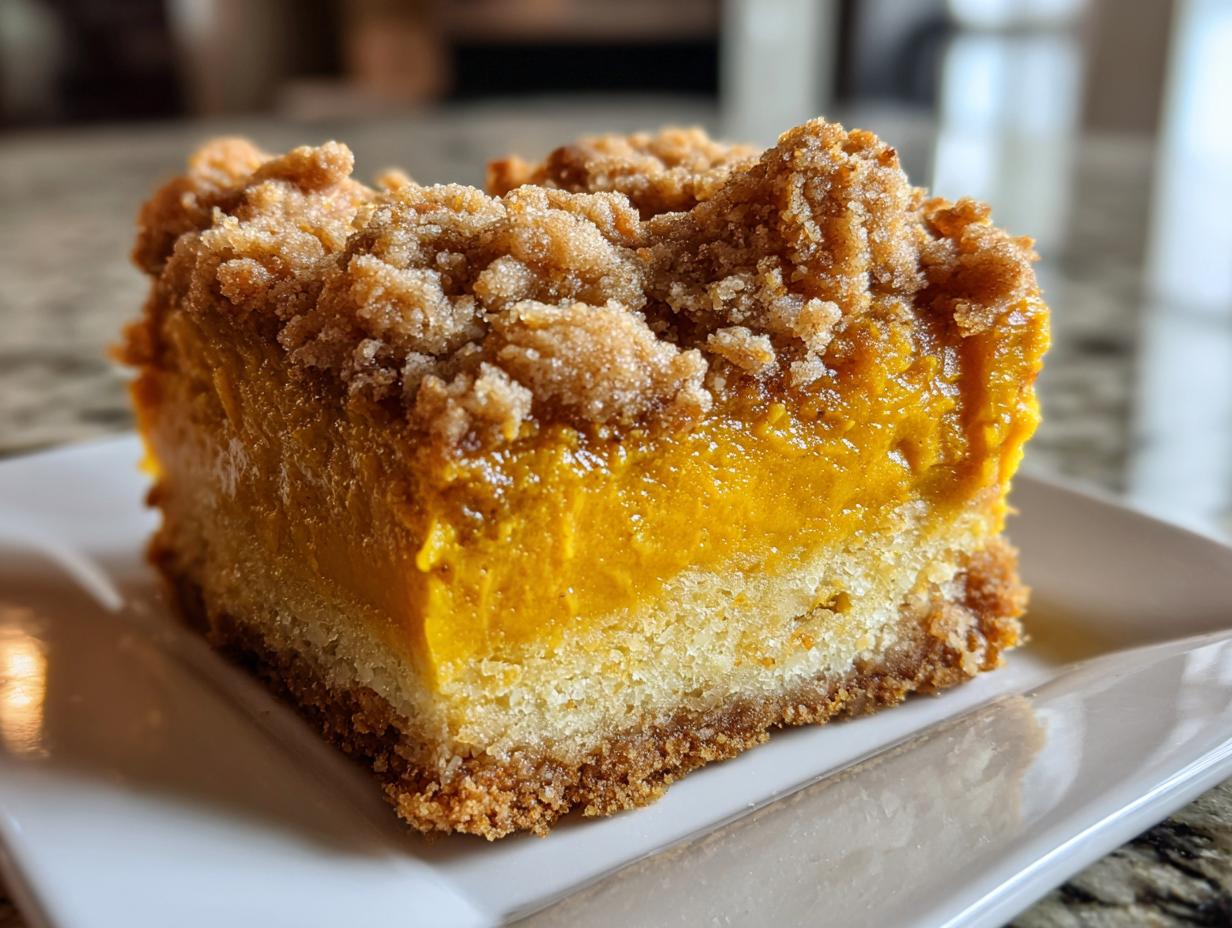
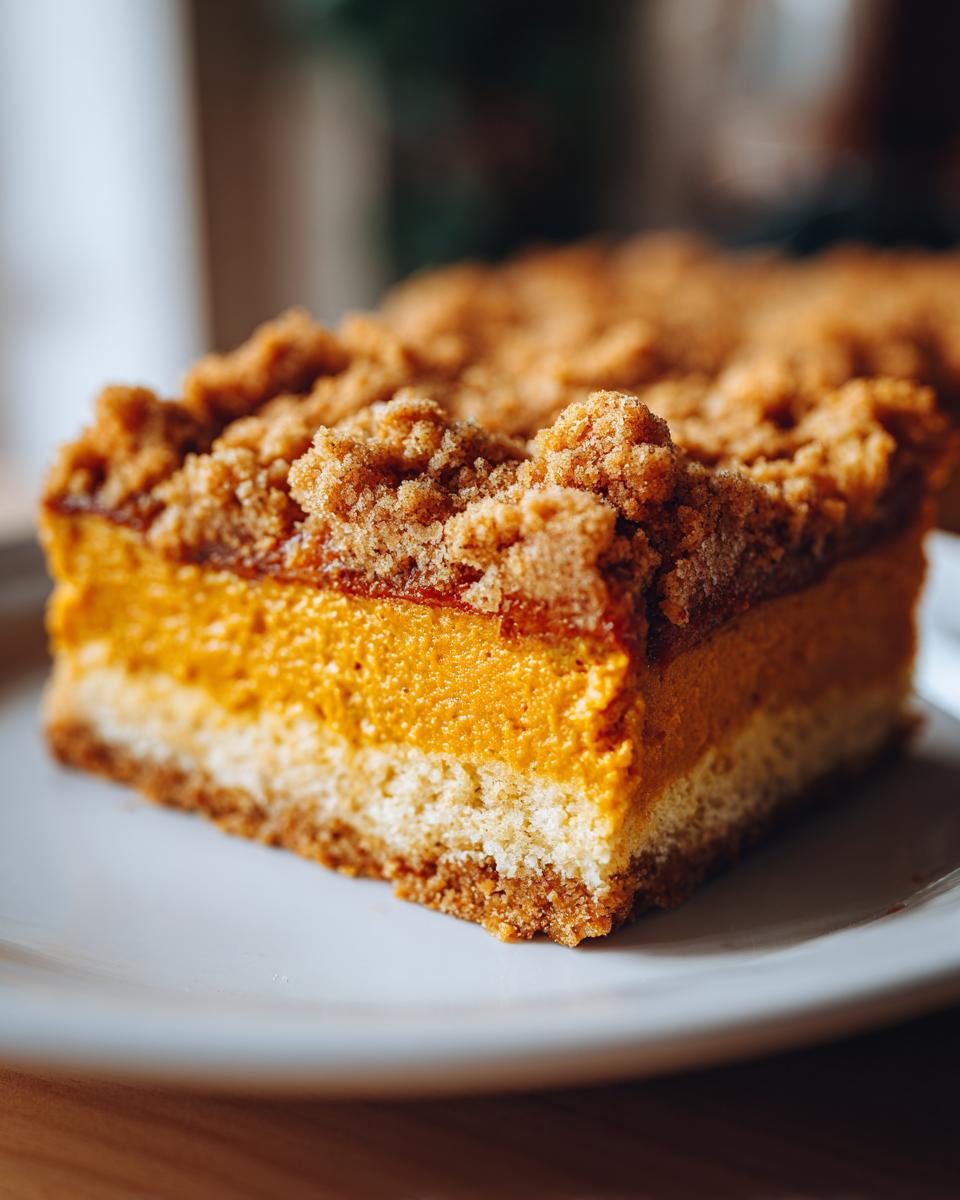
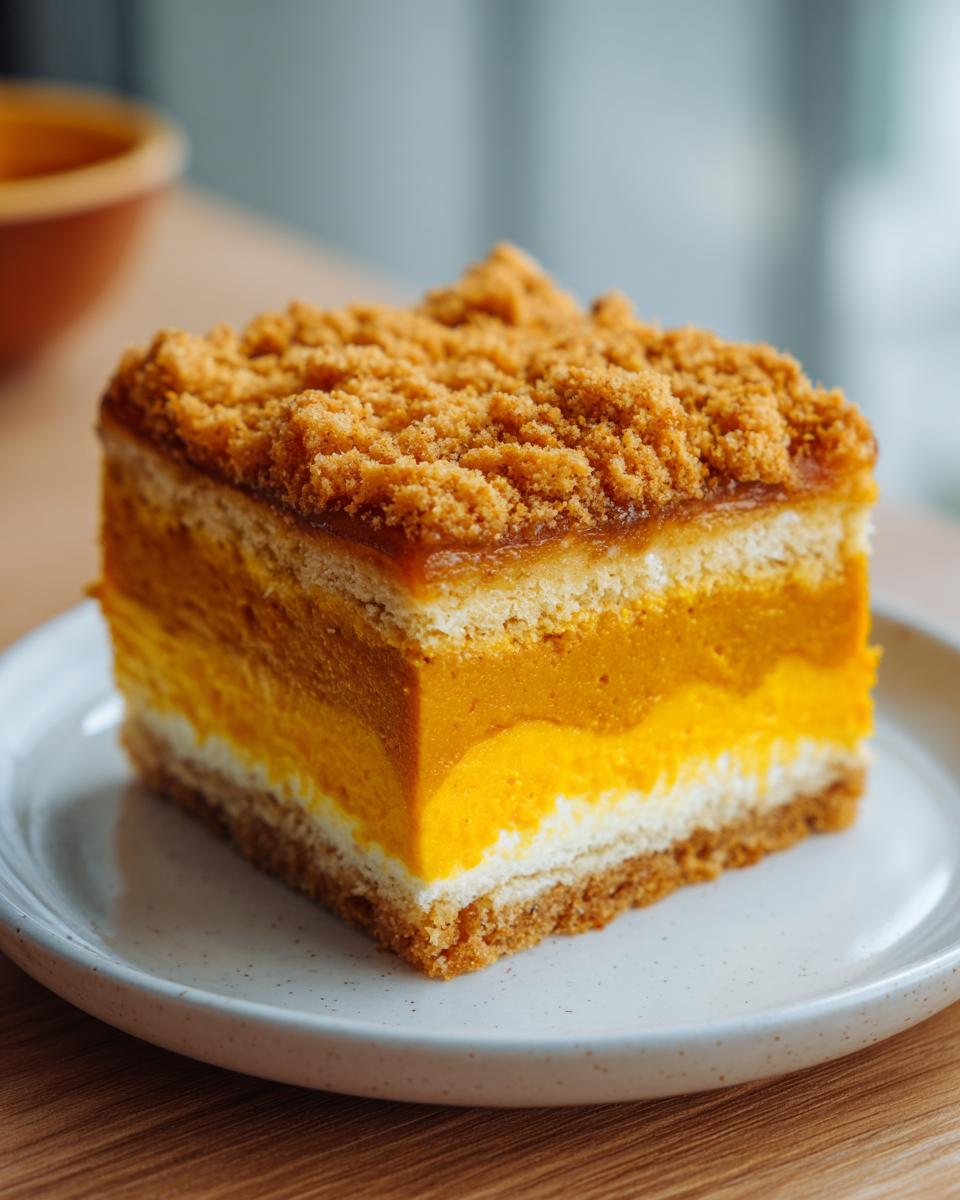
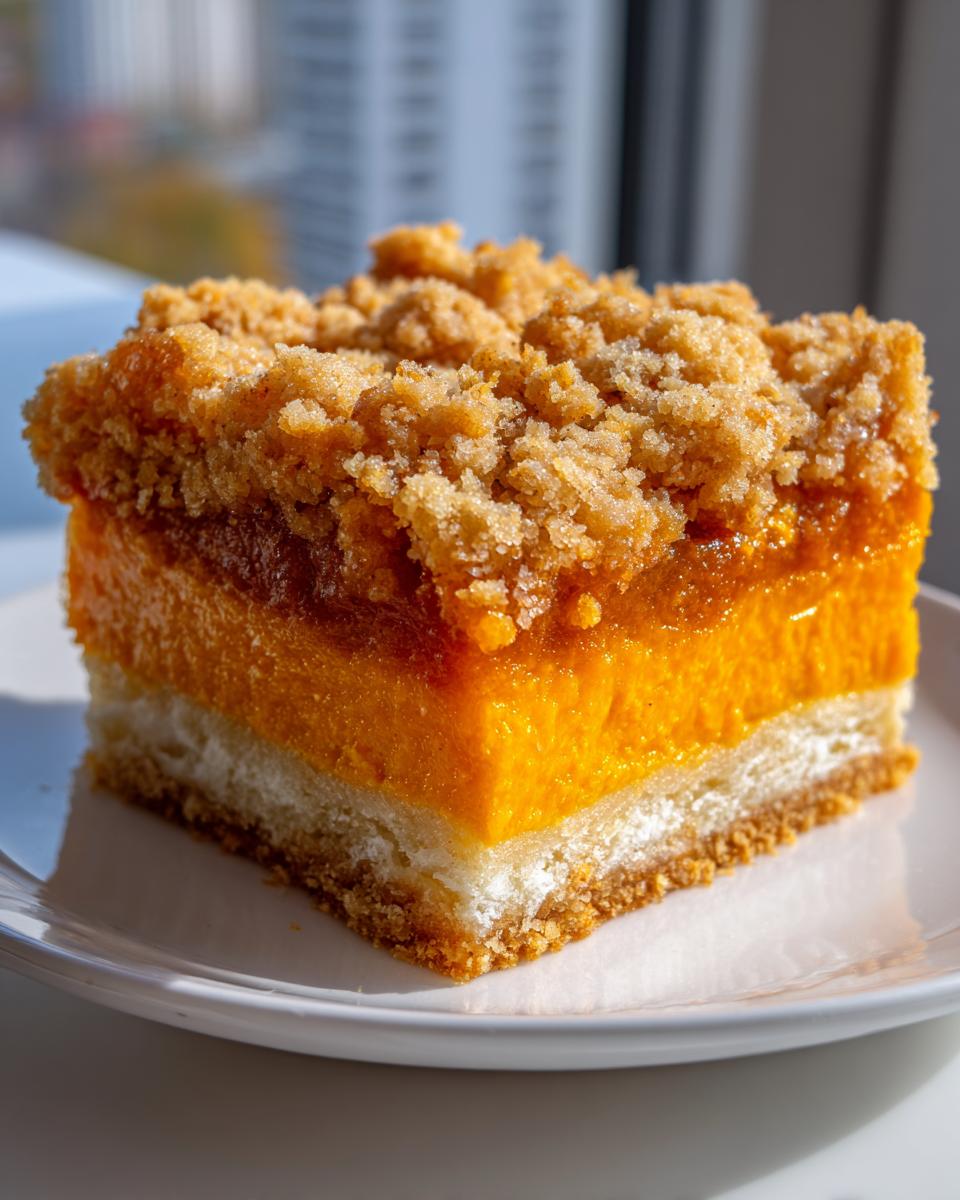
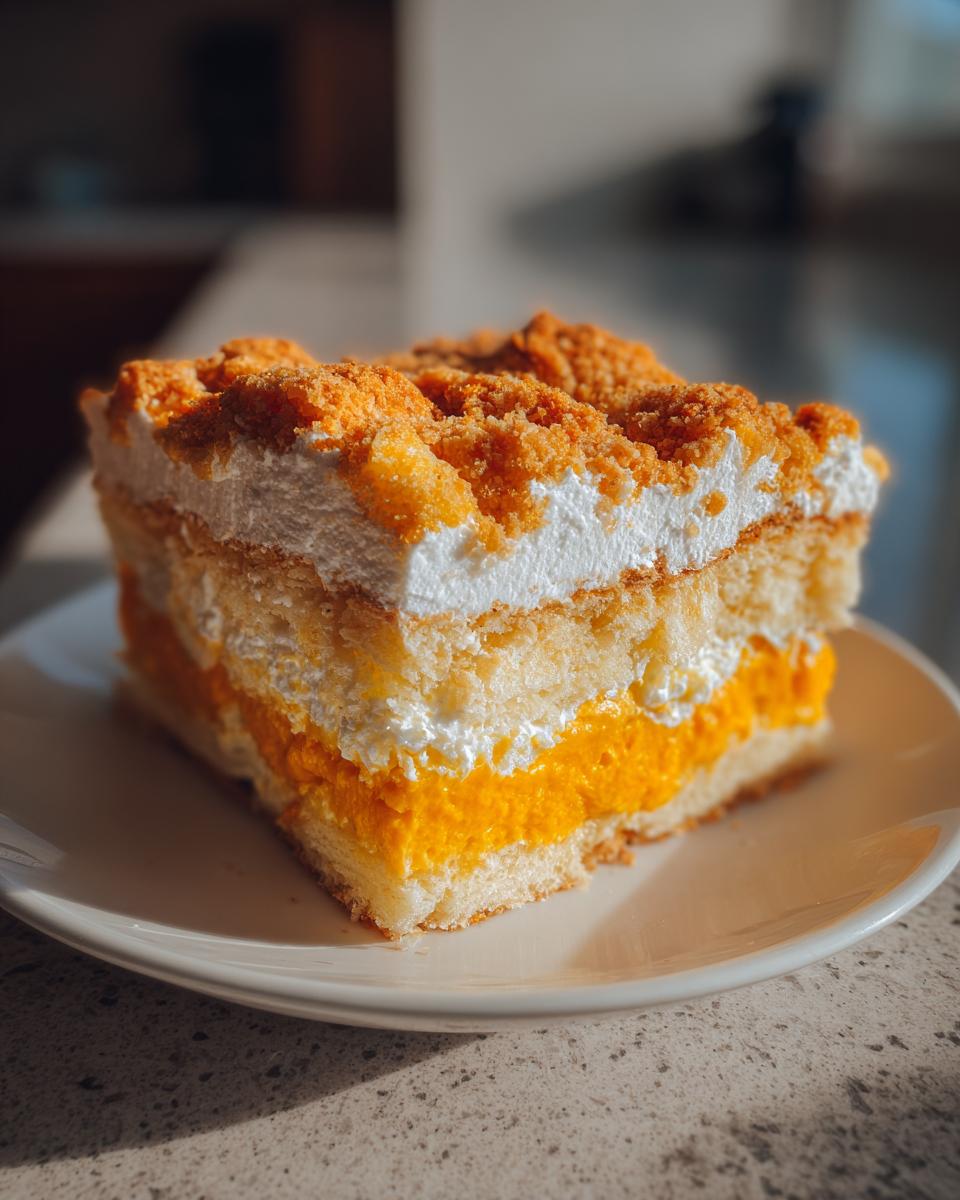
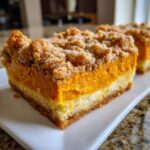
Oh, friends, when that crisp autumn air finally hits, my mind immediately jumps straight to dessert. Forget the overly complicated layer cakes; what we really need is something that delivers cozy spice and serious texture contrast. That’s why I’m so excited to share what I consider the undisputed king of fall baking: the **pumpkin crunch** cake. This isn’t just any dessert; it’s the perfect combination of that smooth, creamy pumpkin filling you dream about and a buttery, crunchy topping that snaps just right. It truly bridges the gap between a simple dump cake and a showstopper dessert, and trust me, it has its roots deep in that classic American comfort cooking I grew up on. You won’t even need your mixer for this one! If you’re looking for another effortless seasonal bake, you have to check out my moist cranberry orange loaf cake, but for now, let’s get crunching!
- Why This Is the Best Easy Pumpkin Crunch Cake Recipe
- Ingredients for Your Layered Pumpkin Crunch Dessert
- How to Prepare the Ultimate Pumpkin Crunch
- Tips for Achieving Perfect Pumpkin Crunch Texture
- Serving Suggestions for This Sweet Crunchy Fall Treat
- Storage and Reheating Instructions for Your Pumpkin Crunch
- Frequently Asked Questions About Pumpkin Crunch Cake
- Nutritional Estimates for This Simple Autumn Baking Treat
- Share Your Perfect Pumpkin Crunch Experience
Why This Is the Best Easy Pumpkin Crunch Cake Recipe
If you are looking for a guaranteed win this holiday season, stop right here. This **easy pumpkin crunch cake** is my absolute go-to because it’s practically foolproof. Seriously, you almost can’t mess it up!
- It’s ridiculously simple: We’re talking about a layered pumpkin dessert where the prep time is less than 15 minutes!
- That texture contrast is everything—creamy, delicate pumpkin filling against that glorious, buttery streusel.
- This is truly a no-fail pumpkin crunch recipe that brings everyone back for seconds. You can find a great side dish recipe over at my easy parmesan pasta guide if you need something savory to balance this sweetness!
Ingredients for Your Layered Pumpkin Crunch Dessert
I love that this recipe keeps the pantry simple for a truly impressive **layered pumpkin dessert**. It uses almost everything you already have on hand, which is a huge win when baking for big groups around the holidays. Remember, the quality of your main ingredient matters here! If you want that dense, custardy filling, you must use 100% pure pumpkin puree, not the canned pumpkin pie filling. That’s my big Jess Carter tip for reliability!
Here’s what you need for this crowd-pleaser:
- 1 box (15.25 ounces) yellow cake mix (Don’t skip this; the yellow cake is non-negotiable for the texture!)
- 1 cup (2 sticks) unsalted butter, melted
- 1 can (15 ounces) pure pumpkin puree
- 1 can (14 ounces) sweetened condensed milk (This is the magic binding agent!)
- 2 large eggs
- 2 teaspoons pumpkin pie spice
- 1 teaspoon vanilla extract
- 1 cup chopped pecans (optional, but oh my goodness, do it!)
If you want to make an amazing cinnamon butter to serve alongside it, check out my copycat recipe for Cinnamon Butter—it’s heaven.
Ingredient Notes and Substitution Tips for Pumpkin Crunch
Sticking strictly to yellow cake mix gives you that sweet, slightly vanilla-y base and topping that pairs perfectly with the spice. If you try spice cake mix, the flavor gets too muddy. Also, be very careful not to grab pumpkin pie filling; that filling already has sugar and spices added, and it will ruin the consistency of our creamy layer. If pecans aren’t your thing, you can totally substitute walnuts, but I find pecans offer better crunch!
How to Prepare the Ultimate Pumpkin Crunch
Okay, now for the fun part! This recipe is so wonderful because it truly feels like a **pumpkin dump cake style** dessert, but the two-step baking process gives us that gorgeous texture contrast we are after. It’s all about smart layering, not hard work. We start by building flavor right in the 9×13 dish. Make sure you’ve got your oven set to 350 degrees Fahrenheit before you even touch the ingredients!
If you want a different, but equally easy, layered treat, I have a fantastic cherry dump cake that gets rave reviews, but for fall, this layered pumpkin crunch is king.
Creating the Cake Base and Creamy Pumpkin Layer
First things first: we take exactly half of that melted butter—that’s 1/2 cup—and mix it right into the dry yellow cake mix. You want it crumbly! Press that mixture firmly into the bottom of your greased 9×13 pan. Pop that base into the oven for just 10 minutes. This little pre-bake sets it up so it doesn’t turn to mush later! While that’s happening, whisk together your pumpkin, condensed milk, eggs, spice, and vanilla until it’s perfectly smooth. Pour that creamy mixture evenly over the warm, snug base layer when it comes out.
Assembling the Streusel Topping for Your Pumpkin Crunch
Now we make the crunchy element! Take the rest of your melted butter (the second 1/2 cup) and mix it thoroughly with the remaining dry cake mix. If you’re using them, toss those chopped pecans into this mix too! You are creating that signature streusel topping that defines this dessert. Sprinkle this topping evenly across the entire surface of the pumpkin filling. Try not to press it down! We want it loose so it bakes up golden and distinctly crunchy. I researched a version from Hawaii that uses this method, similar to the Aiea Bowl style, and the topping is essential!
Tips for Achieving Perfect Pumpkin Crunch Texture
Listen, achieving that perfect balance between the creamy pumpkin layer and that *snap* of the topping is the whole game here. If you pull it out too soon, that middle layer is going to be soupy, and trust me, nobody wants a soupy **pumpkin crunch**!
My biggest tip, which I learned from folks making the famous Hawaiian pumpkin crunch versions, is patience during cooling. You need the full bake time—aim for 45 to 55 minutes—until that top is golden brown and solid. But after it comes out, don’t rush to slice it! Let it cool completely, or better yet, chill it for a few hours. That chilling time transforms the filling into a firm, almost fudgy texture, cutting through the crunch perfectly.
If you’ve ever made a savory dish like my sweet potato gnocchi, you know temperature control matters, and this is the same idea. If you want that solid, sliceable result for a holiday table, cooling is mandatory if you want those clean squares!
Serving Suggestions for This Sweet Crunchy Fall Treat
This **layered pumpkin dessert** is so versatile, which is why I love making it for big events! Since it’s rich and spicy, it pairs beautifully with something light and cool on the side. A big dollop of freshly whipped cream is my first choice, or you can never go wrong with a scoop of vanilla bean ice cream melting right over that crunchy topping.
For a true **Thanksgiving pumpkin dessert** lineup, I often serve this alongside the espresso after dinner. The bitterness of the coffee just cuts through the sweetness of the condensed milk perfectly! You could even whip up a batch of my classic homemade eggnog during the winter months and use a splash of that instead of milk in your whipped cream for a real festive kick!
Storage and Reheating Instructions for Your Pumpkin Crunch
Since this incredible **pumpkin crunch** has that lovely, creamy middle layer made with condensed milk, we have to treat it right when storing it away. You absolutely need to keep leftovers covered tightly in the refrigerator. Honestly, I think this dessert tastes even better the next day when it’s well chilled!
Now, as for reheating? Don’t bother! Seriously, save your oven space. This layered treat is designed to be served either chilled straight from the fridge or allowed to sit on the counter for about 15 minutes to come up to cool room temperature. Too much heat and you lose that great textural quality. If you’re looking for a good make-ahead chocolate item instead, you can check out my easy no-bake peanut butter bars!
Frequently Asked Questions About Pumpkin Crunch Cake
I get so many questions about this recipe since it pops up every fall! It’s one of those beloved, simple desserts, and I want to make sure everyone gets that perfect result. You deserve a fantastic, hassle-free **creamy pumpkin dessert** when you’re baking for company.
Can I make this pumpkin crunch recipe ahead of time?
You absolutely can, and I actually encourage chilling it! This recipe holds up wonderfully in the fridge. If you want that firm, almost fudge-like texture that people mention when talking about the famous Hawaiian versions, cover it tightly and let it chill for at least four hours, or even overnight. It slices cleaner that way, too! Check out my guide for the best creamy tomato bisque if you need a comforting lunch to go with your leftovers!
What makes this a ‘dump cake style’ pumpkin crunch?
It earned that title because it’s so close to being a true dump cake! We aren’t creaming butter or folding in whipped egg whites here. We’re mixing the cake mix with butter to make a crumb, then layering that crumb with the pre-mixed filling and saving the rest of the crumb for the top. It’s all about layering components without complicated mixing steps, which keeps our prep time incredibly short!
If you want to see another recipe that’s just as easy but completely different, I recommend checking out the classic tips over at this recipe for comparison!
Nutritional Estimates for This Simple Autumn Baking Treat
Now, I know most of us aren’t baking this ultimate **pumpkin crunch** to count calories, but for those who like to keep track, I pulled the general estimates for you. Please remember, since this recipe relies on ingredients like condensed milk and butter, these numbers reflect what you’d expect from a rich, decadent fall dessert!
Keep in mind these values are estimates based on my standard preparation using the listed ingredients. If you add heaps of whipped cream or serve it warm with ice cream, the numbers go up!
- Serving Size: 1 slice
- Calories: 380
- Sugar: 35g
- Fat: 21g (with 11g Saturated Fat)
- Carbohydrates: 48g
- Protein: 5g
If you’re looking for ways to make your breakfasts a bit lighter but still delicious, I’ve gathered some of my favorite healthy breakfast ideas that don’t compromise on flavor!
Share Your Perfect Pumpkin Crunch Experience
Well, that’s all there is to it! You’ve got yourself the ultimate **fall pumpkin dessert**. I would absolutely love to hear how this recipe turned out for you! Did it make it to your Thanksgiving table? Please take a moment to leave a rating below, and if you snapped a photo, I want to see it! Tag me or send it through my contact page; seeing your success makes my whole day.
If you try this crunchy favorite, promise me you’ll come back and let me know! And hey, if you loved the ease of this, be sure to look up this incredibly rich other crunch recipe I found while researching!
PrintThe Ultimate Easy Layered Pumpkin Crunch Cake
Make this simple, reliable layered pumpkin dessert featuring a creamy pumpkin filling and a buttery, crunchy streusel topping. It is a perfect crowd-pleasing treat for Thanksgiving or any autumn gathering.
- Prep Time: 15 min
- Cook Time: 65 min
- Total Time: 80 min
- Yield: 12 servings 1x
- Category: Dessert
- Method: Baking
- Cuisine: American
- Diet: Vegetarian
Ingredients
- 1 box (15.25 ounces) yellow cake mix
- 1 cup (2 sticks) unsalted butter, melted
- 1 can (15 ounces) pure pumpkin puree
- 1 can (14 ounces) sweetened condensed milk
- 2 large eggs
- 2 teaspoons pumpkin pie spice
- 1 teaspoon vanilla extract
- 1 cup chopped pecans (optional, for extra crunch)
Instructions
- Preheat your oven to 350 degrees Fahrenheit. Lightly grease a 9×13 inch baking dish.
- In a medium bowl, combine the dry yellow cake mix with half of the melted butter (1/2 cup). Mix until crumbly. Press this mixture evenly into the bottom of the prepared baking dish to form the base layer.
- Bake the base layer for 10 minutes. Remove from the oven.
- While the base bakes, prepare the pumpkin filling. In a separate bowl, whisk together the pumpkin puree, sweetened condensed milk, eggs, pumpkin pie spice, and vanilla extract until the mixture is smooth and well combined.
- Pour the pumpkin filling evenly over the partially baked cake base.
- In a small bowl, combine the remaining melted butter (1/2 cup) with the remaining dry cake mix and the chopped pecans, if using. Mix until crumbly, creating the streusel topping.
- Sprinkle the streusel topping evenly over the pumpkin layer.
- Return the dish to the oven and bake for 45 to 55 minutes, or until the center is set and the topping is golden brown and crunchy.
- Let the pumpkin crunch cake cool completely on a wire rack before slicing and serving.
Notes
- For a texture similar to Hawaiian pumpkin crunch, chill the cake for at least 4 hours before serving.
- Serve this sweet crunchy fall treat slightly warm or cold with whipped cream.
- If you skip the pecans, use the remaining cake mix and butter to create a thicker, more uniform streusel topping.
Nutrition
- Serving Size: 1 slice
- Calories: 380
- Sugar: 35
- Sodium: 280
- Fat: 21
- Saturated Fat: 11
- Unsaturated Fat: 10
- Trans Fat: 0.5
- Carbohydrates: 48
- Fiber: 2
- Protein: 5
- Cholesterol: 45