
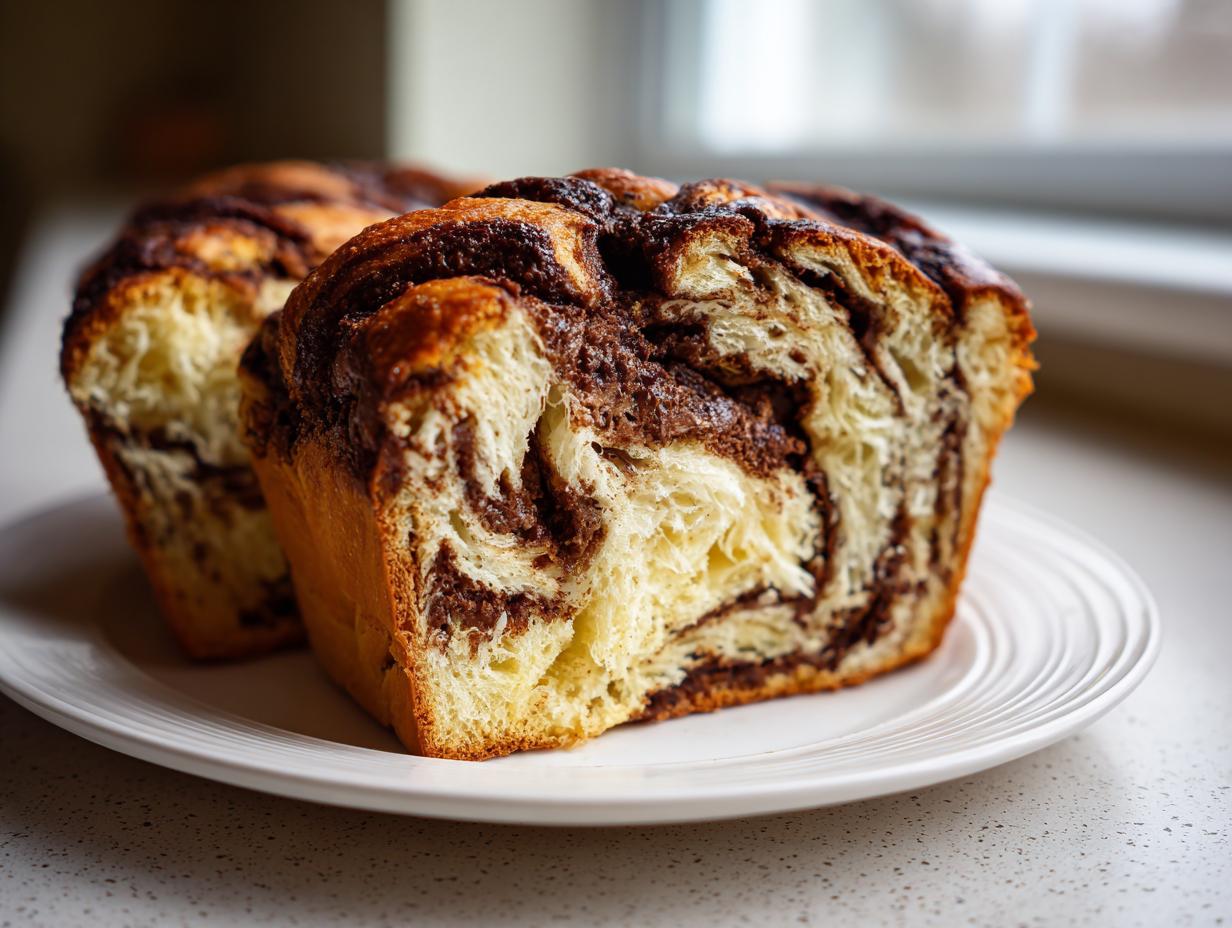
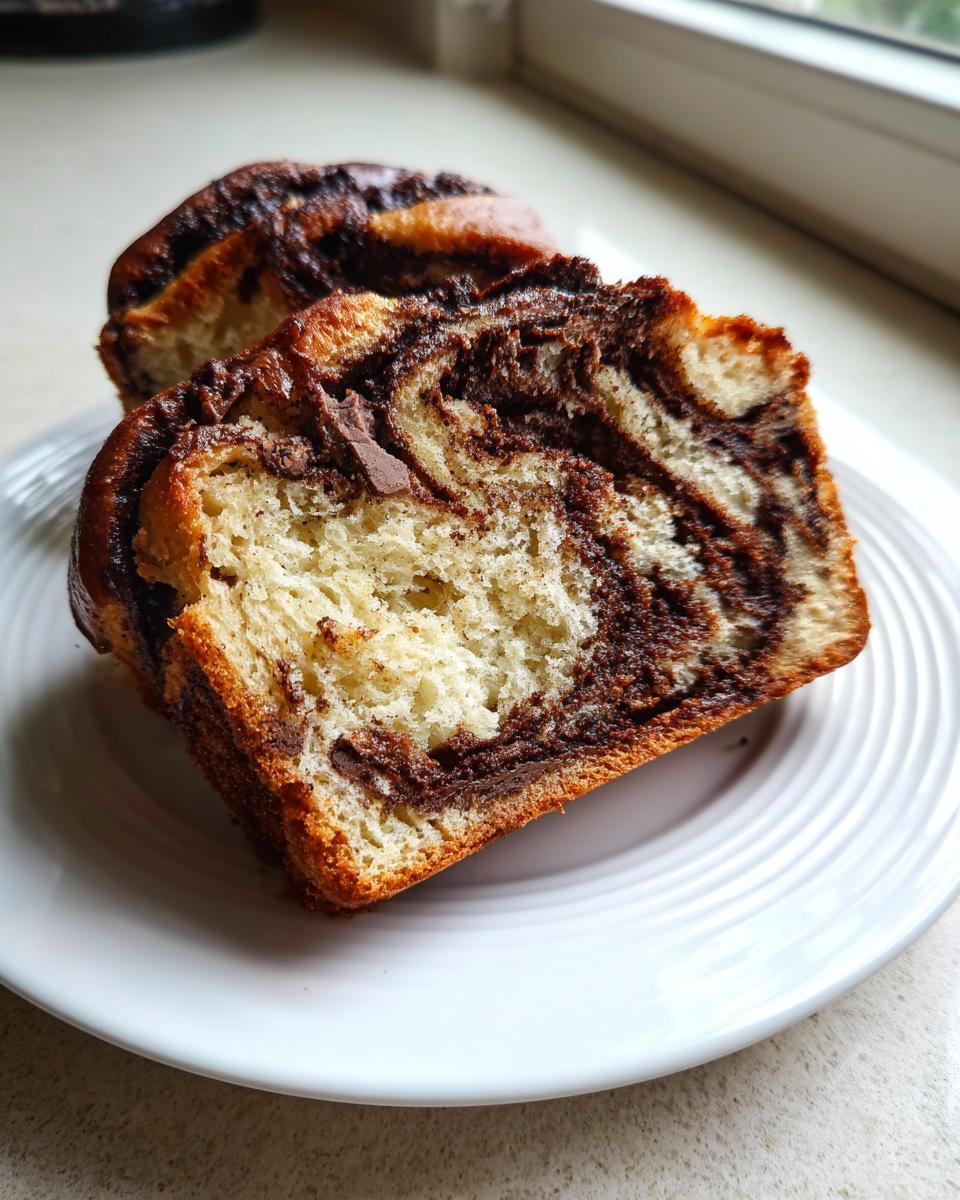
Forget the dry, sad versions you sometimes find wrapped in plastic! I promise you, making incredible, bakery-quality chocolate babka right in your own kitchen is totally doable. This isn’t just any recipe; this is the one that gets those unbelievably deep chocolate swirls and a tenderness that just screams luxurious weekend baking project. Watching that swirl develop as you twist the dough is pure magic, honestly. I’m Jess Carter, and teaching you how to master this show-stopping sweet bread is one of my absolute favorite things to share. When you pull this decadent loaf out of the oven, trust me, you’ll wonder why you waited so long!
- Why This Homemade Chocolate Babka Recipe Works (E-E-A-T Focus)
- Gathering Ingredients for Your Chocolate Babka Loaf
- Step-by-Step Instructions for the Ultimate Chocolate Treat
- Baking and Glazing Your Rich Chocolate Babka Bread
- Tips for Success with Your Weekend Baking Project
- Make Ahead Babka and Storage Instructions
- Serving Suggestions for This Bakery Classic Dessert
- Frequently Asked Questions About Chocolate Babka
- Nutritional Estimates for Chocolate Swirl Loaf
- Nutritional Estimates for Chocolate Swirl Loaf
Why This Homemade Chocolate Babka Recipe Works (E-E-A-T Focus)
This isn’t just another recipe; it’s a tested method for achieving that coveted bakery classic at home. What sets this chocolate babka apart is twofold: the extremely rich, high-fat brioche dough and the intensity of the filling. We aren’t cutting corners here, which is why you get that signature moist, tender crumb.
- Our dough uses a generous amount of butter and eggs, which is the foundation for that amazing buttery pull.
- The filling isn’t just sugary chocolate; it’s a carefully balanced blend designed to stay luscious even after baking.
Achieving the Soft Brioche Babka Dough Texture
To get that fantastic soft brioche babka dough texture, temperature is everything. Make sure your eggs and milk are room temperature before you even start. That might seem fussy, but it helps everything emulsify perfectly! We need long kneading time—about 12 minutes total—to develop the gluten structure strong enough to hold up to all that butter.
Here’s my test, straight from my years of working with enriched doughs: after the final knead, take a small piece of dough and gently stretch it. If you can pull it thin enough to see light through it without tearing—like a windowpane—you’re ready for the rise. Don’t rush it!
The Secret to Rich Chocolate Filling Secrets
A lot of recipes use sugar or cheaper fats in the filling, which often results in cracks or a gritty texture. My secret to a genuinely rich texture involves using both Dutch-process cocoa powder and real, chopped bittersweet chocolate, along with melted butter. This combination ensures you get deep, complex chocolate flavor that melts beautifully when baked.
The melted butter in the filling acts almost like a binder, helping the chocolate cling to the dough when you roll it up. You want it spreadable but thick—a spreadable paste, not a runny puddle. That spreadability is the key before we move on to learning how to braid chocolate babka!
Gathering Ingredients for Your Chocolate Babka Loaf
Okay, now that we know *why* this recipe is the best, it’s time to look at what you need to make this truly memorable chocolate babka. Since this recipe makes two beautiful loaves—perfect for eating one now and freezing the other for later—make sure you have enough room in your fridge for the dough! We are using simple ingredients, but the quality really counts here, especially when it comes to that chocolate.
Here is the full rundown:
- For the Dough: 1 cup whole milk, warm (not hot!); 2 1/4 teaspoons active dry yeast; 1/2 cup granulated sugar, plus 1 teaspoon for yeast; 3 large eggs, room temperature; 1 teaspoon salt; 4 1/2 cups all-purpose flour, plus more for dusting; 1 cup (2 sticks) unsalted butter, softened and cut into pieces.
- For the Filling: 1 cup powdered sugar; 3/4 cup unsweetened cocoa powder; 1/2 cup (1 stick) unsalted butter, melted; 4 ounces bittersweet chocolate, chopped. I always recommend using bittersweet chocolate here—it cuts through the richness of the brioche dough beautifully.
- For the Syrup Topping: 1/4 cup water; 1/4 cup granulated sugar. This simple syrup is essential for that amazing shine and keeping the top from drying out! You can find a great tip for homemade chocolate syrup if you ever need an emergency topping substitution over at this link, but please stick to the syrup for this bake!
Ingredient Notes and Substitutions
A few quick notes from my kitchen to yours to ensure everything goes smoothly. First, for the yeast activation in Step 1, that milk needs to be warm to the touch, about 105 to 115 degrees. If it’s too hot, you’ll kill your yeast, and that’s a sad start to any loaf! Conversely, if it’s too cool, the yeast just sleeps in.
Second, that butter for the dough? It absolutely must be softened, like playdough consistency, not melted and goopy. Melted butter adds fat in a way the recipe isn’t designed to handle, and your dough will stay floppy and won’t structure correctly. Remember, we get two loaves from this batch!
Step-by-Step Instructions for the Ultimate Chocolate Treat
This is where the real fun begins! Baking this rich chocolate babka bread takes a little patience, especially with the dough rising, but every minute is absolutely worth it. We’re moving quickly from mixing to the first rise, so have your bowls ready. If you’ve ever worked with a basic bread dough, this is similar, but way richer because of all that butter we added!
Making and Proofing the Tender Crumb Pastry Dough
First things first: Step 1 is yeast activation. Mix your warm milk, a teaspoon of sugar, and your yeast together. Don’t sweat it if you aren’t sure about the temperature; if it feels comfortably warm on your wrist, you’re golden. Let that sit until it looks foamy—that means those little guys are awake and ready to work! If you’ve ever made a sourdough starter, you know the feeling when the yeast wakes up—check out my guide on how to make sourdough starter from scratch for more on understanding yeast!
Once foamy, add the rest of your wet ingredients and mix them up. Then, slowly add the flour until you get what I call a ‘shaggy dough.’ It looks messy, I know! Now, add the beautiful softened butter, piece by piece, and start that long knead. You need 8 to 10 minutes until it’s smooth; this builds structure. After kneading, pop it in a clean bowl, cover it, and let it do its thing for anywhere from 90 minutes to 2 hours until it’s doubled. Don’t check it every five minutes, or it gets confused!
How to Braid Chocolate Babka Beautifully
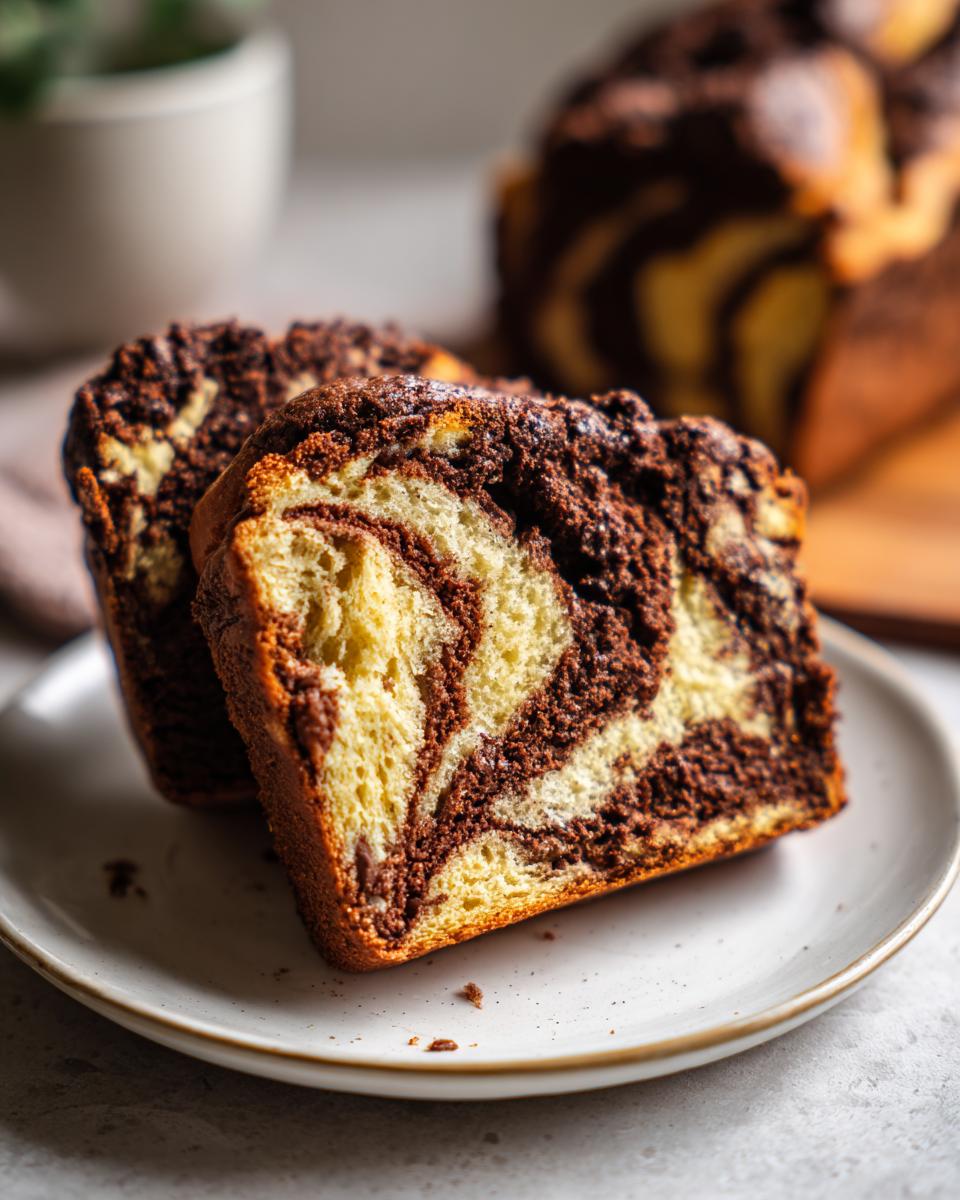
This part looks intimidating, but once you see the layers, you’ll get it! After the dough has risen, punch it down gently. Roll it into that big rectangle—about 12 by 18 inches is perfect—and spread that decadent filling all the way to the edges, except for that one-inch border on the long side. That border is your seal!
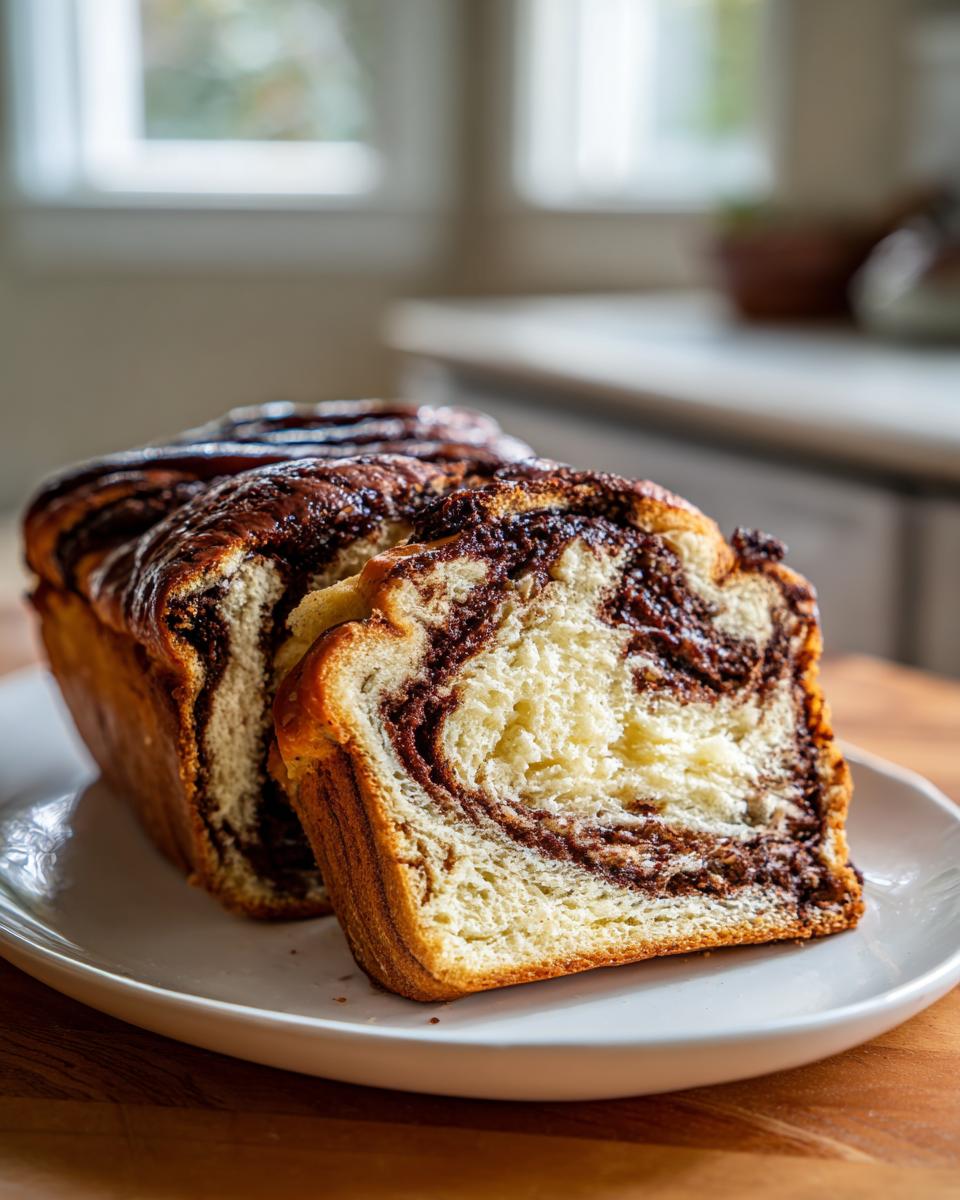
Roll it up as tightly as you can into a log, pinching the seam closed firmly. Now, for the showstopper: take a very sharp knife and slice that log right down the center, exposing those beautiful swirls inside. Turn the cut sides up towards the ceiling so they face you. Then, gently twist these two halves around each other, keeping those gorgeous chocolate layers facing up the whole time. Pinch the bottom ends together tightly and carefully ease your braided loaf into your prepared pan. Have another glass of time while it proofs again!
Baking and Glazing Your Rich Chocolate Babka Bread
Alright, the braiding is done! You’ve got this gorgeous swirly thing tucked into the loaf pan, and now it needs its warm hug in the oven. Make sure your oven is fully preheated to 350°F (175°C) while that second proof is finishing up. We aren’t interested in under-baked dough here, trust me!
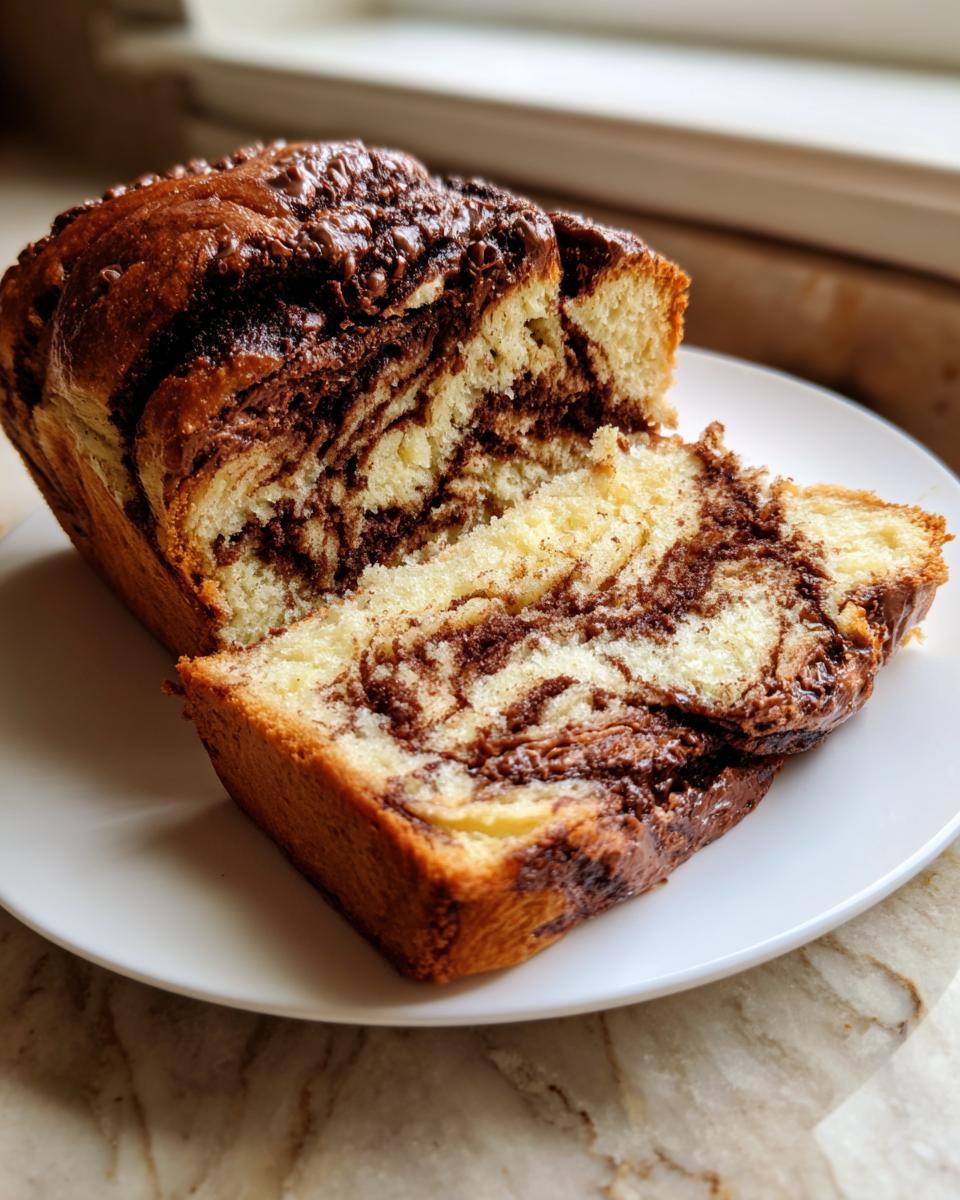
Bake this beauty for about 35 to 45 minutes. Since this is a rich loaf, you need to check it to make sure the middle is done without burning the outside. A toothpick test works, sure, but since it’s full of chocolate, it might come out looking a bit gooey even when it’s done. I like to gently touch the top—it should spring back slightly. If you have an instant-read thermometer, stick it near the center; you’re looking for about 200°F internally.
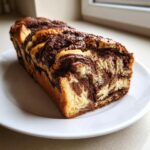
While that’s happening, you need to whip up the simple syrup. It’s just water and sugar heated until crystal clear. Pop that on low heat—don’t let it boil away. The second that rich chocolate babka bread comes out, piping hot from the oven, you grab a pastry brush and bathe the entire top surface with that warm syrup. Don’t be shy; brush every inch! This step is non-negotiable, it seals in the moisture and gives you that gorgeous texture that keeps the bread incredibly soft.
Let it cool in the pan for just 15 minutes before you turn it out onto a rack. If you leave it in the pan too long, the steam gets trapped and can make the bottom soggy. That syrup soaks right in and keeps this bread perfect, even a day later!
Tips for Success with Your Weekend Baking Project
Baking babka is such a rewarding weekend baking project, but there are just a few little things that can go sideways if you aren’t careful. Let’s talk about the common pitfalls so you can avoid them and walk away with that perfect loaf!
First, watch that filling consistency. If your chocolate filling is too warm or too thin when you spread it on the dough (Step 7), it’s going to ooze out the sides the second you start rolling or braiding. Then, when you turn the cut sides up—poof!—no beautiful chocolate swirl, just a sticky mess on your counter. I learned that the hard way during my first attempt. My entire beautiful swirl melted into the tray before it even hit the oven, turning it into a very tasty, but very plain, chocolate bread instead of a true babka.
If your dough didn’t seem to double during that first rise, don’t panic or try to force the second rise to make up the time. Under-proofed dough leads to a dense final crumb, and we are aiming for light and airy here! If it looks a little sluggish, just give it a warmer spot—maybe near the pilot light if you have a gas oven, or just inside an oven that’s been warmed for 30 seconds and then turned off.
Another thing to focus on is that slicing step (Step 9). That knife needs to be super sharp! If you drag a dull knife through the dough, you’ll compress the layers instead of cleanly slicing them, which ruins the possibility of those sharp, distinct layers showing during the twist. You want a definite, clean cut down the center. If you find yourself struggling, try chilling the dough for 15 minutes right after spreading the filling; it firms up nicely and makes slicing much easier.
If you’re looking for other comforting, slightly challenging baking projects that yield incredible results, you have to try my recipe for the best soft chewy classic snickerdoodle recipe next!
Make Ahead Babka and Storage Instructions
I know this chocolate babka takes a slice of your day, and who always has three open hours on a Tuesday morning? Nobody! That’s why I love that this rich chocolate babka bread recipe is totally set up for success ahead of time. This is a fantastic way to plan for a big holiday brunch or just have an amazing treat ready when the weekend finally hits.
The absolute best way to prepare ahead is using the dough for cold fermentation. This is where the magic of an overnight dough bread recipe really shines. After you’ve gone through the initial kneading (Step 4), instead of letting it rise on the counter for 1.5 to 2 hours, lightly grease your bowl, cover it tightly with plastic wrap, and pop it right into the refrigerator. It can chill there, slowly developing flavor, for up to 24 hours. It’s so nice to wake up and know the toughest step is already done!
When you’re ready to move forward, just take the dough out and let it sit on the counter until it’s slightly warmed up—maybe 45 minutes to an hour—before proceeding with rolling and filling. It won’t double in size on the counter, but it needs to lose that deep chill so you can roll it out without fighting it!
Now, what about storage once it’s baked? Because we are so generous with that simple syrup glaze, these loaves stay incredibly moist! Keep leftover babka tightly wrapped on the counter at room temperature for up to three days. The sugar in the syrup helps preserve it beautifully.
Since this recipe yields two loaves, freezing is always an option. Let the finished loaf cool completely on the rack first. Wrap one loaf tightly in plastic wrap, and then wrap it again snugly in aluminum foil. It freezes beautifully for up to three months. When you pull it out later, just let it thaw on the counter still wrapped up, and then reheat slices briefly in the oven or microwave for that fresh-out-of-the-oven feeling. We do the same thing with my famous make-ahead breakfast dish; check out my guide for the French toast casserole for the ultimate make-ahead bake if you want to prep a whole brunch menu!
Serving Suggestions for This Bakery Classic Dessert
Honestly, pulling apart a warm slice of this bakery classic dessert is a moment that deserves the right setting! While this chocolate swirl loaf is decadent enough to stand entirely on its own for a late-night treat, I love pairing it with simple things that let the rich chocolate flavor really shine through.
For morning indulgence, nothing beats a slice alongside a strong, dark-roast coffee. The slight bitterness of the coffee is the perfect contrast to the sweet, buttery brioche. If you are serving it for brunch—and trust me, it makes an incredible holiday brunch recipe centerpiece—I occasionally top a slice with a generous dollop of homemade whipped cream or a little drizzle of crème fraîche. It feels fancy without any extra effort!
Fresh berries are also wonderful. A handful of raspberries or some thinly sliced strawberries brightens up the whole plate. The tartness cuts right through the richness of the chocolate filling. In fact, for Christmas morning or Easter brunch, I sometimes prepare my famous classic homemade eggnog recipe and serve that alongside the babka for dipping—it’s heaven!
You truly don’t need much else, though. This bread is the star. Just being able to say, “Oh this? I made this decadent sweet bread myself,” is half the fun!
Frequently Asked Questions About Chocolate Babka
It’s totally normal to have questions when tackling a beautiful loaf like this! Yeast bread baking might seem scary, but once you get the hang of enriched doughs like this, you’ll be unstoppable. Here are a few things I get asked all the time about my recipe.
Can I use instant yeast instead of active dry yeast?
Oh, absolutely! Instant yeast is faster and more forgiving, which is great for a busy home cook. If you use instant yeast, you can skip Step 1 entirely—no need to proof it in warm milk. Just whisk the instant yeast right into your dry ingredients (the flour and the sugar) and then proceed with adding the wet ingredients like the eggs and milk. It’s an easy shortcut for still getting that beautiful rise!
Why is my dough so sticky and hard to handle?
This is the most common question I get about this homemade chocolate babka recipe! Remember, this is based on a brioche dough, which is called an enriched dough. That means it has a ton of butter and eggs relative to the flour. It’s supposed to be soft, sticky, and look a little unruly before that long kneading time. If you are truly worried it’s too wet after 10 minutes of kneading, add flour one tablespoon at a time until it pulls cleanly away from the sides of the mixer bowl. But resist the urge to add too much flour; we want that soft, tender crumb pastry texture!
Can I skip the simple syrup glaze?
You *can*, but please don’t! The simple syrup is not just for show; it’s your insurance policy against dryness. Since this is a rich, sweet loaf, the syrup—brushed on hot—soaks in, keeps the crumb moist for days, and provides the beautiful shine you expect from a great chocolate swirl loaf. If you absolutely must skip it, let the bread cool completely, then brush lightly with melted butter just to help seal in some humidity.
What if I want to use something other than the cocoa/chocolate filling?
I love creativity in the kitchen, but for the first time, I strongly recommend sticking to the filling recipe provided. The ratio of fat and sugar in that filling is specifically calculated to prevent it from totally liquifying and leaking out during the braid and bake. If you want to switch up the flavor profile, try adding a teaspoon of cinnamon or a dash of instant espresso powder to the existing chocolate filling. Nutella is a popular choice, but it’s generally much softer than our filling, so if you use it, chill it hard in the fridge until it’s almost solid before spreading it on the dough!
Troubleshooting Common Issues in Yeast Bread Baking
When we undertake any process involving yeast, there are bound to be hiccups, but learning how to recover is key to mastering yeast bread baking. If your dough didn’t rise the first time, check your yeast water temperature or your kitchen temperature. A cold kitchen means slow, sad rising. If your filling leaked out during baking, 9 times out of 10 it means the dough either wasn’t sealed tightly enough at the large seam, or you didn’t slice cleanly enough before twisting. The twist needs to expose the layers to look right, but the ends need to be pinched shut so the gooey center has nowhere to escape!
If your final product is dry, you probably didn’t use the simple syrup, or you overbaked it slightly. Next time, check the temperature earlier! For more tips on fixing bread woes, you can always check out my guide on easy crock pot creamy chicken tortilla soup—just kidding! That’s soup! But dealing with temperamental doughs requires patience, just like soup making!
Nutritional Estimates for Chocolate Swirl Loaf
Here are the estimates for one slice of this amazing chocolate swirl loaf. Please remember these are only guides calculated based on the ingredients listed above, and your final numbers might shift slightly depending on the exact brands of milk or chocolate you end up using!
- Serving Size: 1 slice
- Calories: 450
- Sugar: 30g
- Sodium: 250mg
- Fat: 25g
- Saturated Fat: 15g
- Unsaturated Fat: 10g
- Trans Fat: 0g
- Carbohydrates: 50g
- Fiber: 3g
- Protein: 8g
- Cholesterol: 75mg
Enjoy every single bite of this stunning creation!
PrintThe Best Homemade Chocolate Babka with Deep Chocolate Swirls
Bake this rich, decadent homemade chocolate babka bread. You will achieve soft, buttery brioche layers and deep chocolate swirls that surpass store-bought versions. This recipe guides you through making the tender dough, the luscious filling, and the final braiding technique.
- Prep Time: 45 min
- Cook Time: 45 min
- Total Time: 3 hours 30 min
- Yield: 2 loaves 1x
- Category: Dessert
- Method: Baking
- Cuisine: American
- Diet: Vegetarian
Ingredients
- 1 cup whole milk, warm
- 2 1/4 teaspoons active dry yeast
- 1/2 cup granulated sugar, plus 1 teaspoon for yeast
- 3 large eggs, room temperature
- 1 teaspoon vanilla extract
- 1 teaspoon salt
- 4 1/2 cups all-purpose flour, plus more for dusting
- 1 cup (2 sticks) unsalted butter, softened and cut into pieces
- 1 cup powdered sugar (for filling)
- 3/4 cup unsweetened cocoa powder (for filling)
- 1/2 cup (1 stick) unsalted butter, melted (for filling)
- 4 ounces bittersweet chocolate, chopped (for filling)
- 1/4 cup water (for syrup)
- 1/4 cup granulated sugar (for syrup)
Instructions
- Activate the yeast: In a small bowl, combine the warm milk, 1 teaspoon of sugar, and the yeast. Let it sit for 5 to 10 minutes until foamy.
- Make the dough: In the bowl of a stand mixer fitted with the dough hook, combine the remaining sugar, eggs, vanilla, salt, and the yeast mixture. Mix on low speed until combined.
- Gradually add the flour, mixing until a shaggy dough forms. Increase the speed to medium-low and knead for 5 minutes.
- Add the softened butter, one piece at a time, allowing each piece to incorporate before adding the next. Continue kneading for 8 to 10 minutes until the dough is smooth and elastic. It will be soft.
- Place the dough in a lightly oiled bowl, cover it, and let it rise in a warm place for 1.5 to 2 hours, or until doubled in size.
- Prepare the chocolate filling: In a medium bowl, mix the powdered sugar, cocoa powder, melted butter, and chopped bittersweet chocolate until smooth.
- Punch down the risen dough. Turn it out onto a lightly floured surface. Roll the dough into a large rectangle, about 12 by 18 inches.
- Spread the chocolate filling evenly over the dough, leaving a 1-inch border on one long edge.
- Starting from the long edge opposite the border, tightly roll the dough into a log. Pinch the seam closed.
- Braid the babka: Using a sharp knife, slice the log lengthwise down the center, exposing the filling layers. Do not cut all the way through the ends.
- Turn the cut sides up. Twist the two halves around each other, keeping the cut sides facing up to show the swirls. Pinch the ends together.
- Carefully transfer the braided loaf to a greased 9×5 inch loaf pan. Cover loosely and let it rise for 45 to 60 minutes, or until puffy.
- Preheat your oven to 350°F (175°C). Bake for 35 to 45 minutes, or until golden brown and cooked through.
- Make the simple syrup: While the babka bakes, combine the water and sugar in a small saucepan. Heat until the sugar dissolves. Do not boil.
- Immediately after removing the babka from the oven, brush the entire top generously with the simple syrup. Let the babka cool in the pan for 15 minutes before transferring it to a wire rack to cool completely.
Notes
- For a make ahead dough, you can place the dough in the refrigerator for the first rise for up to 24 hours. Allow it to warm up slightly before rolling and filling.
- If you prefer a very glossy finish, you can use a simple glaze of powdered sugar and milk instead of the syrup, but the syrup keeps the crumb more moist.
- This recipe makes two loaves; consider freezing one for a future weekend baking project.
Nutrition
- Serving Size: 1 slice
- Calories: 450
- Sugar: 30g
- Sodium: 250mg
- Fat: 25g
- Saturated Fat: 15g
- Unsaturated Fat: 10g
- Trans Fat: 0g
- Carbohydrates: 50g
- Fiber: 3g
- Protein: 8g
- Cholesterol: 75mg